Introduction
Welcome to the world of PC gaming and computing! As an avid computer user, you know how important it is to keep your machine running smoothly. A clean and well-maintained PC not only looks great but also performs at its best. When it comes to keeping your PC in top shape, cleaning the PC case is an essential task that should not be overlooked.
Your PC case serves as the protective housing for all the vital components of your computer, including the motherboard, CPU, graphics card, and hard drives. Over time, dust, dirt, pet hair, and other debris can accumulate inside the case, blocking airflow and causing the components to heat up. This can lead to poor performance, system crashes, and even hardware damage.
Regularly cleaning your PC case is essential to ensure proper cooling, prevent overheating, and extend the lifespan of your computer. Not only will a clean PC case improve performance, but it can also enhance the overall aesthetics of your setup.
In this article, we will discuss how often you should clean your PC case and guide you through the step-by-step process of cleaning it. We’ll also provide you with some handy maintenance tips to help you keep your PC case in pristine condition.
Before we jump into the specifics, it’s important to note that cleaning your PC case does not require advanced technical skills. With a few basic tools and some patience, you can easily give your PC case the cleaning it deserves.
Signs that it’s time to clean your PC case
Cleaning your PC case on a regular basis is crucial to ensure optimal performance and prevent hardware issues. But how do you know when it’s time to give your PC case a thorough cleaning? Here are some signs that indicate it’s time to roll up your sleeves and get to work:
- Dust buildup: One of the most obvious signs that your PC case needs cleaning is the presence of dust on the exterior surfaces. Dust can accumulate on the front and top panels, as well as on the vents and grilles. If you notice a layer of dirt or dust particles, it’s a clear indication that it’s time for a clean.
- Fan noise and performance issues: If you’ve been experiencing louder-than-usual fan noise coming from your PC case, it could be due to dust clogging up the fans. Dust buildup can impede proper airflow and cause the fans to work harder, resulting in increased noise levels and reduced cooling efficiency.
- Overheating: If your computer has been overheating frequently or shutting down unexpectedly, it could be a sign that the cooling system is compromised. Dust accumulation in the case can insulate the components and hinder proper heat dissipation, leading to overheating issues.
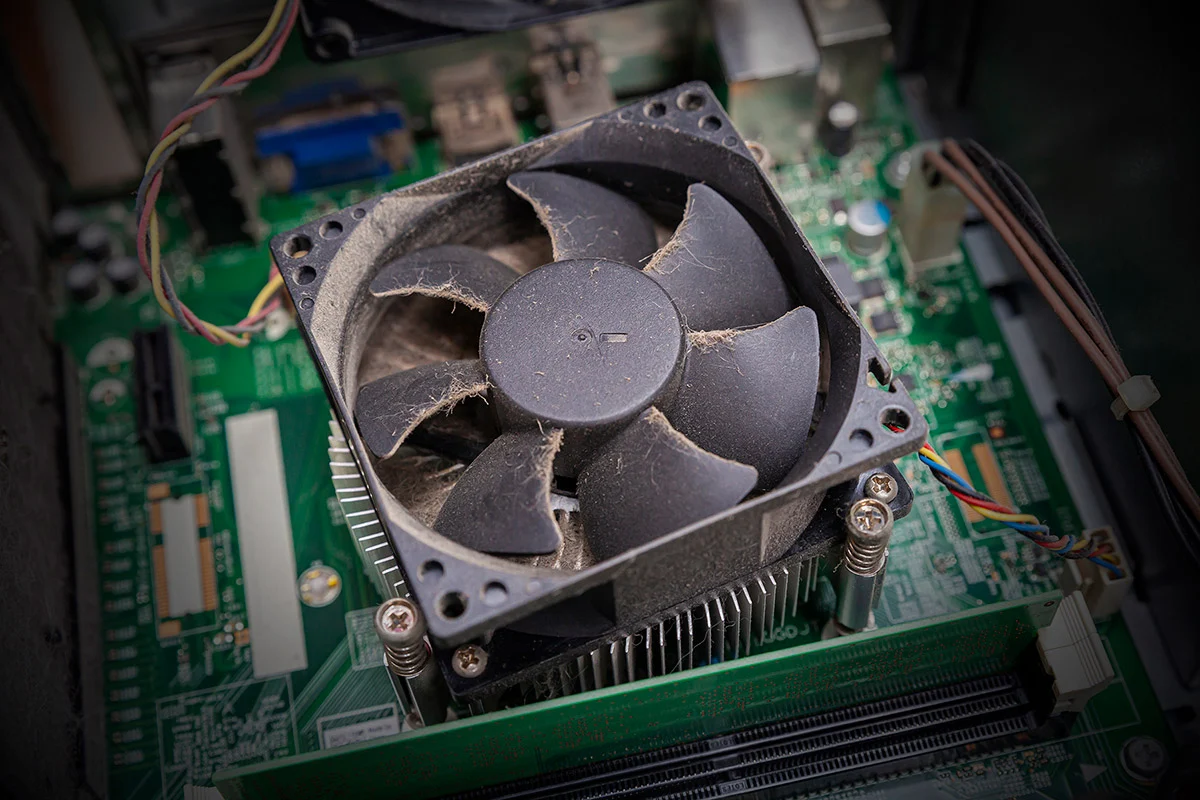
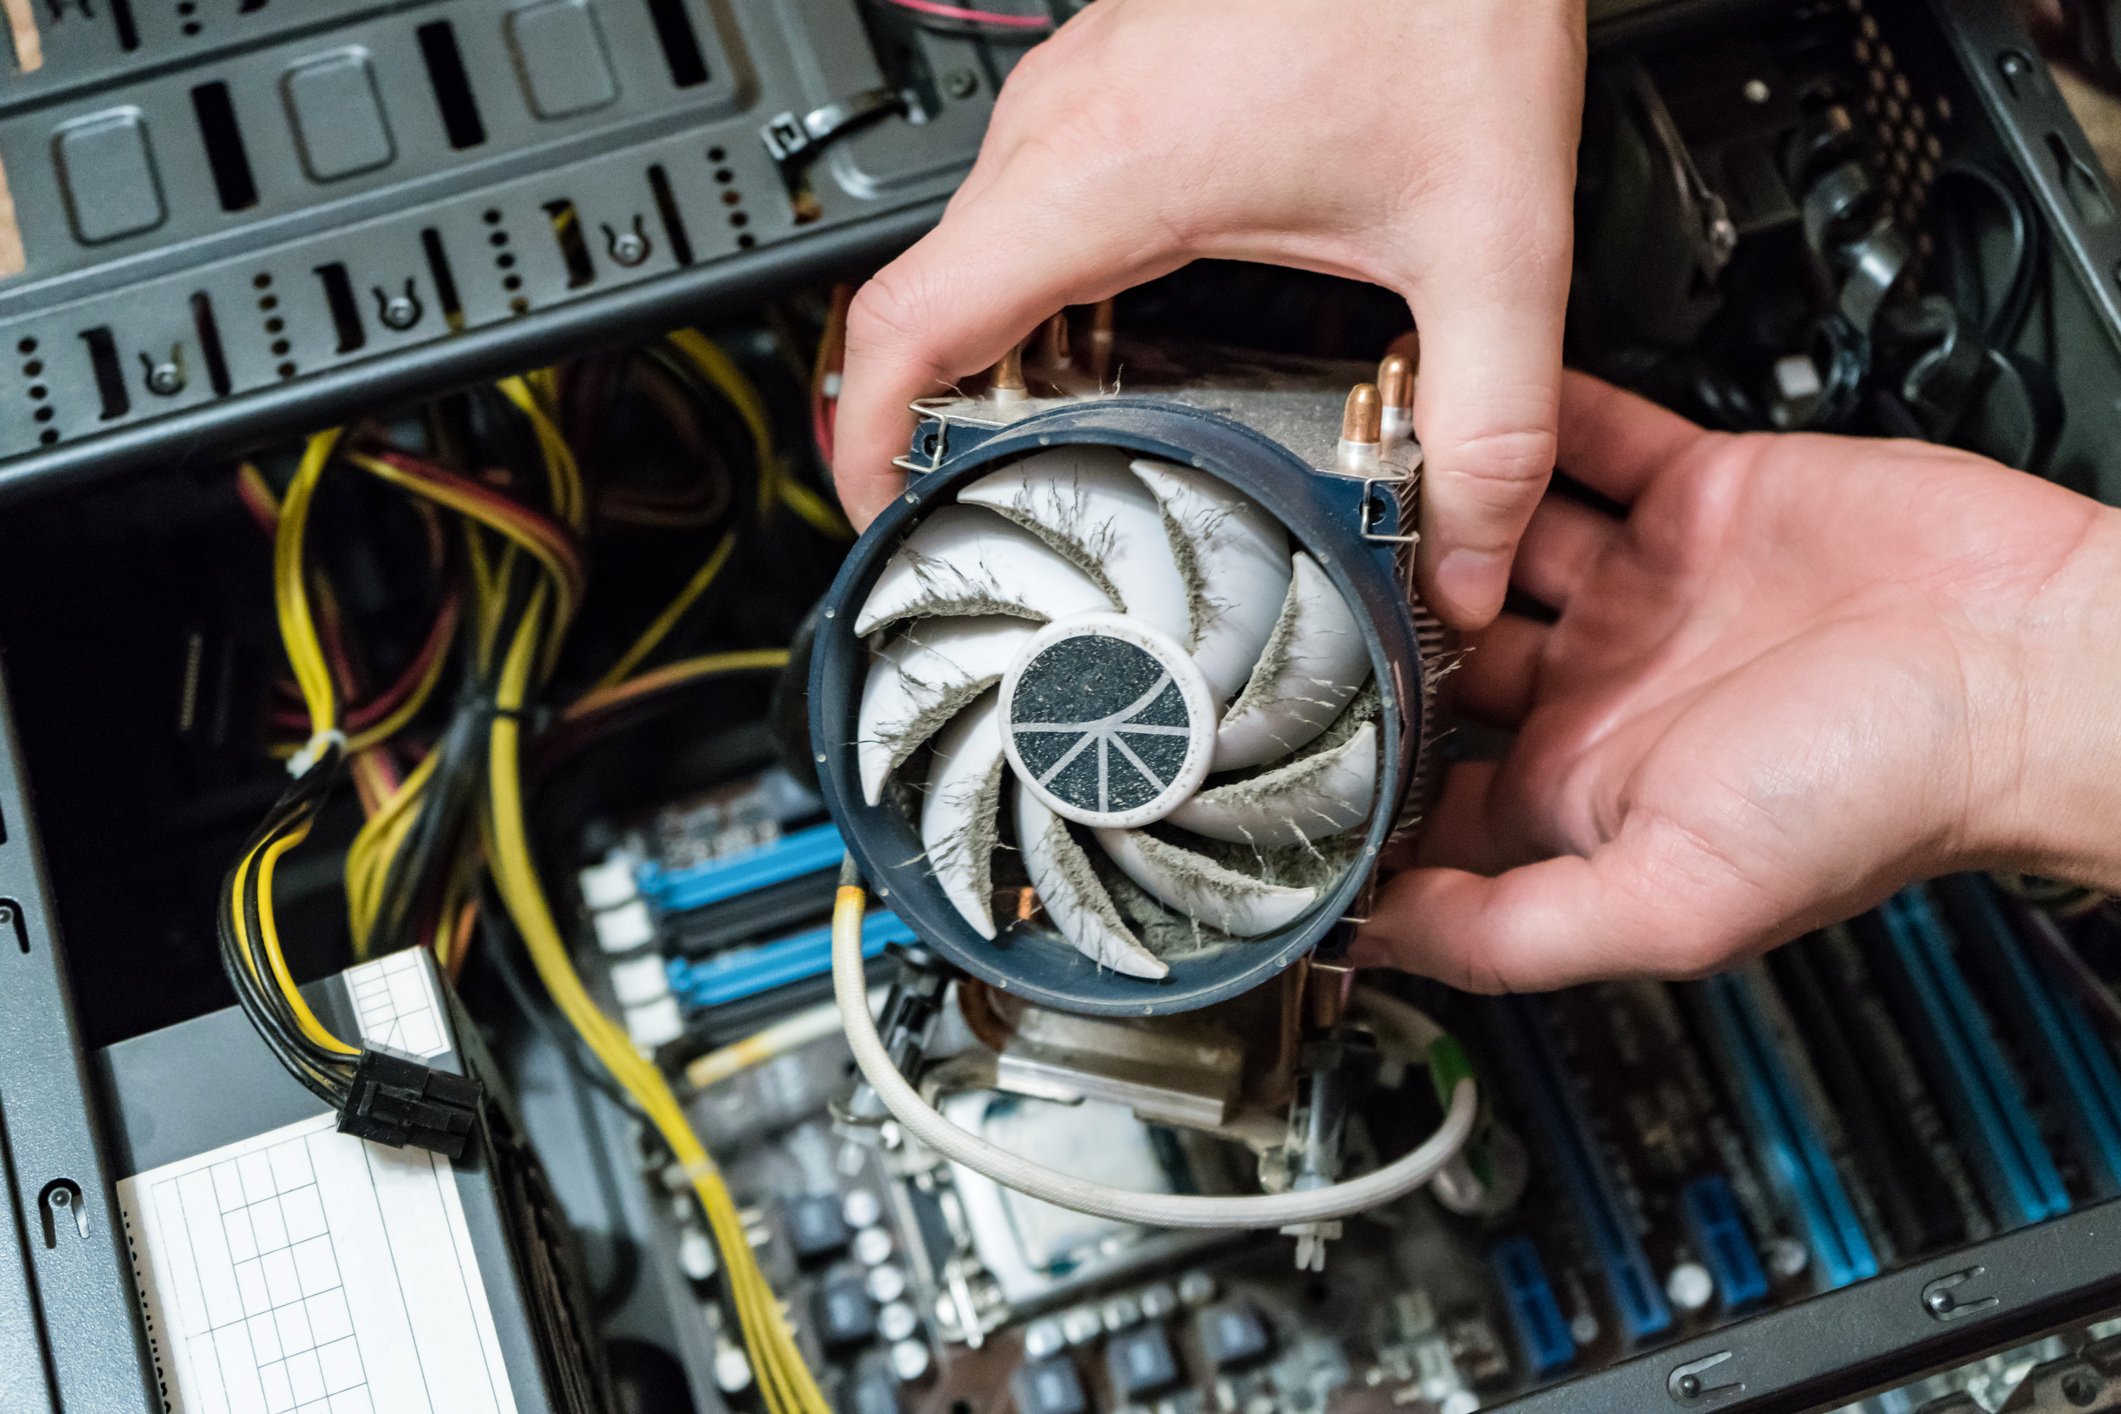
- Visible dust inside the case: To determine if there is dust buildup inside your PC case, you can open it up (when the computer is powered off and unplugged) and visually inspect the components. Look for dust on the fans, heat sinks, and other surfaces. If you can see visible layers of dust, it’s time for a thorough cleaning.
- Strange odors: A musty or unpleasant smell coming from your PC case can indicate the presence of dust or other contaminants. If you notice any strange odors emanating from your computer, it’s a good idea to clean the case and eliminate any potential sources of odor.
By keeping an eye out for these signs, you can identify when it’s time to clean your PC case and prevent potential problems associated with dust and dirt buildup. Regular cleaning not only ensures optimal performance but also extends the lifespan of your computer components.
Why cleaning your PC case is important
Regularly cleaning your PC case is not just about maintaining a tidy and visually appealing computer setup. It plays a crucial role in the overall health and performance of your computer. Here are some key reasons why cleaning your PC case is important:
- Improved cooling: The PC case houses various cooling components such as fans and heat sinks that help dissipate heat generated by the CPU, GPU, and other hardware. Over time, dust and debris can accumulate on these components, obstructing airflow and reducing their cooling efficiency. By cleaning your PC case, you can ensure proper airflow, prevent overheating, and maintain optimal cooling performance.
- Extended component lifespan: Excessive heat buildup due to poor airflow can significantly impact the lifespan of your computer components. When components are exposed to high temperatures for prolonged periods, they are more prone to failure, which can lead to costly repairs or replacements. By keeping your PC case clean and free from dust, you can help prolong the lifespan of your hardware.
- Prevention of hardware issues: Dust accumulation inside your PC case can cause various hardware issues. Dust particles can find their way onto sensitive electronic components, such as the motherboard and graphics card, potentially interfering with their proper functioning. Cleaning your PC case regularly can help prevent static buildup, short circuits, and other potential hardware problems caused by dust and debris.
- Better performance: A clean PC case leads to better performance. When your computer components are operating within optimal temperature ranges, they can perform at their best. Without dust and debris hindering the airflow, you can expect smoother and more efficient computing experiences, whether you’re gaming, editing videos, or performing resource-intensive tasks.
- Aesthetics: Let’s not forget the visual appeal of a clean PC case. If you take pride in your computer setup, a clean and well-maintained case can enhance the overall aesthetics of your gaming or workstation area. It gives a polished and professional look, elevating your computing experience.
Considering these reasons, it’s clear that regularly cleaning your PC case is an essential aspect of PC maintenance. By investing a little time and effort into keeping your PC case clean, you can ensure optimal performance, prevent hardware issues, and extend the lifespan of your computer components.
How often should you clean your PC case?
The frequency at which you should clean your PC case depends on various factors, including your environment, usage patterns, and the level of dust present in your surroundings. While there is no one-size-fits-all answer, it is generally recommended to clean your PC case every three to six months.
If your computer is located in a dusty environment or you have pets that shed fur, you may need to clean your PC case more frequently. Dust can accumulate faster in such conditions and can impact the performance and longevity of your components. On the other hand, if you have a clean and dust-free environment, you may be able to extend the cleaning interval to around six months.
Another important factor to consider is your computer usage. If you frequently use your PC for resource-intensive tasks like gaming, video editing, or rendering, it can generate more heat and dust. In such cases, you may want to clean your PC case more frequently to prevent thermal issues and keep your computer running smoothly.
Pay attention to the signs mentioned earlier, such as dust buildup, fan noise, or overheating. If you notice any of these signs between your regular maintenance intervals, it’s a good indicator that you should clean your PC case sooner rather than later.
Ultimately, the key is to strike a balance between regular cleaning and not overdoing it. Cleaning too often can be excessive and time-consuming, while neglecting regular cleaning can lead to performance issues and potential hardware damage.
Observing the recommended three to six-month cleaning interval and monitoring for signs of dust buildup and performance issues will help you determine the appropriate frequency for maintaining your PC case. Remember, a clean PC case is essential for optimum performance, longevity, and a pleasant computing experience.
Factors that affect how often you should clean your PC case
The frequency at which you should clean your PC case can vary depending on several factors. Understanding these factors will help you determine the appropriate cleaning schedule for your specific setup. Here are some key factors that can affect how often you should clean your PC case:
- Environment: The environment in which your PC is located plays a significant role in how quickly dust and debris accumulate. If you live in a dusty or high-traffic area, such as near construction sites or busy roads, your PC case may collect dust more rapidly. Similarly, if you have pets that shed fur or dander, it can contribute to increased dust buildup. In such cases, you may need to clean your PC case more frequently, potentially every two to three months.
- Usage patterns: How you use your computer can also impact the frequency of cleaning your PC case. If you primarily use your PC for tasks that generate a lot of heat, such as gaming, video editing, or rendering, it can result in increased dust and debris accumulation. These activities can stress your hardware and cause more rapid dust buildup. Consider cleaning your PC case more frequently if you engage in resource-intensive activities on a regular basis.
- Cooling system: The type and effectiveness of your PC’s cooling system can influence the cleaning frequency. If your PC has robust cooling solutions, such as multiple case fans or liquid cooling, it may be more resistant to dust accumulation. On the other hand, if your cooling system is limited or less efficient, dust can accumulate more rapidly, requiring more frequent cleaning to maintain proper airflow and cooling performance.
- Cable management: Proper cable management inside your PC case can contribute to better airflow and reduced dust buildup. Organizing and routing cables away from fans and components allows for unobstructed airflow and can help prevent dust from settling. If your cable management is poor or you have a cluttered case interior, it may impede proper cooling and increase the likelihood of dust accumulation. Consider cleaning your PC case more frequently in such scenarios.
- Personal preference: Lastly, personal preference can also be a deciding factor in how often you clean your PC case. Some users simply prefer to maintain a clean and dust-free computer setup to ensure optimal performance and aesthetics. If keeping your PC case immaculate is important to you, you may choose to clean it more frequently, even if the above factors are not significant.
Considering these factors will help you assess how quickly dust accumulates in your PC case and determine the appropriate cleaning frequency. It’s important to find a balance between regular maintenance and avoiding excessive cleaning to ensure proper performance and longevity of your components.
Step-by-step guide to cleaning your PC case
Cleaning your PC case is a straightforward process that can be done with a few basic tools and some patience. Follow this step-by-step guide to ensure a thorough and effective cleaning:
- Prepare your workspace: Start by preparing a clean and well-lit workspace where you can comfortably work on your PC case. Make sure you have enough room to spread out the necessary tools and materials.
- Gather the required tools and materials: Gather the tools and materials you’ll need for cleaning. This typically includes a can of compressed air, a soft brush or microfiber cloth, isopropyl alcohol, cotton swabs, and possibly a vacuum cleaner with a brush attachment.
- Power off and unplug your computer: Before you begin cleaning, ensure that your computer is powered off and unplugged from the electrical outlet. This is important for your safety and to avoid any potential damage to your hardware.
- Remove the side panel: Carefully remove the side panel of your PC case to gain access to the components inside. Check the manufacturer’s instructions for any specific steps or precautions to follow.
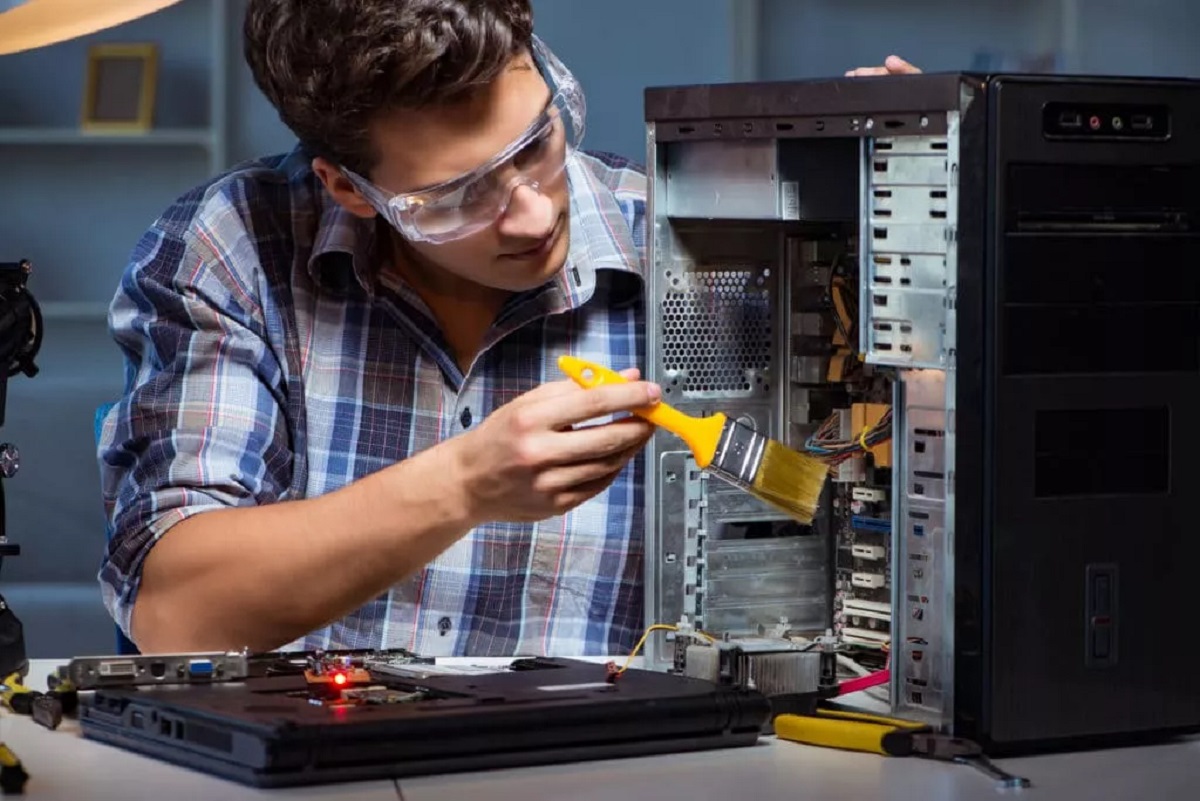
- Clean the exterior of the case: Use a soft brush or microfiber cloth to gently remove dust and debris from the exterior surfaces of the PC case. Pay attention to vents, grilles, and front panels. For stubborn dirt, you can lightly dampen the cloth with isopropyl alcohol.
- Clean the interior of the case: Now it’s time to clean the inside of the PC case. Start by using compressed air to blow away dust from the components, paying close attention to fans, heat sinks, and other hard-to-reach areas. Be sure to hold the can of compressed air upright and use short bursts to avoid liquid from coming out.
- Clean the case fans: Fans are often a primary source of dust accumulation. Use compressed air to blow away dust from the fan blades, ensuring they spin freely. If necessary, use a cotton swab lightly moistened with isopropyl alcohol to clean the fan blades and remove any stubborn dirt.
- Clean the case filters: If your PC case has removable filters, take them out and clean them separately. Use compressed air or a soft brush to remove dust and debris, or rinse them under running water if they are washable. Allow the filters to dry completely before reinstalling them.
- Remove dust from cable connections: Use compressed air or a soft brush to remove dust and debris from cable connections and ports. Ensure they are clean and free of any obstructions before reassembling.
- Reassemble the PC case: Once you’ve finished cleaning, carefully reassemble the PC case by securely attaching the side panel. Make sure all the screws are tightened properly.
- Final touches: Before powering on your computer, take a moment to wipe down the exterior surfaces with a clean cloth to remove any fingerprints or smudges.
Following these steps will help you maintain a clean and dust-free PC case, ensuring optimal performance and component longevity. Remember to perform these cleaning tasks in a well-ventilated area, wear an anti-static wristband if available, and exercise caution to avoid any accidental damage to your hardware.
Tools and materials you need for cleaning
To effectively clean your PC case, you’ll need a few essential tools and materials. Having these items on hand will ensure that you can tackle the task with ease and thoroughness. Here are the tools and materials you need for cleaning your PC case:
- Compressed air: A can of compressed air is a must-have tool for removing dust and debris from hard-to-reach areas inside your PC case. The pressurized air blasts away dust and helps restore optimal airflow. Make sure to use compressed air specifically designed for electronics, as it is non-conductive and safe to use on sensitive components.
- Soft brush or microfiber cloth: A soft brush or microfiber cloth is ideal for dusting off the exterior surfaces of your PC case. It allows you to gently remove dirt and debris without scratching or damaging the finish. Microfiber cloths are especially effective at trapping and removing dust particles without leaving lint behind.
- Isopropyl alcohol: Isopropyl alcohol is useful for cleaning stubborn dirt or stains on your PC case. It can be used in small amounts on a microfiber cloth to wipe away grime from surfaces. Make sure to use a high percentage of isopropyl alcohol (at least 90%) for better cleaning results.
- Cotton swabs: Cotton swabs are handy for cleaning small and delicate areas such as fan blades, connectors, and ports. They allow you to target specific spots and remove dirt effectively. Dip the cotton swab into isopropyl alcohol for better cleaning power.
- Vacuum cleaner with a brush attachment: While not essential, a vacuum cleaner with a brush attachment can be useful for removing loose dust and debris from the PC case. Use the brush attachment to gently vacuum the interior and exterior surfaces of the case, being careful not to touch any sensitive components.
- Anti-static wristband (optional): If available, an anti-static wristband can help prevent static electricity discharge while working inside your PC case. This can protect your components from potential damage caused by electrostatic discharge (ESD). If you do not have a wristband, be sure to ground yourself by touching a grounded object before handling any components.
Having these tools and materials readily available will make the cleaning process smoother and more efficient. Remember to read and follow any safety instructions provided with the products, especially when working with compressed air and isopropyl alcohol. Taking the necessary precautions will help you maintain a clean and well-functioning PC case without risking damage to your valuable hardware.
Precautions to take before cleaning your PC case
Before diving into cleaning your PC case, it’s important to take certain precautions to protect both yourself and your computer components. Following these precautions will help ensure a safe and successful cleaning process. Here are some precautions to keep in mind:
- Power off and unplug your computer: Before you start cleaning, make sure your computer is powered off and unplugged from the electrical outlet. This will prevent any potential electrical accidents and protect you from electric shock.
- Ground yourself: Before touching any computer components, ground yourself by touching a grounded object, such as a metal part of your PC case or a grounded outlet. This helps discharge any static electricity buildup and prevents ESD (electrostatic discharge) from damaging sensitive components.
- Work in a well-ventilated area: Cleaning your PC case can stir up dust and particles in the air. To ensure proper ventilation, work in a well-ventilated area or near an open window. This will help dissipate any airborne particles and minimize inhalation of dust, especially if you’re using compressed air.
- Use an anti-static wristband (optional): If you have an anti-static wristband, consider wearing it to prevent ESD. This is especially important when working with sensitive components such as the motherboard, CPU, or graphics card. The wristband helps discharge static electricity safely, avoiding any potential damage.
- Avoid excessive pressure: When cleaning your PC case, avoid applying excessive pressure to any components or connectors. Be gentle and use a soft brush, microfiber cloth, or compressed air in short bursts to dislodge dust and debris. Applying too much pressure can cause damage or dislodge connectors.
- Avoid moisture: While isopropyl alcohol is commonly used for cleaning, be careful not to apply excessive moisture. Dampen a cloth or cotton swab lightly with isopropyl alcohol and ensure it is not dripping. Moisture can damage sensitive components, so use sparingly and allow time for any moisture to evaporate before reassembling your PC case.
- Avoid vacuuming directly on components: If you’re using a vacuum cleaner with a brush attachment, be cautious not to directly vacuum sensitive components such as the motherboard, graphics card, or memory modules. The brush attachment can generate static electricity and potentially damage or dislocate components. Instead, use the vacuum to gently remove loose dust from the case’s interior and exterior surfaces.
- Keep track of screws and cables: As you remove the side panel and other components for cleaning, keep track of screws and cables. It’s a good practice to place them in a designated container or on a clean surface to avoid misplacing or losing them. Proper cable management and reassembly are crucial to ensure the components are connected securely and airflow is not obstructed.
By taking these precautions, you can minimize the risk of damage to your computer components and ensure a safe cleaning process. Remember, patience, care, and attention to detail are key when cleaning your PC case. Following these precautions will help maintain the integrity of your hardware and keep your PC running smoothly.
Cleaning the exterior of your PC case
Keeping the exterior of your PC case clean not only enhances its appearance but also helps maintain optimal airflow and prevent dust buildup. Here’s a step-by-step process for cleaning the exterior surfaces of your PC case:
- Power off and unplug your computer: Before you begin cleaning, ensure that your computer is powered off and unplugged from the electrical outlet. Safety should always be a priority when working with electronic devices.
- Gather your tools and materials: Grab a soft brush or microfiber cloth, isopropyl alcohol, and a clean rag or paper towel. These materials will help you effectively remove dust and grime from the exterior surfaces of your PC case.
- Dust the surfaces: Starting from the top, use a soft brush or microfiber cloth to gently dust off the exterior surfaces of your PC case. Pay attention to areas with ventilation, front panels, and any other decorative elements. Work your way around the case, removing dust and debris.
- Wipe with isopropyl alcohol: If there are stubborn stains, fingerprints, or dirt on the surfaces, dampen a clean rag or paper towel with a small amount of isopropyl alcohol. Gently wipe the affected areas to remove the grime. Be careful not to saturate the cloth with too much alcohol to prevent any liquid from seeping into the case.
- Dry the surfaces: Once you’ve cleaned the surfaces, allow them to air dry for a few minutes. Make sure no excess moisture remains before proceeding to the next step.
- Inspect for missed spots: Take a final look at the exterior surfaces of your PC case to ensure all dust and stains have been removed. Use the soft brush or microfiber cloth to touch up any areas that may have been missed.
Remember to be gentle and avoid applying excessive pressure when cleaning the exterior of your PC case. Avoid using abrasive materials or harsh chemicals that could damage the finish or paint. If you’re unsure about the compatibility of a particular cleaning agent, it’s best to err on the side of caution and stick to isopropyl alcohol or a mild cleaning solution.
Regularly cleaning the exterior of your PC case will help maintain its visual appeal and prevent dust from accumulating on the surfaces. It’s a small but important step in keeping your computer setup clean and well-maintained.
Cleaning the interior of your PC case
Cleaning the interior of your PC case is an essential step in maintaining optimal performance and preventing dust-related issues. Follow these steps to effectively clean the interior of your PC case:
- Power off and unplug your computer: Before you start cleaning, ensure that your computer is powered off and unplugged from the electrical outlet. This is crucial for your safety and to avoid any potential damage to your hardware.
- Remove the side panel: Carefully remove the side panel of your PC case to gain access to the interior components. Consult your case’s manual if you’re unsure how to remove the panel properly.
- Use compressed air to blow away dust: With the side panel removed, use a can of compressed air to blow away dust from the interior surfaces. Start from the top and work your way down, paying special attention to fans, heat sinks, and other components that tend to accumulate dust. Remember to hold the can upright and use short bursts to avoid any liquid from coming out.
- Clean fans and heat sinks: Dust buildup on fans and heat sinks can hinder airflow and cooling performance. Use compressed air to blow away dust from the fan blades, heat sinks, and other cooling components. For more stubborn dirt, you can gently wipe the areas with a cotton swab lightly moistened with isopropyl alcohol.
- Remove loose dust with a vacuum cleaner: If you have a vacuum cleaner with a brush attachment, you can use it to remove loose dust and debris from the interior surfaces of your PC case. Be mindful not to touch any sensitive components or exert too much suction that could potentially dislodge or damage any parts.
- Clean cable connections and ports: Use compressed air to blow away dust from cable connections and ports. This will help maintain good contact and prevent any connectivity issues. Be gentle when cleaning delicate connectors to avoid any accidental damage. If needed, you can use a cotton swab lightly moistened with isopropyl alcohol to clean the contacts.
- Clean the motherboard and other components: If you notice dust on the motherboard or other components, you can use a soft brush or compressed air to remove the debris. Be cautious when working near sensitive components and connectors to avoid any damage.
- Clean the power supply: If your power supply has a removable dust filter, take it out and clean it separately. Use compressed air to blow away dust and debris, ensuring the filter is clean. If the power supply does not have a removable filter, gently blow compressed air into the fan vents to remove any dust buildup.
- Reassemble the PC case: Once you’ve finished cleaning, carefully reassemble the PC case by securely attaching the side panel. Ensure that all screws are tightened properly.
It’s important to exercise caution when cleaning the interior of your PC case. Avoid applying excessive pressure or using abrasive materials that could damage delicate components. Additionally, be mindful of static electricity and take necessary precautions such as grounding yourself before handling any components.
A clean interior promotes optimal airflow, reduces heat buildup, and extends the lifespan of your PC components. By following these steps regularly, you can ensure that your PC case remains clean and free from dust-related issues.
Cleaning your PC case fans
PC case fans play a crucial role in maintaining proper airflow and cooling inside your computer. Over time, dust and debris can accumulate on the fan blades, affecting their performance and potentially causing overheating issues. Follow these steps to effectively clean your PC case fans:
- Power off and unplug your computer: Before you begin cleaning, ensure that your computer is powered off and unplugged from the electrical outlet. This is important for your safety and to avoid any potential damage to your hardware.
- Access the fans: Depending on your PC case, you may need to remove the side panel to access the fans. Consult your case’s manual for specific instructions on accessing the fans.
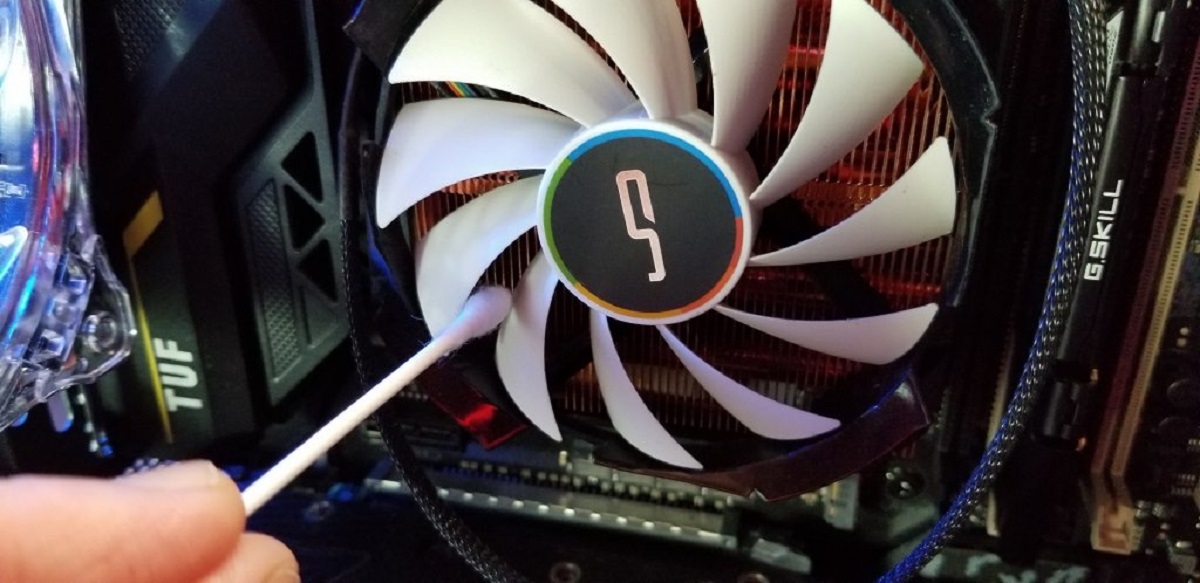
- Hold the fan in place: Fans can spin freely, making it challenging to clean them. To hold the fan in place and prevent it from spinning, use a pen, pencil, or your finger to gently press against the center hub of the fan.
- Blow away dust with compressed air: With the fan held in place, use a can of compressed air to blow away dust from the fan blades. Start at one edge of the blades and move across, making sure to remove as much dust as possible. Be sure to hold the can of compressed air upright and use short bursts to avoid any potential liquid from coming out.
- Remove stubborn dirt: If there are stubborn dirt or debris on the fan blades, you can use a cotton swab lightly moistened with isopropyl alcohol to gently clean them. Be careful not to apply excessive pressure or get any liquid on the fan motor or bearings.
- Repeat for other fans: If your PC case has multiple fans, repeat the same process for each one, ensuring that you clean all the fan blades thoroughly.
- Inspect for any remaining dust: After cleaning the fans, take a moment to inspect them for any remaining dust or debris. Use compressed air or a brush to touch up any areas that may have been missed during the initial cleaning.
- Reassemble the PC case: Once you’ve finished cleaning the fans, carefully reassemble the PC case by securely attaching the side panel. Ensure that all screws are tightened properly.
Regularly cleaning your PC case fans is essential for maintaining their performance and preventing overheating. By removing dust and debris from the fan blades, you ensure better airflow and cooling efficiency, which in turn helps extend the lifespan of your computer components.
Remember to exercise caution when cleaning the fans, especially when using compressed air or any liquid near the fan motor or bearings. Taking these steps will keep your PC case fans in good working condition and contribute to a cooler and more efficient computing experience.
Cleaning your PC case filters
PC case filters serve as the first line of defense against dust and debris, keeping them from entering your computer and clogging up the internal components. Regularly cleaning your PC case filters is crucial for maintaining proper airflow and preventing overheating issues. Follow these steps to effectively clean your PC case filters:
- Power off and unplug your computer: Before you begin cleaning, ensure that your computer is powered off and unplugged from the electrical outlet. This is important for your safety and to avoid any potential damage to your hardware.
- Locate the filters: The filters are typically located on the intake vents or openings of your PC case. Consult your case’s manual if you’re unsure where to find them.
- Remove the filters: Depending on your case design, the filters may be removable or hinged. Carefully remove the filters from the case. If unsure, refer to the manual for specific instructions on removing the filters.
- Inspect the filters: Take a close look at the filters and assess the level of dirt and dust buildup. If the filters are washable, you’ll be able to clean them with water. Filters that are not washable may require dry cleaning methods like using compressed air or a brush.
- Clean washable filters: If your filters are washable, rinse them under running water to remove the dust and debris. Gently scrub the filters with a soft brush or your fingers to dislodge any stubborn dirt. Allow them to air dry completely before reinserting them back into the PC case.
- Clean non-washable filters: For non-washable filters, use compressed air, a soft brush, or a vacuum cleaner with a brush attachment to remove the dust and debris. Direct the airflow or brush over the filters, working on both sides to ensure thorough cleaning. Be gentle to avoid damaging the filters or dislodging any delicate parts.
- Inspect for any remaining debris: After cleaning the filters, inspect them for any remaining debris. Use a brush or compressed air to touch up any areas that may have been missed during the cleaning process.
- Reinstall the filters: Once the filters have dried completely or you’ve finished cleaning them, carefully reinsert them into their designated spots in the PC case. Ensure that they are securely in place.
- Reassemble the PC case: Finally, reassemble the PC case by securely attaching the side panel. Make sure all the screws are tightened properly.
Regularly cleaning your PC case filters will help maintain efficient airflow, prevent dust buildup, and improve the overall cooling performance of your computer. By keeping these filters clean, you can reduce the risk of overheating and ensure the longevity of your components.
Refer to your PC case manual for specific guidance on cleaning the filters, as the process may vary depending on the case design. Following these steps will help keep your PC case filters in optimal condition, contributing to a cleaner and healthier computing environment.
Tips for maintaining a clean PC case
Maintaining a clean PC case is an ongoing process that can help optimize performance, ensure component longevity, and create a visually appealing computer setup. Here are some tips to help you keep your PC case clean and dust-free:
- Place your PC in a clean area: Position your computer in a clean and well-ventilated area, away from dusty or high-traffic spots. Avoid placing it directly on the floor where dust and debris can accumulate more easily.
- Utilize positive air pressure: Configuring your PC case with more intake fans than exhaust fans can create positive air pressure. This setup helps push the dust out of the case through the vents and prevents it from settling on components.
- Invest in dust filters: Consider installing dust filters on the intake vents of your PC case. These filters help trap dust and debris before they enter the case, reducing the amount of buildup on internal components. Regularly clean or replace these filters to ensure optimal effectiveness.
- Keep your work area clean: Regularly dust and clean your work area to minimize the amount of dust that can find its way into your PC case. Clean your desk, shelves, or any surfaces near your computer to prevent particles from accumulating and being drawn into the case.
- Perform regular maintenance: Schedule regular maintenance sessions to clean your PC case. Set a reminder every three to six months, depending on your environment and usage patterns. Consistency is key to maintaining a clean and well-functioning PC case.
- Use a can of compressed air: Compressed air is an effective tool for removing dust and debris from the case, fans, and other components. Use short bursts and hold the can upright to avoid any liquid from being released.
- Keep cable management tidy: Proper cable management inside your PC case not only improves airflow but also reduces the risk of dust accumulation. Organize and secure cables away from fans and components to facilitate better airflow and easier cleaning.
- Avoid smoking around your PC: Smoking near your PC can lead to the buildup of nicotine and other harmful substances inside the case. It’s best to keep your computer area smoke-free to maintain a clean and healthy environment for your PC components.
- Regularly clean peripherals: Dust and debris can accumulate on peripherals like keyboards, mice, and monitors. Regularly clean these devices using appropriate methods to prevent them from transferring dust back onto your PC case.
- Consider using a case cover: Using a case cover can help minimize dust accumulation on the external surfaces of your PC case. Opt for a case with a front panel or cover that offers dust protection and easy access for cleaning.
By following these tips, you can maintain a clean and dust-free PC case, improving performance, prolonging component lifespan, and creating a more enjoyable computing experience. Remember, a little effort in regular maintenance can go a long way in preserving the integrity and efficiency of your PC setup.
Conclusion
Maintaining a clean PC case is essential for optimal performance, component longevity, and overall aesthetics. Regularly cleaning your PC case helps ensure proper airflow, prevents dust buildup, and reduces the risk of overheating and hardware issues.
By following the step-by-step cleaning guide outlined in this article, you can effectively clean both the interior and exterior of your PC case, as well as the fans and filters. Remember to take necessary precautions, such as powering off and unplugging your computer, grounding yourself, and using appropriate tools and materials.
Factors such as your environment, usage patterns, and cooling system can influence how often you should clean your PC case. Pay attention to signs such as dust buildup, fan noise, and performance issues to determine when it’s time for a thorough cleaning.
In addition to regular cleaning, implementing preventive measures like positive air pressure, dust filters, and tidy cable management can help maintain a cleaner PC case for longer periods. Keeping your work area clean and avoiding smoking near your PC also contribute to a dust-free environment.
Maintaining a clean PC case is not just about functionality, but also about creating a visually appealing and professional-looking computer setup. A clean and well-maintained PC case enhances your computing experience and prolongs the life of your components.
By following the tips and guidelines provided in this article, you can ensure that your PC case remains dust-free and in optimal condition. Regular maintenance, attention to detail, and consistency are key to keeping your computer running smoothly and looking its best.