Introduction
Decorating a PC case is a fun and creative way to add your personal touch to your gaming or workstation setup. Not only does it make your PC look visually appealing, but it also allows you to showcase your style and personality. Whether you’re an avid gamer, a tech enthusiast, or just someone who loves to customize their belongings, decorating a PC case is an exciting project that can elevate your computer setup to the next level.
When it comes to decorating your PC case, the possibilities are endless. From choosing the right case to planning the design, painting techniques, and adding accessories, there are various steps involved in creating a customized look. This guide will walk you through the process, providing you with tips and tricks to transform your PC case into a work of art.
Before diving into the details, it’s important to note that decorating a PC case requires some basic knowledge of computer hardware and a careful approach to avoid any damages. If you’re unsure about any step along the way, it’s always best to consult with a professional or seek guidance from online forums and communities.
Now, let’s get started! In the following sections, we’ll discuss how to choose the right PC case, clean and prepare it for decorating, plan your design, explore different painting techniques, add decals and stickers, customize with LED lights, manage cables, install additional accessories, and give your PC case those final touches that will make it stand out.
So, get ready to unleash your creativity and let’s dive into the wonderful world of PC case decoration!
Choosing the Right PC Case
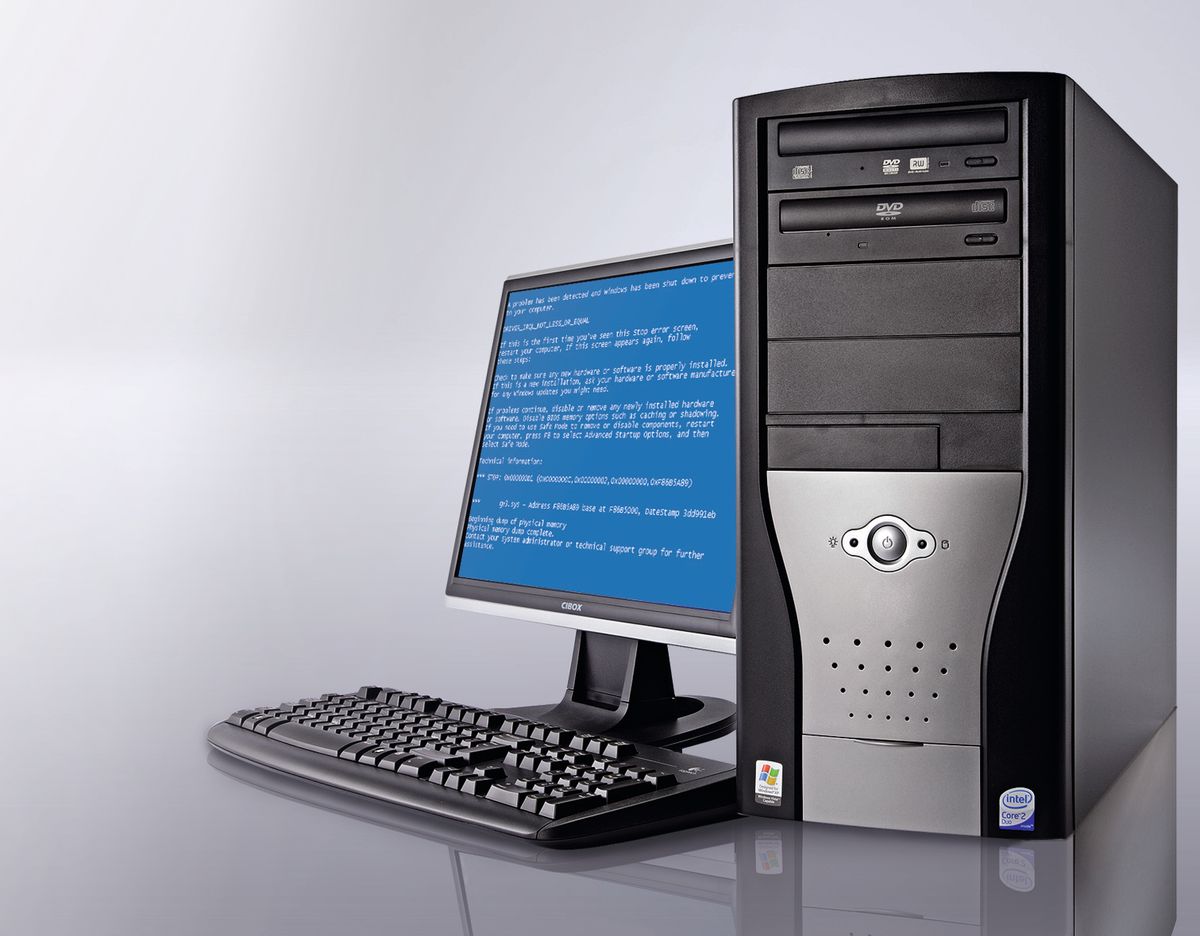
When it comes to decorating your PC case, choosing the right case is a crucial step. The case not only serves as the foundation for your customizations but also determines the overall look and functionality of your computer setup. Here are some key factors to consider when selecting a PC case:
Size: PC cases come in various sizes, such as full tower, mid-tower, and mini-tower. The size of your case should depend on your specific needs and available space. Consider the number of components you plan to install and ensure that the case is spacious enough to accommodate them comfortably.
Airflow: Good airflow is essential to keep your components cool and prevent overheating. Look for a PC case with adequate ventilation options, such as mesh panels or vents, to ensure proper airflow. This will help maintain optimal performance and longevity for your hardware.
Compatibility: Ensure that the case is compatible with your motherboard form factor and other components. Check the specifications of the case to see if it supports the size of your motherboard, GPU length, and PSU form factor. It’s also important to consider the number of drive bays and expansion slots available.
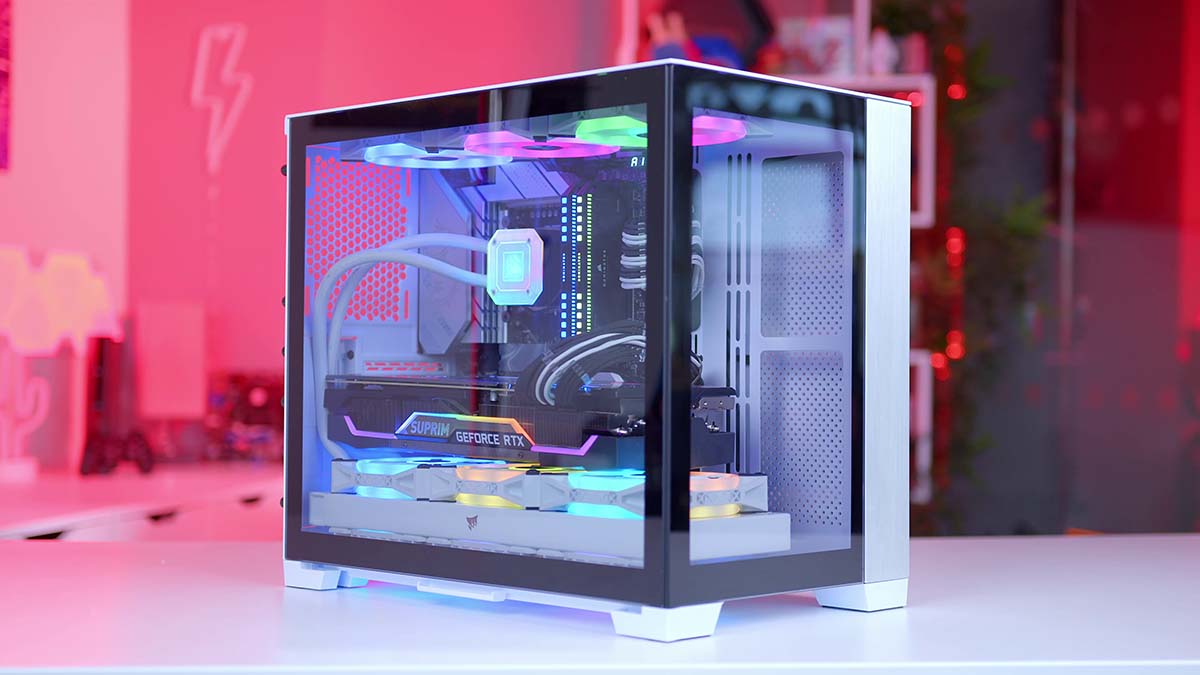
Aesthetics: Consider the overall design and aesthetic appeal of the case. Do you prefer a sleek and minimalistic look, or do you want something more flashy and eye-catching? Take into account the color scheme and any additional features like tempered glass panels or customizable RGB lighting.
Functionality: Think about the functionality and ease of use. Look for features like tool-less installation, removable dust filters, and cable management options. These features will not only make building and maintaining your PC easier but also contribute to a cleaner and more organized appearance.
Research and read reviews from other users to gain a better understanding of the different options available in the market. Consider your budget and prioritize the factors that are most important to you. Remember, a well-chosen PC case will provide a solid foundation for your customization journey and ensure that your decorative efforts are showcased in the best possible way.
Cleaning and Preparing the Case
Before you dive into decorating your PC case, it’s crucial to clean and prepare it properly to ensure a smooth and long-lasting finish. Follow these steps to get your case ready for customization:
1. Gather the necessary supplies: Start by gathering the tools and supplies you’ll need, such as a soft cloth, compressed air canister, mild soap or cleaning solution, and a screwdriver set. Having everything on hand will make the cleaning process more efficient.
2. Disassemble the case: Carefully remove any panels, side panels, and components from your PC case. This will allow you to clean each part thoroughly and make it easier to access all the nooks and crannies.
3. Dust off the case: Use a compressed air canister to blow away any dust and debris from the case. Pay close attention to fan grilles, vents, and hard-to-reach areas. Be gentle to avoid damaging any delicate components.
4. Wipe the surfaces: Dampen a soft cloth with water and mild soap or a gentle cleaning solution. Wipe down all the surfaces, inside and outside the case, to remove any fingerprints, dirt, or smudges. Avoid using harsh chemicals that could damage the case’s finish.
5. Clean the panels: Take each panel and clean them individually. Use the same cloth and cleaning solution to wipe down the panels, paying attention to remove any marks or residues. If necessary, you can remove more stubborn stains by lightly scrubbing with a soft-bristled brush.
6. Allow the case to dry: After wiping down all the surfaces, allow the case and panels to air dry completely. This will ensure that no moisture remains, which could interfere with the painting or decorating process.
7. Inspect for damages: While cleaning, inspect the case for any damages or signs of wear. Check for any dents, scratches, or loose parts that may need repairing or replacement. Fixing these issues beforehand will ensure that your finished design looks polished and professional.
8. Reassemble the case: Once everything is dry and in good condition, reassemble the case by putting back all the panels and components. Ensure that everything is secured and properly aligned before moving forward with your decorating plans.
By taking the time to clean and prepare your PC case, you’ll create a clean canvas for your decorations and ensure that they adhere properly. This step is crucial for achieving a professional and impressive finish that will make your customized PC case truly stand out.
Planning the Design
Planning the design of your PC case decoration is an exciting and essential step. Taking the time to conceptualize and visualize your desired design will help you create a cohesive and aesthetically pleasing look. Here are some steps to consider when planning your PC case design:
1. Theme and inspiration: Start by deciding on a theme or concept for your design. This could be based on your favorite game, movie, hobby, or any other source of inspiration. Look for images, artwork, or color schemes that resonate with your chosen theme to get ideas for patterns, textures, and overall aesthetics.
2. Sketch it out: Grab a pencil and paper or use digital design tools to create a rough sketch of your design. Consider the placement of different elements such as decals, stickers, or painted motifs. This will give you a visual representation of how the final design will look on your PC case.
3. Color palette: Select a color palette that complements your chosen theme and appeals to your personal preferences. Consider using a combination of contrasting colors or shades within the same color family to create visual interest. Experiment with different color options to find the perfect combination that brings your design to life.
4. Balancing the design: Ensure that the design is well-balanced and not too overwhelming. Distribute the elements evenly across the case without overcrowding any particular area. Keep in mind the function and visibility of different components, such as fans or ports, and avoid obstructing them with your design elements.
5. Consider the case’s features: Take into account the specific features of your PC case, such as windows, fan placements, or cable management holes. These features can be incorporated into the design to create a seamless and integrated look. For example, you can align decals or painted elements with fan grilles or use cable management routes as visual guide lines.
6. Test it out: Before committing to your final design, consider creating mock-ups or digital 3D renders to see how the design will look on your actual PC case. This will help you make any necessary adjustments or fine-tune the details before moving forward with the actual implementation.
7. Personal touches: Don’t forget to add personal touches to your design. This could be your signature, a favorite quote, or any customized element that represents your personality. Adding these small details will make your PC case decoration unique and truly yours.
By taking the time to plan your design, you’ll have a clear vision of what you want to achieve and avoid any potential pitfalls during the decoration process. This step allows you to fully unleash your creativity and create a stunning PC case design that reflects your style and personality.
Painting Techniques
Painting your PC case is a popular and effective way to customize its appearance and give it a fresh new look. With the right techniques and materials, you can achieve professional results. Here are some painting techniques to consider when decorating your PC case:
1. Surface preparation: Before painting, it’s important to properly prepare the surface of the PC case. Clean it thoroughly to remove any dust, dirt, or grease. Use a fine-grit sandpaper to lightly roughen the surface, which will help the paint adhere better.
2. Priming: Applying a coat of primer is essential for achieving a smooth and long-lasting paint finish. Choose a primer that is suitable for the case’s material. Apply it evenly over the entire surface and allow it to dry according to the manufacturer’s instructions.
3. Base coat: Once the primer is dry, apply a base coat of paint. Select a high-quality paint that is compatible with the case’s material and your chosen color. Use smooth and even strokes to ensure a uniform coverage. Allow the base coat to dry completely before moving on to the next steps.
4. Masking and stenciling: If you want to add intricate designs or patterns to your PC case, consider using masking tape or stencils. Masking tape allows you to create clean lines and boundaries, while stencils give you the ability to add detailed shapes or symbols. Apply the tape or stencil securely, paint over it, and carefully remove it once the paint is dry.
5. Gradient effect: If you desire a gradient or ombre effect on your PC case, you can achieve this by layering different shades of paint. Start with a base color, let it dry, then apply a lighter or darker shade gradually to create a smooth transition. Blend the colors together using a sponge or soft cloth.
6. Texturing: To add texture to your PC case, consider using techniques like dry brushing or splatter effects. Dry brushing involves lightly brushing a small amount of paint onto the surface to create a rough or weathered look. Splatter effects can be achieved by flicking paint onto the case using a toothbrush or a dedicated art tool.
7. Clear coating: Once you’re satisfied with the painted design, protect it with a clear coat or varnish. This will add a layer of protection and give your PC case a glossy or matte finish, depending on your preference. Follow the manufacturer’s instructions for applying and drying the clear coat.
8. Finishing touches: After the paint has dried and the clear coat is applied, inspect the case for any imperfections or uneven areas. Touch up any spots that need adjustment, and ensure that the design looks seamless and polished.
Remember to work in a well-ventilated area and wear appropriate safety gear, such as a mask and gloves, when painting. Take your time and be patient throughout the painting process to achieve the best results. By utilizing these techniques, you can transform your PC case into a unique and visually stunning masterpiece.
Adding Decals and Stickers
Adding decals and stickers to your PC case is a versatile and easy way to customize its appearance. With a wide variety of designs and styles available, you can find decals and stickers that match your personality and enhance the overall aesthetic of your PC setup. Here are some tips for adding decals and stickers to your PC case:
1. Clean and prepare the surface: Before applying any decals or stickers, make sure the surface of your PC case is clean and free of dust or debris. Use a soft cloth and mild cleaning solution to wipe the area where you plan to place the decal or sticker. This will ensure that they adhere properly and prevent any unwanted bubbles or imperfections.
2. Determine the placement: Consider the overall design of your PC case and decide where you want to place the decals or stickers. Take into account the size and shape of the decal/sticker and how it will complement the existing elements of your case. You can experiment by positioning them in different areas to find the best placement.
3. Measure and align: If you’re using multiple decals or stickers, measure and align them properly to create a balanced and symmetrical look. Use a ruler or a measuring tape to ensure that they are evenly spaced and at the desired height or position.
4. Peel and apply: Carefully peel off the backing of the decal or sticker, starting from one corner. Avoid touching the adhesive side with your fingers to prevent any oils or residues from affecting the adhesion. Once peeled, place the decal or sticker onto the surface and gently press it down, working from the center outward to remove any air bubbles.
5. Smooth out any bubbles: If you notice any bubbles or creases, gently smooth them out with a credit card or a soft cloth. Start from the center and move outwards, applying light pressure to ensure a smooth and flat application.
6. Remove the transfer tape (if applicable): Some decals or stickers may come with a transfer tape. Once the decal or sticker is applied and any air bubbles are smoothed out, carefully remove the transfer tape by peeling it away at a 45-degree angle. This will reveal the final design on your PC case.
7. Customization and layering: If you want to add an extra touch of customization, consider layering decals or stickers to create a more dynamic and personalized design. You can mix and match different designs or add text overlays to make your PC case truly unique.
8. Maintenance and removal: To keep your decals and stickers looking their best, clean them regularly with a soft, damp cloth. Avoid using abrasive cleaning materials that could damage or fade the design. If you decide to remove the decals or stickers in the future, gently peel them off starting from one corner. Use a hairdryer on low heat to help loosen the adhesive if needed, and clean any residue with rubbing alcohol.
Decals and stickers are a cost-effective and customizable option for adding personality and style to your PC case. Whether you prefer a sleek and minimalistic look or a vibrant and eye-catching design, they allow you to express your creativity and make your computer setup truly stand out.
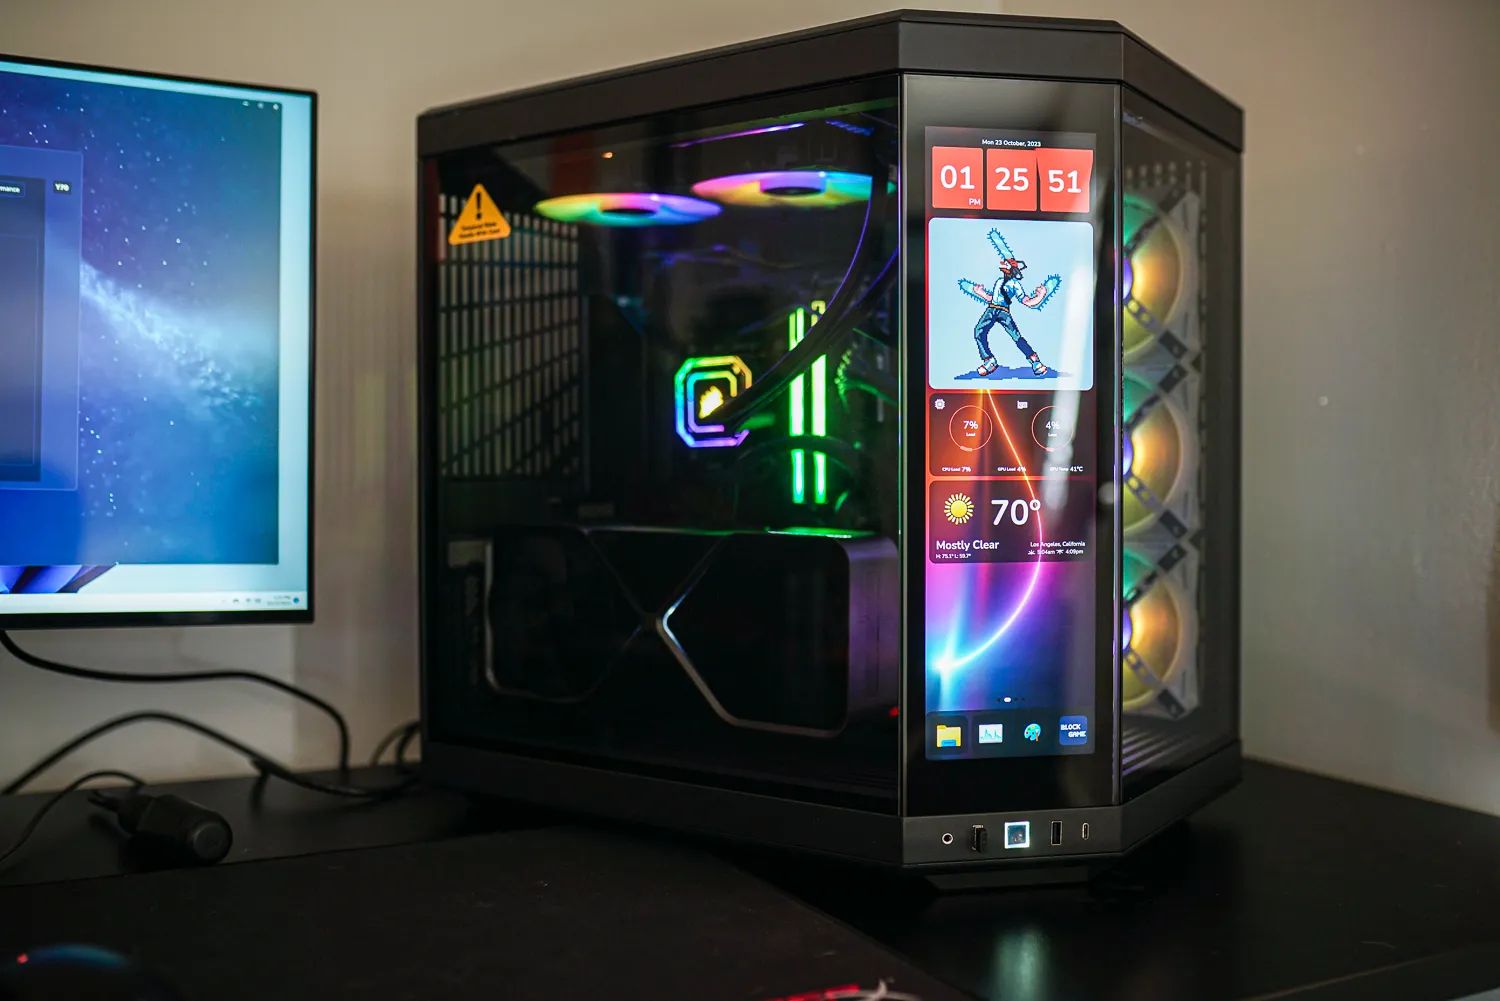
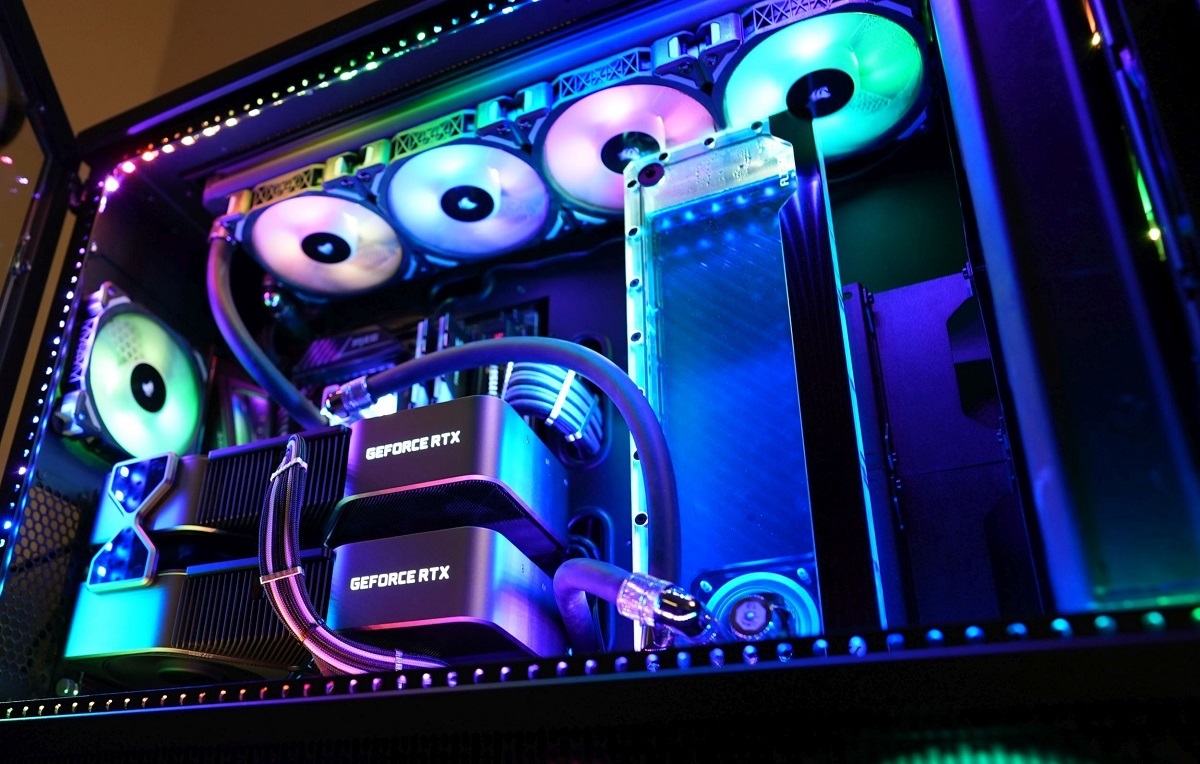
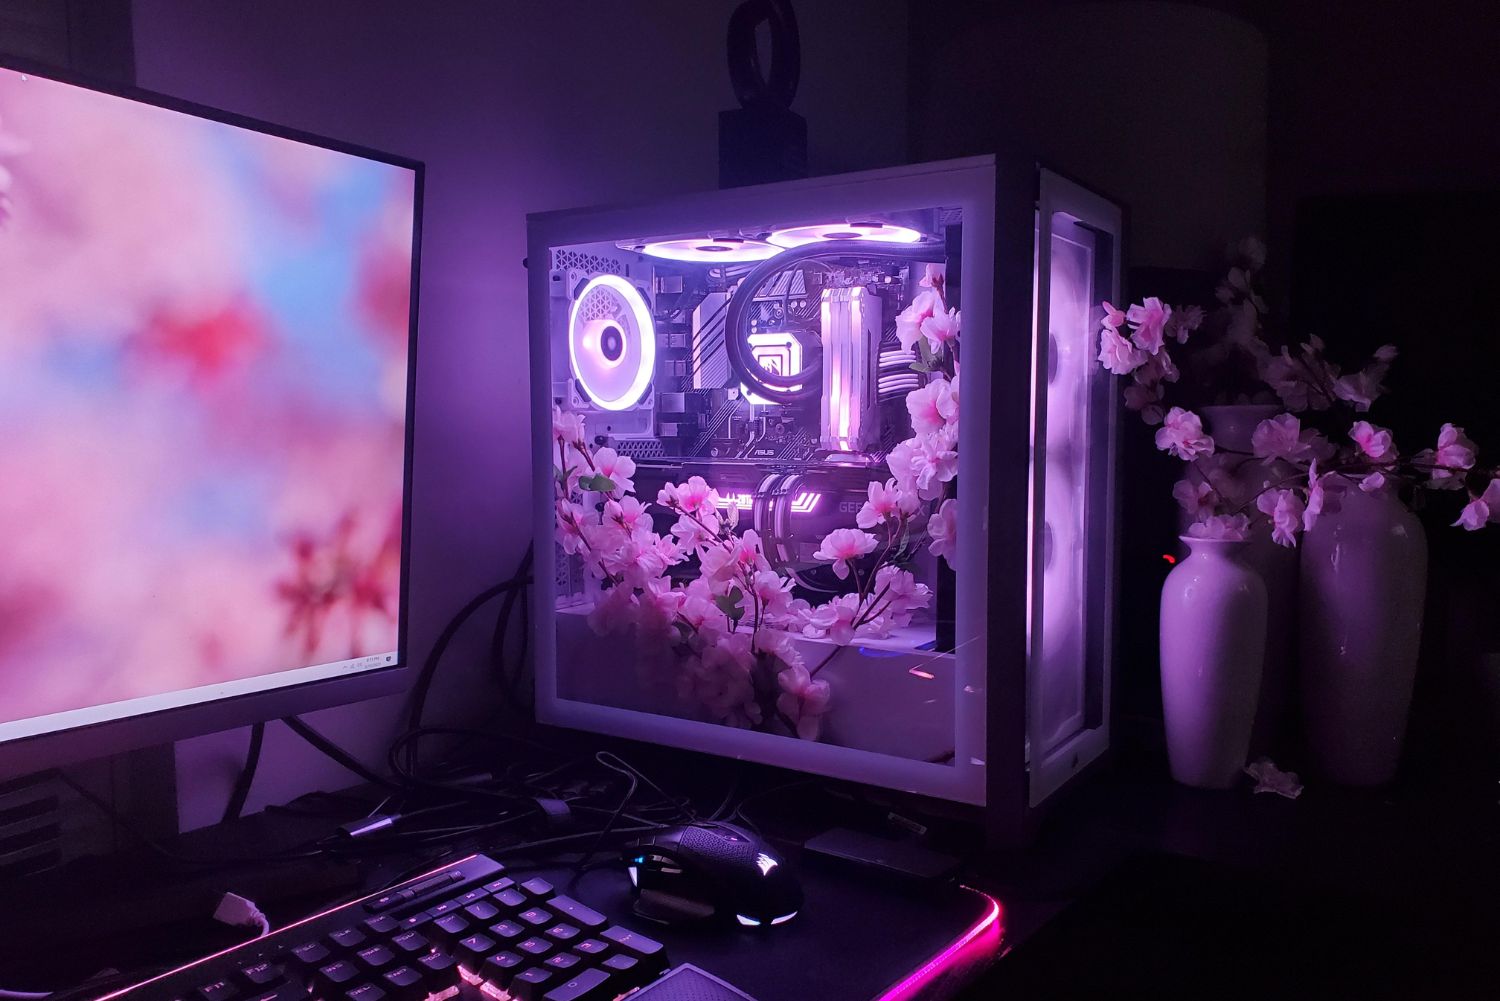
Customizing the Case with LED Lights
One of the most popular ways to enhance the visual appeal and create a captivating look for your PC case is by customizing it with LED lights. LED lights offer endless possibilities for adding vibrant colors, dynamic lighting effects, and a touch of personal style. Here’s a guide to customizing your PC case with LED lights:
1. Determine the lighting style: Decide on the lighting style you want to achieve for your PC case. You can opt for a single color, RGB lighting with multiple colors, or even addressable RGB lights that allow for individual LED control. Each style offers a different level of customization and visual impact.
2. Select LED strips or fans: Choose LED strips or fans that fit the size and layout of your PC case. LED strips can be mounted along the edges or inside the case to provide ambient lighting, while LED fans offer a more prominent illumination effect. Consider the brightness, color options, and compatibility with your PC case and motherboard.
3. Plan the lighting layout: Plan where you want to install the LED lights. Decide whether you want to highlight specific components, create an even illumination, or focus on certain areas of the case. Take into account the cable management and ensure that the lights won’t interfere with any moving parts or obstruct the airflow.
4. Connect the LED lights: Follow the manufacturer’s instructions to connect the LED lights to the appropriate connectors on your motherboard or LED controller. Ensure a secure connection, and be mindful of the polarity to avoid any damage. If necessary, arrange the cables neatly using zip ties or cable management solutions.
5. Utilize lighting control software: If you have addressable RGB lights, take advantage of the lighting control software provided by your motherboard manufacturer. This software allows you to customize the lighting effects, color patterns, and synchronization with other components in your system.
6. Experiment with lighting effects: Have fun experimenting with various lighting effects to create the desired ambiance. You can choose from options such as static, breathing, color cycling, or even sync the lights with sound or in-game events using third-party software. Adjust the brightness and speed of the effects to find the perfect combination.
7. Accentuate with lighting accessories: Consider adding additional lighting accessories such as LED light strips, light diffusers, or light covers to further enhance the aesthetics. These accessories offer unique lighting effects and can be placed strategically to create a more immersive and visually stunning PC case design.
8. Ensure proper ventilation and safety: While customizing your PC case with LED lights, make sure to maintain proper ventilation and avoid any potential safety risks. Ensure that the lights do not obstruct the airflow and that they are securely mounted to prevent any accidental damage or short circuits.
Customizing your PC case with LED lights allows you to create a mesmerizing visual experience and showcase your personal style. By following these steps and being mindful of safety considerations, you can transform your PC case into a lighting masterpiece that enhances your overall gaming or workstation setup.
Cable Management
Proper cable management is not only essential for maintaining a clean and organized appearance of your PC case but also for ensuring optimal airflow and efficient operation of your components. Messy and tangled cables can obstruct the airflow, increase the risk of heat buildup, and make it challenging to troubleshoot or upgrade your system. Here are some tips for effective cable management:
1. Plan ahead: Before assembling your PC, plan the cable routing paths and consider the length and placement of your components. This will help you determine the optimal locations for cable pass-throughs, tie-down points, and hidden cable routing spaces.
2. Use cable ties and clips: Cable ties and clips are essential tools for organizing and securing cables. Use them to group cables together, preventing them from hanging loosely or tangling. Additionally, use adhesive cable clips or Velcro straps to secure cables to the case’s interior, keeping them neatly arranged and out of the way.
3. Optimize cable length: Use the appropriate cable lengths to avoid excessive slack. Longer cables can clutter the case and impede airflow, while excessively short cables can strain connectors or pull components out of alignment. If necessary, consider using cable extensions or custom cables to achieve the ideal length.
4. Route cables behind the motherboard: Most modern PC cases feature a dedicated space between the rear of the motherboard tray and the side panel. Take advantage of this space to route cables, as it keeps them hidden from view and improves airflow. Use cable grommets or routing holes to guide cables from one side of the case to the other.
5. Separate power and data cables: It is beneficial to separate power cables from data cables, such as SATA or USB cables, to reduce electromagnetic interference. Grouping them separately and routing them along different paths can enhance signal integrity and overall system performance.
6. Utilize cable combs and braided sleeves: Cable combs and braided sleeves are useful accessories for achieving a clean and organized cable appearance. Cable combs can be used to align and straighten cables, while braided sleeves provide a sleek and professional look. These accessories not only improve aesthetics but also help keep cables tightly bundled.
7. Label cables: To simplify future maintenance or upgrades, consider labeling your cables. Use cable tags, colored ties, or label stickers to identify each cable’s purpose and destination. This ensures quick and hassle-free troubleshooting or component replacement when necessary.
8. Regularly maintain and adjust: Cable management is an ongoing process. Regularly inspect and adjust the cables to keep them organized. When adding new components or making changes to your setup, take the time to revise and reorganize the cables accordingly.
Proper cable management not only enhances the aesthetics of your PC case but also improves airflow, reduces clutter, and facilitates maintenance. By implementing these cable management tips, you can achieve a clean and organized interior that not only looks impressive but also promotes the long-term functionality and performance of your PC.
Installing Additional Accessories
Adding additional accessories to your PC case can enhance its functionality and personalization. Whether you want to improve cooling, expand storage options, or enhance connectivity, here are some steps to follow when installing additional accessories:
1. Determine compatibility: Before purchasing any additional accessories, ensure they are compatible with your PC case and components. Check the specifications and requirements of the accessory to confirm if it fits your case’s size, form factor, and available ports.
2. Plan the installation: Evaluate your PC case layout and available space to determine the best location for the accessory. Consider factors such as accessibility, cable routing, and airflow to optimize the performance and convenience of the accessory.
3. Power off and disconnect: Before installing any accessory, power off your PC and unplug the power cord. This ensures safety and prevents accidental damage. Additionally, if you are working with any internal components, grounding yourself through an antistatic wrist strap is recommended.
4. Install cooling accessories: If you’re installing additional cooling components, such as fans or liquid cooling systems, refer to the manufacturer’s instructions. Ensure proper alignment, secure mounting, and appropriate connection to maintain optimal airflow and cooling performance within your PC case.
5. Expand storage options: When adding storage options, such as hard drives or solid-state drives, identify available drive bays or mounting points within your PC case. Install the drives securely, using screws or tool-less mechanisms provided by your case manufacturer. Connect the data and power cables as per the drive’s specifications.
6. Enhance connectivity: If you want to improve connectivity options, consider adding internal or external ports, such as USB hubs or card readers. Ensure a proper fit within your case and connect them to available internal headers or external ports as needed.
7. Install RGB lighting accessories: To further enhance the visual appeal, you may choose to install additional RGB lighting accessories. Follow the manufacturer’s instructions regarding placement, connection, and software control. Securely mount the lighting accessories, and route the cables to maintain a tidy appearance.
8. Test and troubleshoot: After installing the additional accessories, power on your PC and perform a thorough check to ensure proper functioning. Test each accessory and make any necessary adjustments or troubleshoot any issues that may arise.
Remember to refer to the manuals and instructions provided by the accessory manufacturers for detailed installation steps specific to each accessory. Taking your time and following proper installation procedures will ensure a seamless and successful integration of additional accessories into your PC case.
Final Touches and Maintenance
Once you have completed the main aspects of decorating and customizing your PC case, it’s time to add the final touches and establish a maintenance routine to keep your creation looking its best. Here are some key final touches and maintenance practices to consider:
1. Cable management check: Ensure that the cables inside your PC case are properly organized and secured even after the installation of additional accessories. Periodically check for any cable slack or issues that may have developed over time and make any necessary adjustments to maintain a tidy interior.
2. Dust management: Regularly clean the exterior and interior of your PC case to prevent dust buildup. Dust can affect the performance and lifespan of your components. Use compressed air or a soft cloth to remove dust from vents, fan grilles, and other hard-to-reach areas. Consider using dust filters to reduce the amount of dust that enters your case.
3. Monitor system temperatures: Keep an eye on the temperatures of your PC components, especially the CPU and GPU. Install monitoring software to track the temperatures and adjust fan speeds or cooling configurations as needed. Maintaining appropriate temperatures will help ensure the longevity and optimal performance of your hardware.
4. Regular component maintenance: Follow the manufacturer’s recommendations for cleaning and maintaining your components, such as the CPU cooler, GPU, and power supply. Keep them free of dust and debris to prevent overheating and reduce the risk of hardware failure.
5. Reevaluate lighting and aesthetics: As time goes on, you may want to change or update the lighting and aesthetics of your PC case. Experiment with different lighting configurations, add or remove decals, stickers, or accessories to keep your setup fresh and aligned with your evolving preferences.
6. Backup your data: It’s crucial to have a regular backup routine in place to protect your important files and data. Utilize external storage devices or cloud-based backup services to regularly save your essential documents, media, and game files.
7. Maintain a clean workspace: Keep your overall workspace clean and organized. A clutter-free environment contributes to efficient PC maintenance and reduces the risk of accidental damage to your case or components.
8. Stay informed and up to date: Keep yourself informed about the latest updates, drivers, and firmware releases for your PC components. Regularly check for software updates and security patches to ensure your system is running smoothly and protected from any vulnerabilities.
By implementing these final touches and maintenance practices, you’ll not only keep your custom PC case looking impressive but also maintain its performance and prolong its lifespan. Regular care and maintenance will ensure that your creation continues to be a source of pride and enjoyment for years to come.