


Introduction
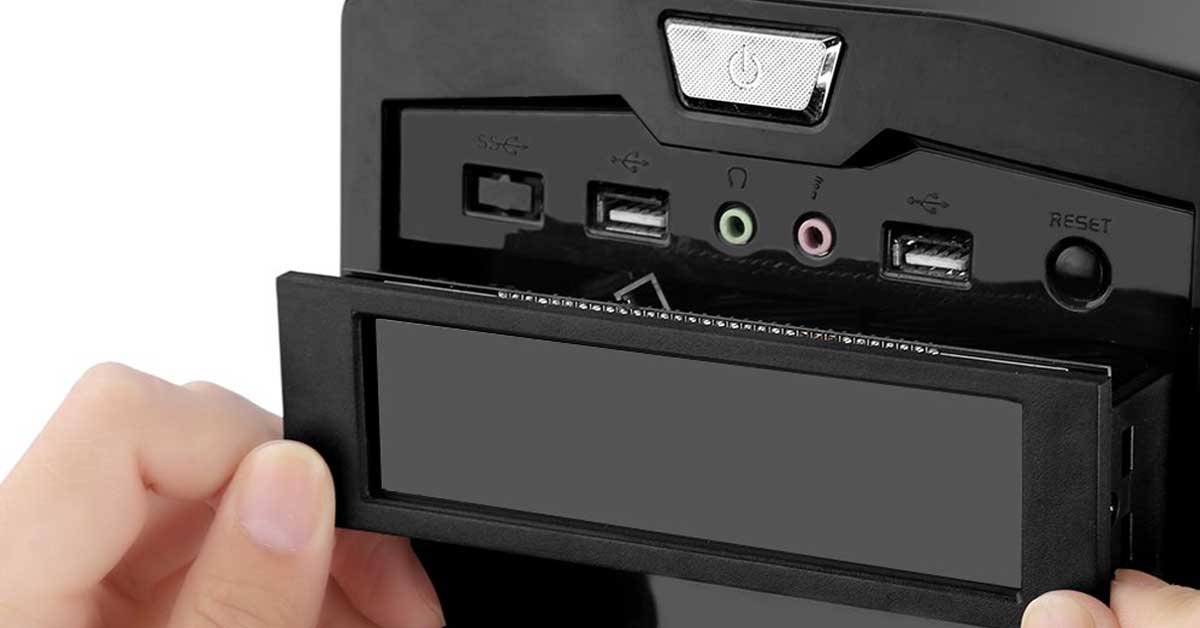
USB ports are an essential part of any PC case, allowing you to connect various devices and peripherals for seamless data transfer. However, over time, these USB ports may become worn out, dirty, or aesthetically unappealing, compromising their functionality and overall appearance.
If you’re tired of looking at ugly USB ports on your PC case, don’t worry! There are several simple and effective ways to fix them and bring back their original charm. In this article, we will explore various techniques to restore and enhance the appearance of your USB ports.
Whether you want to clean them up, align the pins, replace them entirely, or add a touch of personalization, we have you covered. From basic maintenance to creative customization options, there’s a solution for everyone.
Before we delve into the methods, it’s important to note that working with USB ports requires care and attention. Always ensure your PC is turned off and disconnected from any power source before attempting any modifications. Additionally, handle the ports and equipment with caution to prevent damage or injury.
Now, let’s explore the various ways to fix those ugly USB ports and give your PC case a fresh and appealing look.
Cleaning the USB Ports
Over time, dust, dirt, and debris can accumulate inside the USB ports, leading to poor connectivity and unsightly appearances. Cleaning the ports is a simple and effective way to improve their functionality and restore their original aesthetic appeal.
To clean the USB ports, start by shutting down your PC and unplugging it from the power source. Use a can of compressed air or a small, soft-bristle brush to gently remove any loose particles or debris from the ports. Be careful not to use excessive force or sharp objects that could cause damage.
Next, dampen a lint-free cloth or cotton swab with isopropyl alcohol or electronic contact cleaner. Gently wipe the inside of the USB ports, ensuring you remove any stubborn dirt or grime. Avoid using excessive liquid, as it can seep into the sensitive components and cause damage.
Once you’ve wiped the ports, let them dry completely before reconnecting any devices or powering on your PC. This will help ensure that the ports are free from moisture, preventing any potential short-circuits.
Regularly cleaning your USB ports not only improves their appearance but also ensures optimal performance and longevity. Consider incorporating this maintenance task into your computer cleaning routine to keep your USB ports in top shape.
Realigning the USB Pins
If your USB ports are not functioning properly or if the pins inside them are misaligned, you can easily fix the issue by realigning the pins. Misaligned pins can cause connectivity problems and make it difficult to plug in USB devices.
To realign the USB pins, start by carefully inspecting the ports to identify any visible misalignments. You may notice bent or crooked pins that are preventing a proper connection.
Using a small pair of tweezers or a thin tool, gently straighten any bent pins by carefully nudging them back into their original position. Be extremely cautious during this process to avoid breaking or damaging the pins.
If the pins are too damaged or if the misalignment is severe, you might consider replacing the USB ports (which we will discuss in the next section). However, it’s worth a try to realign the pins first, as it can often solve the problem.
After realigning the pins, test the USB ports by plugging in a device to ensure a secure connection. If the connection is stable and the device is recognized, you have successfully fixed the alignment issue.
Remember to handle the pins and ports delicately to prevent any further damage. Realignment is a quick and cost-effective solution to improve the functionality of your USB ports without the need for any additional equipment or replacements.
Replacing the USB Ports
If cleaning and realigning the USB ports did not solve the issue or if the ports are heavily damaged or worn out, it may be necessary to replace them. Replacing the USB ports will not only fix any functionality problems but also give your PC case a fresh and updated look.
To replace the USB ports, you will need to purchase new USB ports that are compatible with your PC case. You can find USB replacement ports online or at computer hardware stores.
Before starting the replacement process, make sure your PC is turned off and unplugged from the power source. Take note of the wiring and connections of the existing USB ports to ensure proper installation of the new ones.
Carefully remove the old USB ports by unscrewing any screws or clips that hold them in place. Disconnect the wiring from the old ports, making sure to remember where each wire connects for the installation of the new ports.
Next, connect the wiring to the new USB ports, following the color-coded or labeled connections. Gently place the new ports into the designated slot in your PC case and secure them with screws or clips.
Once the new USB ports are installed, double-check all the connections to ensure they are secure. Then, plug your PC back in and power it on to test the functionality of the new ports.
Replacing the USB ports not only resolves any issues with connectivity but also gives you the opportunity to upgrade to newer, more aesthetically pleasing ports. You can choose from various types, like USB 3.0 or USB-C ports, depending on your needs and preferences.
While replacing the USB ports requires a bit more effort than cleaning or realigning them, it can ultimately provide a long-lasting solution and improve the overall appearance of your PC case.
Using USB Port Dust Covers
USB port dust covers are a practical and simple solution to keep your USB ports clean and protected from dust, dirt, and other debris. These small accessories can not only improve the appearance of your USB ports but also prevent potential damage caused by dust build-up.
To use USB port dust covers, first, ensure that your PC is turned off and unplugged from the power source. Then, carefully insert the dust covers into the USB ports. These covers are designed to fit snugly, creating a barrier against dust and debris.
USB port dust covers come in various materials such as silicone or rubber, which are flexible and durable. They are available in different colors and designs, allowing you to choose options that complement the style of your PC case.
By using dust covers, you can effectively keep your USB ports clean and prevent any potential damage to the internal components. These covers are relatively inexpensive and easy to replace if they become worn or damaged.
It is important to regularly clean the dust covers themselves to maintain their effectiveness. Simply remove them from the USB ports and wipe them with a soft cloth or rinse them under running water. Allow them to dry completely before reinserting them into the ports.
USB port dust covers are a great investment to protect your USB ports from dust, maintain their functional integrity, and enhance the overall appearance of your PC case. They are a simple yet effective solution that can save you from frequent cleaning and potential port issues caused by dust accumulation.
Customizing USB Port Covers
If you want to add a touch of personalization and style to your USB ports, customizing the port covers is a fantastic option. This allows you to showcase your creativity and make your PC case stand out from the crowd.
Customizing USB port covers can be done in various ways. Here are a few ideas to get you started:
- Decals and Stickers: Apply decorative decals or stickers to the USB port covers. You can choose from a wide range of designs, including logos, patterns, or even custom-made designs. Ensure that the decals or stickers are properly sized and adhere securely to the port covers.
- Painting: Get artistic by painting the USB port covers with your preferred colors or designs. Make sure to use paint that is compatible with the material of the covers, such as acrylic or enamel paint. Consider using stencils or tape to create precise lines and shapes for a clean and professional finish.
- Custom 3D Prints: If you have access to a 3D printer, you can design and print customized USB port covers. This allows for intricate and unique designs that perfectly fit your style and preferences. Check online printing platforms for ready-made designs or create your own using 3D modeling software.
- Vinyl Wraps: Wrap the USB port covers with vinyl film. This is a versatile and removable option that allows you to experiment with different patterns and textures. You can find vinyl wraps in various colors and designs, ranging from glossy to matte finishes.
- Laser Engraving: For a professional and elegant look, consider laser engraving designs or patterns onto the USB port covers. This method provides precise and durable results, and you can choose from a multitude of designs or create your own unique engraving.
When customizing the USB port covers, it’s important to consider the compatibility with the material and the overall aesthetics of your PC case. Ensure that your chosen customization method does not obstruct the functionality or connection of the USB ports.
Customizing USB port covers is a fun and creative way to add a personal touch to your PC case. It allows you to express your individuality and make a statement with your computer setup.
Using USB Port Extensions
If you need more flexibility and convenience with your USB ports, using USB port extensions can be a practical solution. USB port extensions provide additional ports and extend the reach of your existing ports, making it easier to connect and use multiple devices.
USB port extensions come in different forms, including USB hubs and extension cables. Here’s how each option can be beneficial:
- USB Hubs: USB hubs are compact devices that provide multiple USB ports, allowing you to connect several devices simultaneously. They come in various configurations, ranging from 4 to 10 or more ports. USB hubs can be powered or unpowered, depending on your needs and the power requirements of your connected devices. They are convenient for expanding the number of available USB ports, especially if your PC case has limited built-in ports.
- Extension Cables: USB extension cables are flexible cables that extend the reach of your existing USB ports. They typically have a male connector on one end that plugs into your PC’s USB port and a female connector on the other end to connect your device. Extension cables are useful for situations where you need to access USB ports that are located farther away from your PC or are difficult to reach. They provide flexibility and convenience without the need for additional hardware.
When using USB port extensions, it’s important to consider the speed and compatibility of the ports. USB 3.0 ports offer faster data transfer rates compared to USB 2.0 ports. Make sure the USB ports on the extensions match the speed of your devices to ensure optimal performance.
Additionally, be mindful of the total power consumption when using USB hubs. Some power-hungry devices may require a powered USB hub to function properly, as the built-in USB ports on your PC may not provide enough power for all connected devices.
Using USB port extensions provides flexibility and convenience, allowing you to connect and use multiple devices with ease. Whether you need extra ports or extended reach, USB port extensions are a practical solution to enhance the functionality of your USB ports.
Painting or Decorating the USB Ports
If you’re looking for a more visually appealing option to enhance the appearance of your USB ports, consider painting or decorating them. This option allows you to customize the look of your USB ports to match your personal style or PC case theme.
Before you start painting or decorating, it’s important to prepare the USB ports properly. Here are the steps to follow:
- Clean the USB Ports: Use a soft cloth or cotton swab dipped in isopropyl alcohol to clean the USB ports, removing any dirt, dust, or residue. Ensure that the ports are completely dry before proceeding.
- Mask Off the Area: If you want to paint only the USB ports and not the surrounding areas, use painter’s tape or masking tape to carefully cover the areas around the ports. This will help create clean lines and prevent any accidental paint transfer.
- Choose Your Paint or Decorative Material: Select a paint color that matches your desired aesthetic or choose a decorative material such as vinyl wrap or decoupage paper. Ensure that the selected material is suitable for use on the USB ports and won’t interfere with their functionality.
- Apply the Paint or Decorative Material: If you’re using paint, apply thin and even coats, allowing each coat to dry completely before adding another layer. For decorative materials, carefully cut them to size and adhere them to the USB ports, smoothing out any bubbles or creases.
- Protect the Finished Surface: Once the paint or decorative material has dried, it’s a good idea to apply a clear coat sealer or varnish to protect the surface and prevent any scratches or fading. This step will ensure the longevity of your painted or decorated USB ports.
By painting or decorating your USB ports, you can add a unique touch to your computer setup and make it truly your own. Whether you prefer a sleek and minimalistic look or a vibrant and eye-catching design, the possibilities are endless.
Remember to handle the USB ports with care to avoid any damage to the painted or decorated surface. Avoid using abrasive cleaners or scrubbing the painted area too harshly, as this can cause the paint to chip or peel.
Painting or decorating the USB ports is an enjoyable and creative way to personalize your PC case. It allows you to transform the ordinary into something extraordinary and showcase your personality through your computer setup.
Adding LED Lights to USB Ports
If you want to take your USB ports to the next level and create a visually stunning effect, consider adding LED lights to illuminate them. This adds a vibrant and eye-catching element to your PC case, making it stand out in any setting.
Here’s how you can add LED lights to your USB ports:
- Select the LED Lighting: Choose LED light strips or individual LED lights that are specifically designed for PC case customization. These lights often come with adhesive backing for easy installation.
- Prepare the USB Ports: Before attaching the LED lights, clean the USB ports thoroughly to remove any dirt or grime. Ensure that the ports are dry before proceeding.
- Attach the LED Lights: Carefully adhere the LED lights along the edges or around the USB ports. Pay attention to the positioning and make sure the lights do not obstruct the functionality of the ports.
- Power the LED Lights: Most LED lights for PC customization come with a USB connector. Simply plug the USB connector of the LED lights into one of the available USB ports on your PC. The lights will be powered whenever your PC is turned on.
- Choose Lighting Effects: Depending on the LED lights you have chosen, you may have the option to select different lighting effects. These can include static colors, color changing modes, or even synchronization with other LED components in your PC case.
LED lights add a dynamic and mesmerizing look to your USB ports, transforming them into attractive focal points within your PC case. Whether you prefer a soothing ambient glow, a vibrant showcase of colors, or a pulse of lighting effects, LED lights give you the flexibility to customize the look to suit your style.
Due to the variety of LED lighting options available, you can create a unique and personalized PC case setup that reflects your individuality and creates a captivating visual experience.
Remember to handle the LED lights with care to avoid damaging the wires or disrupting the adhesive. Ensure that the lights are securely attached and positioned in a way that complements the overall aesthetics of your PC case.
Adding LED lights to your USB ports not only enhances their visual appeal but also adds an exciting and dynamic element to your PC case setup. It’s a fantastic way to show off your creativity and make a striking statement with your computer setup.
Conclusion
Fixing and enhancing the appearance of your USB ports is a rewarding process that can improve both the functionality and aesthetics of your PC case. Whether you choose to clean, realign, replace, customize, or add LED lights to your USB ports, each method offers its own unique benefits.
By regularly cleaning your USB ports, you can maintain their performance and prevent connectivity issues caused by dust and debris. Realigning the USB pins can solve connection problems and restore proper functionality. If your USB ports are extensively damaged or worn out, replacing them can provide a long-term solution while also upgrading to newer, more advanced ports.
For those who want to personalize their PC case, customizing USB port covers, painting or decorating the ports, or adding LED lights are great options. These techniques allow you to showcase your creativity, express your style, and make a statement with your computer setup.
Remember to approach these modifications with caution and care. Always ensure that your PC is turned off and disconnected from the power source before attempting any changes. Take your time, follow the instructions carefully, and handle the ports and equipment delicately to avoid any damage.
Whether you’re a seasoned PC enthusiast or a casual user, fixing and beautifying your USB ports is an enjoyable endeavor that can elevate the overall look and functionality of your PC case. With a few simple steps, you can transform those once-ugly USB ports into eye-catching features that perfectly complement your personal style.


![How to Fix 0x80300024 Error on Windows 10 [Easy Guide]](https://robots.net/wp-content/uploads/2022/06/0x80300024-featured-300x175.jpg)


