Introduction
An SD card is a popular removable storage device used in a wide range of electronic devices such as cameras, smartphones, and tablets. It is often partitioned into multiple sections to organize and manage data efficiently. However, there may be instances where you need to remove a partition on an SD card. Whether you want to reclaim storage space, reformat the card, or address a compatibility issue, removing a partition can be a useful solution.
In this article, we will explore different methods to remove a partition on an SD card, regardless of the operating system you are using. We’ll cover methods for Windows, Mac, and Linux, as well as options for using third-party partitioning tools. By following these step-by-step instructions, you’ll be able to safely remove a partition on your SD card and optimize its storage capacity.
However, before proceeding with any partition removal process, it’s essential to understand that it could result in data loss. Therefore, it is crucial to back up any important files and data stored on the SD card before attempting to remove a partition. This precautionary step will ensure that your valuable data remains safe and accessible even after the partition removal process.
Now, let’s dive into the various methods you can use to remove a partition on your SD card, depending on your operating system and personal preferences.
What is a partition on an SD card?
A partition on an SD card refers to a logical division or section within the card’s storage space. It is used to create separate areas designated for specific purposes, such as organizing files, installing operating systems, or creating backups. Think of partitions as virtual compartments that help manage the data on your SD card more effectively.
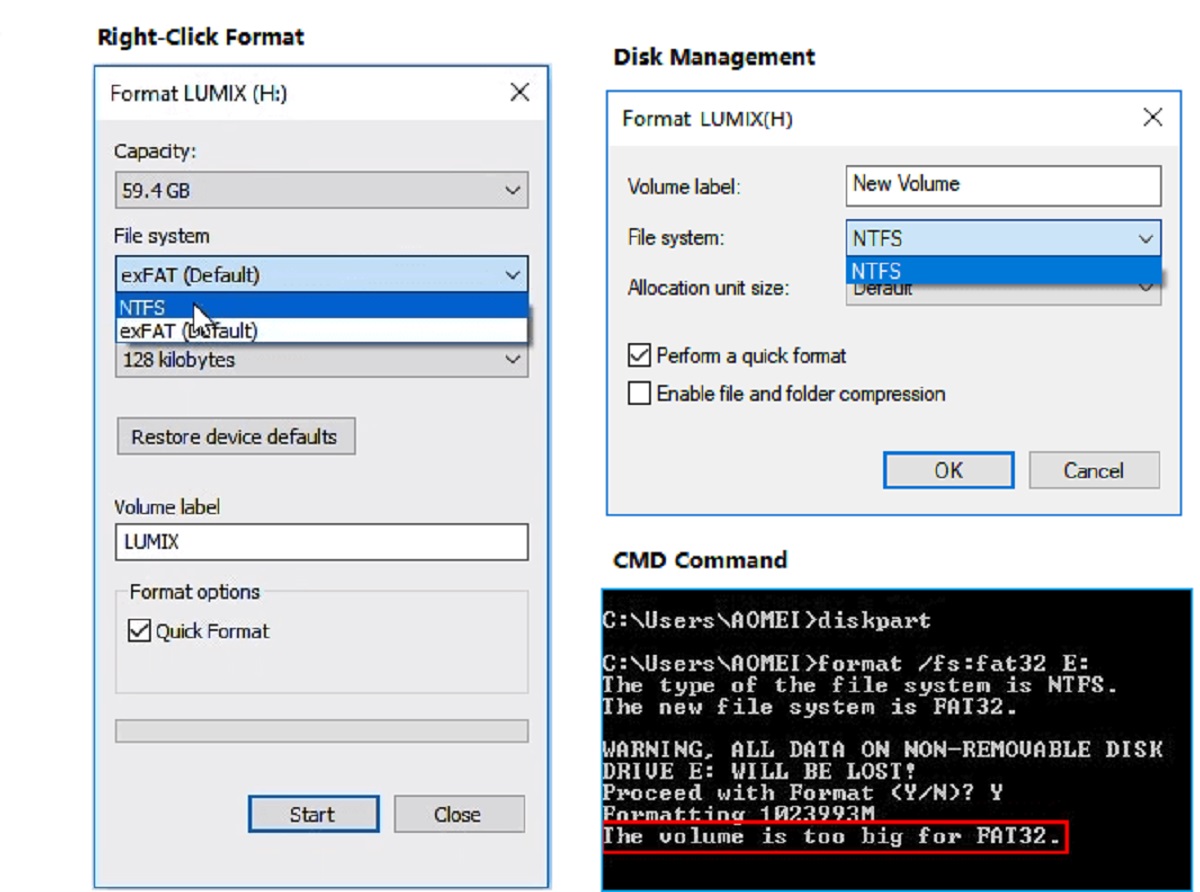
Each partition on an SD card is formatted with a specific file system, such as FAT32, exFAT, or NTFS, depending on the device and operating system requirements. These file systems determine how data is stored, accessed, and organized within the partition.
When you purchase a new SD card, it usually comes with a single partition that occupies the entire storage space. However, there may be instances where it becomes necessary to create additional partitions. For example, you might want separate sections for storing media files, documents, or even create a bootable partition for a different operating system.
Creating multiple partitions on an SD card allows you to better organize and manage your files. Each partition can have its own formatting, file system, and storage capacity. This enables you to keep different types of data separate, simplifying the process of locating and accessing specific files.
It’s important to note that when you remove a partition from an SD card, the storage space originally allocated to that partition becomes unallocated. This means that it will no longer be usable until it is added back or merged with an existing partition.
Understanding what a partition is and its significance on an SD card is crucial before attempting to remove one. It ensures that you can make informed decisions and take the necessary precautions to safeguard your data while managing the storage space on your SD card.
Why would you want to remove a partition on an SD card?
There are several reasons why you might want to remove a partition on an SD card. Understanding these reasons will help you determine if removing a partition is the right solution for your specific situation. Here are some common scenarios where removing a partition can be beneficial:
- Reclaiming storage space: Over time, you may find that one partition on your SD card is not being fully utilized or is no longer necessary. By removing that partition, you can free up storage space and make it available for other purposes.
- Resolving compatibility issues: Sometimes, the file system or partition structure on an SD card can cause compatibility issues with certain devices or operating systems. By removing the partition and recreating it with a different configuration, you can resolve compatibility problems and ensure smooth operation.
- Improving performance: If you notice that the performance of your SD card is slowing down or becoming unreliable, it could be due to fragmented files or a complex partition structure. Removing unnecessary partitions can simplify the file system and improve overall performance.
- Changing the SD card’s purpose: If you initially set up partitions on your SD card for a specific purpose but now want to repurpose it for a different use, removing the existing partitions allows you to start with a clean slate and allocate the storage space accordingly.
- Reformatting the card: In some cases, you may want to reformat the entire SD card to remove any existing partitions and start fresh. This can be useful when you want to clear all data and configurations from the card or when you want to switch to a different file system.
Understanding why you want to remove a partition on your SD card will help you make an informed decision and choose the right approach. Keep in mind that removing a partition will result in the loss of any data stored within that partition, so it’s crucial to back up any important files before proceeding with the partition removal process.
Precautions before removing a partition
Before you proceed with the process of removing a partition on an SD card, it’s important to take some precautions to ensure the safety of your data and the smooth execution of the procedure. Here are some essential precautions to keep in mind:
- Backup your data: Removing a partition will result in the loss of any data stored within that partition. To safeguard your important files, make sure to back them up before proceeding with the partition removal process. This can be done by copying the files to your computer or an external storage device.
- Verify the importance of the partition: Double-check if the partition you are planning to remove contains any critical data or applications. Ensure that you have made a record of any necessary files or configurations stored within that partition.
- Ensure you have the correct SD card: Make sure you are working with the correct SD card and partition. Mistakenly removing a partition on the wrong SD card can result in permanent data loss, so it’s important to verify the correct card before proceeding.
- Understand the consequences: Removing a partition will render the storage space allocated to that partition as unallocated. This means the space cannot be accessed or used until it is either merged with an existing partition or a new partition is created. Be aware of the implications and ensure it aligns with your intended goals.
- Choose the appropriate method: Depending on your operating system and personal preferences, choose the most suitable method for removing the partition. Read through the instructions and requirements of each method to ensure compatibility and familiarity.
- Follow instructions carefully: Each method for removing a partition may have specific steps and prerequisites. Carefully read and understand the instructions provided before attempting to remove a partition to avoid any errors or unintended consequences.
- Confirm your actions: Before confirming the removal of a partition, double-check your selections and ensure that you are removing the correct partition. Confirming the action initiates the removal process and irreversibly deletes the partition and its contents.
By taking these precautions, you can minimize the risk of data loss and ensure a smooth partition removal process. It’s always better to be safe than sorry when tampering with storage devices, especially when it involves valuable data that you want to preserve.
Method 1: Using Disk Management on Windows
If you’re using a Windows operating system, Disk Management is a built-in tool that can be used to manage disk partitions, including removing partitions on an SD card. Here’s a step-by-step guide on how to remove a partition using Disk Management:
- Insert your SD card into the SD card slot or connect it via a card reader to your Windows computer.
- Open the Disk Management tool by pressing the Windows key + X and selecting “Disk Management” from the menu that appears. Alternatively, you can search for “Disk Management” in the Windows search bar and open the application.
- In the Disk Management window, locate your SD card. It should be labeled with the disk number, size, and the assigned drive letter.
- Right-click on the partition you want to remove and select “Delete Volume.” Confirm the action if prompted.
- The selected partition will be deleted, and the space will be shown as unallocated.
- If desired, you can create a new partition on the unallocated space by right-clicking the unallocated space and selecting “New Simple Volume.” Follow the on-screen instructions to create the new partition.
- Once you have finished removing or creating partitions, close the Disk Management tool.
- Eject the SD card from your computer properly to ensure all changes have been saved.
Using Disk Management provides a straightforward method for removing partitions on an SD card in Windows. However, remember to exercise caution and double-check the partition you are deleting to avoid any accidental data loss.
Note that the steps may vary slightly depending on your specific version of Windows, but the general process remains the same.
Method 2: Using Disk Utility on Mac
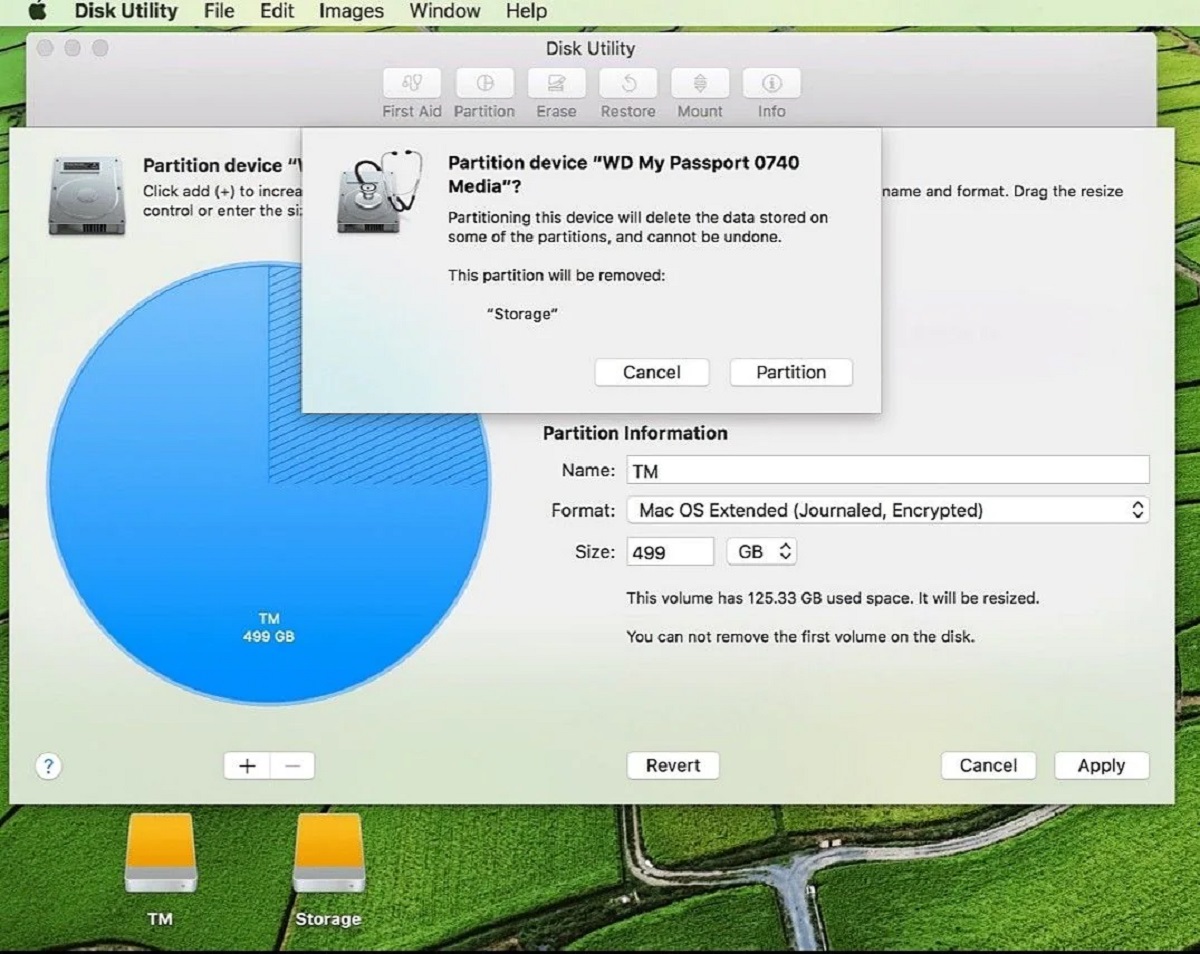
If you’re using a Mac computer, the built-in Disk Utility tool can be used to manage disk partitions, including removing partitions on an SD card. Here’s a step-by-step guide on how to remove a partition using Disk Utility:
- Insert your SD card into the SD card slot or connect it via a card reader to your Mac computer.
- Go to “Applications” > “Utilities” > “Disk Utility” to open the Disk Utility tool.
- In the Disk Utility window, you will see a list of drives and volumes on the left-hand side. Locate your SD card and select it.
- Select the partition you want to remove from the volume scheme displayed on the right-hand side of the window.
- Click on the “-” (minus) button at the bottom of the window to remove the selected partition. Confirm the action if prompted.
- The selected partition will be removed, and the space will be shown as “Free Space.”
- If desired, you can create a new partition on the free space by selecting the “Free Space” and clicking on the “+” (plus) button. Follow the on-screen instructions to create the new partition.
- Once you have finished removing or creating partitions, close the Disk Utility.
- Eject the SD card from your computer properly to ensure all changes have been saved.
Using Disk Utility on a Mac provides an effective way to remove partitions on an SD card and manage your storage space. Remember to exercise caution and double-check the partition you are removing to avoid any accidental data loss.
Note that the steps may vary slightly depending on your version of macOS, but the general process remains the same.
Method 3: Using GParted on Linux
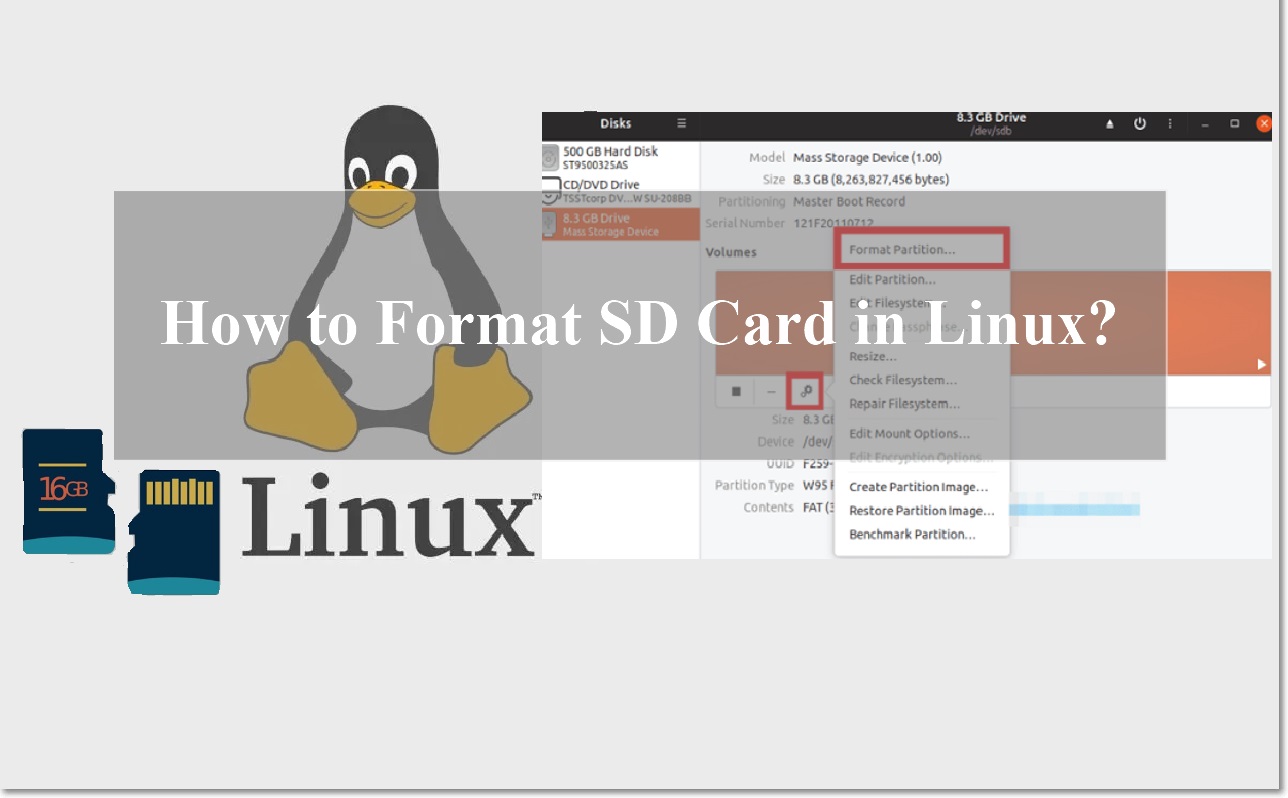
If you’re using a Linux distribution, one powerful tool for managing disk partitions is GParted. It provides a user-friendly interface to manipulate partitions, including removing partitions on an SD card. Here’s a step-by-step guide on how to remove a partition using GParted:
- Open a terminal and install GParted if it is not already installed on your Linux system. The command may vary depending on your distribution. For example, on Ubuntu or Debian-based systems, you can use the command
sudo apt-get install gpartedto install GParted. - Insert your SD card into the SD card slot or connect it via a card reader to your Linux computer.
- Open GParted from the system menu or by entering
sudo gpartedin the terminal with root privileges. - In the GParted interface, select your SD card from the drop-down menu in the top-right corner.
- Right-click on the partition you want to remove and select “Delete”. Confirm the action if prompted.
- The selected partition will be deleted, and the space will be shown as unallocated.
- If desired, you can create a new partition on the unallocated space by right-clicking the unallocated space and selecting “New”. Follow the on-screen instructions to create the new partition.
- Once you have finished removing or creating partitions, click on the “Apply” button to save the changes.
- Exit GParted and eject the SD card from your computer properly.
Using GParted on Linux provides a robust and flexible way to remove partitions on an SD card. Ensure that you have a good understanding of the partition you are deleting to avoid any unintentional data loss or system instability.
Note that the steps may vary slightly depending on your specific Linux distribution, but the general process remains the same.
Method 4: Using a third-party partitioning tool
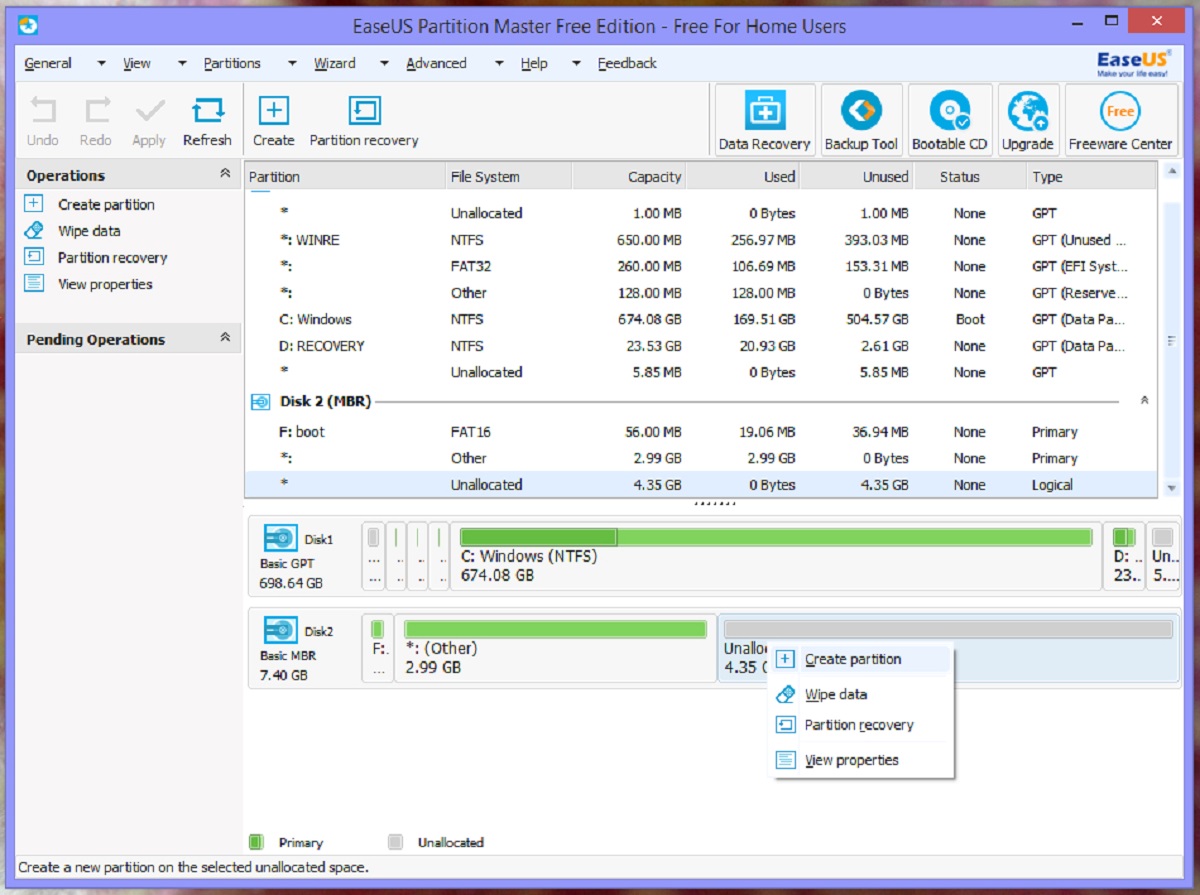
If you prefer more advanced options or if the built-in tools on your operating system are not meeting your needs, you can use third-party partitioning tools to remove partitions on an SD card. These tools offer additional features and flexibility in managing disk partitions. Here’s a general guide on how to remove a partition using a third-party partitioning tool:
- Research and choose a reliable third-party partitioning tool that is compatible with your operating system. There are several popular options available, such as MiniTool Partition Wizard (Windows), EaseUS Partition Master (Windows), and GParted (available on multiple platforms).
- Download and install the chosen partitioning tool on your computer.
- Insert your SD card into the SD card slot or connect it via a card reader to your computer.
- Open the installed third-party partitioning tool and select your SD card from the list of available drives.
- Navigate to the option that allows you to modify partitions or manage disk partitions.
- Locate the partition you want to remove and select it.
- Choose the option to delete or remove the selected partition. Confirm the action if prompted.
- The selected partition will be deleted, and the space will be shown as unallocated.
- If desired, you can create a new partition on the unallocated space using the partitioning tool. Follow the tool’s instructions to create the new partition.
- Once you have finished removing or creating partitions, save the changes and exit the third-party partitioning tool.
- Eject the SD card from your computer properly to ensure all changes have been saved.
Using a third-party partitioning tool gives you more options and flexibility in managing partitions on your SD card. However, it’s important to choose a reputable tool and familiarize yourself with its features and instructions to avoid any mishaps or data loss.
Note that the steps may vary depending on the specific third-party partitioning tool you choose, so refer to the tool’s documentation or online guides for more detailed instructions.
Conclusion
Removing a partition on an SD card can be a useful solution in various situations, such as reclaiming storage space, resolving compatibility issues, or reformatting the card. By following the methods outlined in this article, you can safely remove partitions on your SD card and optimize its storage capacity.
Before proceeding with any partition removal, it is crucial to back up any important files and data stored on the SD card to prevent data loss. Taking precautions like verifying the importance of the partition, ensuring you have the correct SD card, and choosing the appropriate method are essential to a successful partition removal process.
For Windows users, utilizing the Disk Management tool provides a straightforward way to remove partitions. Mac users can rely on the built-in Disk Utility tool for managing partitions on their SD cards. Linux users can leverage the power of GParted to remove partitions with ease. Additionally, third-party partitioning tools offer advanced features and flexibility for managing partitions on multiple platforms.
Remember to be cautious when removing partitions, double-check your selections, and confirm your actions, as removing a partition will result in the loss of any data stored within it. Always follow the instructions carefully and eject the SD card properly once you have finished making changes.
By understanding the reasons for removing a partition, taking necessary precautions, and following the appropriate methods, you can effectively remove partitions on your SD card and optimize its storage space according to your needs. Have your backup ready, choose the right method for your operating system, and take control of your SD card’s partitioning.


