Introduction
Welcome to the world of QuickBooks, where managing your business finances is made easy and efficient. One crucial aspect of running a business is handling customer refunds. Whether it’s due to a returned product, a canceled service, or a billing mistake, providing refunds to customers is a necessary process that should be handled accurately and promptly.
QuickBooks provides a user-friendly platform that simplifies the refund process, allowing you to seamlessly issue refunds to your customers while maintaining accurate records. This article will guide you through the steps of refunding a customer in QuickBooks and provide tips to ensure a smooth refund experience.
By following the steps outlined in this article, you’ll learn how to navigate the refund process, issue partial refunds, record refunds as credit memos, apply customer refunds to invoices, and efficiently track customer refunds in QuickBooks. We’ll also address common errors and troubleshoot any issues that may arise along the way.
Whether you’re a small business owner, a bookkeeper, or a finance professional, having a solid understanding of the refund process in QuickBooks is essential for maintaining customer satisfaction and accurate financial records. With this knowledge, you’ll be equipped to handle refunds efficiently, improve customer relationships, and effectively manage your business finances.
Now, let’s dive into the various aspects of refunding a customer in QuickBooks and explore the steps and best practices to make the process seamless and error-free. By the end of this article, you’ll be well-equipped to handle customer refunds in QuickBooks like a pro!
Understanding the Refund Process in QuickBooks
Before diving into the steps of refunding a customer in QuickBooks, it’s essential to have a clear understanding of the refund process and how it works within the platform.
In QuickBooks, a refund is a transaction that reverses a customer payment and returns the funds to the customer. It can be initiated for various reasons, such as product returns, canceled services, or overpayments. Refunds can be issued as full or partial refunds, depending on the specific circumstances.
When a refund is processed in QuickBooks, it not only updates the customer’s balance but also maintains a record of the refund within the accounting system. This ensures accurate financial reporting and tracking of the refund activity.
QuickBooks offers different methods to issue customer refunds, including issuing a refund check, recording a refund as a credit memo, or applying the refund amount to an existing invoice. Each method has its own benefits and considerations, which we will explore in later sections.
It’s important to note that when refunding customers in QuickBooks, it’s necessary to have a clear understanding of your company’s refund policy and adhere to it consistently. Setting clear refund policies helps maintain transparency and avoids confusion or disputes with customers.
In addition, before initiating a refund, it’s crucial to ensure that you have the necessary funds available in your bank account or accounts receivable to cover the refund amount. This prevents any potential cash flow issues and maintains the financial stability of your business.
Understanding the refund process is essential not only for accurate record-keeping but also for maintaining customer relationships. By promptly and accurately refunding customers when necessary, you demonstrate your commitment to customer satisfaction and build trust in your brand.
Now that we’ve established an understanding of the refund process in QuickBooks, let’s move on to the specific steps involved in refunding a customer in the next section.
Steps to Refund a Customer in QuickBooks
Refunding a customer in QuickBooks is a straightforward process that can be completed in just a few steps. By following the steps below, you’ll be able to issue refunds accurately and efficiently.
Step 1: Open the Customer Center
Start by opening the Customer Center in QuickBooks. You can do this by clicking on the “Customers” tab in the main navigation menu.
Step 2: Select the Customer
Identify the customer you want to refund and select their name from the list in the Customer Center. This will open the Customer Information page for that particular customer.
Step 3: Choose the Refund Method
Next, decide on the method you want to use to refund the customer. QuickBooks provides different options, including issuing a refund check, recording a refund as a credit memo, or applying the refund to an existing invoice. Select the method that aligns with your business’s refund policy and the specific circumstances of the refund.
Step 4: Enter Refund Details
Once you’ve chosen the refund method, enter the necessary details. This includes the refund date, the refund amount, and any additional information or notes associated with the refund. Double-check the accuracy of the information before proceeding.
Step 5: Save the Refund
After entering the refund details, click on the “Save” or “Save & Close” button to save the refund transaction. QuickBooks will automatically update the customer’s balance and record the refund in the appropriate accounts.
Step 6: Print or Email Refund Receipt
If you’re issuing a refund check or credit memo, you have the option to print or email a refund receipt to the customer. This provides them with confirmation of the refund and serves as a record for both parties.
Step 7: Reconcile Bank Account
If you issued a refund via a check, you’ll need to reconcile your bank account to ensure that the refund transaction matches your bank statement. This step helps maintain accurate financial records and ensures that your bank accounts are properly balanced.
Following these steps will help you navigate the refund process in QuickBooks effectively. However, it’s important to keep in mind that the specific steps may vary slightly depending on the version of QuickBooks you’re using. It’s recommended to consult the QuickBooks Help Center or refer to the User Guide for your specific version for detailed instructions.
In the next section, we’ll explore the process of issuing partial refunds in QuickBooks and how to handle them accurately.
Issuing a Partial Refund in QuickBooks
Sometimes, you may need to issue a partial refund to a customer in QuickBooks. This can occur when a customer returns only a portion of their order or requests a refund for a specific item or service. QuickBooks makes it easy to handle partial refunds, ensuring that you accurately reflect the refund amount and maintain clear records.
Step 1: Open the Customer Center
Similar to issuing a full refund, start by opening the Customer Center in QuickBooks. Navigate to the “Customers” tab in the main navigation menu.
Step 2: Locate the Customer
Select the customer’s name from the list in the Customer Center. This will bring up their Customer Information page.
Step 3: Choose the Refund Method
Decide on the method you will use to issue the partial refund. Options include issuing a refund check, recording a refund as a credit memo, or applying the refund to an existing invoice.
Step 4: Enter Partial Refund Details
Enter the details of the partial refund, including the refund date, the specific items or services being refunded, and the refund amount. Ensure that the refund amount accurately reflects the portion being refunded.
Step 5: Save the Partial Refund
Save the partial refund transaction by clicking on the “Save” or “Save & Close” button. QuickBooks will update the customer’s balance accordingly and record the refund transaction.
Step 6: Print or Email Refund Receipt
If necessary, print or email a refund receipt to provide the customer with confirmation of the partial refund. This serves as a record for both parties and helps maintain transparency.
Step 7: Reconcile Bank Account
If you issued a refund via a check, ensure that you reconcile your bank account to match the refund transaction with your bank statement. This step helps maintain accurate financial records and ensures your bank accounts are properly balanced.
By following these steps, you can successfully issue partial refunds in QuickBooks. It’s essential to accurately document the partial refund details to ensure the customer’s account balance is updated correctly, and your financial records reflect the accurate refund amount.
In the following section, we’ll explore another method of recording a refund – as a credit memo – and how it benefits your record-keeping and customer relations.
Recording a Refund as a Credit Memo in QuickBooks
In addition to issuing refund checks or applying refunds to existing invoices, QuickBooks allows you to record a refund as a credit memo. This method is useful when you want to keep the refund amount as a credit for the customer to use for future purchases or to apply it towards an outstanding balance.
Step 1: Open the Customer Center
As with the previous steps, begin by opening the Customer Center in QuickBooks. Access the “Customers” tab in the main navigation menu of your QuickBooks account.
Step 2: Locate the Customer
Select the customer from the list in the Customer Center to access their Customer Information page.
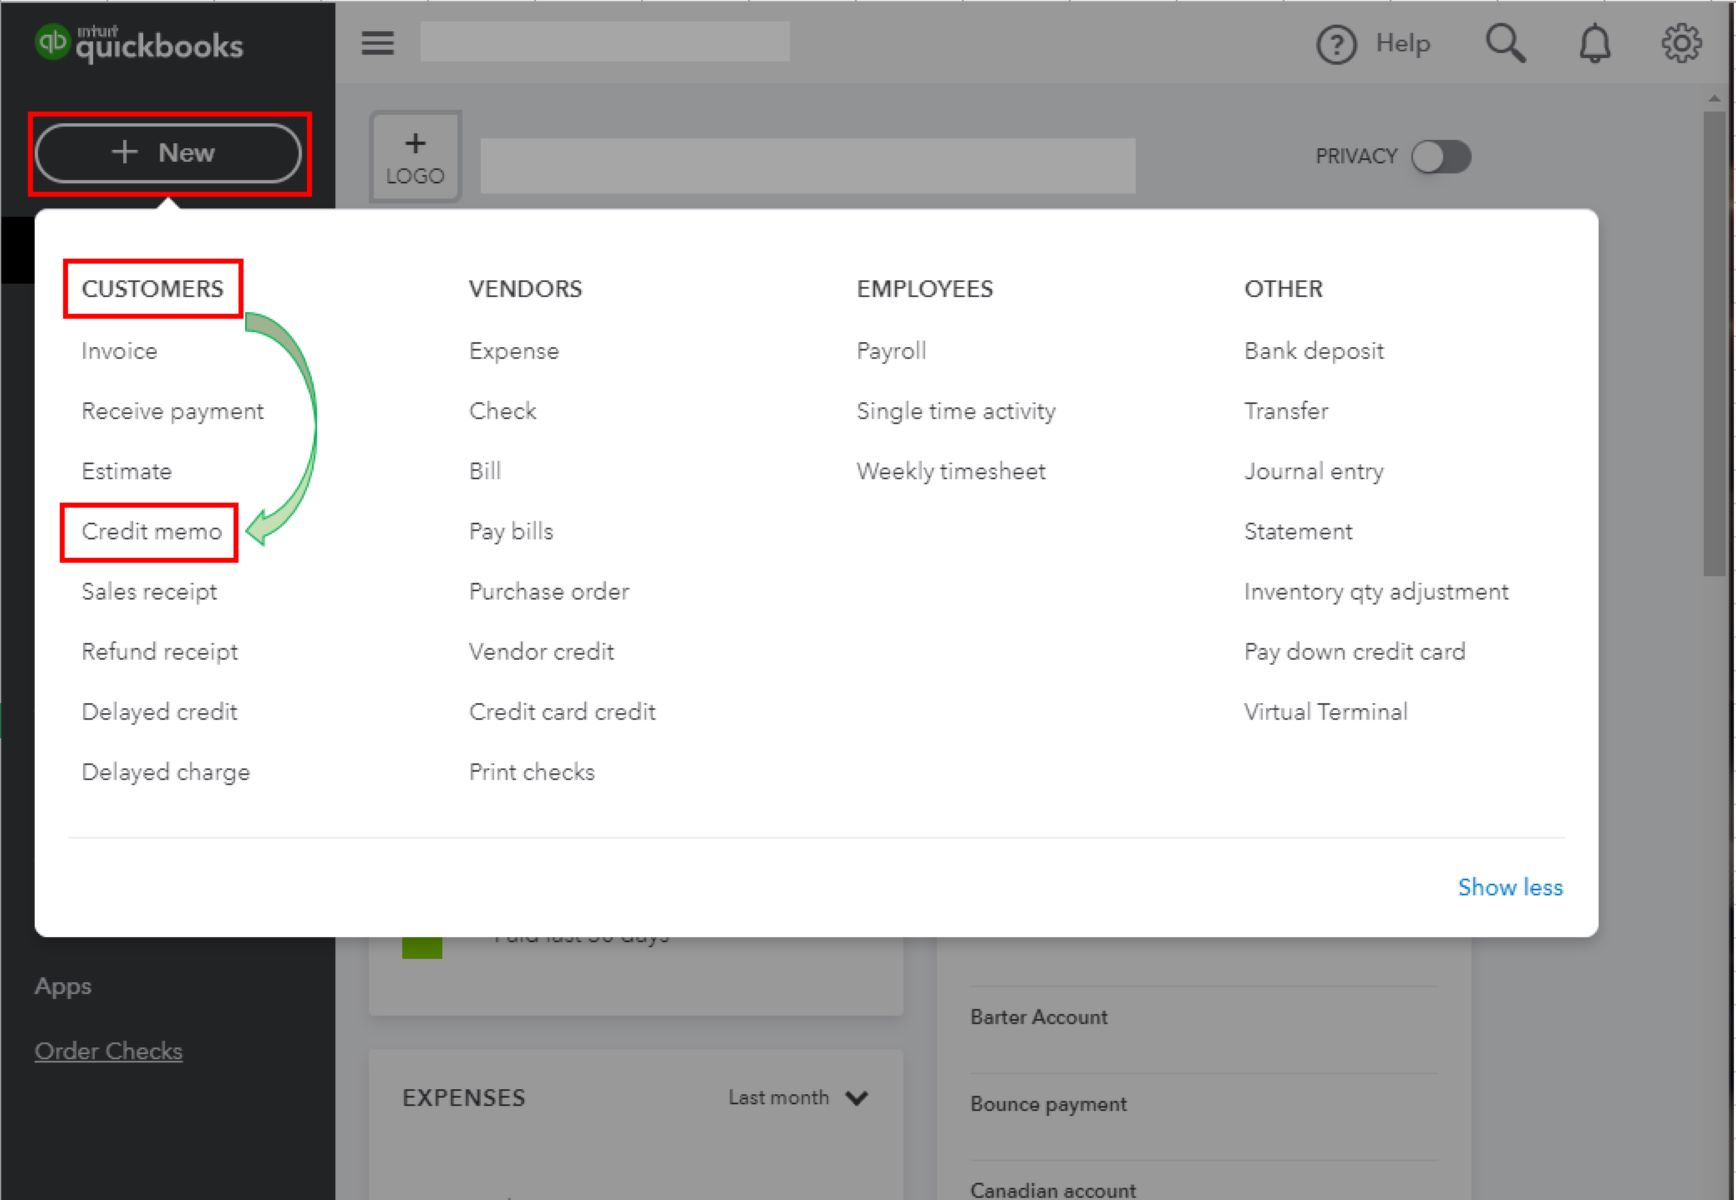
Step 3: Create a Credit Memo
Click on the “Create Credit Memos/Refunds” button in the top toolbar of the Customer Information page. This will open a new window to create the credit memo.
Step 4: Enter Credit Memo Details
Enter the details of the credit memo, including the customer’s name, the refund date, the specific items or services being credited, and the credit amount. Ensure that the credit memo accurately reflects the amount of the refund.
Step 5: Save the Credit Memo
Save the credit memo transaction by clicking on the “Save” or “Save & Close” button. QuickBooks will update the customer’s balance, reflecting the credit, and record the credit memo transaction.
Step 6: Apply the Credit to Future Invoices
If the customer has future purchases or an outstanding balance, you can apply the credit memo as a payment to these invoices. Navigate to the desired invoice and apply the credit memo as a payment, reducing the invoice balance accordingly.
Step 7: Communication with the Customer
Inform the customer about the credit memo and provide them with relevant details, such as the credit amount and how it can be applied to future purchases. Maintaining clear communication helps foster positive customer relations and ensures they understand how the credit can be used.
Recording a refund as a credit memo offers flexibility for both you and your customers. It allows customers to use the credit towards future purchases, improving customer retention and potentially increasing sales. Additionally, by using credit memos, you can easily track and manage customer credits within QuickBooks.
In the next section, we will learn how to apply a customer refund to an existing invoice in QuickBooks.
Applying a Customer Refund to an Invoice in QuickBooks
When a customer has an outstanding invoice and you receive a refund from them, QuickBooks provides the option to apply that refund directly to the invoice. This process ensures that the customer’s balance is accurately updated, and any overpayments or credits are appropriately applied.
Step 1: Open the Customer Center
Start by opening the Customer Center in QuickBooks by clicking on the “Customers” tab in the main navigation menu.
Step 2: Locate the Customer
Locate and select the customer from the list in the Customer Center. This will open their Customer Information page.
Step 3: Identify the Invoice and Refund
Identify the specific invoice that you want to apply the customer refund to, as well as the refund transaction that is available to apply. Take note of the corresponding amounts.
Step 4: Apply the Refund to the Invoice
In the Customer Information page, locate the “Receive Payment” option and click on it to open the “Receive Payments” screen. Choose the refund transaction and the invoice you want to apply it to. Enter the refund amount in the “Amount” field and ensure that it matches the refund amount you received from the customer.
Step 5: Save the Payment
After applying the refund to the invoice, click on the “Save” or “Save & Close” button to save the payment transaction. QuickBooks will adjust the customer’s outstanding balance, reflecting the applied refund, and record the payment transaction.
Step 6: Review the Updated Invoice and Balance
Once the payment is saved, navigate to the invoice that you applied the refund to and verify that the balance has been reduced by the refund amount. This ensures that the customer’s account balance is accurately updated.
Step 7: Send Updated Invoice and Confirmation to the Customer
If necessary, send the updated invoice to the customer and provide them with confirmation of the applied refund. This communication helps maintain transparency and ensures the customer is aware of the adjustment made to their invoice.
By applying a customer refund to an invoice in QuickBooks, you streamline the refund process and maintain accurate records of customer transactions. It’s a convenient way to handle overpayments, credits, or any outstanding balance with ease.
Now that you’ve learned how to apply a customer refund to an invoice, let’s move on to the next section, which will cover how to view and track customer refunds within QuickBooks.
Viewing and Tracking Customer Refunds in QuickBooks
QuickBooks provides robust features for viewing and tracking customer refunds, giving you a clear overview of your refund transactions and helping you stay organized. By utilizing these tools, you can easily locate specific refunds, review refund details, and effectively manage your refund records.
Step 1: Access the Customer Center
To view and track customer refunds in QuickBooks, start by opening the Customer Center. Click on the “Customers” tab in the main navigation menu to access the Customer Center.
Step 2: Select the Refunds tab
In the Customer Center, navigate to the “Refunds” tab to view a list of all customer refunds that have been processed in QuickBooks. This tab provides an organized view of the refund transactions.
Step 3: Filter Refunds
If you’re looking for specific refunds, you can use the filter options available in QuickBooks to narrow down the list. Filters such as date range, customer name, or refund type can be applied to refine the results and locate the desired refunds quickly.
Step 4: Review Refund Details
Click on a specific refund transaction to view its details. This includes information such as the refund date, customer name, refund amount, refund method, and any notes associated with the refund. Reviewing these details allows you to verify accuracy and track the refund back to its source.
Step 5: Export and Customize Reports
To further analyze your refund data, you can export refund reports from QuickBooks or customize reports to fit your specific needs. QuickBooks offers a variety of pre-built refund reports that can be modified to display the exact information you require.
Step 6: Reconcile Refunds
As part of your regular accounting practices, it’s essential to reconcile your refund transactions to ensure they match your bank statements. The reconciliation process involves verifying that the refund transactions recorded in QuickBooks align with the corresponding bank transactions.
Step 7: Maintain Proper Documentation
To ensure a comprehensive audit trail and accurate record-keeping, it’s important to maintain proper documentation for each refund. This includes saving copies of refund receipts, credit memos, check stubs, or any other relevant refund-related documents. This documentation is useful for reference purposes and can be crucial during tax or financial audits.
By effectively viewing and tracking customer refunds in QuickBooks, you can stay organized, maintain accurate financial records, and have a clear understanding of your refund activity. This allows you to provide better customer service and enables efficient financial management.
In the next section, we’ll explore common errors that may occur during the refund process and provide troubleshooting tips to help you overcome these challenges.
Common Errors and Troubleshooting Tips for Refunding Customers in QuickBooks
While QuickBooks provides a user-friendly platform for refunding customers, errors can still occur during the refund process. Understanding common errors and having troubleshooting strategies in place can help you resolve issues quickly and ensure a smooth refund experience. Here are some common errors and troubleshooting tips for refunding customers in QuickBooks:
Error 1: Incorrect Refund Amount
One common error is entering an incorrect refund amount, which may result in over or under-refunding the customer. To avoid this, double-check the refund amount before saving the transaction. If an error occurs, create a new refund or credit memo with the corrected amount and void or delete the incorrect transaction.
Error 2: Applying a Refund to the Wrong Customer or Invoice
Mistakenly applying a refund to the wrong customer or invoice can cause discrepancies in your records. To rectify this error, locate the incorrect transaction and void or delete it. Then, create a new refund or credit memo and apply it to the correct customer or invoice.
Error 3: Reversing a Refund without Proper Authorization
Reversing a refund without proper authorization can lead to confusion and potential legal or ethical issues. Ensure that you have documented authorization or a valid reason for reversing a refund transaction. If a reversal is necessary, create a new transaction with appropriate notes documenting the reason for the reversal.
Error 4: Refunding without Sufficient Funds
Issuing a customer refund when you don’t have sufficient funds can result in a bounced check or overdraft. Before refunding a customer, check your bank account balance or accounts receivable to ensure you have enough funds to cover the refund amount. If necessary, make necessary financial adjustments or wait until sufficient funds are available.
Troubleshooting Tip: Review and Reconcile Refund Transactions Regularly
Regularly reviewing and reconciling refund transactions can help you identify errors or discrepancies in a timely manner. Reconcile your bank accounts to ensure that refund transactions match your bank statements and accurately reflect the amount refunded.
Troubleshooting Tip: Seek Assistance from QuickBooks Support
If you encounter technical issues or complex refund situations, don’t hesitate to seek assistance from QuickBooks support. They can provide guidance, answer your questions, and help you troubleshoot any problems you may encounter.
Troubleshooting Tip: Maintain Clear Communication with Customers
Clear communication with customers is crucial when handling refund-related issues. If an error occurs during the refund process, promptly notify the customer, explain the situation, and provide updated refund details. Open and transparent communication helps maintain trust and resolves issues more effectively.
By understanding common errors and implementing these troubleshooting tips, you can minimize refund-related issues and ensure a smooth refund process for both you and your customers. This will help to maintain good customer relationships and seamless financial management.
In the final section, we’ll explore best practices for refunding customers in QuickBooks and provide additional tips for a successful refund process.
Best Practices for Refunding Customers in QuickBooks
When it comes to refunding customers in QuickBooks, following best practices can help you maintain accurate records, provide excellent customer service, and streamline your refund process. Here are some best practices to consider:
1. Establish Clear Refund Policies
Having clear refund policies in place helps both you and your customers understand the guidelines for issuing refunds. Clearly communicate your policies on returns, cancellations, and billing errors to avoid confusion or disputes.
2. Document Agreements and Authorizations
If you need to refund a customer outside of your standard refund policies, ensure that you obtain proper authorization. Document any agreements or authorizations in writing to maintain a comprehensive audit trail.
3. Double-Check Refund Details
Take the time to review the refund details before saving the transaction. Double-check the refund amount, the customer name, and any additional notes or information to ensure accuracy.
4. Maintain Timely Refunds
Process refunds promptly to demonstrate your commitment to customer satisfaction. Customers appreciate receiving their refunds in a timely manner, which helps uphold your brand’s reputation.
5. Communicate with Customers
Keep the lines of communication open with customers throughout the refund process. Notify them of any refunds, explain any changes to their invoices, and address any concerns or questions they may have.
6. Reconcile Bank Accounts Regularly
Reconcile your bank accounts regularly to ensure that your refund transactions align with your bank statements. This helps maintain accurate financial records and ensures that your accounts are properly balanced.
7. Keep Proper Documentation
Maintain proper documentation for all refund transactions. This includes saving copies of refund receipts, credit memos, check stubs, or any other relevant refund-related documents. Proper documentation is crucial for reference purposes and helps during tax or financial audits.
8. Stay Up-to-Date with QuickBooks
Keep your QuickBooks software up-to-date with the latest version and updates. This ensures that you have access to the latest features, bug fixes, and security enhancements, which can improve your refunding process.
9. Regularly Train and Educate Team Members
If you have a team responsible for refunding customers in QuickBooks, provide regular training and education to ensure they are familiar with the refund process and best practices. This helps maintain consistency and accuracy in refund transactions.
10. Seek Professional Advice if Needed
If you encounter complex refund scenarios or have specific questions about refunding customers in QuickBooks, consider seeking advice from accounting professionals or QuickBooks experts. Their expertise can provide valuable insights and guidance.
By implementing these best practices, you can ensure a smooth and efficient refund process in QuickBooks. This not only helps maintain accurate financial records but also enhances customer satisfaction and strengthens your business relationships.
With these best practices in mind, you are now equipped to effectively refund customers in QuickBooks and manage the refund process with confidence.
Conclusion
Refunding customers in QuickBooks is an essential process for businesses to maintain customer satisfaction, accuracy in financial records, and efficient financial management. By understanding the refund process and following the steps outlined in this article, you can confidently issue customer refunds while utilizing the various refund methods available in QuickBooks.
We began by exploring the refund process in QuickBooks, emphasizing the importance of understanding refund policies and ensuring sufficient funds before initiating a refund. We then delved into the steps involved in refunding customers, including opening the Customer Center, selecting the customer, choosing the refund method, entering refund details, and saving the transaction.
We also discussed important topics such as issuing partial refunds, recording refunds as credit memos, and applying refunds to existing invoices. These features provide flexibility and customization options to meet specific refund requirements.
Furthermore, we learned about viewing and tracking customer refunds in QuickBooks, which helps in maintaining accurate records and analyzing refund data for better financial management. We explored common errors that may occur during the refund process and provided troubleshooting tips to resolve issues effectively.
Lastly, we discussed best practices for refunding customers, including establishing clear refund policies, double-checking refund details, maintaining timely refunds, communicating with customers, reconciling bank accounts regularly, keeping proper documentation, and staying up-to-date with QuickBooks and providing training to team members when necessary.
By following these best practices, you can ensure a streamlined and efficient refund process in QuickBooks, improving customer satisfaction, maintaining accurate financial records, and fostering positive business relationships.
Now that you have a comprehensive understanding of refunding customers in QuickBooks and the knowledge to navigate the refund process effectively, you can confidently handle customer refunds and manage your business finances with ease.


