Introduction
Recording a returned check in QuickBooks is an essential task for accurate accounting and maintaining the financial records of your business. When a check you have received is returned by the bank due to insufficient funds or any other reason, it is important to properly document this transaction and update your records accordingly.
In this article, we will guide you through the step-by-step process of recording a returned check in QuickBooks. By following these instructions, you will be able to keep your financial statements up-to-date and have a clear overview of your company’s cash flow. Whether you are an experienced QuickBooks user or a beginner, this guide will provide you with the necessary knowledge to handle returned checks efficiently.
Before we dive into the steps, it’s important to note that QuickBooks offers different versions and editions, so the exact process may vary slightly depending on the version you are using. However, the underlying principles and steps remain the same across most editions, making this guide applicable to a wide range of users.
Now, let’s get started and learn how to record a returned check in QuickBooks!
Step 1: Gather Information
The first step in recording a returned check in QuickBooks is to gather all the necessary information related to the returned check. This includes details such as the check number, the date the check was issued, the amount of the check, and any fees or charges associated with the returned check.
Start by retrieving the physical or electronic copy of the returned check, if available. Take note of the check number, which is typically indicated on the top right corner of the check. Also, find the date the check was issued and the amount that was originally written on the check.
In addition to the basic information about the returned check, you will also need to gather any relevant fees or charges that were incurred due to the returned check. This might include bank fees or penalty fees imposed by your own business. These fees will need to be recorded and accounted for in your QuickBooks transactions.
It is important to have accurate and comprehensive information about the returned check, as this will ensure that your accounting records are precise and up-to-date. Take the time to gather all the necessary information before proceeding to the next step.
Remember, having all the required information at hand will make the recording process in QuickBooks much smoother, allowing you to enter the correct details and accurately reflect the returned check in your financial statements.
Step 2: Create a New Deposit
Once you have gathered all the necessary information about the returned check, the next step is to create a new deposit in QuickBooks. This deposit will account for the amount of the returned check and any associated fees or charges.
To create a new deposit, follow these steps:
- Open QuickBooks and navigate to the Banking menu.
- Select “Make Deposits” from the drop-down menu.
- In the “Payments to Deposit” window, select the appropriate bank account where the returned check was originally deposited.
- Locate the returned check in the list of payments and click on it to select it.
- If there are any fees or charges associated with the returned check, enter them in the “Additions” column.
- Verify that the total deposit amount reflects the amount of the returned check minus any fees or charges.
- Click “Save” to create the new deposit.
By following these steps, you will create a new deposit in QuickBooks that accurately reflects the returned check and any associated fees. This deposit will be recorded in your account and will be used to reconcile your bank statements.
It is important to ensure that the deposit amount is accurate and matches the amount of the returned check in order to maintain the integrity of your financial records. Double-check the information before saving the new deposit to avoid any discrepancies.
Now that you have created a new deposit to account for the returned check, you are one step closer to properly recording this transaction in QuickBooks. The next step is to enter the specific information about the returned check.
Step 3: Enter Returned Check Information
After creating a new deposit to account for the returned check, the next step is to enter the specific information about the returned check itself. This includes the check number, issued date, amount, and any additional details that are relevant to the returned check.
To enter the returned check information in QuickBooks, follow these steps:
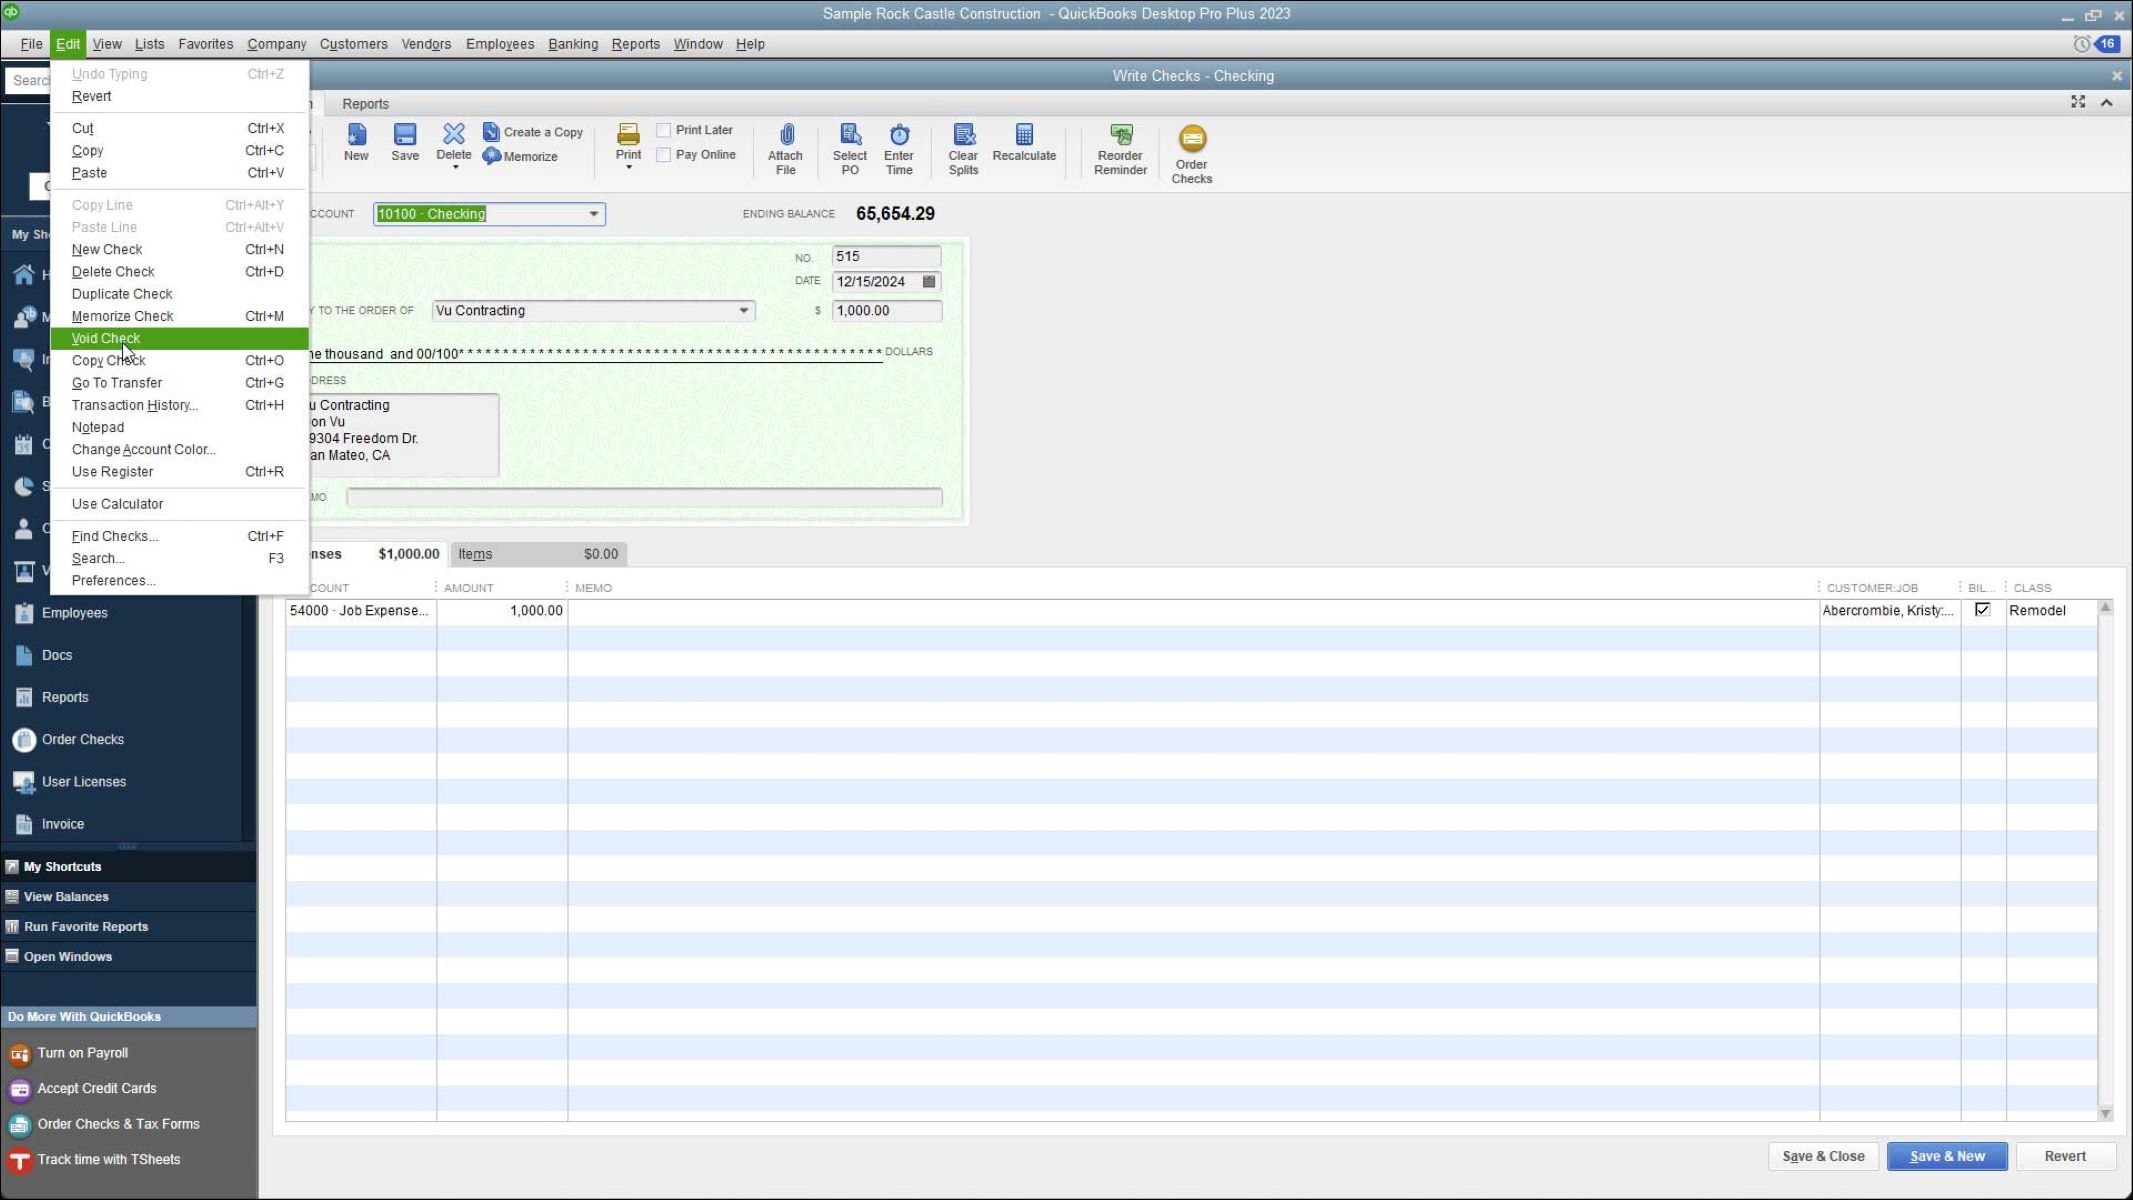
- Go to the Banking menu in QuickBooks and select “Write Checks.”
- In the “Pay to the Order of” field, enter the name of the individual or business to whom the check was originally issued.
- In the “Date” field, enter the date that the original check was issued.
- In the “Amount” field, enter the amount that was originally written on the check.
- In the “Memo” field, add any additional details or notes about the returned check.
- In the “Expenses” section, select the appropriate expense account to record any fees or charges associated with the returned check.
- Verify that the total amount of the check and any associated fees or charges is accurate.
- Click “Save” to record the returned check in QuickBooks.
By following these steps, you will accurately enter the returned check information into QuickBooks. This information will be recorded in your account and reflected in your financial statements.
It is important to ensure that the details of the returned check are entered correctly, especially the check number, date, and amount. This will help you maintain accurate records and facilitate future reference or reconciliation processes.
Now that you have entered the specific information about the returned check, the next step is to reconcile the bank statement to ensure that your records match the actual transactions.
Step 4: Reconcile the Bank Statement
After entering the returned check information in QuickBooks, the final step is to reconcile the bank statement with your recorded transactions. Reconciliation is an important process that helps you ensure that the transactions in your QuickBooks account match the transactions reported by the bank.
To reconcile the bank statement in QuickBooks, follow these steps:
- Go to the Banking menu and select “Reconcile.”
- Choose the appropriate bank account that corresponds to the statement you are reconciling.
- Enter the statement date and ending balance as shown on the bank statement.
- Click “Continue” to start the reconciliation process.
- Review the list of transactions that appear on the screen.
- Locate the returned check transaction in the list.
- Check the box next to the returned check transaction to mark it as reconciled.
- Confirm that the difference between the bank statement balance and the QuickBooks balance is zero.
- Click “Finish Now” to complete the reconciliation process.
By following these steps, you will reconcile the bank statement in QuickBooks and ensure that your recorded transactions match the bank’s reported transactions. The reconciliation process helps identify any discrepancies or errors and allows you to make any necessary adjustments to maintain accurate financial records.
It is important to reconcile your bank statements regularly to ensure the integrity of your financial records. This process helps identify any missing or fraudulent transactions and provides you with a clear overview of your business’s financial health.
Congratulations! You have successfully recorded a returned check in QuickBooks and reconciled your bank statement. Your financial records are now updated and accurate, giving you a clear picture of your company’s cash flow.
Conclusion
Recording returned checks in QuickBooks is a crucial step in maintaining accurate financial records for your business. By following the steps outlined in this guide, you can effectively handle returned checks and keep your accounting in order.
Remember to gather all the necessary information about the returned check, including the check number, date, and amount. Creating a new deposit in QuickBooks helps account for the returned check and any associated fees or charges. Be sure to enter the specific details of the returned check accurately in the Write Checks section of QuickBooks.
Lastly, reconciling your bank statement with QuickBooks ensures that your recorded transactions match the bank’s reported transactions. Regular reconciliation helps identify any discrepancies or errors and maintains the integrity of your financial records.
By following these steps, you can navigate the process of recording returned checks in QuickBooks with ease and confidence. Properly managing returned checks not only ensures accurate financial reporting but also helps in making informed business decisions.
Remember, QuickBooks offers various versions and editions, so there might be slight differences in the interface or process. However, the underlying principles discussed in this guide remain the same.
Keep your financial records organized and up-to-date by recording returned checks promptly and accurately in QuickBooks. By doing so, you can stay on top of your company’s cash flow and maintain a solid financial foundation for your business.