Introduction
Welcome to our step-by-step guide on how to change the company name in QuickBooks. As your business evolves and grows, there may come a time when you need to update your company name for various reasons, such as rebranding or mergers. Fortunately, QuickBooks makes it easy to make this change within the software.
Changing your company name in QuickBooks is important to maintain accurate records, financial statements, and business documents. It ensures consistency across all your business operations and maintains professionalism in your financial management system. In this guide, we will walk you through the process of changing the company name in QuickBooks in a few simple steps.
Before we begin, it’s important to note that changing your company name in QuickBooks will update the name displayed on your invoices, reports, and other financial documents. However, it will not affect the legal name of your company. If you need to change your legal business name, you should consult with the appropriate legal authorities and follow the necessary procedures.
Now, let’s get started with the step-by-step instructions to change your company name in QuickBooks. Don’t worry, the process is straightforward, and you’ll have your company name updated in no time.
Step 1: Open QuickBooks
The first step in changing your company name in QuickBooks is to open the software. Ensure that you have all the necessary login credentials and access to the QuickBooks account associated with your company.
To open QuickBooks, locate the QuickBooks icon on your desktop or in your applications folder. Double-click the icon to launch the program. If you don’t have QuickBooks installed on your computer, visit the Intuit website and download the appropriate version for your operating system.
Once QuickBooks is open, you will be prompted to sign in to your account. Enter your username and password to access your QuickBooks account. If you have forgotten your login credentials, click on the “Forgot User ID?” or “Forgot Password?” links to recover or reset your account information.
After successfully logging in to your QuickBooks account, you will be taken to the QuickBooks home screen. This is where you can access all the features and functions of the software. From here, you can proceed to the next step and begin the process of changing your company name.
It’s worth mentioning that the steps mentioned in this guide may vary slightly depending on the version of QuickBooks you are using. However, the general process remains the same, so you should be able to follow along regardless of your specific QuickBooks edition.
Now that you have successfully opened QuickBooks, let’s move on to the next step and access the company settings to change the company name.
Step 2: Access the Company Settings
Once you have opened QuickBooks, the next step is to access the company settings where you can make changes to your company name. Follow these simple steps to access the company settings:
- From the QuickBooks home screen, look for the gear icon located in the top-right corner of the screen. This gear icon represents the settings in QuickBooks.
- Click on the gear icon to open a dropdown menu. From the options available, select “Account and Settings”. This will open the settings page for your QuickBooks account.
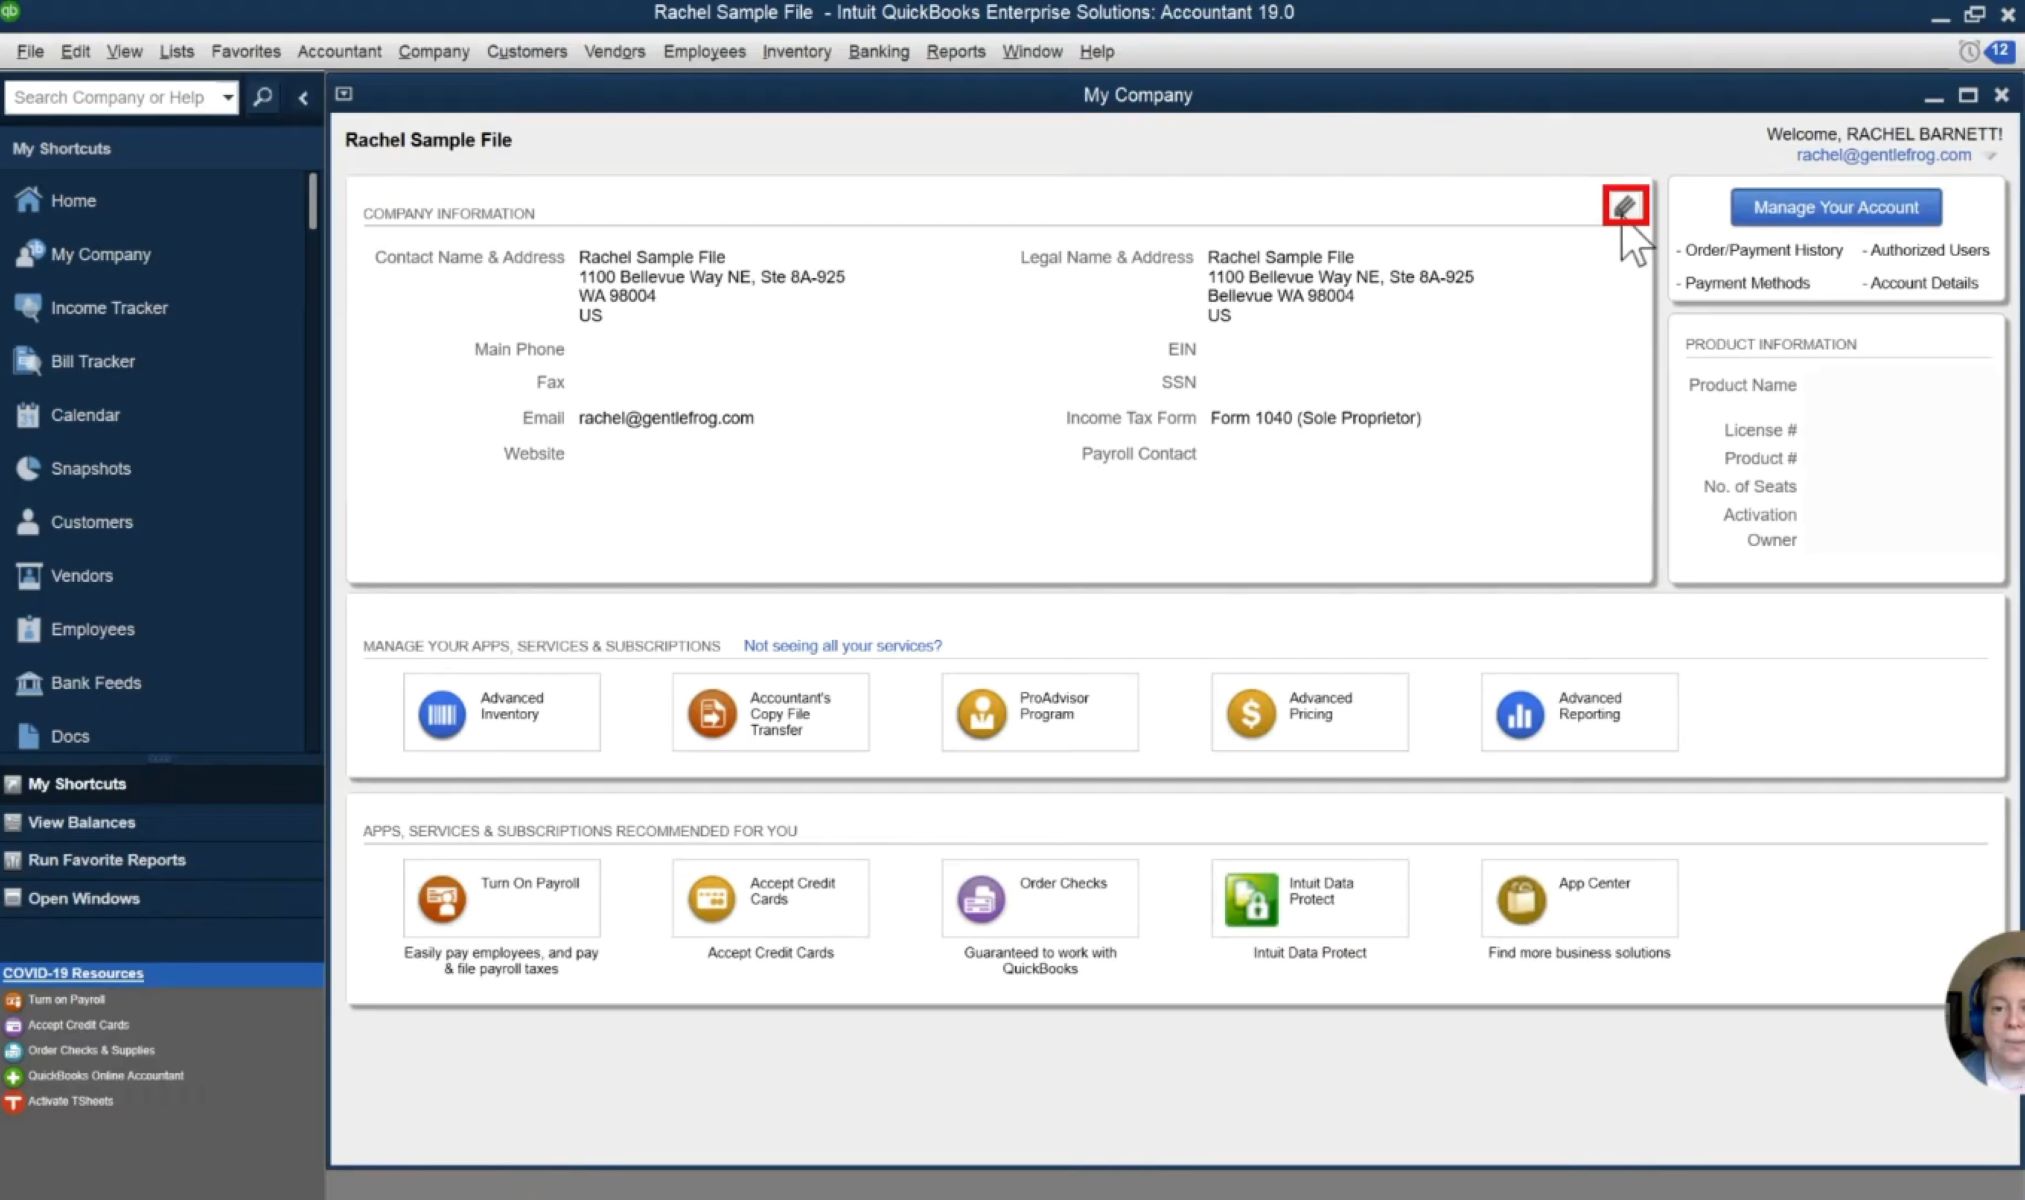
- On the left-hand side of the settings page, you will see a list of categories. Look for and click on “Company Settings”. This will take you to the company settings page.
By accessing the company settings, you will be able to modify various aspects of your company’s information, including the company name.
It’s important to note that only users with administrative access to the QuickBooks account will be able to make changes to the company settings. If you do not have administrative access, you may need to reach out to the account administrator or request administrative privileges.
Now that you have successfully accessed the company settings in QuickBooks, let’s move on to the next step and learn how to change the company name.
Step 3: Change the Company Name
Now that you are on the company settings page in QuickBooks, you can proceed to change the company name. Follow these steps to update your company name:
- On the company settings page, locate the “Company Name” field. This is where you can enter the new name for your company.
- Click on the “Edit” button next to the “Company Name” field. This will allow you to make changes to the company name.
- In the editable field, delete the existing company name and enter the new name that you want to use for your company.
- Double-check the spelling and accuracy of the new company name to ensure it is correct.
Once you have entered the new company name, it is important to remember that QuickBooks allows up to 100 characters for the company name. Make sure the new name is within this character limit.
After you have entered the new company name, you may also have the option to update the legal name and other related information. However, please note that changing the legal name of your company requires additional legal documentation and processes outside of QuickBooks. Be sure to follow the appropriate legal procedures if you need to update the legal name of your business.
Once you are satisfied with the new company name, click on the “Save” button to save the changes. QuickBooks will then update your company name across the software.
Congratulations! You have successfully changed the company name in QuickBooks. However, we still have a few more steps to ensure that the updated company name is reflected in other areas of your QuickBooks account.
Now let’s move on to the next step and review and save the changes.
Step 4: Review and Save the Changes
After changing the company name in QuickBooks, it’s important to review and save the changes to ensure they are accurately reflected throughout the software. Follow these steps to review and save the changes:
- Once you have clicked the “Save” button after changing the company name, QuickBooks will display a confirmation message indicating that the changes have been saved successfully. Take a moment to review this message and ensure that it confirms the update.
- After reviewing the confirmation message, navigate back to the QuickBooks home screen by clicking on the QuickBooks logo or using the appropriate navigation options.
- On the home screen, take a look at the top navigation bar to see if the updated company name is displayed correctly. This will give you an immediate visual confirmation that the change has been applied.
- Next, generate a sample report or invoice to verify that the new company name appears correctly on these documents. This is important as these documents are commonly shared with customers and stakeholders.
- Review any other areas of QuickBooks where the company name is displayed, such as customer lists, vendor lists, and employee profiles. Make note of any areas where the old company name is still being used and make adjustments accordingly.
By thoroughly reviewing these different areas of QuickBooks, you can ensure that the updated company name is accurately displayed throughout the software.
If you encounter any issues or inconsistencies during the review process, double-check that you followed the previous steps correctly. If problems persist, you may need to reach out to QuickBooks support for further assistance.
Once you are satisfied with the changes and have reviewed all relevant areas, you can consider the changes officially saved. Congratulations! Your QuickBooks account now reflects the updated company name.
Now that you have completed the review and save step, let’s move on to the final step and learn how to update the information in other areas to ensure consistency throughout your QuickBooks account.
Step 5: Update Information in Other Areas
Now that you have successfully changed the company name in QuickBooks, it’s essential to update the company name in other areas to ensure consistency throughout your QuickBooks account. Follow these steps to update the company name in other relevant sections:
- Customer and Vendor Lists: Review your customer and vendor lists in QuickBooks and update any references to the old company name. Edit the names accordingly to reflect the new company name and save the changes.
- Financial Statements: If you generate financial statements in QuickBooks, such as profit and loss statements or balance sheets, ensure that the company name is updated and accurately displayed on these reports. Edit the report settings if necessary to reflect the updated company name.
- Business Forms and Templates: Many businesses customize their invoices, purchase orders, and other business forms in QuickBooks. Open your customized forms and templates and modify them to include the new company name. This will ensure that all documents generated by QuickBooks display the correct company name.
- User Permissions: If you have multiple users accessing your QuickBooks account, it’s important to update their permissions to reflect the new company name. Review user profiles and make any necessary changes to ensure that everyone is operating under the updated company name.
- Logo and Branding: If your company logo or branding includes the company name, update these elements accordingly. Replace the old company name with the new one to maintain consistency in your branding across all QuickBooks documents.
By updating the information in these other areas of QuickBooks, you can ensure that the new company name is consistently reflected throughout the software. This will help to maintain a professional and cohesive image for your business.
Remember to save any changes made in these other areas to ensure that the updated company name is visible across all relevant sections in QuickBooks.
With these steps completed, congratulations! You have successfully updated your company name in QuickBooks and ensured consistency throughout the software.
By following this step-by-step guide, you have taken the necessary actions to reflect your new company name accurately in QuickBooks. This process will help maintain accurate records, financial statements, and business documents, ensuring the professionalism and integrity of your financial management system.
If you experience any issues or challenges during the process, don’t hesitate to reach out to QuickBooks support for assistance. They will be able to provide further guidance and resolution if needed.
Conclusion
Changing the company name in QuickBooks is a straightforward process that allows you to maintain accurate records and ensure consistency throughout your financial management system. By following the step-by-step guide outlined above, you can easily update your company name and reflect the change in various areas of QuickBooks.
Remember, changing the company name in QuickBooks does not affect the legal name of your business. If you need to update the legal name, be sure to follow the appropriate legal procedures outside of QuickBooks.
Throughout the process, make sure to review and save the changes to ensure that the updated company name is accurately displayed in reports, invoices, and other business documents. Update any other areas in QuickBooks where the old company name is referenced, such as customer lists, vendor lists, and user profiles.
Additionally, consider updating your business forms, templates, and branding materials to include the new company name. This will help maintain a cohesive and professional image across all your business documents.
If you encounter any difficulties or require further assistance during the process, don’t hesitate to reach out to QuickBooks support or consult their extensive knowledge base for guidance.
By successfully changing the company name in QuickBooks, you have taken an important step towards keeping your financial records accurate and up to date. This change reflects your business’s growth and evolution, ensuring that your financial management system remains aligned with your current branding and business identity.
Congratulations on completing the process of changing the company name in QuickBooks. Your updated company name will now be accurately reflected throughout the software, providing a professional and consistent experience for you and your stakeholders.