Introduction
Welcome to the world of QuickBooks Online, where managing your financial transactions has never been easier. As a business owner or accounting professional, it’s crucial to accurately record every deposit made into your bank accounts. By doing so, you can ensure your financial records are up-to-date and reliable.
In this article, we will guide you through the process of recording deposits in QuickBooks Online. Whether you’re receiving payments from customers, making a deposit from a loan or investment, or simply depositing cash into your business account, QuickBooks Online provides a streamlined and efficient way to keep track of your money.
By properly recording deposits in QuickBooks Online, you can gain valuable insights into your cash flow, reconcile your bank accounts easily, and stay on top of your financial health. Additionally, accurate deposit recording helps when it’s time to prepare financial statements or analyze your business’s performance.
Before diving into the steps, it’s important to have a basic understanding of deposits in QuickBooks Online. A deposit represents money that you receive and add to a bank account. This can include customer payments for products or services, funds transferred from another bank account, or proceeds from loans or investments.
Now, let’s explore the step-by-step process of recording deposits in QuickBooks Online. By following these guidelines, you’ll be well-equipped to maintain accurate financial records and effectively manage your business’s cash flow.
Understanding Deposits in QuickBooks Online
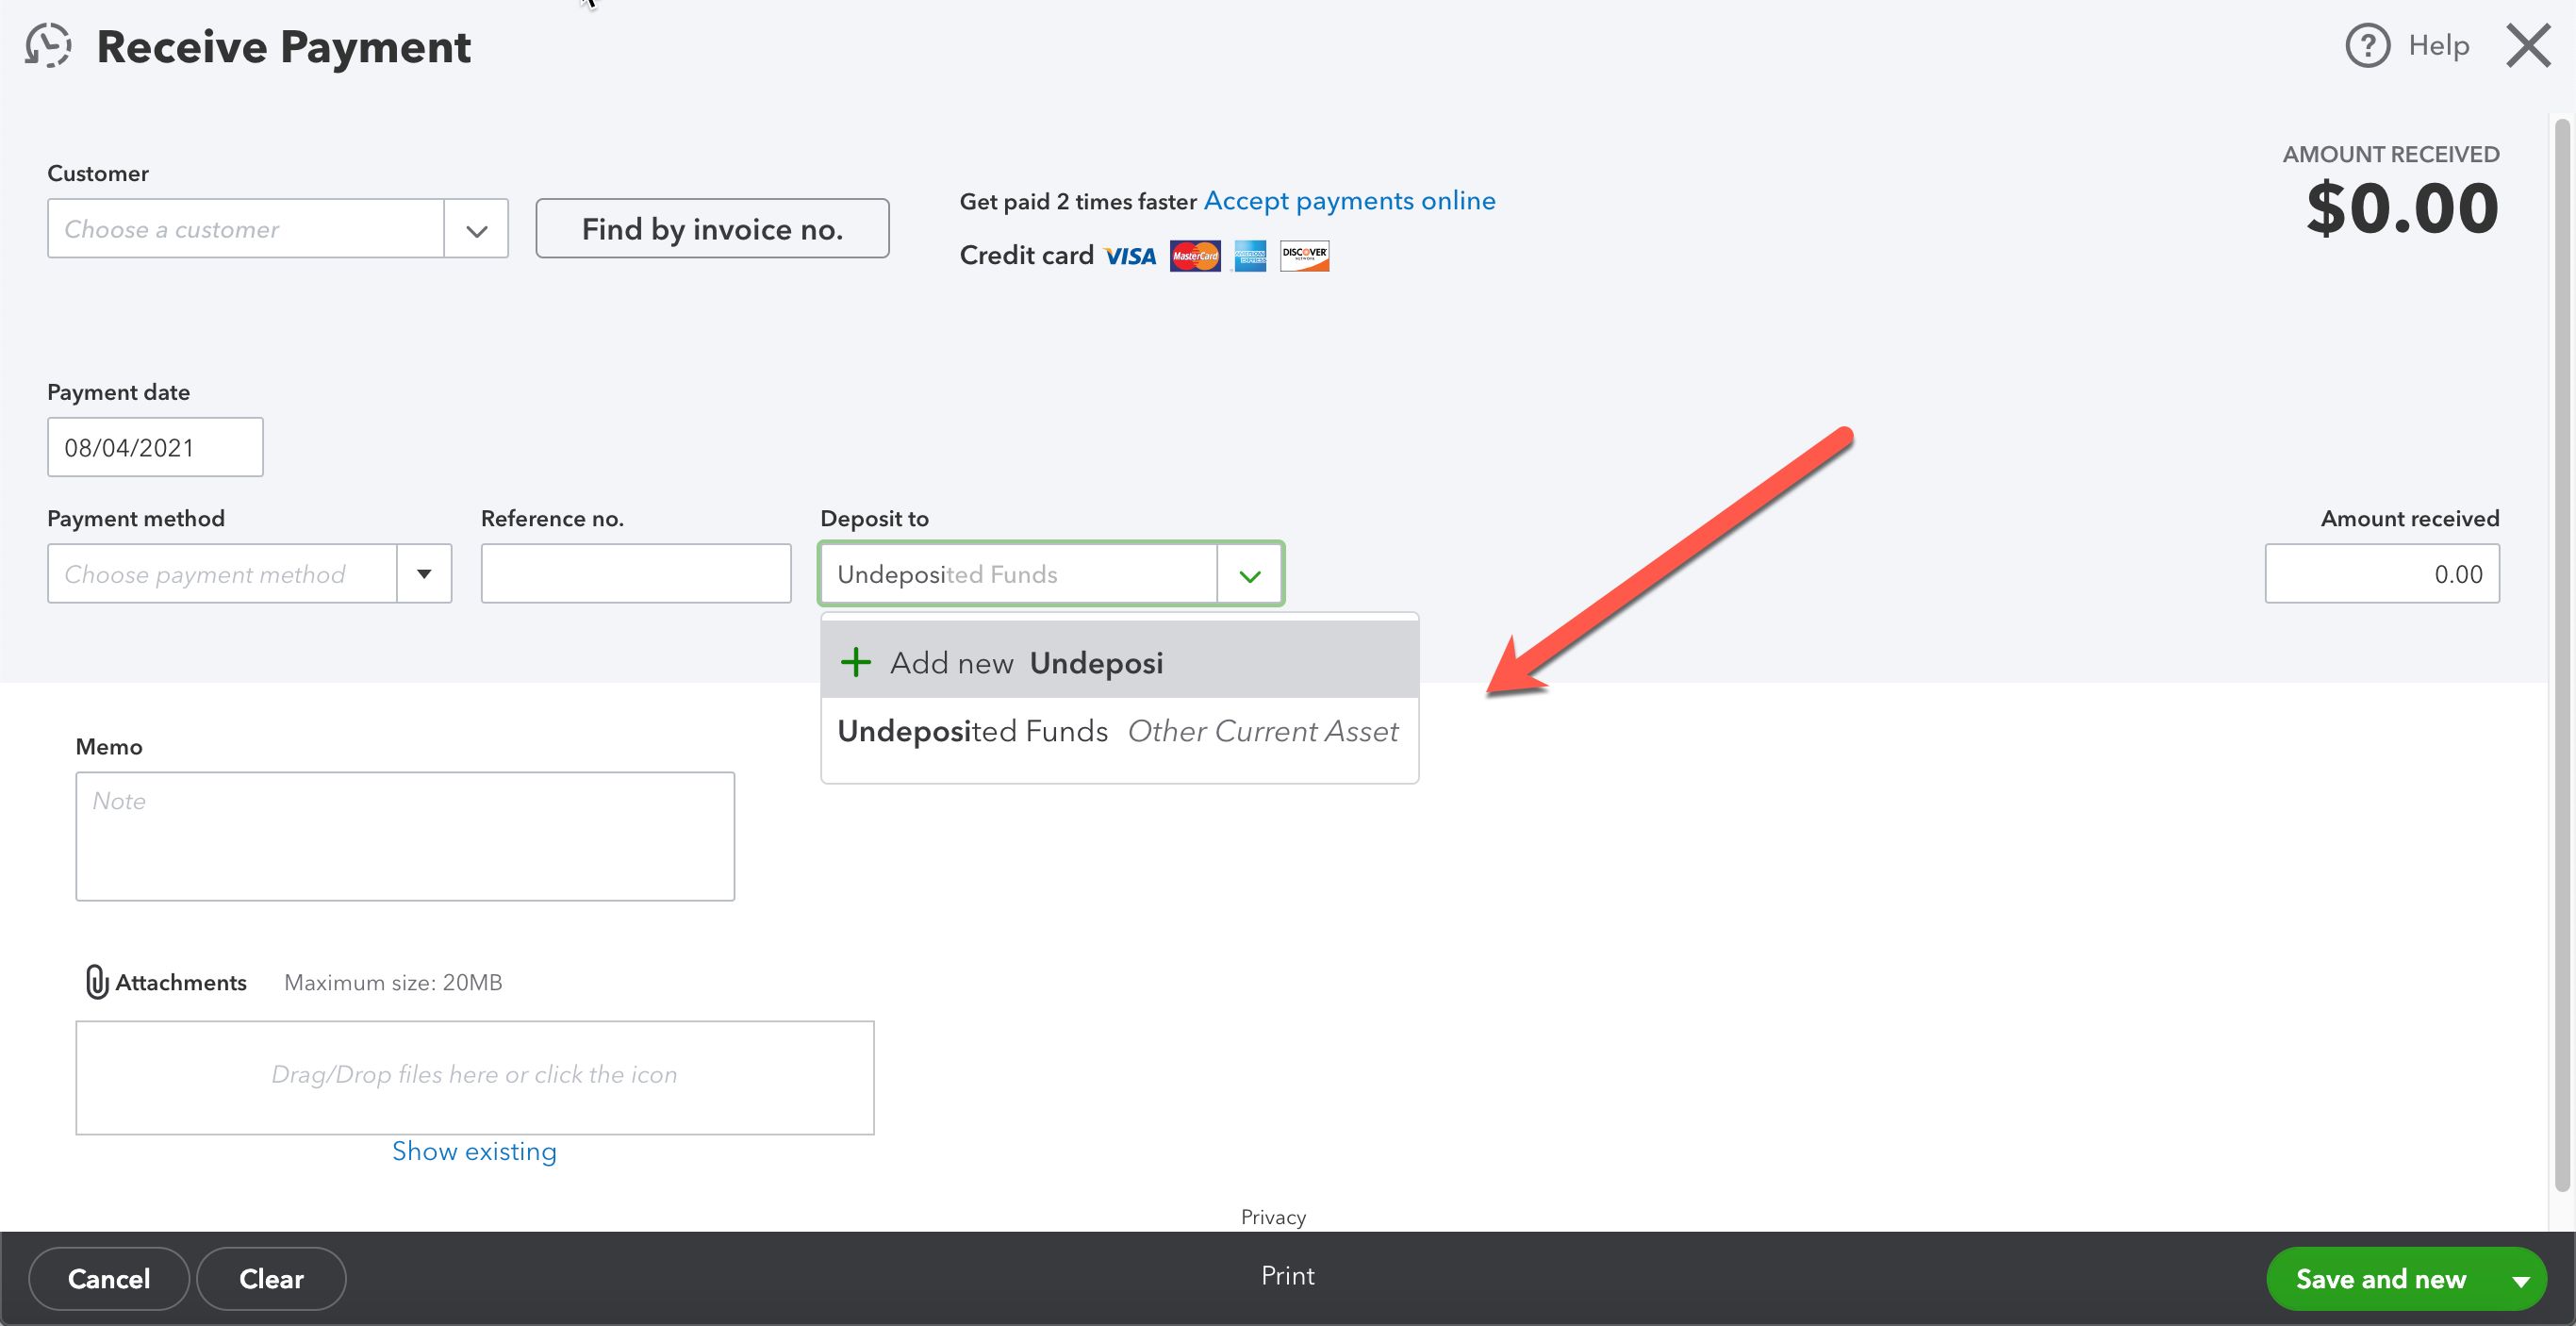
Before recording deposits in QuickBooks Online, it’s important to understand how deposits are categorized and how they impact your financial records. Deposits in QuickBooks Online are typically classified as either “Undeposited Funds” or “Bank Deposit.”
“Undeposited Funds” is a temporary holding account where you can accumulate customer payments or other funds before making an actual deposit to your bank account. This account acts as an intermediary step to group multiple payments together and streamline the depositing process.
When you record a deposit in QuickBooks Online, you’ll have the option to select the specific bank account the deposit is being made into. This bank account represents the actual account where the funds will be deposited, such as your business checking or savings account.
It’s important to note that when you record a deposit, QuickBooks Online automatically selects the “Undeposited Funds” account as the default source account. However, if you have already grouped payments in the “Undeposited Funds” account, you can directly record the deposit to your designated bank account without going through the “Undeposited Funds” account.
Understanding the distinction between “Undeposited Funds” and the actual bank account is crucial for accurate financial reporting. Depositing funds directly to the bank account bypasses the “Undeposited Funds” account and may impact your cash flow and reconciliation process. Therefore, it’s recommended to use the “Undeposited Funds” account to properly track and manage your receipts before finalizing the deposit.
By comprehending how deposits are categorized and how they affect your financial records, you’ll be better equipped to accurately record and manage your deposits in QuickBooks Online. This understanding lays the foundation for efficient bookkeeping and ensures the integrity of your financial statements.
Step-by-Step Guide to Recording Deposits in QuickBooks Online
Recording deposits in QuickBooks Online is a straightforward process that allows you to keep track of your income accurately. Follow these step-by-step instructions to record deposits in QuickBooks Online:
- Accessing the Banking menu: Login to your QuickBooks Online account and navigate to the left menu. Click on the “Banking” tab to access your banking transactions.
- Selecting the correct account: From the Banking screen, select the account where you want to record the deposit. Ensure that you choose the correct account associated with the deposit.
- Clicking on the “Record Deposits” button: Once you’ve selected the appropriate bank account, locate the “Record Deposits” button on the right side of the screen and click on it.
- Entering the deposit details: In the “Record Deposits” window, you’ll see a list of payments waiting to be deposited. Check the boxes next to the payments you want to include in the deposit.
- Applying payments to invoices or sales receipts: If the payments being deposited are related to specific invoices or sales receipts, select the correct transactions and apply the payments to them.
- Allocating deposits to specific accounts: If you need to allocate a portion of the deposit to different accounts, such as sales tax or service fees, enter the amounts in the corresponding fields.
- Finalizing the deposit: Once you’ve entered all the necessary information, review the details carefully. Make sure everything is accurate and click on the “Save and Close” button to finalize the deposit.
Congratulations! You have successfully recorded a deposit in QuickBooks Online. Repeat these steps for any future deposits you receive to maintain an accurate record of your income.
It’s important to note that QuickBooks Online will automatically update your cash balance based on the recorded deposit, making it easier to reconcile your bank statements and track your finances.
By following this step-by-step guide, you can ensure that your deposit recording process in QuickBooks Online is efficient, accurate, and seamlessly integrated into your overall accounting workflow.
Accessing the Banking menu
The first step in recording deposits in QuickBooks Online is to access the Banking menu. Here’s how you can do it:
- Sign in to your QuickBooks Online account using your login credentials.
- Once logged in, navigate to the left menu where you’ll find various options and tabs.
- Locate and click on the “Banking” tab. This will take you to the Banking screen where you can view and manage your banking transactions.
By accessing the Banking menu, you can easily visualize and organize your financial transactions, making it convenient to record deposits and track your income.
It’s worth noting that the Banking menu in QuickBooks Online provides a comprehensive view of your linked bank accounts, credit cards, and other financial institutions. This centralized hub allows you to sync your transactions, reconcile your accounts, and manage your deposits efficiently.
Once you have completed this step, you can proceed to the next step of selecting the correct account for recording your deposits.
Selecting the correct account
After accessing the Banking menu in QuickBooks Online, the next step is to select the correct account where you want to record the deposit. Follow these instructions to choose the appropriate account:
- From the Banking screen, you will see a list of your bank accounts and credit cards listed on the left-hand side of the page.
- Identify and select the account where you want to record the deposit. Ensure that you choose the correct account associated with the deposit you are recording.
- Click on the account name to access the transactions specific to that account.
Selecting the correct account is crucial as it ensures accurate record-keeping and provides a clear audit trail of your financial activities. By associating the deposit with the appropriate account, you can maintain organized and precise financial records.
Having multiple bank accounts within QuickBooks Online allows you to easily manage and track various sources of income and expenses. By associating deposits with specific accounts, you can gain insights into your cash flow and financial performance.
Once you have successfully selected the correct account, you are ready to proceed with recording your deposit in QuickBooks Online. The next step is to click on the “Record Deposits” button, which will take you to the deposit recording window.
Clicking on the “Record Deposits” button
After selecting the correct account in QuickBooks Online, the next step is to click on the “Record Deposits” button. This action will allow you to start recording the deposit and input the necessary details. Here’s how to do it:
- On the Banking screen, look for the “Record Deposits” button located on the right-hand side of the page. It is typically displayed as an icon or a button with the label “Record Deposits.” Click on this button.
- Upon clicking the button, a new window will appear, prompting you to enter the relevant information for the deposit.
By clicking on the “Record Deposits” button, you initiate the recording process and gain access to a dedicated window where you can input the necessary details. This ensures that your deposit is accurately documented in your QuickBooks Online account.
The “Record Deposits” window provides a user-friendly interface where you can conveniently enter essential information related to your deposit. This includes details such as the deposit date, payment method, and the specific customer or client associated with the payment.
It’s worth noting that the appearance and organization of the “Record Deposits” window may vary depending on your QuickBooks Online setup and preferences. However, the basic functionality remains the same across different versions of the software.
Once you have successfully clicked on the “Record Deposits” button and entered the relevant details, you can proceed to the next step of entering the deposit details. This will involve selecting the payments you want to include in the deposit and applying payments to invoices or sales receipts, if applicable.
Entering the deposit details
After clicking on the “Record Deposits” button in QuickBooks Online, you will be prompted to enter the deposit details. This step involves selecting the payments you want to include in the deposit and providing relevant information. Here’s how to enter the deposit details:
- In the “Record Deposits” window, you will see a list of payments waiting to be deposited. These payments could be customer payments, transfers from another account, or other sources of income.
- Check the boxes next to the payments that you want to include in the deposit. By selecting the appropriate payments, you ensure accurate recording of your income.
- If the payments being deposited are related to specific invoices or sales receipts, you can apply the payments to the corresponding transactions. This helps in maintaining accurate accounts receivable records.
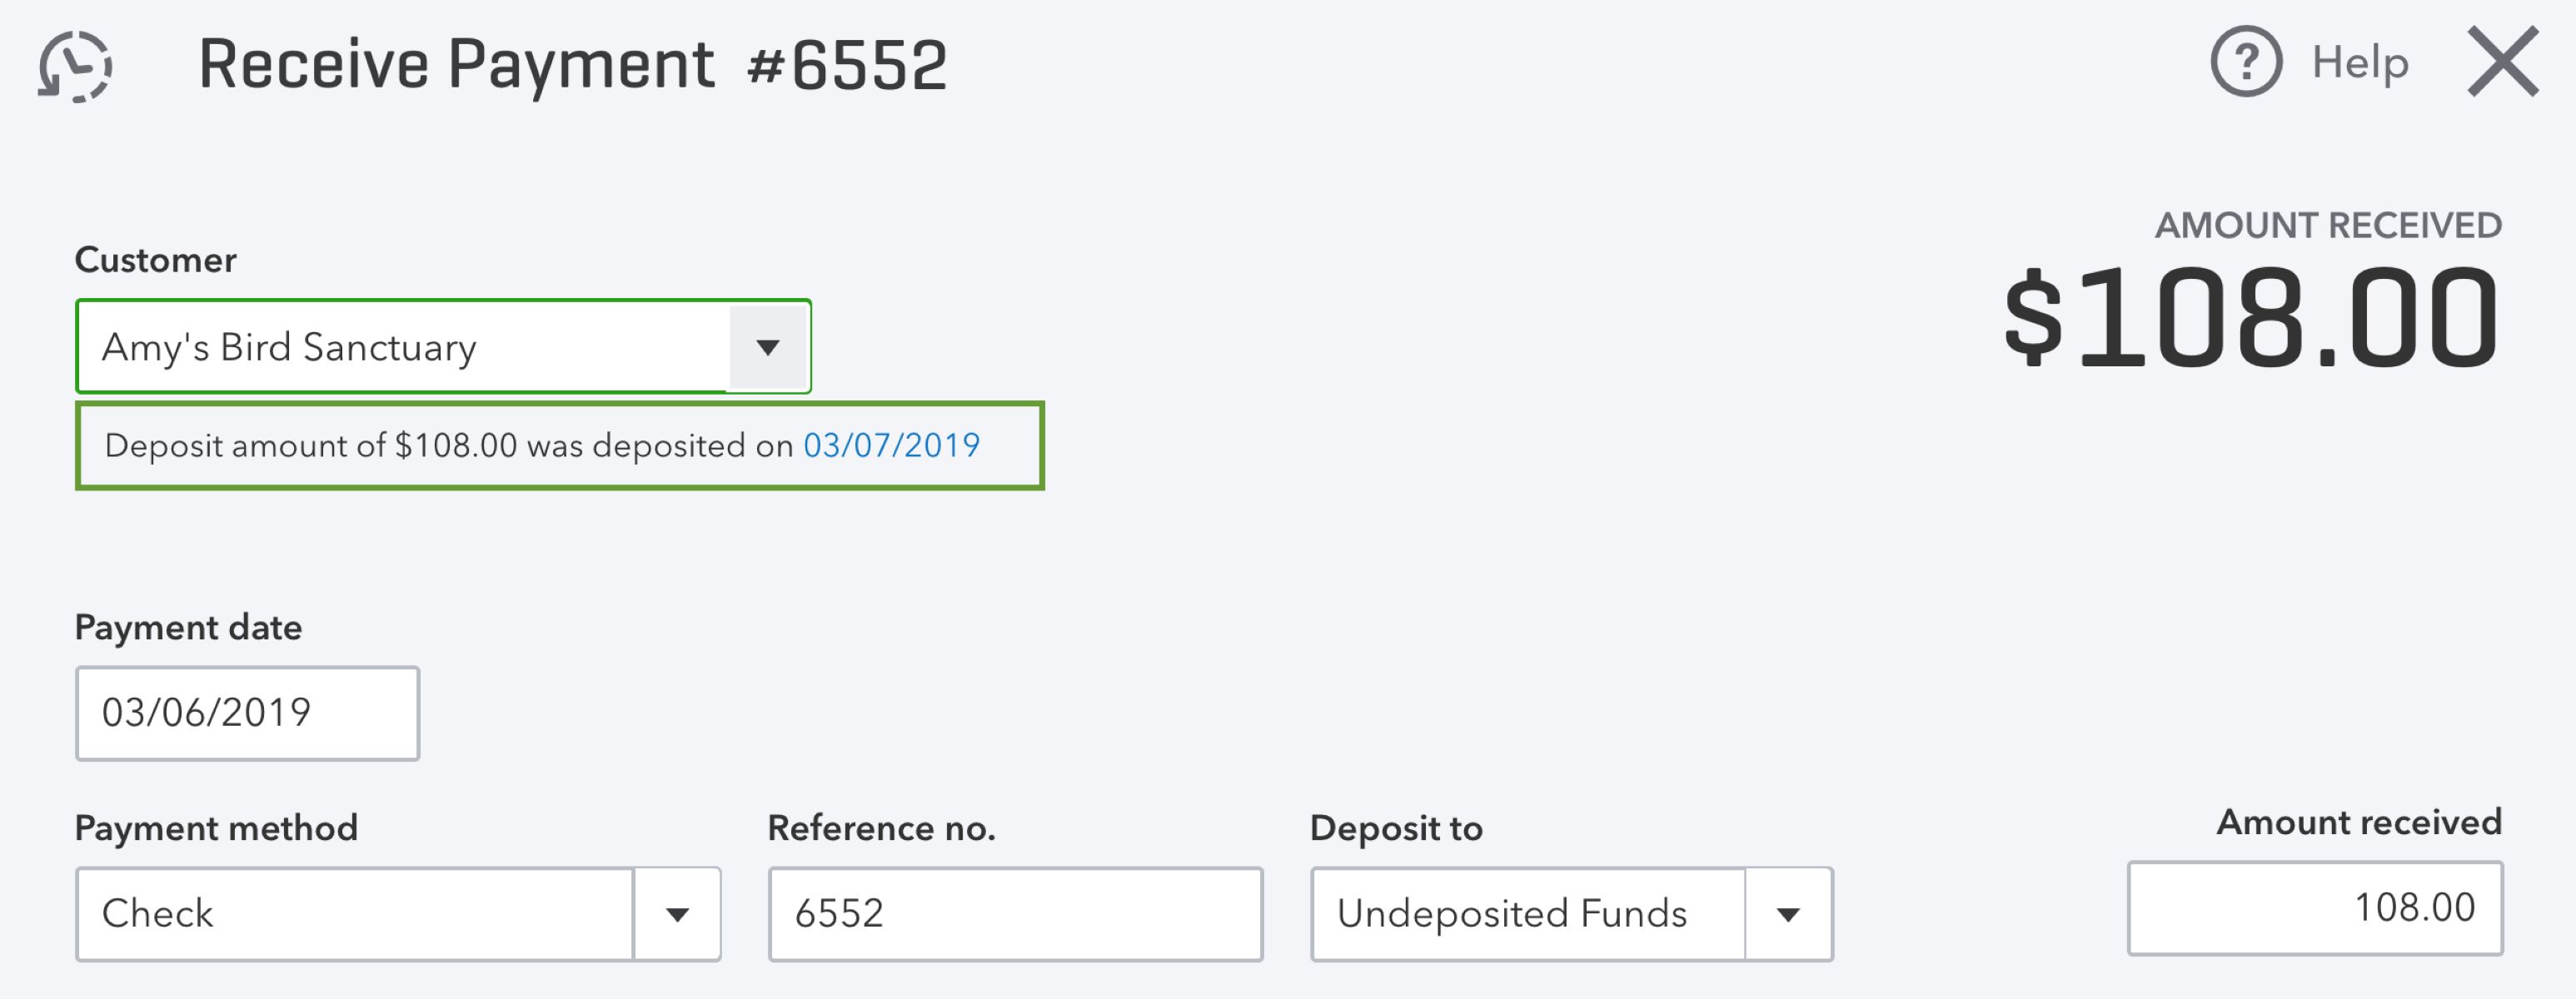
- Enter any additional relevant details, such as the deposit date, payment method, or the specific customer associated with the payment. Providing this information will enhance the accuracy and organization of your financial records.
By entering the deposit details in QuickBooks Online, you are capturing vital information about the income received and ensuring that it is properly recorded. This step allows you to have a complete and detailed record of your deposits, making it easier to track and analyze your financials.
It’s important to double-check the accuracy of the entered details before proceeding to the next step. This helps to maintain the integrity of your financial records and avoids any potential errors or discrepancies in your accounting.
Once you have entered the deposit details, you can move on to the next step of allocating the deposits to specific accounts. This step allows you to allocate a portion of the deposit to different accounts, such as sales tax or service fees.
Applying payments to invoices or sales receipts
When recording deposits in QuickBooks Online, it’s essential to apply payments to the corresponding invoices or sales receipts, if applicable. This step helps in maintaining accurate accounts receivable records and tracking customer payments effectively. Follow these steps to apply payments to invoices or sales receipts:
- In the “Record Deposits” window, review the list of payments that you have selected to include in the deposit.
- If any of the payments are associated with specific invoices or sales receipts, locate those transactions and select them.
- Once the transactions are selected, QuickBooks Online will automatically apply the payments to the corresponding invoices or sales receipts.
Applying payments to invoices or sales receipts ensures that your accounts receivable balances are accurately updated. This step also helps in reconciling your customer payments and maintaining a clear audit trail of your business transactions.
By associating payments with the related transactions, you can easily track which invoices or sales receipts have been paid, view outstanding balances, and generate accurate financial statements.
If there are no specific invoices or sales receipts to apply the payments to, such as when you receive a general payment without any accompanying invoice, you can still proceed with recording the deposit. QuickBooks Online allows you to record such payments as unapplied funds, which you can later allocate to specific transactions or accounts as needed.
Once you have applied the payments to invoices or sales receipts, you can proceed to the next step of allocating the deposits to specific accounts. This step allows you to categorize the deposit amounts into different accounts according to your business needs.
Allocating deposits to specific accounts
After applying payments to invoices or sales receipts in QuickBooks Online, the next step is to allocate the deposits to specific accounts. This process involves assigning a portion of the deposit to different accounts to accurately track various income sources and expenses. Here’s how to allocate deposits to specific accounts:
- In the “Record Deposits” window, you will find fields or columns where you can enter the amounts to allocate to specific accounts.
- Identify the accounts you want to allocate the deposit to. Common examples include sales tax, service fees, or specific income accounts.
- Enter the corresponding amounts in the allocated fields next to the respective accounts.
Allocating deposits to specific accounts allows for detailed tracking of various income and expense categories. This level of granularity provides you with valuable insights into your business’s financial performance and facilitates accurate reporting.
By allocating the deposit amounts to specific accounts, you can easily view the breakdown of income sources and expense categories. This information is useful for analyzing profitability, tracking tax obligations, and making informed business decisions.
Please note that the allocation process in QuickBooks Online may vary based on your account settings or preferences. The software offers flexibility in customizing account allocations to suit your unique business needs.
After completing the allocation, it’s important to review the amounts to ensure accuracy. Double-check the allocated amounts and verify that they align with your intended distribution of the deposit.
Once you have successfully allocated the deposit amounts to specific accounts, you can proceed to the final step of finalizing the deposit, where you will review the deposit details and save the transaction.
Finalizing the deposit
The final step in recording deposits in QuickBooks Online is to review the deposit details and finalize the transaction. This step ensures that all information is accurate, and the deposit is properly recorded in your financial records. Here’s how to finalize the deposit:
- In the “Record Deposits” window, take a moment to review the deposit details, including the deposit date, payment method, allocated amounts, and any applied payments to invoices or sales receipts.
- Double-check the information to ensure accuracy. Verify that all amounts and account allocations are correct.
- If everything looks accurate, click on the “Save and Close” button to finalize the deposit.
By reviewing and finalizing the deposit, you confirm that all information is correct and that the deposit has been accurately recorded in your QuickBooks Online account. This step aids in maintaining the integrity and consistency of your financial records.
Once the deposit is finalized, QuickBooks Online will automatically update your cash balance based on the recorded deposit. This ensures that your financial statements accurately reflect the deposits made and facilitates easy reconciliation of your bank accounts.
It’s important to note that once a deposit is finalized, it becomes a permanent entry in your financial records. However, in case you need to make any adjustments or corrections, QuickBooks Online allows you to edit or delete the transaction accordingly.
After finalizing the deposit, you can proceed with recording any additional deposits or continue with your other financial management tasks within QuickBooks Online.
By following this step-by-step guide, you can confidently record deposits in QuickBooks Online and maintain accurate financial records of your income. This process ensures that your business’s financial health remains transparent and organized, enabling effective decision-making and analysis.
Tips and Best Practices for Recording Deposits in QuickBooks Online
Recording deposits accurately in QuickBooks Online is crucial for maintaining organized and reliable financial records. To ensure the best possible outcome, consider the following tips and best practices:
- Regularly reconcile your bank accounts: Reconciling your bank accounts in QuickBooks Online ensures that your recorded deposits match the transactions in your bank statements. This helps identify any discrepancies and ensures the accuracy of your financial records.
- Use clear and descriptive names for your accounts: When selecting or creating accounts in QuickBooks Online, use names that clearly indicate their purpose. This makes it easier to allocate deposits and analyze your financial statements.
- Consistently categorize deposits: Use designated income accounts for different types of deposits. Consistency in categorization helps in tracking and comparing income sources accurately.
- Customize deposit reports: Utilize QuickBooks Online’s reporting features to generate customized reports that provide insights into your deposits, accounts receivable, and cash flow. These reports can be invaluable for financial analysis and decision-making.
- Consider integrating payment solutions: Explore options to integrate payment processing solutions with QuickBooks Online. This streamlines the deposit recording process by automatically syncing payments received.
- Maintain proper documentation: Keep all relevant documents, such as invoices, receipts, and bank statements, for reference and verification purposes. This documentation helps in auditing and resolving any discrepancies that may arise.
- Regularly backup your QuickBooks Online data: Protect your financial records by regularly backing up your QuickBooks Online data. This safeguards your deposit records and ensures they can be recovered in the event of data loss.
- Stay updated with QuickBooks Online features and updates: QuickBooks Online regularly releases updates and improvements. Stay informed about new features and enhancements that can enhance your deposit recording process and overall user experience.
By following these tips and best practices, you can streamline your deposit recording workflows, improve the accuracy of your financial records, and make informed decisions based on reliable data.
Remember, proper deposit recording in QuickBooks Online is essential for maintaining the financial health of your business and ensuring compliance with financial regulations and reporting requirements.
Conclusion
Recording deposits accurately in QuickBooks Online is a fundamental aspect of maintaining reliable financial records for your business. By following the step-by-step guide outlined in this article, you can confidently record your deposits and ensure the integrity of your financial data.
Understanding the different types of deposits in QuickBooks Online, such as “Undeposited Funds” and “Bank Deposit,” sets the foundation for accurate recording. Accessing the Banking menu, selecting the correct account, and clicking on the “Record Deposits” button initiate the deposit recording process.
Entering the deposit details, applying payments to invoices or sales receipts, and allocating deposits to specific accounts ensure comprehensive and organized tracking of your income sources and expenses. By following best practices, such as regular reconciliation of bank accounts, using clear account names, and customizing deposit reports, you can enhance the accuracy and efficiency of your deposit recording process.
Lastly, it is crucial to stay up-to-date with the latest features and updates in QuickBooks Online, and to maintain proper documentation and backup of your financial records for reference and security purposes.
By implementing these strategies and following the tips provided, you can successfully record deposits in QuickBooks Online and have a clear overview of your business’s financial health. Accurate deposit recording allows for effective financial analysis, decision-making, and ensures compliance with regulations.
Now it’s time to put your knowledge into practice and begin recording deposits in QuickBooks Online with confidence!