Introduction
Installing a CPU cooler is an essential step when building or upgrading a computer. The CPU cooler ensures that your processor is kept at an optimal temperature, preventing overheating and potential damage. Whether you’re a novice enthusiast or a seasoned computer builder, installing a CPU cooler is a crucial task that requires careful attention.
A CPU cooler is responsible for dissipating heat generated by the processor, maintaining its performance and longevity. Without a properly installed cooler, your computer might experience frequent crashes, performance issues, or even permanent damage to the CPU. That’s why it’s important to understand the process of installing a CPU cooler correctly.
In this guide, we will walk you through the step-by-step process of installing a CPU cooler. We’ll cover the tools and equipment you’ll need, as well as provide troubleshooting tips to help you overcome common challenges. By following these instructions, you’ll be able to safely and effectively install a CPU cooler, ensuring the optimal performance and lifespan of your computer’s processor.
Before we get started, it’s important to note that the specific steps and requirements may vary depending on the type of CPU cooler and motherboard you have. Please consult the instruction manual that came with your specific cooler for any manufacturer-specific guidelines or recommendations.
Now, let’s gather our tools and equipment and dive into the exciting world of CPU cooler installations!
Tools and Equipment Needed
Before you begin installing a CPU cooler, make sure you have the following tools and equipment ready:
1. Screwdriver: You’ll need a screwdriver that fits the screws or bolts used to secure the CPU cooler to the motherboard. The specific size and type of screwdriver will depend on the cooler and motherboard you’re using, so consult the instruction manual to determine the appropriate screwdriver.
2. Thermal Paste: Thermal paste is a crucial component in conducting heat from the processor to the CPU cooler. It helps fill in microscopic imperfections between the CPU and cooler, ensuring efficient heat transfer. Some CPU coolers come with pre-applied thermal paste, but if yours doesn’t, make sure to have a high-quality thermal paste ready.
3. Isopropyl Alcohol and Microfiber Cloth: Before applying thermal paste, it’s important to clean the surface of the processor to remove any existing thermal paste or debris. Isopropyl alcohol and a microfiber cloth are ideal for this task, as they effectively remove residue without leaving behind lint or other particles.
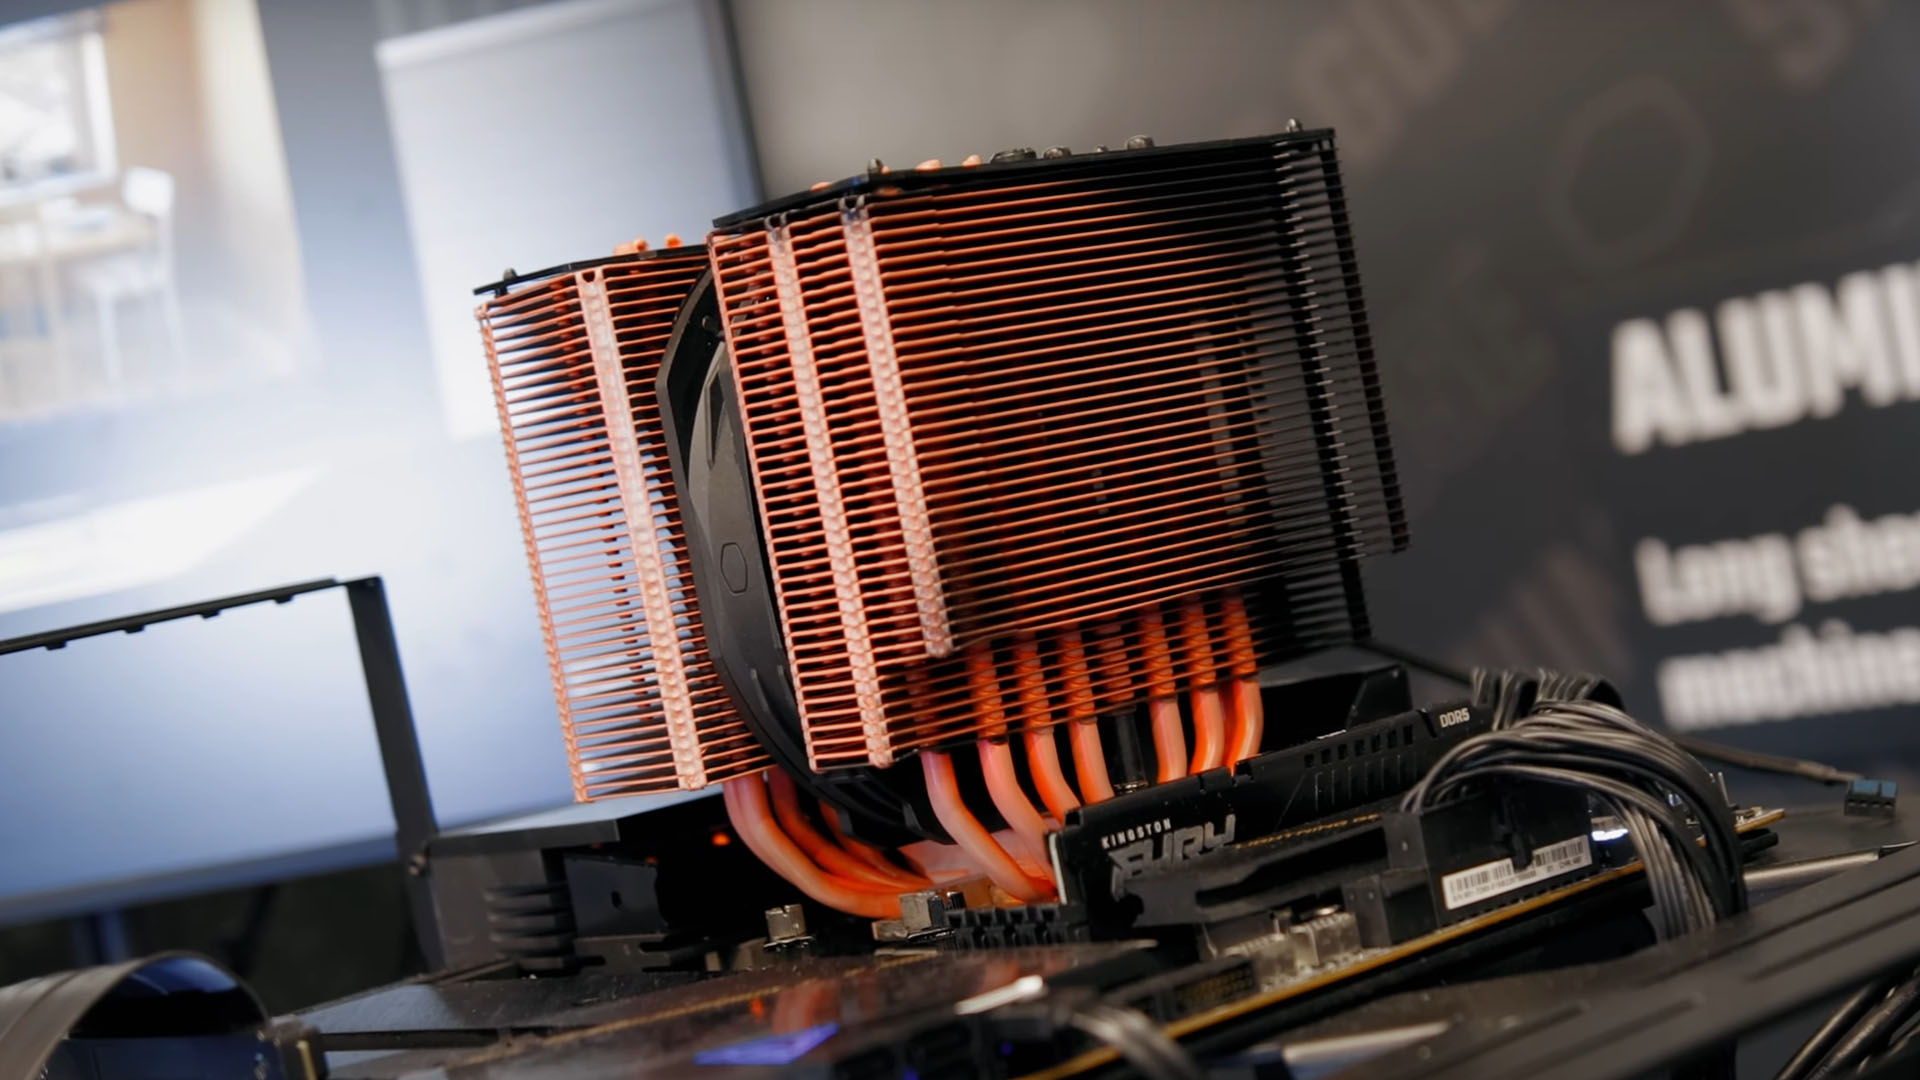
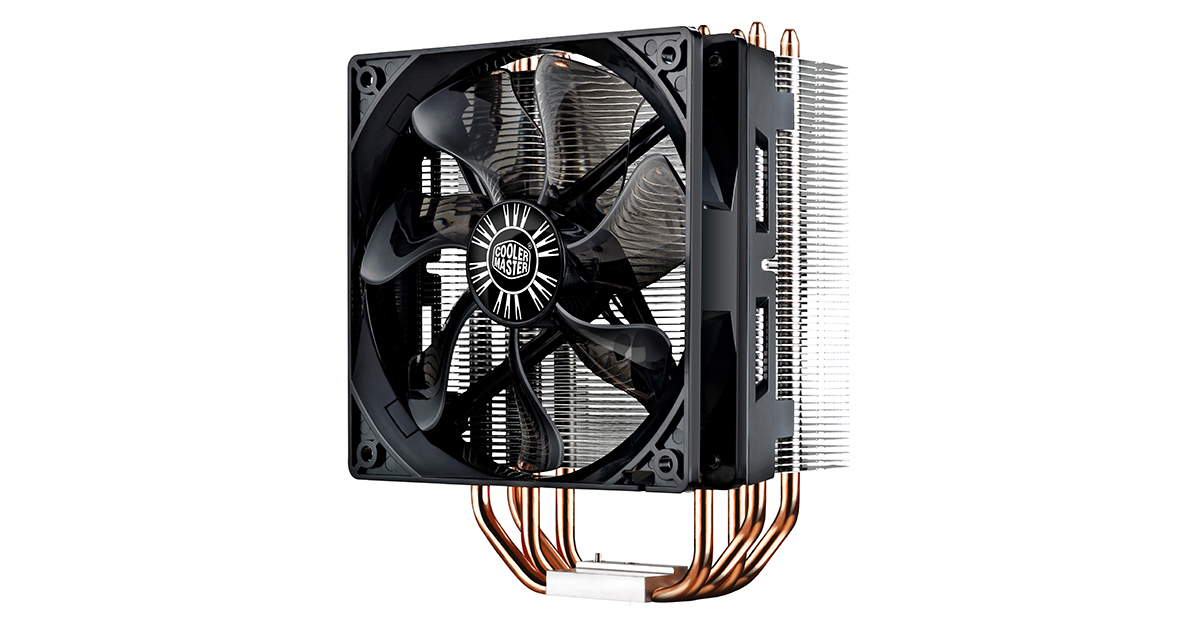
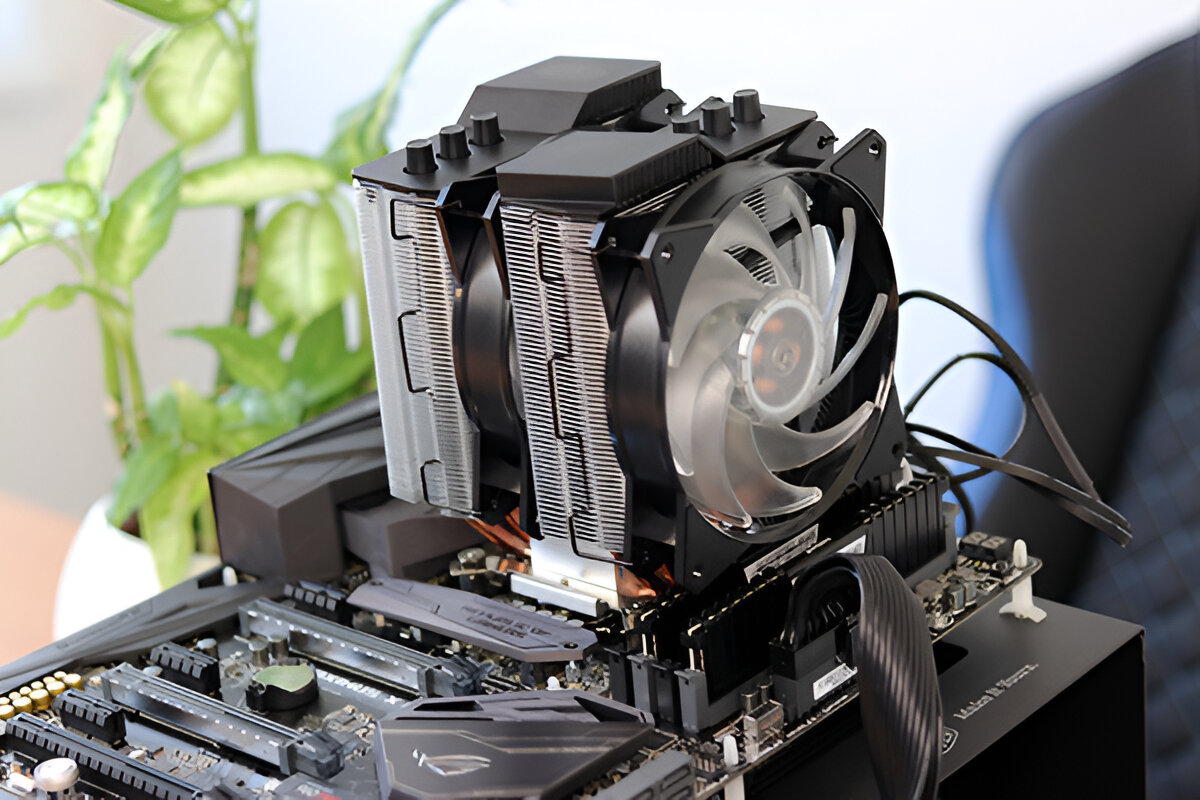
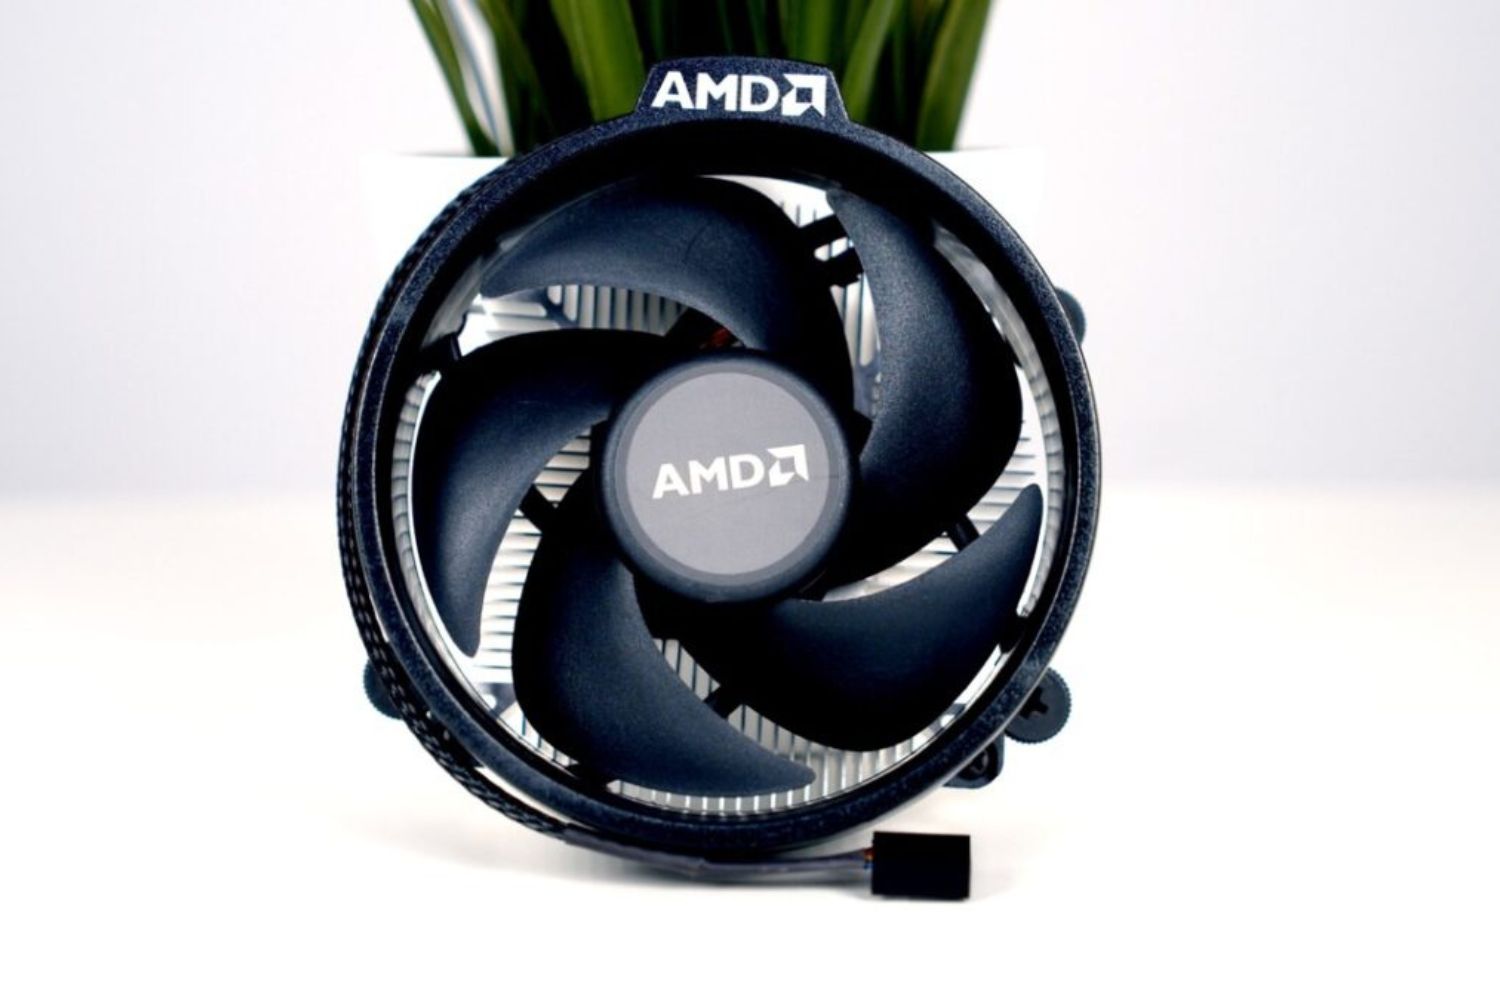
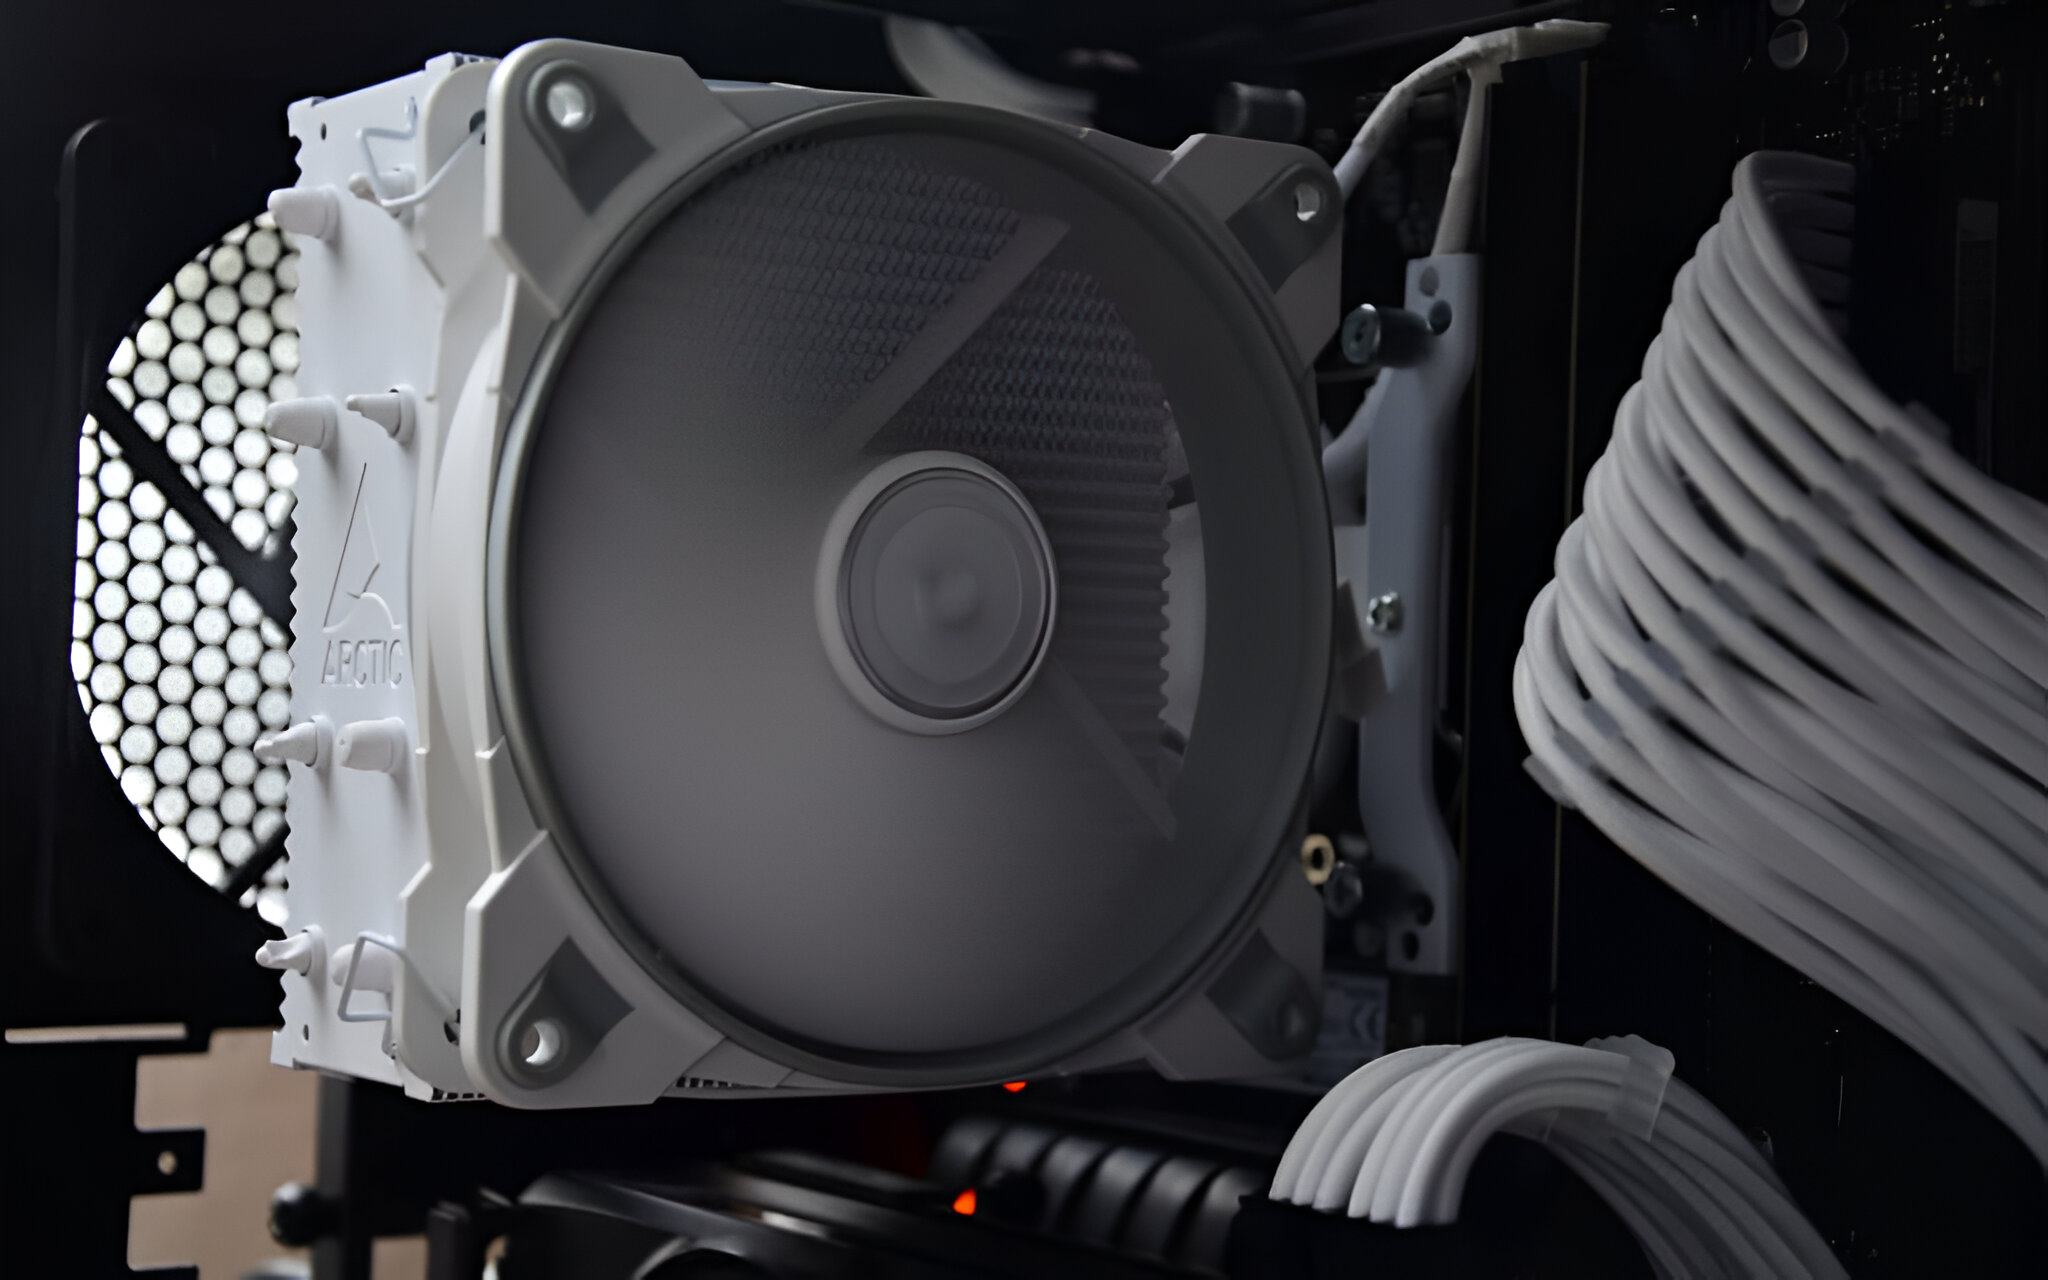
4. CPU Cooler: Of course, you’ll need the CPU cooler itself. There are various types of CPU coolers, including air coolers and liquid coolers. Choose one that is compatible with your processor and fits within your budget and cooling preferences.
5. Anti-static Wrist Strap: While not strictly necessary, an anti-static wrist strap is highly recommended to protect your components from static electricity. Static charges can damage sensitive electronic parts, so wearing an anti-static wrist strap while working on your computer can help prevent any mishaps.
These are the essential tools and equipment needed for installing a CPU cooler. Make sure you have everything on hand before you proceed to the next step. Having all the necessary tools ready will ensure a smooth and hassle-free installation process.
Preparing the Motherboard
Before installing the CPU cooler, it’s important to prepare the motherboard to ensure a proper and secure fit. Follow these steps to prepare the motherboard:
1. Power Off and Disconnect: Ensure that your computer is powered off and unplugged from the electrical outlet. This will prevent any accidents or damage during the installation process.
2. Remove Existing Cooler (if applicable): If you’re replacing an existing CPU cooler, carefully remove it by loosening the screws or bolts that secure it to the motherboard. Gently twist and lift the cooler to detach it from the processor.
3. Clean the CPU Surface: Use a small amount of isopropyl alcohol and a microfiber cloth to clean the surface of the CPU. This will help remove any residue or thermal paste, ensuring a clean and smooth surface for the new cooler. Be gentle and avoid applying excessive pressure while cleaning.
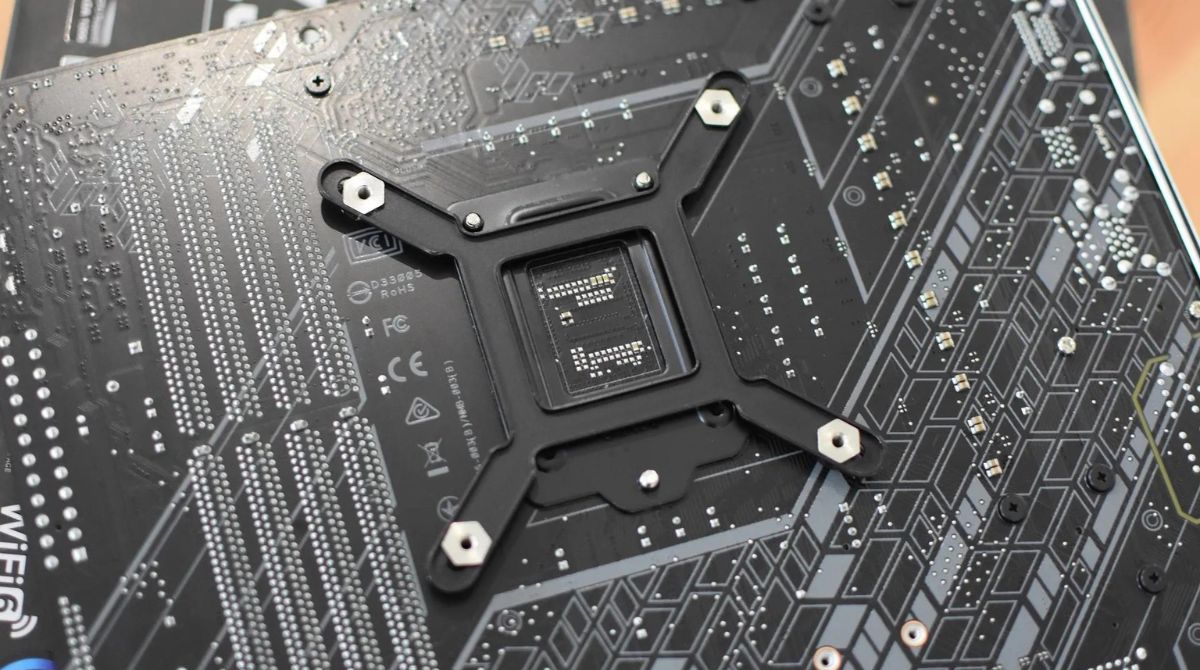
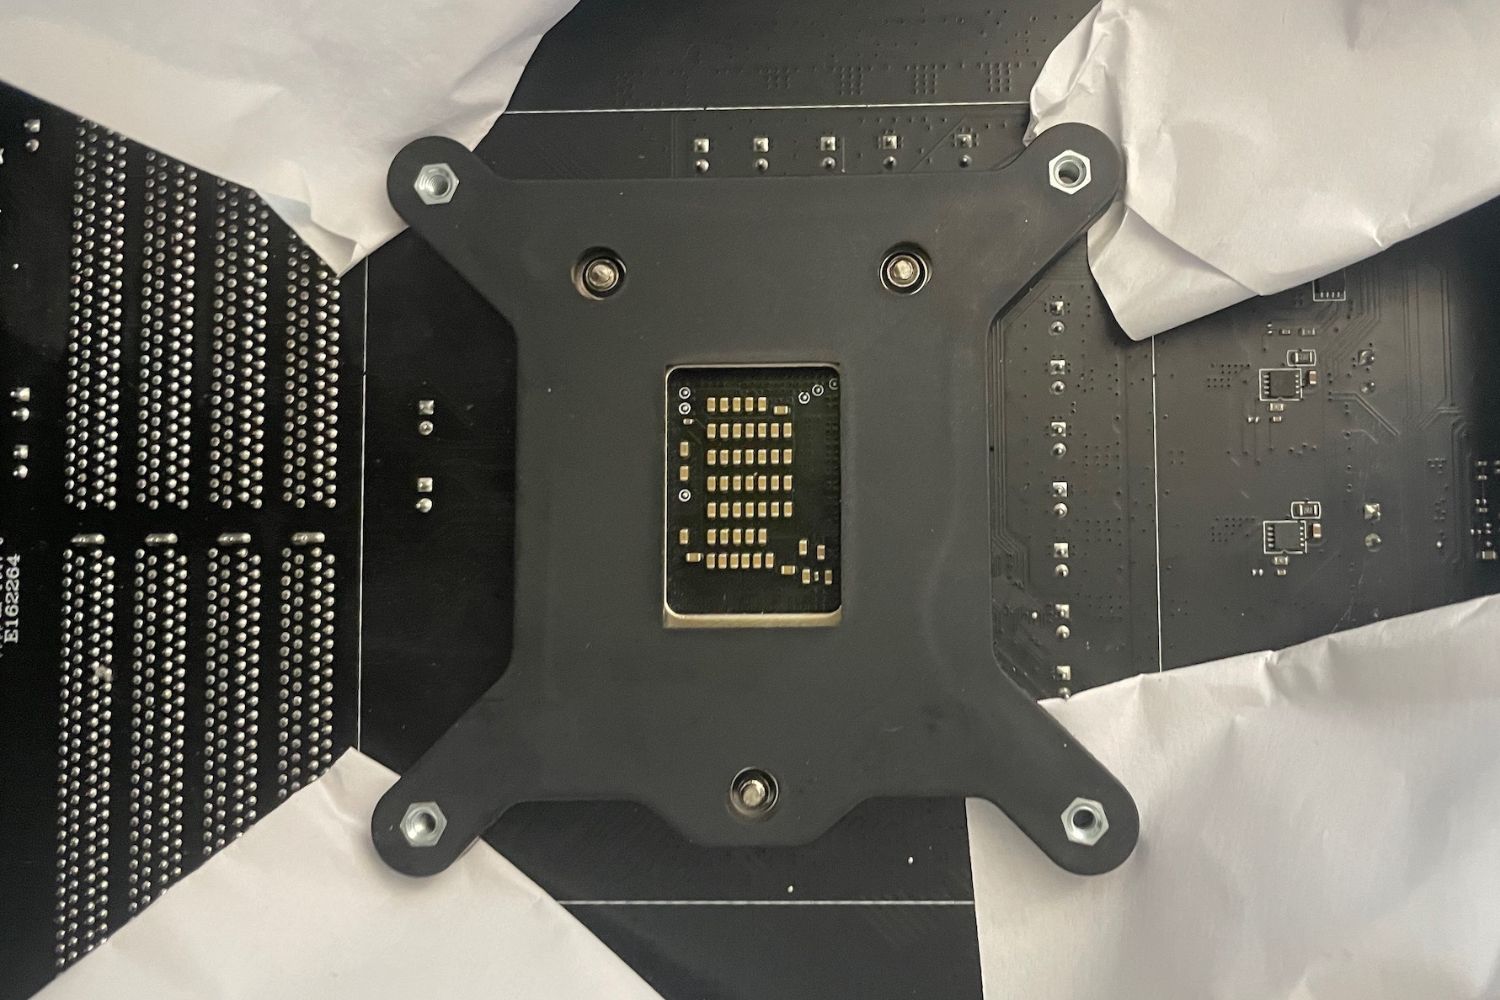
4. Check Mounting Holes: Examine the motherboard’s CPU socket area to locate the mounting holes for the cooler. These holes may be labeled or correspond to a specific cooler type (such as LGA or AM4). Ensure that the mounting holes align with the cooler you’re installing.
5. Install Backplate (if necessary): Some CPU coolers require a backplate to provide additional stability. If your cooler includes a backplate, follow the manufacturer’s instructions to install it onto the back of the motherboard. Make sure it is properly aligned with the CPU socket.
6. Apply Standoffs (if necessary): For certain CPU coolers, standoffs or mounting brackets may be needed to secure the cooler to the motherboard. Check the cooler’s instructions and attach the standoffs or brackets as directed.
By carefully preparing the motherboard, you’ll ensure a solid foundation for the CPU cooler installation. Taking the time to clean the CPU surface and check for necessary components like backplates and standoffs will help ensure a successful installation.
Applying Thermal Paste
Thermal paste is a crucial component in ensuring effective heat transfer between the CPU and the cooler. Follow these steps to apply thermal paste correctly:
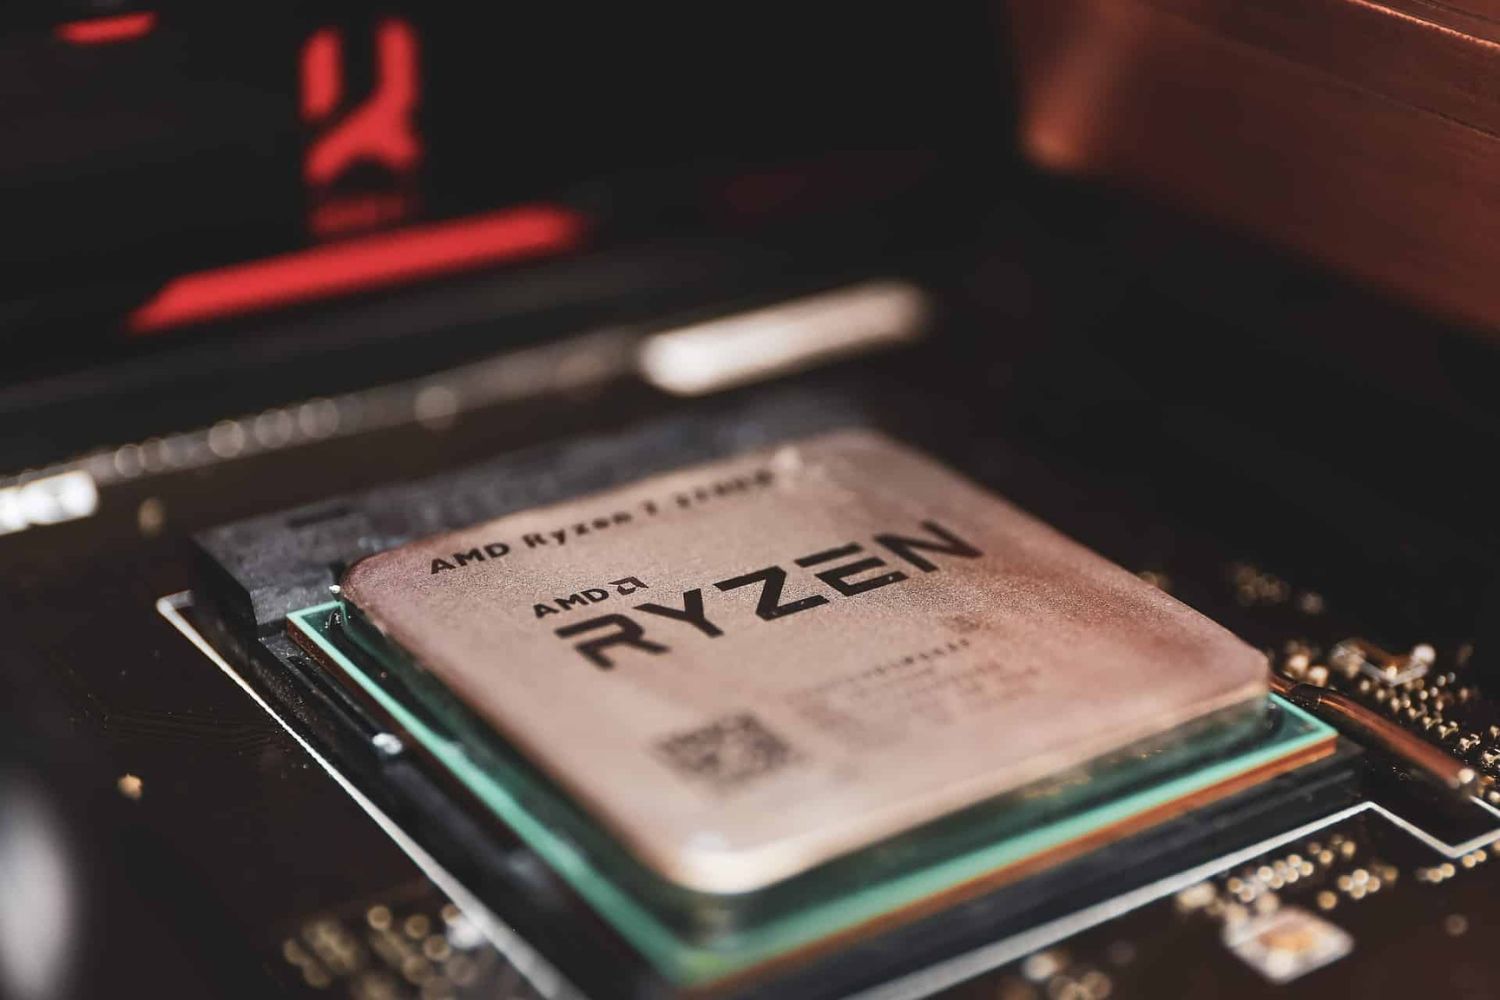
1. Locate the CPU: Identify the location of the CPU on the motherboard. It is usually a square or rectangular shape with numerous tiny pins or contacts.
2. Identify the contact surface: Look for a smooth, metallic surface on top of the CPU. This is where the thermal paste will be applied.
3. Dispense the thermal paste: Depending on the type of thermal paste you have, there are different methods for dispensing it. Some come in a small syringe, while others may be in a tube. Follow the manufacturer’s instructions to dispense an appropriate amount of thermal paste onto the center of the CPU contact surface.
4. Spread the thermal paste: Gently spread the thermal paste over the CPU surface using a plastic card, a clean fingertip (with gloves or an anti-static wrist strap), or a thermal paste applicator. Be careful not to press too hard or apply excessive force, as this can cause air bubbles or uneven coverage.
5. Ensure even coverage: The goal is to achieve a thin, even layer of thermal paste that covers the entire CPU surface. This will help maximize heat transfer between the CPU and the cooler. Avoid applying too much thermal paste, as it can lead to poor heat transfer efficiency.
6. Verify the CPU cooler’s instructions: Some CPU coolers may have specific guidelines for thermal paste application. Consult the instructions provided with your cooler to ensure you follow any manufacturer recommendations or requirements.
Remember, the goal of applying thermal paste is to improve the contact and heat transfer between the CPU and the cooler. By following these steps and applying an appropriate amount of thermal paste, you’ll help ensure efficient cooling and optimal performance for your CPU.
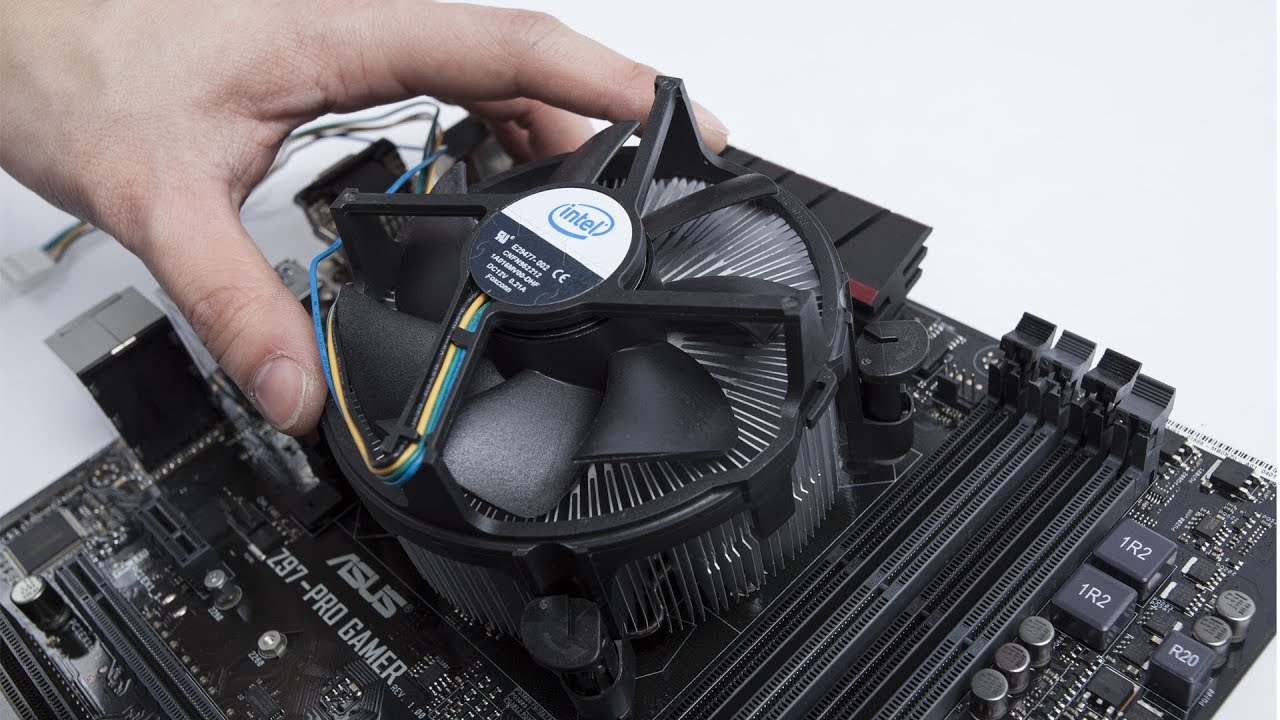
Attaching the CPU Cooler
Now that the thermal paste is applied, it’s time to attach the CPU cooler. Follow these steps to securely install the CPU cooler onto the motherboard:
1. Orient the CPU cooler: Identify the correct orientation of the CPU cooler. Most coolers have an arrow or marking that indicates the direction of airflow. Make sure this aligns with the desired airflow direction in your system.
2. Line up the mounting holes: Carefully position the CPU cooler above the CPU socket, aligning the mounting holes with the standoffs or brackets on the motherboard. Take note of any additional brackets or retention mechanisms that need to be attached.
3. Secure the cooler: Place the cooler onto the CPU socket, ensuring that it is positioned evenly and centered over the CPU. Gently press down and align the screw holes or mounting points.
4. Attach screws or clips: Depending on the type of CPU cooler, you may need to use screws or clips to secure it in place. Follow the manufacturer’s instructions to attach the necessary fasteners, making sure to tighten them evenly in a diagonal pattern to apply equal pressure.
5. Check for proper installation: Ensure that the CPU cooler sits flush and level on the CPU socket. Double-check that it is securely fastened and there is no wobbling or movement. Confirm that any retention mechanisms or brackets are properly engaged.
6. Connect the fan(s) and cables: If your CPU cooler includes a fan or multiple fans, connect them to the designated CPU fan headers on the motherboard. Also, connect any additional cables such as RGB lighting or fan control cables according to the manufacturer’s instructions.
By following these steps, you’ll securely attach the CPU cooler to your motherboard. Take your time to ensure proper alignment and fastening to avoid any potential damage or poor cooling performance. Once the CPU cooler is securely in place, you’re one step closer to a properly cooled and functional computer system.
Checking for Proper Installation
After attaching the CPU cooler, it is crucial to perform a few checks to ensure that it is properly installed and functioning correctly. Follow these steps to verify the installation:
1. Visual Inspection: Take a close look at the CPU cooler and surrounding components. Ensure that there are no loose screws, wires, or any obstructions that could interfere with the cooler’s operation or contact with the CPU.
2. Proper Contact: Verify that the CPU cooler is making full contact with the CPU. Check for an even spread of thermal paste between the cooler and the CPU surface. Uneven contact or gaps may lead to inadequate cooling performance.
3. Secure Mounting: Gently press on the CPU cooler to confirm that it is securely attached. It should not move or wiggle excessively. If you notice any instability, carefully inspect the mounting screws or clips and tighten them if necessary.
4. Fan Operation: Power on your computer and observe the CPU cooler’s fan(s). Ensure that the fan(s) spin freely and that there are no unusual noises. If the fan(s) are not operational or there are abnormal sounds, double-check the fan connections and ensure they are correctly plugged into the motherboard.
5. Temperature Monitoring: After the computer has been running for a few minutes, check the CPU temperature using hardware monitoring software. Compare the temperature readings to the normal operating range for your specific CPU. If the temperatures are significantly higher than expected, it may indicate an improper installation or inadequate cooling.
6. Stress Testing: To further validate the stability and efficiency of the CPU cooler, consider running a stress test on your computer. Stress tests like Prime95 or CPU-Z can put a heavy load on the CPU and help identify any potential overheating issues.
By performing these checks, you can ensure that the CPU cooler is properly installed and functioning as it should. If you encounter any irregularities or concerns during the inspection process, refer back to the installation instructions, double-check your steps, or consult with a professional for further assistance.
Troubleshooting Tips
Though installing a CPU cooler is a straightforward process, issues can occasionally arise. Here are some troubleshooting tips to help you overcome common challenges:
1. High temperatures: If your CPU temperatures are higher than expected, first ensure that the CPU cooler is securely installed and making proper contact with the CPU. Check the fan speed and adjust it if necessary. Also, verify the airflow in your system by ensuring that cables and components are not obstructing the cooler or case fans.
2. Noisy fan: If the CPU cooler fan is making excessive noise, check for any obstructions like cables touching the blades. Clean the fan and heatsink to remove any accumulated dust or debris. If the noise persists, consider replacing the fan with a quieter model.
3. Overheating and shutdowns: If your system is experiencing frequent overheating or sudden shutdowns, it could indicate insufficient cooling. Double-check that the cooler is securely mounted, the thermal paste is properly applied, and the fans are functioning correctly. It may be necessary to upgrade to a more powerful CPU cooler if your current one is unable to handle the heat generated by your processor.
4. Incompatibility with motherboard/CPU: It’s essential to check for compatibility between the CPU cooler, motherboard, and CPU. Ensure that the cooler’s mounting mechanism matches the CPU socket of your motherboard and that it supports your specific CPU model. If there are compatibility issues, consider finding an alternative CPU cooler that is compatible with your setup.
5. Inconsistent temperature readings: If you’re receiving inconsistent temperature readings from monitoring software, make sure you are using reliable and updated software. Ensure that the temperature sensors are properly calibrated and functioning correctly. It’s also worth checking for any BIOS updates for your motherboard that may address temperature reporting issues.
6. Thermal paste application: If you suspect improper thermal paste application, you may need to remove the cooler, clean the surfaces, and reapply the thermal paste. Make sure to use the appropriate amount and spread it evenly over the CPU surface to ensure optimal heat transfer.
If you encounter any issues during the CPU cooler installation or experience ongoing problems with cooling performance, it’s advisable to consult the manufacturer’s support documentation or seek assistance from a qualified technician. They can provide specific solutions based on your hardware configuration and help troubleshoot any issues you’re facing.
Conclusion
Installing a CPU cooler is a crucial step in building or maintaining a computer system. By following the steps outlined in this guide, you can ensure the proper installation and functioning of your CPU cooler, which is essential for maintaining optimal CPU performance and preventing overheating.
Throughout this guide, we discussed the tools and equipment you’ll need, how to prepare the motherboard, the process of applying thermal paste, attaching the CPU cooler, checking for proper installation, and troubleshooting common issues. By taking the time to properly install and maintain your CPU cooler, you can enjoy a reliable and efficient computer system.
Remember to consult your specific CPU cooler and motherboard manuals for any manufacturer-specific instructions or recommendations. Each CPU cooler installation may have some variations, so it’s essential to follow the instructions provided with your specific hardware.
If you encounter any difficulties or are unsure about any step of the installation process, don’t hesitate to seek assistance from a professional or consult online forums dedicated to computer building and maintenance. They can provide valuable insights and guidance.
By ensuring a proper CPU cooler installation, you not only safeguard your CPU from potential damage due to overheating but also ensure that your system performs optimally under heavy workloads.
We hope this guide has provided you with the necessary knowledge and confidence to install a CPU cooler successfully. Remember to prioritize safety, double-check your work, and take your time during the installation process. With proper cooling, your CPU will be able to deliver the best performance for all your computing needs.