Introduction
Welcome to our comprehensive guide on how to install a CPU on a motherboard. Whether you’re a seasoned computer enthusiast or a first-time builder, understanding the process of properly installing a CPU is crucial for the smooth operation of your computer system.
The CPU, or Central Processing Unit, is the brain of your computer. It performs all the necessary calculations and instructions, allowing your computer to run applications and perform various tasks. Thus, ensuring a correct and secure installation is essential for optimal performance and longevity of your system.
In this article, we will walk you through the step-by-step process of installing a CPU on a motherboard. We’ll cover everything from gathering the necessary tools and equipment to attaching the CPU cooler. By following these instructions, you’ll be able to confidently install a CPU on a motherboard, even if you have little to no prior experience.
Before we dive into the installation process, it’s important to note that the specific steps may vary depending on the type of CPU socket and motherboard you have. Therefore, we recommend consulting the user manuals provided with your CPU and motherboard for any specific instructions or requirements. This will ensure that you follow the manufacturer’s guidelines and avoid any potential damage or compatibility issues.
Now, let’s get started with our step-by-step guide on how to install a CPU on a motherboard.
Step 1: Gather the necessary tools and equipment
Before you begin the CPU installation process, it’s important to gather all the necessary tools and equipment. This will ensure that you have everything within reach and avoid any interruptions during the installation.
Here’s a list of the essential tools and equipment you’ll need:
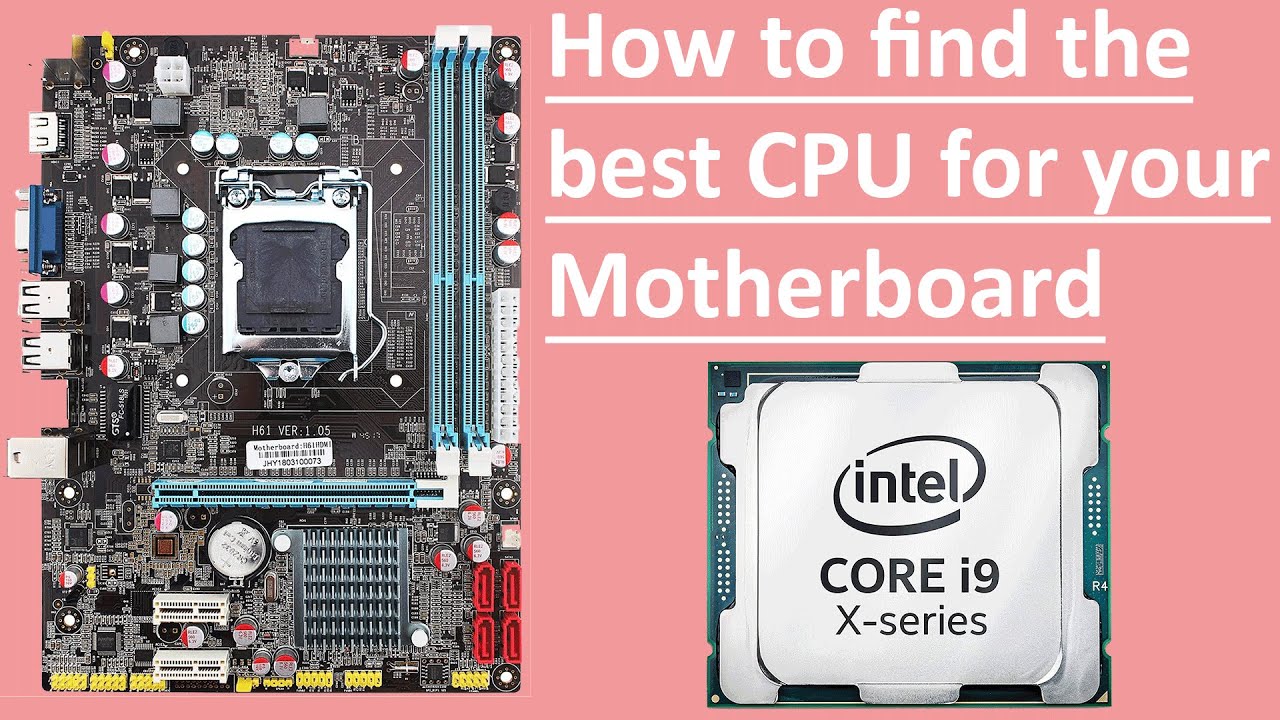
- A compatible CPU and motherboard: Make sure the CPU is compatible with the motherboard’s socket type. Refer to the specifications of both the CPU and motherboard to ensure compatibility.
- Screwdriver: You may need a screwdriver for certain motherboard mounting brackets or CPU coolers. The type and size of the screwdriver will depend on your specific hardware.
- Thermal paste (optional): Thermal paste helps improve heat transfer between the CPU and the CPU cooler. If your CPU cooler doesn’t come with pre-applied thermal paste, you’ll need to have some on hand.
- Anti-static wrist strap (optional): While not necessary, an anti-static wrist strap can help dissipate any static electricity you may have, preventing potential damage to sensitive components.
It’s crucial to handle the CPU and motherboard components with caution. Static electricity can damage the delicate electronic components, so make sure to ground yourself by either using an anti-static wrist strap or touching a grounded metal surface before handling the components.
This step may seem simple but gathering the necessary tools and equipment beforehand will make the CPU installation process much smoother and more efficient. Now that you have all the required items, let’s move on to preparing the motherboard in the next step.
Step 2: Preparing the motherboard
Now that you’ve gathered all the necessary tools and equipment, it’s time to prepare the motherboard for CPU installation. This step involves a few important tasks to ensure a proper installation process.
Here’s what you need to do:
- Refer to the motherboard manual: Familiarize yourself with the motherboard layout and socket location. This will help you properly identify the CPU socket.
- Place the motherboard on a flat and non-conductive surface: Make sure you have a clean and static-free workspace to work on. Place the motherboard on a clean surface, such as an anti-static mat or non-conductive material like wood or cardboard.
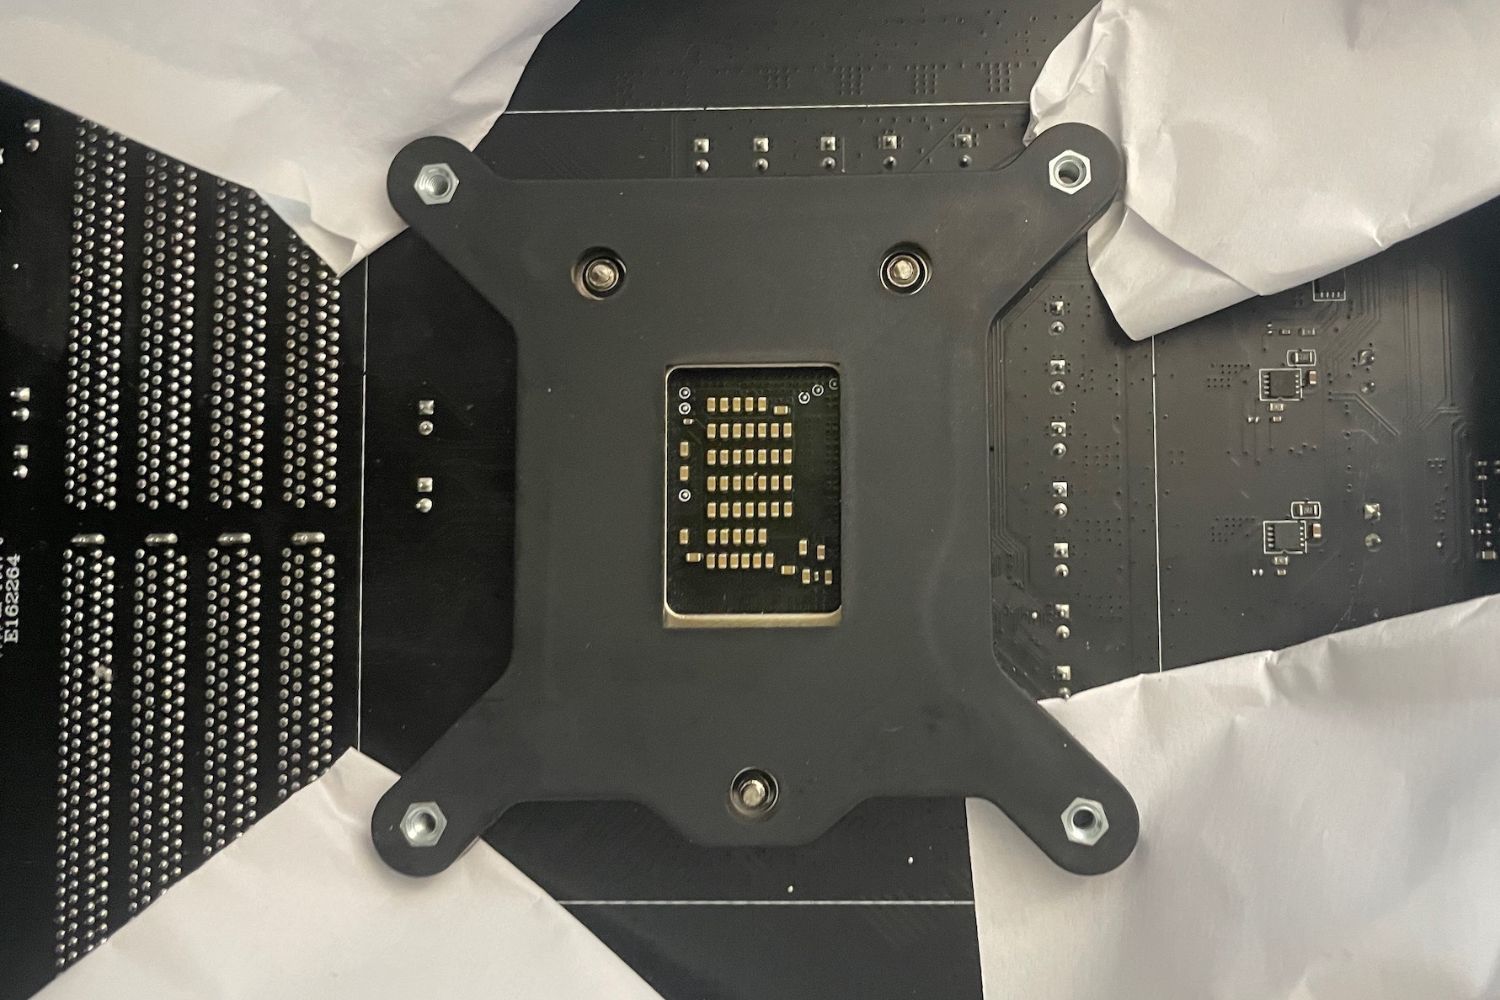
- Open the CPU socket: Locate the CPU socket and carefully open the socket latch or cover. The latch or cover may vary depending on the motherboard model, so refer to the manual for specific instructions on how to open it.
- Inspect the socket and motherboard: Before installing the CPU, inspect the CPU socket for any dirt, debris, or bent pins. Ensure that the socket is clean and free from any obstructions. Similarly, check the motherboard for any damage or loose components.
- Adjust socket lever (if applicable): Some CPU sockets have a lever mechanism to secure the CPU in place. If your motherboard has this lever, make sure it is in the raised position to allow easy installation of the CPU.
By carefully following these steps, you will ensure that the motherboard is ready for the CPU installation. Taking the time to properly prepare the motherboard will help prevent any complications or damage during the installation process. Now, let’s move on to preparing the CPU in the next step.
Step 3: Preparing the CPU
With the motherboard prepared, you’re now ready to move on to preparing the CPU. This step involves handling the CPU with care and making sure it’s ready for installation.
Follow these steps to prepare the CPU:
- Ensure a clean and static-free environment: Find a clean and well-lit area to work on. It’s crucial to avoid any static electricity, as it can damage the CPU. Ground yourself by either using an anti-static wrist strap or by touching a grounded metal surface.
- Remove the CPU from its packaging: Open the CPU packaging carefully, ensuring you don’t touch the pins or the CPU’s delicate surface. Handle the CPU by its sides and take note of any arrow or marker on the CPU that indicates the orientation for installation.
- Inspect the CPU for any damage: Before proceeding with the installation, check the CPU for any visible damage or bent pins. If you notice any issues, contact the manufacturer for assistance.
- Identify the CPU socket alignment: Look for the corresponding alignment markers or notches on the CPU socket and CPU itself. Align these markers to ensure proper installation orientation.
- Avoid excessive pressure: Avoid applying excessive pressure to the CPU. Gently place the CPU into the socket, ensuring it rests in place without any tilting or misalignment.
By following these steps, you will ensure that the CPU is well-prepared for installation. Taking the time to handle the CPU with care and inspecting it for any damage is crucial for a successful installation. Now, let’s move on to the next step: installing the CPU on the motherboard.
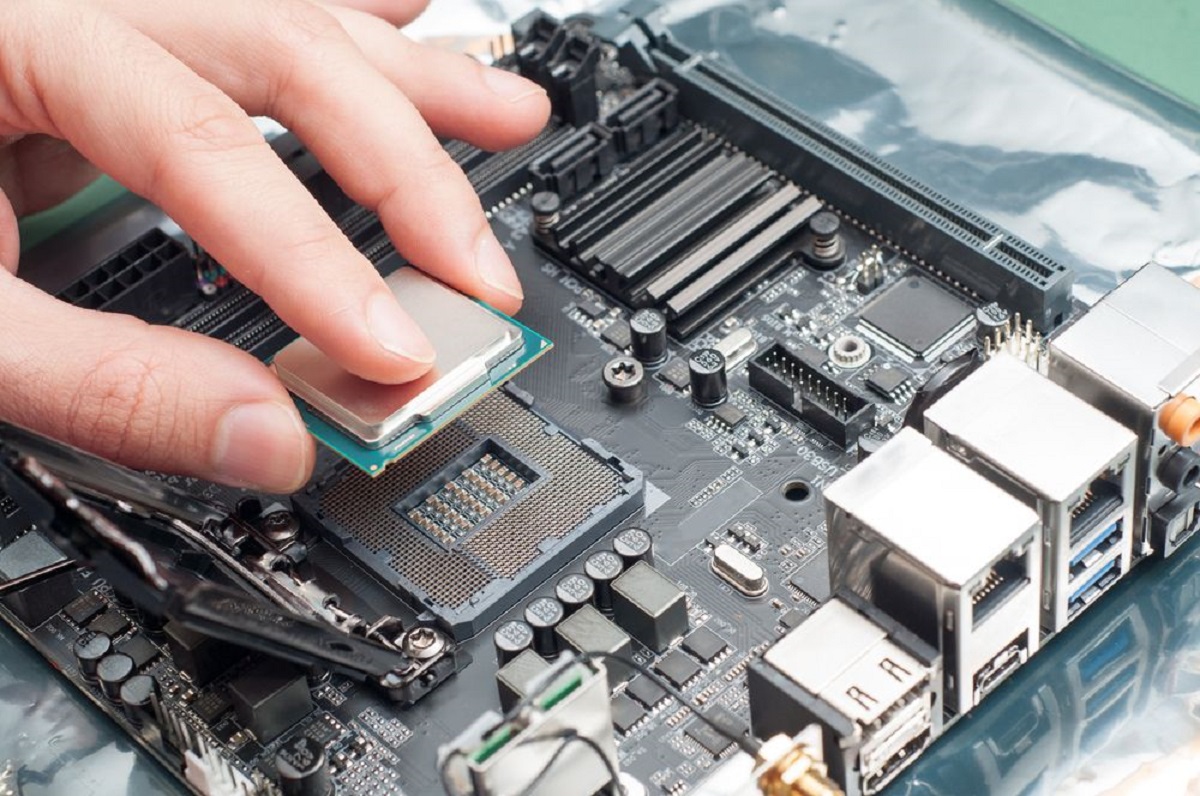
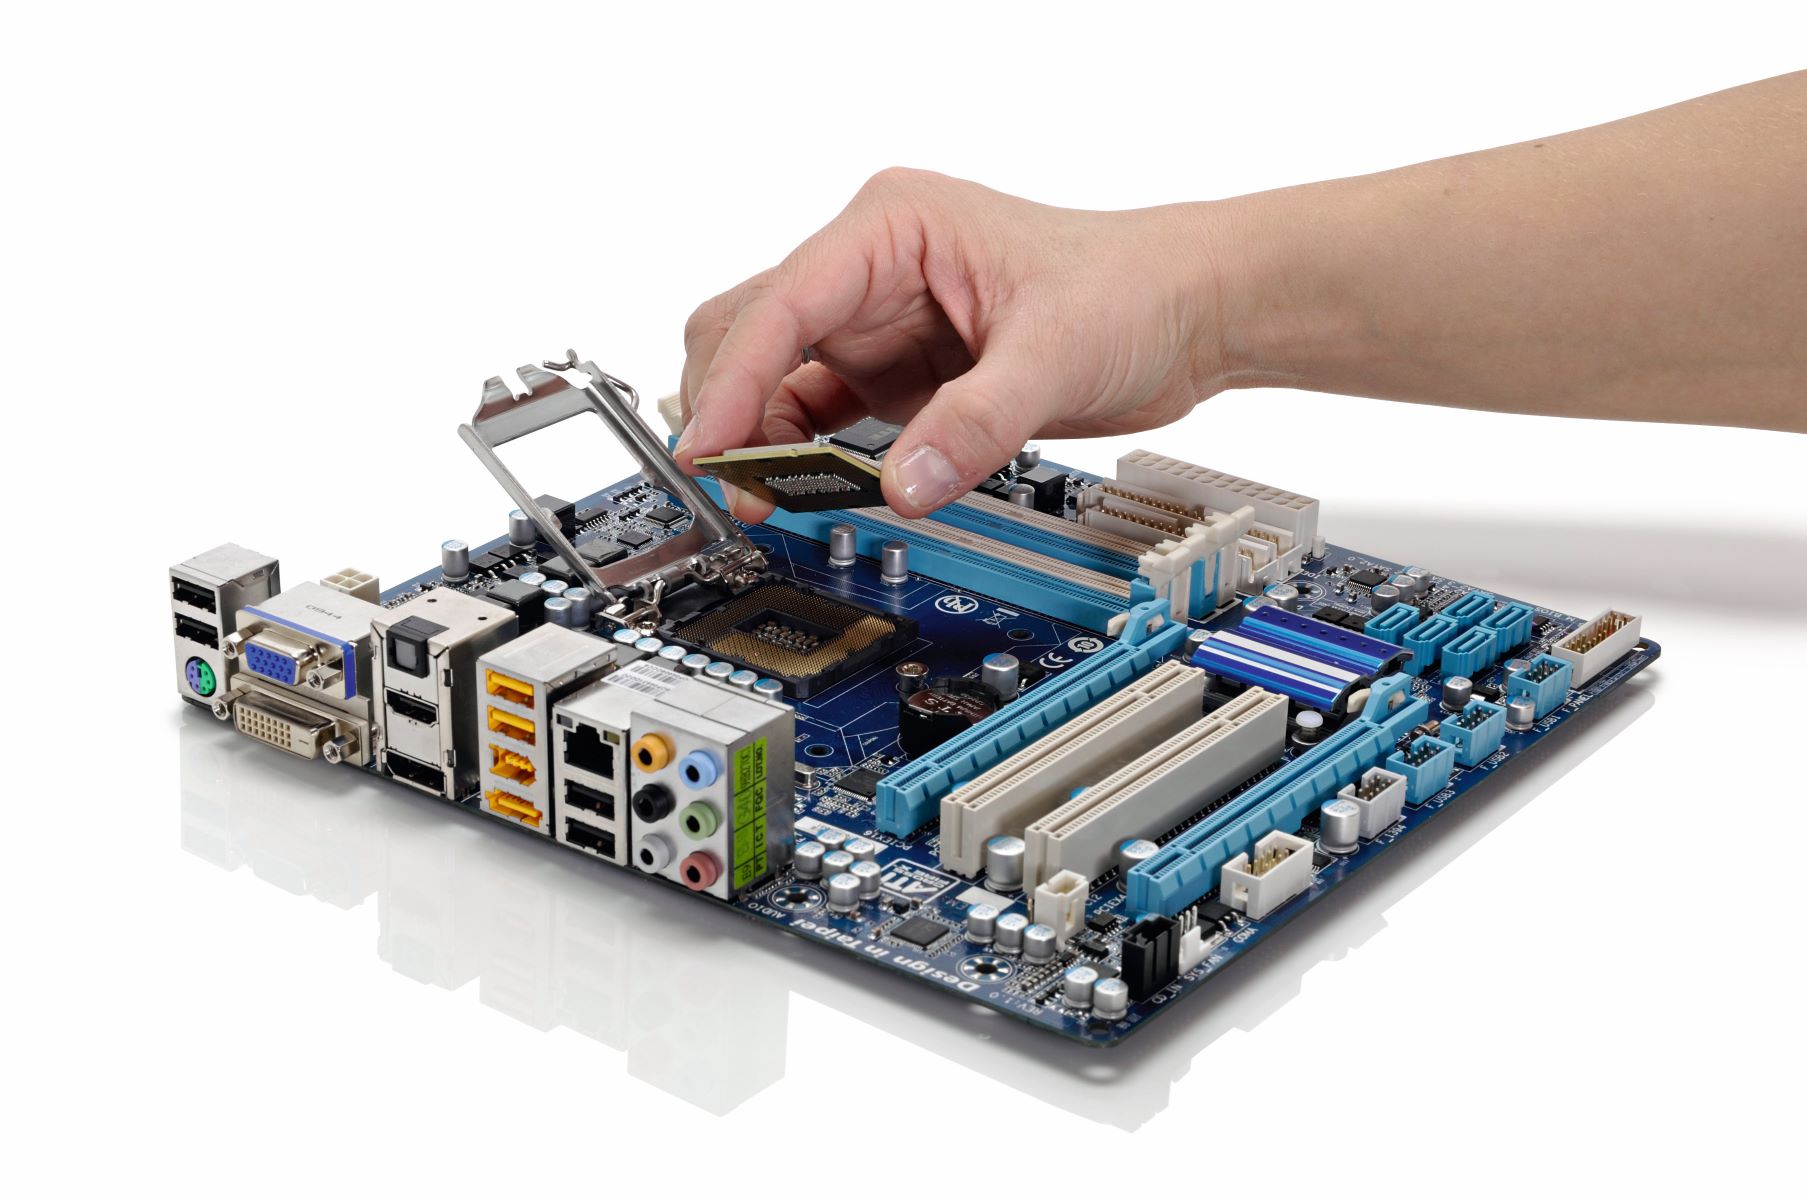
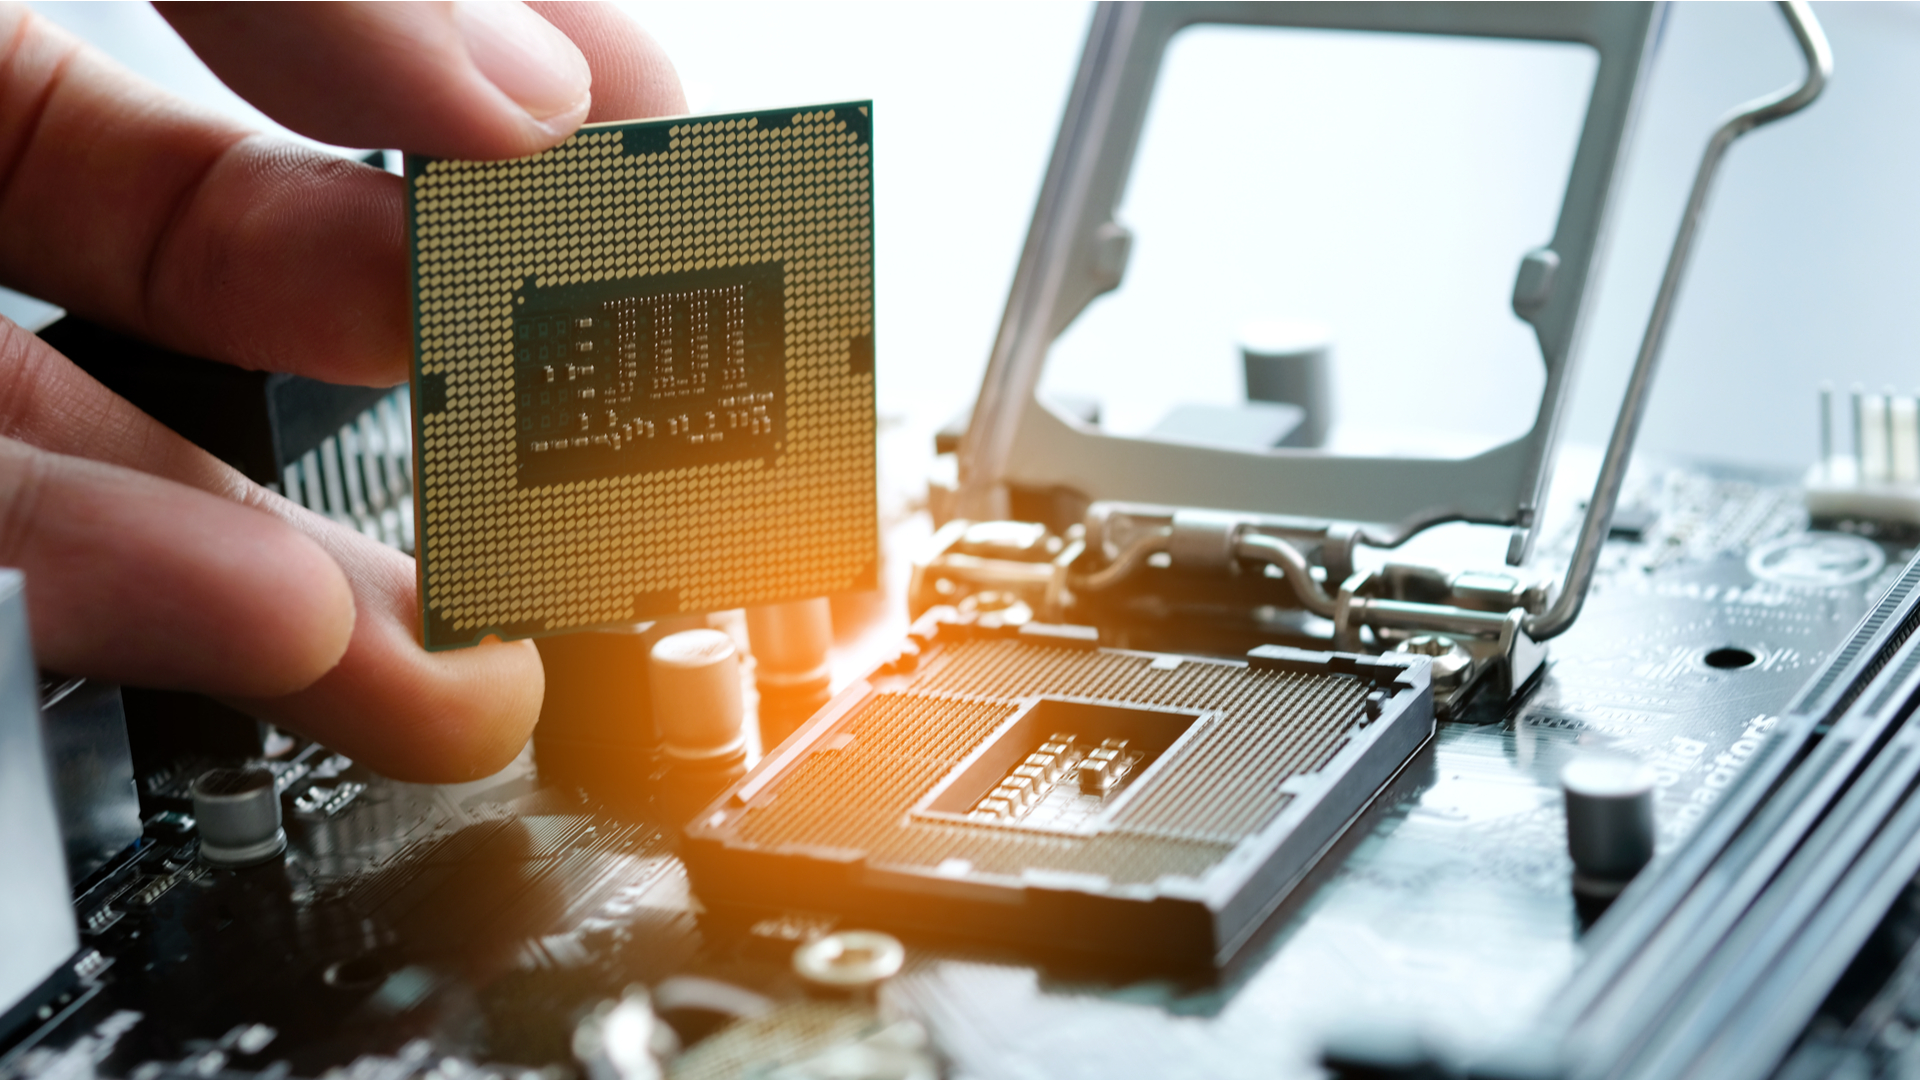
Step 4: Installing the CPU on the motherboard
Now that you have prepared both the motherboard and the CPU, it’s time to install the CPU onto the motherboard. This step requires careful handling to ensure a secure and proper installation.
Follow these steps to install the CPU:
- Locate the CPU socket on the motherboard: Refer to the motherboard manual to identify the CPU socket. It is usually a square or rectangular socket with pins or contacts at the bottom.
- Align the CPU correctly: Match the alignment markers or notches on the CPU with those on the socket. This ensures that the CPU is properly oriented for installation. Take extra care to avoid misalignment.
- Lower the CPU into the socket: Gently lower the CPU into the socket, making sure it sits evenly and correctly aligned. Avoid applying any force or pressure; the CPU should fit snugly into place with minimal effort.
- Do not touch the CPU pins or contacts: It’s crucial to avoid touching the pins or the contacts on the bottom of the CPU. Oils and debris from your fingers can interfere with the CPU’s performance.
Once the CPU is properly installed, you’re ready to move on to the next step: securing the CPU with the retention mechanism.
Step 5: Securing the CPU with the retention mechanism
After installing the CPU onto the motherboard, it’s important to secure it in place using the retention mechanism. This mechanism varies depending on the motherboard model, but it is designed to hold the CPU firmly in position and ensure proper connectivity.
Follow these steps to secure the CPU with the retention mechanism:
- Refer to the motherboard manual: Consult the motherboard manual to understand the specific instructions for securing the CPU. Different motherboards may have different retention mechanisms, so it’s important to follow the manufacturer’s guidelines.
- Lower the retention arm or bracket: Some motherboards have a retention arm that needs to be lowered to secure the CPU. Carefully lower the arm until it locks into place over the CPU.
- Apply gentle pressure: Once the retention arm is in place, apply gentle pressure to ensure the CPU is securely seated in the socket. Be careful not to use excessive force.
- Double-check the installation: Take a moment to visually inspect the CPU and make sure it is still properly aligned and seated in the socket. Ensure the retention arm is fully latched and secured.
By following these steps, you will ensure that the CPU is securely held in place by the retention mechanism. This is essential for maintaining a stable connection and preventing any movement or dislodging of the CPU during use.
Now that the CPU is securely in place, let’s move on to the next step: applying thermal paste, if necessary.
Step 6: Applying thermal paste (if necessary)
In some cases, it may be necessary to apply thermal paste to the CPU before attaching the CPU cooler. Thermal paste helps improve the heat transfer between the CPU and the CPU cooler, enhancing overall cooling performance.
Follow these steps to apply thermal paste:
- Check if thermal paste is necessary: Not all CPU coolers require thermal paste, as some come with pre-applied thermal compound. Make sure to check the manufacturer’s instructions or the cooler’s packaging to determine if thermal paste is needed.
- Clean the CPU surface (if needed): If you’re reusing an old CPU or have accidentally removed the pre-applied thermal compound, it’s important to clean the CPU surface. Use isopropyl alcohol and a lint-free cloth or cotton swab to gently remove any residue.
- Apply a pea-sized amount of thermal paste: Using a thermal paste applicator or a clean fingertip, apply a small pea-sized dot of thermal paste onto the center of the CPU surface. Avoid applying too much paste, as it can cause excess spillage and interfere with cooling efficiency.
- Evenly spread the thermal paste (optional): If you prefer a more even spread of thermal paste, you can use a plastic card or a spatula to gently spread the paste across the CPU surface in a thin layer. Be careful not to apply too much pressure or disturb the CPU alignment.
Remember that thermal paste is essential to ensure efficient heat transfer between the CPU and the cooler. A proper application of thermal paste helps prevent overheating and maintains optimal CPU performance.
With the thermal paste applied (if necessary), we’re ready for the next step: attaching the CPU cooler.
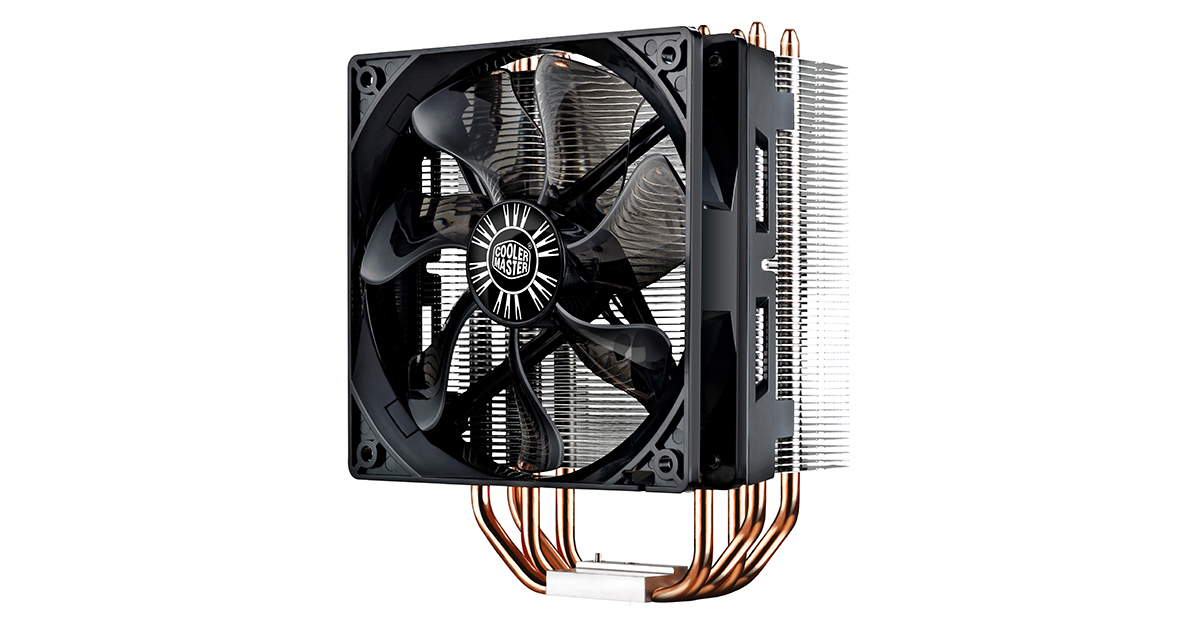
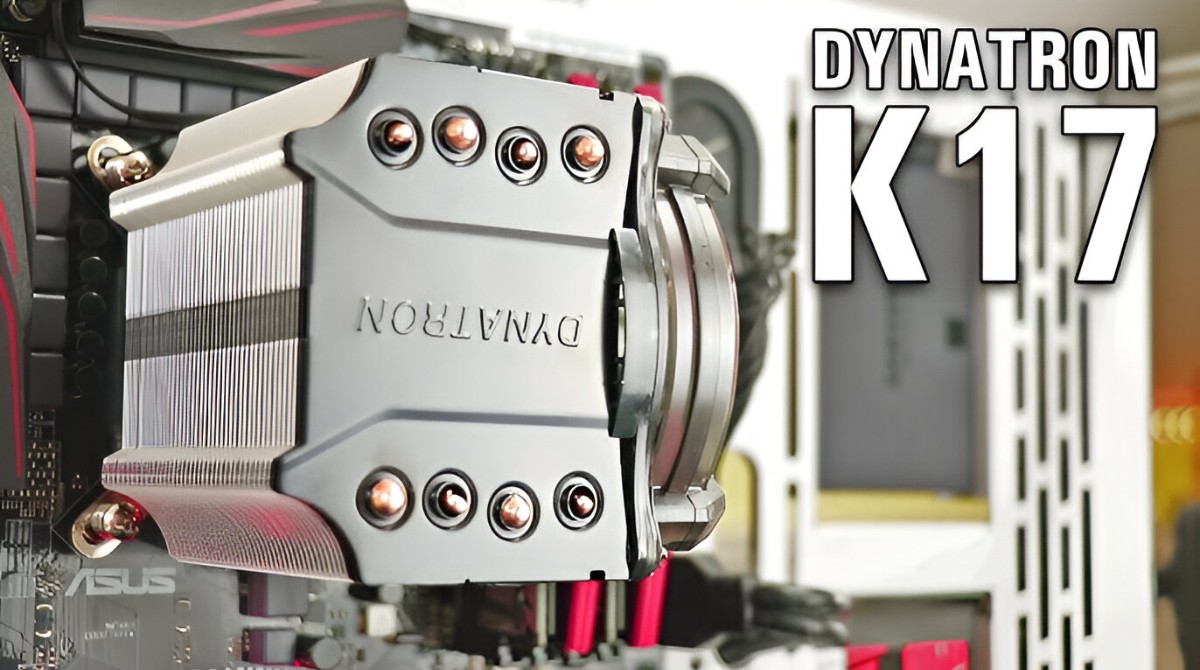
Step 7: Attaching the CPU cooler
Now that the CPU is in place and, if necessary, thermal paste has been applied, it’s time to attach the CPU cooler. The CPU cooler plays a vital role in dissipating heat generated by the CPU and ensuring its optimal performance.
Follow these steps to attach the CPU cooler:
- Identify the CPU cooler mounting mechanism: Different CPU coolers come with various mounting mechanisms, such as brackets, clips, or screws. Refer to the CPU cooler’s manual to understand the specific installation process for your particular model.
- Align the CPU cooler with the mounting brackets: Position the CPU cooler over the CPU socket, aligning it with the mounting brackets or holes surrounding the CPU socket. Make sure the cooler is properly centered and aligned with the CPU.
- Attach the CPU cooler: Depending on the mounting mechanism, secure the CPU cooler in place. This may involve tightening screws, snapping brackets into place, or locking clips onto the mounting holes. Follow the manufacturer’s instructions carefully to ensure a secure and proper attachment.
- Ensure even pressure: When attaching the CPU cooler, apply even pressure on all sides to ensure proper contact between the cooler and the CPU surface. This helps ensure optimal heat dissipation.
- Double-check the attachment: After installing the CPU cooler, give it a gentle wiggle to ensure that it’s securely attached. Verify that it’s not loose and firmly in position.
Properly attaching the CPU cooler is essential to maintain adequate cooling for the CPU. It helps ensure the CPU operates within its temperature limits, preventing performance issues and potential damage.
With the CPU cooler securely attached, we’re almost done with the installation process. Take a moment to celebrate your progress before moving on to the final step: finalizing the installation.
Step 8: Finalizing the installation
Congratulations! You’re in the final stage of the CPU installation process. In this step, we’ll go through a few essential tasks to ensure that the installation is complete and ready for the next steps of setting up your computer system.
Follow these steps to finalize the installation:
- Double-check all connections: Take a moment to verify that all connections are secure. Ensure that the CPU is properly installed, the cooler is attached firmly, and any necessary power cables are connected.
- Replace or reinstall components: If you had to remove any other components, such as RAM modules or graphics cards, during the CPU installation, make sure to reinsert them or reinstall them securely.
- Close the case or reattach the motherboard: If you removed the motherboard from the computer case for easier access, carefully place it back into the case and secure it with screws or clips.
- Connect other components and cables: Connect all the necessary components and cables, including the power supply cables, storage devices, graphics card, and any other peripherals.
- Power on the system: Once everything is in place, connect the power supply and turn on the computer. Listen for any unusual sounds or beeps and check for any error messages on the screen.
- Enter BIOS and verify CPU settings (optional): Access the BIOS settings by pressing the appropriate key during startup (usually Del or F2). Verify that the CPU is detected correctly and adjust any necessary settings, such as clock speed or voltage, if desired. Make sure to consult the motherboard manual for specific instructions.
By following these final steps, you’ve successfully installed the CPU on your motherboard. You can now proceed with installing the operating system, drivers, and other software to complete the setup of your computer.
Remember to refer to the manuals of your specific hardware components for any additional instructions or recommendations. Following the manufacturer’s guidelines ensures a smooth and successful installation process.
Once again, congratulations on completing the CPU installation! You’re one step closer to enjoying a fully functional computer system.
Conclusion
Congratulations on successfully installing your CPU on the motherboard! The CPU is the heart of your computer system, and a proper installation is crucial for its optimal performance.
In this guide, we covered the step-by-step process of installing a CPU on a motherboard. We began by gathering the necessary tools and equipment, ensuring that you have everything you need for a smooth installation. We then moved on to preparing the motherboard and CPU, making sure they are clean, undamaged, and properly aligned. Next, we securely installed the CPU onto the motherboard and attached the CPU cooler for efficient heat dissipation.
If necessary, we applied thermal paste to improve the heat transfer between the CPU and the cooler. Finally, we finalized the installation by double-checking all connections, reattaching other components, closing the computer case, and powering on the system.
Remember, it’s important to consult the manuals provided with your specific hardware components for any specific instructions or requirements. Following the manufacturer’s guidelines ensures a successful and trouble-free CPU installation.
Now that you’ve completed the CPU installation, you’re one step closer to enjoying a fully functional computer system. Whether you’re a seasoned enthusiast or a first-time builder, installing a CPU on a motherboard is an essential skill that will serve you well in your computer journey.
Thank you for using our guide, and we wish you the best of luck with your newly installed CPU and the overall setup of your computer system!