Introduction
Welcome to this guide on how to install the CPU Cooler Hyper 212 Evo on an MSI B350 Tomahawk ATX AM4 motherboard. Whether you’re a seasoned PC builder or just starting out, correctly installing a CPU cooler is crucial for maintaining optimal performance and preventing overheating. By following this step-by-step guide, you’ll be able to successfully install the Hyper 212 Evo CPU cooler and ensure efficient cooling for your AMD Ryzen processor.
Before we dive into the installation process, let’s take a moment to understand the importance of a CPU cooler. The CPU (Central Processing Unit) is the brain of your computer, and it generates a significant amount of heat while running intensive applications or games. Without a proper cooling solution, the CPU can quickly overheat, leading to performance issues and potential hardware damage.
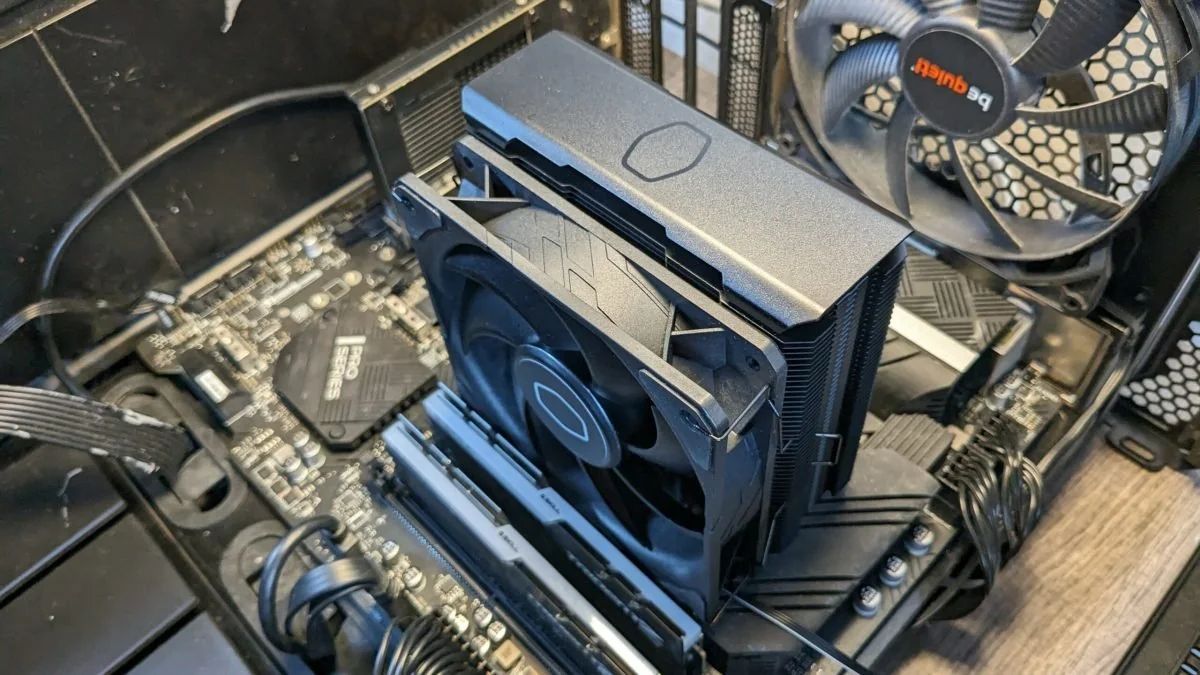
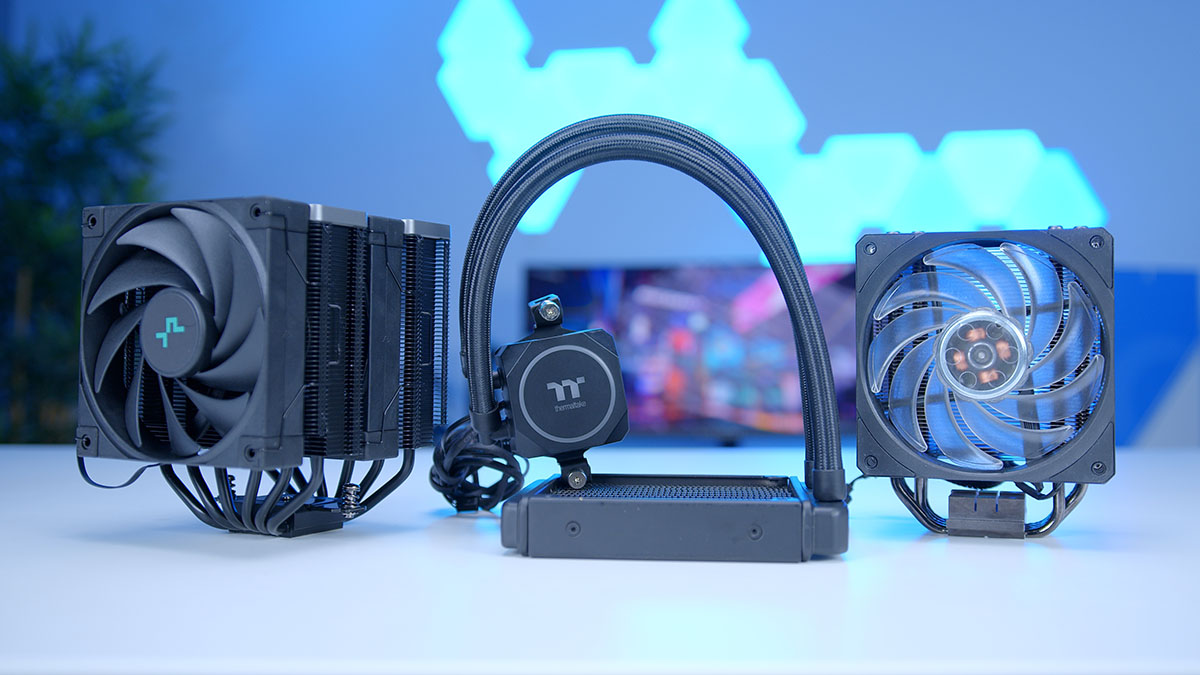
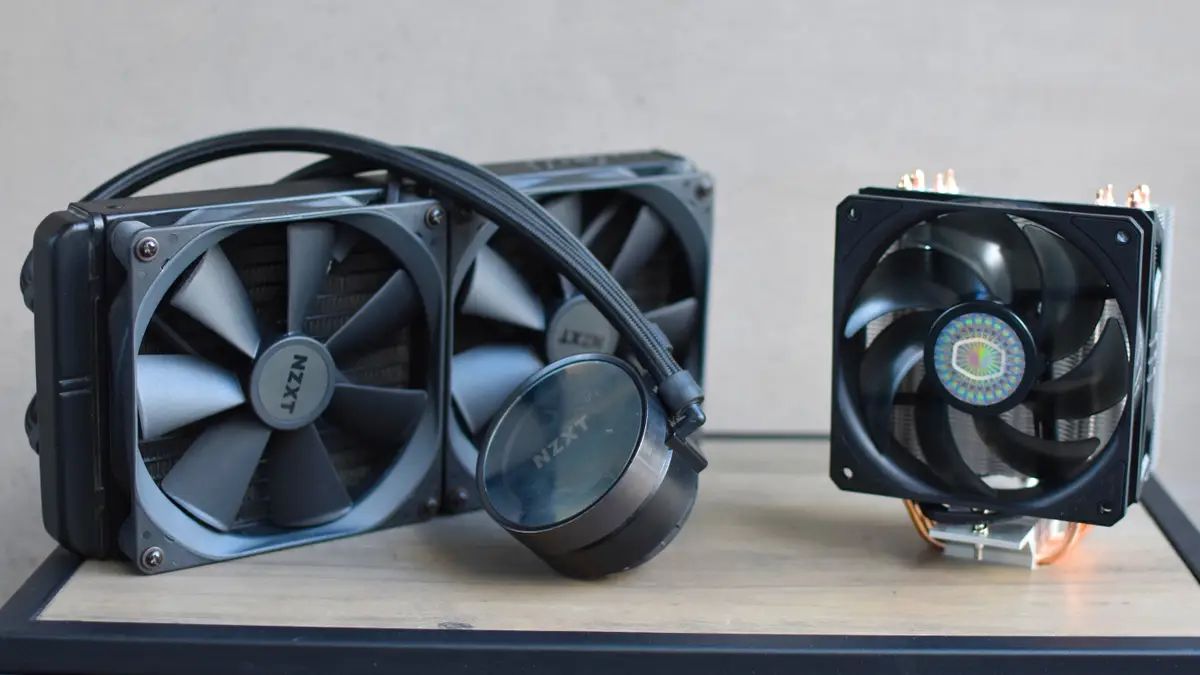
The Hyper 212 Evo CPU cooler is a popular and reliable choice for cooling AMD Ryzen processors. It features a tower design with a large heatsink and a 120mm fan, which efficiently dissipates heat from the CPU. The installation process may seem daunting at first, but with a little patience and attention to detail, you’ll have your CPU cooler up and running in no time.
Throughout this guide, we’ll cover each step of the installation process, from preparing for installation to securing the mounting brackets and finally connecting the CPU fan to the motherboard. Additionally, we’ll provide tips and precautions to ensure a smooth and successful installation.
Before diving into the installation process, however, there are a few things you should consider. Firstly, make sure you have all the necessary tools and components at hand, including a screwdriver, thermal paste, and the Hyper 212 Evo CPU cooler itself. Additionally, it’s essential to work in a clean and static-free environment to avoid any potential damage to the delicate components of your motherboard or CPU.
Now that we’ve covered the basics, let’s proceed to the first step of the installation process: preparing for installation.
Things to Consider Before Installing CPU Cooler
Before diving into the installation process of your CPU cooler, there are a few important things to consider. These considerations will ensure a successful and trouble-free installation, allowing for optimal cooling performance for your processor.
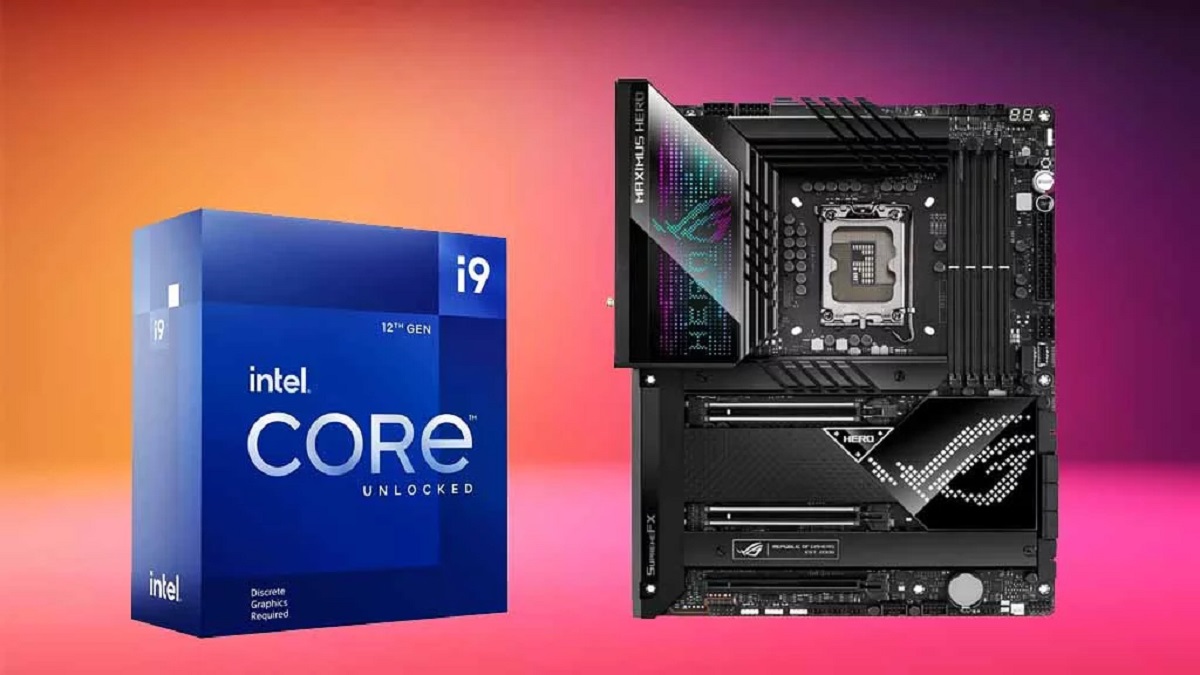
1. Compatibility: It’s crucial to ensure compatibility between the CPU cooler and your motherboard. Verify that the Hyper 212 Evo CPU cooler is compatible with your specific socket type, in this case, the MSI B350 Tomahawk ATX AM4 motherboard. Refer to the manufacturer’s specifications and your motherboard’s manual to confirm compatibility.
2. Thermal Paste: Thermal paste is a crucial component in the installation process as it facilitates the transfer of heat between the CPU and the cooler. Ensure you have a high-quality thermal paste and apply it correctly to the CPU surface before installing the cooler. This will help maximize heat dissipation efficiency.
3. Workspace: Create a clean and well-organized workspace before beginning the installation. Ensure you have sufficient room, proper lighting, and a static-free environment. This will help prevent any accidental damage to the delicate components of the motherboard and CPU.
4. Safety Measures: Before starting the installation process, be sure to take a few safety precautions. Turn off and unplug the computer from the power source. Ground yourself by touching a metal object to discharge any static electricity. This will help prevent any potential electrical damage to the components during the installation process.
5. Documentation: Familiarize yourself with the installation instructions provided by the manufacturer. Carefully read through the manual, ensuring you understand each step of the process before proceeding. Following the instructions correctly will ensure a smooth installation and proper functionality of the CPU cooler.
6. Maintenance: Lastly, consider the long-term maintenance of the CPU cooler. It’s important to periodically clean the cooler and fan to remove any dust or debris buildup that may hinder its performance. Regular maintenance will help prolong the life of your CPU cooler and optimize its cooling capabilities.
By considering these factors before installing your CPU cooler, you’ll be well-prepared for a smooth and successful installation process. With compatibility confirmed, a clean workspace, the proper application of thermal paste, safety measures in place, and a good understanding of the manufacturer’s instructions, you’re ready to proceed to install the Hyper 212 Evo on your MSI B350 Tomahawk ATX AM4 motherboard.
Step 1: Preparing for Installation
Before diving into the installation process of the Hyper 212 Evo CPU cooler on your MSI B350 Tomahawk ATX AM4 motherboard, it’s important to prepare your workspace and gather the necessary tools and components. Following these steps will ensure a smooth and hassle-free installation.
1. Gather the Tools: Start by gathering all the tools and components you’ll need for the installation. You’ll require a screwdriver, the Hyper 212 Evo CPU cooler, thermal paste, and any additional accessories that come with the cooler. Having everything ready beforehand will streamline the installation process.
2. Clear the Workspace: Clear any clutter from your workspace and make sure you have enough room to comfortably work on your motherboard. Remove any objects that could potentially damage or interfere with the installation process.
3. Ground Yourself: To protect your components from static electricity, which can cause damage, it’s important to ground yourself. Before starting the installation, touch a grounded metal object, such as a metal table or the case of your computer, to discharge any static buildup in your body.
4. Turn off and Unplug: Before working on your motherboard, shut down your computer and unplug it from the power source. This will eliminate any risk of electric shock and allow you to work safely on your hardware.
5. Open the Computer Case: Remove the side panel of your computer case to gain access to the internal components, including the motherboard. This step will vary depending on the design of your computer case, but it usually involves removing a few screws or sliding the panel off.
6. Locate the CPU Socket: Locate the CPU socket on your motherboard. The socket is a square or rectangular area on the motherboard that houses the CPU. It is usually marked with a label, such as “CPU” or “Socket AM4.” Take note of the orientation of the socket and the surrounding components.
7. Remove the Pentium Lever: On most motherboards, there is a metal lever or latch that secures the CPU in place. Carefully lift the lever to release the CPU socket cover. Gently lift the cover and set it aside, making sure not to touch the exposed pins or any other fragile components.
Once you have completed these steps, you are now ready to move on to Step 2: Applying Thermal Paste to the CPU. By thoroughly preparing your workspace and ensuring the safety of your components, you are setting yourself up for a successful installation of the Hyper 212 Evo CPU cooler.
Step 2: Applying Thermal Paste to CPU
Applying thermal paste correctly is crucial for efficient heat transfer between the CPU and the cooler. In this step, we’ll guide you through the process of applying thermal paste to ensure optimal cooling performance for your processor.
1. Clean the CPU Surface: Before applying thermal paste, it’s essential to clean the surface of the CPU. Gently wipe away any existing thermal paste or residue using a lint-free cloth or a cotton swab soaked in isopropyl alcohol. Ensure the surface is clean and completely dry before proceeding.
2. Determine the Amount of Thermal Paste: A small pea-sized amount of thermal paste is sufficient for most CPUs. Squeeze a small amount, roughly the size of a grain of rice or a pea, onto the center of the CPU surface. Avoid applying an excessive amount of paste, as it can lead to poor heat transfer and potential damage to other components.
3. Spread the Thermal Paste: Using a plastic card or a thermal paste applicator, spread the thermal paste evenly across the surface of the CPU. Apply gentle pressure and ensure that the paste covers the entire surface without any gaps or excess buildup. The goal is to create a thin, uniform layer of thermal paste for optimal heat conductivity.
4. Avoid Spreading Too Thinly: While it’s essential to spread the thermal paste evenly, be cautious not to spread it too thinly. A very thin layer can prevent effective heat transfer. Aim for a thickness of around 0.1mm to 0.3mm to ensure efficient heat dissipation.
5. Maintain Proper Pressure: Once the thermal paste is applied, maintain proper pressure when installing the CPU cooler. Too much pressure can cause the paste to squeeze out, impacting its effectiveness as a thermal conductor. Follow the instructions provided by the cooler’s manufacturer to secure the cooler evenly and firmly in place.
6. Double Check the Alignment: Before installing the CPU cooler, double-check the alignment to ensure proper placement. Ensure that the cooler’s base is aligned with the CPU surface and that the mounting brackets or screws are positioned correctly. Proper alignment will result in optimal heat transfer from the CPU to the cooler.
With the thermal paste applied and the CPU surface clean, you’re now ready to move on to Step 3: Installing the Backplate. Taking the time to apply thermal paste accurately ensures efficient cooling for your CPU and promotes overall system stability.
Step 3: Installing the Backplate
In this step, we’ll guide you through the process of installing the backplate for the Hyper 212 Evo CPU cooler. The backplate provides stability and support for the cooler, ensuring a secure installation on your MSI B350 Tomahawk ATX AM4 motherboard.
1. Identify the Backplate: Locate the backplate that comes with the Hyper 212 Evo CPU cooler. The backplate is a rectangular or square metal plate with mounting holes that align with the holes on the backside of your motherboard. Ensure the backplate matches your specific socket type and aligns with the mounting holes on your motherboard.
2. Position the Backplate: Place the backplate on the backside of your motherboard, aligning the mounting holes with the holes on the motherboard. The backplate should fit snugly without any obstruction or misalignment. Make sure to position it with the correct orientation, matching the socket layout on your motherboard.
3. Secure the Backplate: Once the backplate is properly positioned, use the provided screws or fasteners to secure it in place. Tighten the screws evenly, following a diagonal pattern. This ensures equal pressure on all sides, providing stability and preventing any wobbling or misalignment of the CPU cooler.
4. Check for Proper Alignment: After securing the backplate, double-check for proper alignment by examining the screws and their positioning. Confirm that the backplate sits flush against the motherboard, with no gaps or unevenness. Proper alignment is crucial for a stable installation and effective heat dissipation.
5. Confirm Compatibility: Before proceeding to the next step, verify that the backplate installation is compatible with your motherboard’s layout and socket type. Refer to your motherboard’s manual or consult the manufacturer’s instructions for clarification.
With the backplate securely installed, you’re now ready to move on to Step 4: Securing the Mounting Brackets. The backplate provides a solid foundation for the CPU cooler, ensuring stability and efficient heat transfer. Take your time during this step to ensure a proper and secure installation.
Step 4: Securing the Mounting Brackets
In this step, we’ll guide you through the process of securing the mounting brackets for the Hyper 212 Evo CPU cooler. The mounting brackets provide the necessary support and stability to attach the cooler to your MSI B350 Tomahawk ATX AM4 motherboard.
1. Identify the Mounting Brackets: Locate the mounting brackets included with the Hyper 212 Evo CPU cooler. The brackets are typically made of metal and have screw holes that align with the backplate on the motherboard. Confirm that you have the correct brackets for your specific socket type.
2. Position the Mounting Brackets: Place the mounting brackets over the backplate, aligning the screw holes with the corresponding holes on the backplate. Ensure that the brackets fit securely and make full contact with the backplate. Proper alignment of the brackets is crucial for a stable and secure installation.
3. Secure the Mounting Brackets: Using the provided screws or fasteners, begin securing the mounting brackets to the backplate. Tighten the screws evenly, following a diagonal pattern to exert equal pressure on each side. This promotes a balanced installation and prevents any misalignment or wobbling of the cooler.
4. Confirm Tightness: After securing the mounting brackets, double-check the tightness of the screws. Ensure that they are snug and firmly in place without being overly tight. Striking the right balance will provide stability while avoiding damage to the motherboard or CPU cooler.
5. Inspect for Proper Alignment: After securing the mounting brackets, visually inspect the installation to confirm proper alignment and positioning. Verify that the brackets sit evenly on the backplate and are parallel to each other. This ensures a solid foundation for attaching the CPU cooler.
6. Evaluate Compatibility: Before moving on to the next step, verify that the mounting bracket installation is compatible with your motherboard and CPU cooler. Refer to the manufacturer’s instructions or your motherboard’s manual for specific guidelines and recommendations.
With the mounting brackets securely attached, you’re now ready to move on to Step 5: Attaching the Cooler to the Mounting Brackets. The mounting brackets provide crucial support for the CPU cooler, ensuring a stable and efficient cooling solution for your AMD Ryzen processor.
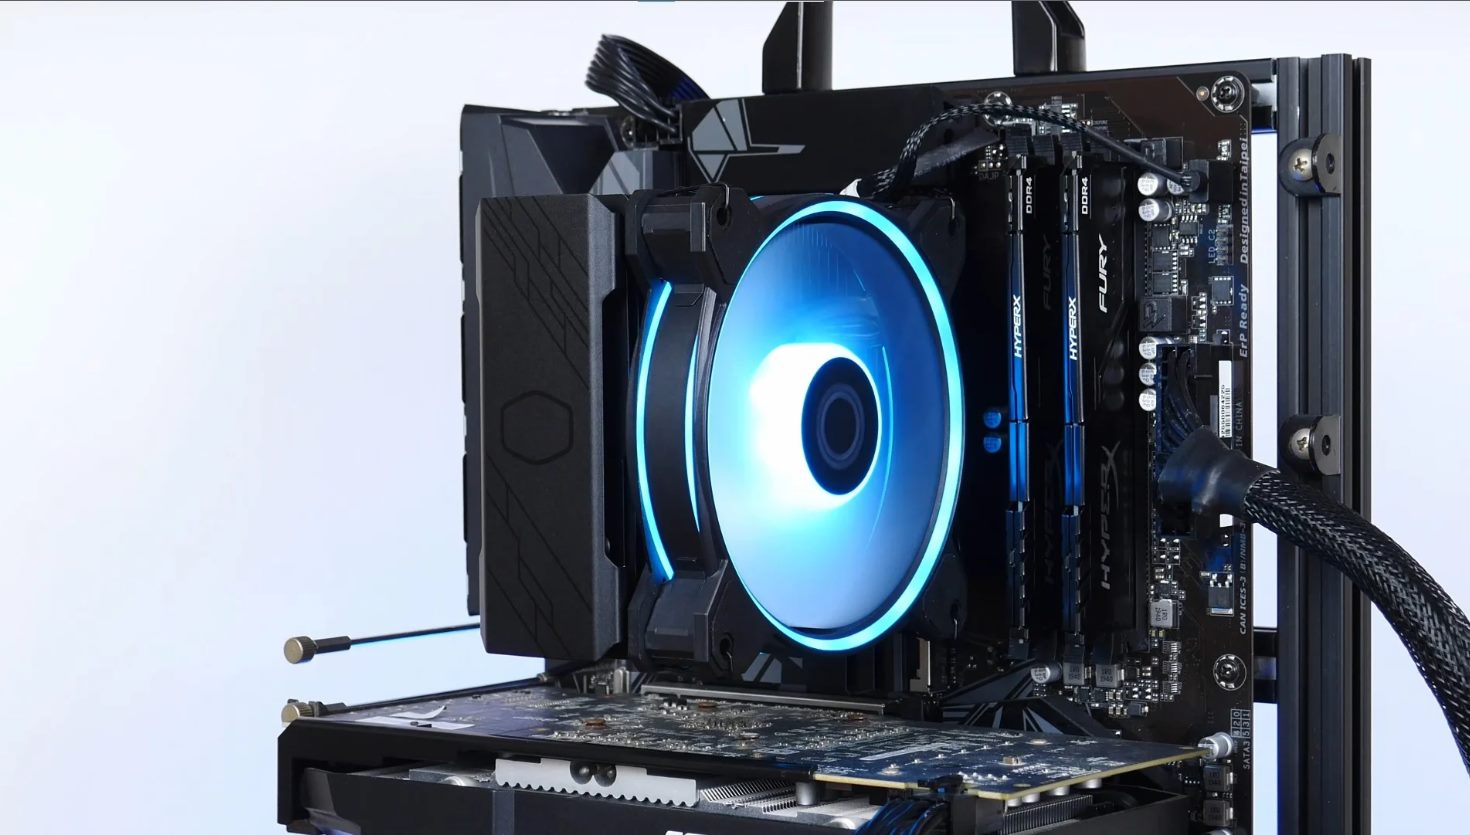
Step 5: Attaching the Cooler to the Mounting Brackets
In this step, we’ll guide you through the process of attaching the Hyper 212 Evo CPU cooler to the mounting brackets on your MSI B350 Tomahawk ATX AM4 motherboard. The proper attachment of the cooler ensures effective heat dissipation and a secure installation.
1. Orient the CPU Cooler: Position the Hyper 212 Evo CPU cooler above the mounting brackets, ensuring the orientation matches the socket layout on your motherboard. Take note of any alignment guides or notches on the cooler to ensure a proper fit.
2. Align the Mounting Holes: Carefully align the mounting holes on the cooler with the corresponding holes on the mounting brackets. Slowly lower the cooler onto the brackets, making sure all the holes align properly. Take caution not to apply excessive force or pressure.
3. Attach the Cooler: Once the cooler is aligned with the mounting brackets, use the provided screws or fasteners to secure the cooler in place. Begin by loosely screwing in the screws, following a diagonal pattern. This ensures even pressure distribution during the final tightening stage.
4. Equal Tightening: After all the screws have been loosely attached, proceed to tighten them fully. Use a screwdriver to tighten the screws, again following the diagonal pattern. Tighten the screws gradually and evenly, alternating between them to maintain balanced pressure.
5. Confirm Stability: Once all screws are securely tightened, gently test the stability of the CPU cooler by wiggling it very lightly. It should be firm and not move or wobble. A stable cooler ensures proper contact with the CPU and efficient heat transfer.
6. Double Check Alignment: After securely attaching the CPU cooler, visually inspect the alignment to ensure it sits parallel to the motherboard, with no gaps or misalignment. Proper alignment is crucial for optimal cooling performance.
7. Proceed with Caution: Handle the computer with care after attaching the CPU cooler. Avoid moving or tilting the computer excessively to prevent any strain on the cooler or potential damage to the motherboard.
By correctly attaching the CPU cooler to the mounting brackets, you’re ensuring a stable and effective cooling solution for your AMD Ryzen processor. With the cooler securely in place, you’re almost ready to move on to Step 6: Connecting the CPU Fan to the Motherboard.
Step 6: Connecting CPU Fan to Motherboard
In this step, we’ll guide you through the process of connecting the CPU fan of the Hyper 212 Evo CPU cooler to your MSI B350 Tomahawk ATX AM4 motherboard. Properly connecting the fan ensures proper cooling and allows for fine-tuning of fan speeds and performance.
1. Locate CPU Fan Header: Identify the CPU fan header on your motherboard. It is typically labeled “CPU_FAN” or “CPU_FAN1” and is located near the CPU socket. Refer to your motherboard’s manual if you need assistance in locating the correct header.
2. Position the CPU Fan Cable: Position the CPU fan cable in a manner that allows for easy reach to the CPU fan header. Ensure that the cable is clear of any obstructions or components that may hinder its connection.
3. Align the Connector: Align the connector of the CPU fan cable with the pins on the CPU fan header. The connector is typically a 4-pin or 3-pin configuration, depending on the fan and motherboard specifications. Be sure to match the alignment of the pins and connector for a secure fit.
4. Connect the CPU Fan: Firmly push the CPU fan connector onto the pins of the CPU fan header. Apply even pressure to ensure a secure connection. The connector should slide on smoothly, without any forceful tugging or bending of the pins.
5. Confirm the Connection: After connecting the CPU fan, double-check its placement to ensure that it is fully inserted onto the pins of the CPU fan header. The connection should be secure, with no loose wires or pins hanging out.
6. Cable Management: Organize the CPU fan cable by routing it in a neat and orderly manner. Use cable ties or adhesive clips to secure the cable along the designated cable management routes of your computer case. This helps improve airflow and prevents the cable from interfering with other components.
7. Test the Connection: Power on your computer and access the BIOS or the manufacturer’s software to confirm that the CPU fan is properly connected and functioning. Most motherboards monitor the fan speed and allow you to adjust the fan settings to achieve optimal cooling performance.
With the CPU fan successfully connected to the motherboard, you’re almost ready to move on to Step 7: Finalizing Installation and Testing. Having a properly connected and functioning CPU fan is essential for maintaining the temperature of your AMD Ryzen processor and ensuring its longevity.
Step 7: Finalizing Installation and Testing
In this final step, we will guide you through the process of finalizing the installation of your CPU cooler and conducting a few tests to ensure everything is functioning properly. These steps will ensure that your Hyper 212 Evo CPU cooler is installed correctly and ready to keep your AMD Ryzen processor cool.
1. Replace the Computer Case Panel: After confirming that the CPU fan is securely connected to the motherboard, carefully reattach the side panel of your computer case. Ensure that all screws or fasteners are tightened properly. This step helps maintain airflow and protects the internal components of your computer.
2. Power on your Computer: Turn on your computer and enter the BIOS or the manufacturer’s software. Verify that the CPU fan is detected and that its speed is within the expected range. Make any necessary adjustments to the fan curve or speed settings to optimize cooling performance.
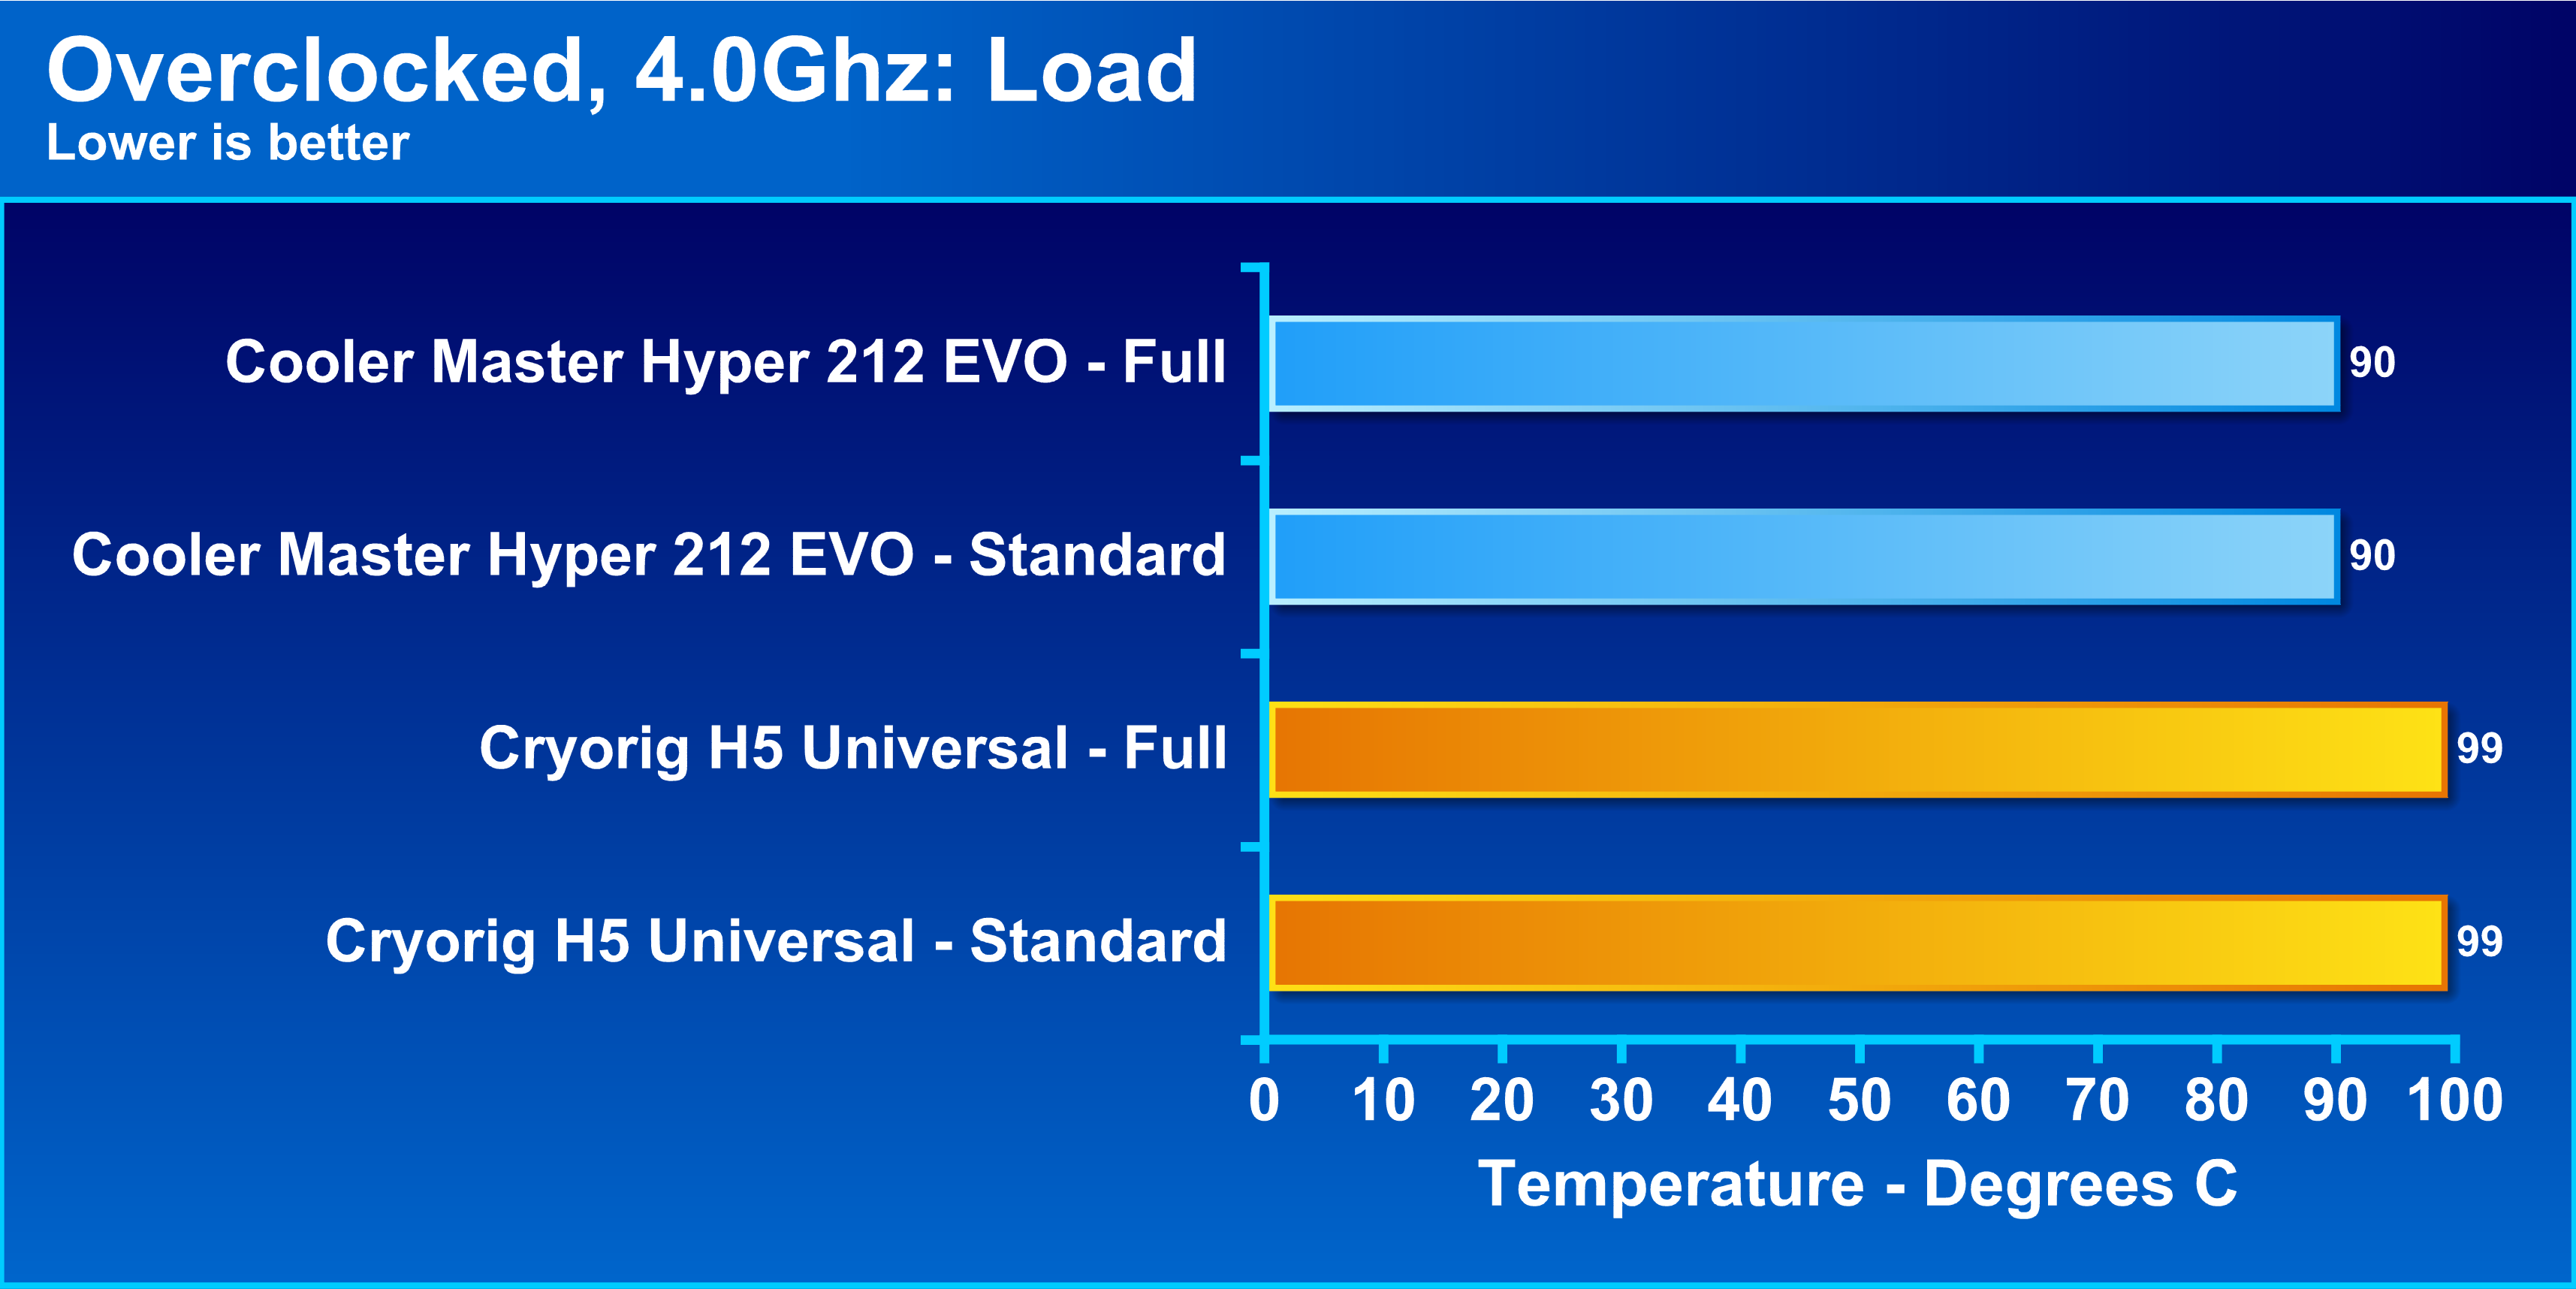
3. Monitor Temperatures: Use monitoring software or the BIOS to track the CPU temperatures under various loads. Ensure that the temperatures stay within safe operating limits. If the temperatures are unusually high or fluctuate excessively, double-check the installation and reapply thermal paste if necessary.
4. Listen for Any Unusual Noises: While the computer is running, listen for any abnormal or loud noises coming from the CPU cooler. Noises such as grinding, clicking, or rattling can indicate an issue with the installation. If you notice any unusual noises, power off your computer and inspect the cooler for any loose components or obstructions.
5. Perform Stress Testing: To ensure the stability and performance of your CPU cooler, consider running stress tests or benchmarking software that pushes your processor to its limits. Monitor the temperatures during the tests to see if the cooler is effectively dissipating heat. If temperatures exceed safe limits or the system becomes unstable, revisit the installation process or adjust the fan settings.
6. Periodic Maintenance: Regularly clean the CPU cooler and fan to remove any dust or debris buildup. Use compressed air or a soft brush to gently clean the cooler fins and fan blades. Regular maintenance helps maintain proper airflow and ensures optimal cooling performance over time.
By following these final steps, you have completed the installation of your Hyper 212 Evo CPU cooler. The finalization process, including monitoring temperatures, performing stress tests, and conducting periodic maintenance, ensures that your CPU cooler runs efficiently and protects your AMD Ryzen processor from overheating.
Conclusion
Congratulations! You have successfully installed the Hyper 212 Evo CPU cooler on your MSI B350 Tomahawk ATX AM4 motherboard. By following the step-by-step guide, you have ensured proper cooling for your AMD Ryzen processor and reduced the risk of overheating.
Throughout the installation process, we covered the essential steps, including preparing for installation, applying thermal paste, installing the backplate, securing the mounting brackets, attaching the cooler, connecting the CPU fan, and finalizing the installation. Each step is crucial for a stable and efficient cooling solution.
It’s important to remember that proper installation and maintenance of your CPU cooler are key to maintaining optimal performance. Regularly monitor the temperatures of your processor and clean the cooler to remove any dust or debris buildup. If you notice any abnormalities or higher-than-usual temperatures, it’s recommended to recheck the installation or seek further assistance.
By installing the Hyper 212 Evo CPU cooler, you have taken a significant step toward ensuring the longevity and performance of your AMD Ryzen processor. With proper cooling in place, you can push your system to its limits without compromising stability.
We hope this guide has been helpful in guiding you through the installation process of the CPU cooler. Should you have any further questions or encounter any issues, consider referring to the manufacturer’s documentation or seeking guidance from online forums and communities.
Thank you for choosing the Hyper 212 Evo CPU cooler and investing the time and effort into correctly installing it on your MSI B350 Tomahawk ATX AM4 motherboard. Enjoy improved cooling performance and a smoother computing experience!