Introduction
A CPU cooler backplate is an essential component of a computer cooling system. It is responsible for providing stability and support to the CPU cooler, ensuring effective heat dissipation from the processor. Without a proper backplate, the CPU cooler may not be able to make sufficient contact with the processor, leading to inadequate cooling and potential performance issues.
When it comes to building or upgrading a computer, many enthusiasts focus on the CPU, GPU, and RAM but often overlook the importance of a CPU cooler backplate. However, understanding its role and having a good-quality backplate can significantly impact the overall performance and longevity of your system.
In this article, we will delve deeper into the significance of a CPU cooler backplate and explore its various components. Furthermore, we will guide you through the installation process to ensure that you can confidently install a CPU cooler backplate in your system.
So, whether you are a seasoned computer builder or a newbie, read on to discover why a CPU cooler backplate is crucial and how to properly install one for optimal performance.
What is a CPU Cooler Backplate?
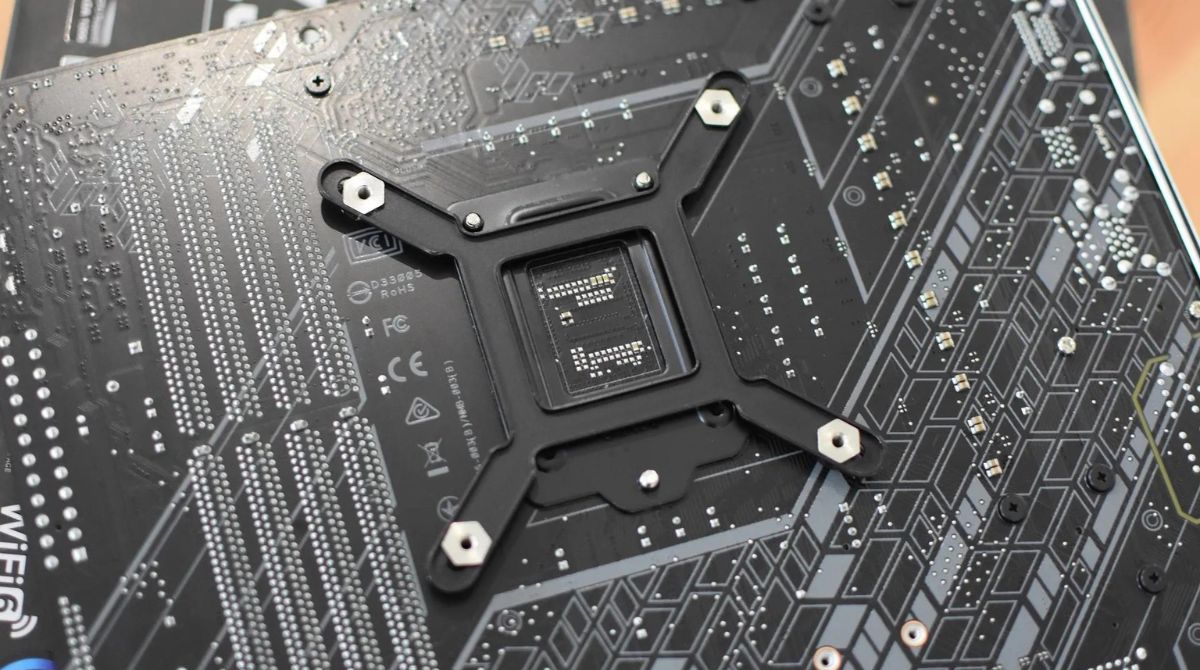
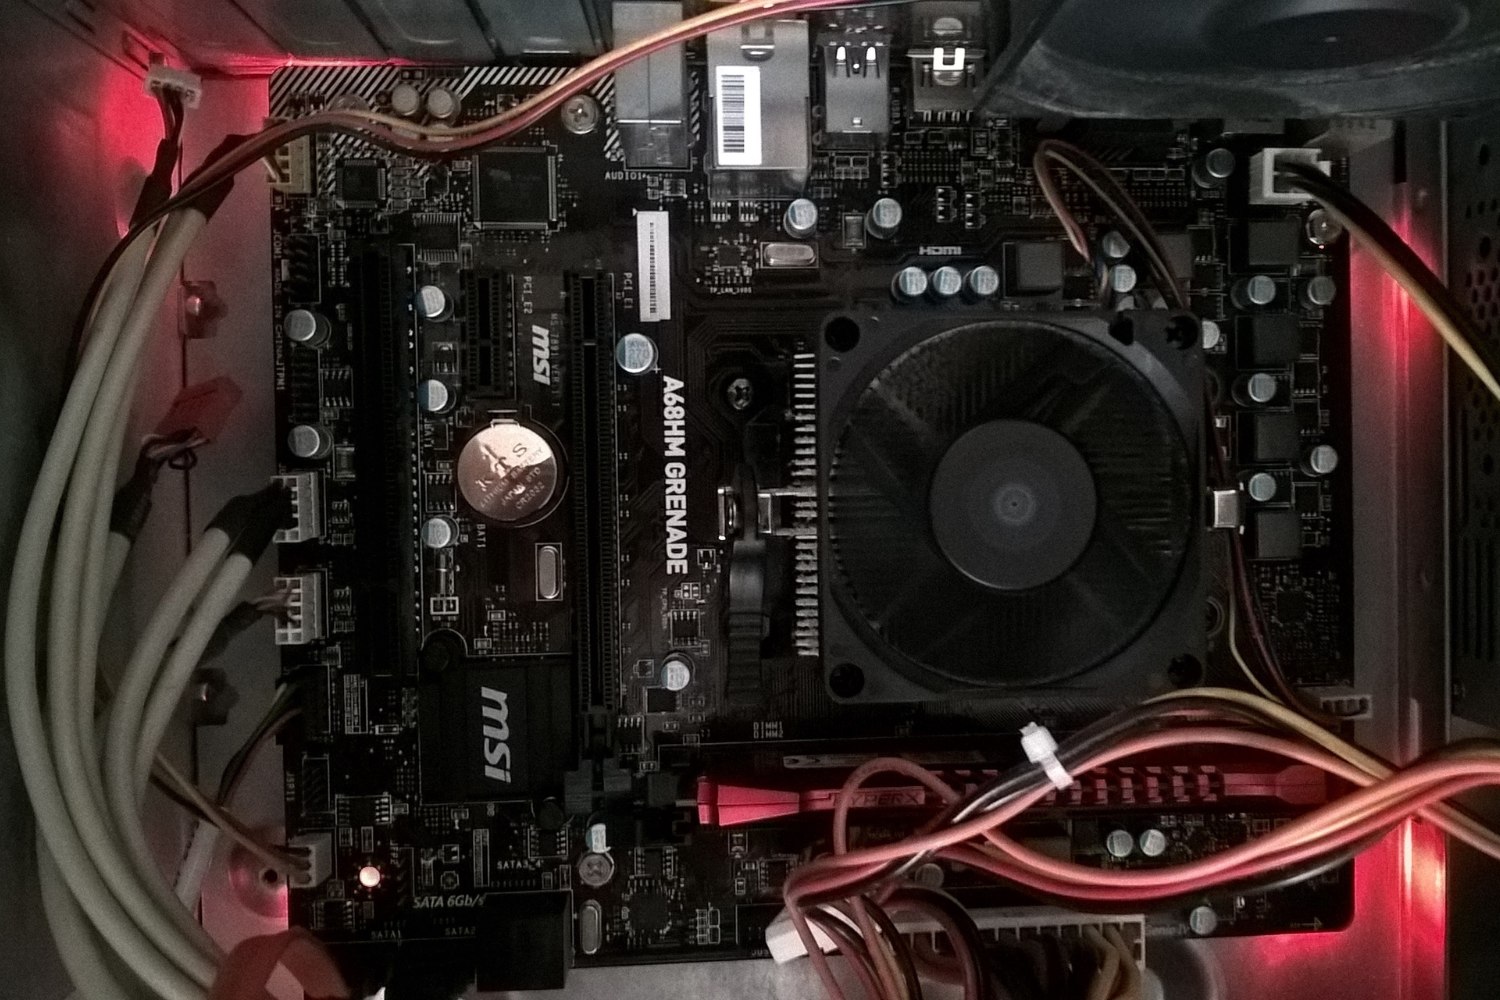
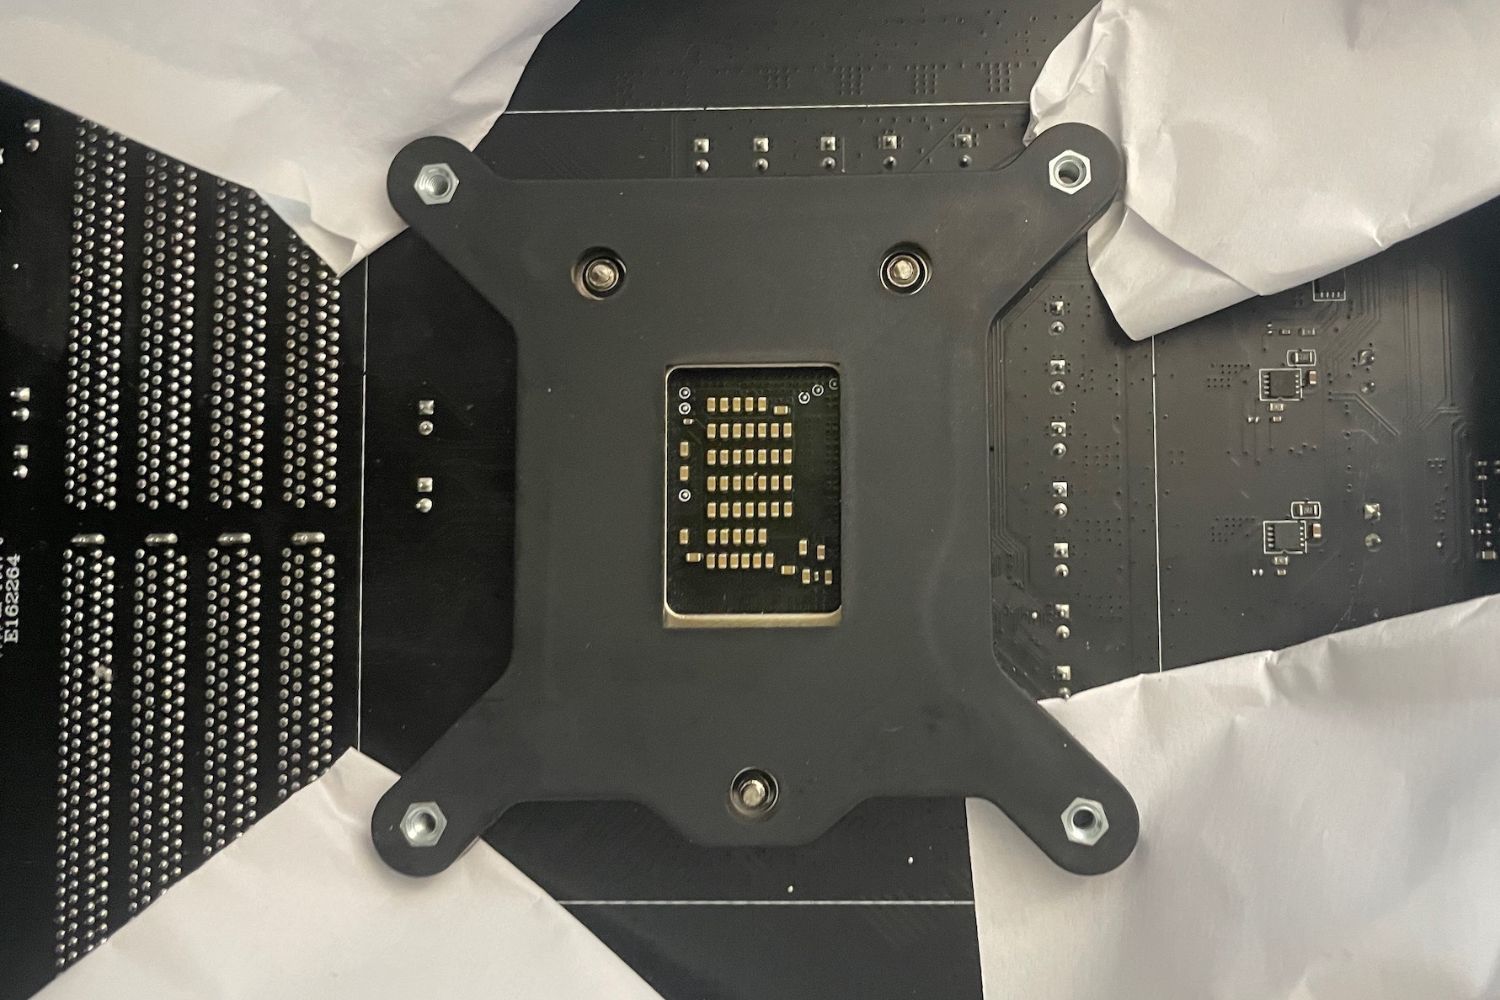
A CPU cooler backplate is a flat, rigid plate typically made of metal that is attached to the motherboard. It is positioned on the backside of the motherboard, behind the CPU socket. The main purpose of the backplate is to provide support for the CPU cooler and evenly distribute its weight across the motherboard.
The CPU cooler backplate serves as a mounting point for the CPU cooler. It ensures that the cooler is firmly attached to the processor, creating a tight and secure contact. This contact is crucial for efficient heat transfer between the processor and the CPU cooler.
One of the key features of a CPU cooler backplate is its ability to prevent motherboard flexing. The weight of the CPU cooler can lead to bending or warping of the motherboard, which can cause electrical contact issues or damage to the components. By distributing the weight evenly, the backplate helps maintain the stability and integrity of the motherboard.
It’s important to note that CPU cooler backplates are not universal and differ based on the socket type of the motherboard. Different CPU sockets have different hole placements, so it’s crucial to ensure that you have the correct backplate that is compatible with your motherboard’s socket.
Without a CPU cooler backplate, the CPU cooler may be loosely attached or may not make proper contact with the processor. This can result in poor heat dissipation and higher CPU temperatures, which can lead to reduced performance, instability, and even potential damage to the processor over time.
Now that we have a clear understanding of what a CPU cooler backplate is and its significance, let’s dive into the various components that make up a typical backplate.
Why is a CPU Cooler Backplate important?
A CPU cooler backplate plays a critical role in ensuring the effective cooling of your processor and maintaining system stability. Let’s take a closer look at why a CPU cooler backplate is important:
1. Improved Heat Dissipation: The primary function of a CPU cooler is to dissipate the heat generated by the processor. The backplate helps in achieving better heat transfer by providing a stable and secure mounting for the CPU cooler. This ensures maximum contact between the CPU and the cooler, allowing for efficient heat dissipation.
2. Prevents Processor Damage: Excessive heat can be detrimental to the health of your CPU. Without a backplate, the CPU cooler may not make proper contact with the processor, resulting in inadequate cooling. Over time, this can lead to increased temperatures, reduced performance, and even potential damage to the processor itself. The backplate helps maintain a secure and tight connection, minimizing the risk of such issues.
3. Stability and Rigidity: The weight of a CPU cooler can put strain on the motherboard, causing it to flex or warp. This can lead to poor connectivity between components, including the CPU and other peripherals. The CPU cooler backplate distributes the weight of the cooler evenly, providing stability and preventing potential damage to the motherboard.
4. Compatibility and Versatility: CPU cooler backplates are designed to be compatible with specific motherboard sockets. Investing in a high-quality backplate ensures that it is properly aligned and secured with the appropriate mounting holes. This compatibility ensures versatile usage, allowing you to swap out CPU coolers or upgrade your system without compatibility concerns.
5. Enhanced System Performance: By maintaining optimal CPU temperatures, a proper CPU cooler backplate helps the processor operate efficiently. Lower temperatures prevent thermal throttling, ensuring that the CPU maintains its maximum performance levels. This is especially important for demanding tasks such as gaming, video editing, and other CPU-intensive applications.
In summary, a CPU cooler backplate is crucial for efficient heat dissipation, preventing processor damage, maintaining system stability, ensuring compatibility, and enhancing overall system performance. Investing in a reliable and compatible backplate will help you build a reliable and high-performing computer system.
Components of a CPU Cooler Backplate
A CPU cooler backplate consists of several key components that work together to provide stability and optimal cooling performance. Let’s explore the different components of a typical CPU cooler backplate:
1. Metal Plate: The metal plate is the main body of the backplate and serves as the foundation for mounting the CPU cooler. It is usually made of durable materials such as aluminum or stainless steel to provide strength and stability.
2. Mounting Screws: The mounting screws secure the CPU cooler to the backplate and ensure a tight and secure connection. These screws typically feature a threaded design that allows for easy installation and removal.
3. Thermal Pads: Thermal pads are used to fill the gaps between the backplate and the motherboard, ensuring optimal heat transfer. These pads are made of thermally conductive materials that help bridge any unevenness or gaps, allowing for better thermal conductivity.
4. Bracket or Retention Clip: The bracket or retention clip is the component that holds the CPU cooler in place. It is attached to the backplate and secures the cooler onto the motherboard. The design of the bracket or clip may vary depending on the specific CPU cooler and socket type.
5. Insulating Washers: Insulating washers are often included with CPU cooler backplates. These washers provide electrical insulation between the backplate and the motherboard, preventing any potential short circuits and ensuring safe and reliable operation.
These components work together to create a stable and reliable mounting system for the CPU cooler. They provide the necessary support, thermal conductivity, and electrical insulation to ensure optimal cooling performance and system longevity.
It is important to note that the specific components and their design can vary depending on the manufacturer and the CPU cooler model. Always refer to the manufacturer’s instructions and ensure compatibility with your motherboard socket before installing a CPU cooler backplate.
Metal Plate
The metal plate is a crucial component of a CPU cooler backplate, serving as the foundation for mounting the cooler onto the motherboard. It is typically made of durable materials such as aluminum or stainless steel to provide strength and stability.
The metal plate is designed to be a rigid and flat surface that sits behind the motherboard. It acts as a support structure, ensuring that the CPU cooler is securely attached and evenly distributed across the processor. This even distribution of weight helps prevent motherboard flexing, reducing the risk of damage to the motherboard and other components.
In addition to its role in providing stability, the metal plate facilitates efficient heat transfer between the CPU and the cooler. It acts as a conduit, allowing the heat generated by the processor to be absorbed by the CPU cooler. The metal plate also helps dissipate heat evenly across its surface, preventing hot spots and ensuring optimal cooling performance.
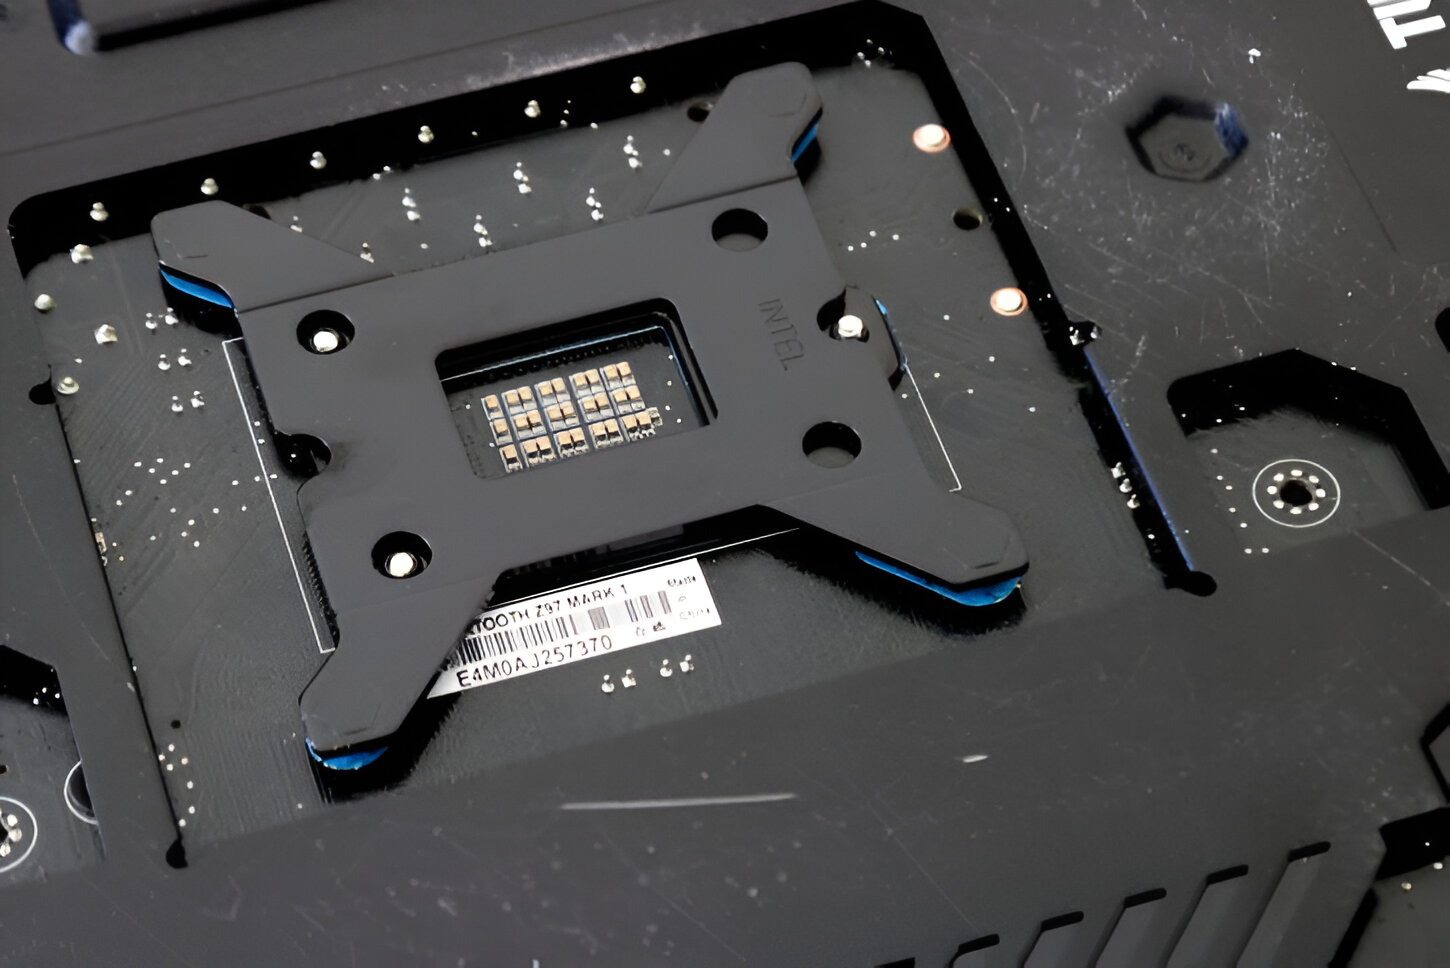
The metal plate of a CPU cooler backplate is often designed with multiple mounting holes. These holes are strategically positioned to align with the corresponding mounting holes on the motherboard, allowing for quick and secure installation. The number and arrangement of the mounting holes may vary depending on the specific motherboard socket and CPU cooler compatibility.
When installing a CPU cooler backplate, it is essential to ensure that the metal plate is correctly aligned with the motherboard socket. The backplate should be positioned in such a way that the mounting holes align with the corresponding holes on the motherboard. Proper alignment ensures that the CPU cooler is attached securely and makes proper contact with the processor.
In summary, the metal plate of a CPU cooler backplate provides stability and support for the CPU cooler, facilitating efficient heat transfer and optimal cooling performance. Its rigid construction and precise alignment with the motherboard socket are critical for a successful installation and long-term functionality of the cooling system.
Mounting Screws
The mounting screws are an essential component of a CPU cooler backplate. These screws play a crucial role in securing the CPU cooler onto the backplate and ensuring a tight and secure connection between the cooler and the processor.
The mounting screws are typically threaded screws that are designed to fit into the mounting holes of the backplate. They are often made of durable materials such as stainless steel, ensuring that they can withstand the weight and pressure exerted by the CPU cooler.
During the installation process, the mounting screws are inserted through the mounting holes on the CPU cooler and then screwed into the corresponding holes on the backplate. This process ensures that the CPU cooler attaches firmly to the backplate, creating a secure connection.
When selecting the mounting screws, it is crucial to ensure that they are compatible with both the CPU cooler and the backplate. Different CPU coolers and backplates may require specific types or sizes of screws. It is essential to consult the manufacturer’s instructions or specifications to determine the appropriate screws for your specific setup.
When tightening the mounting screws, it is important not to over-tighten them. Over-tightening can lead to excessive pressure on the CPU, potentially causing damage or negatively impacting the cooling performance. It is recommended to tighten the screws evenly and snugly, ensuring a secure connection without applying excessive force.
Mounting screws are removable, allowing for easy installation and removal of the CPU cooler. This feature is particularly useful for maintenance or upgrades, as it allows you to replace or clean the CPU cooler without having to remove the backplate.
In summary, the mounting screws are integral to securely attaching the CPU cooler to the backplate. Their threaded design and proper selection ensure a tight and secure connection, promoting effective heat transfer and optimal cooling performance. Proper installation and tightening of the mounting screws are important for maintaining system integrity and avoiding potential damage to the CPU and other components.
Thermal Pads
Thermal pads are an important component of a CPU cooler backplate, contributing to effective heat transfer between the CPU and the cooler. These pads are made of thermally conductive materials and are used to fill the gaps and promote optimal thermal conductivity.
Thermal pads are placed between the backplate and the motherboard, ensuring that there is good thermal contact between the two surfaces. These pads help bridge any unevenness or gaps that may exist, enhancing the transfer of heat from the CPU to the cooler.
The thermally conductive nature of the pads allows them to efficiently transfer heat away from the CPU and into the CPU cooler. This helps to prevent hot spots and ensures more effective heat dissipation, ultimately contributing to improved cooling performance.
One of the advantages of using thermal pads is that they are flexible and conformable. This allows them to adapt to the uneven surfaces of the CPU and the cooler, creating a more uniform contact area. Their flexibility also helps to alleviate the stress on the CPU and the cooler, reducing the risk of damage or performance degradation.
When installing a CPU cooler backplate, it is essential to properly position and apply the thermal pads. Depending on the specific design, the thermal pads may come in pre-cut shapes that correspond to the size and shape of the components. Alternatively, thermal pads may be provided in large sheets that can be cut to fit the required areas.
It is important to ensure that the thermal pads are not too thick or too thin. If they are too thick, they may create excessive pressure on the CPU and impede heat transfer. If they are too thin, they may not provide adequate thermal conduction and result in suboptimal cooling performance.
Thermal pads are typically reusable and do not require replacement unless they are damaged or worn out. When maintaining or upgrading your system, it is advisable to inspect the condition of the thermal pads and replace them if necessary.
In summary, thermal pads are an essential component of a CPU cooler backplate, facilitating optimal thermal transfer between the CPU and the cooler. Their thermally conductive properties and conformable nature contribute to improved cooling performance and help prevent hot spots. Proper positioning and thickness of the thermal pads are crucial for optimal cooling efficiency and system longevity.
Bracket or Retention Clip
The bracket or retention clip is a key component of a CPU cooler backplate that holds the CPU cooler securely in place. It is attached to the backplate and ensures proper alignment and stability of the cooler on the motherboard.
The design of the bracket or retention clip may vary depending on the specific CPU cooler and socket type. Some brackets feature a screw-based mechanism, while others may utilize a locking system or a lever. The primary function of the bracket or retention clip is to exert downward pressure on the CPU cooler, ensuring firm contact with the processor.
During installation, the bracket or retention clip is fastened onto the backplate using screws or other securing methods. It is positioned in a way that aligns with the mounting holes on the CPU cooler, allowing for easy attachment.
The bracket or retention clip serves multiple purposes. Firstly, it helps distribute the weight of the CPU cooler evenly across the CPU and the backplate, preventing excessive pressure on any specific area. This helps maintain the stability of the motherboard and reduces the risk of damage caused by the weight of the cooler.
Secondly, the bracket or retention clip keeps the CPU cooler securely in place, minimizing the chances of it moving or becoming loose during operation. A stable attachment allows for consistent and reliable heat transfer, ensuring effective cooling performance.
Depending on the design, the bracket or retention clip may also enable easy removal and installation of the CPU cooler. This is particularly useful when cleaning or maintaining the cooler, as it allows for quick access without having to disassemble the entire backplate.
It is important to note that the bracket or retention clip must be properly positioned and secured for optimal performance. Incorrect installation can lead to a loose or misaligned CPU cooler, compromising the cooling efficiency and potentially causing damage to the processor.
When choosing a CPU cooler backplate, it is essential to ensure compatibility between the bracket or retention clip and both the backplate and the CPU cooler. Different coolers and sockets may require specific bracket designs, so referring to the manufacturer’s instructions or specifications is crucial.
In summary, the bracket or retention clip plays a vital role in securely holding the CPU cooler in place on the backplate. It maintains stability, distributes weight evenly, and enables easy installation and removal of the cooler. Proper installation and compatibility between the backplate, bracket, and cooler are important for optimal cooling performance and system longevity.
Installation of a CPU Cooler Backplate
The installation of a CPU cooler backplate is a critical step in ensuring proper cooling and stability for your computer system. It involves several key steps to securely attach the backplate and mount the CPU cooler. Let’s explore the installation process:
1. Removing the Old Backplate (If Applicable): If you are upgrading your CPU cooler or replacing a faulty one, you may need to remove the existing backplate. This typically involves unscrewing the mounting screws and carefully lifting the old backplate off the motherboard. Be sure to refer to the manufacturer’s instructions for specific guidance.
2. Positioning the New Backplate: Place the new CPU cooler backplate on the backside of the motherboard, aligning it with the holes on the motherboard socket. Ensure that the backplate is centered and positioned correctly according to the socket type. The backplate should be flat against the motherboard without any twisting or warping.
3. Secure the Backplate with Mounting Screws: Insert the mounting screws provided with the CPU cooler backplate through the motherboard and into the threaded holes on the backplate. Use an appropriate screwdriver to tighten the screws evenly, ensuring a secure connection. Take care not to overtighten, as this could damage the motherboard or strip the screws.
4. Applying Thermal Pads: If your CPU cooler backplate requires thermal pads, carefully cut or select the appropriate size and shape to fit the designated areas. Place the thermal pads on the areas of the backplate that will come into direct contact with the motherboard components, such as the CPU socket. Ensure that the thermal pads are aligned properly and cover the necessary areas to promote optimal heat transfer.
5. Attaching the Bracket or Retention Clip: Attach the bracket or retention clip to the CPU cooler backplate, aligning it with the mounting holes on the cooler. Depending on the design, secure the bracket or retention clip using screws, locking mechanisms, or other methods provided by the manufacturer. Ensure that the attachment is tight and secure, providing proper pressure and contact between the CPU cooler and the processor.
6. Mounting the CPU Cooler: With the backplate and bracket securely in place, carefully position the CPU cooler over the CPU socket, aligning the mounting holes on the cooler with the bracket or retention clip. Gently lower the cooler onto the bracket, ensuring that it makes firm and consistent contact with the processor. Use the provided mounting screws or mechanisms to secure the cooler to the bracket, tightening them evenly and following the manufacturer’s instructions.
Once the CPU cooler is securely mounted, double-check all connections, ensuring that the backplate, thermal pads, and bracket are properly aligned and tightened. Finally, connect the necessary cooling fan headers to the corresponding connectors on the motherboard.
Remember to consult the specific manufacturer’s instructions and recommendations for your CPU cooler backplate and motherboard. The installation process may vary depending on the brand and model, and it is important to follow the provided guidelines to ensure a successful installation.
Removing the Old Backplate (If Applicable)
When upgrading your CPU cooler or replacing a faulty one, you may need to remove the existing backplate from your motherboard. This step ensures a clean and proper installation of the new CPU cooler backplate. Here’s a step-by-step guide to removing the old backplate:
1. Turn off your Computer: Before starting any hardware-related tasks, make sure to power off your computer and unplug it from the power source. This ensures safety and prevents any accidental damage during the removal process.
2. Access the Back of the Motherboard: Depending on the case design, you may need to remove the side panel or open the case to access the backside of the motherboard. Take precautions to ground yourself properly by touching a metal surface to discharge any static electricity.
3. Locate the Mounting Screws: Observe the existing backplate and identify the mounting screws that secure it to the motherboard. These screws are usually located around the CPU socket area and may vary in number depending on the motherboard and backplate design. Use a screwdriver appropriate for the screw type.
4. Remove the Mounting Screws: Carefully unscrew each mounting screw, ensuring that you hold the backplate to prevent it from falling or putting pressure on the motherboard. Loosen the screws in a diagonal or alternating pattern to maintain balance and avoid any damage to the motherboard.
5. Lift and Remove the Old Backplate: Once all the mounting screws are removed, gently lift the old backplate off the motherboard. Pay attention to any adhesive or thermal pads that may be attached to the backplate. Lift them off carefully to avoid damaging the motherboard components.
6. Clean the Motherboard (Optional): If there is any residual adhesive or thermal compound on the motherboard, you can use isopropyl alcohol and a clean cloth or cotton swab to clean it off. Ensure that the motherboard surface is dry and free from any debris before proceeding with the installation of the new CPU cooler backplate.
It’s important to note that not all CPU coolers require the removal of the old backplate. Some coolers may utilize the existing backplate or may come with a compatible backplate that can be installed without removing the old one. Refer to the instructions provided by the CPU cooler manufacturer to determine if backplate removal is necessary.
By following these steps, you can safely and effectively remove the old backplate from your motherboard and prepare it for the installation of the new CPU cooler backplate.
Positioning the New Backplate
Positioning the new backplate correctly is a crucial step in the installation process of a CPU cooler. This ensures that the backplate aligns properly with the CPU socket, allowing for a secure and stable mounting of the cooler. Here’s a step-by-step guide to positioning the new backplate:
1. Refer to the Manufacturer’s Instructions: Before starting, always refer to the manufacturer’s instructions specific to your CPU cooler and motherboard. These instructions will provide you with specific guidance and any unique considerations for your particular setup.
2. Identify the Correct Orientation: Examine the new backplate to identify the correct orientation. Look for any labels, markings, or notches that indicate the top or bottom side. The orientation may vary depending on the brand and socket type.
3. Access the Back of the Motherboard: To access the backside of the motherboard, you may need to remove the side panel of your computer case or open the case cover. Take precautions to ground yourself before handling any components to prevent static discharge.
4. Align the Backplate with the CPU Socket: Position the new backplate behind the motherboard, aligning it with the mounting holes on the motherboard that correspond to your CPU socket. Ensure that the backplate is seated flat against the motherboard without any twisting or warping. Double-check the alignment to ensure proper placement.
5. Confirm Central Alignment and Socket Type: Verify that the backplate is centrally aligned with the CPU socket. Confirm that it covers the entire socket area and aligns properly with the CPU socket shape. Different socket types may require specific alignment, so ensure compatibility with your motherboard’s socket.
6. Secure the Backplate if Required: Depending on the design of your CPU cooler backplate, it may require additional steps to secure it to the motherboard. Follow the manufacturer’s instructions on how to secure the backplate, using the recommended mounting screws or attachment mechanisms.
Proper positioning of the new backplate is crucial for a successful installation of the CPU cooler. It ensures that the CPU cooler will securely fit and make proper contact with the processor, ensuring efficient cooling performance. Always refer to the manufacturer’s instructions specific to your CPU cooler and motherboard to ensure proper alignment and compatibility.
Secure the Backplate with Mounting Screws
Once the new backplate is correctly positioned behind the motherboard, the next step in installing a CPU cooler backplate is to securely attach it using the provided mounting screws. Proper attachment is essential to ensure stability and optimal heat transfer between the CPU and the cooler. Here is a step-by-step guide to securely fasten the backplate with mounting screws:
1. Refer to the Manufacturer’s Instructions: Before beginning the installation of the mounting screws, refer to the manufacturer’s instructions specific to your CPU cooler and motherboard. This will provide you with the necessary information on screw types, sizes, and tightening sequences.
2. Insert the Mounting Screws: Take the appropriate mounting screws and carefully insert them through the mounting holes on the motherboard. These holes should align with the corresponding holes on the backplate. Gently push the screws through until they are secure but not tightened.
3. Tighten the Mounting Screws: Using a screwdriver, tighten the mounting screws securely. Begin by tightening one screw partially, then move diagonally or alternate to the screw on the opposite side. This helps maintain balance and even pressure distribution. Proceed to tighten the remaining screws in the same manner, taking care not to over-tighten.
4. Check for Even Pressure: Throughout the tightening process, ensure that there is even pressure applied to each screw. Avoid applying excessive force, as this can lead to damage to the motherboard or CPU socket. The screws should be tightened enough to securely attach the backplate, but not to the point of deformation.
5. Double-Check Screw Tightness: Once all the mounting screws are tightened, double-check their tightness. Ensure that they are securely fastened, but again, be cautious not to overtighten as it can cause damage. A snug and balanced tightness is key for an effective connection.
Properly securing the backplate with mounting screws is crucial for a stable and secure connection between the CPU cooler and the motherboard. It ensures that the CPU cooler will be properly positioned and make good contact with the processor for optimal heat transfer. Always follow the manufacturer’s instructions and guidelines for the specific CPU cooler and motherboard to ensure proper screw selection, attachment, and tightening sequence.
Applying Thermal Pads
When installing a CPU cooler backplate, the use of thermal pads is often required to ensure optimal heat transfer between the components. Thermal pads are designed to fill any gaps between the backplate and the motherboard, promoting efficient thermal conductivity. Here’s a step-by-step guide on applying thermal pads:
1. Read the Manufacturer’s Instructions: Before applying thermal pads, refer to the manufacturer’s instructions provided with your CPU cooler and backplate. These instructions will provide specific guidance on thermal pad usage, including the thickness and positioning.
2. Determine Pad Placement: Identify the areas on the CPU cooler backplate that require thermal pads. Thermal pads are typically applied to the regions of the backplate that will come into direct contact with the motherboard components, such as the CPU socket or voltage regulator modules (VRMs).
3. Cut or Select Appropriate Thermal Pad Size: Thermal pads may come in various shapes and sizes. Some thermal pads come pre-cut to match the specific components on the backplate, while others may require trimming to the appropriate size. Follow the manufacturer’s instructions to determine the required pad size.
4. Position and Apply Thermal Pads: Carefully place the thermal pads onto the designated areas of the backplate. Position them in such a way that they cover the required contact points on the motherboard. Apply gentle pressure to ensure the pads adhere securely to the surface of the backplate.
5. Align Pad Edges: Make sure that the edges of the thermal pads align neatly with the edges of the contact areas on the backplate. This helps to avoid any overlap or excess hanging that could interfere with the installation process or cause issues with mounting the CPU cooler.
6. Verify Thermal Pad Thickness: Check the thickness of the applied thermal pads to ensure they conform to the manufacturer’s specifications. If necessary, measure the thickness using a precision tool or consult the thermal pad specifications provided by the manufacturer.
It’s important to note that not all CPU cooler backplates require the use of thermal pads. Some CPU coolers come with a built-in thermal interface material (TIM) or use thermal paste instead. Always refer to the manufacturer’s instructions to determine whether thermal pads are necessary.
Properly applying thermal pads helps eliminate gaps between the backplate and the motherboard, maximizing thermal conductivity and improving cooling efficiency. Following the manufacturer’s guidelines ensures optimal thermal performance and safeguards the integrity of your CPU cooler installation.
Attaching the Bracket or Retention Clip
Attaching the bracket or retention clip is an important step in the installation of a CPU cooler backplate. The bracket or retention clip securely holds the CPU cooler in place, ensuring proper alignment and stability. Here’s a step-by-step guide to attaching the bracket or retention clip:
1. Refer to the Manufacturer’s Instructions: Before starting, it is crucial to refer to the manufacturer’s instructions specific to your CPU cooler and backplate. These instructions will provide you with detailed guidance on attaching the bracket or retention clip.
2. Identify the Bracket or Retention Clip: Locate the bracket or retention clip provided with your CPU cooler backplate kit. Take note of its design and any specific features.
3. Align the Bracket or Retention Clip: Position the bracket or retention clip on the backplate, aligning it with the mounting holes on the cooler and the corresponding holes on the backplate. Ensure that the bracket or retention clip is centered and squared with the CPU socket.
4. Attach the Bracket or Retention Clip: Once aligned, use the provided hardware, such as screws or clips, to secure the bracket or retention clip onto the backplate. Depending on the design, you may need to slide the bracket or retention clip onto the backplate or fasten it using screws or other mechanisms.
5. Check for Secure Attachment: Ensure that the bracket or retention clip is securely attached to the backplate and does not move or shift when gently touched. Double-check the tightness of any screws or clips to ensure a stable connection.
6. Verify Proper Alignment: After attaching the bracket or retention clip, visually inspect the alignment of the CPU cooler mount. Ensure that it is directly above the CPU socket and properly aligned with the mounting holes on the bracket or retention clip.
Proper attachment of the bracket or retention clip is crucial for the stability and alignment of the CPU cooler. It ensures that the cooler will be securely held in place during operation and maintain proper contact with the processor.
It is important to note that the specific installation method for the bracket or retention clip may vary depending on your CPU cooler and backplate design. Always consult the manufacturer’s instructions for specific guidance and follow the recommended installation procedures.
By following these steps, you can securely attach the bracket or retention clip to the backplate, ensuring a stable and aligned mounting for your CPU cooler.
Mounting the CPU Cooler
Mounting the CPU cooler is the final step in the installation of a CPU cooler backplate. This step involves attaching the cooler onto the bracket or retention clip, ensuring proper contact with the processor for efficient heat transfer. Here’s a step-by-step guide to mounting the CPU cooler:
1. Refer to the Manufacturer’s Instructions: Before starting, refer to the manufacturer’s instructions specific to your CPU cooler and backplate. These instructions will provide detailed guidance on mounting the CPU cooler onto the bracket or retention clip.
2. Position the CPU Cooler: Carefully position the CPU cooler onto the bracket or retention clip. Align the mounting holes on the cooler with the corresponding holes on the bracket or retention clip, ensuring a proper fit.
3. Attach the CPU Cooler: Once aligned, use the provided mounting hardware, such as screws or clips, to secure the CPU cooler onto the bracket or retention clip. Begin with one screw or clip, partially tightening it. Then, move diagonally or alternate to the screw or clip on the opposite side. Repeat this process until all screws or clips are partially tightened.
4. Tighten the Mounting Screws or Clips: Starting from the first screw or clip, gradually tighten each one in a diagonal or alternating pattern. Apply gentle pressure to ensure even and secure contact between the CPU cooler and the processor.
5. Check for Proper Contact: Once all mounting screws or clips are tightened, gently verify that the CPU cooler is making proper contact with the processor. Ensure that there is full contact between the cooler’s thermal interface material (TIM) and the processor’s heat spreader.
6. Connect Cooling Fan(s): Depending on your CPU cooler’s design, connect the cooling fan or fans to the appropriate headers on the motherboard. Ensure that the fans are properly installed and oriented to provide efficient airflow through the cooler’s heatsink.
It is crucial to follow the manufacturer’s instructions for mounting the CPU cooler to ensure proper installation and maximize cooling performance. Improper mounting can result in inadequate contact between the CPU cooler and the processor, leading to suboptimal cooling efficiency.
It is also important to avoid overtightening the mounting screws or clips, as this can put excessive pressure on the CPU and potentially damage the processor or motherboard. Tighten the screws or clips snugly, but with care to avoid overcompression.
By following these steps, you can successfully mount the CPU cooler onto the bracket or retention clip, completing the installation process for your CPU cooler backplate.
Conclusion
Installing a CPU cooler backplate is a crucial step in ensuring efficient heat dissipation, system stability, and optimal performance for your computer. Understanding the components of a CPU cooler backplate and the installation process is vital for a successful installation. By following the manufacturer’s instructions and guidelines, you can achieve a secure and reliable mounting of your CPU cooler.
The metal plate provides the foundation and stability for the CPU cooler, preventing motherboard flexing and ensuring even weight distribution. Mounting screws securely attach the CPU cooler to the backplate, allowing for proper contact and heat transfer. Thermal pads fill any gaps between the backplate and the motherboard, improving thermal conductivity and preventing hot spots. The bracket or retention clip holds the CPU cooler in place, maintaining alignment and stability. Finally, mounting the CPU cooler onto the bracket completes the installation, ensuring proper cooling performance.
Throughout the installation process, it is essential to refer to the manufacturer’s instructions specific to your CPU cooler and backplate. Proper tightening of screws, alignment of thermal pads, and correct attachment of the bracket or retention clip are crucial for optimal cooling efficiency and system longevity.
Remember to exercise caution and follow best practices, such as grounding yourself and using proper tools. Take care not to overtighten components, which could potentially cause damage to the motherboard or CPU. Lastly, always prioritize compatibility by ensuring that the backplate and CPU cooler are appropriate for your motherboard’s socket type.
By understanding the importance of a CPU cooler backplate and following the correct installation procedures, you can create a stable, efficient, and reliable cooling solution for your computer system. A properly installed CPU cooler backplate will help maintain optimal CPU temperatures, prevent performance issues, and contribute to the overall longevity and smooth operation of your system.