Introduction
Installing a CPU cooler bracket is an essential step when it comes to maintaining the optimal performance and temperature of your computer’s processor. Whether you are building a new PC or upgrading your existing one, properly mounting the CPU cooler is crucial to prevent overheating and ensure smooth operation.
In this guide, we will walk you through the step-by-step process of installing a CPU cooler bracket. We will cover everything you need to know, from removing the old cooler to securely mounting the new one. By following these instructions and taking necessary precautions, you will be able to successfully install a CPU cooler bracket and keep your processor running cool and efficient.
Before we dive into the installation process, it’s important to note that different CPU cooler brackets exist for various CPU socket types. Make sure you have the appropriate bracket that is compatible with your specific CPU socket. Consult your CPU cooler’s manufacturer or refer to the instruction manual to ensure you have the correct bracket.
Now, let’s gather the necessary tools and get started on installing the CPU cooler bracket.
What You Will Need
Before you begin installing the CPU cooler bracket, there are a few essential tools and components you will need to have on hand. Gathering these items beforehand will ensure a smooth and efficient installation process. Here’s what you will need:
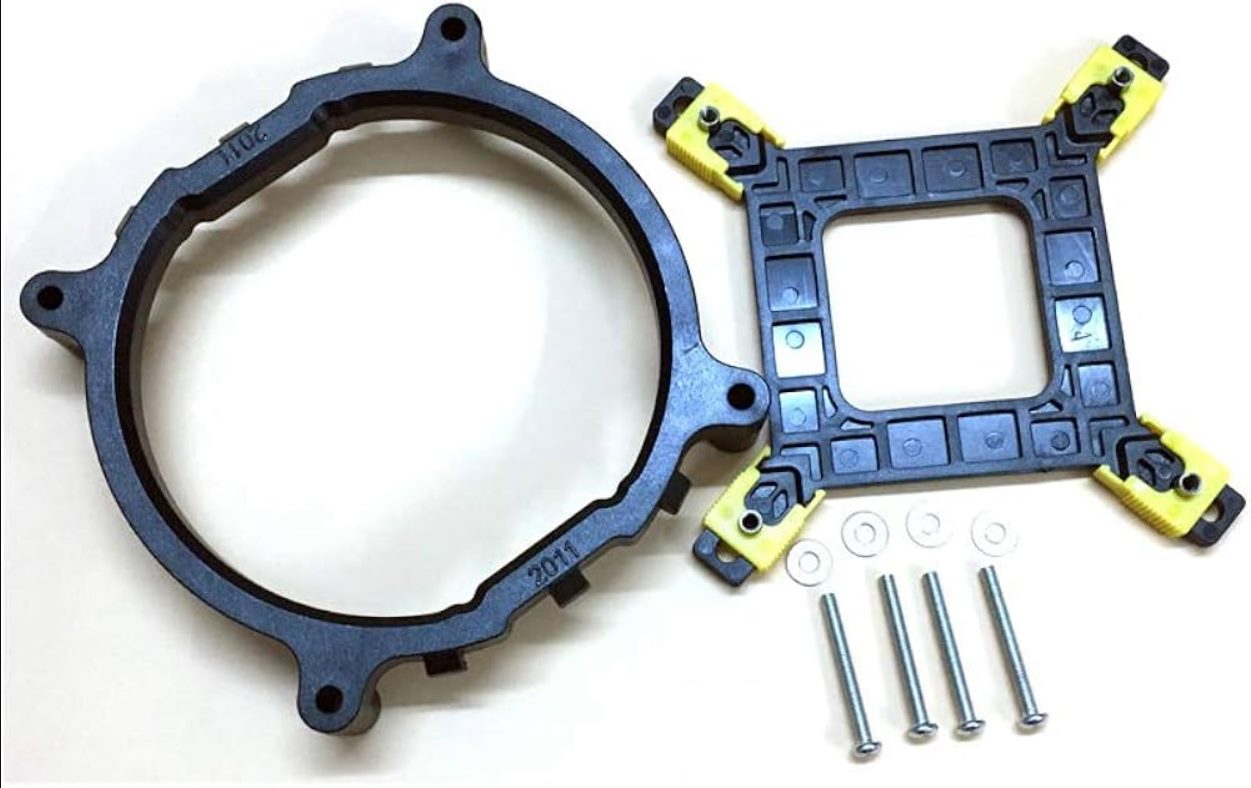
- CPU Cooler Bracket: Make sure you have the appropriate CPU Cooler bracket that is compatible with your specific CPU socket. Refer to the manufacturer’s instructions or consult the product documentation to ensure you have the correct bracket.
- Screwdriver: Depending on the type of CPU cooler bracket and mounting mechanism, you may need a Phillips head screwdriver or a hex key to secure the bracket in place.
- Thermal Paste: Thermal paste is a crucial component that helps to ensure proper heat transfer between the CPU and the cooler. Make sure you have a high-quality thermal paste to apply before installing the cooler.
- Clean Cloth or Alcohol Pads: It’s important to clean the surface of the CPU and the CPU socket before installing the cooler. A clean cloth or alcohol pads can be used to remove any dust, debris, or residue from the surfaces.
- Anti-static Wrist Strap (Optional): While not necessary, an anti-static wrist strap can be used to prevent any static electricity from damaging the sensitive components of your computer.
Having these tools and components ready will ensure that you have everything you need to proceed with the CPU cooler bracket installation. Before continuing, double-check that you have all the necessary items listed above.
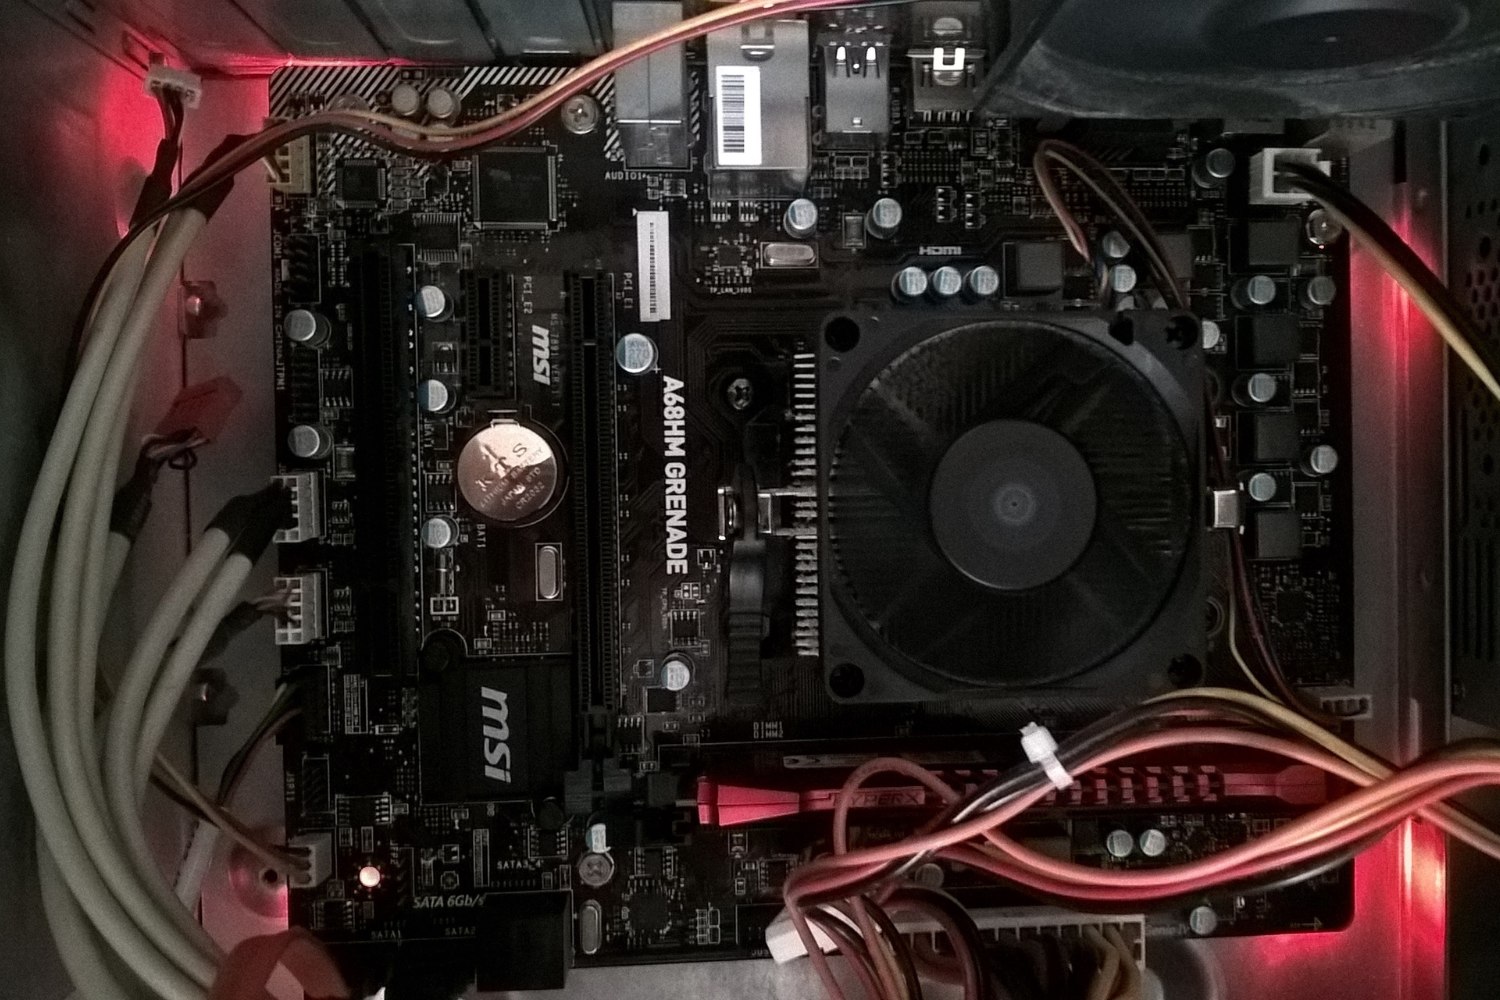
Step 1: Removing the Old Cooler
Before you can install the new CPU cooler bracket, you will need to remove the old cooler from your computer. Follow these steps to ensure a proper removal:
- Power Off and Unplug: Shut down your computer and disconnect it from the power source. This will prevent any accidental damage or electrical mishaps during the removal process.
- Remove Side Panel: Open the side panel of your computer case to gain access to the motherboard and CPU area. Refer to your computer case manual for specific instructions if needed.
- Identify Cooler Mounting Mechanism: Take a close look at how the old CPU cooler is mounted onto the motherboard. Note the type of mounting mechanism used, such as screws, clips, or brackets.
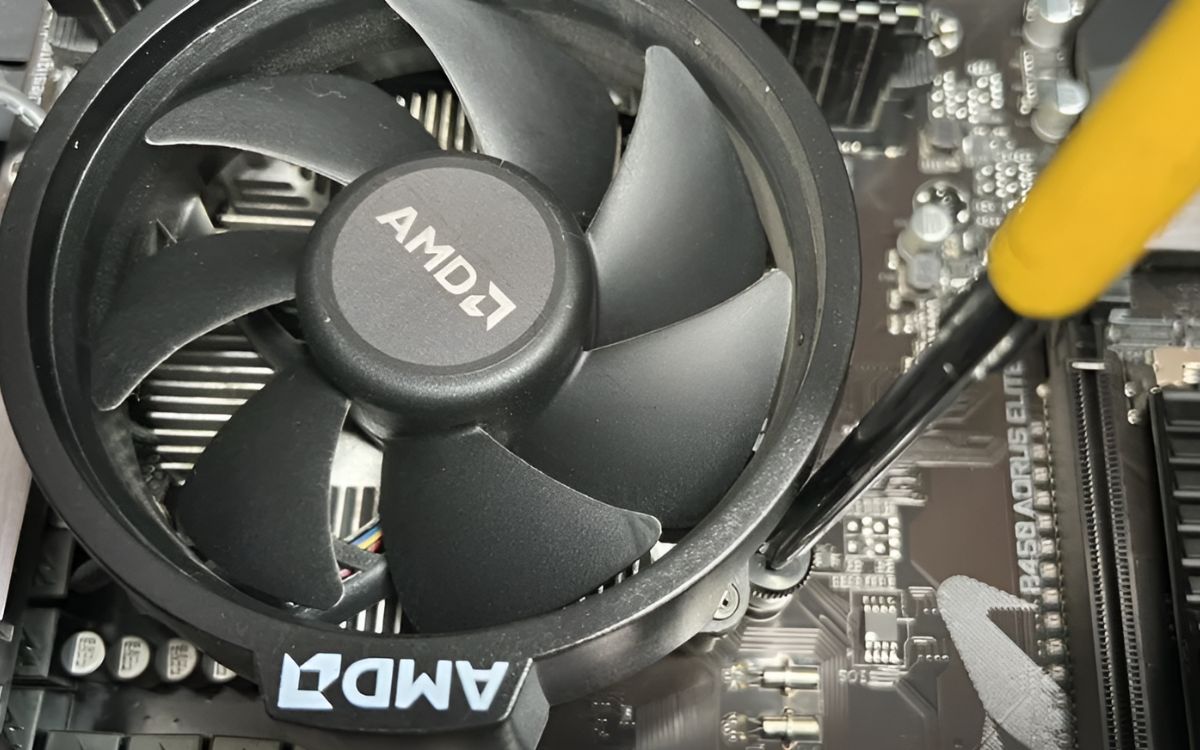
- Disconnect Fan Power Cable: Locate the power cable connected to the CPU cooler fan. Gently unplug it from the motherboard or fan header, ensuring not to apply excessive force.
- Loosen Cooler Mounting Screws: Using a screwdriver or the appropriate tool, loosen the screws holding the CPU cooler in place. Unscrew them in a diagonal pattern to release the pressure evenly.
- Remove Cooler: Carefully lift the CPU cooler away from the CPU socket. Be cautious not to tug on any components or apply too much force to prevent any damage.
- Clean CPU Surface: Take a clean cloth or alcohol pad and gently wipe away any remnants of thermal paste from the surface of the CPU. Ensure that it is clean and free of any debris.
Once you have successfully removed the old CPU cooler and cleaned the CPU surface, you are ready to proceed to the next step of preparing the CPU socket for the installation of the new CPU cooler bracket.
Step 2: Preparing the CPU Socket
After removing the old CPU cooler, it’s important to prepare the CPU socket before installing the new cooler bracket. Follow these steps to ensure a proper preparation:
- Inspect the CPU Socket: Take a close look at the CPU socket on your motherboard. Ensure that there is no leftover thermal paste or debris present. If necessary, use a clean cloth or alcohol pad to gently wipe away any contaminants.
- Check for Socket Alignment: Depending on the CPU socket type, there may be notches or markings that indicate the correct alignment for the CPU cooler bracket. Take note of these alignment indicators for proper installation in the next step.
- Apply Thermal Paste: Before installing the CPU cooler bracket, it’s important to apply a thin layer of thermal paste to the surface of the CPU. This paste helps in creating an efficient heat transfer between the CPU and the cooler. Follow the instructions provided with the thermal paste for proper application.
- Spread the Thermal Paste: Using a spreading tool or a plastic card, gently spread the thermal paste evenly over the surface of the CPU. Be careful not to apply too much pressure or make it too thin. A pea-sized amount of thermal paste is usually sufficient for most CPUs.
- Ensure Socket Locking Mechanism: Check the locking mechanism present on your CPU socket. This mechanism is used to secure the CPU cooler bracket in place. Ensure that it is in the unlocked position, allowing for easy installation of the bracket.
Once you have cleaned the CPU socket, applied the thermal paste, and ensured the locking mechanism is in the unlocked position, you are now ready to move on to the next step of installing the CPU cooler bracket.
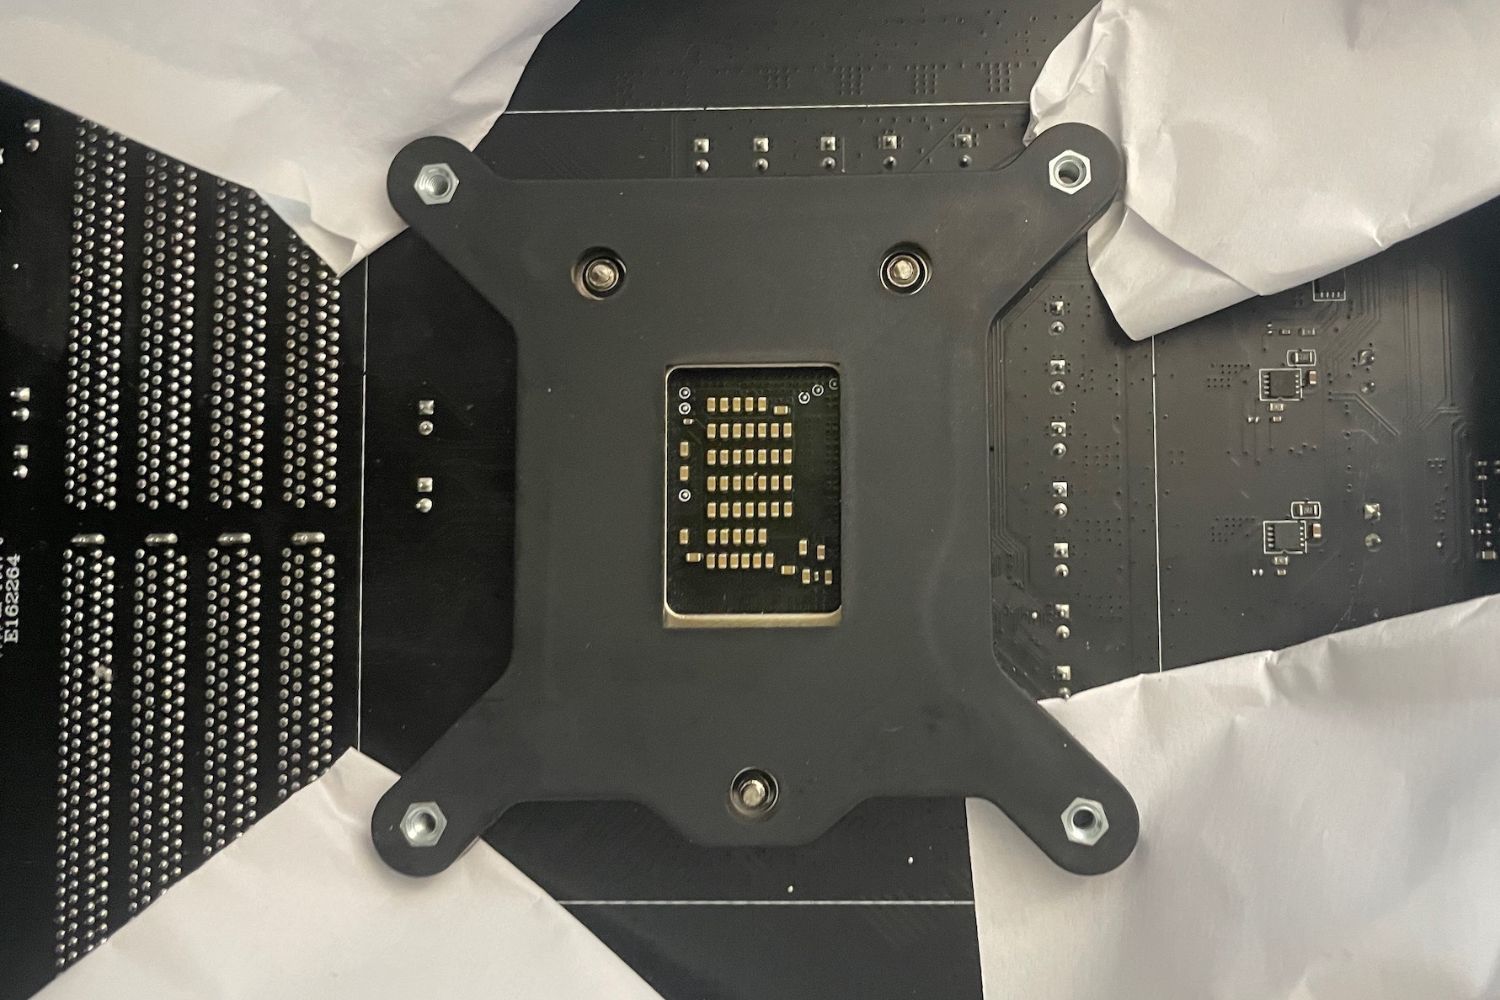
Step 3: Installing the Backplate
Now that you have prepared the CPU socket, it’s time to install the backplate. The backplate provides structural support for the CPU cooler bracket and helps distribute the weight evenly. Follow these steps to properly install the backplate:
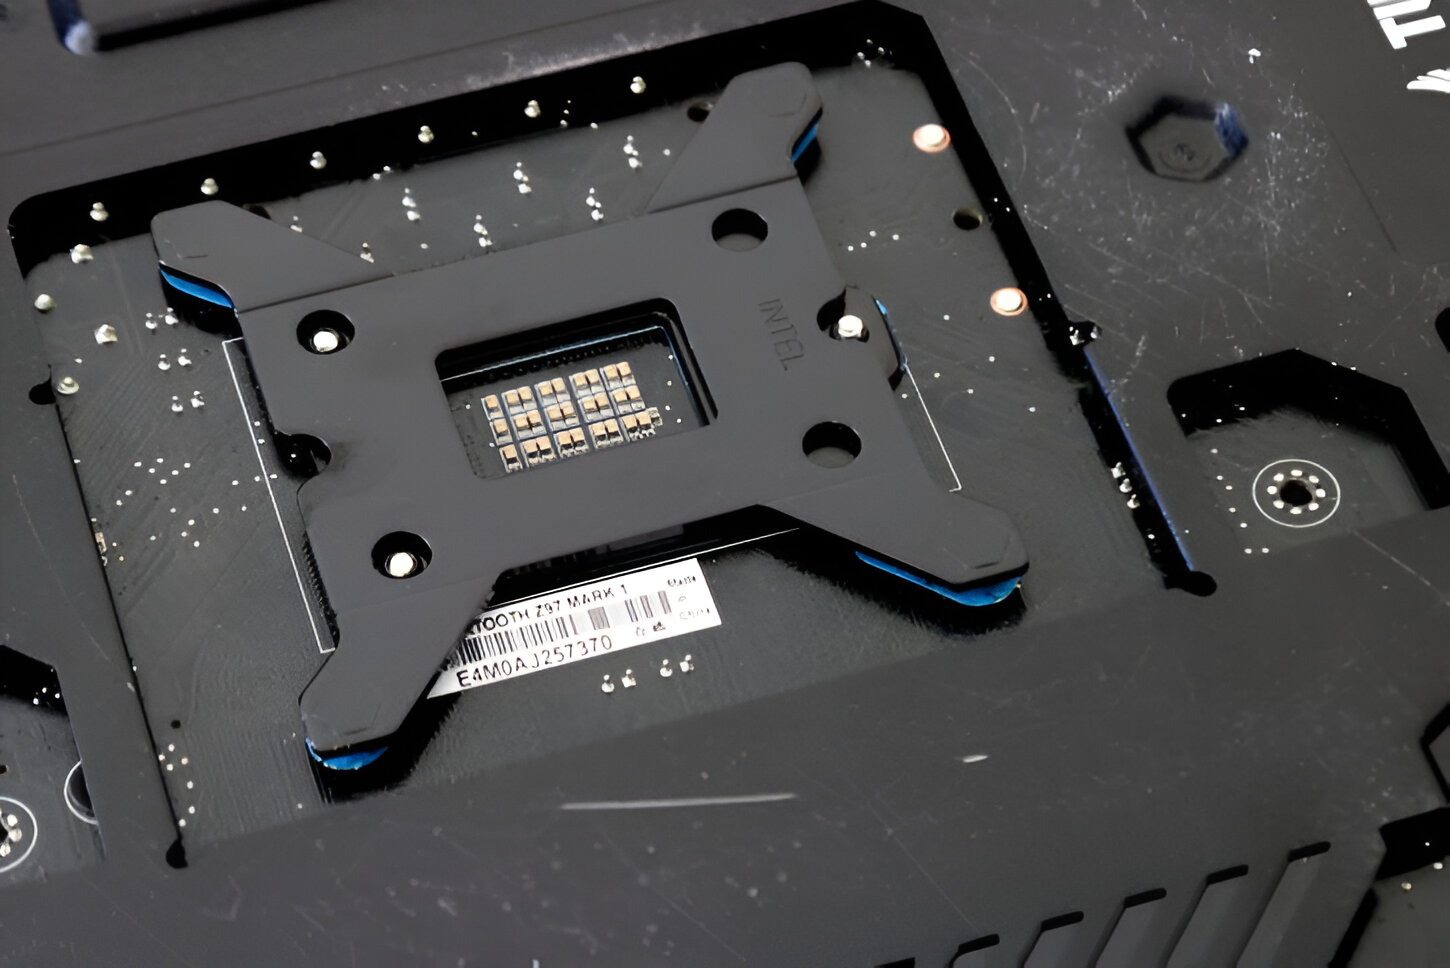
- Align the Backplate: Take the CPU cooler bracket’s backplate and align it with the holes on the backside of the motherboard, ensuring that it lines up with the CPU socket. The orientation may vary depending on your motherboard and CPU cooler, so refer to the manufacturer’s instructions for proper alignment.
- Secure the Backplate: Depending on the type of CPU cooler bracket, you may need to use screws or adhesive pads to secure the backplate to the motherboard. Follow the manufacturer’s instructions to properly secure the backplate in place. Ensure that it sits firmly and does not move or wobble.
- Check for Proper Fit: Ensure that the backplate is not obstructing any nearby components or connectors on the motherboard. Verify that it is seated flush against the backside of the motherboard without any gaps or misalignments.
- Double-Check Alignment: Before proceeding to the next step, double-check the alignment of the backplate and verify that it is correctly positioned according to your CPU socket’s alignment indicators.
Once the backplate is securely installed and properly aligned, you are now ready to move on to the next step of mounting the CPU cooler onto the bracket.
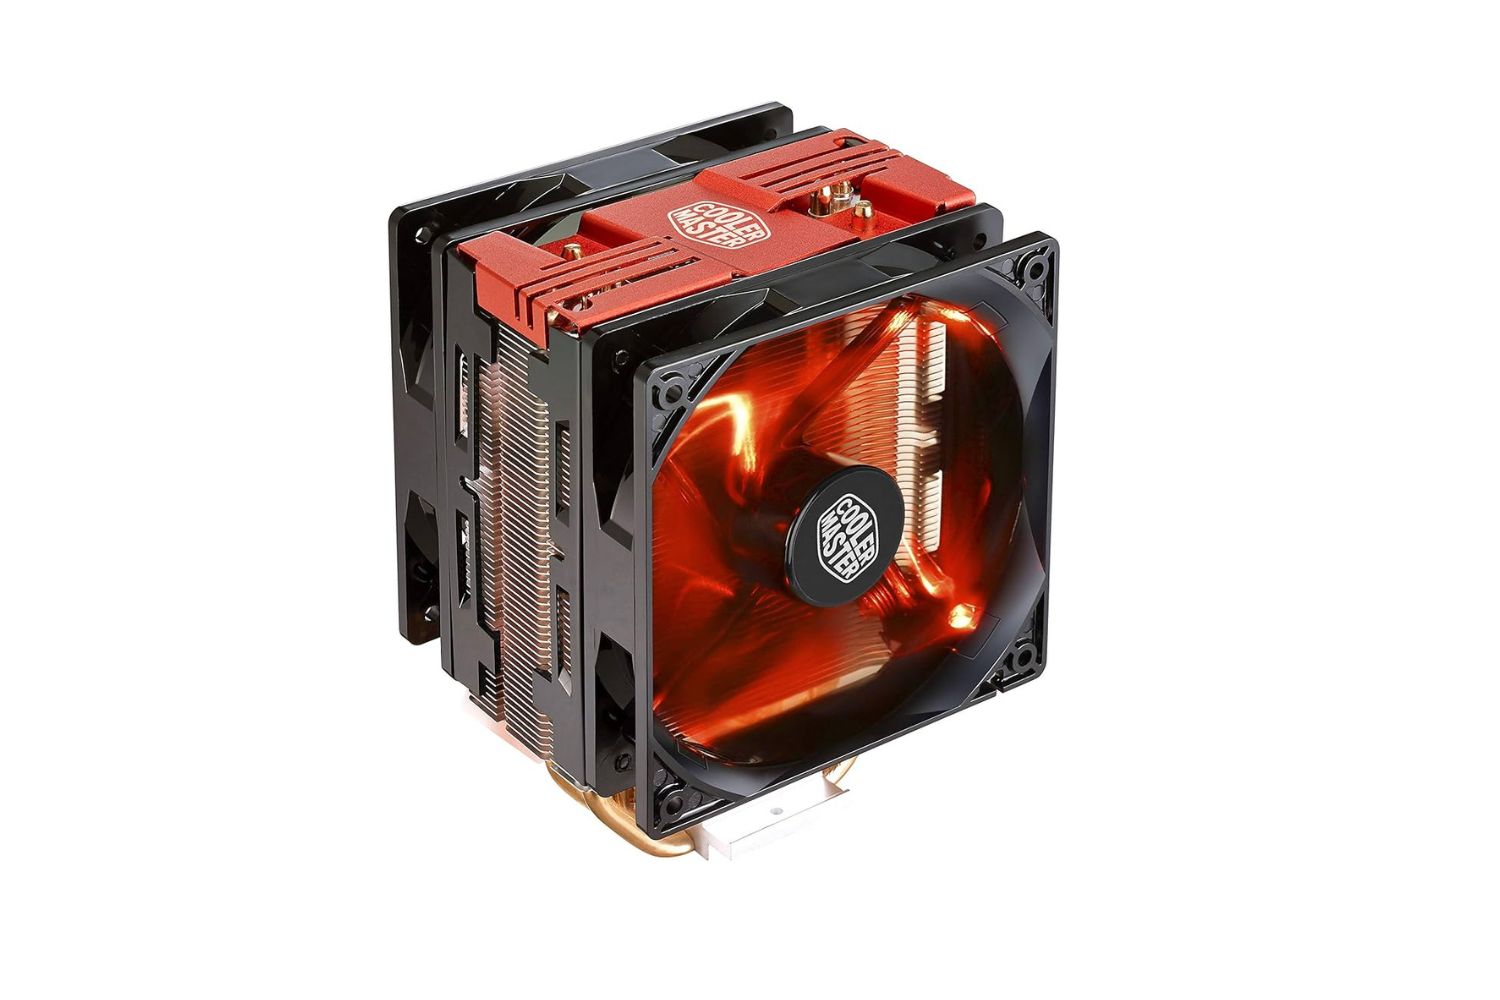
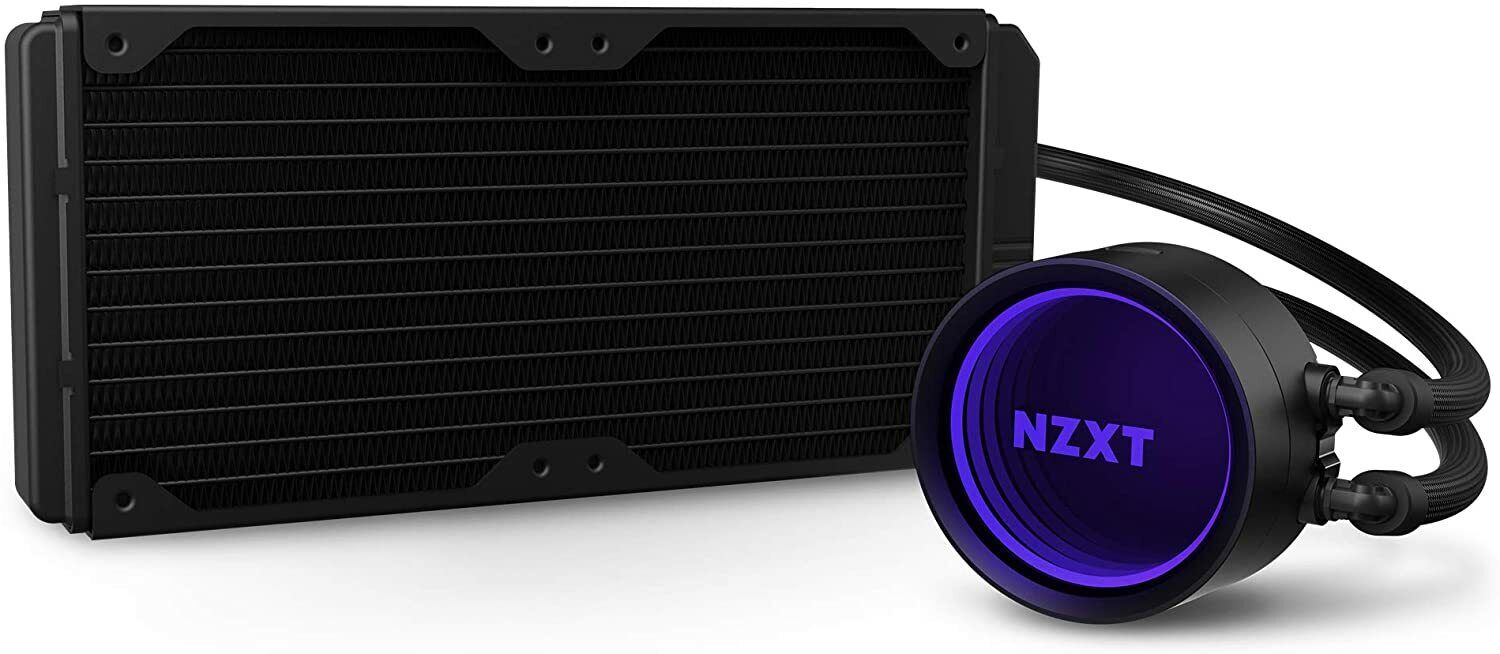
Step 4: Mounting the CPU Cooler
With the backplate installed, it’s time to mount the CPU cooler onto the bracket. This step ensures proper heat dissipation and cooling performance for your processor. Follow these steps to correctly mount the CPU cooler:
- Prepare the CPU Cooler: Depending on the type of CPU cooler you have, you may need to attach any necessary mounting brackets or adapters. Refer to the manufacturer’s instructions for guidance on how to prepare your specific CPU cooler for installation.
- Position the CPU Cooler: Carefully place the CPU cooler onto the CPU socket, aligning it with the mounting holes on the CPU cooler bracket. Make sure the CPU cooler is positioned in line with the backplate and the CPU socket.
- Secure Mounting Screws: Using the provided screws or mounting clips, begin to secure the CPU cooler onto the bracket by screwing in the screws diagonally. Tighten them gradually, alternating between corners, to ensure even pressure distribution.
- Avoid Over-Tightening: Be cautious not to over-tighten the screws as this can potentially damage the CPU or the motherboard. Ensure that the CPU cooler is securely mounted, but avoid applying excessive force.
- Verify Proper Alignment: Check that the CPU cooler is properly aligned with the CPU socket. Verify that it is sitting flat and level on the CPU, with no uneven gaps or misalignments.
- Confirm Clearance: Double-check that the CPU cooler does not obstruct any nearby components, such as RAM modules or PCIe slots. Ensure that there is enough clearance for proper airflow within the computer case.
Once you have successfully mounted the CPU cooler onto the bracket, you are ready to move on to the next step of securing the cooler in place.
Step 5: Securing the Cooler in Place
Now that the CPU cooler is mounted onto the bracket, it’s time to secure it in place to ensure stability and proper cooling performance. Follow these steps to securely fasten the CPU cooler:
- Tighten Mounting Screws: Using a screwdriver or the provided tool, firmly tighten the mounting screws of the CPU cooler. Ensure that they are securely fastened, but avoid over-tightening as it may damage the CPU cooler or the motherboard.
- Check for Even Pressure: As you tighten the screws, pay attention to the pressure distribution. Make sure it is evenly distributed across all corners of the CPU cooler to ensure proper contact with the CPU.
- Verify Cooler Orientation: Double-check the orientation of the CPU cooler to ensure that the airflow direction is going towards the proper exhaust or intake fans in your computer case. This will help optimize cooling efficiency.
- Ensure Fan Clearance: Make sure there is sufficient clearance between the CPU cooler and any nearby components, such as RAM modules or VRM heatsinks. This will prevent any interference and allow for proper airflow.
- Confirm Fan Connections: Reconnect the fan power cable of the CPU cooler to the appropriate fan header on the motherboard. Ensure that it is securely connected and properly seated.
After securing the CPU cooler in place, give it a gentle wiggle to confirm that it is firmly attached and does not move or wobble. Once you have confirmed its stability, you are ready to connect the CPU cooler to the motherboard in the next step.
Step 6: Connecting the Cooler to the Motherboard
With the CPU cooler securely fastened in place, it’s time to connect it to the motherboard to ensure proper functionality and control. Follow these steps to correctly connect the cooler to the motherboard:
- Locate CPU Fan Header: Identify the CPU fan header on the motherboard, which is typically labeled “CPU_FAN” or similar. Refer to your motherboard manual for the exact location and labeling.
- Position the Connector: Take the CPU cooler’s fan cable and align the connector with the CPU fan header on the motherboard. Ensure that the pins are properly aligned and make a firm connection.
- Secure the Connection: Once the connector is properly positioned, gently press it down to secure the connection. Ensure that it is seated firmly and does not wiggle or come loose.
- Confirm Fan Control: Check the fan control settings in your motherboard’s BIOS or UEFI. Ensure that the CPU fan is set to the appropriate mode, such as PWM or DC, depending on your CPU cooler’s fan type.
- Adjust Fan Speed (Optional): If desired, you can use software provided by your motherboard or third-party utilities to adjust the fan speed of the CPU cooler. This allows for customization based on your cooling needs and preferences.
- Test the CPU Cooler: Power on your computer and monitor the CPU temperature. Verify that the CPU cooler fan is spinning and that the temperature remains within normal operating range. If there are any unusual noises or high temperatures, promptly address the issue.
Once you have successfully connected the CPU cooler to the motherboard and tested its functionality, you can proceed to the final step of testing and troubleshooting.
Step 7: Testing and Troubleshooting
After completing the installation of the CPU cooler bracket and connecting the cooler to the motherboard, it’s important to perform some testing and troubleshooting to ensure everything is working properly. Follow these steps to test and troubleshoot the CPU cooler:
- Power on the Computer: Turn on your computer and observe the CPU cooler’s fan. Verify that it is spinning and providing adequate airflow to dissipate heat from the CPU.
- Monitor CPU Temperature: Use monitoring software or the BIOS/UEFI interface to keep an eye on the CPU temperature. Ensure that it remains within safe operating limits and doesn’t exceed the manufacturer’s specifications.
- Listen for Unusual Noises: Pay attention to any abnormal noises coming from the CPU cooler, such as rattling, grinding, or excessive vibration. These can indicate a problem with the installation or faulty components.
- Check for Proper Cooling Performance: Run demanding tasks or applications that put a heavy load on the CPU, such as gaming or rendering. Monitor the CPU temperature to see if the cooler is effectively cooling the processor under such conditions.
- Address Temperature Issues: If you notice unusually high CPU temperatures or the cooler struggling to keep the temperature within safe limits, consider rechecking the installation. Ensure that the cooler is securely mounted, the thermal paste is properly applied, and there is adequate airflow within the computer case.
- Consult Manufacturer Support: If you encounter persistent issues with the CPU cooler, consult the manufacturer’s support resources. They can provide specific troubleshooting steps or offer guidance on potential solutions.
By performing these tests and troubleshooting steps, you can ensure that the CPU cooler is functioning correctly and maintaining the optimal temperature for your processor. Address any issues or concerns promptly to avoid any potential long-term damage to your CPU or system stability.
Conclusion
Installing a CPU cooler bracket is a fundamental step in maintaining the performance and temperature of your computer’s processor. By following the steps outlined in this guide, you can successfully install a CPU cooler bracket and ensure efficient cooling for your CPU.
Remember to gather all the necessary tools and components before beginning the installation process. Take your time to carefully remove the old cooler, clean the CPU socket, and apply thermal paste. By properly aligning and securing the backplate, mounting the CPU cooler, and connecting it to the motherboard, you ensure a stable and functional setup.
After installation, it’s important to test and troubleshoot the CPU cooler to ensure it is functioning optimally. Monitor the CPU temperature, check for any unusual noises, and verify proper cooling performance during demanding tasks. If you encounter any issues, be sure to address them promptly and consult the manufacturer’s support if needed.
Taking the time to correctly install a CPU cooler bracket can greatly contribute to the longevity and performance of your computer. Proper cooling and temperature management are vital for the smooth operation of your CPU, especially during intensive tasks.
By following the steps outlined in this guide, you can confidently install a CPU cooler bracket and protect the health of your CPU. With a well-installed cooler, you can enjoy a cooler and more stable computing experience for years to come.