Introduction
Welcome to our guide on how to install the Thermaltake Cl-P0497 CPU Cooler! If you’re looking to upgrade your computer’s cooling system for optimal performance, this guide is perfect for you. The Thermaltake Cl-P0497 CPU Cooler offers excellent cooling capabilities and is designed to keep your CPU running at optimal temperature levels.
Over time, the internal components of your computer can heat up, which can lead to reduced performance and potential damage to your hardware. A high-quality CPU cooler, like the Thermaltake Cl-P0497, helps dissipate heat efficiently and ensures that your computer remains cool during heavy usage.
This installation guide will provide you with a step-by-step process to help you correctly install the Thermaltake Cl-P0497 CPU Cooler. It is important to follow the instructions carefully to avoid any damage to your hardware and to ensure a successful installation.
Before we dive into the installation process, let’s take a closer look at what the Thermaltake Cl-P0497 CPU Cooler has to offer and the essential tools you will need for the installation.
What is the Thermaltake Cl-P0497 CPU Cooler?
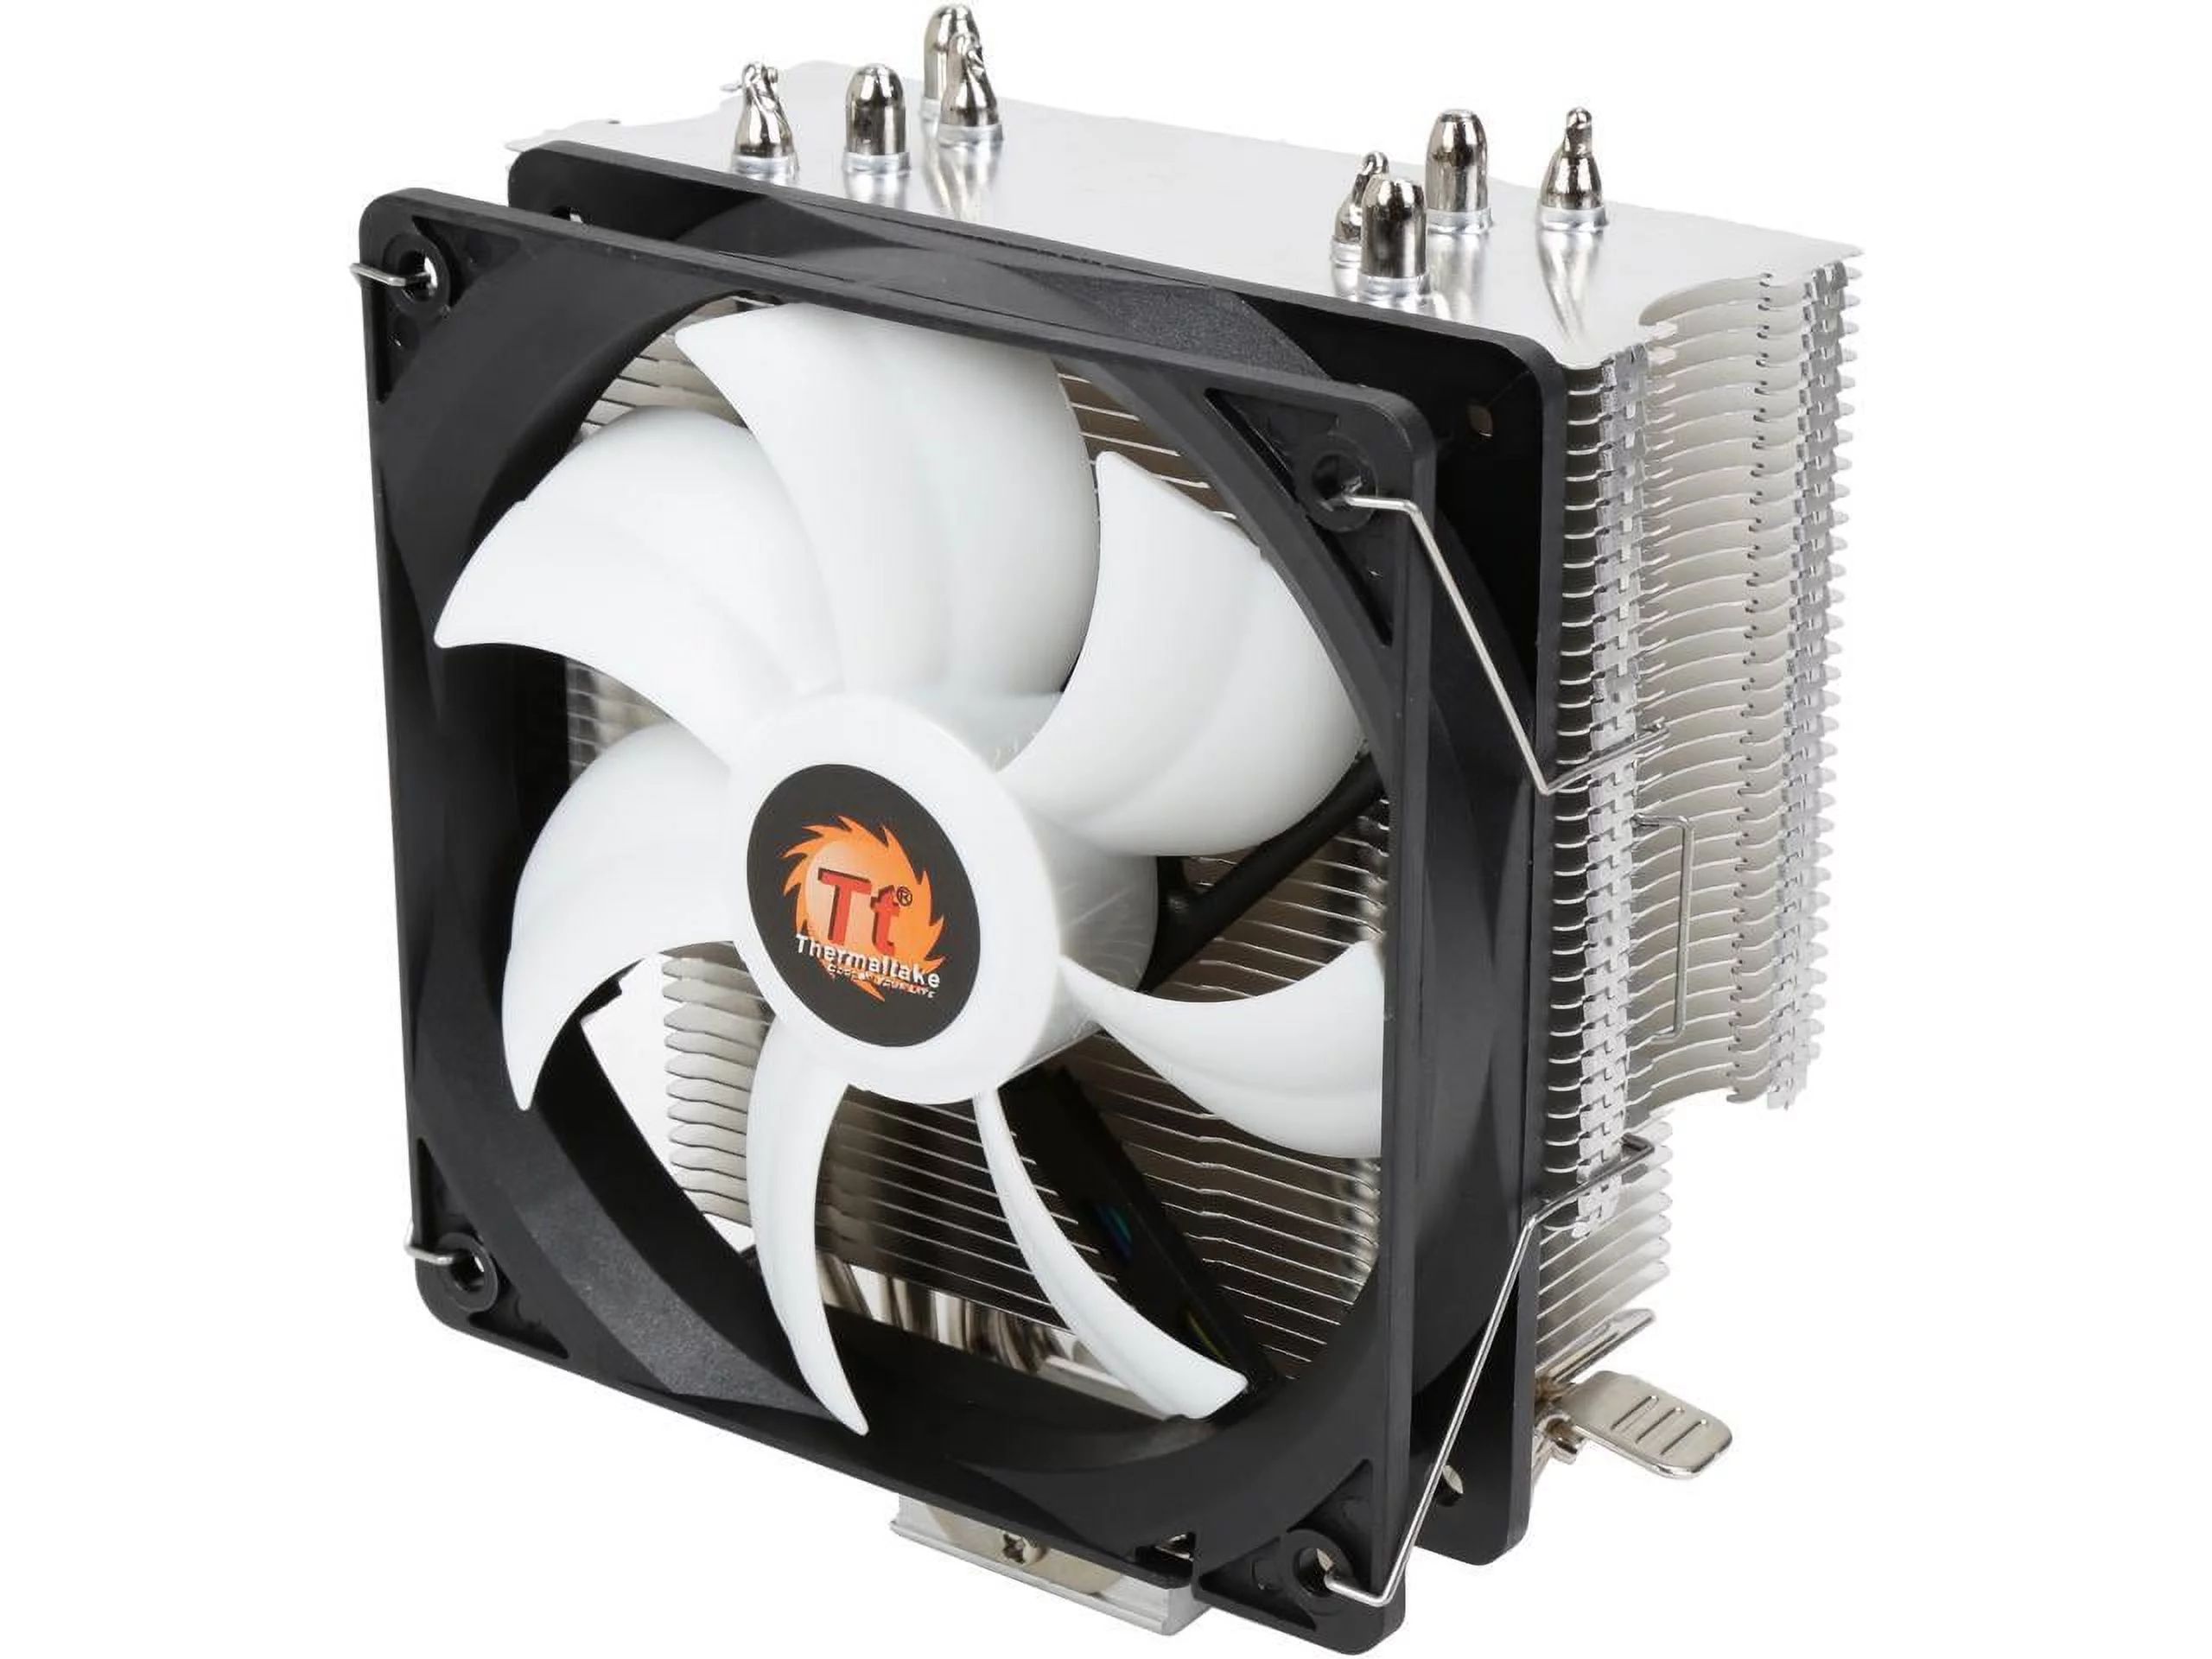
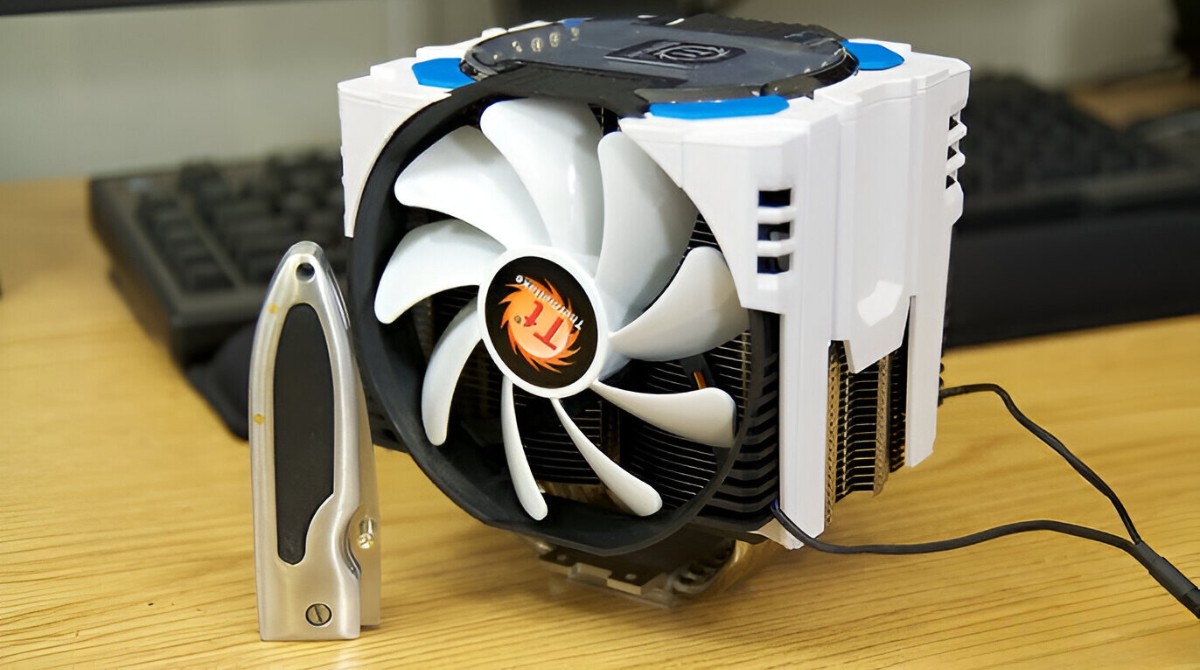
The Thermaltake Cl-P0497 is a high-performance CPU cooler designed to provide efficient cooling for your computer’s central processing unit (CPU). It features a robust heatsink with a copper base and aluminum fins, optimized to quickly dissipate heat generated by the CPU.
One of the standout features of the Thermaltake Cl-P0497 is its direct-contact heat pipe design. It utilizes four copper heat pipes directly in contact with the CPU surface, maximizing heat transfer and enhancing overall cooling performance. This design ensures that heat from the CPU is promptly transferred to the heatsink, where it is then dissipated by the airflow generated by the cooler’s fan.
The Cl-P0497 cooler also comes with a 120mm PWM fan for efficient and quiet cooling. The fan operates at variable speeds depending on the CPU temperature, allowing for optimal cooling under heavy loads while maintaining low noise levels during regular usage.
Furthermore, the Thermaltake Cl-P0497 CPU Cooler is compatible with a wide range of CPU sockets, making it suitable for both Intel and AMD processors. Whether you have a mainstream Intel Core i5 or a powerful AMD Ryzen processor, this cooler can effectively handle the heat and keep your CPU temperatures in check.
Overall, the Thermaltake Cl-P0497 CPU Cooler is a reliable and high-performance cooling solution for your computer. With its superior heat dissipation capabilities, direct contact heat pipe design, and quiet operation, it is an excellent choice for users who want to keep their CPUs running at optimal temperatures and ensure long-lasting performance.
What You Will Need
Before you start the installation process, it’s important to gather the necessary tools and materials. Here’s a list of what you will need to install the Thermaltake Cl-P0497 CPU Cooler:
- A screwdriver (typically a Phillips head or flathead, depending on your computer case)
- Thermal paste (to ensure proper heat transfer between the CPU and the cooler)
- Clean cloth or alcohol wipes (to clean the CPU and remove any old thermal paste)
- The Thermaltake Cl-P0497 CPU Cooler (including the heatsink, fan, and mounting brackets)
- Any additional mounting hardware included with your specific CPU cooler
- The user manual or installation guide provided by Thermaltake (for reference)
Before you begin, make sure you have a clean and well-lit workspace to prevent any accidental damage to your hardware. It’s also a good idea to ground yourself by touching a grounded metal object or using an anti-static wristband to avoid static electricity discharge.
Ensure that you have enough time set aside for the installation process, as it may take anywhere from 20 to 45 minutes depending on your experience level and computer setup. Following the installation steps carefully will help ensure a successful and trouble-free installation of the Thermaltake Cl-P0497 CPU Cooler.
Now that you have all the necessary tools and materials ready, let’s move on to the step-by-step installation process for the Thermaltake Cl-P0497 CPU Cooler.
Step 1: Prepare Your Workstation
Before diving into the installation process, it’s important to properly prepare your workstation to ensure a smooth and hassle-free experience. Here are the steps to follow:
- Power off your computer: Before beginning any hardware installation, it’s crucial to turn off your computer and unplug it from the power source. This will prevent any accidental damage to your hardware or electrical components.
- Select a clean and static-free workspace: Find a clean and static-free area to work on. It’s important to minimize the risk of static electricity damaging your sensitive computer components. Working on a non-static, hard surface like a table or desk is ideal.
- Gather your tools and materials: Ensure that you have all the necessary tools and materials listed in the previous section, such as a screwdriver, thermal paste, clean cloth or alcohol wipes, and the Thermaltake Cl-P0497 CPU Cooler itself.
- Organize your workspace: Take a moment to organize your workspace and remove any unnecessary clutter. This will make it easier to access the components and follow the installation steps without any distractions.
- Ground yourself: To prevent any static electricity discharge that could potentially damage your computer components, it’s essential to ground yourself. Either use an anti-static wristband or touch a grounded metal object to discharge any static build-up.
- Refer to the user manual or installation guide: It’s always a good idea to have the Thermaltake Cl-P0497 CPU Cooler’s user manual or installation guide on hand. Familiarize yourself with the components and review the installation steps before proceeding.
By carefully preparing your workstation, you are setting yourself up for a successful Thermaltake Cl-P0497 CPU Cooler installation. With everything in order, you’ll be ready to move on to the next step: removing the old CPU cooler.
Step 2: Remove the Old CPU Cooler
Before installing the Thermaltake Cl-P0497 CPU Cooler, you need to remove the old cooler from your computer. Here’s a step-by-step guide on how to do it:
- Power off your computer: Ensure that your computer is powered off and unplugged from the power source to avoid any electrical accidents.
- Remove the side panel of your computer case: Most computer cases have a side panel that can be easily removed using screws or latches. Refer to your computer case’s user manual if you are unsure how to remove it.
- Locate the CPU cooler: The CPU cooler is typically located near the center of the motherboard. It is connected to the CPU socket and usually has a fan and heatsink attached to it.
- Disconnect the CPU fan cable: Locate the cable that connects the CPU fan to the motherboard. Gently pull the connector away from the motherboard to disconnect it. Take note of any clips or locks that may be holding the connector in place.
- Unscrew the CPU cooler: Using a screwdriver, carefully remove the screws or fasteners that are securing the CPU cooler to the motherboard. Be cautious not to damage any surrounding components.
- Detach the CPU cooler from the CPU: With the screws removed, lift the CPU cooler away from the CPU. There may be some resistance due to the thermal paste that is used to facilitate heat transfer. Gently twist the cooler back and forth to break the seal and separate it from the CPU.
- Clean the CPU and heatsink: Use a clean cloth or alcohol wipes to remove any residual thermal paste from the CPU and the heatsink. Ensure that both surfaces are completely clean before proceeding to the next step.
- Set aside the old CPU cooler: Once the old cooler is removed and the CPU and heatsink are clean, set aside the old CPU cooler in a safe place. You may need to refer to it later for any mounting brackets or additional hardware.
By carefully removing the old CPU cooler, you are now ready to proceed with the installation of the Thermaltake Cl-P0497 CPU Cooler. Next, we’ll learn how to apply thermal paste onto the CPU before mounting the new cooler.
Step 3: Apply Thermal Paste
Applying thermal paste is a crucial step in ensuring proper heat transfer between the CPU and the cooler. Follow these steps to apply the thermal paste correctly:
- Prepare your thermal paste: Squeeze a small amount of thermal paste onto a clean surface, such as a plastic card or the back of your hand. A pea-sized drop of thermal paste is usually sufficient for most CPUs.
- Clean the CPU surface: Use a clean cloth or alcohol wipes to remove any residue or old thermal paste from the surface of the CPU. Ensure that the surface is dry and free of any debris.
- Apply the thermal paste: Using a spreading tool, carefully spread the thermal paste evenly over the center of the CPU surface. The goal is to create a thin and uniform layer that will facilitate optimal heat transfer.
- Avoid excessive thermal paste: Be careful not to apply too much thermal paste, as this can lead to poor heat transfer and potential damage to your hardware. A thin layer is all that is needed to achieve the desired results.
- Mounting pressure will spread the paste: Remember that the mounting pressure exerted by the CPU cooler will help to spread the thermal paste evenly across the CPU surface. So, there is no need to manually spread the thermal paste beyond a thin layer.
- Double-check for any excess paste: Before proceeding to the next step, double-check for any excess thermal paste that may have spilled over onto the surrounding components. If necessary, use a clean cloth or a cotton swab to carefully remove any excess paste.
By applying thermal paste correctly, you are ensuring optimal heat transfer between the CPU and the Thermaltake Cl-P0497 CPU Cooler. This will help to keep your CPU temperatures in check and maintain the overall performance and reliability of your computer.
Step 4: Install the Backplate
The installation of the backplate is an essential step in securely mounting the Thermaltake Cl-P0497 CPU Cooler. Follow these steps to properly install the backplate:
- Refer to the user manual: Consult the user manual or installation guide provided by Thermaltake to locate the specific backplate and mounting hardware required for your CPU socket. Different CPU sockets may have specific backplate configurations.
- Align the backplate: Place the backplate behind the motherboard, aligning it with the mounting holes on the motherboard. Ensure that the backplate is positioned correctly and snugly against the motherboard’s backside.
- Install mounting screws: Insert the mounting screws through the holes in the motherboard and secure them onto the backplate. Use a screwdriver to tighten the screws, but be careful not to overtighten them, as this can damage the motherboard.
- Confirm proper alignment: Double-check to make sure the backplate is aligned properly and securely attached to the motherboard. It should provide a firm and stable foundation for mounting the CPU cooler.
- Verify compatibility and clearance: Before proceeding, ensure that the backplate does not interfere with any components on the motherboard, such as capacitors or connectors. Also, verify that there is enough clearance inside the computer case for the CPU cooler to fit properly.
By successfully installing the backplate, you’ve established a solid foundation for mounting the Thermaltake Cl-P0497 CPU Cooler. The backplate ensures stability and proper distribution of pressure when the CPU cooler is mounted, allowing for effective and efficient cooling of your CPU.
Step 5: Mount the Heatsink
Mounting the heatsink is a crucial step in the installation process of the Thermaltake Cl-P0497 CPU Cooler. Follow these steps to securely mount the heatsink:
- Prepare the heatsink and fan: Attach the fan to the heatsink, following the manufacturer’s instructions. Ensure that the fan is properly aligned and securely attached to the heatsink.
- Position the heatsink: Place the heatsink onto the CPU, aligning the mounting holes on the heatsink with the corresponding mounting screws or brackets on the backplate.
- Secure the heatsink: Using the provided screws or mounting brackets, attach the heatsink to the backplate. Start by loosely screwing or securing one corner first, then move diagonally to the opposite corner to secure it. Repeat this process for the remaining screws or brackets.
- Tighten the screws or brackets: After all screws or brackets are attached loosely, use a screwdriver to tighten them evenly in a diagonal pattern. This ensures that the pressure is evenly distributed across the CPU and prevents any potential damage caused by uneven mounting pressure.
- Double-check the alignment and mounting: Confirm that the heatsink sits flush and evenly on the CPU. Ensure that all screws or brackets are tightly secured, but be cautious not to overtighten and risk damaging the CPU or motherboard.
By successfully mounting the heatsink, you are ensuring effective cooling for your CPU. The Thermaltake Cl-P0497 CPU Cooler’s heatsink is designed to efficiently dissipate heat and keep your CPU temperatures at optimal levels, enhancing the overall performance and longevity of your computer.
Step 6: Connect the CPU Fan
Connecting the CPU fan is an important step in the installation process of the Thermaltake Cl-P0497 CPU Cooler. Follow these steps to properly connect the CPU fan:
- Locate the CPU fan connector: Identify the CPU fan connector on your motherboard. It is usually labeled as “CPU_FAN” or something similar. Refer to your motherboard’s manual if you are unsure.
- Connect the CPU fan cable: Take the CPU fan cable from the Thermaltake Cl-P0497 CPU Cooler and carefully align the connector with the CPU fan header on the motherboard. Ensure that the pins match correctly.
- Secure the connection: Gently press the CPU fan connector onto the CPU fan header until it is firmly attached. Make sure that the connection is secure and that the cable is not loose.
- Route and manage the fan cable: Carefully route the CPU fan cable towards a suitable cable management area to keep it organized and prevent any interference with other components. Use zip ties or Velcro straps to secure the cable neatly.
- Verify the fan is spinning: Power on your computer and enter the BIOS/UEFI setup to verify that the CPU fan is spinning properly. The fan should be running smoothly and quietly, indicating that it is properly connected.
- Adjust fan speed if needed: If you notice that the fan speed is too high or too low, you can adjust it through the BIOS/UEFI settings or by using software provided by your motherboard manufacturer. This allows you to find a balance between cooling performance and noise levels.
By connecting the CPU fan correctly, you are ensuring that the Thermaltake Cl-P0497 CPU Cooler performs optimally by providing efficient cooling to your CPU. The CPU fan helps to dissipate heat generated by the CPU and maintain the temperature within safe limits, ensuring the stability and longevity of your computer.
Step 7: Secure the CPU Cooler
Securing the CPU cooler is the final step in the installation process of the Thermaltake Cl-P0497. Follow these steps to ensure that the CPU cooler is securely fastened:
- Double-check the mounting screws or brackets: Confirm that all the screws or brackets used to mount the CPU cooler to the backplate are securely tightened. It is essential to ensure that the cooler is snugly attached to the motherboard.
- Check for any movement: Gently wiggle the CPU cooler to check for any excessive movement. There may be a slight give due to the mounting mechanism, but there should be no significant wobbling or looseness.
- Inspect the clearance: Verify that the CPU cooler does not interfere with any surrounding components. Check for any parts that may come into contact with the cooler when the computer is running, such as RAM modules or VRM heatsinks.
- Reinstall the computer case side panel: Carefully put the side panel back onto the computer case and securely screw it into place. This ensures that the CPU cooler remains protected and properly secured inside the case.
- Power on the computer and monitor temperatures: Turn on your computer and monitor the CPU temperatures using appropriate software or BIOS/UEFI tools. Ensure that the Thermaltake Cl-P0497 is effectively cooling the CPU and keeping temperatures within safe operating limits.
- Listen for abnormal noises: Listen for any unusual noises coming from the CPU cooler during operation. Any rattling, buzzing, or grinding sounds could indicate a loose connection or a problem with the fan. If detected, double-check the installation and potentially reseat the cooler.
- Perform stability tests: Run stability tests or put your computer through resource-intensive tasks to ensure that the CPU cooler can adequately handle the heat generated. Monitor temperatures and system performance during these tests to ensure everything is functioning as expected.
By securely fastening the CPU cooler, you are ensuring that the Thermaltake Cl-P0497 effectively dissipates heat from the CPU, keeping temperatures at safe levels. This allows for optimal performance, stability, and longevity of your computer system.
Step 8: Test for Stability
After installing the Thermaltake Cl-P0497 CPU Cooler, it is important to test for stability to ensure that the cooler is functioning correctly and effectively cooling your CPU. Follow these steps to test for stability:
- Run stress tests: Run stress tests or resource-intensive applications that put a heavy load on your CPU. These tests will help determine if the CPU cooler can handle the increased heat generated during high-performance tasks.
- Monitor temperatures: Use software or BIOS/UEFI tools to monitor the CPU temperatures during the stress tests. Ideally, the temperatures should stay within acceptable ranges depending on your CPU model and workload. Higher temperatures are expected during stress testing but should not reach dangerous levels.
- Observe system performance: Monitor the overall system performance while conducting stress tests. Ensure that the computer is not experiencing any instability, crashes, or slowdowns due to overheating or inadequate cooling. A stable and responsive system indicates that the CPU cooler is working effectively.
- Listen for abnormal noises: Pay attention to any unusual noises coming from the CPU cooler during stress testing. Excessive fan noise, grinding sounds, or rattling may indicate a problem with the cooler or fan. Investigate and resolve any issues to ensure optimal cooling performance.
- Repeat stability tests: It is recommended to run stability tests for an extended period to ensure consistent performance. By doing so, you can identify any potential issues that may not surface during shorter tests. Monitor temperatures and system performance over an extended time to confirm stability.
- Make adjustments if necessary: If you encounter any issues during stability testing, such as high temperatures or system instability, consider reapplying thermal paste, readjusting the CPU cooler mounting, or adjusting fan settings to optimize cooling performance. Consult the user manual or seek professional assistance if needed.
By testing for stability, you can ensure that the Thermaltake Cl-P0497 CPU Cooler effectively cools your CPU during demanding tasks, maintaining stable and reliable performance. A well-cooled CPU contributes to the overall longevity and efficiency of your computer system.
Conclusion
Congratulations! You have successfully installed the Thermaltake Cl-P0497 CPU Cooler. By following the step-by-step installation guide, you have ensured proper cooling for your CPU, which in turn helps maintain optimal performance and extends the lifespan of your computer system.
The Thermaltake Cl-P0497 CPU Cooler offers excellent heat dissipation capabilities, thanks to its direct-contact heat pipe design and efficient fan. With its compatibility with various CPU sockets and quiet operation, it is a reliable choice for those looking to upgrade their cooling solution.
Remember, proper installation of the cooler is crucial to maximize its cooling performance. Ensure that you have gathered the necessary tools, prepared your workstation, removed the old CPU cooler, applied thermal paste, installed the backplate, mounted the heatsink securely, connected the CPU fan correctly, and tested for stability.
Regularly monitoring the CPU temperatures, especially during demanding tasks, is recommended to ensure that the Thermaltake Cl-P0497 is effectively cooling your CPU. If you notice any abnormal temperatures or instability, quickly identify and address the issue to prevent any potential damage to your hardware.
By investing in a high-quality CPU cooler like the Thermaltake Cl-P0497, you can enjoy improved performance, longevity, and reliability. Your computer will remain cool even during intense tasks, allowing you to push the limits of your system without compromising stability.
If you encounter any difficulties during the installation process or have any further questions, consult the user manual, seek assistance from the manufacturer, or consult with a professional technician who can provide expert guidance.
With the Thermaltake Cl-P0497 CPU Cooler installed, you can now experience the benefits of optimal cooling and unleash the full potential of your computer system. Enjoy enhanced performance and peace of mind knowing that your CPU is well-cooled and taken care of.