Introduction
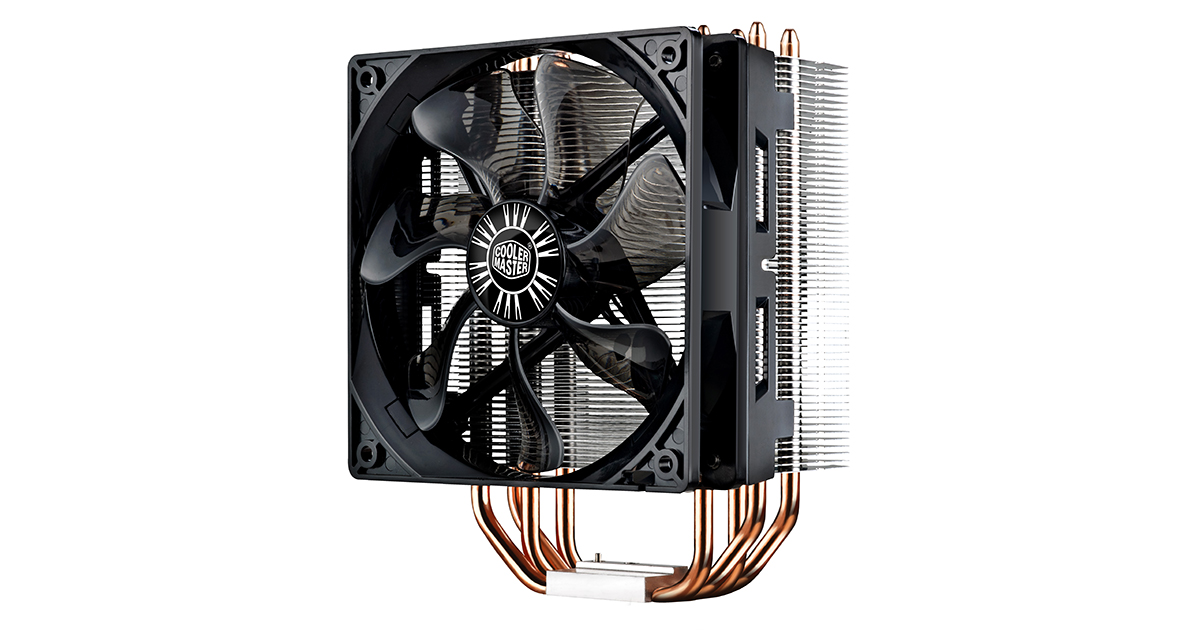
When it comes to keeping your CPU cool and running efficiently, a high-quality CPU cooler is essential. The Cooler Master Hyper 212 Evo CPU Cooler with 120mm PWM Fan is a popular choice among computer enthusiasts for its superior cooling performance and easy installation process.
In this guide, we will walk you through the step-by-step process of installing the Cooler Master Hyper 212 Evo CPU Cooler on your system. Whether you’re a seasoned computer builder or a first-time DIYer, this guide will help you achieve optimal cooling for your CPU.
By installing the Hyper 212 Evo, you can expect lower CPU temperatures, reduced noise levels, and improved overall system stability. The cooler boasts a sleek design and boasts a 120mm PWM fan that provides efficient airflow to ensure your CPU remains cool under heavy workloads.
Before we dive into the installation process, it’s important to note that every computer setup and motherboard configuration can vary. Therefore, it’s crucial to consult your motherboard’s manual and familiarize yourself with its specifications before proceeding with the installation.
Now, let’s gather the necessary tools and equipment for a successful installation of the Cooler Master Hyper 212 Evo CPU Cooler.
Step 1: Gather the necessary tools and equipment
Before you begin the installation process, it’s important to gather all the necessary tools and equipment. By having everything on hand, you can ensure a smooth and efficient installation of the Cooler Master Hyper 212 Evo CPU Cooler. Here’s a list of what you’ll need:
- Screwdriver: Depending on your motherboard, you may need a Phillips screwdriver or a flat-head screwdriver to remove the old CPU cooler and secure the Hyper 212 Evo.
- Thermal paste: A small tube of thermal paste is included with the Cooler Master Hyper 212 Evo. This will help ensure proper heat transfer between your CPU and the cooler.
- CPU cooler mounting brackets: The Cooler Master Hyper 212 Evo comes with a set of mounting brackets that are compatible with most CPU sockets. Make sure you have these brackets included in your package.
- Backplate: Some motherboards require a backplate for installation. Check your motherboard’s manual to see if a backplate is needed, and ensure that you have it on hand.
- Rubber washers: The Hyper 212 Evo typically includes rubber washers to help reduce noise and vibration. These are optional but can be beneficial for a quieter system.
- CPU cooler fan: The Hyper 212 Evo comes with a 120mm PWM fan. This fan is crucial for efficient airflow and cooling. Ensure that it’s included in your package.
- Anti-static wrist strap: While not mandatory, an anti-static wrist strap can help protect your computer components from static electricity during the installation process.
By having all these tools and equipment ready, you’ll be fully prepared to tackle the installation process without any interruptions. Now that you’re ready, let’s move on to preparing your computer for the installation of the Cooler Master Hyper 212 Evo CPU Cooler.
Step 2: Prepare your computer for installation
Before you begin the installation of the Cooler Master Hyper 212 Evo CPU Cooler, it’s essential to prepare your computer to ensure a smooth and successful installation process. Follow these steps to ensure everything is in order:
- Power off your computer: Before working on any computer components, it’s crucial to power off your computer and unplug it from the power source. This will help prevent any risk of electric shock and ensure your safety.
- Remove the side panel: Most computer cases have a removable side panel that allows you to access the internal components. Use the necessary tools, such as a screwdriver, to remove the screws holding the side panel in place. Carefully slide off the panel and set it aside.
- Locate the CPU and CPU cooler: Inside your computer case, locate the CPU (central processing unit) and the current CPU cooler. Familiarize yourself with the placement of these components; this will make it easier when it comes time to remove the old cooler and install the Hyper 212 Evo.
- Disconnect the CPU fan cable: Locate the cable that connects the current CPU cooler fan to the motherboard. Gently disconnect the cable by pulling it out from the header on the motherboard. This will ensure that the fan is not obstructed during the installation process.
- Clean the CPU and heatsink: Now is a good time to clean the CPU and heatsink. Use a lint-free cloth or a microfiber cloth to remove any dust or debris that may have accumulated over time. This step will help ensure proper heat transfer between the CPU and the new cooler.
- Review your motherboard’s manual: As mentioned earlier, it’s essential to consult your motherboard’s manual for any specific instructions or recommendations regarding the installation process. Take a few moments to review the manual and familiarize yourself with the CPU socket and mounting points.
By preparing your computer properly, you’ll be ready to proceed with removing the old CPU cooler and installing the Cooler Master Hyper 212 Evo. This step is crucial to ensure a successful and hassle-free installation process. In the next step, we’ll guide you through removing the old CPU cooler.
Step 3: Remove the old CPU cooler
Now that your computer is prepared, it’s time to remove the old CPU cooler. Follow these steps to safely remove the existing cooler and make way for the Cooler Master Hyper 212 Evo:
- Locate the CPU cooler retention mechanism: Different motherboards have different CPU cooler retention mechanisms. Most commonly, there will be a set of screws or clips that hold the cooler in place. Refer to your motherboard’s manual to identify the specifics of your retention mechanism.
- Disconnect the CPU cooler fan: If your CPU cooler has a separate fan, you’ll need to disconnect it from the cooler before removing it. Gently unplug the fan cable from the header on the motherboard and set it aside.
- Loosen the screws or clips: Using the appropriate tools, carefully loosen the screws or unclip the retention mechanism that holds the CPU cooler in place. Depending on the cooler design, you may need to remove all screws or clips or simply loosen them enough to release the cooler from the CPU socket.
- Remove the old CPU cooler: Once the retention mechanism is loosened, carefully lift the CPU cooler away from the CPU socket. Be cautious not to apply too much force or twist the cooler, as this can damage the motherboard or CPU socket.
- Clean the CPU and heatsink: With the old cooler removed, take a moment to clean the CPU and heatsink again using a lint-free cloth or microfiber cloth. This will ensure there is no leftover thermal paste or debris that could hinder the performance of your new cooler.
By following these steps, you have successfully removed the old CPU cooler from your system. Take your time during this process to prevent any damage to your motherboard or CPU. Now that the old cooler is out of the way, it’s time to move on to the next step: installing the backplate for the Cooler Master Hyper 212 Evo.
Step 4: Install the backplate
Installing the backplate is an important step in ensuring the stability and proper positioning of the Cooler Master Hyper 212 Evo CPU cooler. Follow these steps to properly install the backplate:
- Locate the backplate: The Cooler Master Hyper 212 Evo comes with a backplate that provides additional support to the CPU cooler. Locate the backplate in your package and ensure you have the correct one for your motherboard.
- Identify the correct orientation: Depending on your motherboard, the backplate may need to be installed in a specific orientation. Consult your motherboard’s manual to determine how the backplate should be positioned.
- Place the backplate on the rear side of the motherboard: Carefully position the backplate onto the backside of the motherboard, aligning the mounting holes with the corresponding holes on the motherboard. Make sure the backplate is centered and evenly flush against the motherboard’s surface.
- Secure the backplate in place: Once the backplate is properly positioned, use the provided screws to secure it to the motherboard. Tighten the screws gently, ensuring that they are snug but not overtightened. Be careful not to damage the motherboard or strip the screws.
- Double-check the stability: After tightening the screws, gently shake the motherboard to ensure the backplate is securely in place. If there is any wobbling or play, recheck the alignment and tighten the screws if necessary.
Installing the backplate is a crucial step in providing a secure base for the Cooler Master Hyper 212 Evo CPU cooler. Take your time, ensuring the correct orientation and proper alignment of the backplate. Now that the backplate is securely installed, we can move on to the next step: applying thermal paste.
Step 5: Apply thermal paste
Applying thermal paste is an important step to ensure efficient heat transfer between your CPU and the Cooler Master Hyper 212 Evo. Follow these steps to properly apply thermal paste:
- Prepare the thermal paste: Start by preparing the thermal paste. Most CPU coolers come with a small tube of thermal paste included. Carefully open the tube, ensuring not to squeeze out too much paste.
- Apply the thermal paste: Take a small amount of thermal paste, about the size of a pea, and place it in the center of the CPU. Thermal paste helps fill in any microscopic gaps between the CPU and the cooler, promoting better heat transfer. Avoid spreading the paste with your fingers as this can introduce air bubbles; let the pressure from the cooler spread it naturally.
- Mount the CPU cooler: Carefully position the Cooler Master Hyper 212 Evo onto the CPU, aligning the screw holes on the cooler with the mounting holes on the backplate. Gently press the cooler down, allowing the thermal paste to spread evenly between the CPU and cooler.
- Secure the CPU cooler: Using the provided screws or clips, secure the CPU cooler in place. Start by tightening one screw partially, then move diagonally to the opposite corner and tighten that screw partially as well. Continue this pattern until all screws are tightened evenly. Be careful not to overtighten the screws.
Properly applying thermal paste ensures optimal heat transfer between the CPU and the Cooler Master Hyper 212 Evo. Take care to apply just enough paste and avoid spreading it with your fingers. With the thermal paste properly applied, we are ready to move on to the next step: mounting the CPU cooler onto the CPU.
Step 6: Mount the CPU cooler onto the CPU
Now that the thermal paste is applied, it’s time to mount the Cooler Master Hyper 212 Evo CPU cooler onto the CPU. Follow these steps to ensure a secure and proper installation:
- Position the CPU cooler: Carefully position the Cooler Master Hyper 212 Evo onto the CPU, aligning the screw holes on the cooler with the mounting holes on the backplate. Take your time to ensure the cooler is centered and evenly placed over the CPU.
- Start securing the cooler: Once positioned, start securing the CPU cooler in place by tightening the screws or clips. Begin with one screw or clip, partially tightening it. Then, move diagonally to the opposite corner and partially tighten that screw or clip as well. Continue this pattern until all screws or clips are tightened evenly.
- Tighten the screws or clips: After partially tightening all screws or clips, go back and tighten them fully. Again, use a diagonal pattern to ensure even and secure mounting. Be cautious not to overtighten the screws or clips, as this can damage the motherboard or CPU.
- Double-check the stability: Once all screws or clips are tightened, gently shake the computer case to ensure that the CPU cooler is securely mounted. There should be no excessive movement or wobbling. If there is any instability, double-check the mounting and tighten any loose screws or clips.
Mounting the CPU cooler onto the CPU is a crucial step to ensure proper cooling and heat dissipation. Take your time during this step to align the cooler correctly and securely fasten it in place. With the cooler mounted, we can move on to the next step: securing the CPU cooler in place.
Step 7: Secure the CPU cooler in place
Now that the Cooler Master Hyper 212 Evo CPU cooler is mounted onto the CPU, it’s time to secure it in place to ensure stability and optimal cooling performance. Follow these steps to securely fasten the CPU cooler:
- Tighten the mounting screws: Using the appropriate tool, ensure that all mounting screws are tightened securely. Start with one screw and tighten it partially, then move diagonally to the opposite corner and tighten that screw partially as well. Continue this pattern until all screws are partially tightened.
- Repeat the tightening process: Once all screws are partially tightened, go back and fully tighten them. Again, use a diagonal pattern to ensure even and secure mounting. Be careful not to overtighten the screws, as this can damage the motherboard or CPU.
- Double-check stability: After fully tightening the mounting screws, gently shake the computer case to ensure that the CPU cooler is securely fastened. There should be no excessive movement or wobbling. If any instability is detected, check the mounting screws again and tighten any loose screws.
Securing the CPU cooler in place is essential to prevent any accidental movement or dislodgment that could impact cooling performance. Take your time during this step to ensure all mounting screws are tightened securely. With the CPU cooler secured, we can move on to the next step: connecting the fan to the motherboard.
Step 8: Connect the fan to the motherboard
With the CPU cooler securely in place, it’s time to connect the fan to the motherboard to ensure proper cooling and control. Follow these steps to connect the Cooler Master Hyper 212 Evo fan:
- Locate the CPU fan header: On your motherboard, locate the CPU fan header. This header is specifically designed to connect the CPU cooler fan and allows the motherboard to monitor and control the fan’s speed.
- Prepare the fan cable: Ensure that the fan cable of the Cooler Master Hyper 212 Evo CPU cooler is untangled and free from any obstructions. This will make it easier to connect it to the motherboard.
- Align the fan connector: Align the fan connector with the CPU fan header on the motherboard, ensuring that the pins and notches match. Gently push the connector into the header until it is securely in place. It should fit snugly and make a clicking sound when fully connected.
- Double-check the connection: After connecting the fan, double-check that the connection is secure and properly seated. Make sure there are no loose connectors or cables that could interfere with the operation of the fan.
Connecting the fan to the motherboard is essential to ensure that the CPU cooler operates effectively and is properly controlled. Take care when aligning and connecting the fan connector to avoid any damage to the motherboard or fan cable. With the fan connected, we can move on to the next step: testing the CPU cooler.
Step 9: Test the CPU cooler
After successfully installing the Cooler Master Hyper 212 Evo CPU cooler, it’s important to test its performance and ensure that everything is functioning as intended. Follow these steps to test the CPU cooler:
- Power on your computer: Plug your computer back into the power source and power it on. Allow the system to boot up normally and reach the operating system.
- Monitor CPU temperatures: Once your computer is running, monitor the CPU temperatures using a monitoring software or utility. Check that the temperatures are within the normal operating range for your specific CPU model.
- Listen for fan operation: Pay attention to the noise levels and operation of the CPU cooler fan. It should be running smoothly and quietly. If you notice any strange noises or excessive vibrations, double-check the fan installation and connection.
- Run stress tests: To put the CPU cooler to the test, you can run stress tests or intensive tasks that push your CPU to its limits. Monitor the temperatures closely to ensure that the cooler is able to maintain optimal cooling performance under heavy load.
Testing the CPU cooler is crucial to ensure that it is functioning properly and providing effective cooling for your CPU. If you notice any issues or abnormal temperatures during testing, double-check your installation steps and consult the Cooler Master manual or customer support for further assistance.
By following these steps, you have successfully installed and tested the Cooler Master Hyper 212 Evo CPU cooler. Enjoy the benefits of improved cooling performance and a more stable system as you continue to use your computer for various tasks.
Conclusion
Installing the Cooler Master Hyper 212 Evo CPU cooler is a straightforward process that can significantly improve the cooling performance of your system. By following the step-by-step instructions outlined in this guide, you have successfully installed this high-quality cooler onto your CPU.
The Hyper 212 Evo offers superb cooling capabilities, lower CPU temperatures, reduced noise levels, and improved system stability. With its 120mm PWM fan and efficient design, it ensures effective airflow and heat dissipation even during demanding tasks.
Remember, every computer setup may have different specifications and requirements. It’s crucial to consult your motherboard’s manual for specific instructions and compatibility before proceeding with the installation.
By gathering the necessary tools, preparing your computer, removing the old CPU cooler, installing the backplate, applying thermal paste, mounting the CPU cooler, securing it in place, connecting the fan to the motherboard, and testing the CPU cooler, you have completed the installation process with precision.
Enjoy the benefits of a cooler and more efficiently functioning CPU, which can result in improved performance and longevity for your system. Take pride in your DIY skills and the knowledge that you have successfully tackled the installation of the Cooler Master Hyper 212 Evo CPU cooler.
If you encounter any issues during the installation process or have any questions, don’t hesitate to consult the Cooler Master website or contact their customer support for further assistance.
Now, sit back, relax, and enjoy the enhanced cooling performance provided by your Cooler Master Hyper 212 Evo CPU cooler!