Introduction
A CPU (Central Processing Unit) cooler plays a crucial role in keeping your computer system cool and running at optimal performance. It helps dissipate the heat generated by the CPU, ensuring its longevity and preventing overheating issues. However, not all CPU coolers are compatible with every PC case. The size, dimensions, and design of your PC case determine whether a particular CPU cooler can fit properly.
Ensuring compatibility between your PC case and CPU cooler is essential to avoid complications during installation and optimize performance. In this article, we will discuss how to determine if your PC case can accommodate a CPU cooler and provide you with the necessary steps to measure compatibility.
By understanding the importance of a compatible CPU cooler and knowing how to evaluate compatibility, you can make an informed decision when selecting a CPU cooler for your system. So, let’s dive in and learn more about how to tell if your PC case can fit a CPU cooler.
What is a CPU Cooler?
A CPU cooler is a component that helps manage the heat generated by the CPU (Central Processing Unit) of a computer system. As the CPU processes data and performs calculations, it generates heat, which, if left unchecked, can lead to performance issues and potential damage to the CPU.
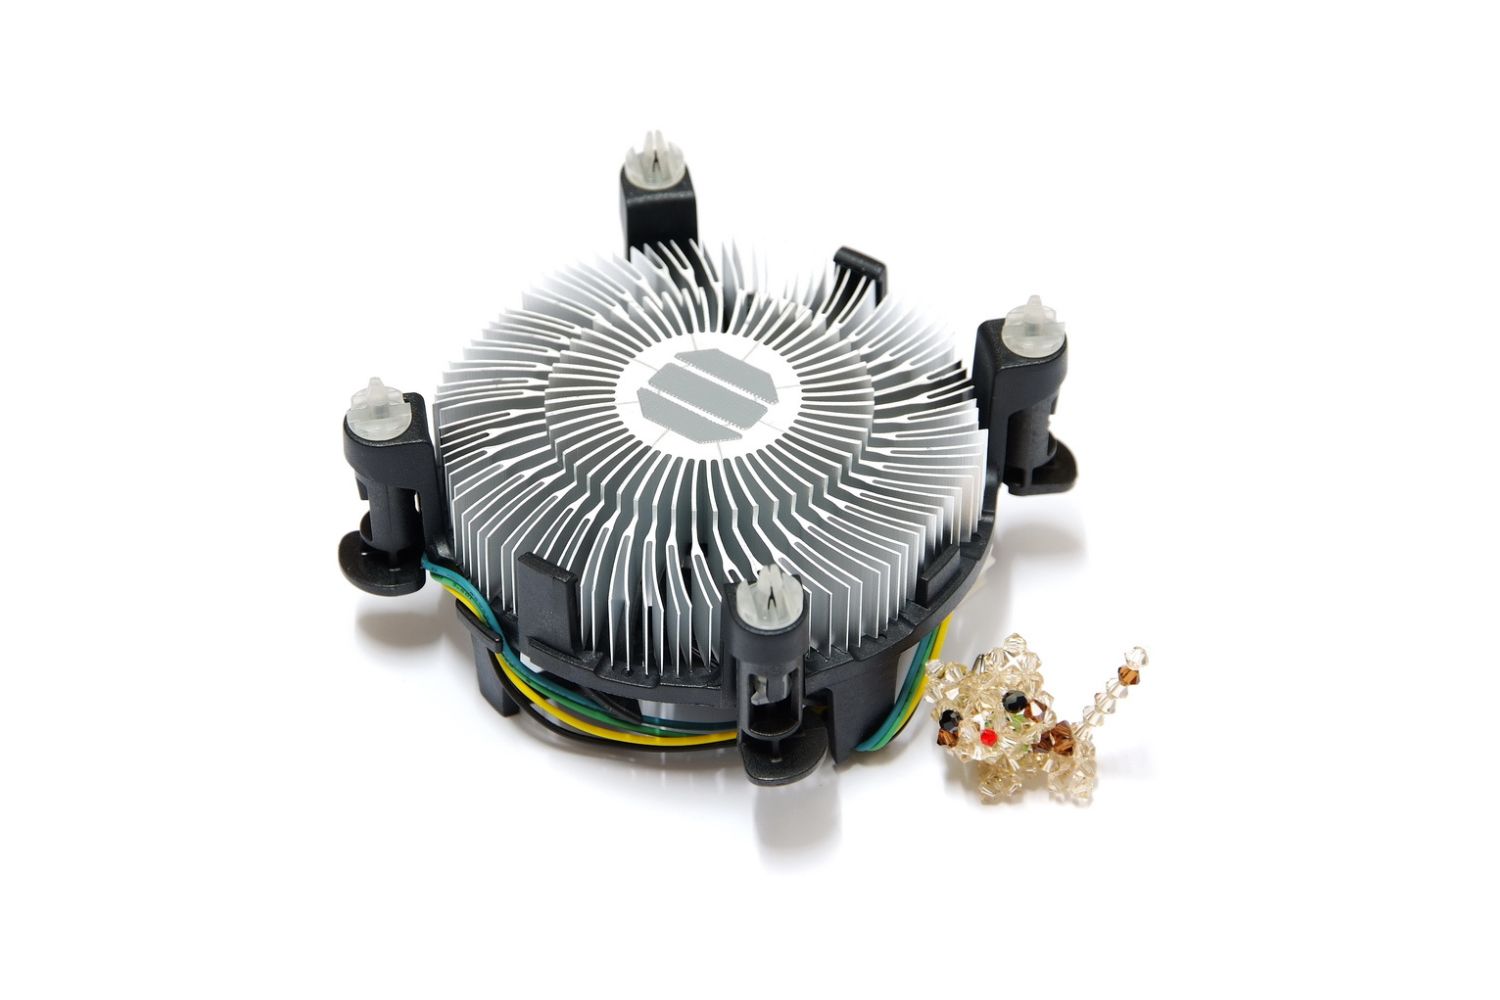
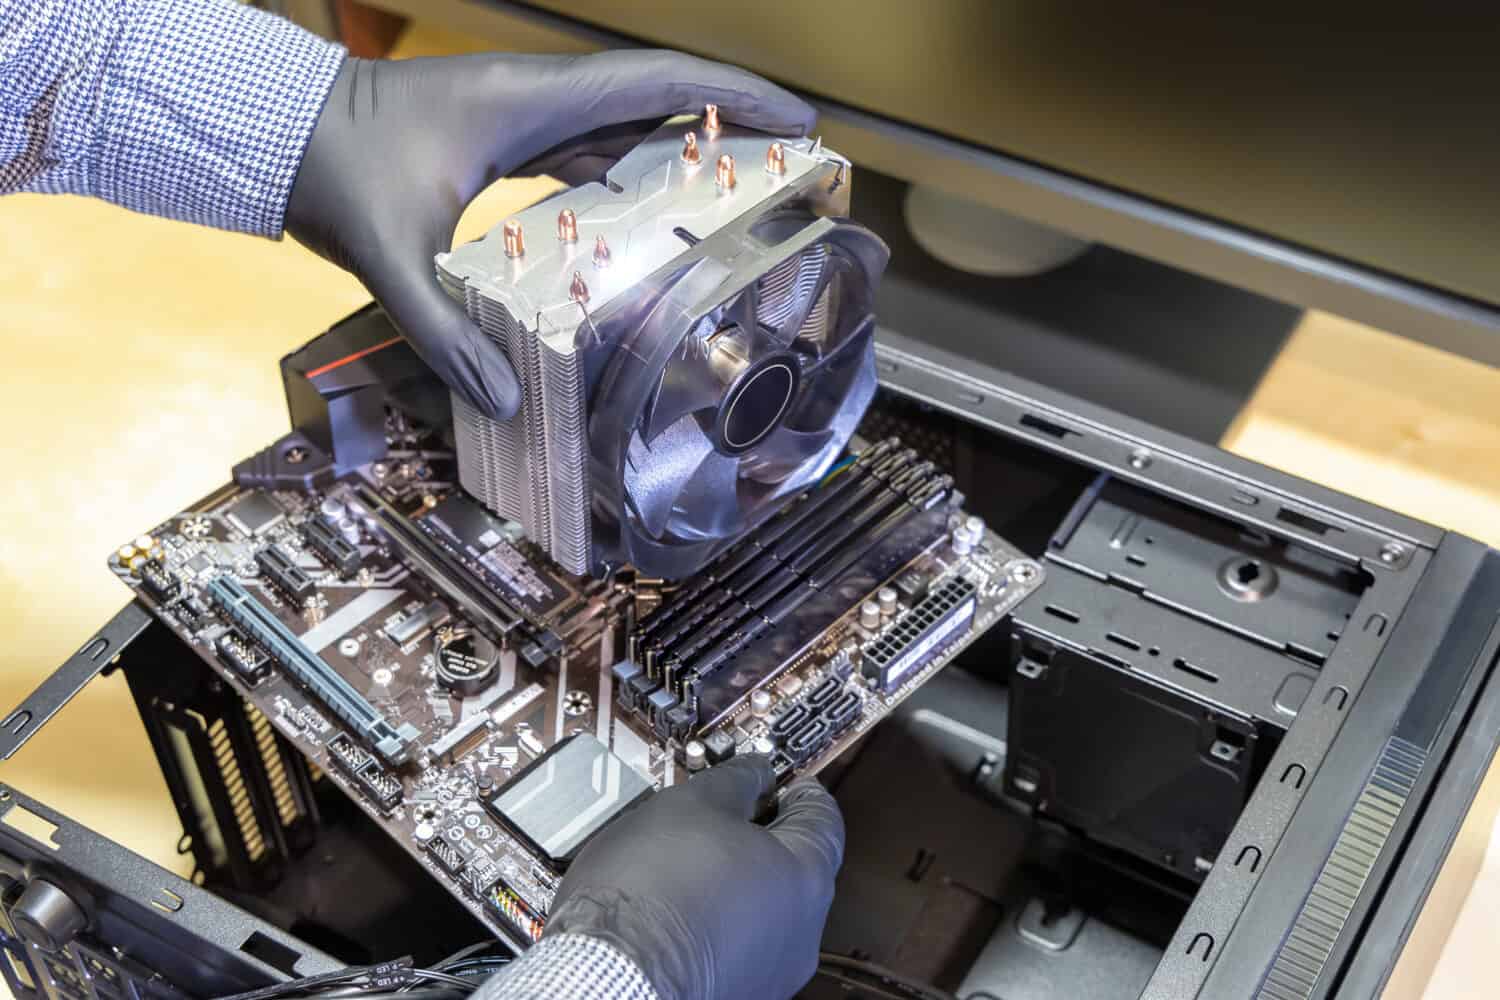
The CPU cooler functions by drawing away the heat from the CPU and dissipating it into the surrounding environment. It consists of a heat sink, a fan or fans, and a mounting mechanism. The heat sink is a metal structure with fins that increase the surface area, allowing for better heat dissipation. The fan or fans blow air across the fins, facilitating heat transfer.
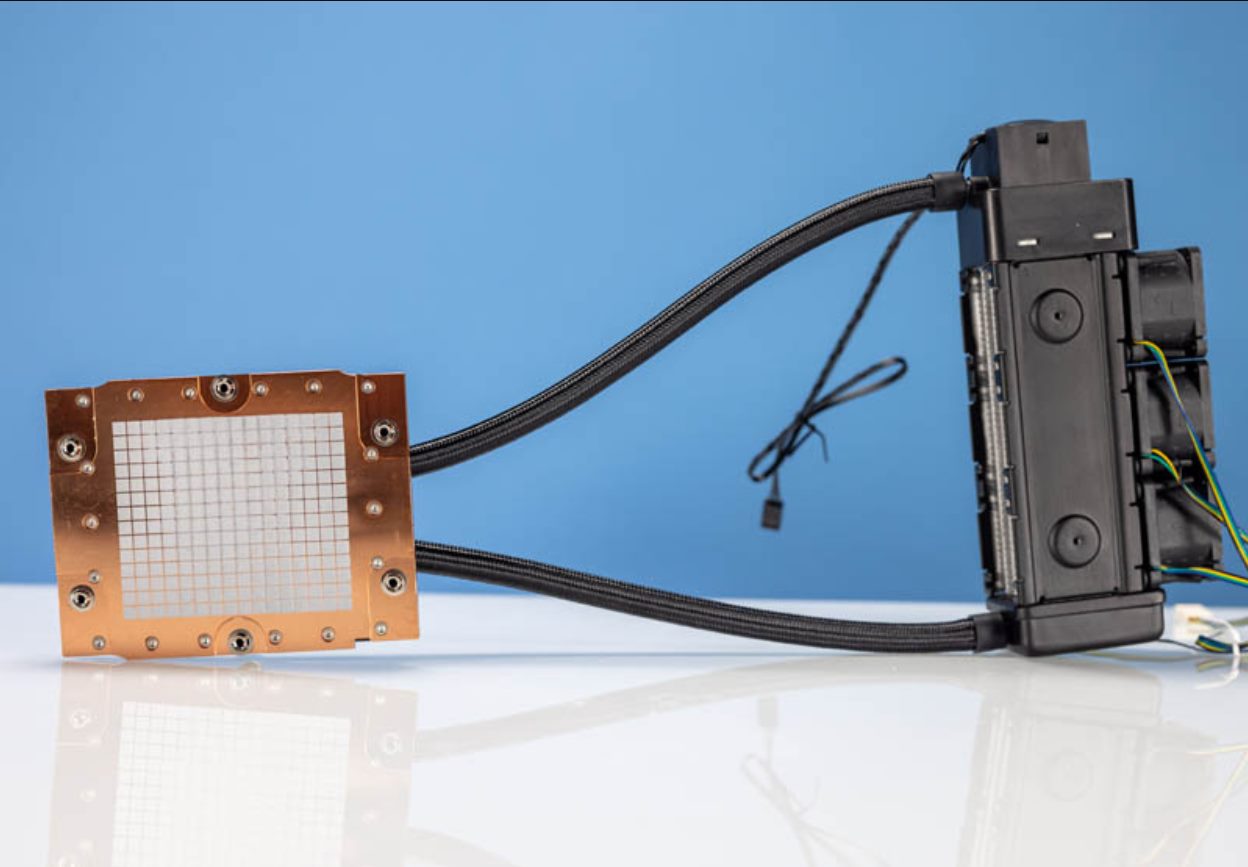
There are various types of CPU coolers available, including air coolers and liquid coolers. Air coolers use a combination of heat sinks and fans to cool the CPU, whereas liquid coolers employ a closed loop system, transferring heat from the CPU to a radiator where it is dissipated with the help of fans.
The CPU cooler plays a crucial role in maintaining the CPU’s temperature within safe limits, preventing overheating. Overheating can cause the CPU to throttle its performance, resulting in reduced speed and efficiency. It can also lead to system instability and crashes. By effectively cooling the CPU, a CPU cooler ensures optimal performance, allowing users to run demanding applications and games without encountering temperature-related issues.
Additionally, a well-functioning CPU cooler can prolong the lifespan of the CPU by preventing excessive heat-related wear and tear. It is an essential component for users who engage in activities that place a heavy load on the CPU, such as video editing, 3D rendering, and gaming.
Now that we have a clear understanding of what a CPU cooler is and its significance in maintaining optimal system performance, let’s explore why it is essential to have a compatible CPU cooler for your PC case.
Importance of a Compatible CPU Cooler
Having a compatible CPU cooler is of utmost importance for several reasons. Let’s take a closer look at why it is crucial to ensure compatibility between your PC case and CPU cooler.
First and foremost, a compatible CPU cooler ensures proper installation and functionality. PC cases come in various sizes and designs, and each has specific dimensions and configurations. If the CPU cooler is too large or has an incompatible design, it may not fit inside the case or interfere with other components. This can lead to a variety of issues, including poor airflow, inefficient cooling, and even physical damage to the components.
Furthermore, a compatible CPU cooler allows for efficient heat dissipation. Proper airflow is vital for cooling components effectively. If the CPU cooler does not fit properly in the case, it can obstruct the airflow, causing heat to accumulate and potentially leading to overheating. This can result in decreased system performance, frequent system crashes, and in severe cases, permanent damage to the CPU and other delicate components.
In addition to preventing overheating, a compatible CPU cooler contributes to overall system stability. When a CPU runs hot, it can experience instability and become more prone to errors and crashes. By keeping the CPU within the recommended temperature range, a compatible CPU cooler ensures a stable and reliable system.
Moreover, a compatible CPU cooler allows for easier maintenance and upgrades. When it comes time to clean or replace the CPU cooler, having one that is compatible with your PC case simplifies the process. It eliminates the need for complicated modifications or purchasing a new case to accommodate the cooler. This not only saves time and effort but also reduces the risk of damaging other components during the installation or removal process.
Overall, a compatible CPU cooler ensures proper installation, efficient cooling, system stability, and easy maintenance. It maximizes the lifespan and performance of your system while minimizing the risk of hardware damage. Now that we understand the importance of compatibility, let’s explore how to measure your CPU cooler clearance to determine if it will fit inside your PC case.
How to Measure Your CPU Cooler Clearance
Measuring the clearance for your CPU cooler is a crucial step in determining if it will fit inside your PC case. Follow these steps to measure the available space and ensure compatibility:
- Open your PC case: Start by safely opening your PC case. Refer to your case’s manual or manufacturer’s instructions for guidance on how to open it without causing any damage.
- Locate the CPU socket: Identify the location of the CPU socket on your motherboard. This is where the CPU cooler will be installed.
- Measure the distance from the CPU socket to the nearest obstruction: Measure the distance between the CPU socket and any nearby obstructions, such as RAM slots, VRM heatsinks, or chipset coolers. This measurement will determine the maximum height that the CPU cooler can be to avoid interference with other components.
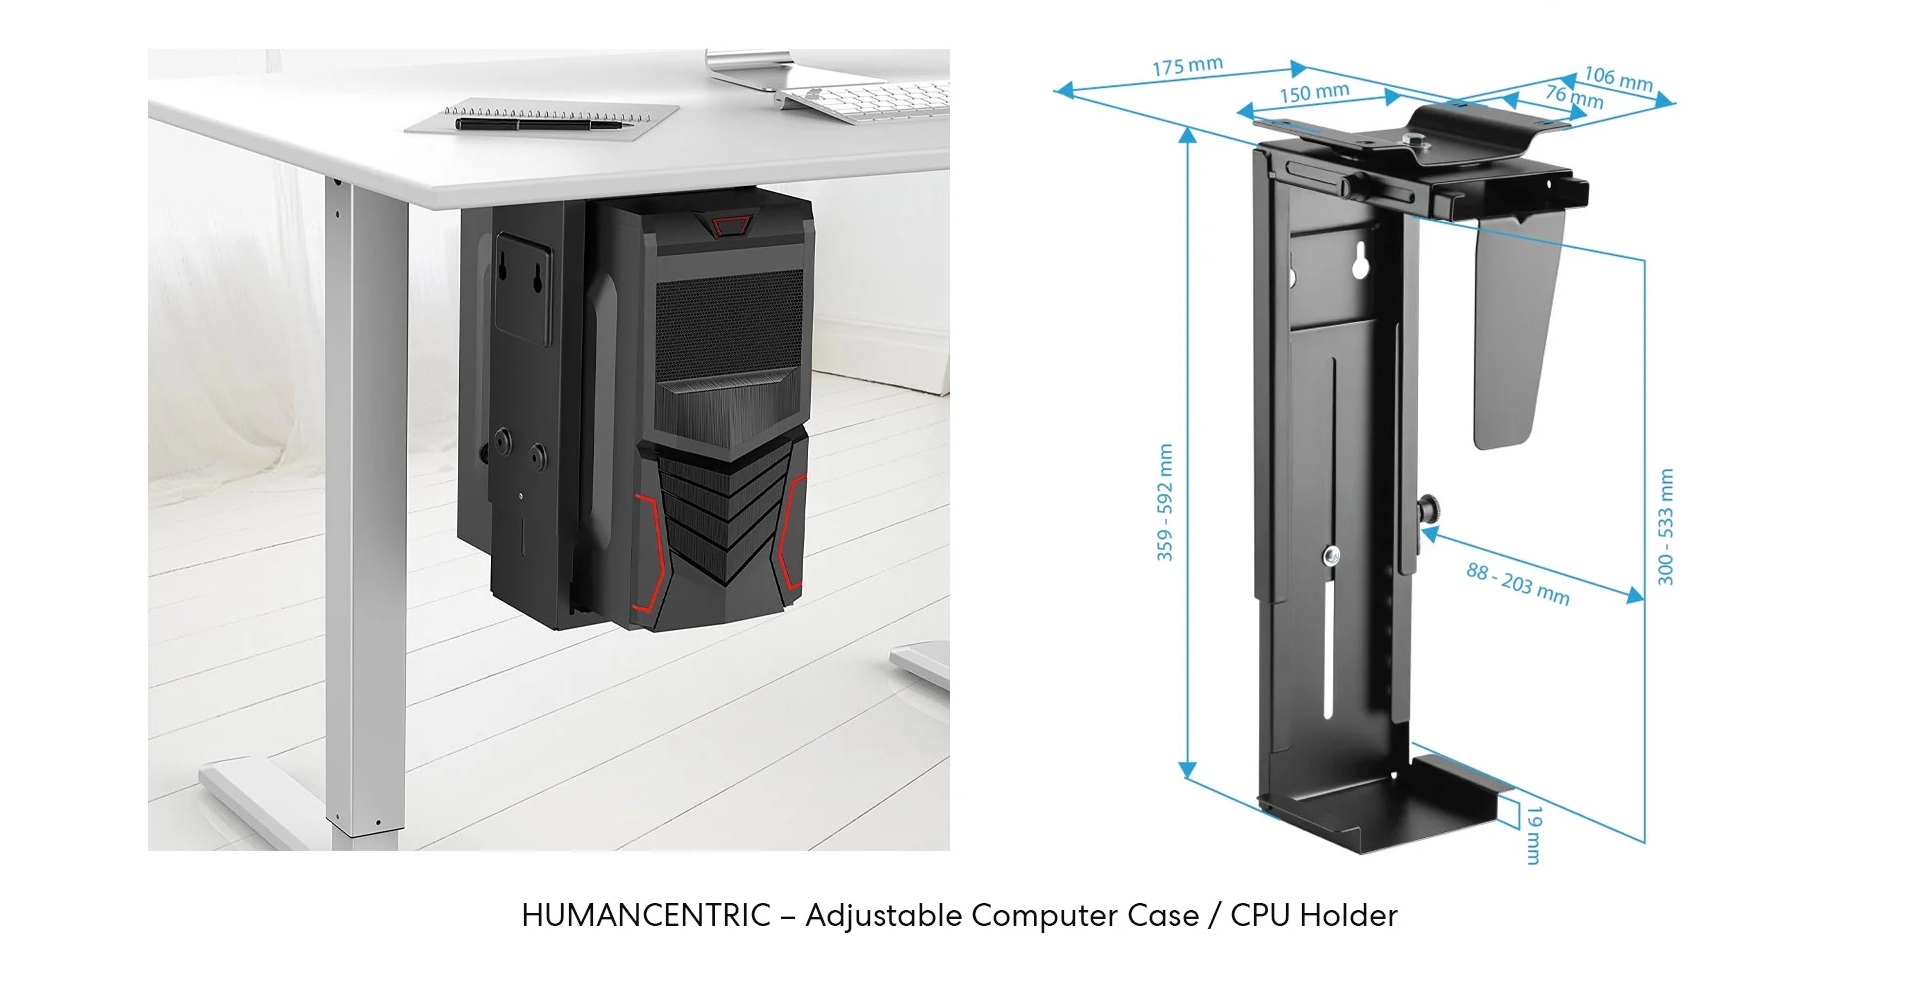
- Measure the available width and depth: Measure the width and depth inside your PC case where the CPU cooler will be positioned. This will determine the maximum dimensions the CPU cooler can have to fit comfortably within the case without obstructing other components or cables.
Make sure to write down these measurements accurately for reference when selecting a compatible CPU cooler.
In addition to measuring your CPU cooler clearance manually, you can also refer to your PC case’s manual or specifications sheet. Many manufacturers provide details on the maximum allowable CPU cooler dimensions for their cases, making it easier to find a compatible cooler.
Now that we know how to measure the clearance for our CPU cooler, let’s discuss the importance of matching the case dimensions with the CPU cooler dimensions to ensure proper compatibility.
Case Dimensions vs CPU Cooler Dimensions
Matching the dimensions of your PC case with the dimensions of the CPU cooler is crucial for a proper fit and compatibility. Let’s explore why this is important:
PC cases come in different sizes and form factors, such as ATX, microATX, and Mini-ITX. Each form factor has specific dimensions and mounting hole configurations. It’s essential to choose a CPU cooler that matches the form factor of your case to ensure a secure and proper fit.
The dimensions of the CPU cooler include its height, width, and depth. These measurements determine whether the cooler can fit inside your PC case without obstructing other components, such as RAM modules or the power supply unit. If the CPU cooler is too large, it may interfere with the RAM slots or push against the side panel of the case, making installation impossible or difficult.
On the other hand, if the CPU cooler is too small, it may not cover the entire CPU surface or provide sufficient cooling capacity. This can lead to higher CPU temperatures and reduced performance.
When selecting a CPU cooler, compare its dimensions, as provided by the manufacturer, with the maximum allowable dimensions specified in your PC case’s manual or specifications sheet. Ensure that the height, width, and depth of the CPU cooler are smaller than the corresponding dimensions of the case, leaving enough clearance for installation and proper airflow.
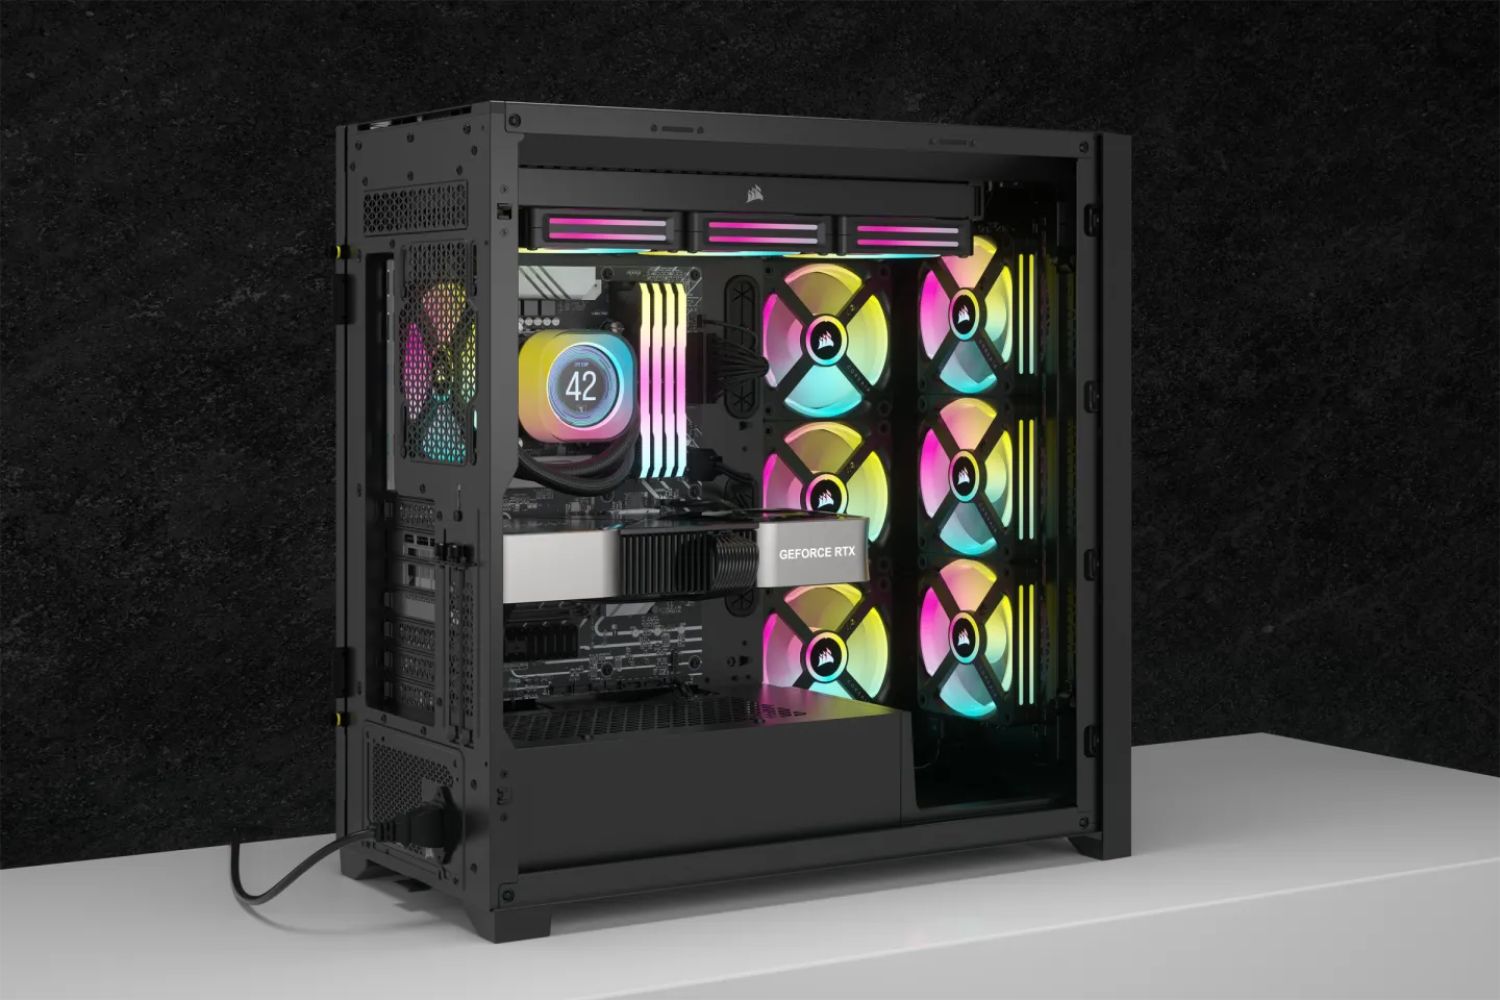
It’s also important to consider the location of other components inside the case, such as the graphics card and power supply unit. Make sure the CPU cooler does not interfere with these components, as it may affect their performance or cause compatibility issues.
By matching the dimensions of your PC case with the dimensions of the CPU cooler, you can ensure a proper fit, efficient cooling, and compatibility with other components. Next, let’s discuss some factors to consider when choosing a CPU cooler for your system.
Factors to Consider When Choosing a CPU Cooler
When selecting a CPU cooler for your system, there are several factors to consider to ensure optimal performance and compatibility. Let’s explore these factors:
- Cooling Performance: The primary function of a CPU cooler is to keep the CPU temperatures within safe limits. Consider the cooling performance of the cooler by looking at its specifications, such as fan size, heat sink design, and maximum cooling capacity. Choose a cooler that can adequately handle the heat generated by your CPU.
- CPU Socket Compatibility: Different CPUs have different socket types. Make sure the CPU cooler you choose is compatible with the socket type of your CPU. Manufacturers usually specify the compatible socket types of their coolers, so check the product specifications or consult the manufacturer’s website.
- Form Factor and Clearance: Consider the form factor and dimensions of your PC case when selecting a CPU cooler. Ensure it fits comfortably inside the case without obstructing other components or cables. Measure the available clearance and match it with the cooler’s height, width, and depth.
- Noise Level: CPU coolers with larger fans or multiple fans tend to provide better cooling performance but can also generate more noise. If noise is a concern for you, look for coolers with quieter fans or consider liquid cooling options that often produce less noise.
- Budget: Determine your budget for the CPU cooler. There are a variety of options available at different price points. Consider your cooling requirements and budget constraints to find the best balance between performance and cost.
- Overclocking Capability: If you plan to overclock your CPU for higher performance, choose a CPU cooler that can handle the additional heat generated by overclocking. Look for coolers with high cooling capacity and good heat dissipation capabilities.
- Aesthetics: Some users may prioritize the visual appearance of their system. Consider the design and aesthetics of the CPU cooler, especially if you have a windowed case or care about the overall look of your system.
By considering these factors, you can choose a CPU cooler that meets your cooling requirements, fits your PC case, and suits your budget and preferences. It’s also a good idea to check the manufacturer’s specifications and user reviews to gather more information about the CPU cooler’s performance and compatibility.
Now that we have discussed the factors to consider when choosing a CPU cooler, let’s move on to the next section, where we will explore how to check compatibility with manufacturer’s specifications.
Common Types of CPU Coolers
There are various types of CPU coolers available in the market, each with its own advantages and considerations. Let’s explore some of the common types:
- Air Coolers: Air coolers are the most common and affordable type of CPU coolers. They consist of a heatsink, heat pipes, and one or more fans. Air coolers rely on the fan(s) to blow air across the heatsink, transferring heat away from the CPU. They are relatively easy to install and offer good cooling performance for most standard use cases.
- All-in-One (AIO) Liquid Coolers: AIO liquid coolers are a popular choice for enthusiasts and gamers looking for more advanced cooling solutions. They consist of a liquid-filled closed-loop system with a pump, radiator, and fan(s). The liquid transfers heat away from the CPU to the radiator, where the fan(s) dissipate the heat. AIO liquid coolers offer excellent cooling performance, especially for highly overclocked CPUs, and can be more visually appealing with customizable RGB lighting options.
- Custom Loop Liquid Coolers: Custom loop liquid coolers are the most advanced and customizable cooling solution. They involve individually selecting components such as a pump, reservoir, radiator, tubing, and water blocks. Custom loop liquid coolers offer excellent cooling performance, allowing for extreme overclocking, but they are more complex to set up and require regular maintenance.
- Low-profile Coolers: Low-profile coolers are designed for small form factor (SFF) cases or systems with limited space. They are compact and have a low height clearance, allowing them to fit in smaller cases without obstructing other components. However, due to their size, they may not offer the same cooling performance as larger air coolers or liquid coolers.
Each type of CPU cooler has its own pros and cons, and the choice depends on factors such as available space, cooling requirements, budget, and personal preference. It’s important to research and consider the specific cooling needs of your system before deciding on the most suitable CPU cooler type.
Now that we have explored the common types of CPU coolers, let’s move on to the next section, where we will discuss how to check compatibility with the manufacturer’s specifications.
Checking Compatibility with Manufacturer’s Specifications
When choosing a CPU cooler, it is crucial to check its compatibility with your specific PC case and CPU. Manufacturers often provide detailed specifications for their products, including compatible socket types, maximum allowable dimensions, and any specific installation requirements. Here are some steps to check compatibility:
- Review the CPU Cooler Specifications: Start by looking at the product specifications provided by the CPU cooler manufacturer. Take note of the compatible socket types, height, width, and depth dimensions, as well as any additional requirements or recommendations.
- Refer to the PC Case Specifications: Consult the specifications sheet or manual of your PC case. Look for information on maximum CPU cooler height, width, and depth that the case can accommodate. Compare these dimensions with the CPU cooler’s specifications to ensure compatibility.
- Consider RAM Clearance: Some CPU coolers can obstruct the RAM slots, especially if they have tall heatsinks. Check the clearance between the CPU cooler and the nearest RAM slots in both the PC case and CPU cooler specifications. Ensure that there is enough space for your RAM modules to fit without interference.
- Check for Other Potential Interferences: Consider other components or obstructions in your system, such as chipset heatsinks, VRM heatsinks, or graphics cards. Ensure that the CPU cooler will not obstruct or interfere with these components during installation.
- Read User Feedback and Reviews: User feedback and reviews can provide valuable insights into compatibility issues that others may have faced. Look for information on specific CPU cooler models and their compatibility with your PC case and CPU.
By thoroughly reviewing the manufacturer’s specifications, considering RAM clearance and potential interferences, and reading user feedback, you can gain a better understanding of the CPU cooler’s compatibility with your PC case and CPU.
In addition to checking the specifications manually, some PC case manufacturers provide compatibility lists or online tools that help determine compatible CPU coolers. These tools often allow you to select your PC case model and provide a list of CPUs and coolers known to be compatible.
Now that we know how to check compatibility with the manufacturer’s specifications, let’s explore alternative methods such as using online compatibility tools.
Using Online Compatibility Tools
Online compatibility tools can be a convenient and efficient way to determine whether a specific CPU cooler is compatible with your PC case and CPU. These tools are provided by manufacturers or third-party websites and can simplify the process of finding compatible components. Here’s how you can use online compatibility tools:
- Visit the Manufacturer’s Website: Check if the PC case or CPU cooler manufacturer offers an online compatibility tool on their official website. Often, these tools allow you to select the specific model of your PC case and provide a list of compatible CPU coolers.
- Input Your PC Case Information: Input the details of your PC case, such as the model name or form factor, into the online compatibility tool. This allows the tool to filter and display compatible CPU coolers based on your specific case model.
- Input Your CPU Information: Some compatibility tools may require you to input your CPU model as well. This helps ensure that the suggested CPU coolers are not only compatible with your case but also with your CPU’s socket type.
- Review the Compatibility Results: Once you have provided the necessary information, the compatibility tool will generate a list of CPU coolers that are known to be compatible with your PC case and CPU. Review this list to find suitable options.
- Consider Additional Factors: While the compatibility tool provides a helpful starting point, it’s important to consider other factors such as cooling performance, dimensions, and budget. Cross-reference the compatibility tool’s suggestions with the manufacturer’s specifications and user reviews to make an informed decision.
Using online compatibility tools can save you time and eliminate the guesswork when it comes to finding compatible CPU coolers. They provide a straightforward way to ensure that the cooler you choose will fit your PC case and work seamlessly with your CPU.
Remember that online compatibility tools are not foolproof, and it’s always a good idea to double-check the information and perform additional research to ensure compatibility. Now that we have explored online compatibility tools, let’s move on to the next section with tips to ensure a proper CPU cooler fit.
Tips for Ensuring Proper CPU Cooler Fit
When installing a CPU cooler, ensuring a proper fit is crucial for optimal performance and system stability. Here are some tips to help you achieve a proper CPU cooler fit:
- Measure Your Clearance: Before purchasing a CPU cooler, measure the available clearance inside your PC case. Take accurate measurements of the height, width, and depth where the CPU cooler will be installed. Compare these measurements with the dimensions of the cooler to ensure compatibility.
- Consider RAM Clearance: If your CPU cooler has a large heatsink, ensure that there is enough clearance for your RAM modules. Some coolers may obstruct RAM slots or require low-profile RAM modules for proper fitment. Check the CPU cooler specifications for RAM clearance information.
- Check Socket Compatibility: Ensure that the CPU cooler is compatible with your CPU’s socket type. Refer to the manufacturer’s specifications for socket compatibility information. Mismatched socket types will prevent proper installation and functionality of the CPU cooler.
- Pay Attention to Mounting Mechanism: Different CPU coolers have different mounting mechanisms, such as push-pin, screw-based, or bracket-mounted. Familiarize yourself with the mounting mechanism of your CPU cooler and ensure that it is compatible with the mounting system provided by your PC case and motherboard.
- Consider Fan Placement: Some CPU coolers allow you to adjust the fan orientation for better airflow. Consider the layout of your PC case and the CPU cooler’s fan placement options. Ensure that the fan(s) will blow air in the proper direction and not obstruct other components.
- Follow Proper Installation Procedures: Carefully follow the installation instructions provided by the CPU cooler manufacturer. Improper installation can result in poor performance, noise, or even damage to the CPU or other components. Pay attention to proper application of thermal paste (if required) and ensure that the cooler is securely fastened to the CPU socket.
- Testing and Monitoring: After installing the CPU cooler, monitor your system’s temperatures and performance. Use software tools or BIOS settings to monitor CPU temperatures and ensure that they stay within safe limits. If you notice unusually high temperatures or performance issues, recheck the CPU cooler installation for any potential issues.
By following these tips, you can ensure a proper fit for your CPU cooler and avoid any compatibility or installation issues. A proper CPU cooler fit will help maintain optimal cooling, improve system performance, and extend the lifespan of your components.
Now that we have explored tips for ensuring a proper CPU cooler fit, let’s conclude our discussion on determining if your PC case can fit a CPU cooler.
Conclusion
Ensuring that your PC case can accommodate a CPU cooler is crucial for maintaining optimal system performance and preventing overheating. By following the steps outlined in this article, you can determine if your PC case can fit a CPU cooler properly:
- Understand the importance of a compatible CPU cooler, which ensures proper installation, efficient cooling, system stability, and easy maintenance.
- Learn how to measure your CPU cooler clearance accurately by considering dimensions, obstructions, and potential interferences within your PC case.
- Recognize the significance of matching the dimensions of your PC case with the dimensions of the CPU cooler to ensure a proper fit without obstructing other components.
- Consider various factors when choosing a CPU cooler, including cooling performance, CPU socket compatibility, form factor, noise level, budget, overclocking capability, and aesthetics.
- Check compatibility with the manufacturer’s specifications by reviewing CPU cooler and PC case specifications, considering RAM clearance, and checking for other potential interferences.
- Utilize online compatibility tools provided by manufacturers or third-party websites to simplify the process of finding compatible CPU coolers.
- Follow the tips provided to ensure a proper CPU cooler fit, such as measuring clearance, considering RAM clearance, checking socket compatibility, paying attention to mounting mechanisms, and following proper installation procedures.
By taking the necessary steps and considering these factors, you can confidently choose a CPU cooler that fits your PC case and provides efficient cooling for your CPU.
Remember to carefully review the manufacturer’s specifications, user feedback, and consult compatibility tools when making your final CPU cooler selection. Regularly monitor your system temperatures and performance to ensure that the CPU cooler is functioning optimally.
By having a compatible CPU cooler properly installed, you can enjoy the benefits of improved system performance, stability, and longevity, allowing you to work and play on your computer with peace of mind.