Introduction
Building a custom PC case is a thrilling and rewarding experience for tech enthusiasts and DIY enthusiasts alike. A custom PC case allows you to showcase your creativity, tailor the design to your specific needs, and take your PC gaming or workstation setup to the next level. With a custom case, you have the freedom to incorporate unique features, choose the materials, and customize the aesthetics to match your personal style. Whether you are building a high-performance gaming rig or a powerful workstation, designing and building your own PC case can be a truly satisfying project.
When embarking on the journey of building a custom PC case, careful planning and consideration are essential. You need to ensure that the final product not only looks great but also provides adequate cooling, compatibility with your components, and ease of access for maintenance and upgrades. In this article, we will guide you through the key factors to consider when building a custom PC case and provide you with the information you need to create a functional and aesthetically pleasing masterpiece.
Throughout the process, it is important to keep in mind that building a custom PC case requires a basic understanding of computer hardware, as well as some knowledge of tools and equipment. However, don’t be intimidated if you are new to this – with the right guidance and a bit of patience, you can successfully build your own custom PC case and enjoy the satisfaction of creating a unique piece of art that houses your powerful components.
So, if you’re ready to embark on this exciting journey, let’s dive into the essential considerations you need to keep in mind when building your own custom PC case.
Planning Your Custom PC Case
Planning is a crucial step in the process of building a custom PC case. It involves laying out the groundwork for the design and functionality of your case. Taking the time to plan properly will help you avoid potential issues and ensure that your final product meets your requirements and expectations.
Start by determining the purpose of your PC case. Are you building a gaming rig or a workstation? Consider the specific components you will be using and their size and compatibility requirements. This will help you determine the dimensions and layout of your case.
Next, consider the form factor you want for your case. Do you prefer a compact or mid-tower design, or do you have the space for a larger full-tower case? Think about the space constraints and where you’ll be placing your case – this will influence the overall dimensions and shape of your design.
Additionally, think about the features you want to incorporate into your case. Do you need extra drive bays for storage expansion, USB and audio ports on the front panel, or space for liquid cooling solutions? Make a list of the desired features and prioritize them based on your needs.
Another important aspect to consider during the planning stage is the accessibility of the internal components. Will you need easy access to the motherboard, graphics card, or hard drives? Think about how you will route cables and ensure proper airflow within the case.
Lastly, sketch out the overall design of your case. Visualize how you want it to look and consider any modifications or customizations you’re planning. This could involve cutouts for extra fans, window panels for showcasing your components, or unique embellishments to give your case a personal touch.
Taking the time to carefully plan your custom PC case will save you headaches later on in the build process. It will provide you with a clear roadmap to follow, allowing you to create a case that not only meets your functional requirements but also reflects your personal style and showcases your hardware in the best possible way.
Selecting the Right Case Materials
When it comes to building a custom PC case, selecting the right materials is crucial for both durability and aesthetics. The choice of materials will determine the overall quality and longevity of your case, as well as its visual appeal. In this section, we will discuss some commonly used materials for custom PC cases and their respective advantages and disadvantages.
One of the most popular materials for PC cases is steel. Steel offers excellent structural integrity and durability, making it a reliable choice for long-term use. It is also relatively affordable and easy to work with when it comes to modifications or customizations. However, it is worth noting that steel can be quite heavy, which can make transportation and handling more challenging.
Another commonly used material is aluminum. Aluminum is lightweight and offers excellent heat dissipation properties, making it ideal for cases where cooling is a top priority. It is also more resistant to corrosion than steel, which can be advantageous in humid environments. However, aluminum cases tend to be more expensive than steel cases and may require additional measures, such as rubber grommets, to reduce vibration and noise.
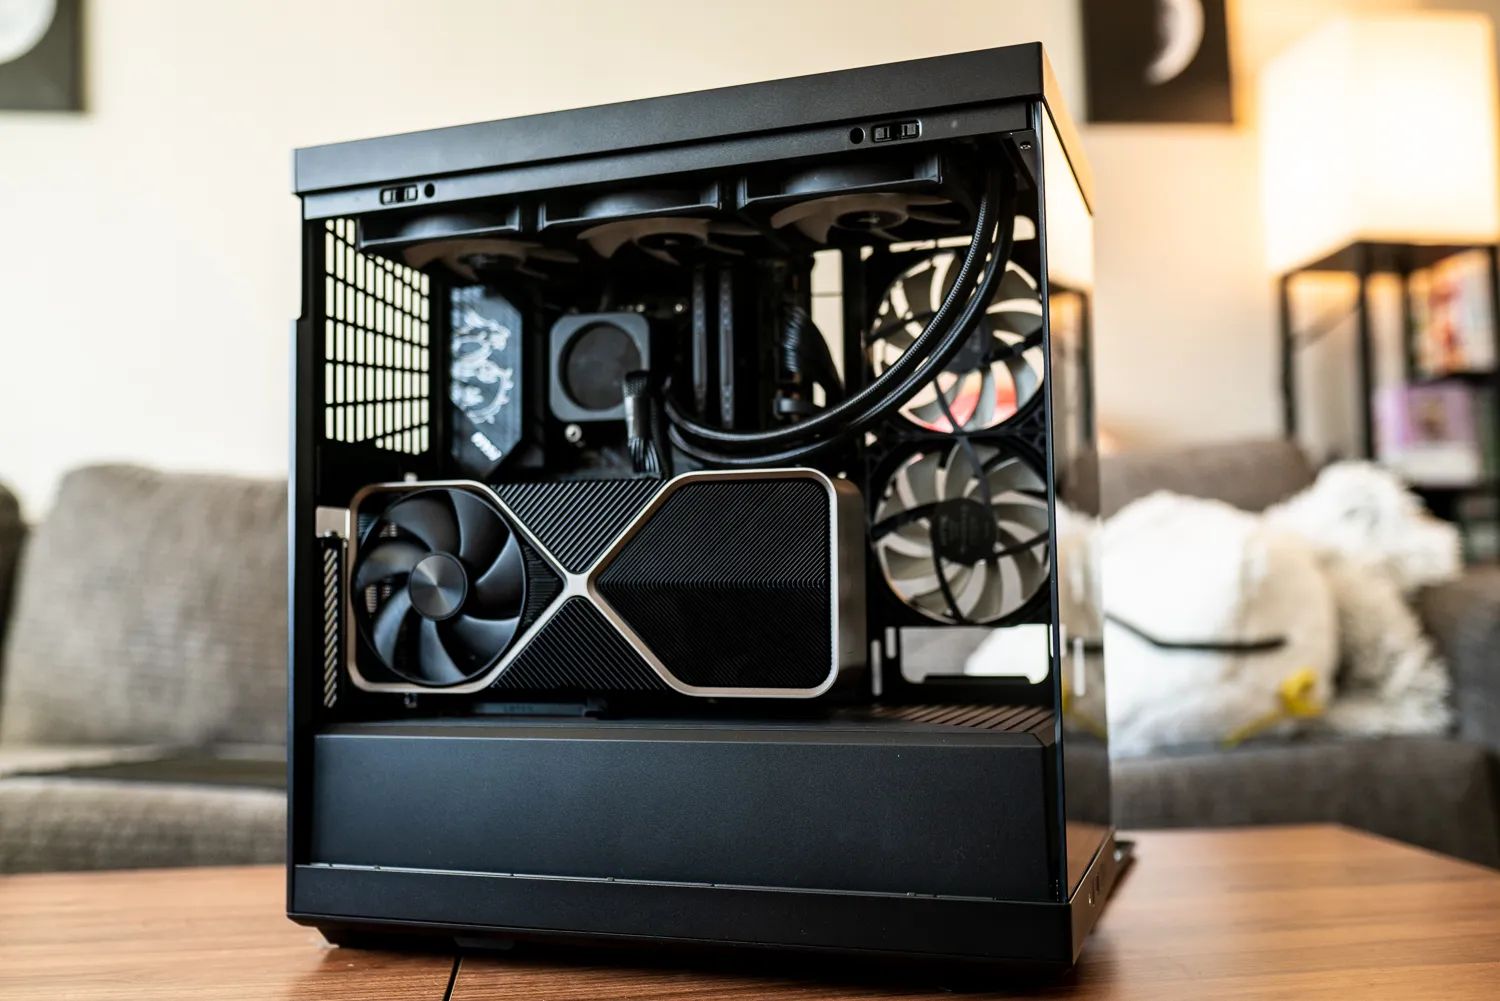
For those looking for a unique and premium feel, tempered glass is an excellent material choice. Tempered glass panels allow for a clear view of the internal components, creating a stunning visual display. It also adds a touch of elegance and sophistication to your PC build. However, tempered glass is more fragile than steel or aluminum, and caution must be taken to avoid accidental breakage during installation or transportation.
Some custom PC builders also opt for materials like acrylic or polycarbonate for their cases. These materials are lightweight and offer a high degree of flexibility, allowing for intricate designs and unique shapes. However, they may not be as durable as other materials, and proper care must be taken to prevent scratches or cracks.
Ultimately, the choice of material for your custom PC case will depend on your specific needs and preferences. Consider factors such as durability, weight, heat dissipation, and aesthetics to make an informed decision. It’s also worth noting that you can mix and match materials to achieve the desired balance of functionality and style, such as combining a steel frame with tempered glass side panels.
By selecting the right materials for your custom PC case, you not only ensure its longevity and performance but also create a visually stunning centerpiece that showcases your hardware in all its glory.
Design Considerations
When building a custom PC case, design considerations play a pivotal role in creating a visually appealing and functional enclosure for your components. The design of your case should not only reflect your personal style but also prioritize elements such as airflow, accessibility, and cable management. In this section, we will delve into the key design considerations to keep in mind when constructing your custom PC case.
One crucial aspect to consider is the overall airflow of the case. Proper airflow is essential for maintaining optimal operating temperatures for your components. Ensure that your case design incorporates adequate ventilation areas, including mesh panels or fan mounts, to allow cool air to enter and hot air to escape. Consider the placement of your fans to create effective airflow patterns and prevent heat buildup in specific areas.
In addition to proper airflow, accessibility is another important factor to consider. Design your case in a way that allows easy access to components for maintenance, upgrades, and cable management. Incorporate features such as removable panels, tool-less drive bays, and ample space for routing cables. This will not only make your life easier when working inside the case but also improve airflow and optimize overall system performance.
Cable management plays a vital role in maintaining a neat and organized interior. Plan for sufficient space behind the motherboard tray to route and hide cables, ensuring an uncluttered appearance. Consider using cable management solutions such as zip ties, cable clips, or Velcro straps to secure and manage cables, preventing them from obstructing airflow or interfering with components.
Furthermore, the aesthetics of your custom PC case should be a reflection of your personal style or theme. Consider the overall color scheme, lighting options, and any custom decals or designs you want to incorporate. LED lighting can add a stylish touch and highlight specific areas or components, creating an eye-catching visual effect.
Another consideration that ties into both aesthetics and functionality is the addition of windows or transparent panels. This allows you to showcase your carefully chosen components, adding a visual element to your build. Whether it’s a full side panel made of tempered glass or a smaller window to peek through, the transparent element can enhance the overall design and create a stunning display.
Remember, the design of your custom PC case should strike a balance between functionality and aesthetics. Prioritize airflow, accessibility, and cable management while injecting your personal style into the design. Creating a well-thought-out and visually pleasing case will not only complement your hardware but also provide a satisfying and enjoyable building experience.
Ventilation and Cooling Options
Proper ventilation and cooling are essential for maintaining the optimal operating temperatures of your components and ensuring their longevity and performance. When designing your custom PC case, it’s crucial to consider ventilation and cooling options to promote effective heat dissipation. In this section, we will explore different options and strategies you can employ to enhance the cooling performance of your case.
One of the fundamental aspects of cooling is the incorporation of fans in strategic locations. Consider the number and size of fans you will install in your case. Intake fans should be placed where fresh air can enter the case, such as at the front or bottom, while exhaust fans should be positioned to expel hot air, typically at the rear or top. Strategically placed fans help create a proper airflow path, drawing cool air in and pushing hot air out of the case.
In addition to standard case fans, you may also consider liquid cooling options. Liquid cooling involves using a radiator, pump, and tubing to circulate coolant and transfer heat away from components more efficiently. This can be particularly beneficial for high-performance systems that generate a substantial amount of heat. Make sure you have enough space in your case to accommodate the radiator and ensure compatibility with your chosen components.
Another factor to consider is the incorporation of dust filters. Dust can accumulate inside your case over time, leading to reduced airflow and potentially causing overheating issues. Implementing removable dust filters on intake fan locations can help prevent dust from entering the case, keeping the internal components clean and ensuring optimal airflow. Regularly cleaning and maintaining these filters will help prolong the lifespan of your components.
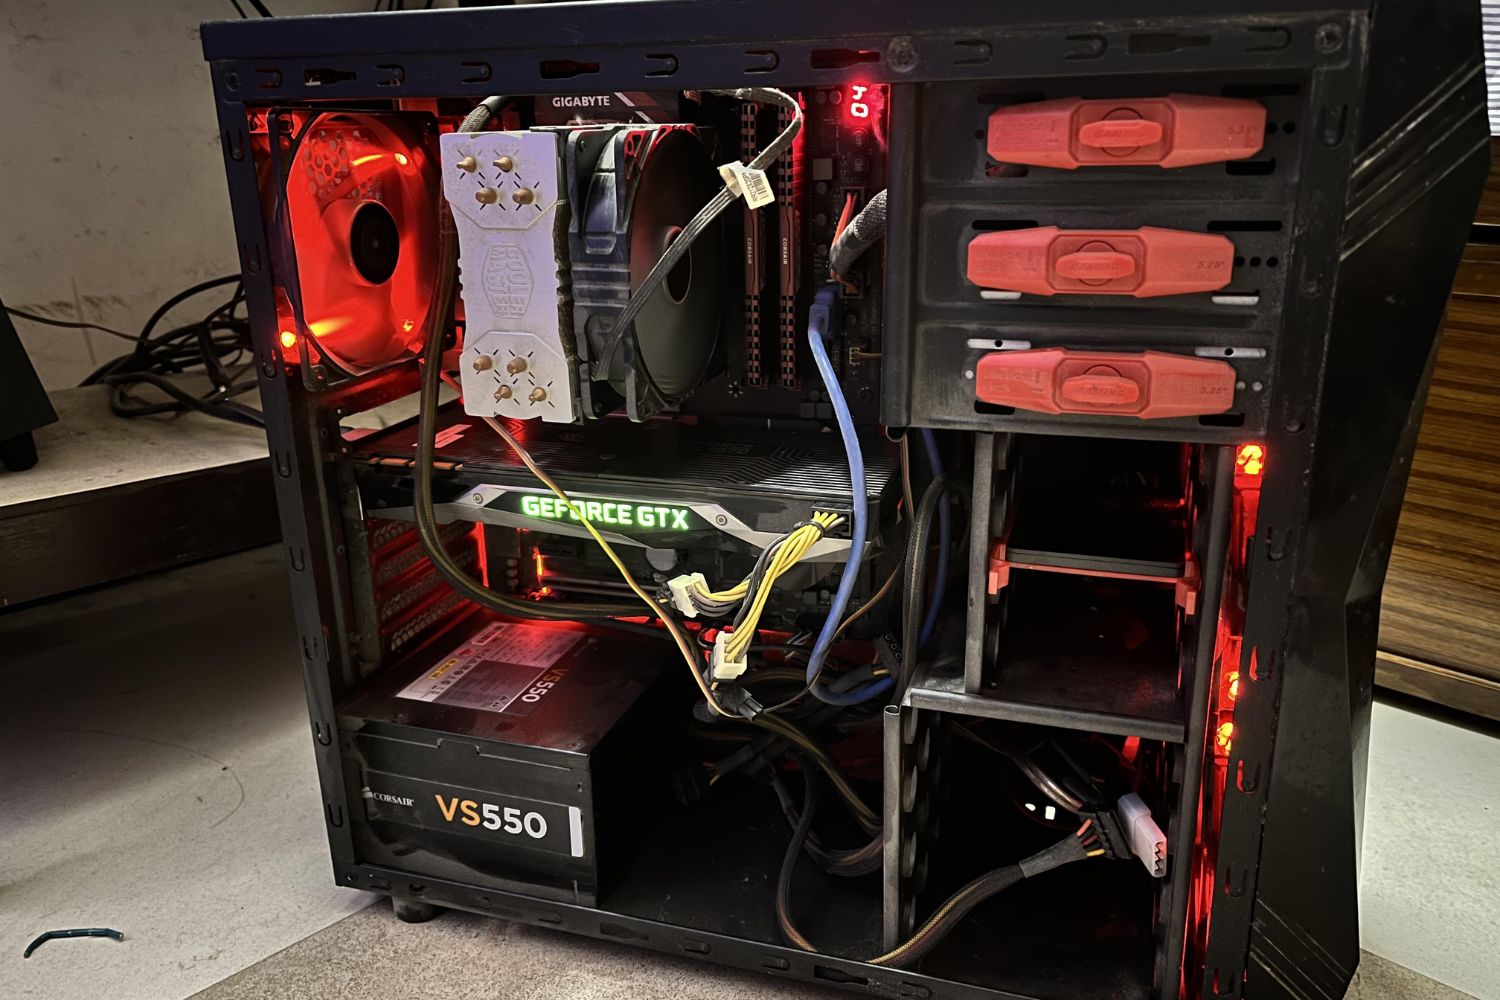
When designing your case, think about cable management and how it can affect airflow. Properly routing and organizing your cables can help prevent obstructions and ensure a clear path for airflow. Use cable ties, Velcro straps, or dedicated cable management channels to keep cables neatly organized and away from critical airflow areas. By optimizing cable management, you can not only improve airflow but also enhance the overall aesthetics of your build.
Lastly, consider the use of additional cooling accessories such as heatsinks or heat pipes for specific components that tend to generate more heat, such as the CPU or graphics card. These cooling solutions can provide passive or active cooling depending on their design and help dissipate heat more efficiently, maintaining lower operating temperatures.
By incorporating proper ventilation and cooling options into your custom PC case design, you can prevent heat-related issues, prolong the lifespan of your components, and ensure optimal performance. Effective cooling not only enhances the stability of your system but also allows for confident and uninterrupted usage, even during intense gaming or demanding tasks.
Cable Management and Routing
Cable management and routing is a critical aspect of building a custom PC case. Proper organization and routing of cables not only contribute to a clean and visually appealing interior but also improve airflow efficiency and ease of maintenance. In this section, we will explore key considerations and techniques for effective cable management.
Start by planning your cable management strategy before you start assembling your components. Identify the main areas where cables will need to be routed, such as the power supply, motherboard, and storage devices. Consider the length of each cable and the most direct path for routing to minimize excess cable length and clutter.
One effective technique for cable management is utilizing cable ties, Velcro straps, or cable management clips. These accessories allow you to secure cables together and keep them neatly organized and out of the way. Use them to bundle cables together, creating a clean and streamlined appearance.
In addition to bundling, consider creating cable channels or using built-in cable management features present in some cases. These channels or features provide designated routes for cables, ensuring they are hidden from plain sight and reducing the risk of cables obstructing airflow or interfering with components.
Take advantage of spaces behind the motherboard tray to route cables. Most modern cases have a space behind the motherboard tray specifically designed for this purpose. This not only keeps the cables out of sight but also helps improve airflow by allowing for a clear path for air to flow across the case.
When routing cables, pay attention to cable length and avoid excessive bending or stretching. Excessively long cables can lead to unnecessary clutter, while cables that are too short may create tension or strain on the connectors. Ensure that there is enough slack to comfortably connect and disconnect components without causing stress on the cables.
Labeling cables can also aid in future maintenance or upgrades. Use cable tags or labels to identify each cable’s purpose, making it easier to identify and troubleshoot any issues that may arise in the future. This is particularly useful for cases with multiple components or complex cable configurations.
Regularly inspect your cable management to ensure that cables have not come loose or become tangled over time. Take the time to readjust and resecure cables if necessary. This will help maintain a clean and organized interior while allowing for easier access to components for maintenance or upgrades.
By implementing proper cable management and routing techniques, you can create a visually appealing and well-organized interior for your custom PC case. Not only will it enhance the overall aesthetics of your build, but it will also improve airflow, increase system stability, and make future maintenance or upgrades a breeze.
Compatibility with Components
Ensuring compatibility with your components is crucial when building a custom PC case. Different components come in various sizes and configurations, and it’s important to ensure that they can fit and function properly within your case. Incompatibilities can lead to issues such as restricted airflow, difficulty in installation, or even damage to your components. In this section, we will discuss key factors to consider for compatibility when designing and building your custom PC case.
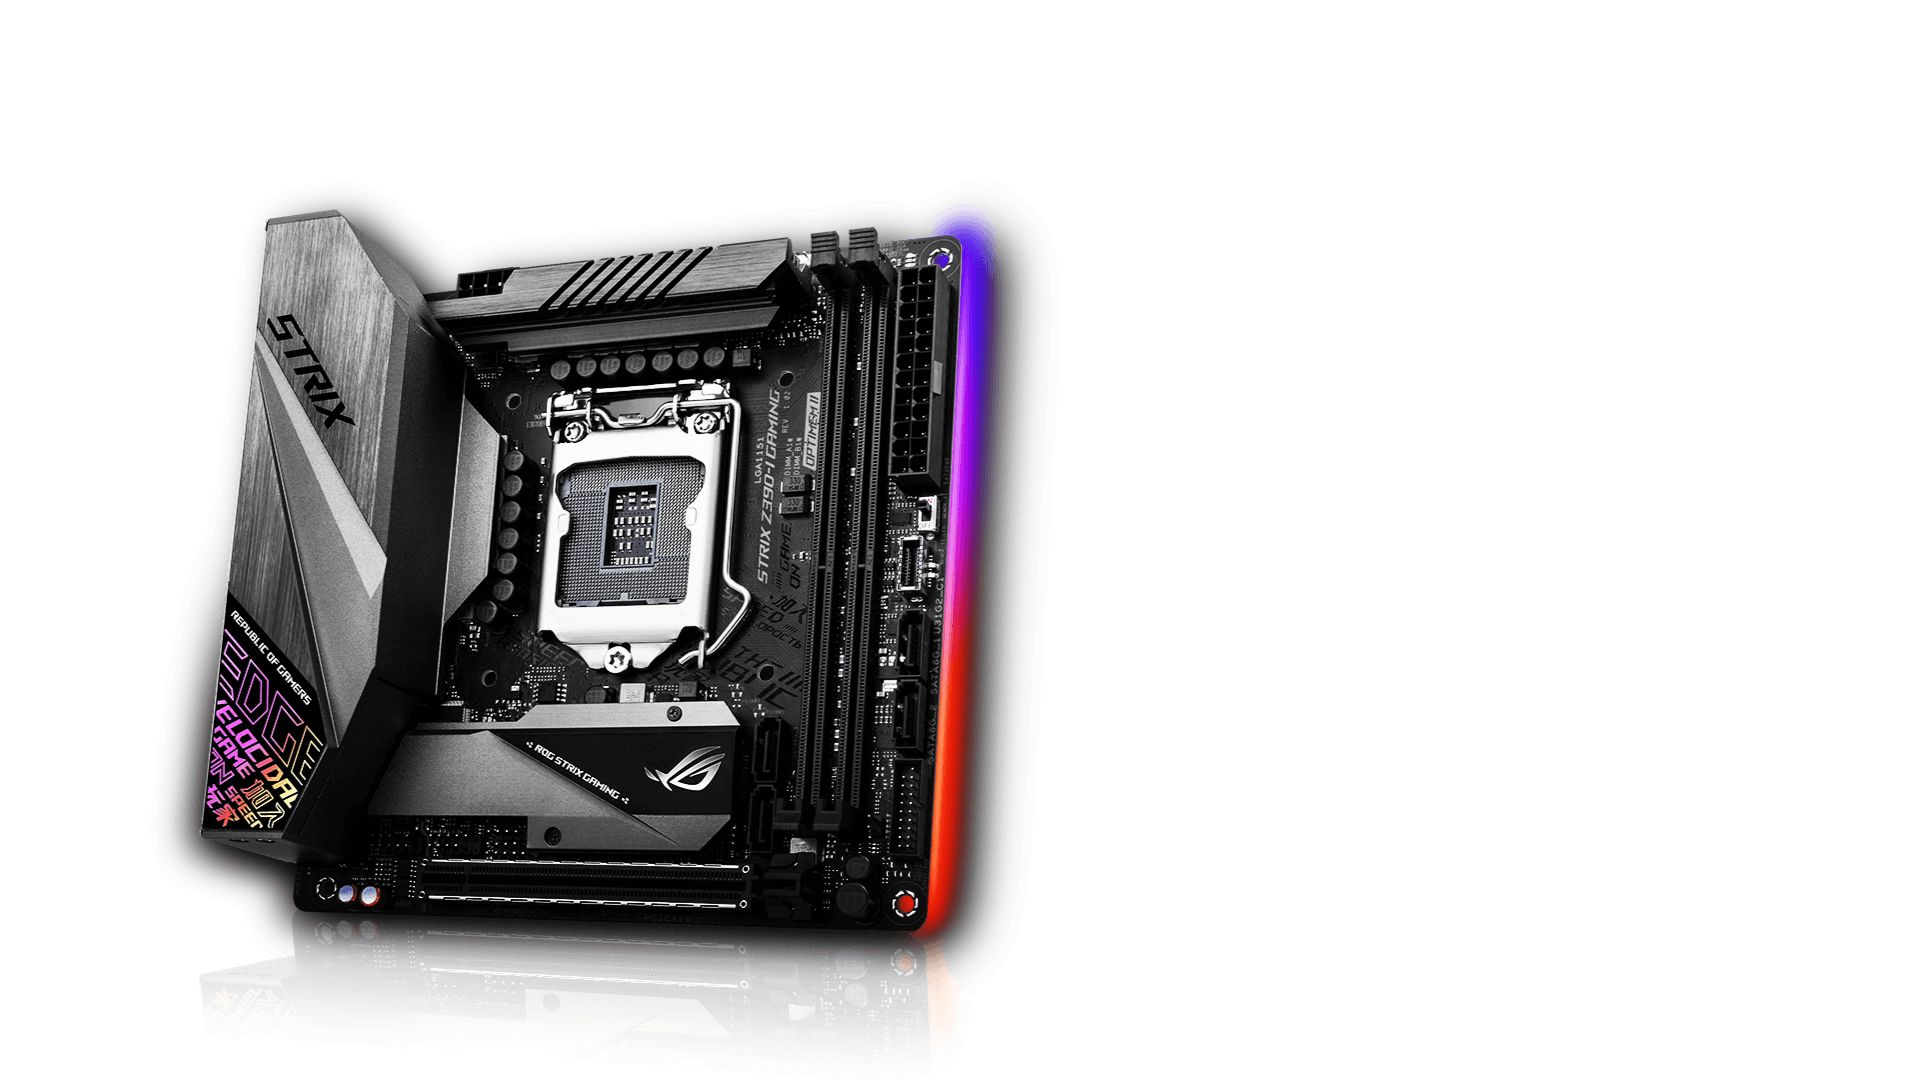
The first consideration is the form factor of your motherboard. Motherboards come in different sizes, such as ATX, Micro-ATX, and Mini-ITX. Ensure that your case is designed to accommodate the specific form factor of your chosen motherboard. This includes having the appropriate mounting points and standoffs for secure installation.
Next, consider the clearance for your CPU cooler. Some high-performance coolers can be quite large and may not fit within certain cases due to height or width limitations. Verify the maximum CPU cooler height that your case can accommodate to ensure compatibility.
Graphics cards also vary in size and length. Check the maximum GPU length that your case can support and ensure that it can accommodate your chosen graphics card. Additionally, consider factors such as PCIe slot spacing and whether your case has enough slots for multiple GPUs if desired.
Another important consideration is the storage configuration. Determine the number and type of storage devices you plan to use, such as solid-state drives (SSDs) or hard disk drives (HDDs). Ensure that your case has sufficient drive bays and mounting options to accommodate your storage needs.
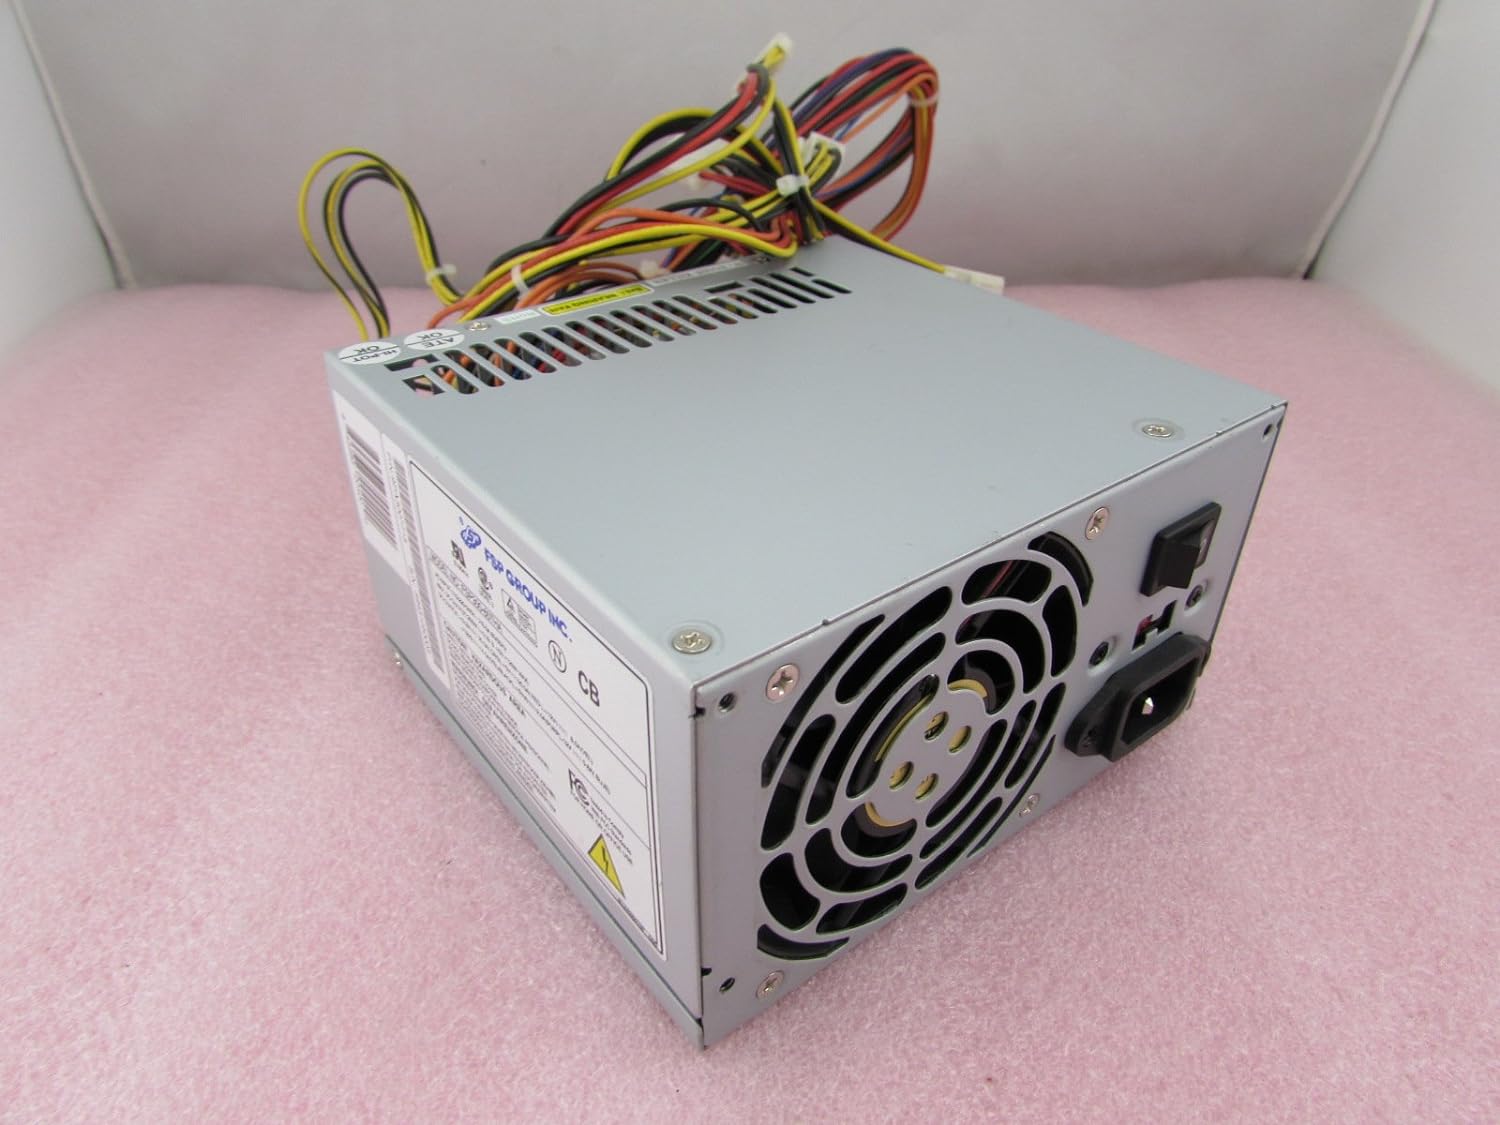
Power supply compatibility is also crucial. Verify the form factor, physical dimensions, and wattage requirements of your chosen power supply unit (PSU) to ensure that it can fit within your case and provide adequate power for your components.
Consider other components and peripherals you may be using, such as optical drives, USB devices, or sound cards. Confirm that your case has the necessary expansion slots and front panel ports to support these components.
Specialized components, such as liquid cooling systems or fan controllers, may require additional space, mounting points, or clearance within your case. Make sure you take these factors into account during the design phase.
Lastly, consider future expandability and compatibility. Plan ahead and leave room for future upgrades or additional components you may want to add down the line. This will save you from potential compatibility issues and the need to replace your case in the future.
By carefully considering the compatibility of your components during the design and build process, you can ensure a smooth and efficient installation, optimize system performance, and avoid potential issues that may arise from incompatible parts. Take the time to research and verify specifications to ensure that your custom PC case is compatible with all your chosen components.
Customization and Aesthetics
Building a custom PC case provides a unique opportunity to express your personal style and creativity. Customization and aesthetics play a key role in creating a visually stunning and personalized enclosure for your components. In this section, we will explore various customization options and considerations to help you design a custom PC case that reflects your individuality.
One of the most popular ways to customize a PC case is through the use of custom paint or vinyl wraps. Painting your case allows you to choose a color or design that resonates with your personal taste. Consider using high-quality spray paints or custom automotive finishes for a durable and professional appearance. Alternatively, vinyl wraps offer a wide variety of colors, patterns, and textures that can transform the look of your case with ease.
LED lighting is another popular customization option that can add ambiance and flair to your build. LED strips, lighting kits, or individually addressable RGB lighting can be installed within the case to create stunning lighting effects. This allows you to customize the color, brightness, and lighting patterns to suit your preferences and create a unique visual impact.
You can also consider adding custom decals or stickers to your case. These can be commercially purchased decals or ones that you design and create yourself. Custom decals can feature your favorite brands, logos, or artwork, giving your case a personal touch and making it truly one-of-a-kind.
Cable sleeves or extensions can enhance the clean and organized appearance of your build. These sleeves come in various colors and patterns and help conceal the unsightly cables, giving your case a sleek and professional look. Cable combs can also be used to keep the cables neatly organized and aligned, further enhancing the aesthetics of your build.
Windowed side panels are another option to showcase your components and add visual appeal. Whether you opt for a fully transparent panel or one with a tint or pattern, a windowed side panel allows you to display your hardware and highlight your build’s internal features.
Consider incorporating unique design elements such as custom cutouts or etchings. These can be used to create intricate patterns or showcase specific components or features of your build. With the right tools and creativity, you can design and create a case that is uniquely yours.
Finally, think about the overall theme or style you want to achieve. Whether it’s a sleek and minimalist design or a bold and futuristic aesthetic, choose components, colors, and finishes that complement each other and create a cohesive look. This will ensure that your custom PC case stands out and becomes a visually stunning centerpiece.
Remember, the possibilities for customization and aesthetics are virtually endless when it comes to building a custom PC case. Let your creativity soar, experiment with different ideas, and create a case that showcases your personality and style.
Tools and Equipment Needed
Building a custom PC case requires a set of tools and equipment to ensure a smooth and successful assembly process. Having the right tools not only makes the build process easier but also helps prevent damage to components and ensures a professional-looking finished product. In this section, we will discuss the essential tools and equipment you will need when building your custom PC case.
- Screwdriver set: A quality screwdriver set with interchangeable bits is essential. Look for magnetic or precision screwdrivers to easily manage small screws used in computer components.
- Allen wrenches: Various components, such as case panels or cooling solutions, may require Allen wrenches for installation. Having a set with different sizes will ensure compatibility.
- Needle-nose pliers: These pliers are handy for gripping and manipulating small components, especially when dealing with cables or connectors.
- Wire cutters/strippers: These tools are essential for cutting or stripping wires when managing cables or making connections.
- Tweezers: Precision tweezers can assist with handling small or delicate components, such as jumpers or connectors.
- Cable ties/zip ties: These are essential for bundling and securing cables, keeping them organized and out of the way for proper cable management.
- Velcro straps: Velcro straps are useful for securing and tidying up larger bundles of cables, allowing for a clean interior and improved airflow.
- Anti-static wrist strap: An anti-static wrist strap helps protect sensitive components from static electricity during the build process. It is recommended to wear one when handling computer hardware.
- Thermal paste: This is necessary for ensuring proper heat transfer between the CPU and its cooler. Make sure to get a high-quality thermal paste for optimal thermal performance.
- Wireless screwdriver or power drill: While not necessary, a wireless screwdriver or power drill with appropriate bits can greatly speed up the process of removing and installing screws.
Additionally, it’s important to have a clean and well-organized workspace. Clear any clutter, have ample lighting, and ensure you have enough space to lay out your components and tools.
Before starting the build process, familiarize yourself with the specific requirements and recommendations from the case manufacturer and the component manufacturers. This will help ensure a smooth build and minimize the risk of compatibility issues or damage to components.
By having the necessary tools and equipment readily available, you’ll be well-prepared to tackle the assembly of your custom PC case. Remember to handle components with care and take your time to ensure a well-executed and successful build.
Building Your Custom PC Case
Now that you have planned, gathered your components, and acquired the necessary tools, it’s time to start building your custom PC case. This exciting process will bring your design to life and result in a unique and personalized enclosure for your components. In this section, we will outline the general steps involved in building your custom PC case.
1. Prepare your workspace: Clear a clean and well-lit area for assembly. Make sure you have enough space to work comfortably and lay out your components and tools. Take precautions to ground yourself and minimize the risk of static discharge by wearing an anti-static wrist strap.
2. Begin with the motherboard: Install the motherboard into the case by aligning it with the standoffs and securing it with screws. Ensure all connections, such as power and data cables, are properly plugged in.
3. Install storage devices: Mount your SSDs or HDDs into the appropriate drive bays or brackets and connect the necessary SATA or power cables.
4. Install the power supply: Insert the power supply into the designated area and secure it with screws. Connect the necessary cables, including the main 24-pin ATX connector, CPU power connector, and GPU power connectors.
5. Install the CPU cooler: Follow the manufacturer’s instructions to install your chosen CPU cooler. Apply a small amount of thermal paste to the CPU before attaching the cooler. Secure it in place using the provided screws or mounts.
6. Install the graphics card: Insert the graphics card into the appropriate PCIe slot on the motherboard and secure it using the retention bracket or screws. Connect any necessary power cables from the power supply.
7. Connect internal cables: Route and connect the necessary cables, including SATA cables for storage devices, front panel connectors, USB headers, and audio connectors. Ensure that cables are neatly organized and secured to prevent interference with airflow.
8. Organize and manage cables: Use cable ties, Velcro straps, or other cable management solutions to bundle and secure cables. Route cables strategically to maintain a clean and organized interior. Make sure to leave enough space for proper airflow.
9. Test and troubleshoot: Double-check all connections and ensure everything is properly seated. Turn on your PC and make sure it boots up correctly. Test all components and monitor temperatures to ensure proper cooling.
10. Close up the case: Once everything is confirmed to be working correctly, close up the case by securing any panels or covers. Ensure all screws are properly tightened.
Throughout the building process, refer to the manuals and instructions provided with your components and consult any online resources or forums for additional guidance or troubleshooting tips specific to your hardware.
Building your custom PC case is an enjoyable and rewarding experience that allows you to showcase your creativity and technical skills. Take your time, be patient, and don’t hesitate to ask for help or seek guidance whenever needed. Once your build is complete, you’ll have a unique and personalized PC case that perfectly suits your needs and reflects your individual style.
Conclusion
Building a custom PC case is an exciting and fulfilling endeavor that allows you to create a unique and personalized enclosure for your components. Throughout this article, we have explored the various considerations and steps involved in designing and constructing your own custom PC case.
We discussed the importance of thorough planning, considering factors such as the purpose of your build, the materials to be used, and the design and aesthetics you want to achieve. Ensuring compatibility with your components and implementing proper cable management and ventilation strategies are crucial for optimal performance and longevity.
We also highlighted the tools and equipment necessary for the build process and provided guidance on assembling the components and managing cables effectively. With the right tools, knowledge, and attention to detail, you can achieve a professional-looking and well-organized interior.
Moreover, customization and aesthetics bring a personal touch to your custom PC case. From custom paint jobs to LED lighting and unique decals, customization allows you to express your individuality and create a visually stunning masterpiece.
Remember to follow the specific instructions and recommendations provided by the case and component manufacturers to ensure a smooth and successful build. Take your time, be patient, and enjoy the process of bringing your design to life.
Ultimately, building your custom PC case grants you the satisfaction of creating a personalized and high-performance enclosure that perfectly suits your needs and style. It allows you to showcase your creativity, technical skills, and attention to detail, while also providing an opportunity for future expansion and upgrades.
We hope that this guide has provided you with valuable insights and guidance for your custom PC case build. Embrace the journey, have fun, and enjoy the rewarding experience of crafting your own unique computing masterpiece.