Introduction
Welcome to this guide on how to install a solid-state drive (SSD) without reinstalling Windows. Upgrading to an SSD can significantly improve the performance and speed of your computer, providing faster boot times and quicker access to your files and applications.
Traditionally, migrating to an SSD involved reinstalling the operating system and all your applications from scratch, which can be a time-consuming and tedious process. However, with the right tools and methods, you can transfer your system to an SSD without the need for a fresh installation.
In this guide, we’ll walk you through the step-by-step process of installing an SSD without reinstalling Windows. We’ll cover everything from backing up your data to cloning your operating system and finalizing the installation. Whether you’re a seasoned tech enthusiast or a beginner, you’ll find this guide helpful in upgrading your computer’s storage.
But before we start, it’s important to note that while the steps provided here are generally safe and straightforward, it’s always a good idea to back up your important files and data before proceeding. While the chances of anything going wrong are minimal, having a backup ensures you won’t lose any valuable data during the installation process.
Now that we’ve covered the basics, let’s dive into the step-by-step process of installing a solid-state drive without reinstalling Windows. Get ready to give your computer a boost in speed and performance!
Backup Your Data
Before proceeding with the installation of an SSD, it’s crucial to back up all your important files and data. While the installation process itself is usually safe and secure, it’s better to be safe than sorry.
There are several methods you can use to back up your data. One option is to utilize an external hard drive or a network storage device to create a full backup of your files. This ensures that all your important documents, photos, videos, and other data are safely stored in a separate location.
Another option is to make use of cloud storage services. Services like Google Drive, Dropbox, and OneDrive offer secure and convenient options for backing up your data. Simply upload your files to the cloud and ensure they are synced and up to date before proceeding with the installation.
If you prefer a more manual approach, you can also copy your files to physical media such as DVDs or USB flash drives. Make sure you have enough storage space and label each disk or drive accordingly so that you can easily locate your files after the installation.
Remember to include any personalized settings, bookmarks, and preferences from applications or browsers. These settings can often be exported and imported later, ensuring you have a seamless transition to your new SSD.
Take your time to carefully review and double-check that you have backed up all the necessary files and data. It can be frustrating to lose important information, so it’s important to be thorough in this step.
Once you have successfully backed up your data, you are ready to move on to the next step of installing your SSD. With your files securely stored, you can proceed with peace of mind, knowing that your important data is protected.
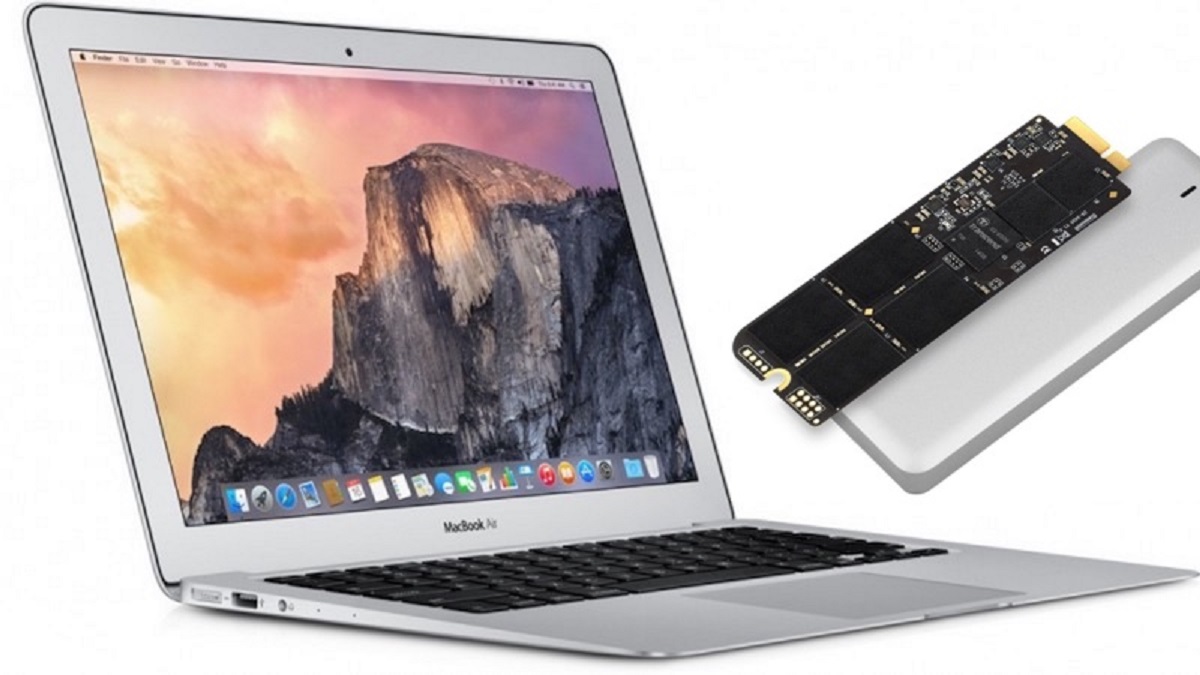
Choose the Right SSD
When it comes to installing a solid-state drive (SSD) in your computer, it’s important to choose the right one that suits your needs and specifications. Here are some factors to consider when selecting an SSD:
- Storage Capacity: Determine how much storage space you require. SSDs come in various capacities, ranging from 120GB to 2TB or more. Consider the size of your current hard drive and the amount of data you have to ensure you choose an SSD with sufficient capacity.
- Form Factor: Check the form factor of your existing drive and make sure that the SSD you select is compatible with your computer. The most common form factors are 2.5 inches and M.2. If you’re unsure, consult your computer’s manual or manufacturer’s website for compatibility information.
- Read/Write Speed: SSDs are known for their fast read and write speeds, which contribute to overall system performance. Look for SSDs with high read and write speeds to ensure snappy boot times and quick access to your data.
- Interface: SSDs connect to your computer via different interfaces, such as SATA, NVMe, or PCIe. Check your computer’s specifications to determine which interface is supported. If your computer supports NVMe or PCIe, consider opting for an SSD with these interfaces for faster performance.
- Reliability and Durability: Consider the durability and reliability of the SSD. Look for SSDs with a good track record and positive customer reviews to ensure you invest in a high-quality and long-lasting drive.
- Price: Lastly, consider your budget. SSD prices have become more affordable over the years, but higher-capacity and faster SSDs can still come at a premium. Determine your price range and try to find the best balance between performance, capacity, and cost.
Take your time to research different SSD models, compare specifications, and read reviews to make an informed decision. Once you have a clear understanding of your requirements and preferences, you’ll be able to choose an SSD that meets your needs and enhances your computing experience.
Now that you’ve chosen the right SSD, it’s time to move on to the next step of the installation process.
Shut Down Your Computer
Before you can begin the installation process of your solid-state drive (SSD), it’s important to properly shut down your computer. This ensures that you can safely work on the hardware and avoid any potential damage.
To shut down your computer, follow these steps:
- Save your work: It’s always a good practice to save any open documents or projects to avoid losing any unsaved work. Make sure everything is closed and saved before proceeding.
- Close all applications: Close any open applications or programs running on your computer. This ensures that no files are being accessed during the shutdown process.
- Click on the Start menu: Locate the Start button on your computer’s taskbar and click on it. A menu will appear with various options.
- Select ‘Shut Down’: From the Start menu, click on the ‘Shut Down’ option. This initiates the process of shutting down your computer.
- Wait for the computer to power off: Once you have selected ‘Shut Down’, give your computer a moment to properly power off. You may see a Windows logo or a message indicating that the computer is shutting down.
- Verify that the computer is off: After a few moments, ensure that the computer is completely powered off. You can do this by checking for any lights or sounds indicating that it’s still running. If everything looks and sounds quiet, then your computer is successfully shut down.
It’s essential to shut down your computer properly to prevent any potential risks or damage to your hardware. By following these steps, you can ensure a safe and smooth installation process for your new SSD.
Now that your computer is shut down, you’re ready to move on to the next step of opening your computer case.
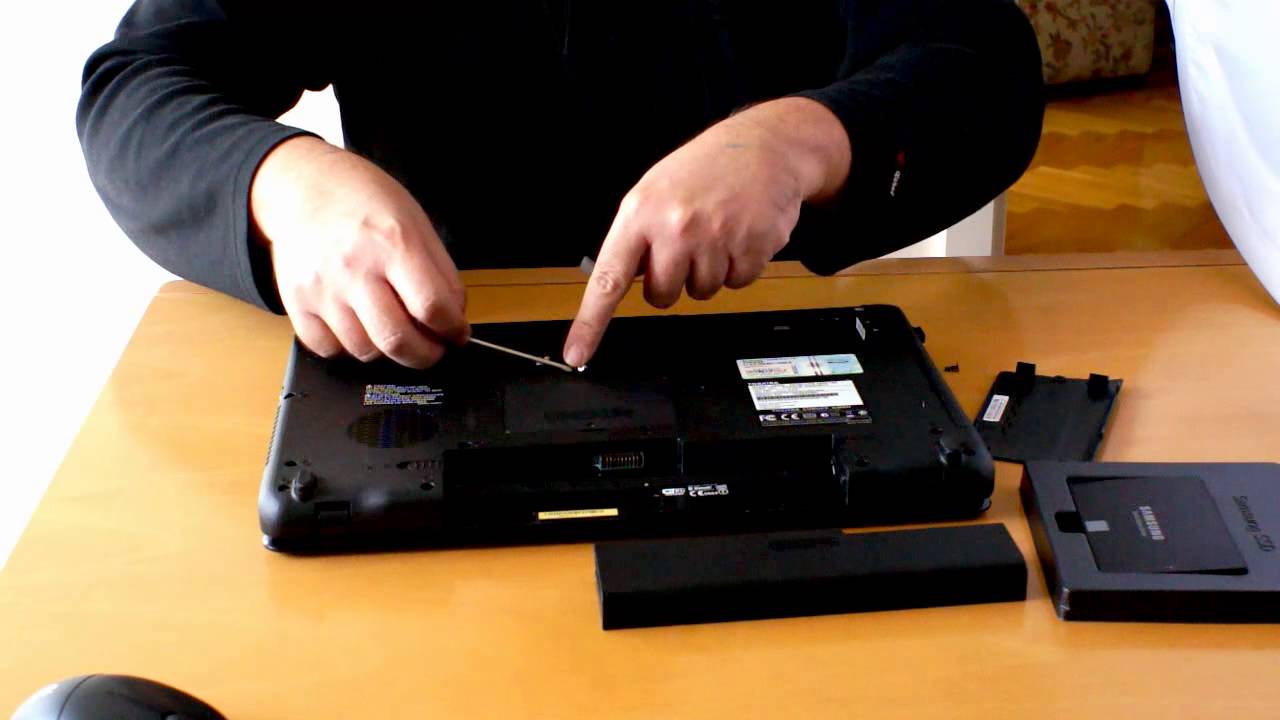
Open Your Computer Case
Opening your computer case is the next step in installing your solid-state drive (SSD). This will allow you to access the internal components of your computer and install the SSD in the appropriate slot. Here’s how you can open your computer case:
- Gather the necessary tools: Before opening your computer case, make sure you have a Phillips screwdriver or any other tools that may be required based on your computer’s design.
- Disconnect the power: Ensure that your computer is completely shutdown and disconnect the power cable from the back of the computer. This will prevent any electrical accidents from occurring while working inside the case.
- Locate the screws: Examine the back of your computer case and look for screws holding the side panel in place. These screws may be located on the top, bottom, or both sides of the case.
- Remove the screws: Use your screwdriver to remove the screws holding the side panel in place. Depending on your case design, you may need to remove multiple screws.
- Slide off the side panel: Once the screws are removed, gently slide or pull off the side panel to expose the internal components of your computer.
- Safely set aside the side panel: Place the side panel in a safe location where it won’t be damaged or accidentally knocked over. You may want to ensure it’s in a secure position to avoid any potential accidents.
With your computer case open, you now have access to the internal components, including the drive bays where you will install your SSD. Take a moment to familiarize yourself with the layout of your computer’s interior and locate the appropriate drive bay for your SSD installation.
Remember to handle the internal components of your computer with care and avoid touching any sensitive parts. Static electricity can cause damage to the components, so it’s a good idea to ground yourself by touching a metal surface before handling any hardware.
Now that your computer case is open, you’re ready to move on to the next step of locating a drive bay for installing your SSD.
Locate a Drive Bay
Locating a suitable drive bay is an important step in the installation process of your solid-state drive (SSD). The drive bay is where you will install the SSD in your computer case. Follow these steps to locate a drive bay:
- Examine the internal layout: Take a look inside your computer case and familiarize yourself with the internal layout. Look for drive bays, which are typically metal frames or brackets designed to hold storage devices.
- Check for available space: Make sure there is enough space in the drive bay to accommodate your SSD. Some drive bays may have additional brackets or connectors that need to be removed or adjusted to properly fit your SSD.
- Consider the size: Determine if the drive bay is suitable for the form factor of your SSD. The most common form factors are 2.5 inches and M.2. Ensure that the drive bay you choose is compatible with the form factor of your SSD.
- Take note of the connection slots: Check if the drive bay has the necessary SATA or power connectors required to connect the SSD. These connectors should be accessible and compatible with your SSD.
- Review the mounting options: Assess how the SSD will be secured in the drive bay. Some drive bays may have mounting screws or brackets, while others may have tool-less installation mechanisms. Make sure you understand how to properly secure your SSD in the chosen drive bay.
If you’re unsure about which drive bay to use, consult your computer’s manual or the manufacturer’s website for more information. Additionally, online communities and forums can provide guidance and suggestions specific to your computer model.
Once you have identified a suitable drive bay, you’re ready to proceed with mounting your SSD. The next section will guide you through the steps of mounting the SSD securely in the drive bay.
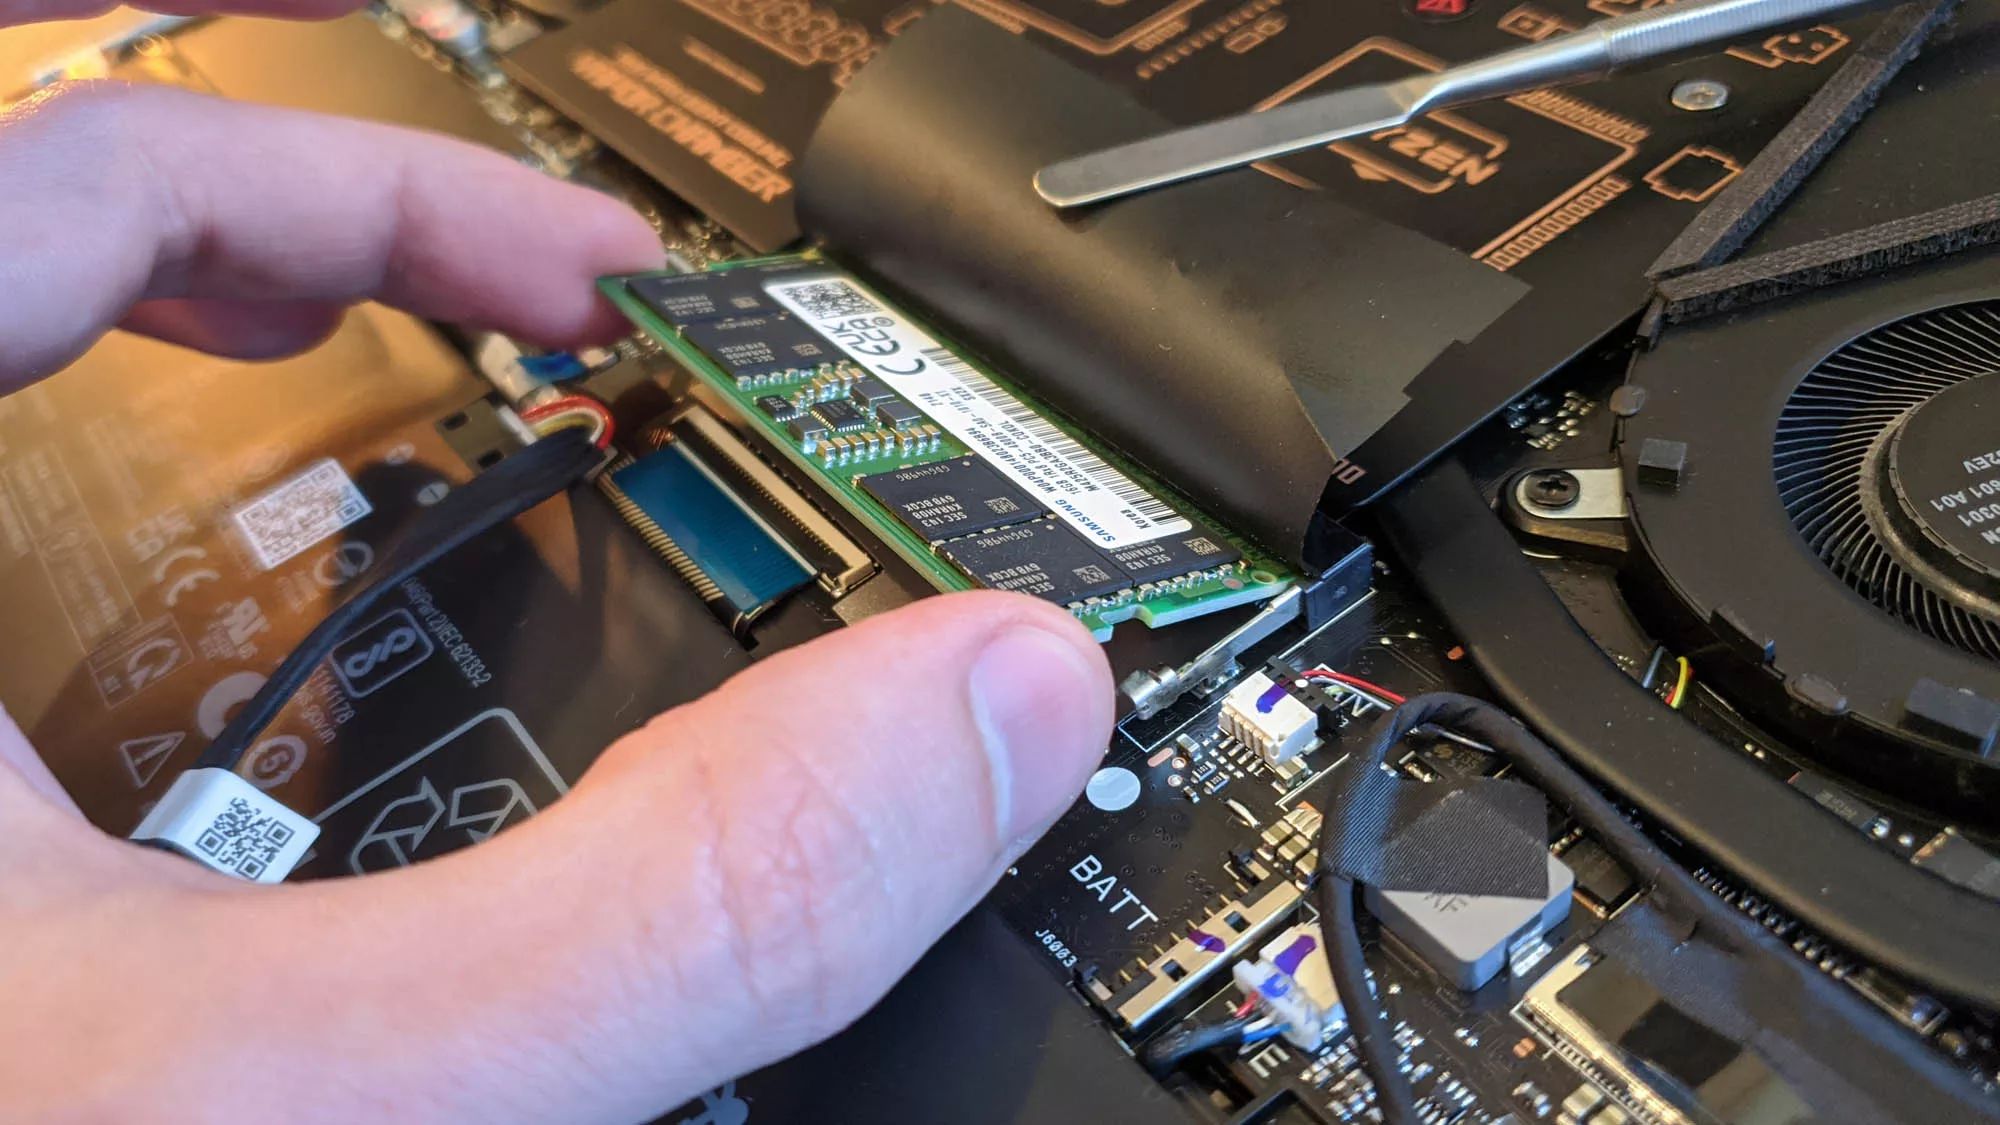
Mount the SSD
Mounting the solid-state drive (SSD) securely in the drive bay is an essential step in the installation process. Properly mounting the SSD ensures stability and prevents any accidental damage while the computer is in use. Follow these steps to mount the SSD:
- Prepare the SSD: If your SSD is in an enclosure or bracket, remove it before mounting. Check the mounting holes on the SSD to ensure compatibility with the drive bay.
- Align the SSD: Position the SSD in the drive bay, aligning the mounting holes on the SSD with the corresponding holes in the drive bay.
- Secure the SSD: Use the provided screws or brackets to secure the SSD in place. Insert the screws into the mounting holes and tighten them gently using a screwdriver. Be careful not to overtighten, as this can damage the SSD or the drive bay.
- Check for stability: Once the SSD is secured, gently wiggle it to ensure it is firmly in place. The SSD should not move or shift around in the drive bay.
In some cases, your computer’s drive bay may have tool-less installation mechanisms. These allow you to mount the SSD without the need for screws. Follow the specific instructions provided by the manufacturer to utilize the tool-less installation method, if available.
It is important to note that if you are installing an M.2 SSD, the mounting process may differ. M.2 SSDs are typically inserted into a specific slot on the motherboard. Consult your computer’s manual or the manufacturer’s website for detailed instructions on how to install an M.2 SSD.
Once the SSD is properly mounted in the drive bay, you’re ready to move on to the next step of connecting the power and data cables.
Connect Power and Data Cables
After mounting the solid-state drive (SSD) securely in the drive bay, the next step is to connect the necessary power and data cables. These cables ensure that the SSD is supplied with power and enables data transfer between the drive and the computer. Here’s how you can connect the power and data cables:
- Locate the SATA power connector: Identify the SATA power connector from your power supply unit (PSU). The SATA power connector has a wide, flat L-shaped connector with multiple pins. It provides power to the SSD.
- Connect the SATA power cable: Take the SATA power cable from your power supply and connect it to the corresponding SATA power connector on the SSD. Ensure that the connector is aligned correctly and firmly inserted. It should fit snugly but not require excessive force.
- Locate the SATA data connector: Locate the SATA data connector on your motherboard. The SATA data connector is a smaller, L-shaped connector with fewer pins than the power connector. It enables data transfer between the SSD and the motherboard.
- Connect the SATA data cable: Take the SATA data cable that came with your SSD or obtain a compatible one. Connect one end of the SATA data cable to the SATA data connector on the SSD, and the other end to the corresponding SATA data connector on the motherboard. Similar to the power cable, ensure a secure and snug connection.
- Secure the cables: Use cable ties or clips to neatly secure and organize the power and data cables inside the case. This helps to ensure proper airflow and prevents the cables from interfering with other components.
Double-check that both the power and data cables are connected securely and properly seated. A loose or improperly connected cable may result in the SSD not functioning correctly.
If you’re installing an M.2 SSD, skip the SATA power and data cable connections. M.2 SSDs typically connect directly to the motherboard using the M.2 slot and do not require separate cables.
Once you have successfully connected the power and data cables, you’re ready to move on to the next step: powering up your computer.
Power Up Your Computer
Now that you have properly connected the power and data cables to your solid-state drive (SSD), it’s time to power up your computer and ensure that everything is functioning correctly. Follow these steps to power up your computer:
- Double-check the cable connections: Before powering up your computer, verify once more that all the cables are securely connected to the SSD and the motherboard. It’s essential to ensure proper connections for the SSD to function correctly.
- Reconnect the power cable: Plug the power cable back into your computer’s power supply unit (PSU). Ensure that it’s inserted firmly and correctly into the socket.
- Power on your computer: Locate the power button on your computer case or front panel. Press the power button to start your computer.
- Observe the startup process: Once you press the power button, your computer will begin the startup process. Listen for any unusual sounds and observe the screen for any error messages or unusual behavior.
- Check the BIOS/UEFI settings: During the startup process, you may need to access the BIOS (Basic Input/Output System) or UEFI (Unified Extensible Firmware Interface) settings of your computer. Consult your computer’s manual or the manufacturer’s website to find out how to access these settings. Ensure that the SSD is detected and properly recognized in the system.
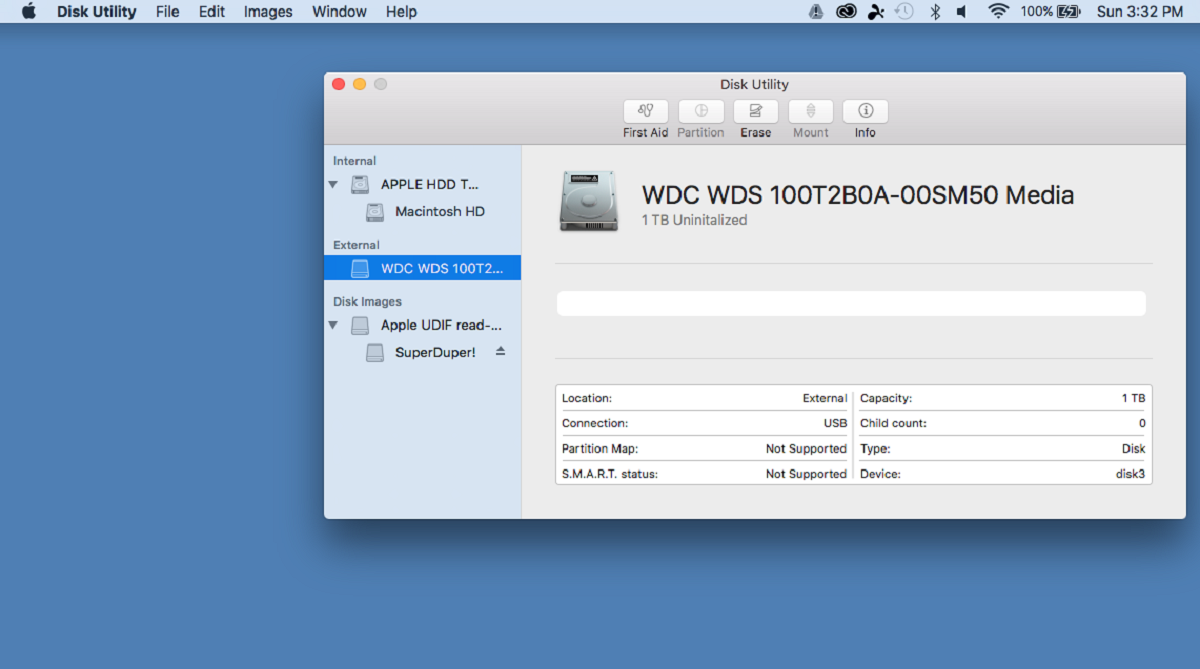
- Verify the SSD in the operating system: Once you boot into your operating system, open the Disk Management utility (for Windows) or the Disk Utility (for macOS) to check if the SSD is recognized and visible. You should see the SSD listed as a storage device.
If your computer starts up without any issues and the SSD is detected in the BIOS/UEFI settings and operating system, congratulations! You have successfully powered up your computer with the newly installed SSD.
If there are any issues or the SSD is not recognized, recheck the cable connections and consult the manufacturer’s documentation or support resources for troubleshooting steps specific to your computer and SSD model.
Now that your computer is up and running, it’s time to proceed with initializing the SSD and transferring your operating system to the new drive.
Initialize the SSD
After successfully powering up your computer with the newly installed solid- state drive (SSD), the next step is to initialize the drive. Initializing the SSD prepares it for use and allows your computer to recognize and utilize its storage capacity. Follow these steps to initialize the SSD:
- Open Disk Management (Windows): On a Windows computer, right-click on the Start button and select “Disk Management” from the menu. This will open the Disk Management utility.
- Identify the unallocated SSD: In the Disk Management window, locate the SSD. It will be listed as “unallocated” and will have a black bar representing the unallocated space.
- Right-click the SSD: Right-click on the unallocated SSD and select “New Simple Volume” from the context menu. This will launch the New Simple Volume Wizard.
- Configure the Simple Volume: Follow the prompts in the Wizard to configure the Simple Volume. You can assign a drive letter, choose a file system (typically NTFS), and give the volume a name or label. Leave the allocation unit size as the default, unless you have specific requirements.
- Format the SSD: Once you have configured the Simple Volume, the Wizard will prompt you to format the SSD. Ensure that “Perform a quick format” is selected and click on “Next” to proceed. Confirm the formatting by clicking on “Finish”.
- Wait for the formatting process to complete: The formatting process may take a few moments depending on the size of the SSD. Once it is complete, the status will change to “Healthy”, indicating that the SSD is initialized and ready for use.
It’s important to note that if you’re installing the SSD as a secondary drive and not the primary drive for your operating system, you may need to follow a different process to initialize and format the drive.
If you’re using a different operating system, such as macOS or Linux, consult the respective documentation or user guides for instructions on how to initialize and format a new drive.
With the SSD successfully initialized and formatted, you’re ready to proceed with cloning your operating system to the new drive and optimizing your computer’s performance.
Clone Your Operating System
Once your solid-state drive (SSD) is initialized and ready for use, the next step is to clone your operating system. Cloning allows you to transfer your existing operating system, applications, and files from your old hard drive to the new SSD without the need for a fresh installation. Follow these steps to clone your operating system:
- Select a cloning software: Choose a reliable cloning software that is compatible with your operating system. There are several options available, such as Clonezilla, Macrium Reflect, or Acronis True Image. Download and install the cloning software on your computer.
- Connect the old hard drive (optional): If your old hard drive is still connected to your computer, you can connect it alongside the new SSD for the cloning process. Alternatively, you can use an external hard drive enclosure to connect the old hard drive externally.
- Launch the cloning software: Open the cloning software on your computer. Choose the option to clone your entire operating system or select specific partitions depending on your preferences.
- Select the source and destination drives: In the cloning software, specify the old hard drive as the source drive and the new SSD as the destination drive. Double-check the drive letters or labels to ensure you’ve selected the correct drives.
- Configure the cloning settings: Depending on the software, you may have various cloning options to choose from, such as sector-by-sector cloning or intelligent cloning. Read the instructions or tooltips provided by the software and select the appropriate settings for your needs.
- Start the cloning process: Once you’ve confirmed your settings, initiate the cloning process. This may take some time, depending on the size of your operating system and the speed of your drives. Be patient and allow the software to complete the cloning operation.
- Verify the cloned data: Once the cloning process finishes, carefully inspect the cloned data on the SSD to ensure everything has been successfully copied. Compare file sizes, folder structures, and key files to verify the integrity of the cloned operating system.
After successfully cloning your operating system to the SSD, you can disconnect the old hard drive if you connected it for the cloning process. Restart your computer and enter the BIOS/UEFI settings to set the SSD as the primary boot drive. Save the changes and exit the BIOS/UEFI settings.
Your computer will now boot from the SSD, providing you with improved speed and performance. You can now enjoy the benefits of an upgraded storage solution without the need to reinstall your operating system or applications.
Remove the Old Hard Drive
Now that you have successfully cloned your operating system to the new solid-state drive (SSD) and set it as the primary boot drive, it’s time to remove the old hard drive from your computer. Removing the old hard drive not only frees up space but also ensures that your computer is only using the new SSD for storage. Follow these steps to remove the old hard drive:
- Shut down your computer: Ensure that your computer is completely powered off before working on its internal components. Follow the proper shutdown procedure as outlined earlier.
- Disconnect the power cable: Unplug the power cable from the back of your computer to ensure it’s completely powered off and there is no risk of electrical shock.
- Ground yourself: Ground yourself by touching a metal surface or using an anti-static wrist strap. This helps to discharge any static electricity that could potentially damage the components inside your computer.
- Open your computer case: Refer to the earlier section on how to open your computer case. Carefully remove the side panel to gain access to the internal components.
- Identify the old hard drive: Locate the old hard drive inside your computer. It will typically be mounted in a drive bay or secured to the chassis with screws or brackets.
- Remove the connections: Disconnect the data cable and power cable from the old hard drive. Gently tug on each cable connector to release it from the drive. Take note of the cable arrangement for future reference.
- Remove any mounting screws or brackets: If the old hard drive is secured with screws or brackets, remove them using a screwdriver. These screws or brackets may be located on the sides or bottom of the drive.
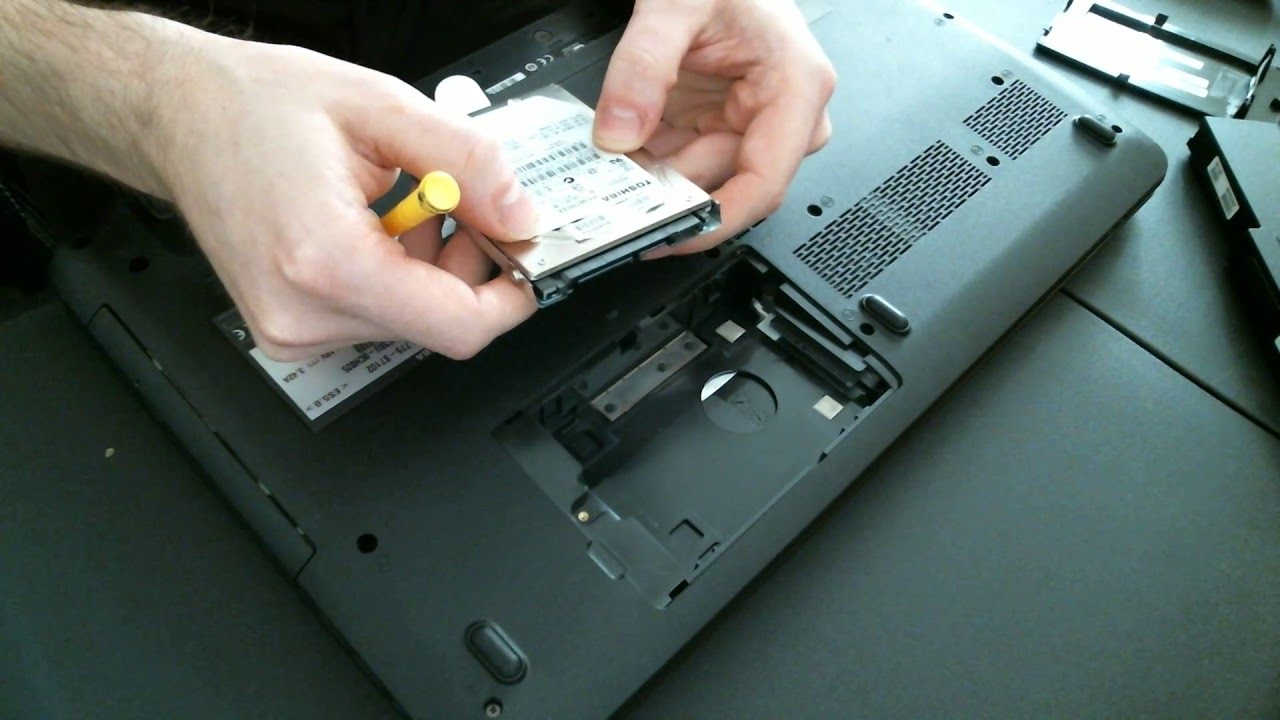
- Slide out or lift the old hard drive: Depending on how the old hard drive is mounted, either slide it out of the drive bay or gently lift it out of the chassis. Be cautious not to damage any other components as you remove the hard drive.
- Set aside or store the old hard drive: If you no longer require the old hard drive, set it aside for proper disposal or consider repurposing it in an external enclosure as additional storage. Ensure you handle it with care to prevent damage to the drive or any sensitive data it may contain.
With the old hard drive successfully removed, your computer is now solely relying on the new SSD for storage. Take a moment to double-check all connections are secure and components are properly mounted in the drive bay before closing the computer case.
Now that you’ve removed the old hard drive, your computer is fully upgraded with the new SSD. Enjoy the enhanced speed, performance, and reliability that the SSD brings to your computing experience!
Finalize the Installation
With the old hard drive removed and the new solid-state drive (SSD) successfully installed and configured, it’s time to finalize the installation process. Follow these steps to ensure a smooth and complete installation:
- Double-check all connections: Take a moment to carefully inspect all cable connections, including the power and data cables for the SSD. Ensure they are securely plugged in and properly seated.
- Secure the computer case: Close the computer case by reattaching the side panel. Use the screws you previously removed to secure the panel and ensure it is correctly aligned and fastened.
- Power on your computer: Connect the power cable to your computer’s power supply and turn on the power. Your computer should now boot from the SSD as the primary drive.
- Set up additional settings: As your computer boots up, you may need to configure additional settings based on your operating system and personal preferences. This may include adjusting the boot order, enabling AHCI mode, or updating drivers. Refer to your computer’s manual or the manufacturer’s website for guidance on these settings.
- Verify the SSD’s performance: Open your operating system and ensure that the SSD is working correctly. Check the device manager or system information to confirm that the SSD is recognized, and its storage capacity matches the specifications of the drive.
- Restore your data and applications: If you have previously backed up your data, now is the time to transfer it back to your computer. Restore your files, reinstall applications, and apply any necessary updates or configurations.
- Test the performance and functionality: Take some time to test the performance of your computer with the new SSD. Notice the faster boot times, improved application loading speeds, and overall responsiveness of your system. Ensure that all your applications, files, and settings are functioning as expected.
- Enjoy your upgraded system: With the installation finalized and your computer running smoothly, enjoy the benefits of your new SSD. Experience faster performance, improved workflow, and a more efficient computing experience.
Congratulations! You have successfully installed and finalized the installation of your new solid-state drive. By following these steps, you have taken a significant step towards optimizing your computer’s storage and overall performance.
Remember to regularly back up your data to ensure that your important files are always protected. With your upgraded system, you can now enjoy a faster and more reliable computing experience for years to come.
Conclusion
Congratulations on successfully completing the installation of your solid-state drive (SSD) without the need to reinstall Windows. By following the steps outlined in this guide, you have upgraded your computer’s storage and improved its performance and speed.
We began by emphasizing the importance of backing up your data before starting the installation process. This ensures that your valuable files and information are safely stored and protected during the upgrade.
We then discussed the crucial step of selecting the right SSD for your needs. Considering factors such as storage capacity, form factor, read/write speed, interface, reliability, and price allowed you to make an informed decision and choose an SSD that suits your requirements.
Next, we walked you through the process of shutting down your computer safely, opening the computer case, locating a drive bay, mounting the SSD securely in the drive bay, and connecting the necessary power and data cables. These steps ensured that the SSD was properly installed and ready for use.
With the hardware installation completed, we discussed initializing the SSD, cloning your operating system, and removing the old hard drive if necessary. These steps allowed you to transfer your existing operating system and files to the new SSD smoothly, maintaining all your settings and preferences.
We concluded the installation process by finalizing the installation, ensuring all connections were secure, and verifying the performance of the SSD. We also encouraged you to restore your data and applications, test the functionality of your computer, and ultimately enjoy your upgraded system.
By installing an SSD without reinstalling Windows, you have harnessed the power of faster storage, quick boot times, and improved overall performance. Your computer is now equipped to handle demanding tasks and provide a more efficient computing experience.
Remember, continue practicing good data management habits and regularly back up your data to ensure its safety. Keep your SSD and system updated with the latest firmware and software releases to maintain optimal performance.
We hope this guide has been helpful in guiding you through the installation process of an SSD without reinstalling Windows. Enjoy the enhanced speed, responsiveness, and efficiency of your upgraded system!