Introduction
Welcome to our comprehensive guide on how to give your SSD a letter! In today’s digital age, solid-state drives (SSDs) have become increasingly popular due to their faster speeds and reliability compared to traditional hard disk drives (HDDs). If you’ve recently installed an SSD on your computer, you may have noticed that it doesn’t have a letter assigned to it like your primary C: drive. That’s where we come in to help!
Understanding the basics of SSDs is essential before we dive into the process of assigning a letter to your SSD. Unlike HDDs, SSDs do not rely on spinning platters to store data. Instead, they use flash memory technology, allowing for quicker access times and improved performance. With their smaller physical footprint and decreased power consumption, SSDs have become the go-to choice for many computer users, including gamers, professionals, and everyday users alike.
So, why should you bother giving your SSD a letter? Well, assigning a letter to your SSD is necessary for the operating system to recognize and access it. Without a letter, your SSD remains invisible to your computer, making it impossible to utilize its storage space effectively. By assigning a letter, you can take full advantage of the speed and reliability offered by SSDs, improving the overall performance of your system.
Throughout this guide, we will provide you with a step-by-step approach to give your SSD a letter, ensuring that you can harness its full potential. We understand that everyone’s level of technical expertise varies, so we’ve outlined multiple methods to cater to different skill levels and preferences. Whether you’re comfortable with Disk Management, Command Prompt, or PowerShell, we’ve got you covered.
Please note that the specific steps may vary depending on your operating system version, but the overall concepts and principles remain the same. We recommend reading through the entire guide before attempting any method to familiarize yourself with the process, troubleshooting tips, and best practices.
Now that we’ve laid the groundwork, let’s dive in and give your SSD the letter it deserves!
Understanding the Basics of SSDs
Before we delve into the process of assigning a letter to your SSD, it’s important to grasp the fundamentals of how SSDs function and differ from traditional hard disk drives (HDDs).
Unlike HDDs which rely on rotating magnetic platters and read/write heads, SSDs utilize flash memory technology. This means that SSDs have no moving parts, resulting in faster access times, improved durability, and reduced power consumption. The absence of mechanical parts also contributes to their near-silent operation and increased resistance to shock and vibrations.
Flash memory, the core technology behind SSDs, stores data in non-volatile memory cells. These cells consist of transistors that can hold an electric charge, representing a binary 0 or 1. When data is written to or read from the SSD, these charges are manipulated accordingly.
One of the major advantages of SSDs is their superior performance compared to HDDs. Traditional hard drives rely on spinning disks to locate and retrieve data, which can result in significant latency. SSDs, on the other hand, have near-instantaneous access times due to the absence of moving parts. This translates to faster boot times, quicker application launches, and shorter file transfer durations.
Another crucial aspect of SSDs is their ability to handle random read and write operations efficiently. This means that SSDs can access and write data in a non-sequential manner, which is especially beneficial for multitasking and accessing numerous small files simultaneously.
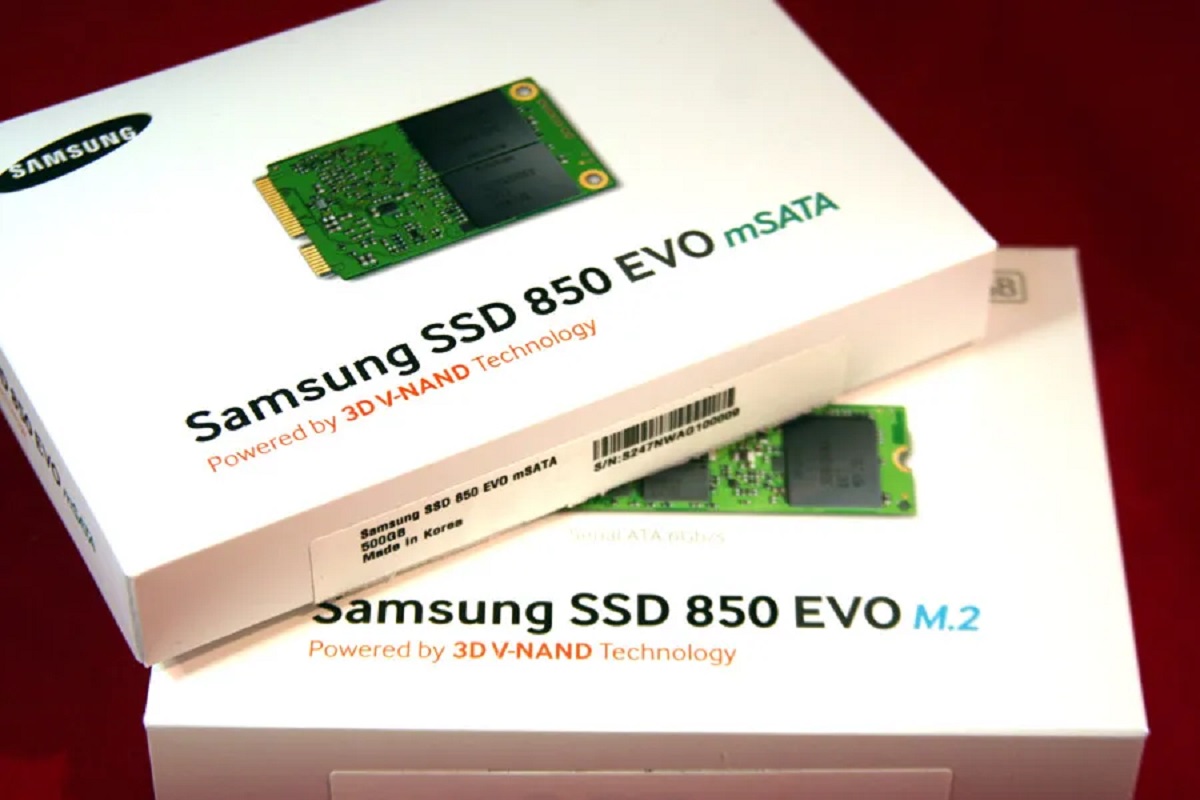
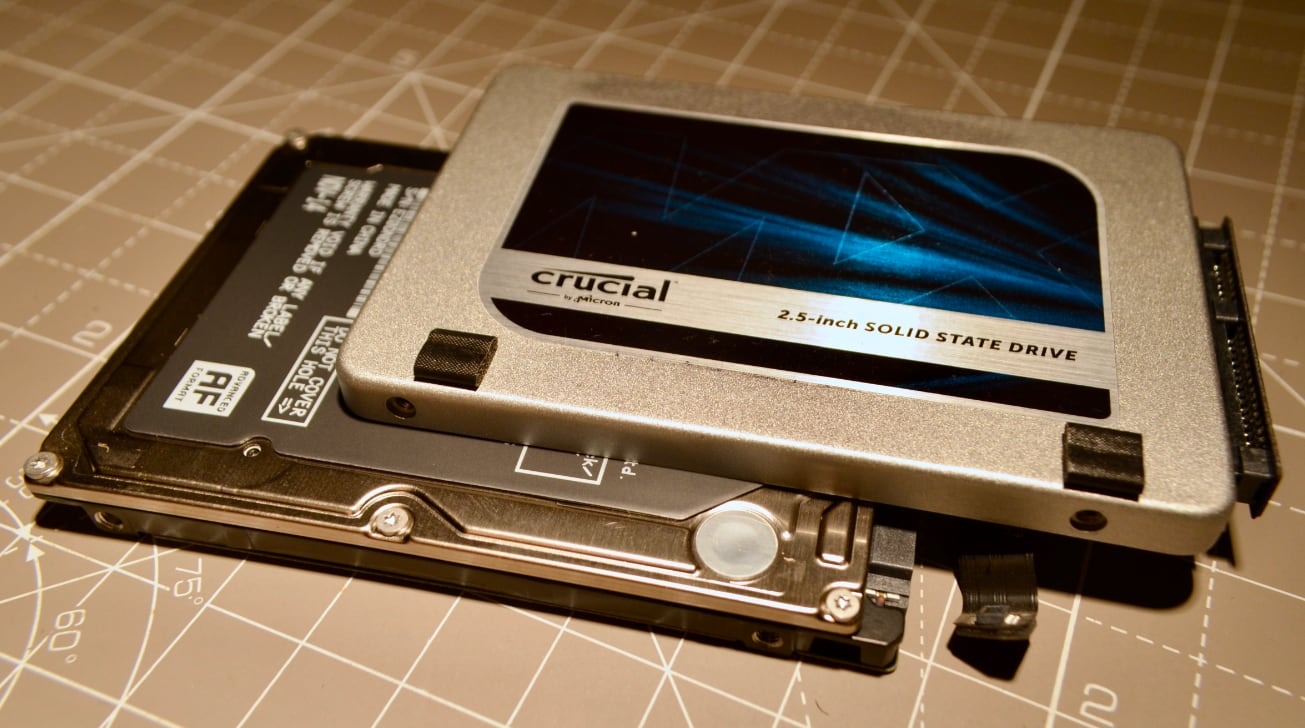
It’s worth noting that SSDs come in different form factors, including the commonly used 2.5-inch form factor for laptops and the smaller M.2 form factor for ultra-thin laptops and compact desktops. Additionally, SSDs are available in various capacities to suit specific storage requirements.
In terms of longevity, SSDs have made significant improvements over the years. While the number of write cycles an SSD can endure is limited compared to HDDs, modern SSDs incorporate wear-leveling algorithms to distribute data writes uniformly across memory cells, ensuring balanced wear and prolonged lifespan.
Maintenance is relatively hassle-free when it comes to SSDs. Unlike HDDs, SSDs do not require defragmentation since data can be accessed randomly without the need for physical read/write heads to move across the disk. However, it’s still important to keep your SSD firmware up to date and perform regular backups to safeguard your data.
Now that you have a solid understanding of the basics of SSD technology, you’re ready to move on and learn how to assign a letter to your SSD. Keep reading for step-by-step instructions on the various methods available.
Why Give SSD a Letter?
You may be wondering why it’s necessary to assign a letter to your SSD when it doesn’t come with one by default. Well, assigning a letter to your SSD serves a crucial purpose in ensuring its proper recognition and functionality within your computer’s operating system.
When you install an SSD on your computer, it typically appears as an unallocated or unassigned piece of storage in Disk Management. This means that the operating system is unable to recognize the SSD as a usable storage device. By assigning a letter to the SSD, you make it visible and accessible to the system, allowing you to make full use of its storage capacity.
By giving your SSD a letter, you enable the operating system to form a link between the assigned letter and the physical storage location on the SSD. This link allows the system to accurately locate and retrieve data from the SSD whenever it is accessed or written to.
Assigning a letter to your SSD is particularly crucial if you plan to install applications, games, or store important files on it. Without a letter, you won’t be able to save data directly to the SSD or launch programs from it. This defeats the purpose of having an SSD, as it won’t provide the speed and performance benefits you expect.
Additionally, assigning a letter to your SSD ensures better organization and ease of use. Once assigned, your SSD will appear as a dedicated drive in File Explorer or the Finder if you’re using a Mac. This makes it easier for you to navigate your disk drives and manage your files and folders effectively.
It’s important to note that assigning a letter to your SSD does not lead to any loss or alteration of the existing data on the drive. The letter assignment process simply establishes a connection between the operating system and the SSD, enabling seamless integration and utilization.
Without a letter assigned to your SSD, it will remain invisible to your computer, essentially rendering it unusable. By assigning a letter, you unlock the full potential of your SSD by harnessing its speed, reliability, and storage capacity.
Now that you understand the importance of giving your SSD a letter, let’s dive into the step-by-step guide on how to achieve this. We’ll cover multiple methods to cater to different preferences and skill levels, so you can find the approach that works best for you.
Step-by-Step Guide to Giving an SSD a Letter
Now that you’re aware of the significance of assigning a letter to your SSD, it’s time to dive into the step-by-step process. In this guide, we’ll walk you through three methods: using Disk Management, Command Prompt, and PowerShell. Choose the method that aligns with your preferred level of expertise and comfort.
Method 1: Using Disk Management
- Open Disk Management by right-clicking on the Start button and selecting “Disk Management” from the context menu.
- In the Disk Management window, locate your SSD. It should be labeled as “Unallocated” or “Not Initialized”.
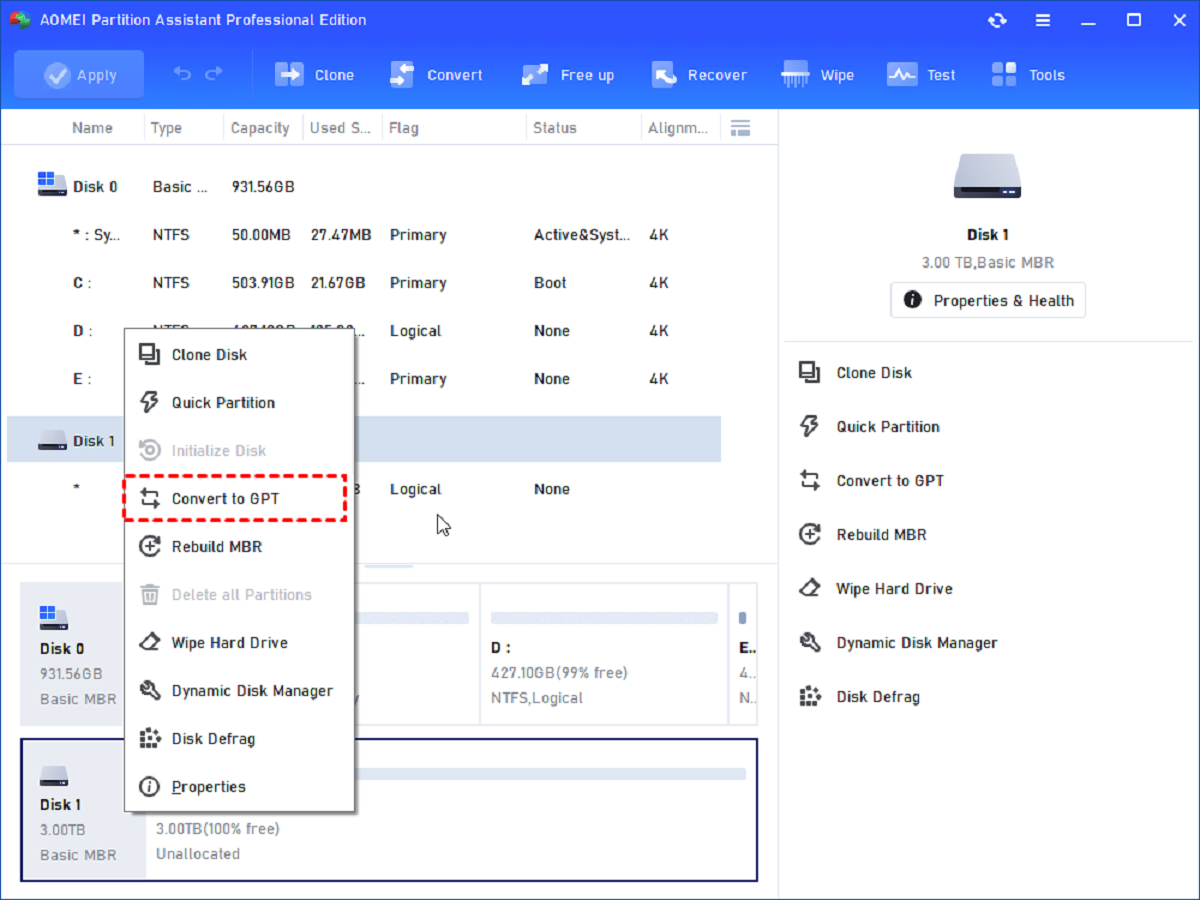
- Right-click on the SSD and select “Initialize Disk”. Choose the appropriate disk type (MBR or GPT) and click “OK”.
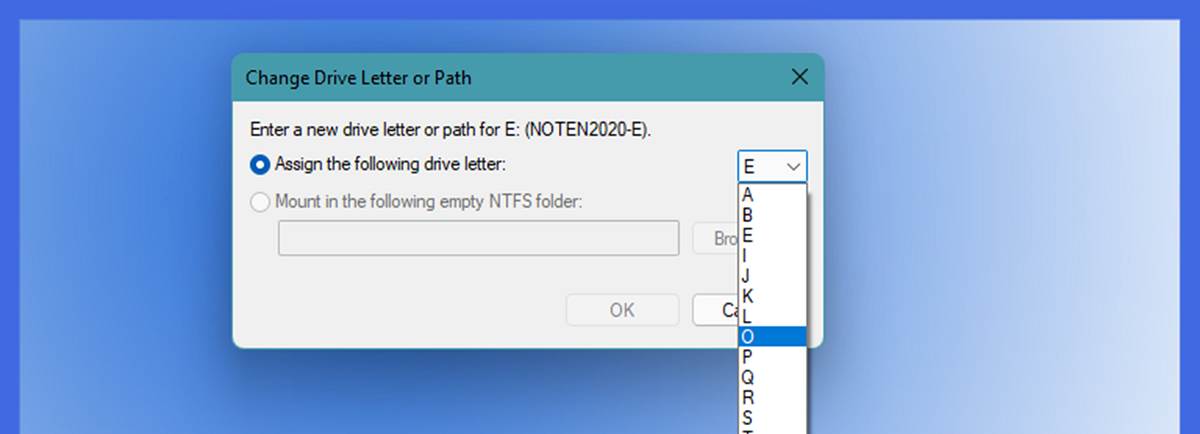
- Right-click on the unallocated space of your SSD and select “New Simple Volume”. Follow the wizard to allocate a drive letter and size for your SSD.
- Once the process is complete, your SSD will be assigned a letter and will appear as a recognized drive in File Explorer.
Method 2: Using Command Prompt
- Open Command Prompt as an administrator by right-clicking on the Start button and selecting “Command Prompt (Admin)”.
- Type “diskpart” in the Command Prompt window and press Enter to launch the DiskPart utility.
- Type “list disk” and press Enter to view a list of available disks on your computer.
- Identify your SSD by its size and locate the corresponding disk number.
- Type “select disk X” (replace X with the disk number of your SSD) and press Enter.
- Type “create partition primary” and press Enter to create a primary partition on your SSD.
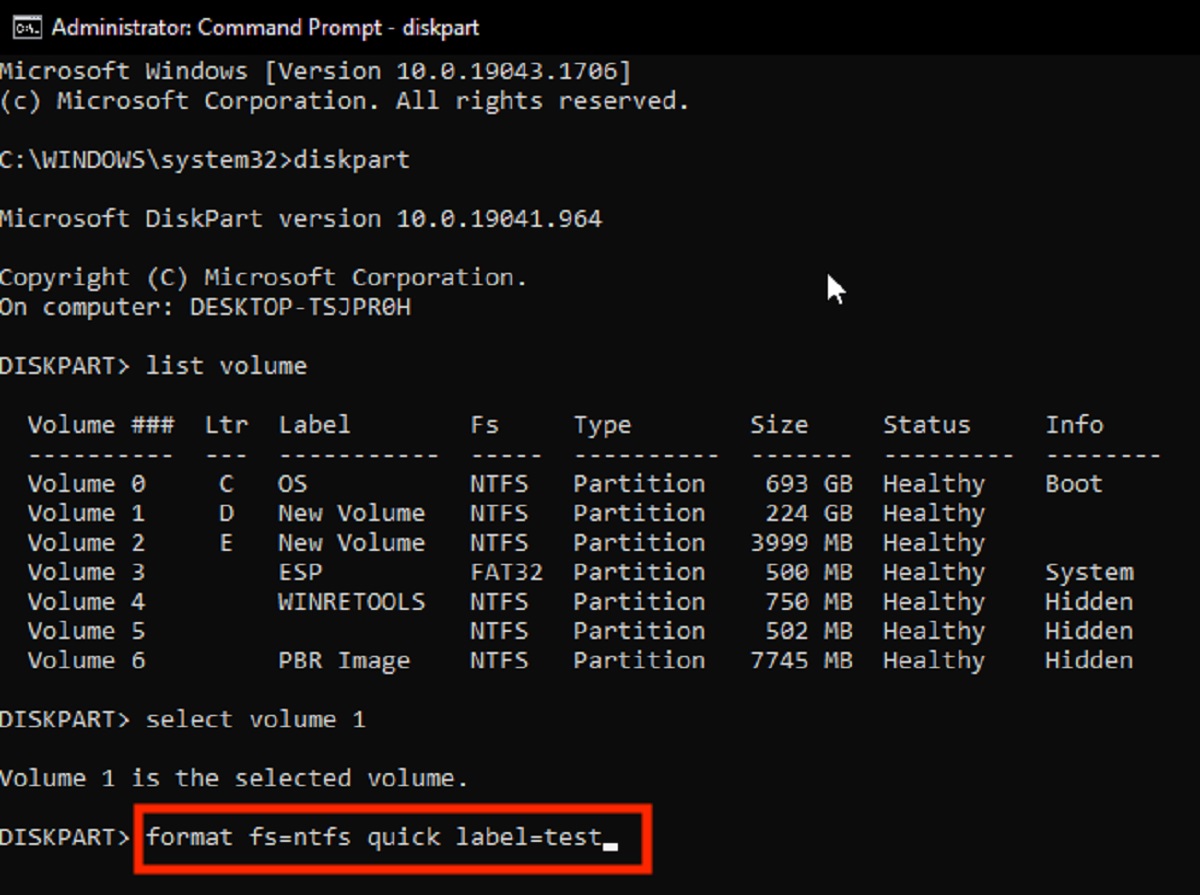
- Type “format fs=ntfs quick” and press Enter to format the partition with the NTFS file system.
- Type “assign letter=X” (replace X with the desired drive letter) and press Enter to assign the letter to your SSD.
- Once the process is complete, exit the DiskPart utility and your SSD will be assigned the specified drive letter.
Method 3: Using PowerShell
- Open PowerShell as an administrator by right-clicking on the Start button and selecting “Windows PowerShell (Admin).
- Type “Get-Disk” and press Enter to retrieve a list of disks on your computer.
- Locate your SSD by examining the properties such as size and status.
- Type “initialize-disk -Number X” (replace X with the disk number of your SSD) and press Enter to initialize the SSD.
- Type “New-Partition -DiskNumber X -UseMaximumSize” (replace X with the disk number of your SSD) and press Enter to create a new partition on the SSD.
- Type “Format-Volume -DriveLetter X” (replace X with the desired drive letter) and press Enter to format the partition and assign the drive letter.
- Once the process is complete, your SSD will be assigned the specified drive letter and will be accessible in File Explorer.
Congratulations! You have successfully assigned a letter to your SSD using one of the methods outlined above. Now you can fully utilize the speed and storage capacity of your SSD, enhancing the performance of your computer. If you encounter any issues along the way, refer to the troubleshooting section for common solutions.
Next, we’ll explore some troubleshooting tips to help you overcome any challenges that may arise during the letter assignment process. Ready to troubleshoot? Read on!
Method 1: Using Disk Management
One of the easiest ways to assign a letter to your SSD is by using the built-in Windows utility called Disk Management. Disk Management provides a user-friendly interface for managing disk drives on your computer. Follow the steps below to give your SSD a letter using Disk Management:
- Right-click on the Start button and select “Disk Management” from the context menu. This will open the Disk Management window.
- In the Disk Management window, locate your SSD. It will likely be labeled as “Unallocated” or “Not Initialized”.
- Right-click on the SSD and select “Initialize Disk”. A dialog box will appear, prompting you to choose the disk type – Master Boot Record (MBR) or GUID Partition Table (GPT). Select the appropriate disk type based on your needs and click “OK”.
- Right-click on the unallocated space of your SSD and select “New Simple Volume”. This will launch the New Simple Volume Wizard.
- Follow the on-screen instructions in the wizard to allocate a drive letter and specify the size for your SSD. You can choose to use the maximum available space for the volume or allocate a specific size if desired.
- Once you’ve completed the wizard and confirmed the settings, the Disk Management utility will format the SSD and assign it the specified drive letter.
- Your SSD will now appear as a recognized drive in File Explorer or the Finder if you’re using a Mac. You can now access and use your SSD to store files, install applications, and improve your system’s performance.
Using Disk Management is a straightforward method for giving your SSD a letter. It provides a graphical interface and guides you through the necessary steps to allocate a letter and format your SSD. However, if you prefer command-line tools or want to explore alternative methods, we have you covered. The next sections will walk you through using Command Prompt and PowerShell to achieve the same goal.
Now that you’ve successfully assigned a letter to your SSD using Disk Management, you’re ready to move on to the next method. In the following sections, we’ll explore using Command Prompt and PowerShell to give your SSD a letter. These methods provide more flexibility and control, catering to advanced users or those who prefer command-line interfaces. Let’s continue!
Method 2: Using Command Prompt
If you’re comfortable using command-line tools, you can assign a letter to your SSD using the Command Prompt utility in Windows. Command Prompt provides a powerful and efficient way to manage disks and perform various disk-related tasks. Follow the steps below to give your SSD a letter using Command Prompt:
- Right-click on the Start button and select “Command Prompt (Admin)” to open Command Prompt as an administrator.
- In the Command Prompt window, type “diskpart” and press Enter to launch the DiskPart utility.
- Once in the DiskPart utility, type “list disk” and press Enter. This will display a list of available disks on your computer.
- Identify your SSD by examining the disk properties such as size. Note the disk number associated with your SSD.
- Type “select disk X” and press Enter, replacing X with the disk number of your SSD. This will select your SSD for further commands.
- Type “create partition primary” and press Enter. This will create a primary partition on your SSD.
- Type “format fs=ntfs quick” and press Enter. This will format the partition with the NTFS file system.
- Type “assign letter=X” and press Enter, replacing X with the desired drive letter for your SSD. This will assign the specified drive letter to your SSD.
- Once you’ve completed the above steps, exit the DiskPart utility by typing “exit” and pressing Enter.
- After exiting DiskPart, you can close the Command Prompt window. Your SSD will now be assigned the specified drive letter and will appear as a recognized drive in File Explorer or the Finder if you’re using a Mac.
Using Command Prompt allows for a more granular control over disk management tasks. With a few commands, you can create a partition, format it, and assign a drive letter to your SSD. This method is particularly useful if you prefer a command-line interface or if you need to automate the process using scripts.
Now that you’ve successfully assigned a letter to your SSD using Command Prompt, let’s move on to the next method: using PowerShell. PowerShell provides another command-line option with additional functionality and flexibility. Continue reading to learn how to give your SSD a letter using PowerShell.
Method 3: Using PowerShell
For advanced users and those who prefer a more powerful command-line experience, PowerShell provides a comprehensive set of tools for managing disks and performing various disk-related operations. By using PowerShell, you can assign a letter to your SSD with ease. Follow the steps below to give your SSD a letter using PowerShell:
- Right-click on the Start button and select “Windows PowerShell (Admin)” to open PowerShell as an administrator.
- In the PowerShell window, type “Get-Disk” and press Enter. This command retrieves a list of available disks on your computer.
- Locate your SSD by examining the properties such as size and status.
- Type “initialize-disk -Number X” and press Enter, replacing X with the disk number of your SSD. This command initializes the SSD.
- Type “New-Partition -DiskNumber X -UseMaximumSize” and press Enter, replacing X with the disk number of your SSD. This command creates a new partition on the SSD using the maximum available size.
- Type “Format-Volume -DriveLetter X” and press Enter, replacing X with the desired drive letter for your SSD. This command formats the partition and assigns the specified drive letter to your SSD.
- Once the formatting and letter assignment are complete, your SSD will be recognized with the specified drive letter in File Explorer or the Finder if you’re using a Mac.
PowerShell is a versatile tool that provides advanced disk management capabilities. With its extensive command set, you can easily initialize, partition, format, and assign drive letters to your SSDs. PowerShell is particularly useful for scripting and automation purposes, allowing you to streamline your disk management tasks.
Congratulations! You have successfully assigned a letter to your SSD using PowerShell. You now have a fully functional SSD with the assigned drive letter, and you can take advantage of its speed and storage capacity to enhance your computing experience.
In the next section, we’ll address common issues that may arise during the letter assignment process and provide troubleshooting tips to help you overcome them. Let’s proceed!
Troubleshooting Common Issues
While assigning a letter to your SSD is typically a straightforward process, you may encounter some common issues along the way. Don’t worry, we’ve got you covered with some troubleshooting tips to help you resolve these issues and successfully assign a letter to your SSD. Here are a few common issues and their possible solutions:
Issue 1: SSD Not Recognized in Disk Management
If your SSD does not appear in Disk Management, there may be a few potential causes and solutions:
- Check the SSD connections to ensure they are securely connected to your computer. A loose cable connection can prevent the SSD from being recognized.
- Verify that the SSD is properly installed and powered on. Double-check the power cables and make sure the SSD is receiving power.
- Try connecting the SSD to a different SATA port or using a different SATA cable to rule out any issues with the current connections.
Issue 2: SSD Shows as “Offline” or “Write-Protected”
If your SSD appears as “Offline” or “Write-Protected” in Disk Management, you can try the following solutions:
- Right-click on the SSD and select “Online” to bring the SSD online if it’s currently set as offline.
- Disable write protection by checking the physical write protection switch on the SSD (if applicable) or by modifying the DiskPart attributes using the “attributes disk clear readonly” command in Command Prompt or PowerShell.
Issue 3: “Access Denied” Error
If you encounter an “Access Denied” error when attempting to assign a letter to your SSD, try the following solutions:
- Run Disk Management, Command Prompt, or PowerShell as an administrator to ensure you have the necessary permissions to make changes to the SSD.
- Check your user account permissions and ensure that you have sufficient privileges to modify disk drives.
- Disable any third-party antivirus or security software temporarily as they may be interfering with the assignment process.
If you’re still experiencing issues after troubleshooting, it’s recommended to consult the documentation or support resources provided by your SSD manufacturer. They may have specific instructions or tools tailored to their SSD models that can assist in troubleshooting and resolving any technical difficulties.
With these troubleshooting tips, you should be able to overcome common issues and successfully assign a letter to your SSD. Once resolved, you can fully utilize the speed and storage capacity of your SSD to enhance your computer’s performance and efficiency.
Now that you’ve learned how to troubleshoot common issues, you’re well-equipped to assign a letter to your SSD. In the next section, we’ll provide a concise summary of the key points covered in this guide, ensuring that you have a quick reference at your fingertips. Let’s wrap up this guide!
Conclusion
Congratulations on successfully assigning a letter to your SSD! By following the step-by-step guide and utilizing methods such as Disk Management, Command Prompt, and PowerShell, you can now fully utilize the speed, reliability, and storage capacity of your SSD. Assigning a letter ensures that your operating system recognizes and accesses the SSD, allowing you to take advantage of its performance benefits.
Throughout this guide, we explored the basics of SSD technology and the reasons why assigning a letter is essential. We walked through the step-by-step process of assigning a letter using Disk Management, Command Prompt, and PowerShell, providing you with multiple options to suit your preferences and skill levels. Troubleshooting tips were also provided to help resolve common issues that may arise during the letter assignment process.
With your SSD properly assigned a letter, you can now use it to store files, install applications, and improve the overall performance of your computer. Enjoy faster boot times, shorter file transfer durations, and quicker application launches. Take advantage of the reliability, durability, and power efficiency of SSDs to enhance your computing experience.
Remember to keep your SSD firmware up to date and perform regular backups to ensure the safety of your data. As technology evolves, SSDs will continue to provide even higher performance and larger storage capacities, further enhancing the capabilities of your computer system.
Thank you for using this guide to give your SSD a letter. We hope it has been informative and helpful in your SSD journey. If you have further questions or need additional assistance, feel free to consult the documentation provided by your SSD manufacturer or seek support from relevant technical forums or customer support channels.
Happy computing with your newly assigned SSD letter!