Introduction
Welcome to our guide on how to format your SSD to GPT (Guid Partition Table). If you have recently acquired a solid-state drive (SSD) and want to optimize its performance and compatibility, converting it to GPT is a crucial step. In this article, we will explain what an SSD and GPT are, outline the benefits of using GPT, and provide a step-by-step tutorial on how to format your SSD to GPT.
An SSD is a storage device that uses flash memory to store data, offering faster read and write speeds compared to traditional hard disk drives (HDDs). As technology has advanced, SSDs have become increasingly popular due to their durability and superior performance. However, to fully harness the potential of your SSD, it is essential to format it using the GPT partitioning scheme.
GPT, or Guid Partition Table, is a modern partitioning scheme that replaces the older MBR (Master Boot Record) scheme. GPT allows for larger partition sizes, supports more partitions on a single drive, and provides improved data protection through backup and restore capabilities. Additionally, GPT is compatible with both BIOS and UEFI systems, making it a versatile choice for modern computers.
Now, you might be wondering why you should bother formatting your SSD to GPT. The benefits are numerous. GPT provides a more efficient and reliable way to manage your disk partitions. It supports drives larger than 2TB, allowing you to fully utilize the capacity of modern SSDs. GPT also offers improved data integrity by storing redundant copies of critical partitioning information, making it more robust against corruption or accidental deletion.
In addition, GPT permits a virtually unlimited number of partitions, giving you the flexibility to create separate partitions for different purposes, such as system files, applications, and personal data. This organization can enhance system performance and make it easier to manage and maintain your files.
So, if you’re ready to optimize your SSD’s performance and take advantage of the benefits GPT has to offer, let’s dive into the step-by-step process of formatting your SSD to GPT. But before we proceed, it is important to note that formatting your SSD will erase all the data on it, so make sure to back up your important files before proceeding.
What is an SSD?
In the world of storage devices, an SSD, which stands for Solid-State Drive, has rapidly gained popularity and become a go-to choice for many computer users. Unlike traditional Hard Disk Drives (HDDs) that use spinning platters and mechanical parts to store and access data, an SSD utilizes a different type of technology called flash memory.
Flash memory is a non-volatile storage medium that retains data even when there is no power. It consists of tiny memory cells that can be electrically programmed and erased. These memory cells are divided into pages and blocks, which allow for efficient reading and writing operations.
The major advantage of SSDs is their incredible speed. Since SSDs do not rely on moving parts, they can access data almost instantaneously. This means that your computer will boot up faster, applications will launch quickly, and files will transfer at blazing speeds. In terms of read and write performance, SSDs can outperform HDDs by a significant margin.
Another notable benefit of SSDs is their durability. Since there are no mechanical parts involved, SSDs are much more resistant to physical shock, making them an ideal choice for portable devices like laptops. Additionally, SSDs have a longer lifespan compared to HDDs, as they do not suffer from wear and tear caused by constant spinning of platters.
SSDs also offer a quieter and more energy-efficient alternative to HDDs. Since there are no moving parts, there is no noise generated during operation. Additionally, SSDs consume less power, leading to longer battery life for laptops or lower electricity bills for desktop computers.
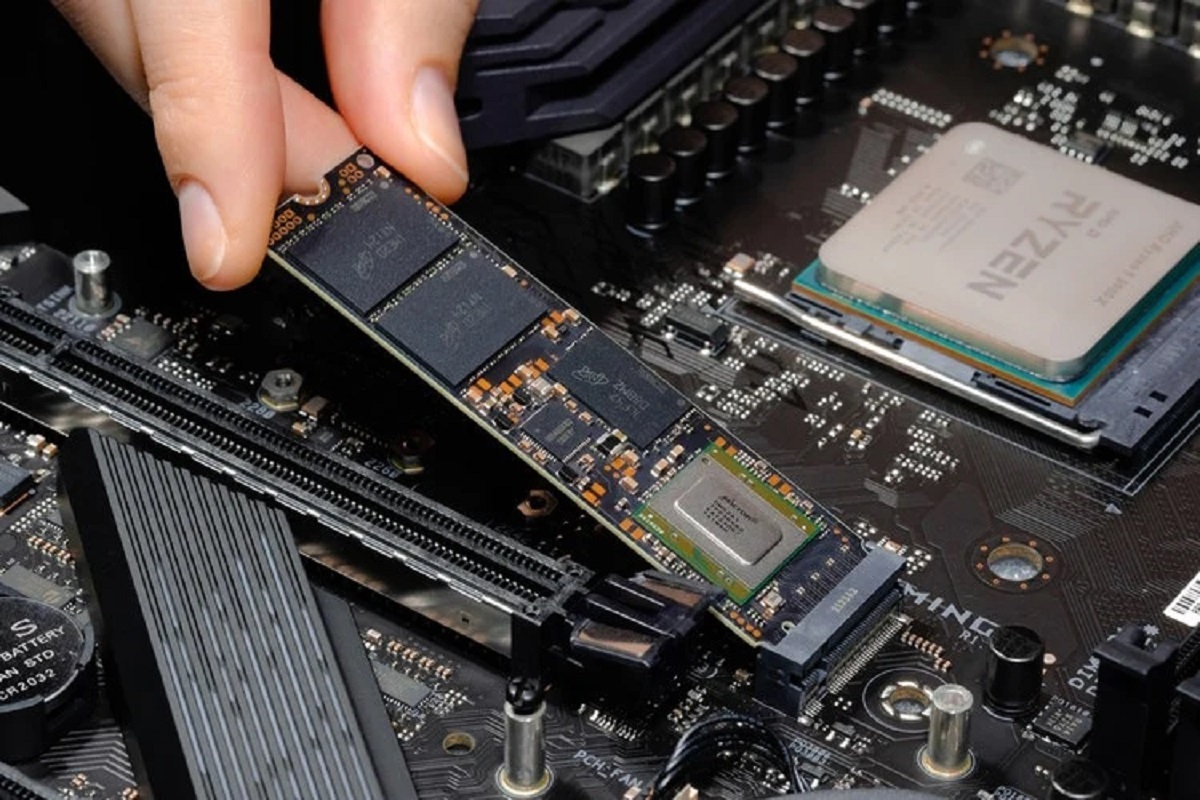
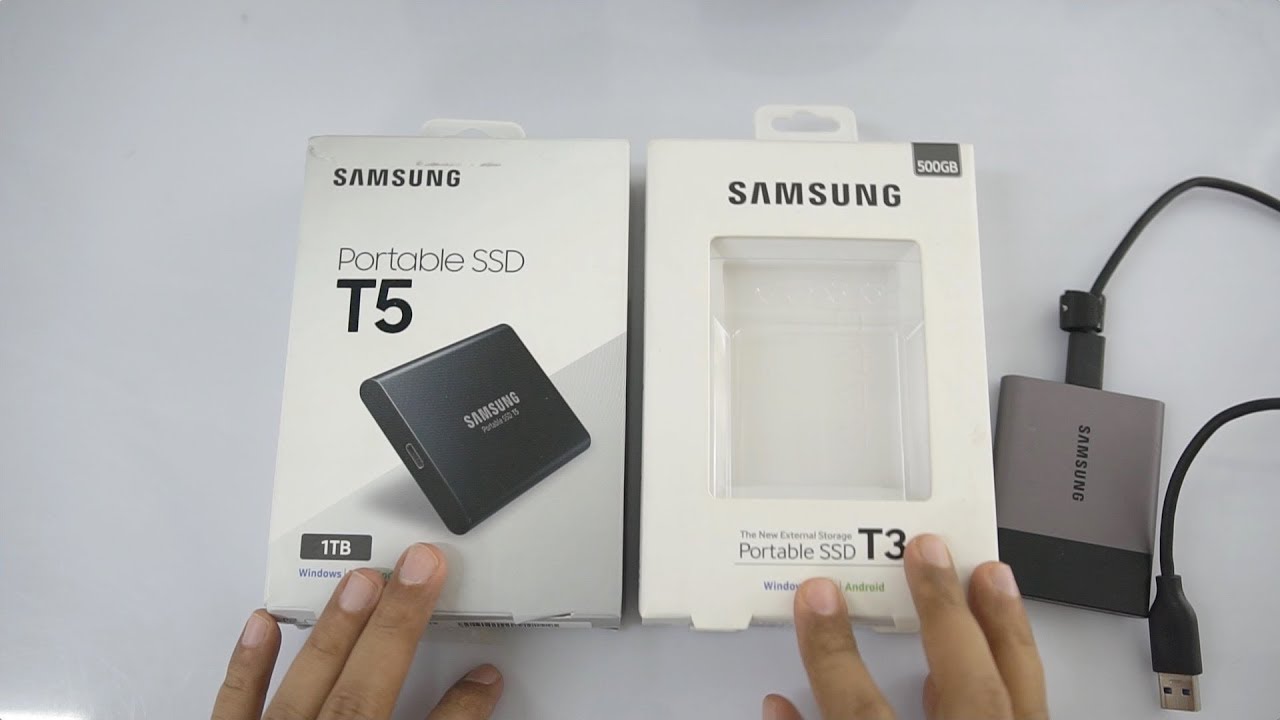
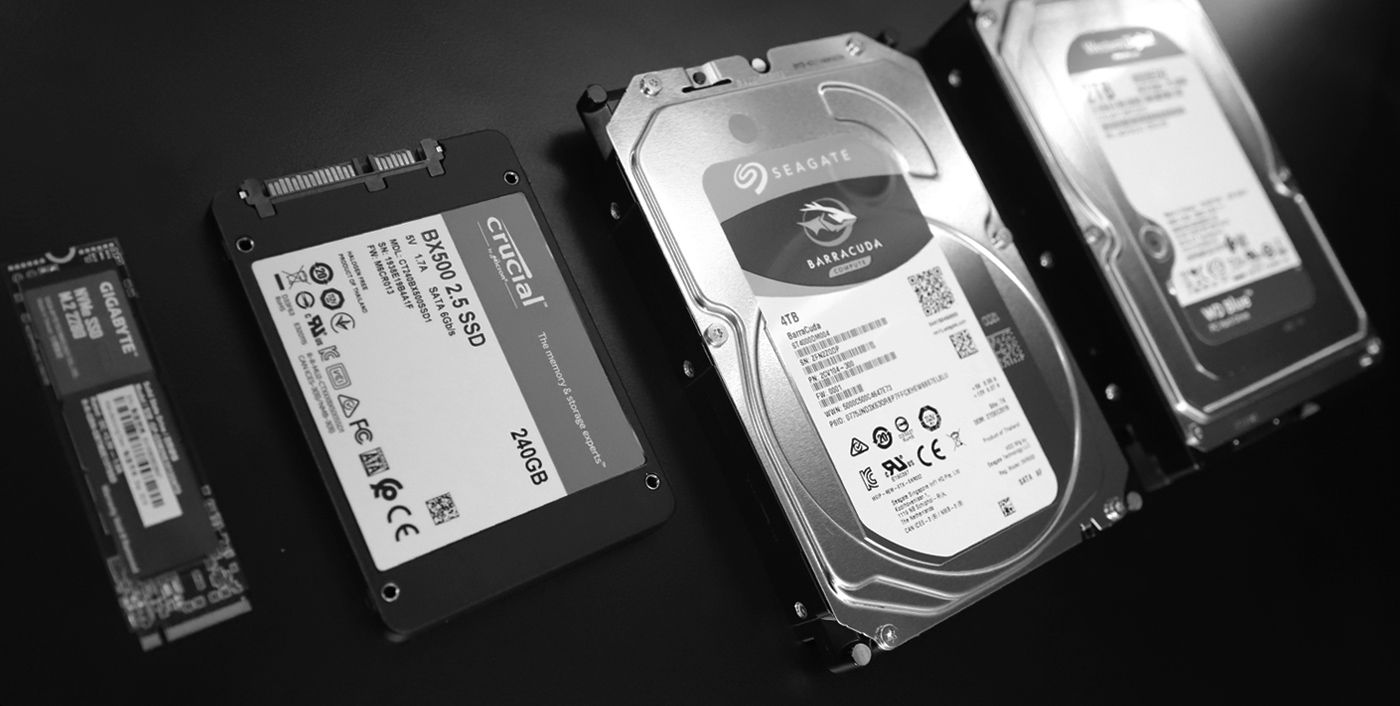
Over the years, SSD technology has advanced rapidly, leading to increased storage capacities and decreased costs. SSDs now come in various form factors, from traditional 2.5-inch drives for desktops and laptops to smaller M.2 drives for ultrabooks and compact devices. Whether you need a few hundred gigabytes or several terabytes of storage, there is likely an SSD option that fits your needs and budget.
In summary, an SSD is a storage device that utilizes flash memory technology to provide blazing-fast performance, durability, energy efficiency, and silent operation. Its speed and reliability have made it an essential component in modern computing, improving overall system responsiveness and enhancing the user experience.
What is GPT?
GPT, which stands for GUID Partition Table, is a partitioning scheme used to organize and manage disk partitions on modern computers. It is the successor to the traditional Master Boot Record (MBR) partitioning scheme and offers several advantages over its predecessor.
GPT gets its name from the Globally Unique Identifier (GUID), which is a unique identifier assigned to each partition on the disk. This unique identifier ensures that there are no conflicts or duplicate IDs among the partitions. This is especially important when dealing with large storage devices, as GPT supports drives of up to 18.4 million terabytes (TB) in size.
One of the key benefits of GPT is its ability to handle larger drive capacities. MBR is limited to a maximum size of 2 terabytes (TB), which becomes a limitation when working with modern high-capacity drives. GPT, on the other hand, allows for larger partitions and can fully utilize the storage capacity of modern drives, even those exceeding 2TB.
GPT also provides enhanced data protection and reliability. It stores multiple copies of critical partitioning information across the disk, referred to as the Primary and Backup partition tables. This redundancy helps guard against data corruption and makes it easier to recover partition information in case of disk failures.
Another noteworthy feature of GPT is its flexibility in creating multiple partitions. MBR only supports up to four primary partitions, while GPT allows for up to 128 partitions on a single disk. This increased partitioning capability makes it easier to manage different operating systems, data types, or organizational needs, giving you more freedom to customize your storage setup.
Additionally, GPT is designed to be compatible with both BIOS (Basic Input/Output System) and UEFI (Unified Extensible Firmware Interface) systems. While MBR is primarily associated with BIOS-based computers, GPT works seamlessly with the newer UEFI systems, which offer better security features and faster boot times.
It’s important to note that GPT is not backward compatible with all operating systems and hardware. While most modern operating systems, such as Windows 10, macOS, and Linux, support GPT, older versions of Windows, particularly those that use a 32-bit architecture, may have limited support. Before converting your disk to GPT, ensure that your operating system and hardware are compatible.
In summary, GPT is a partitioning scheme that overcomes the limitations of the traditional MBR scheme. With its support for larger drive capacities, enhanced data protection, increased partitioning flexibility, and compatibility with both BIOS and UEFI systems, GPT has become the preferred choice for modern computer systems.
Benefits of using GPT
When it comes to managing your disk partitions, using the GPT (GUID Partition Table) partitioning scheme offers several significant advantages over its predecessor, the MBR (Master Boot Record) scheme. Let’s explore the benefits of using GPT:
Support for larger drives: One of the primary advantages of GPT is its ability to handle larger drive capacities. While MBR is limited to a maximum size of 2 terabytes (TB), GPT can support drives up to a whopping 18.4 million terabytes (TB). This means that you can fully utilize the storage capacity of modern high-capacity drives without any limitations.
Improved data protection: GPT provides better data protection by storing multiple copies of critical partitioning information across the disk. The Primary and Backup partition tables ensure redundancy, making it easier to recover partition information in case of disk failures or data corruption. This redundancy adds an extra layer of reliability to your storage setup.
Increased partitioning flexibility: With GPT, you have the freedom to create a larger number of partitions compared to MBR. While MBR supports only four primary partitions, GPT allows for up to 128 partitions on a single disk. This increased partitioning capability enables you to organize your data more efficiently, whether you need separate partitions for different operating systems, specific applications, or personal files.
Compatibility with BIOS and UEFI: GPT is designed to be compatible with both BIOS (Basic Input/Output System) and UEFI (Unified Extensible Firmware Interface) systems. While MBR is primarily associated with BIOS-based computers, GPT works seamlessly with the newer UEFI systems. UEFI systems offer faster boot times, advanced security features, and support for larger disks, making GPT a preferred choice for modern computer setups.
Enhanced disk performance: GPT’s advanced data structure improves disk performance by reducing file fragmentation. With GPT, data is stored more efficiently, leading to faster read and write speeds. This can result in improved overall system responsiveness and faster file transfers, ultimately enhancing the user experience.
Smarter partition naming: GPT allows for longer and more descriptive partition names compared to the limited naming options in MBR. This feature can be useful when managing multiple partitions, as you can easily identify and differentiate between them based on their names, making it easier to manage and organize your data.
In summary, utilizing the GPT partitioning scheme offers numerous benefits, including support for larger drive capacities, improved data protection, increased partitioning flexibility, compatibility with both BIOS and UEFI systems, enhanced disk performance, and smarter partition naming. By adopting GPT, you can optimize your disk management and take full advantage of the capabilities of modern storage devices.
Preparing for GPT Formatting
Before you proceed with formatting your SSD to GPT (GUID Partition Table), it’s important to take a few necessary steps to ensure a smooth and successful process. Here are some essential preparations to consider:
Backup your data: Formatting your SSD will erase all existing data on it. Therefore, it’s crucial to back up your important files and documents before proceeding. You can create a backup on an external storage device, cloud storage, or another internal drive to safeguard your data and prevent any potential loss.
Check compatibility: Verify that your computer’s hardware and operating system support GPT. Most modern systems, including Windows 10, macOS, and Linux, are compatible with GPT. However, older versions of operating systems, particularly those with a 32-bit architecture, may have limited or no support for GPT. Ensure that your system meets the requirements to avoid any compatibility issues during the formatting process.
Update firmware and drivers: It’s a good practice to update your computer’s firmware (BIOS or UEFI) to the latest version before proceeding with GPT formatting. Firmware updates often include improvements, bug fixes, and enhanced compatibility. Additionally, updating device drivers, particularly for storage and disk-related components, can help ensure optimal performance during the formatting process.
Disconnect unnecessary drives: Consider disconnecting any external drives, including USB flash drives or external hard drives, that are not required for the formatting process. This will prevent accidental data loss or potential confusion during the partitioning and formatting steps. It’s always best to work with only the target SSD to minimize the risk of errors.
Ensure a power source: It’s highly recommended to perform the formatting process when your computer is connected to a stable power source. This helps prevent any disruptions or power surges during the critical formatting process, ensuring that it completes successfully without any interruptions.
Make a recovery plan: Although formatting your SSD to GPT is generally a safe and straightforward process, it’s always a good practice to have a recovery plan in case anything unexpected happens. This can include creating a recovery USB drive or having access to an installation media for your operating system. Having a recovery plan in place provides peace of mind and an option to revert back if necessary.
Taking these preparatory steps will help ensure a smoother and more successful formatting process when converting your SSD to GPT. By backing up your data, checking compatibility, updating firmware and drivers, disconnecting unnecessary drives, ensuring a stable power source, and having a recovery plan in place, you’ll be well-prepared for the subsequent steps in formatting your SSD to GPT.
Backup your data
Before formatting your SSD to GPT (GUID Partition Table), it is crucial to back up your data. Formatting the drive will erase all existing data, including files, applications, and settings. Taking the time to create a backup ensures that you won’t lose any important information. Here are some steps to help you backup your data safely:
Identify important files: Take a moment to identify the files and folders that contain critical or irreplaceable data. This may include personal documents, photos, videos, music, and any other files that hold sentimental or business value. Make a list or note of these files, so you can ensure their backup later.
Choose a backup method: Decide on the most appropriate backup method for your needs. There are several options available, including external hard drives, USB flash drives, network-attached storage (NAS), cloud storage services, or a combination of these. Each option offers its advantages and considerations, such as storage capacity, speed, accessibility, and cost. Consider your storage requirements and choose the method that best fits your needs.
External hard drives or USB drives: If you have access to an external hard drive or USB flash drive, you can simply copy and paste your important files onto the drive. This method is easy and offers offline storage. However, keep in mind that you may need multiple drives if you have a large amount of data to backup.
Network-attached storage (NAS): NAS devices provide a centralized storage solution accessible from multiple devices on your home or office network. You can transfer your important files directly to the NAS for backup. NAS devices offer more storage capacity compared to external drives and can be set up to automatically backup specific folders or files.
Cloud storage services: Cloud storage services, such as Google Drive, Dropbox, or Microsoft OneDrive, offer convenient and accessible backup solutions. You can upload your files to these services and access them from any device with an internet connection. Cloud storage provides off-site backup, protecting your data from physical damage or loss. However, be mindful of the storage limitations and potential subscription costs associated with cloud services.
Backup software: Consider using backup software to automate and streamline the backup process. Backup software provides features like scheduled backups, incremental backups, and encryption for added security. These tools can help simplify the backup process and ensure that your data is protected regularly.
Verify your backup: After completing the backup process, take a moment to verify that your files are copied correctly and can be accessed without issues. Open a few files and ensure that they are intact and readable. This verification step provides peace of mind and ensures the integrity of your backup before proceeding with the formatting process.
By taking the time to backup your data properly, you can safeguard your important files and avoid any potential data loss during the formatting process. Remember to regularly update your backups to maintain a current copy of your data. With your data securely backed up, you can proceed with confidence to the next step of formatting your SSD to GPT.
Checking Compatibility
Before proceeding with the formatting of your SSD to GPT (GUID Partition Table), it is important to ensure compatibility with your computer’s hardware and operating system. Here are some steps to help you check if your system supports GPT:
Operating System Compatibility: Check if your operating system supports GPT. Most modern operating systems, including Windows 10, macOS, and various Linux distributions, are compatible with GPT. However, older operating systems, particularly those with a 32-bit architecture, may have limited or no support for GPT. Verify that your operating system is compatible or consider upgrading to a newer version if needed.
BIOS or UEFI Support: Determine if your computer’s firmware is compatible with GPT. GPT is designed to work with both BIOS (Basic Input/Output System) and UEFI (Unified Extensible Firmware Interface) systems. However, to utilize GPT, your computer must have a UEFI firmware. If your computer has an older BIOS firmware, you may need to enable UEFI mode or consider upgrading your firmware if supported by your motherboard.
Partitioning Tools: Check the partitioning tools available on your system. Verify that you have access to a reliable partitioning tool that supports GPT formatting. Most operating systems come with built-in partitioning tools, such as Disk Management in Windows or Disk Utility in macOS, which support GPT formatting. Alternatively, there are third-party partitioning tools available if needed.
Hardware Requirements: Ensure that your hardware meets the necessary requirements for GPT. While GPT is compatible with most modern hardware, it is essential to verify that your computer’s components, such as the motherboard and storage controller, support GPT. Additionally, ensure that your computer’s storage interface, such as SATA or NVMe, is compatible with GPT.
Backup and Recovery Options: Consider your backup and recovery options before proceeding with any major formatting changes. As formatting your SSD to GPT will delete all data on the drive, it is crucial to have a backup of your important files. Verify that you have a reliable backup solution in place and ensure that you can easily recover your data if needed.
Consult Documentation and Manufacturer: If you are unsure about your system’s compatibility with GPT, consult your computer’s documentation or contact the manufacturer’s support. The documentation or support team can provide specific information about GPT compatibility for your model and any potential limitations or recommendations.
By checking the compatibility of your system, you can ensure a smooth and successful formatting process when converting your SSD to GPT. Ensuring operating system compatibility, verifying BIOS or UEFI support, checking available partitioning tools, considering hardware requirements, having backup and recovery options in place, and consulting documentation or manufacturer support will help you confidently proceed with the formatting process knowing that your system supports GPT.
How to Format SSD to GPT
Formatting your SSD to GPT (GUID Partition Table) is a straightforward process that can be accomplished using the built-in partitioning tools available in most operating systems. Follow these step-by-step instructions to format your SSD to GPT:
Step 1: Open Disk Management: In Windows, right-click on the Start button and select “Disk Management” from the context menu. On macOS, open Spotlight search (Cmd + Space) and type “Disk Utility,” then select the application from the results.
Step 2: Locate the SSD: In the Disk Management or Disk Utility window, locate your SSD from the list of available drives. Click on it to select it as the target drive for formatting.
Step 3: Initialize the SSD: In Disk Management, if your SSD is not initialized, a pop-up window will appear. Select the option to initialize the disk, choosing the GPT partition style. Proceed with the initialization process. In Disk Utility on macOS, if the SSD is not listed, go to the “View” menu and select “Show All Devices.” Then, select the SSD’s parent device and click on the “Erase” button.
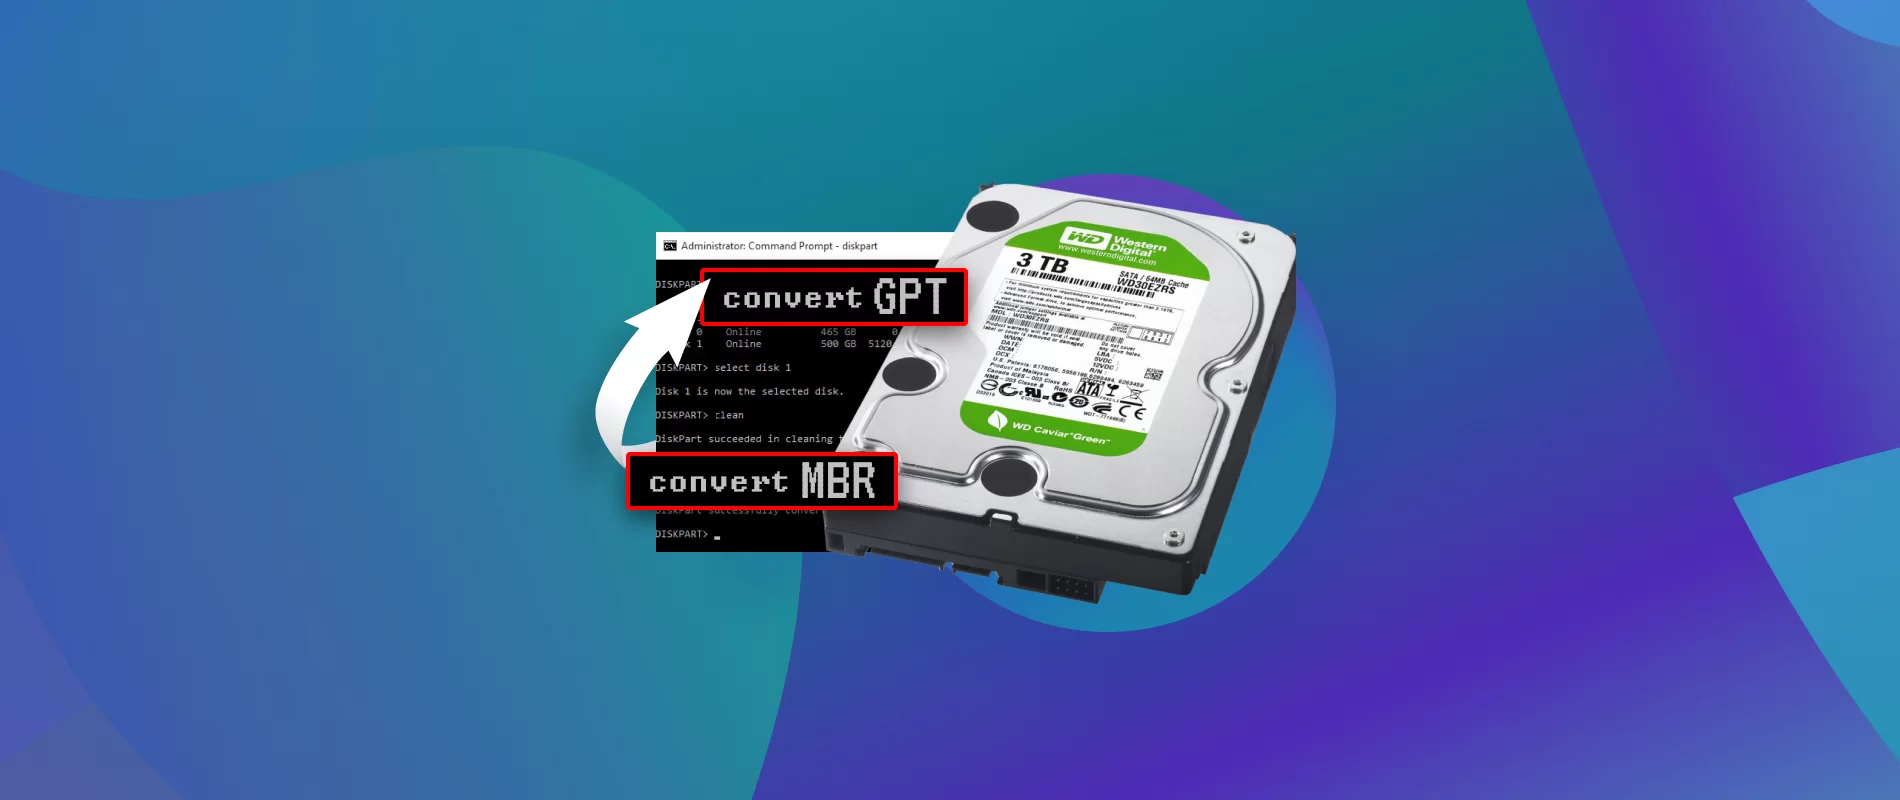
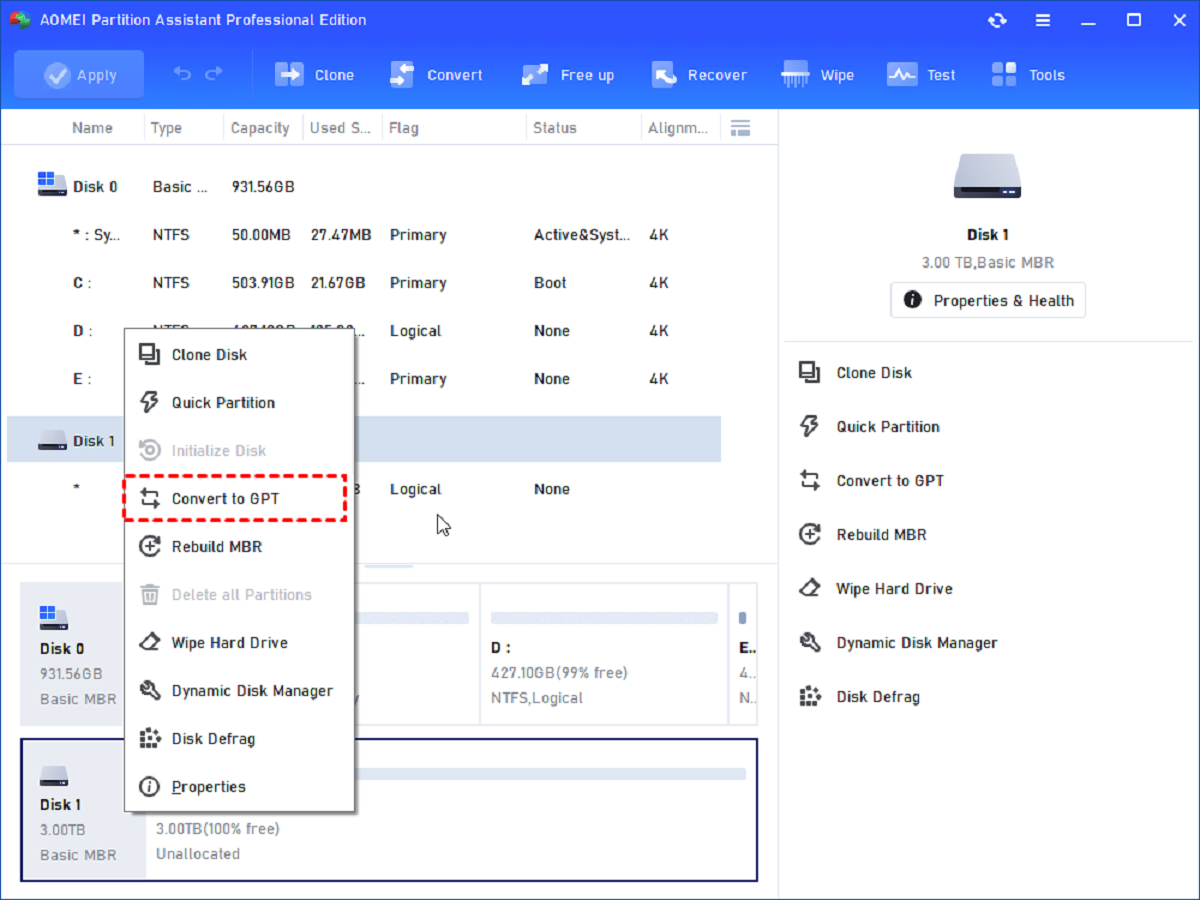
Step 4: Convert to GPT: Right-click on the SSD in Disk Management and select “Convert to GPT Disk.” Confirm the conversion if prompted. In Disk Utility on macOS, click on the “Format” drop-down menu and choose “GUID Partition Map.”
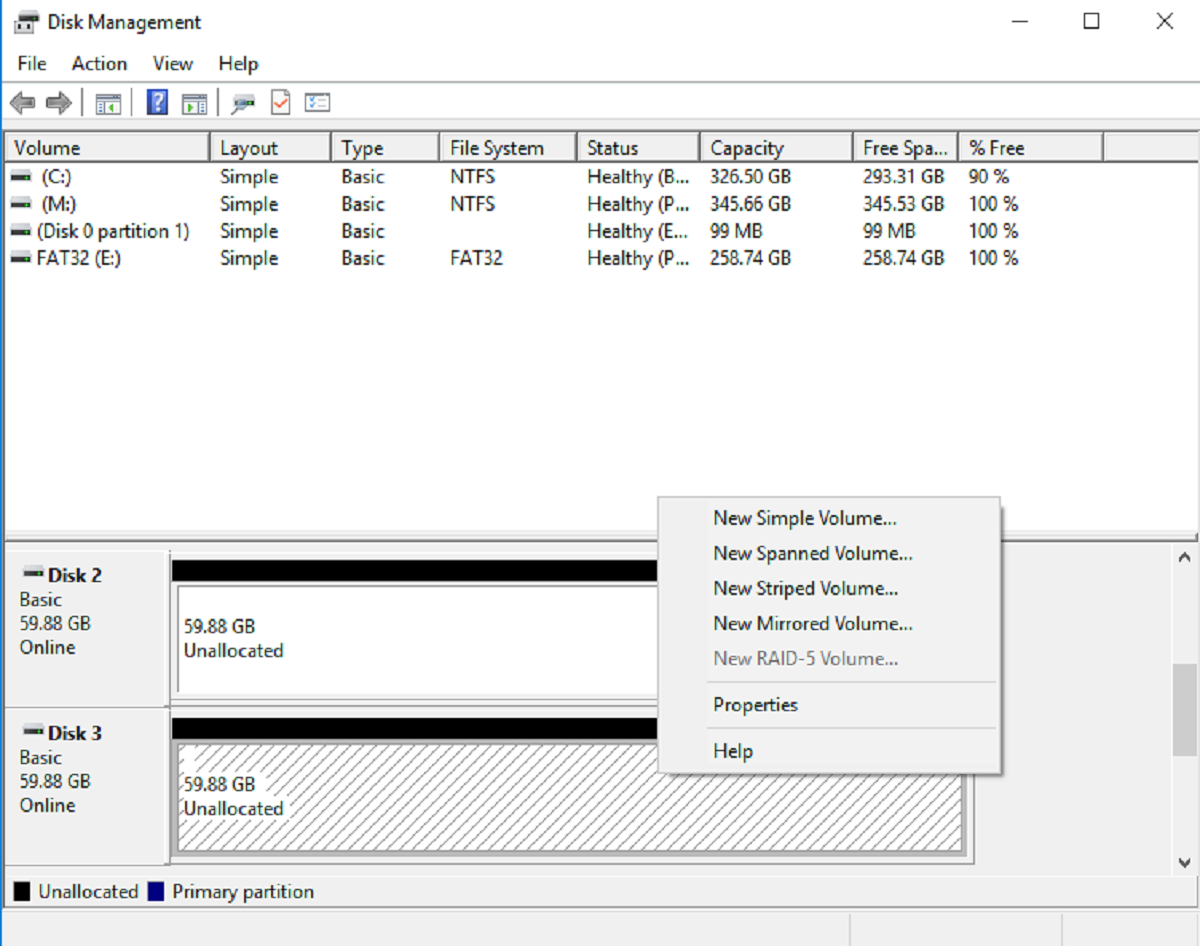
Step 5: Create New Partitions: In Disk Management, right-click on the “Unallocated” space on the SSD and select “New Simple Volume.” Follow the on-screen prompts to specify the size, assign a drive letter, and format the partition using the desired file system (e.g., NTFS or exFAT). In Disk Utility on macOS, click on the “+” button to add a new partition. Specify the size and format for the partition.
Step 6: Format the Partitions: If the partitions were not automatically formatted during the previous step, you can do so now. In Disk Management, right-click on each partition and select “Format.” Choose the desired file system and assign a volume label if desired. In Disk Utility on macOS, select each partition and click on the “Erase” button. Specify the format and provide a name for each partition.
Step 7: Assign Drive Letters: In Disk Management on Windows, right-click on each partition and select “Change Drive Letter and Paths.” Assign a vacant drive letter to each partition. You may also choose to mount the partitions in an empty folder if preferred. On macOS, drive letters are not used. The partitions will be automatically mounted and assigned names based on the names given during the formatting process.
Step 8: Verify the Changes: Take a moment to review the changes before finalizing. Ensure that the SSD is now formatted to GPT and that the partitions are correctly formatted and assigned drive letters or names.
Once you have completed these steps, your SSD should be formatted to GPT, with the desired partitioning and formatting applied. You can now proceed to use your SSD with the benefits and features provided by the GPT partitioning scheme.
Step 1: Open Disk Management
The first step in formatting your SSD to GPT is to open the Disk Management tool, which allows you to manage and configure disk partitions on your Windows computer. Disk Management enables you to initialize, format, and assign drive letters to your SSD. Here’s how to open Disk Management:
Method 1: Using the Start Menu
- Right-click on the Start button or press the Windows key + X on your keyboard.
- In the context menu that appears, select “Disk Management.”
Method 2: Using the Run Dialog Box
- Press the Windows key + R on your keyboard to open the Run dialog box.
- Type “diskmgmt.msc” (without quotes) in the text field.
- Click “OK” or press Enter.
Method 3: Using Control Panel
- Open the Control Panel on your computer.
- Select “System and Security.”
- Under the section “Administrative Tools,” click on “Create and format hard disk partitions.”
Once you have opened Disk Management using any of the above methods, you will see a graphical representation of your drives and their partitions. The main window is divided into two sections: the upper section displays a list of available drives, and the lower section shows the graphical representation of your disk partitions.
Note that if you are using macOS, the Disk Management tool is called “Disk Utility.” You can open it by pressing Cmd + Space to open Spotlight search, typing “Disk Utility,” and selecting the application from the results.
Opening Disk Management is the initial step towards formatting your SSD to GPT. Proceed to the next steps to continue the process of converting your SSD to the GPT partitioning scheme.
Step 2: Locate the SSD
After opening the Disk Management tool, the next step in formatting your SSD to GPT is to locate the SSD within the list of available drives. Here’s how you can find your SSD:
Windows:
- Look at the list of drives displayed in the upper section of the Disk Management window. The drives are listed by their assigned drive letters, such as C:, D:, E:, etc.
- Locate your SSD by identifying its size, which is typically displayed next to its drive letter. SSDs are often labeled as “Solid State Drive” or “SSD” in the description.
- Take note of the drive letter associated with your SSD, as you will need it for further steps in the formatting process.
macOS:
- In Disk Utility, you will see a list of drives and volumes displayed on the left-hand side of the window.
- Identify your SSD by its name, size, and format type. SSDs are generally displayed with their manufacturer’s name or a model identifier.
- Take note of the SSD’s name or volume label, as you will need it for subsequent formatting steps.
It is important to accurately identify your SSD to ensure that you format the correct drive. This is especially important if you have multiple drives connected to your computer.
If you are unsure which drive is your SSD, you can refer to the drive’s capacity displayed in Disk Management or Disk Utility, as SSDs typically have a larger capacity compared to other types of drives.
Once you have located your SSD in the Disk Management or Disk Utility interface, you are ready to proceed to the next step of initializing the SSD in preparation for the GPT formatting process.
Step 3: Initialize the SSD
The third step in formatting your SSD to GPT is to initialize the drive. Initialization prepares the SSD for partitioning and allows it to be recognized by the operating system. Here’s how to initialize your SSD:
Windows:
- In the Disk Management window, locate your SSD in the list of drives.
- If the SSD is shown as “Not Initialized,” a pop-up window will appear automatically when you select the SSD. If the pop-up window does not appear, you can right-click on the SSD and select “Initialize Disk.”
- In the Initialize Disk window, choose the GPT (GUID Partition Table) option. Make sure all checkboxes are selected for the available drives you want to initialize, then click “OK” to proceed.
macOS:
- In Disk Utility, locate your SSD in the list of drives on the left-hand side of the window.
- If the SSD is not listed, go to the “View” menu and select “Show All Devices.”
- Select the parent device of the SSD (the device name above the SSD’s volume name).
- Click on the “Erase” button located in the main Disk Utility window.
- In the Erase window, choose the format type you prefer and name your SSD, then click “Erase” to initialize the drive with the selected format and name.
By initializing the SSD, you are preparing it for the GPT partitioning scheme. The initialization process sets up the necessary partitioning information, allowing you to create partitions and format them according to your needs. Ensure that you have selected the GPT option for initialization, as this is essential for formatting the SSD to GPT.
Once you have successfully initialized the SSD, you can proceed to the next step of converting the drive to GPT format.
Step 4: Convert to GPT
After initializing the SSD, the next step in formatting your SSD to GPT is to convert it to the GPT partitioning scheme. This process ensures that the drive is formatted with the appropriate structure to fully utilize the benefits of GPT. Here’s how to convert your SSD to GPT:
Windows:
- In the Disk Management window, right-click on your SSD.
- From the context menu, select “Convert to GPT Disk.”
- If prompted to confirm the conversion, review the information provided, and click “OK” to proceed.
macOS:
- In Disk Utility, select your SSD from the list of drives on the left-hand side of the window.
- Click on the “Format” drop-down menu located in the main Disk Utility window.
- Choose the “GUID Partition Map” option to convert the SSD to the GPT format.
Once you have initiated the conversion process, the Disk Management or Disk Utility tool will convert the SSD to GPT format. This process updates the partitioning scheme, making it compatible with GPT-specific features and enabling the creation of multiple partitions, larger partition sizes, and improved data integrity.
It’s important to note that converting the SSD to GPT will not delete any data on the drive. However, it’s always recommended to have a backup of your important files before proceeding with any formatting process.
After the conversion to GPT is complete, your SSD is now formatted in the GPT partitioning scheme, allowing you to proceed to the next steps of creating new partitions and formatting them according to your requirements.
Step 5: Create New Partitions
Once you have converted your SSD to the GPT (GUID Partition Table) format, the next step in the formatting process is to create new partitions on the drive. Creating partitions allows you to separate and organize your data, making it easier to manage and access. Follow these steps to create new partitions:
Windows:
- In the Disk Management window, right-click on the unallocated space on your SSD.
- From the context menu, select “New Simple Volume.”
- Follow the on-screen prompts to specify the size of the new partition. If you want to use the entire unallocated space for a single partition, simply click “Next.”
- Assign a drive letter to the partition or choose to mount it in an empty folder. Select a suitable file system, such as NTFS or exFAT.
- Provide a volume label, if desired, to give the partition a descriptive name.
- Click “Next” and then “Finish” to create the new partition.
macOS:
- In Disk Utility, select your SSD from the list of drives on the left-hand side of the window.
- Click on the “+” button located in the main Disk Utility window.
- Specify the size for the new partition by adjusting the size slider.
- Assign a name and choose a format for the partition, such as APFS or Mac OS Extended (Journaled).
- Click “Add” to create the new partition.
When creating new partitions, consider your specific needs and the intended use of each partition. For example, you might create separate partitions for your operating system, programs, personal files, or specific projects.
By creating multiple partitions, you can isolate data, control access permissions, and enhance system organization and performance. Be mindful of the size allocated to each partition and ensure sufficient space for your data requirements.
Once you have created the desired partitions, you are ready to proceed to the next step of formatting them with the desired file system.
Step 6: Format the Partitions
After creating the new partitions on your SSD, the next step in the formatting process is to format each partition with the desired file system. Formatting prepares the partitions for data storage and defines the structure in which files will be organized and stored. Follow these steps to format the partitions:
Windows:
- In the Disk Management window, right-click on the partition you want to format.
- From the context menu, select “Format.”
- In the Format dialog box, specify the file system you want to use, such as NTFS or exFAT.
- Assign a volume label to the partition, if desired, to provide a descriptive name.
- Choose the allocation unit size. For most scenarios, the default allocation size is recommended.
- Ensure that the “Quick Format” option is selected to expedite the formatting process.
- Click “OK” to begin the formatting process. A progress indicator will be displayed as the partition is being formatted.
- Repeat these steps for each partition you want to format.
macOS:
- In Disk Utility, select the partition you want to format from the list of drives and partitions on the left-hand side of the window.
- Click on the “Erase” button located in the main Disk Utility window.
- In the Erase tab, provide a name for the partition.
- Select the desired format for the partition, such as APFS, Mac OS Extended (Journaled), or exFAT.
- Choose the scheme for the partition, which should be “GUID Partition Map” for GPT-formatted drives.
- Click on the “Erase” button to begin the formatting process.
- Repeat these steps for each partition you want to format.
Formatting the partitions will erase any existing data, so it is essential to ensure that you have backed up any important files beforehand. The formatting process organizes the partitions and prepares them for data storage according to the specified file system.
By formatting the partitions with the desired file system, you can ensure compatibility with your operating system and optimize the storage of your data. It is recommended to use the file system that is best suited for your specific needs, such as NTFS for Windows, APFS or Mac OS Extended (Journaled) for macOS, or exFAT for cross-platform compatibility.
Once you have formatted all the partitions, you can proceed to the next step of assigning drive letters (Windows) or utilizing the automatically assigned names (macOS) to access and manage your partitions.
Step 7: Assign Drive Letters
After formatting the partitions on your SSD, the next step in the formatting process is to assign drive letters (Windows) or utilize the automatically assigned names (macOS) to access and manage your partitions. Drive letters or names provide a unique identifier for each partition, allowing you to easily locate and access them. Follow these steps to assign drive letters or names:
Windows:
- In the Disk Management window, right-click on a formatted partition.
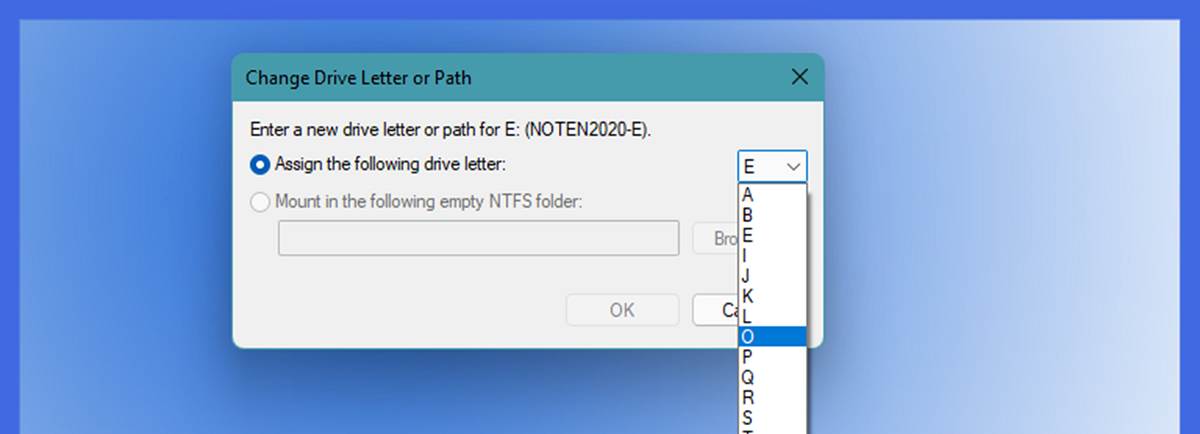
- From the context menu, select “Change Drive Letter and Paths.”
- Click on the “Change” button.
- Choose a drive letter from the available options, or click “Add” to mount the partition in an empty folder.
- Click “OK” to save the changes.
- Repeat these steps for each formatted partition you want to assign a drive letter to.
macOS:
In macOS, drive letter assignments are not used. The partitions will be automatically mounted and assigned names based on the names given during the formatting process.
By assigning drive letters (Windows) or utilizing the assigned names (macOS), you can easily identify and access each partition on your SSD. This allows you to organize and manage your data more efficiently, making it accessible and usable within your operating system’s file explorer or finder.
It is important to note that drive letter assignments are specific to the computer you are using. If you connect your SSD to another computer, the assigned drive letters may differ. However, the partition names (macOS) will remain consistent as long as the respective file systems are supported.
Once you have assigned drive letters or utilized the assigned names, you can begin using your SSD partitions to store, organize, and access your data according to your specific needs and preferences.
Step 8: Verify the Changes
The final step in formatting your SSD to GPT is to verify the changes that have been made. Verifying the changes ensures that the formatting process is complete and that your SSD is properly configured according to the GPT partitioning scheme. Here’s how to verify the changes:
Windows:
- In the Disk Management window, take a moment to review the changes that have been made.
- Ensure that your SSD is now listed with the proper drive letter and that the partitions are correctly formatted and accessible.
- Double-check that the file system, size, and volume labels of each partition match your intended configuration.
- Open File Explorer and check if the assigned drive letters are present and that you can access and use the partitions as expected.
macOS:
- In Disk Utility, review the list of drives and partitions on the left-hand side of the window.
- Verify that your SSD and its partitions are displayed correctly.
- Check that the format type, size, and assigned names of each partition match your intended configuration.
- Click on each partition to ensure that you can access and use them without any issues.
Verifying the changes allows you to confirm that the formatting process has been successful and that your SSD is ready for use. It helps to ensure that the partitions are correctly formatted, accessible, and functioning as expected.
If any issues or discrepancies are identified during the verification process, it’s recommended to revisit the respective steps of the formatting process to rectify any potential errors. Double-check that each partition has been assigned the correct format, size, and drive letter (Windows) or name (macOS).
By verifying the changes, you can have confidence that your SSD is properly formatted to the GPT partitioning scheme, and that the partitions are correctly configured and ready to be used for your data storage needs.
Conclusion
Congratulations! You have successfully formatted your SSD to GPT (GUID Partition Table). By following the step-by-step process outlined in this guide, you have optimized your SSD’s performance, improved data management, and ensured compatibility with modern systems. Let’s recap the key steps:
- Open Disk Management or Disk Utility to access the drive management tool.
- Locate your SSD in the list of available drives.
- Initialize the SSD, choosing the GPT partitioning scheme.
- Convert the SSD to GPT format.
- Create new partitions on the SSD to separate and organize your data.
- Format each partition with the desired file system, such as NTFS or APFS.
- Assign drive letters (Windows) or utilize the assigned names (macOS) to the partitions for easy access.
- Verify the changes made by reviewing the drive management tool and ensuring that the partitions are correctly formatted and accessible.
Remember, formatting your SSD to GPT erases all data on the drive. It’s important to back up your important files before proceeding with the formatting process. Additionally, always double-check your actions to avoid accidental formatting or formatting the wrong drive.
Now that your SSD is formatted to GPT, you can enjoy the benefits of this modern partitioning scheme. GPT allows for larger drive capacities, increased partition flexibility, improved data protection, and compatibility with both BIOS and UEFI systems. Leverage these advantages to enhance your system’s performance, organization, and data management.
Keep in mind that your SSD, as a storage device, still requires regular maintenance and backup procedures to ensure the longevity and integrity of your data. As you continue to use your SSD, remember to implement proper data backup strategies and regularly monitor its health using appropriate software or utilities.
We hope this guide has been helpful in assisting you throughout the process of formatting your SSD to GPT. By following these steps, you have taken an important step towards maximizing the potential of your SSD and optimizing your overall computing experience.