Introduction
Welcome to the world of SSDs (Solid State Drives) and the powerful tool known as Command Prompt. If you are considering formatting your SSD, whether it’s for optimizing performance, resolving issues, or preparing it for a fresh operating system installation, this guide will walk you through the process using Command Prompt.
As technology evolves, SSDs have become a popular choice for storage due to their faster read and write speeds, enhanced durability, and compact form factor. However, like any storage device, SSDs may require formatting at some point in their lifespan.
Command Prompt, also known as CMD, is a command-line interpreter that allows you to execute various commands and perform administrative tasks on your computer. It provides a more direct and powerful way of interacting with your system, giving you control over various aspects of your drive, including formatting.
In this guide, we will explore the step-by-step process of formatting your SSD using Command Prompt. We will also provide additional tips to help you ensure a smooth and successful formatting experience.
Note: It is essential to back up your data before proceeding with the formatting process, as it will erase all the existing data on your SSD. Make sure you have a backup of any important files.
Now, let’s dive into the world of Command Prompt and learn how to format your SSD like a pro!
Reasons to Format SSD
Formatting your SSD can provide several benefits and serve various purposes. Here are some common reasons why you might want to format your SSD:
- Optimizing Performance: Over time, an SSD might become fragmented or cluttered with unnecessary files, which can slow down its overall performance. By formatting your SSD, you can start fresh and eliminate any performance-degrading factors, resulting in improved speed and responsiveness.
- Resolving Issues: If you encounter recurring errors, corrupted data, or other issues with your SSD, formatting can help resolve these problems. Formatting can wipe out any software or file-related issues that may be causing the trouble, allowing you to start anew with a clean and stable SSD.
- Preparing for New OS Installation: If you plan to install a new operating system on your computer or upgrade to a different version, it is often recommended to format your SSD beforehand. This ensures that the new operating system can be installed cleanly, without any conflicts or compatibility issues with the existing system files.
- Removing Sensitive Data: When selling, donating, or disposing of an SSD, it is crucial to securely erase all the data stored on it to prevent unauthorized access. By formatting the SSD, you can effectively erase all the data, making it nearly impossible to recover.
- Starting Fresh: Sometimes, you may simply want to start fresh with a clean slate. Formatting your SSD allows you to wipe out all the data and settings, giving you a blank canvas to personalize and set up your system according to your preferences.
Regardless of the reason, formatting your SSD can help ensure a smooth and efficient performance for your storage device. It is important to note that formatting will erase all the data on your SSD, so be sure to back up any essential files before proceeding with the formatting process.
Understanding Command Prompt
Before we dive into the process of formatting your SSD using Command Prompt, let’s take a moment to familiarize ourselves with this powerful tool.
Command Prompt, or CMD, is a command-line interpreter available on Windows operating systems. It provides a text-based interface that allows you to execute various commands and perform administrative tasks directly on your computer, bypassing the need for a graphical user interface.
Command Prompt can be accessed by opening the “Run” dialog box (Windows key + R) and typing “cmd” or by searching for “Command Prompt” in the Start menu. Once opened, you’ll see a black window with a blinking cursor, ready for your commands.
Why use Command Prompt for formatting your SSD? While there are other methods and graphical interfaces available for formatting drives, Command Prompt offers some unique advantages:
- Power and Control: Command Prompt provides more direct control over your system compared to other methods, allowing you to execute advanced commands and perform various administrative tasks.
- Efficiency: Command Prompt is lightweight and efficient, making it a quick and convenient way to perform tasks without the need for resource-heavy graphical interfaces.
- Familiarity: For those who are comfortable and familiar with the command-line environment, using Command Prompt will feel natural and provide a sense of control over the formatting process.
While Command Prompt may seem intimidating to those unfamiliar with command-line interfaces, don’t worry! The steps provided in this guide will be clear and easy to follow, even if you are new to using Command Prompt.
Now that we have a basic understanding of Command Prompt, let’s move on to the step-by-step process of formatting your SSD using this powerful tool!
Step 1: Open Command Prompt
The first step in formatting your SSD using Command Prompt is to open the Command Prompt window. Here’s how you can do it:
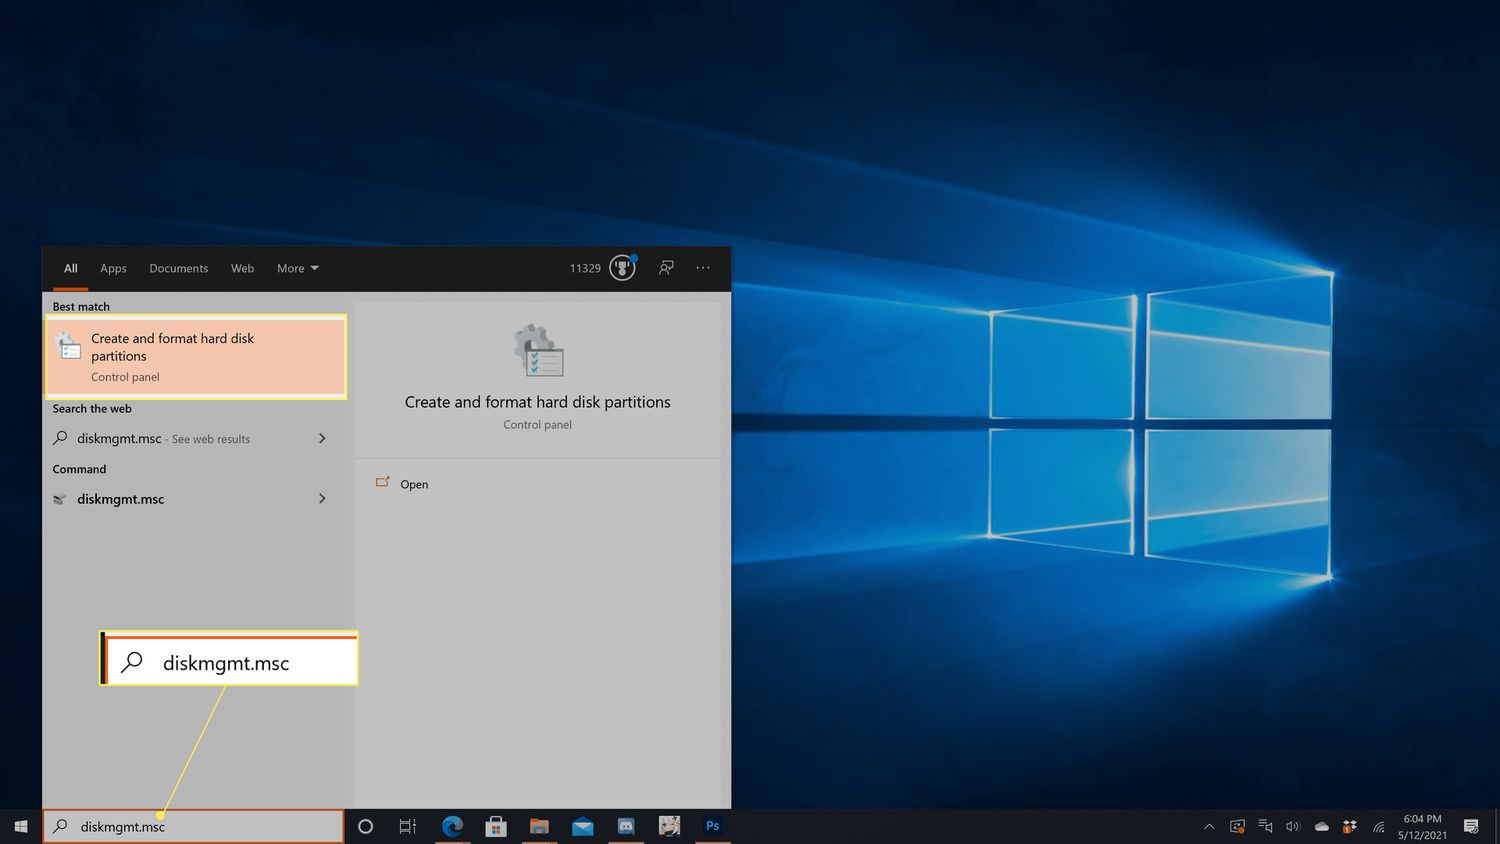
- Using the Start Menu: Click on the “Start” button located at the bottom-left corner of your screen. In the search bar, type “Command Prompt” and press Enter. This will open the Command Prompt window.
- Using the Run Dialog Box: Press the Windows key + R on your keyboard. In the Run dialog box, type “cmd” and press Enter. This will also open the Command Prompt window.
- Using the Power User Menu: Press the Windows key + X on your keyboard to open the Power User Menu. From the menu that appears, select “Command Prompt” or “Command Prompt (Admin)” if you require administrative privileges.
Once the Command Prompt window is open, you will see a black window with a blinking cursor, indicating that it is ready to accept your commands.
Note: If you need administrative privileges to format your SSD, make sure to open Command Prompt with administrative rights. Administrative access will allow you to perform advanced tasks and execute commands that require elevated permissions.
Now that you have successfully opened the Command Prompt window, you are ready to move on to the next step: locating your SSD.
Step 2: Locate the SSD
After opening the Command Prompt window, the next step in formatting your SSD is to locate the drive you want to format. Follow these steps to find the SSD:
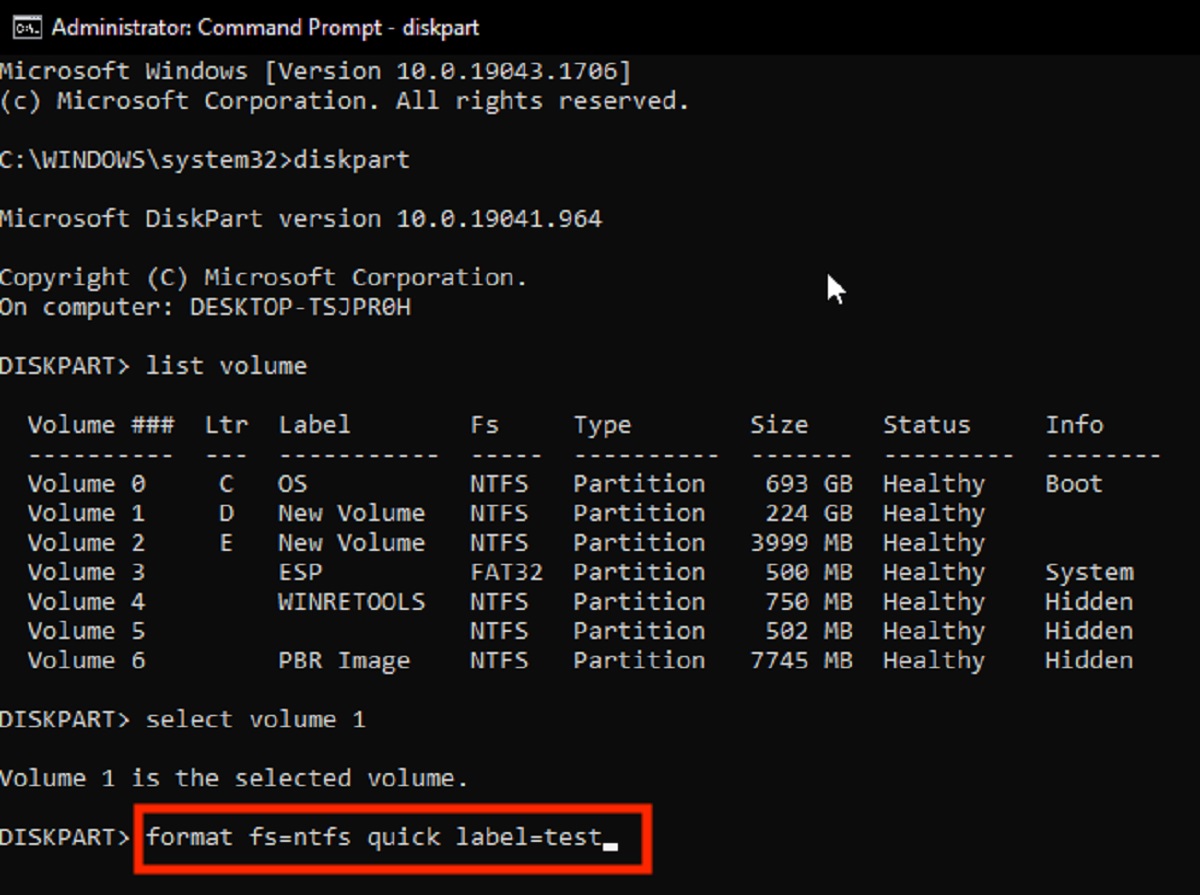
- List Disk: In the Command Prompt window, type “diskpart” and press Enter. This will launch the DiskPart utility, which allows you to manage and manipulate disks and volumes on your computer.
- List Disks: After entering the “diskpart” command, type “list disk” and press Enter. This command will display a list of all the disks connected to your computer.
- Identify the SSD: Look for the disk that represents your SSD. The disks will be listed with their respective sizes and other information. Take note of the disk number that corresponds to your SSD.
It is important to identify the correct disk that represents your SSD accurately. Formatting the wrong disk can result in permanent data loss.
Once you have located and identified your SSD, you are ready to proceed to the next step: formatting the SSD using Command Prompt.
Step 3: Format the SSD
Now that you have located your SSD in Command Prompt, it’s time to proceed with formatting it. Follow the steps below to format your SSD:
- Select the SSD: In the Command Prompt window, type “select disk X” (replace X with the disk number corresponding to your SSD) and press Enter. This command selects the SSD for formatting.
- Clean the SSD: Once the SSD is selected, type “clean” and press Enter. This command will remove all partitions and data from the SSD, preparing it for the formatting process.
- Create a New Partition: After cleaning the SSD, type “create partition primary” and press Enter. This command creates a new primary partition on the SSD.
- Format the Partition: To format the newly created partition on the SSD, type “format fs=ntfs quick” and press Enter. This command will format the partition with the NTFS file system quickly. You can replace “ntfs” with another file system if desired.
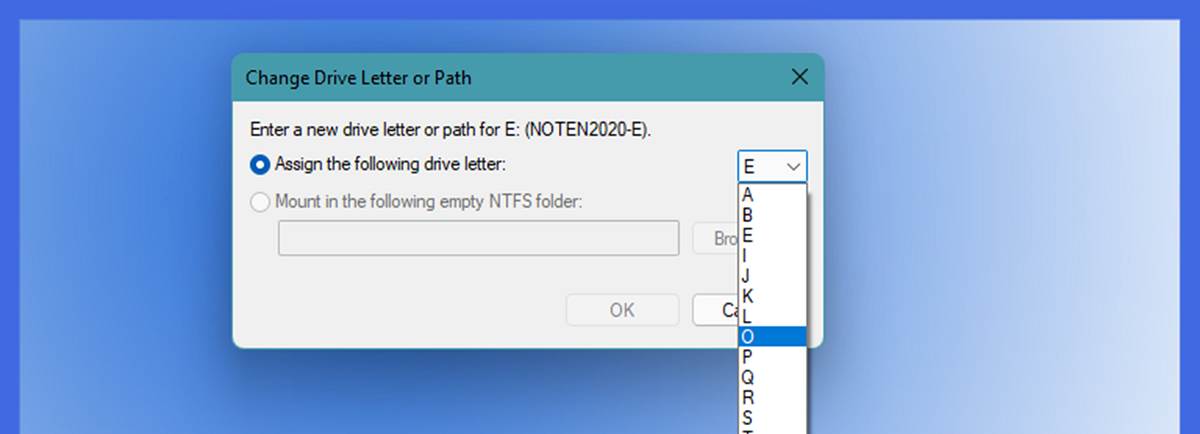
- Assign a Drive Letter: After formatting the partition, type “assign letter=X” (replace X with the desired drive letter) and press Enter. This command assigns a drive letter to the formatted partition, allowing you to access it in File Explorer.
Once you have completed these steps, the formatting process for your SSD is complete. You now have a freshly formatted SSD ready to be used for your desired purpose.
It is important to note that formatting your SSD will erase all the existing data on it. Make sure you have backed up any essential files before proceeding with the formatting process.
Now that you have successfully formatted your SSD using Command Prompt, the next step is to verify the formatting to ensure it was done correctly.
Step 4: Verify the Formatting
After formatting your SSD using Command Prompt, it is essential to verify that the formatting process was successful. Follow the steps below to verify the formatting:
- Open File Explorer: Click on the “File Explorer” icon on your taskbar or press the Windows key + E on your keyboard to open File Explorer.
- Locate the Formatted SSD: In File Explorer, navigate to “This PC” or “My Computer” and look for the drive with the assigned drive letter that you specified during the formatting process. This is where the formatted SSD should appear.
- Access the SSD: Double-click on the SSD drive to access it and ensure that you can open and save files without any issues. Confirm that the drive size matches the specifications of your SSD.
- Perform a Test: To further verify the formatting, you can perform a test by copying a small file to the SSD and then opening it to ensure that it is accessible and functional.
If you are able to access, save, and retrieve files from the SSD without any errors or abnormalities, it indicates that the formatting process was successful. Congratulations!
If you encounter any difficulties or issues during the verification process, it is recommended to repeat the formatting process using Command Prompt, ensuring that you follow the steps accurately.
Now that you have verified the formatting of your SSD, you can proceed with additional steps, such as installing an operating system, restoring data from your backup, or utilizing the freshly formatted drive for your specific needs.
Additional Tips for Formatting SSDs in Command Prompt
When formatting your SSD using Command Prompt, there are a few additional tips that can help ensure a smooth and successful formatting process. Consider the following tips:
- Double-check the Disk Number: Before proceeding with the formatting process, double-check the disk number of your SSD to avoid accidentally formatting the wrong disk. Ensure that you have selected the correct disk in Command Prompt using the “select disk” command.
- Backup Important Data: Prior to formatting your SSD, it is crucial to create a backup of any important files or data. Formatting will erase all the existing data on the disk, so backing up your files beforehand will prevent data loss.
- Use the Appropriate File System: Choose the file system that is most suitable for your needs. NTFS is a popular option for Windows, providing support for large file sizes and advanced features. However, if you plan to use the SSD with other operating systems, consider using a file system that is compatible with those systems.
- Consider Secure Erase: If you want to securely erase all the data on your SSD, consider using specialized tools that provide secure erase functionality. These tools can ensure that the data is permanently and irretrievably erased from the SSD, protecting your privacy.
- Update SSD Firmware: It is a good practice to check if there are any firmware updates available for your SSD and update it before formatting. Firmware updates can often improve performance, compatibility, and stability of the SSD.
By following these additional tips, you can enhance the formatting process and ensure the best results for your SSD using Command Prompt.
Remember to exercise caution and double-check your actions before proceeding with any commands in Command Prompt. Mistakenly formatting the wrong drive can result in data loss, so be careful and attentive throughout the process.
Now that you are equipped with these additional tips, you can confidently format your SSD using Command Prompt with a higher level of success and efficiency.
Conclusion
Formatting your SSD using Command Prompt can be a powerful and efficient way to optimize its performance, resolve issues, or prepare it for a new operating system installation. By following the step-by-step process outlined in this guide, you can format your SSD like a pro.
We discussed the importance of backing up your data before formatting and understanding the benefits of using Command Prompt for this task. With Command Prompt, you have more control and can execute advanced commands directly on your SSD.
Throughout the formatting process, we covered essential steps such as opening Command Prompt, locating your SSD, formatting the drive, and verifying the formatting results. These steps ensure that the formatting is done correctly and that you can access and use the SSD without any issues.
We also provided additional tips to further enhance your formatting experience, such as double-checking disk numbers, backing up data, choosing the appropriate file system, considering secure erase options, and updating SSD firmware.
Remember, formatting your SSD will erase all data on the drive, so it is crucial to have backups in place and exercise caution when selecting and executing commands in Command Prompt.
Now that you have a better understanding of how to format your SSD using Command Prompt and the importance of each step, you can confidently proceed and tailor your SSD to your specific needs.
Good luck with formatting your SSD and enjoy the improved performance and functionality that comes with a freshly formatted drive!