Introduction
Formatting a Solid State Drive (SSD) for Linux Mint is an essential step when preparing your drive for use. Whether you are setting up a new SSD or reformatting an existing one, this process ensures optimal performance and compatibility with the Linux Mint operating system.
Linux Mint is a popular distribution of the Linux operating system known for its user-friendly interface and stability. When formatting your SSD for Linux Mint, it is crucial to follow the correct steps to avoid data loss and ensure a smooth installation process.
In this article, we will guide you through the process of formatting your SSD for Linux Mint. We will cover the necessary steps, including backing up your data, determining the device name of your SSD, formatting the drive using the terminal, and configuring automatic mounting on startup.
By following these steps, you will be able to properly format your SSD and get it ready for use with Linux Mint. So, let’s dive in and get started!
Step 1: Backup your data
Before proceeding with formatting your Solid State Drive (SSD) for Linux Mint, it is crucial to back up your data. Formatting erases all the data on the drive, so it is essential to ensure that any important files or documents are safely stored elsewhere.
To start, identify the files and directories you want to include in your backup. This may include personal documents, photos, videos, music, and any other important files you have stored on your SSD. Consider using an external hard drive, cloud storage service, or another storage device to save your backup data.
There are several ways to back up your data. One option is to manually copy and paste your files onto an external storage device. This method is simple and straightforward but may be time-consuming if you have a large amount of data.
Alternatively, you can use backup tools and software available for Linux Mint. These tools allow you to create full system backups or selective backups of specific files and directories. Some popular backup tools for Linux Mint include Timeshift, Déjà Dup, and Back In Time. They offer a user-friendly interface and the flexibility to schedule automatic backups.
Once you have selected your preferred method of backup, follow the instructions provided by the tool or software to create a backup of your data. Ensure that the backup is complete and verify that you can access and restore your files if necessary.
Remember, backing up your data is an essential precautionary measure before formatting your SSD. It protects you from the risk of data loss and provides peace of mind throughout the formatting process. Once you have completed the backup process and confirmed the safety of your data, you can proceed with formatting your SSD for Linux Mint.
Step 2: Determine the device name for your solid state drive
To format your Solid State Drive (SSD) for Linux Mint, you need to determine the device name for your drive. The device name is essential as it will be used in the subsequent steps of the formatting process.
There are various ways to identify the device name of your SSD in Linux Mint. One way is to use the command line interface and the “lsblk” command. Open a terminal by clicking on the terminal icon or by using the keyboard shortcut Ctrl+Alt+T.
In the terminal, enter the following command:
lsblk
This command will generate a list of all the storage devices connected to your system, including your SSD. Look for a device name that resembles “/dev/sdx” (where “x” is a letter, like “a,” “b,” “c,” etc.). This is the device name for your SSD.
Make sure to take note of the device name for future reference. It is crucial to avoid making any mistakes when formatting your SSD, as you don’t want to accidentally format the wrong device and lose important data.
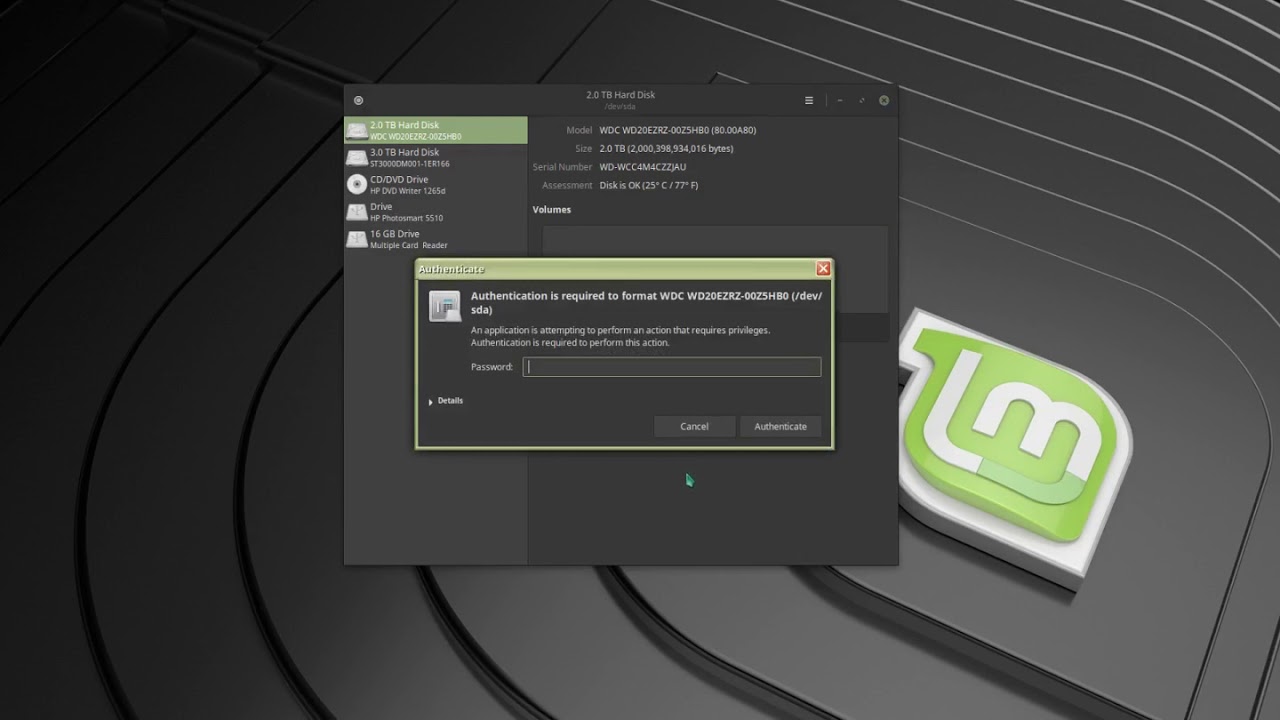
Another method to determine the device name is using disk management tools in the Linux Mint graphical user interface. Open the “Disks” application from the menu or by searching for “Disks” in the application launcher.
In the Disks application, you will see a list of your storage devices. Locate your SSD and click on it to select it. The device name will be displayed at the top of the window, next to the “Device” label.
Once you have successfully determined the device name for your SSD, you are ready to proceed to the next step of the formatting process. Make sure to double-check the device name to ensure accuracy before moving forward.
Step 3: Launch the terminal
After determining the device name for your solid state drive (SSD), the next step in formatting it for Linux Mint is to launch the terminal. The terminal is a command line interface that allows you to enter commands and execute them on your system.
To launch the terminal in Linux Mint, you have a few different options. The most common way is to click on the terminal icon, which resembles a black screen with a command prompt, located in the application launcher or taskbar. Alternatively, you can use the keyboard shortcut Ctrl+Alt+T to open the terminal.
Once the terminal is open, you are ready to perform the necessary actions to format your SSD. The terminal provides you with direct access to the system commands, allowing you to execute specific actions such as formatting the drive.
It’s important to note that when using the terminal, you need to enter commands accurately to avoid errors. Make sure to follow the instructions closely and double-check the commands you enter to ensure accuracy.
The terminal also offers a range of additional commands and features that can be useful when working with Linux Mint. You can use commands to navigate through directories, manage files, install software, and perform various system tasks. Exploring and familiarizing yourself with the terminal’s functionality can help you become more proficient in using Linux Mint.
If you encounter any difficulties when working with the terminal, don’t hesitate to seek assistance from online resources, forums, or the Linux Mint community. There are plenty of resources available to help you navigate through the terminal and troubleshoot any issues you may encounter.
With the terminal launched and at your disposal, you are now ready to move on to the next step of the formatting process, which involves using commands to format your SSD for Linux Mint.
Step 4: Format the solid state drive using the mkfs command
Now that you have launched the terminal and determined the device name of your solid state drive (SSD), it’s time to format the drive using the mkfs command. The mkfs command creates a file system on the SSD, making it ready for use with Linux Mint.
To start, open the terminal and enter the following command, replacing “/dev/sdx” with the device name of your SSD:
sudo mkfs.ext4 /dev/sdx
The “sudo” command is used to execute the command with administrative privileges, ensuring that you have the necessary permissions to format the drive.
The “mkfs.ext4” command is specifically used to create an ext4 file system, which is the default and widely used file system for Linux. However, if you prefer a different file system, such as ext3 or ext2, you can replace “ext4” with your preferred file system when entering the command.
Once you enter the command, you will be prompted to enter your password. After entering the password, the formatting process will begin. Depending on the size of your SSD, the process may take some time. You will see progress updates in the terminal as the formatting proceeds.
It’s important to note that formatting the SSD erases all existing data on the drive. Double-check that you have backed up any crucial data before proceeding with the formatting process to avoid permanent data loss.
After the formatting process is complete, you will see a message indicating a successful format. Your solid state drive is now ready for use with Linux Mint. However, it’s not yet mounted, so we will proceed to the next step.
Congratulations! You have successfully formatted your SSD using the mkfs command in the terminal. Now, let’s move on to the next step to mount the newly formatted drive.
Step 5: Mount the newly formatted drive
After formatting your solid state drive (SSD) using the mkfs command and creating a file system, the next step is to mount the newly formatted drive. Mounting a drive makes it accessible within the Linux Mint file system hierarchy, allowing you to read from and write to the drive.
To mount the SSD, follow these steps:
1. Identify an empty directory as the mount point. This is the location where you will access the contents of the SSD. Choose a descriptive and easily accessible directory name, such as “/mnt/ssd” or “/media/ssd”. Create the directory if it doesn’t already exist.
2. Open the terminal and enter the following command, replacing “/dev/sdx” with the device name of your SSD and “/path/to/mount/point” with the directory you chose as the mount point:
sudo mount /dev/sdx /path/to/mount/point
The “sudo” command is used to execute the command with administrative privileges, ensuring that you have the necessary permissions to mount the drive.
After entering the command, you will be prompted to enter your password. Once you enter the password, the SSD will be mounted to the specified directory.
You can verify that the SSD is successfully mounted by entering the “df” command in the terminal. This command displays a list of all mounted drives, including their mount points and usage statistics. Make sure to look for your SSD in the list and confirm that the mount point you specified is shown.
From now on, you can access and work with the contents of the SSD through the specified mount point. Any files or directories you add or modify within the mount point will be stored on the SSD.
If you want the SSD to be automatically mounted on system startup, you can add an entry to the “/etc/fstab” file. This configuration file manages the mounting of drives at boot time. Refer to the Linux Mint documentation or online resources for detailed instructions on how to edit the “/etc/fstab” file.
Congratulations! You have successfully mounted your newly formatted SSD. Proceed to the next step to learn how to configure automatic mounting of the drive on startup.
Step 6: Configure automatic mounting on startup
To ensure that your solid state drive (SSD) is automatically mounted every time you start your Linux Mint system, you can configure automatic mounting. This will save you the hassle of manually mounting the drive each time you boot up your computer.
To configure automatic mounting, follow these steps:
1. Open a terminal and enter the following command to open the “/etc/fstab” file in a text editor:
sudo nano /etc/fstab
The “sudo” command is used to execute the command with administrative privileges. It will prompt you to enter your password before opening the file.
2. In the text editor, locate an empty line at the end of the file and add a new entry in the following format:
/dev/sdx /path/to/mount/point ext4 defaults 0 2
Replace “/dev/sdx” with the device name of your SSD and “/path/to/mount/point” with the directory you chose as the mount point. Ensure that the file system type (in this example, “ext4”) matches the format you used during the formatting process.
3. Save the changes to the “/etc/fstab” file by pressing Ctrl+O and then exit the text editor by pressing Ctrl+X.
4. To verify that the changes are successful, restart your computer. Upon reboot, your SSD should be automatically mounted to the specified mount point.
Please note that if you decide to change the mount point or the file system of your SSD in the future, you will need to update the corresponding entry in the “/etc/fstab” file.
By configuring automatic mounting on startup, you ensure that your SSD is always accessible without the need for manual intervention. This simplifies the process of using your drive and ensures a seamless experience with Linux Mint.
Congratulations! You have successfully configured automatic mounting for your SSD. Your drive will now be mounted automatically every time you start your Linux Mint system.
Conclusion
Formatting a solid state drive (SSD) for Linux Mint is a crucial step in preparing the drive for use with the operating system. By following the steps outlined in this article, you can successfully format your SSD and ensure compatibility and optimal performance.
We started by emphasizing the importance of backing up your data before proceeding with the formatting process. This is a crucial precaution to avoid any potential data loss during the formatting process.
Next, we guided you through the process of determining the device name of your SSD, using either the terminal or the Disks application in Linux Mint. This ensures that you have the correct device name for the subsequent steps.
We then discussed the importance of launching the terminal, which provides a command line interface for executing specific actions and commands. Familiarizing yourself with the terminal is beneficial when working with Linux Mint.
The article then walked you through the process of formatting your SSD using the “mkfs” command. We highlighted the need to double-check the device name and reminded you about the irreversible nature of the formatting process, ensuring that you have backed up your data beforehand.
Furthermore, we explained the steps for mounting the newly formatted SSD and accessing its contents. We also discussed how to configure automatic mounting on system startup, eliminating the need for manual intervention every time you boot up your computer.
By following these steps, you successfully formatted your SSD for use with Linux Mint. It’s worth noting that these steps are specific to Linux Mint, so please refer to the documentation or user guides for other Linux distributions if you are using a different one.
We hope that this guide has provided you with a clear understanding of how to format a solid state drive for Linux Mint. Now you can proceed with confidence to utilize your SSD and enjoy the benefits of increased speed and performance in your Linux Mint system.