Introduction
Are you a proud owner of a Samsung Smart TV and wondering how to get access to local channels? With a range of options available, it’s easier than ever to enjoy your favorite local programming on your Samsung Smart TV.
Local channels provide a wide variety of content, including news, sports, and entertainment. Whether you want to stay updated with local news, watch your favorite local sports teams in action, or catch popular locally produced shows, getting local channels on your Samsung Smart TV can enhance your viewing experience.
In this article, we will explore different options to help you get local channels on your Samsung Smart TV. From using an antenna to accessing local channels through a cable or satellite provider, and even streaming local channels through a streaming service, we will guide you through the process step by step.
Whether you live in a metropolitan area with a strong signal or in a rural location with limited options, there is a solution that suits your needs. So, let’s dive in and discover the various methods to get local channels on your Samsung Smart TV.
Option 1: Use an Antenna
One of the simplest and most cost-effective ways to get local channels on your Samsung Smart TV is by using an antenna. This traditional method allows you to receive over-the-air broadcasts from local television stations.
Here’s how you can set up an antenna to access local channels on your Samsung Smart TV:
- Step 1: Check the Signal Strength in Your Area
- Step 2: Connect an Antenna to Your Samsung Smart TV
- Step 3: Scan for Available Channels
- Step 4: Set Up an External Set-Top Box or DVR
Before installing an antenna, it’s important to check the signal strength in your area. Websites like TV Fool or AntennaWeb provide tools to help you determine the type of antenna you need and the available channels.
Connect your antenna to the coaxial input of your Samsung Smart TV. This input is usually located at the back of the TV. If your TV doesn’t have a built-in coaxial input, you can use an external digital converter box.
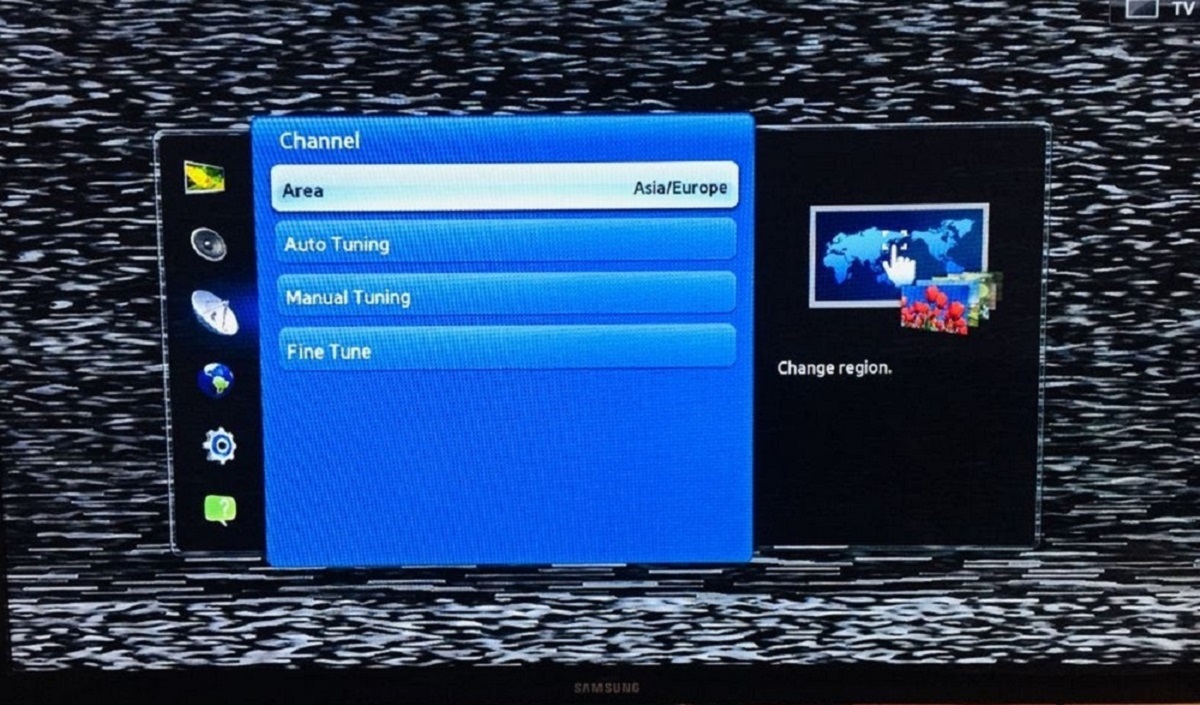
Once your antenna is connected, go to the menu of your Samsung Smart TV and select the “Channel” or “Setup” option. From there, choose the “Auto Scan” or “Channel Scan” option to search for available channels. Your TV will automatically tune and store the channels it detects.
For additional features like the ability to pause, rewind, or record live TV, you can connect an external set-top box or DVR to your Samsung Smart TV. These devices provide enhanced functionality while still utilizing the antenna signal.
By following these steps, you can enjoy a variety of local channels on your Samsung Smart TV without relying on cable or satellite subscriptions. This option allows you to access high-definition broadcasts and eliminates the need for monthly bills.
Option 2: Use a Cable or Satellite Provider
Another way to get local channels on your Samsung Smart TV is by subscribing to a cable or satellite provider in your area. This option allows you to access a wide range of channels, including local ones, through a set-top box or digital receiver.
Here are the steps to set up a cable or satellite provider on your Samsung Smart TV:
- Step 1: Check the Availability in Your Area
- Step 2: Choose a Package and Provider
- Step 3: Set Up the Set-Top Box
- Step 4: Activate and Scan for Channels
Research and compare different cable or satellite providers available in your area. Check their channel lineups to ensure that the local channels you desire are included in their packages.
Select a package that suits your needs and budget, and contact the chosen cable or satellite provider to subscribe to their services.
Once you receive the set-top box or digital receiver from your provider, connect it to your Samsung Smart TV using an HDMI cable. Follow the instructions provided by the provider to complete the setup process.
After setting up the set-top box, activate it by following the provider’s instructions. Then, perform a channel scan on your Samsung Smart TV to detect and store the available channels provided by your cable or satellite provider.
Using a cable or satellite provider offers additional benefits such as access to premium channels, On-Demand content, and DVR capabilities. However, keep in mind that this option often comes with a monthly subscription fee.
By choosing the right cable or satellite provider, you can enjoy a seamless viewing experience and access a wide variety of local channels and additional programming on your Samsung Smart TV.
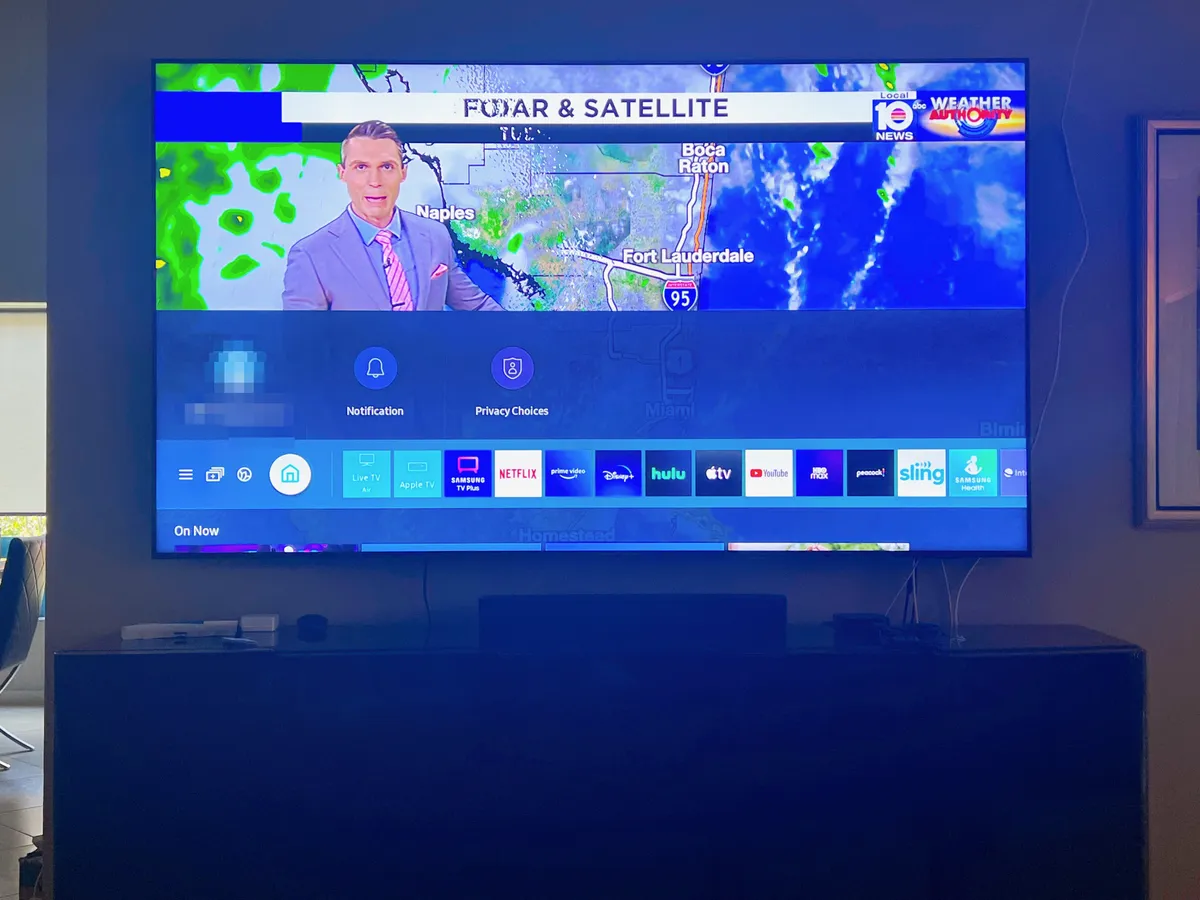
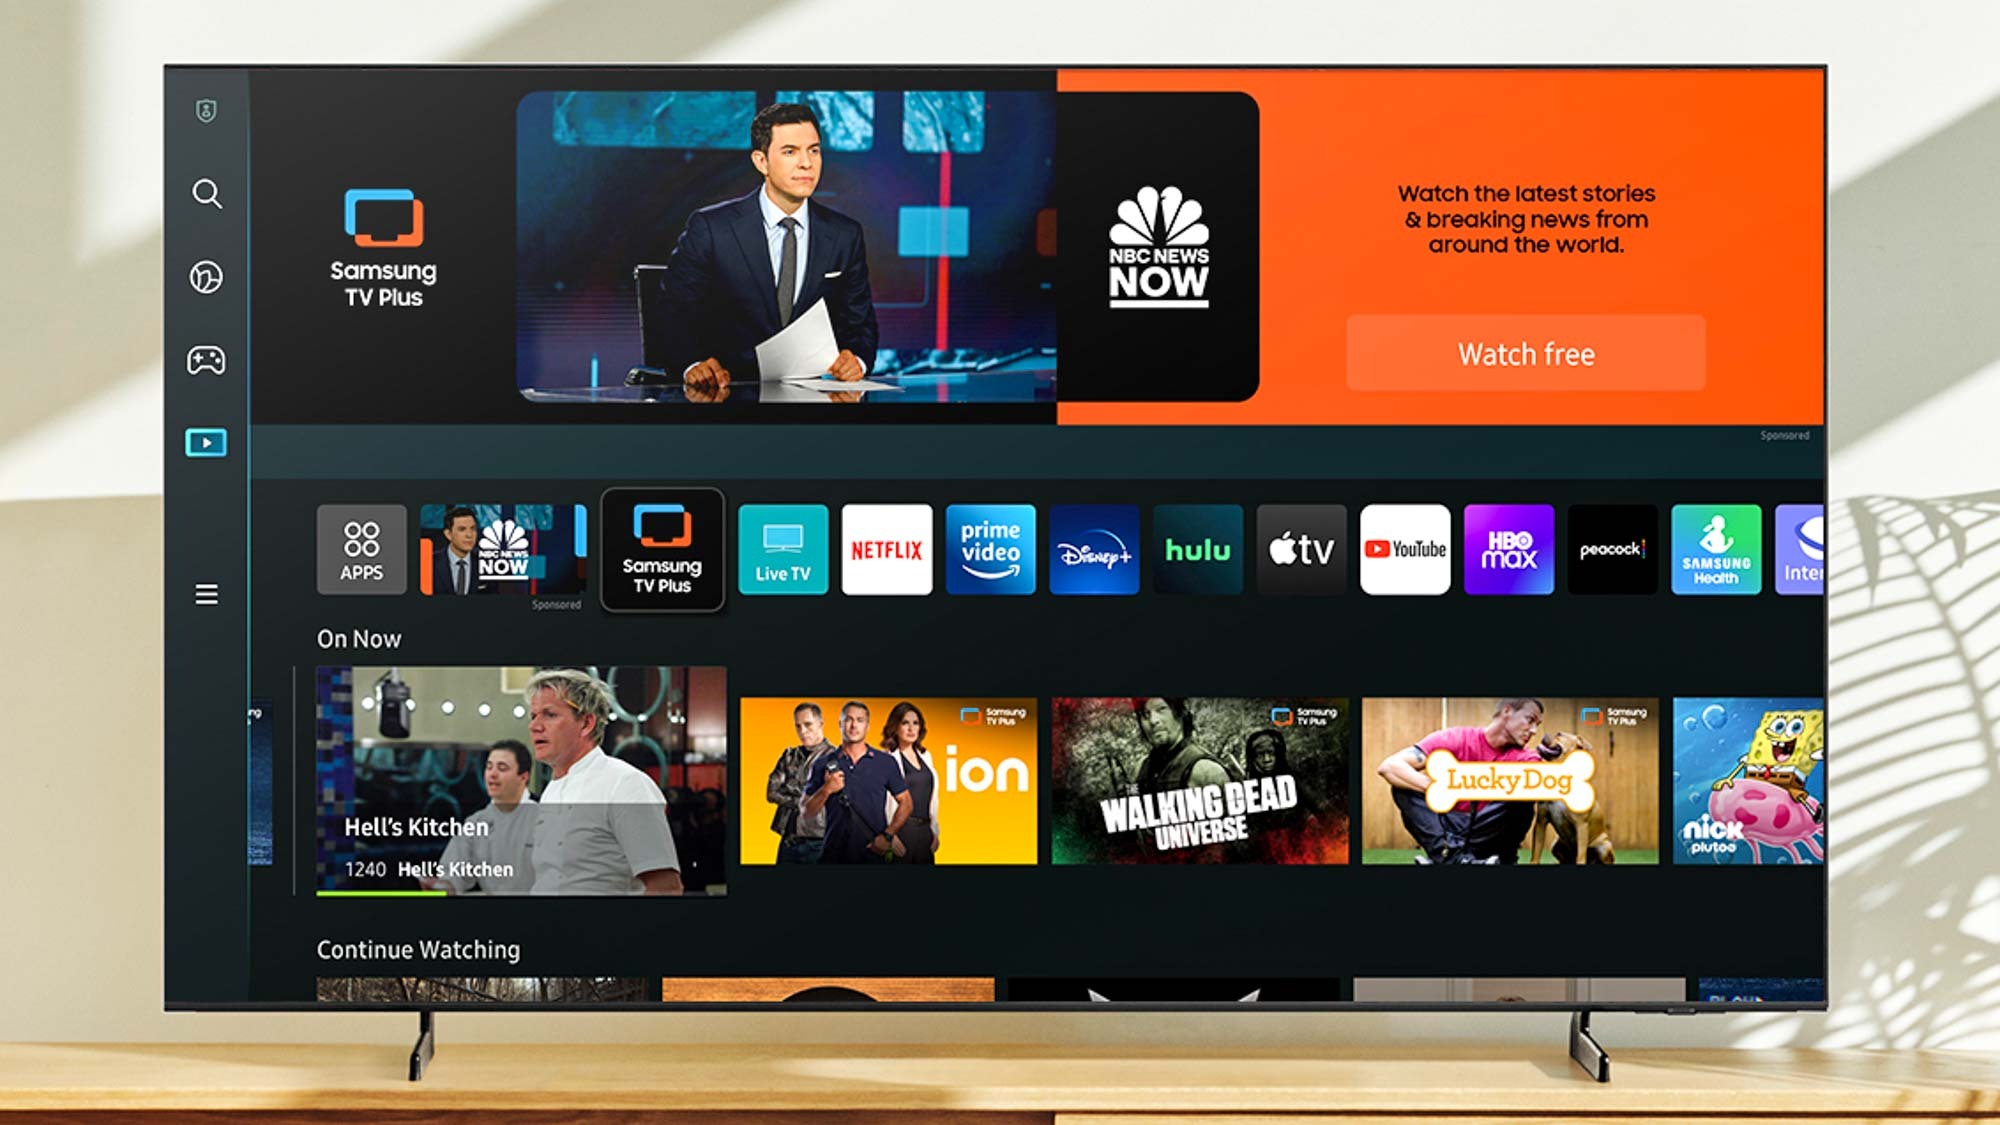
Option 3: Use a Streaming Service
If you prefer a more versatile and flexible option to get local channels on your Samsung Smart TV, using a streaming service is a great choice. Streaming services provide access to a wide range of channels, including local ones, through an internet connection.
Here’s how you can set up a streaming service to access local channels on your Samsung Smart TV:
- Step 1: Choose a Streaming Service
- Step 2: Sign Up and Download the App
- Step 3: Log In and Set Up Your Account
- Step 4: Access and Stream Local Channels
Research and compare different streaming services that offer local channels in your area. Some popular options include Hulu + Live TV, YouTube TV, Sling TV, and AT&T TV. Check their channel lineups and pricing to find the best fit for your preferences.
Once you decide on a streaming service, sign up for an account and download the respective app onto your Samsung Smart TV. You can usually find the app in the app store or content hub of your TV.
Open the streaming service app on your TV and log in using your account credentials. Follow the on-screen prompts to set up your preferences, including selecting your desired local channels.
After setting up your account, you can browse through the available local channels and start streaming your favorite shows, news, and sports events directly on your Samsung Smart TV.
Using a streaming service provides the flexibility to watch local channels and other content on-demand, allowing you to personalize your viewing experience. However, keep in mind that streaming services typically require a stable internet connection and may involve a monthly subscription fee.
By choosing the right streaming service, you can enjoy the convenience of accessing local channels and a vast library of content on your Samsung Smart TV, without the need for traditional cable or satellite subscriptions.
Step 1: Check the Signal Strength in Your Area
Before setting up an antenna to access local channels on your Samsung Smart TV, it’s crucial to check the signal strength in your area. This step will help you determine the type of antenna you need and the available channels that you can receive.
Here’s how you can check the signal strength:
- Use Online Tools: Websites like TV Fool or AntennaWeb provide tools that allow you to enter your address or ZIP code to see a signal strength report for your location. These tools provide detailed information about the channels available in your area and the estimated signal strength.
- Consult Local Broadcasters: Contact the local broadcasters in your area and inquire about the signal strength. They will have accurate information about the strength and availability of their channels.
- Consider Topography: Take into account the topography of your area, such as nearby mountains, tall buildings, or other obstructions that may impact the signal strength. These factors can affect the reception quality, so it’s essential to assess the potential challenges you might face.
- Talk to Neighbors: Reach out to your neighbors who may already be using an antenna to access local channels. They can provide valuable insights into the signal strength and any specific considerations for your area.
By checking the signal strength in your area, you can determine the most suitable antenna type and its positioning to optimize your reception. It’s important to ensure a strong signal to enjoy clear and uninterrupted local channels on your Samsung Smart TV.
Step 2: Connect an Antenna to Your Samsung Smart TV
Once you have determined the signal strength in your area, the next step in accessing local channels on your Samsung Smart TV is to connect an antenna. This will allow you to receive over-the-air broadcasts from local television stations.
Follow these steps to connect an antenna to your Samsung Smart TV:
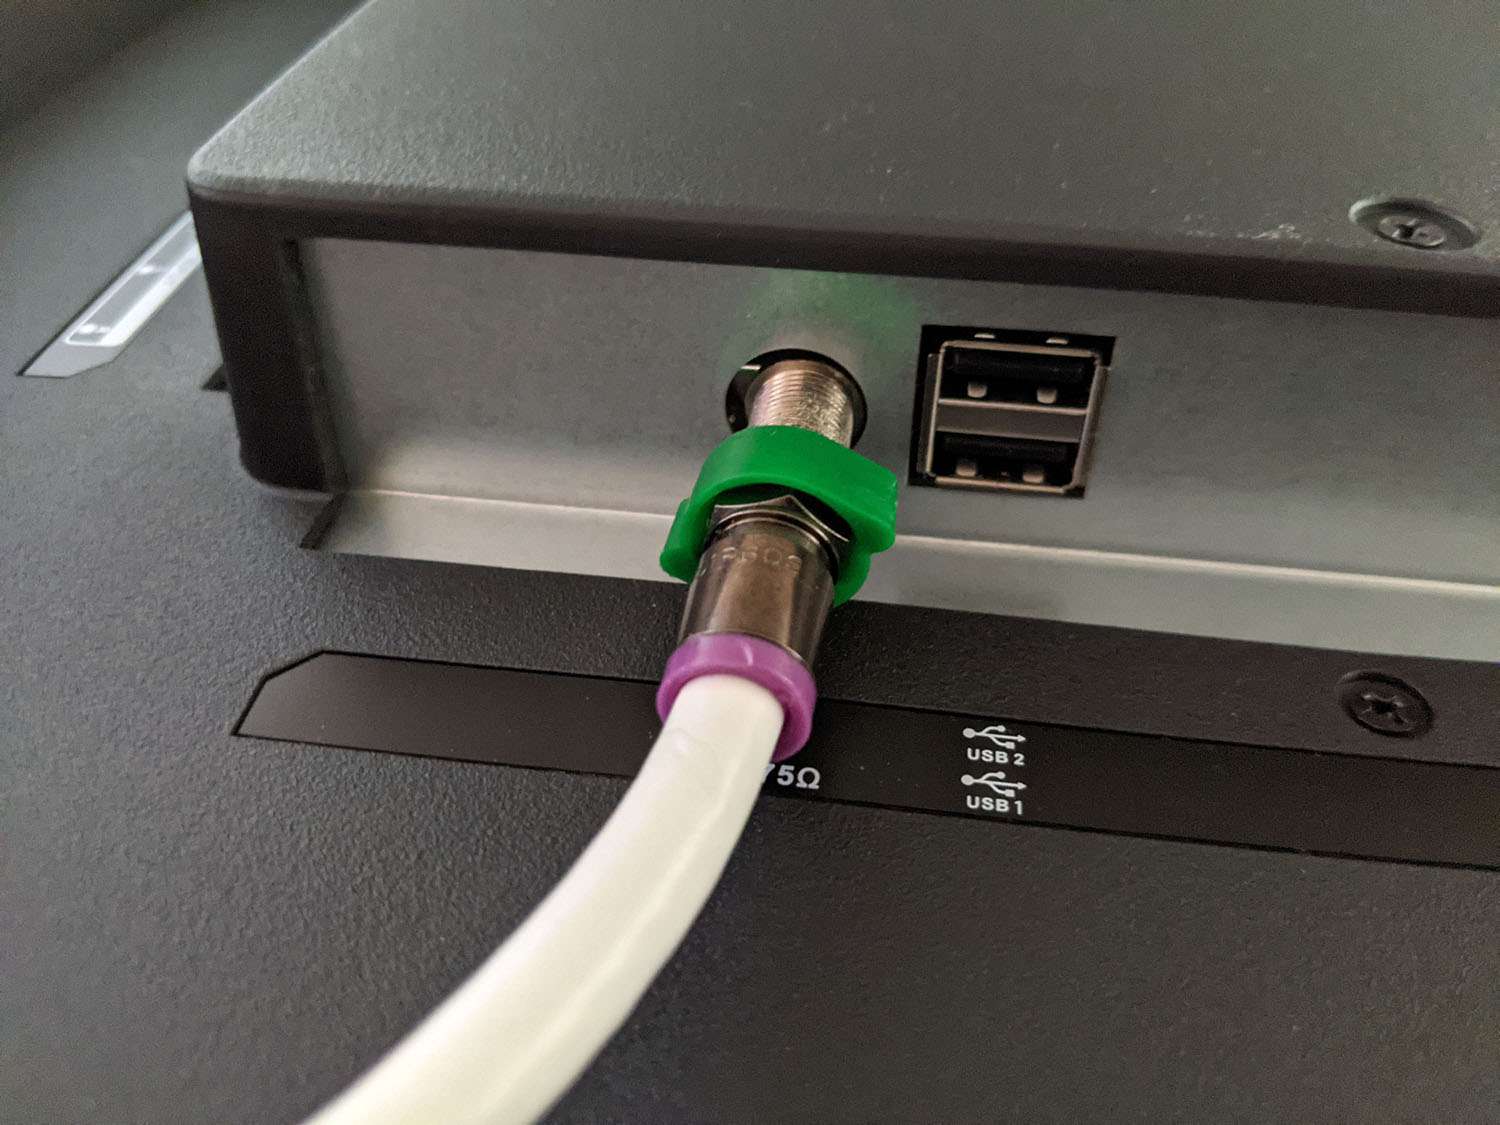
- Locate the Coaxial Input: Find the coaxial input on your Samsung Smart TV. It is usually located at the back of the TV and labeled as “Antenna In” or “RF In”.
- Select the Right Antenna: Based on the signal strength in your area, choose the appropriate antenna type. There are different types of antennas available, such as indoor antennas, outdoor antennas, amplified antennas, and directional antennas. Select the one that suits your location and needs.
- Uncoil the Antenna Cable: Gently uncoil the cable that is attached to the antenna. Make sure there are no knots or kinks in the cable.
- Connect the Antenna to the Coaxial Input: Insert one end of the antenna cable into the coaxial input on your Samsung Smart TV. Ensure that it is securely connected.
- Position the Antenna: Place the antenna in an optimal location for improved signal reception. If it’s an indoor antenna, experiment with different positions like near a window or higher up on a wall. For outdoor antennas, mount it in a suitable spot, avoiding any obstructions.
- Secure the Connection: Double-check the connections to ensure they are tight and secure. Loose connections can result in a weak or no signal.
By properly connecting the antenna to your Samsung Smart TV, you are ready to receive local channels. However, keep in mind that the positioning and orientation of the antenna may require adjustment to optimize the signal reception. This may involve fine-tuning the antenna and experimenting with its placement.
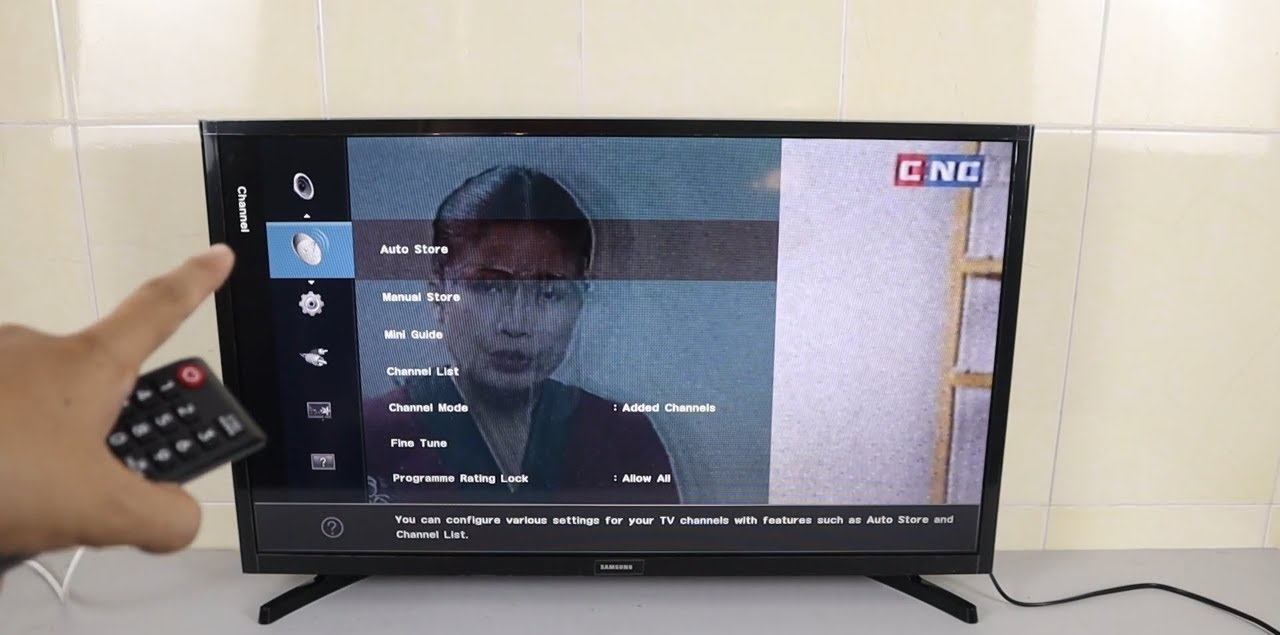
Step 3: Scan for Available Channels
After connecting the antenna to your Samsung Smart TV, the next step to access local channels is to scan for available channels. This process allows your TV to detect and store the channels that are being broadcasted in your area.
Follow these steps to scan for available channels on your Samsung Smart TV:
- Access the Menu: Using your TV’s remote control, navigate to the menu or settings option on your Samsung Smart TV. The exact location of the menu may vary depending on the model.
- Select Channel Setup or Tuning: Within the menu, look for options related to channel setup, tuning, or antenna. Choose the appropriate option to proceed.
- Choose Auto Scan or Channel Scan: Look for the auto scan or channel scan option within the channel setup menu. This initiates a scan of the available channels.
- Select Scan Type: In some cases, you may have the option to choose between a full scan or a quick scan. A full scan performs a more comprehensive search for channels, while a quick scan may only detect the strongest signals. It’s recommended to choose the full scan for the best results.
- Start the Scan: Once you’ve selected the scan type, start the scan process. Your Samsung Smart TV will begin searching for available channels using the input from your antenna.
- Wait for the Scan to Complete: The scan process may take a few minutes to complete. During this time, your TV will tune to each channel’s frequency and save the channels that have been successfully detected.
After the scan is complete, your Samsung Smart TV will display a list of the channels it has found. You can now navigate through the available channels using your TV’s remote control.
Note that you may need to repeat the scanning process if you move your antenna to a different position or make any changes to your TV setup. Regularly scanning for channels ensures that you have access to the most up-to-date channel lineup in your area.
Step 4: Set Up an External Set-Top Box or DVR
To enhance your experience with accessing local channels on your Samsung Smart TV, you may want to consider setting up an external set-top box or DVR. These devices offer additional features like the ability to pause, rewind, or record live TV, giving you greater control over your viewing.
Follow these steps to set up an external set-top box or DVR:
- Research and Purchase the Device: Look for a compatible set-top box or DVR that meets your requirements. Consider factors such as storage capacity, supported features, and connectivity options. Ensure that the device is compatible with your Samsung Smart TV.
- Connect the Set-Top Box or DVR: Use an HDMI cable to connect the set-top box or DVR to one of the HDMI ports on your Samsung Smart TV. HDMI provides high-definition audio and video signals, ensuring optimal performance.
- Power On the Devices: Connect the power cables of both the set-top box or DVR and your Samsung Smart TV to an electrical outlet. Power on the devices and wait for them to boot up.
- Configure the Set-Top Box or DVR: Follow the manufacturer’s instructions to configure the set-top box or DVR. This may involve connecting it to your home network, signing in to your account, and setting up any additional preferences or features.
- Set up Channel Source: On your Samsung Smart TV, navigate to the input or source menu and select the HDMI port to which you connected the set-top box or DVR. This will make it the current channel source for your television.
- Control the Set-Top Box or DVR: To control the set-top box or DVR, use the remote control that came with the device. This allows you to access the additional features and functionalities offered by the device.
With an external set-top box or DVR, you can enjoy the convenience of pausing, rewinding, or recording live TV, providing you with a more personalized and flexible viewing experience. This option is especially useful for those who want to enjoy local channels while having the functionality of a traditional cable or satellite setup.
Step 5: Access Local Channels through a Cable or Satellite Provider
If you have subscribed to a cable or satellite provider, accessing local channels on your Samsung Smart TV becomes seamless. By using the provider’s set-top box or digital receiver, you can enjoy a wide range of channels, including local ones.
Here are the steps to access local channels through a cable or satellite provider:
- Select the Appropriate Input Source: Using your Samsung Smart TV’s remote control, navigate to the input or source menu. Choose the HDMI port to which your set-top box or digital receiver is connected. This will make it the current input source for your TV.
- Power on the Set-Top Box or Digital Receiver: Make sure your set-top box or digital receiver is powered on. Depending on your provider, you may need to press the power button on the remote control or the device itself.
- Tune to a Local Channel: Use the remote control provided by your cable or satellite provider to tune to a specific local channel. You can browse through the channel guide or enter the channel number directly using the remote control.
- Access Additional Features: Depending on your cable or satellite provider, you may have access to additional features such as On-Demand content, interactive program guides, and DVR functionality. Explore the menus and features of your set-top box or digital receiver to take full advantage of the services provided.
- On-Demand and Pay-Per-View Options: Some cable or satellite providers offer On-Demand and pay-per-view options for local channels. You can browse through these options to watch specific shows or events at your convenience, even if you missed them when they originally aired.
By following these steps, you can easily access local channels through the cable or satellite provider on your Samsung Smart TV. This option provides a wide range of channels, including local programming, and may offer additional features and services to enhance your viewing experience.
Step 6: Stream Local Channels through a Streaming Service
Streaming services offer a convenient way to access local channels on your Samsung Smart TV through an internet connection. By subscribing to a streaming service that includes local channel offerings, you can enjoy a variety of programming without the need for a traditional cable or satellite subscription.
Follow these steps to stream local channels on your Samsung Smart TV:
- Choose a Compatible Streaming Service: Research and select a streaming service that offers local channels in your area. Popular options include Hulu + Live TV, YouTube TV, Sling TV, and AT&T TV. Make sure the streaming service is compatible with your Samsung Smart TV.
- Sign Up and Create an Account: Visit the streaming service’s website and sign up for an account. Provide the required information and choose a subscription plan that includes the local channels you desire.
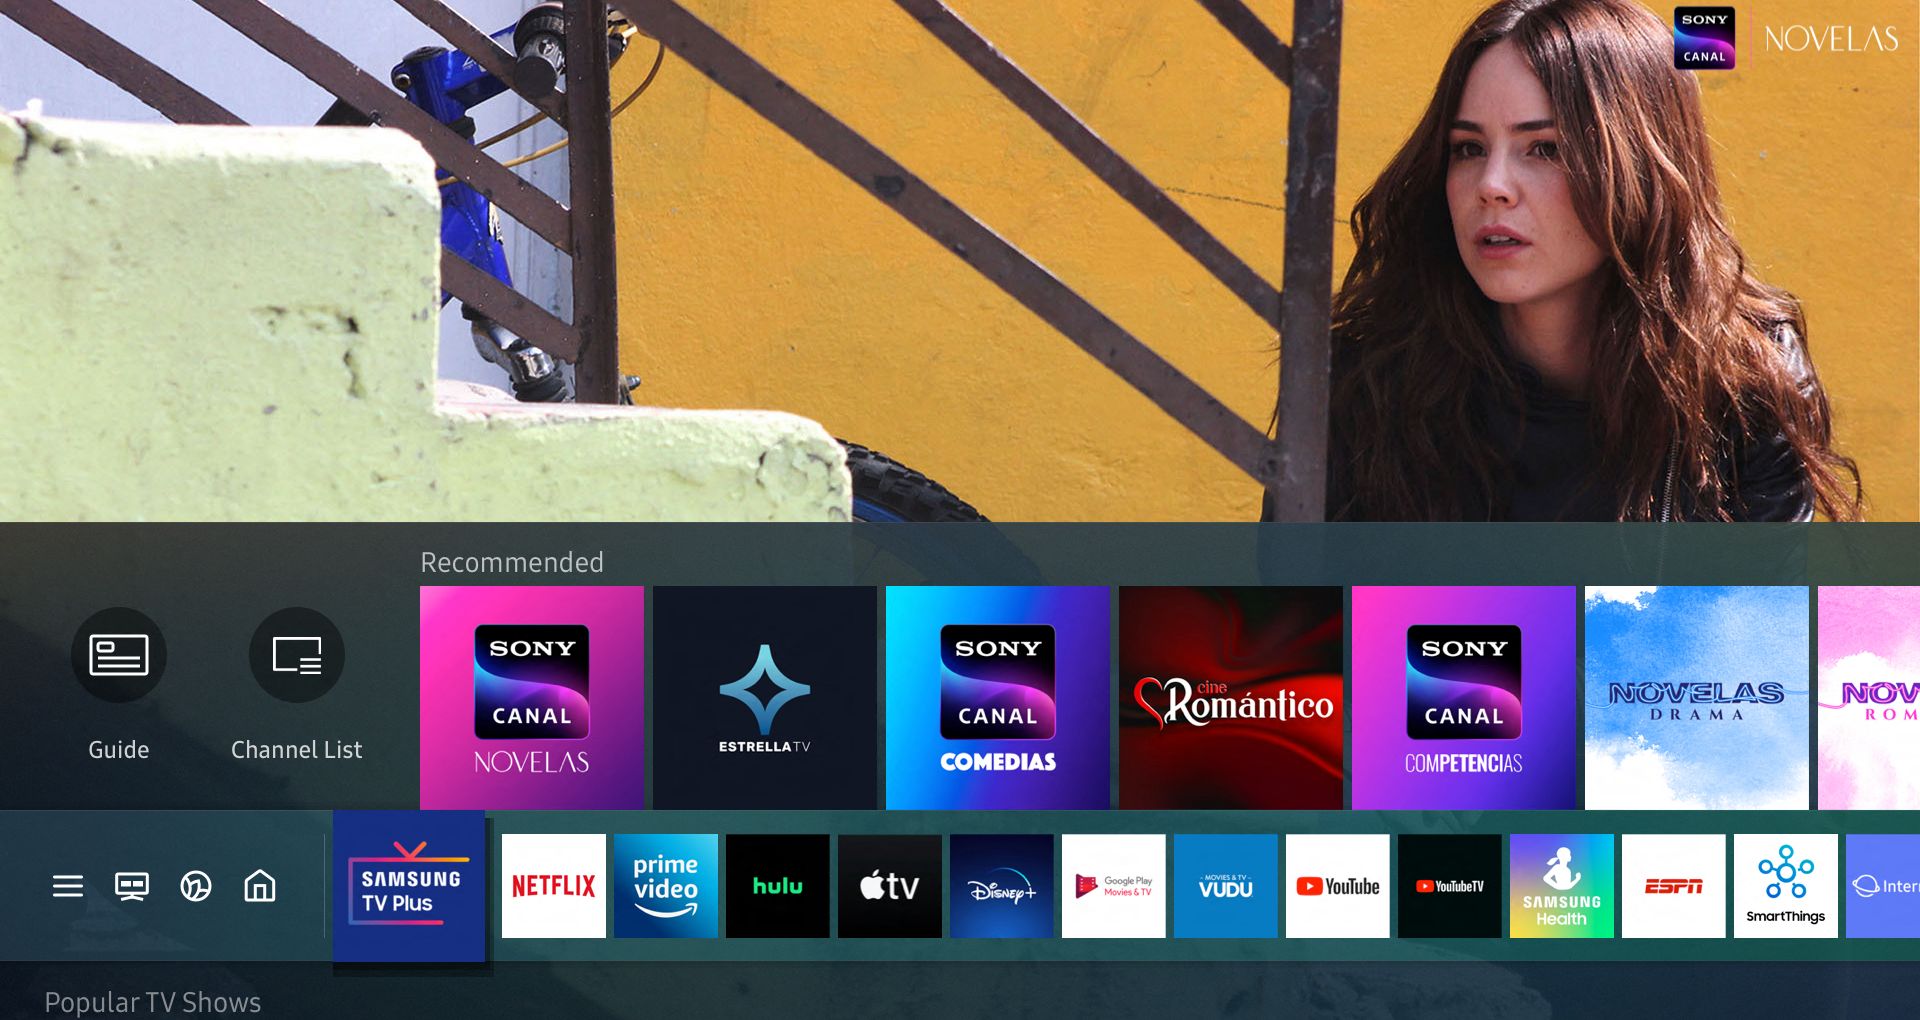
- Download and Launch the App: Using the Samsung Smart TV’s app store or content hub, search for and download the app of the streaming service you have subscribed to. Once downloaded, launch the app on your TV.
- Log In to Your Account: Enter your account credentials (username and password) to log in to your streaming service account within the app on your Samsung Smart TV.
- Select a Local Channel: Navigate through the available options and select a local channel you want to watch. Use the provided menu or remote control options to browse the channel guide and find programming that interests you.
- Explore Additional Features: Streaming services often offer additional features such as on-demand content, cloud DVR, and personalized recommendations. Take some time to explore these features and customize your viewing experience.
By following these steps, you can easily stream local channels on your Samsung Smart TV using a compatible streaming service. Keep in mind that streaming services require a reliable internet connection and may involve a monthly subscription fee.
With the ability to stream local channels, you can enjoy live TV, local news, sports events, and other local programming right on your Samsung Smart TV, giving you the flexibility to watch what you want, when you want.
Conclusion
Getting local channels on your Samsung Smart TV opens up a world of entertainment, including news updates, sports events, and locally produced shows. We explored three options to access local channels: using an antenna, subscribing to a cable or satellite provider, or streaming services.
Using an antenna provides a cost-effective way to receive over-the-air broadcasts. By following the steps to check signal strength, connect the antenna, and scan for available channels, you can enjoy local programming without monthly bills.
Subscribing to a cable or satellite provider offers a wide range of channels, including local ones, through a set-top box or digital receiver. The steps to set up the provider, connect the box, and scan for channels ensure access to premium content, on-demand features, and DVR capabilities.
Streaming services provide a versatile option with access to local channels through an internet connection. Sign up for a compatible service, download the app, and stream local channels with the flexibility to personalize your viewing experience.
By following these steps, you can easily access local channels on your Samsung Smart TV, enhancing your entertainment options. Determine the best option for your needs, considering signal strength, available providers, and desired features.
Whether you choose to use an antenna, subscribe to a cable or satellite provider, or opt for a streaming service, the availability of local channels ensures you stay connected with your local community and enjoy the content that matters most to you.
Explore the options, set up your Samsung Smart TV, and start enjoying the diverse array of local channels that await you. Happy viewing!