Introduction
Welcome to the guide on how to format your Seagate external hard drive to FAT32. This article will provide you with step-by-step instructions on formatting your drive for compatibility with various operating systems. Whether you want to use your Seagate external hard drive on a Windows or Mac computer, FAT32 is a widely compatible file system that allows seamless data transfer between different platforms.
Before we dive into the formatting process, let’s understand what FAT32 is and why it’s essential for cross-platform compatibility.
FAT32, short for File Allocation Table 32, is a file system that has been around for decades. It is widely supported by multiple operating systems, including Windows, Mac, and Linux. One of its major advantages is its compatibility with both Windows and Mac systems, making it an ideal choice for users who work on different platforms or want to share data across various devices.
However, it’s important to note that FAT32 does have some limitations. The maximum individual file size supported by FAT32 is 4GB, which can be a constraint if you frequently work with large multimedia files. Additionally, FAT32 does not support file permissions or journaling, which are important for data security and integrity.
If the limitations mentioned above do not affect your specific usage requirements, FAT32 is an excellent choice for formatting your Seagate external hard drive.
Next, we’ll discuss how to determine the compatibility of your Seagate external hard drive with FAT32 formatting before proceeding with the instructions.
Understanding FAT32
FAT32 is a commonly used file system that was introduced by Microsoft in the 1990s. It has gained popularity due to its compatibility across different operating systems, including Windows, Mac, and Linux. Understanding the key features and limitations of FAT32 is crucial before formatting your Seagate external hard drive.
Firstly, FAT32 utilizes a file allocation table (FAT) to organize and manage files on the storage device. The FAT stores information about the physical location of each file on the drive, making it easier for the operating system to retrieve and access the data.
Secondly, FAT32 offers wide compatibility. By formatting your Seagate external hard drive to FAT32, you ensure that it can be read and written on both Windows and Mac systems without the need for any additional software or drivers. This cross-platform compatibility is particularly useful when sharing files between different computers or operating systems.
Despite its advantages, there are a few limitations to consider when using FAT32. One notable limitation is the maximum file size it can support, which is 4GB. This means that if you need to store large files, such as high-definition videos or disk images, FAT32 may not be the most suitable choice. In such cases, considering alternative file systems like exFAT or NTFS is recommended.
Additionally, FAT32 does not support file permissions or journaling. File permissions allow you to control access to specific files and folders, ensuring that only authorized users can modify or access them. Journaling, on the other hand, is a feature that helps maintain the integrity of data by recording changes made to the file system.
It is important to note that formatting your Seagate external hard drive to FAT32 will erase all existing data on the drive. Therefore, it is crucial to back up any essential files before proceeding with the formatting process.
Now that we have a basic understanding of FAT32 and its compatibility, let’s move on to the next section to check the compatibility of your Seagate external hard drive before formatting.
Checking Compatibility
Before you proceed with formatting your Seagate external hard drive to FAT32, it’s important to check its compatibility with this file system. Here are a few steps to determine if your drive is compatible:
- Operating System Compatibility: FAT32 is compatible with both Windows and Mac systems. Ensure that the operating system you plan to use supports FAT32. Most modern Windows versions, including Windows 10, natively support FAT32. For Mac users, FAT32 is supported by macOS 10.6 or later.
- Drive Size: FAT32 has a maximum partition size of 32GB when formatting on Windows. If your Seagate external hard drive has a capacity larger than 32GB, you may need to use third-party software or consider other file systems such as exFAT or NTFS, which support larger partition sizes.
- File Size Limit: As mentioned earlier, FAT32 has a maximum individual file size limit of 4GB. If you frequently work with large files that exceed this limit, FAT32 may not be the best choice. Consider alternative file systems that support larger file sizes.
- Data Backup: Formatting your Seagate external hard drive will erase all the existing data on the drive. Before proceeding, ensure that you have backed up any important files to another location to avoid permanent data loss.
Once you have verified the compatibility of your Seagate external hard drive and considered the limitations of FAT32, you are ready to proceed with the formatting process. The next section will guide you through the steps for formatting your drive on Windows.
Backing Up the Data
Before you format your Seagate external hard drive to FAT32, it is vital to back up any important data stored on the drive. Formatting will erase all existing files and partitions, ensuring a clean slate for the new file system.
Here are the steps to back up your data:
- Identify Important Files: Go through the contents of your Seagate external hard drive and identify any files or folders that you consider important or irreplaceable. This could include documents, photos, videos, music, or any other files that you cannot afford to lose.
- Choose Backup Destination: Determine where you want to back up your data. This could be an external storage device, such as another external hard drive or a USB flash drive, or it could be cloud storage services like Dropbox, Google Drive, or OneDrive. Select a backup destination that provides enough storage space for your data.
- Copy the Files: Copy the identified files and folders from your Seagate external hard drive to the chosen backup destination. You can do this by simply dragging and dropping the files or by using file backup software that offers more advanced features like automated backups or incremental backups.
- Verify the Backup: After copying the files, double-check that they are successfully transferred and accessible in the backup location. It’s always a good idea to test a few files to ensure they are intact and can be opened without any issues.
By following these steps, you can protect your data from any potential loss during the formatting process. Once you have completed the backup, you can proceed with formatting your Seagate external hard drive to FAT32, as explained in the upcoming sections.
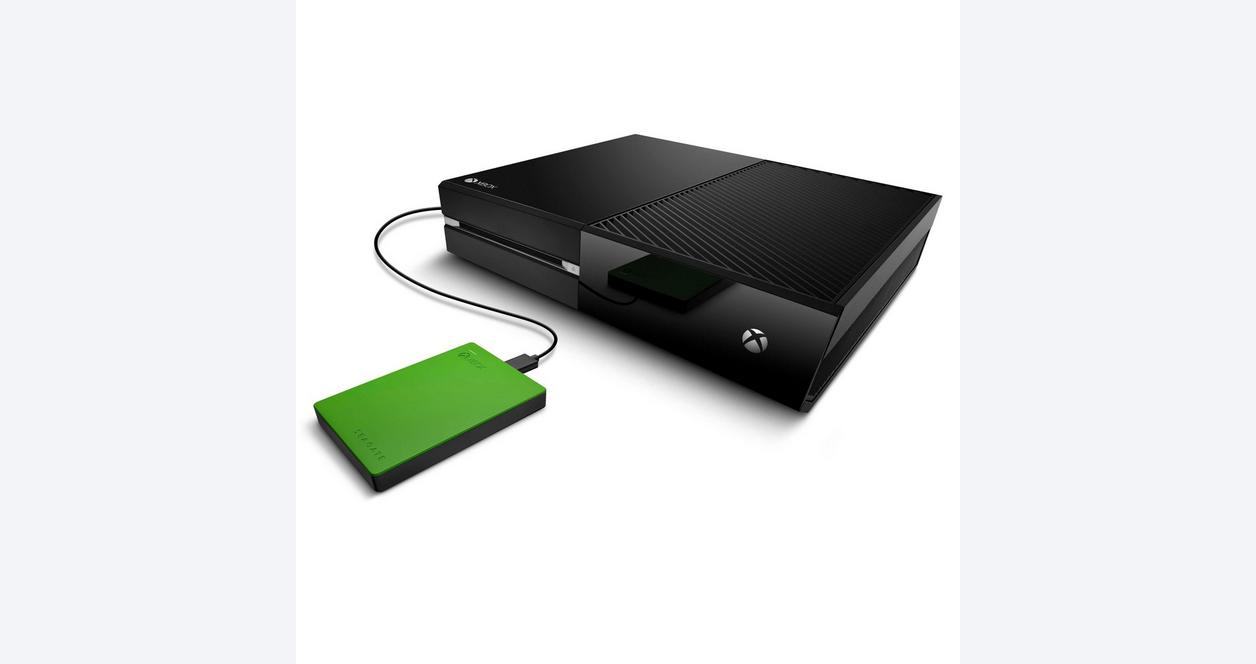
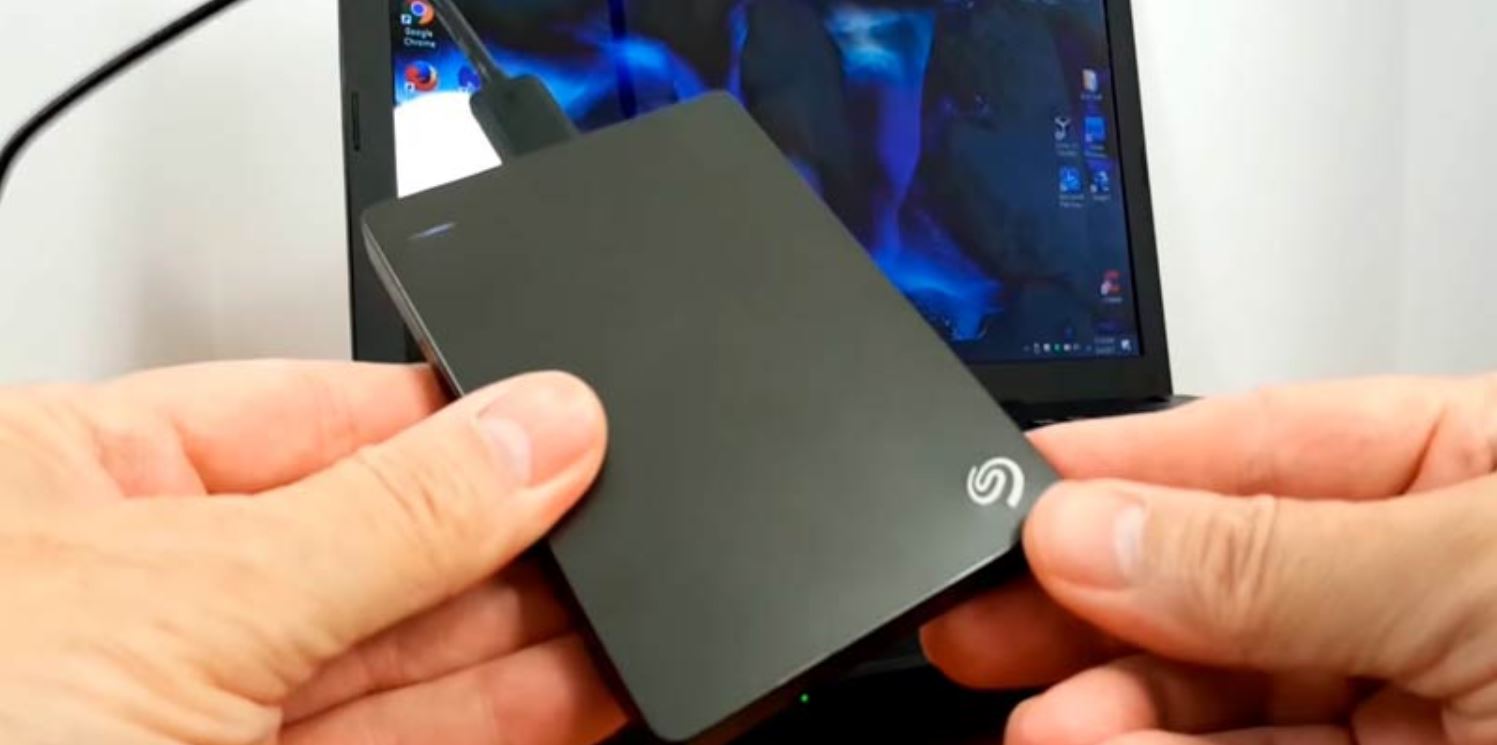
Connecting the Seagate External Hard Drive
Before you start formatting your Seagate external hard drive to FAT32, you need to ensure that the drive is properly connected to your computer. Follow these steps to connect your Seagate external hard drive:
- Check the Connection Type: Determine the type of connection your Seagate external hard drive supports. It can be either USB-A, USB-C, Thunderbolt, or another interface. Make sure your computer has a compatible port before proceeding.
- Plug in the Power Adapter: If your Seagate external hard drive requires a power supply, connect the provided power adapter to an electrical outlet and plug it into the drive. Some models may draw power directly from the USB port, eliminating the need for a separate power adapter.
- Connect the Drive to the Computer: Take the USB cable, which is usually provided with the Seagate external hard drive, and plug one end into the appropriate port on the drive. Then, connect the other end of the cable to an available USB port on your computer.
- Wait for Recognition: Once the drive is connected, wait for your operating system to recognize it. Depending on your computer’s settings, you may see a notification or an icon representing the external hard drive in your file explorer or desktop. This indicates that the drive has been successfully connected.
- Verify Drive Availability: Open your file explorer or disk utility program and verify that your Seagate external hard drive is listed among the connected storage devices. Ensure that the drive is visible and recognized by your operating system before proceeding further.
Once you have confirmed that your Seagate external hard drive is properly connected and recognized by your computer, you can proceed to the next section, which will guide you through the process of formatting the drive on Windows.
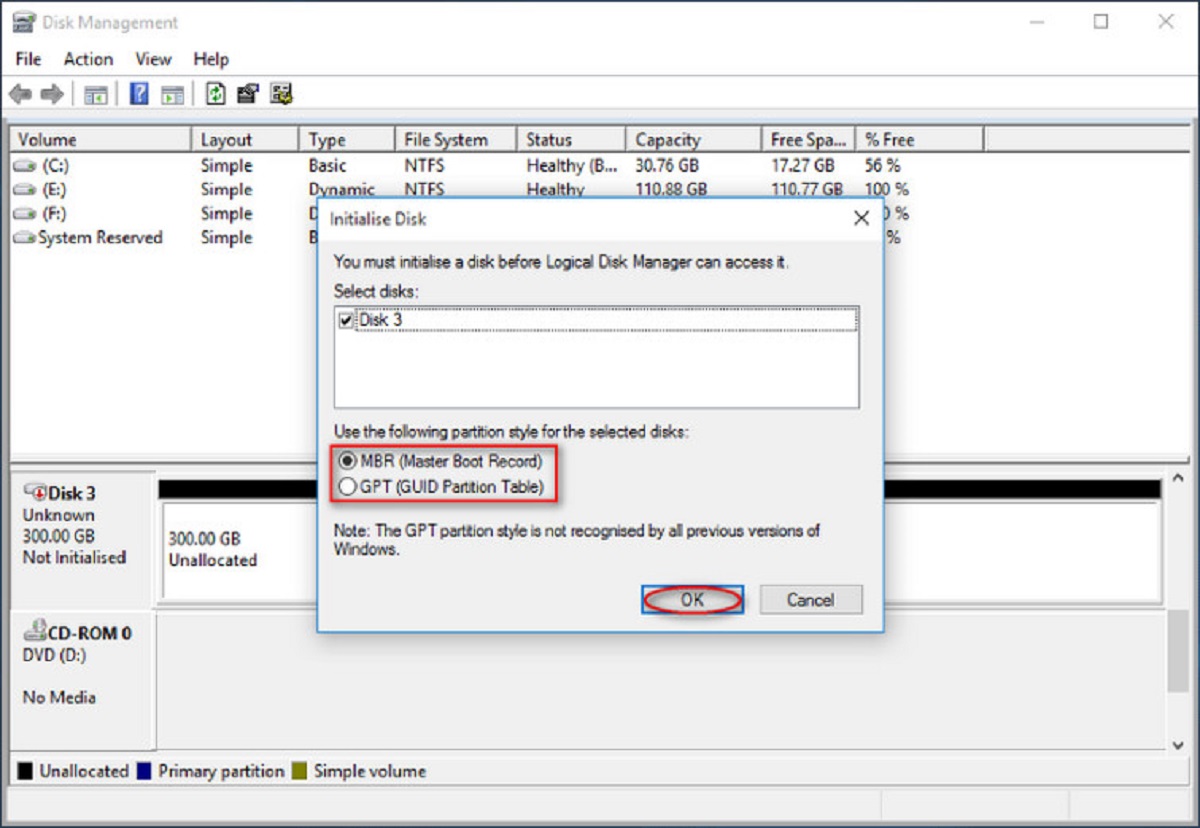
Formatting the Drive on Windows
To format your Seagate external hard drive to FAT32 on Windows, follow these step-by-step instructions:
- Open File Explorer: Go to the Start menu and click on “File Explorer” to open the file management application on your Windows computer.
- Locate the Drive: In the left sidebar of File Explorer, you should see a list of available drives and storage devices. Locate your Seagate external hard drive in the list and take note of its drive letter (e.g., E:, F:, etc.).
- Right-Click on the Drive: Once you have identified your Seagate external hard drive, right-click on its drive letter and select “Format” from the contextual menu. This action will open the Format dialog box.
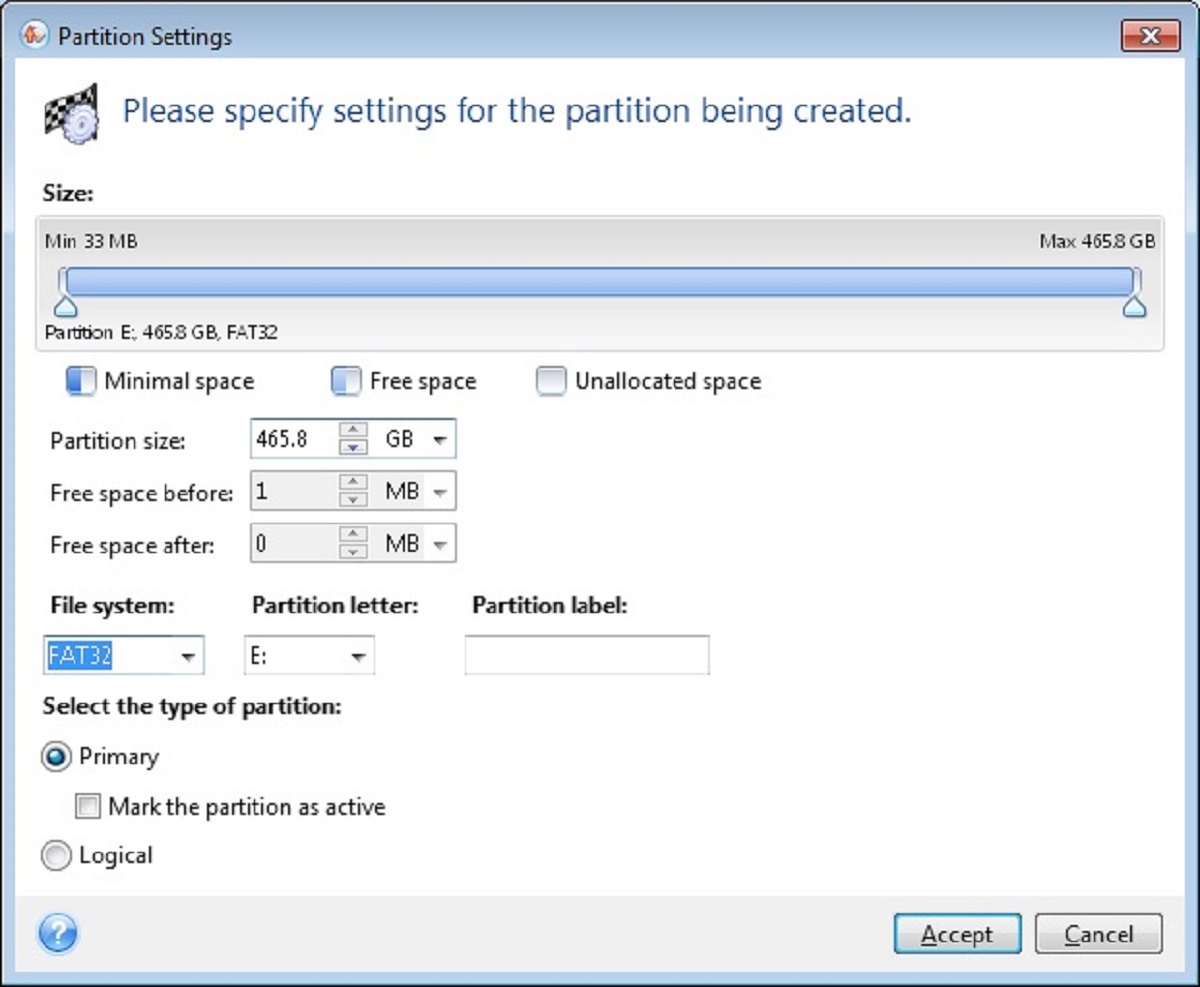
- Select FAT32 File System: In the Format dialog box, you will see a “File System” dropdown menu. Click on it and select “FAT32” from the list of available file systems.
- Choose Quick Format (Optional): If you want to perform a quick format, check the box next to “Quick Format.” This option will speed up the formatting process by skipping the scanning and checking of each sector on the drive. However, please note that a quick format does not thoroughly erase the data, so if you have sensitive files, consider performing a full format instead.
- Assign a Volume Label: You have the option to assign a name or label to your Seagate external hard drive. Enter a preferred name in the “Volume Label” field if you wish.
- Start the Formatting Process: Once you have reviewed your settings, click on the “Start” button to begin the formatting process. You will see a warning message stating that all data on the drive will be erased. Ensure that you have backed up any important files before proceeding.
- Wait for Formatting to Complete: The formatting process may take some time, depending on the size of your Seagate external hard drive. Be patient and do not interrupt the process. Once the formatting is complete, you will see a notification indicating that the process was successful.
That’s it! You have successfully formatted your Seagate external hard drive to FAT32 on Windows. Your drive is now ready to be used on both Windows and Mac systems. If you want to use the drive on a Mac, skip to the next section for instructions on formatting it on macOS.
Formatting the Drive on Mac
If you want to format your Seagate external hard drive to FAT32 on a Mac, follow these step-by-step instructions:
- Open Disk Utility: Launch “Disk Utility” by navigating to the “Applications” folder, then selecting “Utilities,” and finally clicking on “Disk Utility.”
- Locate the Drive: In the left sidebar of Disk Utility, you will see a list of connected drives and volumes. Find your Seagate external hard drive in the list and select it.
- Erase the Drive: Click on the “Erase” button at the top of the Disk Utility window. This action will open the Erase dialog box.
- Choose FAT32 as the Format: In the Erase dialog box, you will see a dropdown menu next to “Format.” Click on it and choose “MS-DOS (FAT)” or “ExFAT” if it is available. These file systems are compatible with both Windows and Mac systems.
- Assign a Name: Optionally, you can assign a name to your Seagate external hard drive by entering it in the “Name” field.
- Choose GUID Partition Map as the Scheme: In the Scheme dropdown menu, select “GUID Partition Map.” This option is necessary for making the drive compatible with both Intel-based Macs and Windows systems.
- Click on the Erase Button: Once you have reviewed your settings, click on the “Erase” button to start the formatting process. You’ll see a warning message informing you that all data on the drive will be erased. Make sure you have backed up any essential files before proceeding.
- Wait for Formatting to Complete: The formatting process might take some time depending on the size of your Seagate external hard drive. Be patient and allow the process to finish uninterrupted. Once it’s done, you will receive a notification confirming the successful formatting.
Once the formatting process is complete, your Seagate external hard drive will be formatted to FAT32 or ExFAT, ready for use on both Mac and Windows systems. Remember to safely eject the drive before disconnecting it from your Mac.
If you encounter any errors or issues during the formatting process, continue reading the next section for troubleshooting tips.
Error Troubleshooting
In rare cases, you may encounter errors or issues when formatting your Seagate external hard drive. Here are some common problems and their potential solutions:
Error: “Windows was unable to complete the format.”
If you receive this error message on Windows, it could indicate a problem with the drive itself. Try the following solutions:
- Check the drive for any physical damage or connectivity issues. Ensure that the USB cable is securely connected and try using a different USB port.
- Run a disk error checking utility on your Seagate external hard drive to fix any potential file system errors. To do this, right-click on the drive in File Explorer, select “Properties,” go to the “Tools” tab, and click on “Check” under the “Error-checking” section.
- Update the drivers for your external hard drive. Visit the Seagate website or the manufacturer’s website to download and install the latest drivers for your drive.
- If none of the above solutions work, it is possible that the drive may be faulty. Consider seeking technical assistance from Seagate customer support or a professional data recovery service.
Error: “Disk Erase failed with the error: Couldn’t unmount disk.”
If you encounter this error message on macOS when trying to format your Seagate external hard drive, try the following solutions:
- Make sure that no files or applications on the drive are currently in use. Close any open files or applications associated with the drive and try unmounting it again.
- Restart your Mac and try formatting the drive again. Sometimes, a simple restart can resolve temporary issues.
- If the above solutions don’t work, you can try using the Terminal application to force unmount the drive before formatting. Open Terminal and type in the command “diskutil unmountDisk force /dev/diskX”, replacing “diskX” with the appropriate disk identifier of your Seagate external hard drive. Once unmounted, proceed with the formatting process in Disk Utility.
- If all else fails, it is recommended to seek professional assistance from a Mac technician or the Seagate customer support for further troubleshooting and guidance.
If you encounter any other errors or issues that are not covered here, it is advisable to consult the documentation provided by Seagate, visit their support website, or contact their customer support team for specific troubleshooting steps tailored to your situation.
By following these troubleshooting tips, hopefully, you’ll be able to resolve any errors and successfully format your Seagate external hard drive.
Final Thoughts
Formatting your Seagate external hard drive to FAT32 can greatly enhance its compatibility with various operating systems, allowing for seamless data transfer and sharing between Windows and Mac computers. Throughout this guide, we have covered the key steps and considerations to keep in mind when formatting your drive.
It’s important to understand the limitations of FAT32, such as the maximum file size and lack of file permissions or journaling. If these limitations align with your usage requirements, FAT32 can be an excellent choice for your Seagate external hard drive.
Prior to formatting, don’t forget to back up any important data stored on your drive to avoid permanent loss. Once the backup is complete, you can proceed with the formatting process provided in the respective sections for Windows and Mac operating systems.
In the event that you encounter any errors or issues during the formatting process, refer to the troubleshooting section for potential solutions. If the problems persist, it is recommended to seek assistance from Seagate customer support or professional technicians.
Formatting your Seagate external hard drive can open up a world of compatibility and convenience, making it easier to share and access your data across various devices. Remember to handle your drive with care, safely eject it after use, and keep it protected from physical damage or extreme conditions.
We hope this guide has been helpful in assisting you with formatting your Seagate external hard drive to FAT32. Enjoy seamless data sharing and storage across Windows and Mac systems!