Introduction
An external portable SSD (Solid State Drive) drive can be an incredibly useful device for storing and transferring large amounts of data. Whether you use it for work, personal files, or gaming, there may come a time when you need to erase the drive to ensure the information it contains is completely removed.
But why erase an external portable SSD drive? There are several reasons why you might want to do this. Perhaps you’re planning to sell or give away the drive and want to ensure that none of your personal or confidential data can be accessed. Or maybe you’re experiencing performance issues with the drive and want to start fresh by removing all the existing data. Whatever the reason, it’s essential to know the different methods available for erasing an external portable SSD drive and choose the right one for your needs.
In this article, we will explore various methods for erasing an external portable SSD drive, ranging from software solutions to physical destruction. We will walk you through each method, discussing the advantages and disadvantages of each one, so that you can make an informed decision on which approach to choose. By the end of this article, you will have a clear understanding of how to effectively erase your external portable SSD drive and protect your data.
Why Erase an External Portable SSD Drive?
There are several reasons why you might consider erasing an external portable SSD drive. Let’s explore some of the most common scenarios where erasure becomes necessary.
Firstly, if you are planning to sell or donate your SSD drive, it’s crucial to erase all the data to protect your privacy and prevent unauthorized access to your personal information. Simply formatting the drive or deleting files is not enough, as the data can still be recovered using specialized software. By properly erasing the drive, you ensure that all your sensitive data is permanently deleted and cannot be retrieved.
Secondly, if you’re experiencing performance issues with your SSD drive, erasing it can help resolve these problems. Over time, the drive may become fragmented or accumulate unnecessary files, which can slow down its performance. By erasing the drive and starting fresh, you can eliminate any potential issues that might be affecting its operation and restore it to its full speed and efficiency.
Additionally, if you’re transitioning to a new device or getting rid of old hardware, you may want to erase the external portable SSD drive to remove any remnants of your data. This is especially important if you’ve used the drive for sensitive work files or confidential information. By securely erasing the drive, you ensure that any traces of your data are completely wiped clean, preventing any potential data breaches or leaks.
Furthermore, if you’re planning to repurpose the SSD drive for a different use, it’s essential to erase it first. By doing so, you eliminate any existing data that may still be present on the drive, allowing you to start with a clean slate. This is particularly important if you’re using the drive for a different purpose, such as switching from personal files to professional work data or vice versa.
Overall, whether it’s to protect your privacy, improve performance, ensure data security, or repurpose the drive, there are several compelling reasons why you might need to erase an external portable SSD drive. The next section explores the different methods you can use to effectively erase the drive and achieve your desired outcome.
Choosing the Right Erasure Method
When it comes to erasing an external portable SSD drive, there are several methods available, each with its own advantages and considerations. Let’s take a look at the different erasure methods and the factors you should consider when choosing the right one for your needs.
1. Secure Erase: Secure Erase is a built-in feature in many SSDs that allows you to erase all the data on the drive quickly and securely. It ensures that the data cannot be recovered using conventional means. However, not all SSDs support this feature, so you’ll need to check if your drive is compatible. Secure Erase is a convenient option if your drive supports it, as it provides a fast and reliable way to erase the data entirely.
2. Formatting the Drive: Formatting the external portable SSD drive is a simple and commonly used method for erasing data. However, it’s important to note that standard formatting methods may not completely erase the data and could be potentially recoverable. If you choose this method, it’s recommended to use a secure formatting option, such as a full format or a secure erase format, if available.
3. Using Data Erasure Software: Data erasure software offers advanced techniques to ensure the complete and secure erasure of the external portable SSD drive. These software tools are specifically designed to overwrite the data multiple times, making it virtually impossible to recover. They often provide different erasure algorithms to choose from, allowing you to customize the level of security and speed. However, keep in mind that some software tools may not be compatible with all SSD drives, so check the compatibility before proceeding.
4. Physically Destroying the Drive: If you require the utmost security and want to ensure that no data can ever be recovered from your external portable SSD drive, physically destroying it is the most effective method. This involves physically damaging the drive, such as by drilling holes or shredding it. However, this method is irreversible and renders the drive unusable. Therefore, it should only be considered if you have no further use for the drive and absolute data destruction is of the highest priority.
When choosing the right erasure method for your external portable SSD drive, consider factors such as the level of security needed, the compatibility of the erasure method with your drive, the importance of data recovery prevention, and the future usability of the drive. By carefully evaluating these factors, you can select the most appropriate erasure method that aligns with your unique requirements and provides you with peace of mind.
Method 1: Secure Erase
Secure Erase is a powerful built-in feature found in many SSDs that allows you to erase all data on the drive quickly and securely. This method ensures that the data is permanently deleted and cannot be recovered using conventional means. If your external portable SSD drive supports Secure Erase, it is a convenient and efficient option for erasing your data.
To perform a Secure Erase, you will need to follow these steps:
- Backup your data: Before performing a Secure Erase, ensure that you have backed up all important data from your SSD drive. Once the erasure process is initiated, there is no way to recover the data.
- Check SSD compatibility: Verify that your SSD drive supports Secure Erase. You can do this by referring to the manufacturer’s documentation or by visiting their website.
- Download and use the manufacturer’s Secure Erase tool: Most SSD manufacturers provide dedicated software tools that allow you to perform a Secure Erase. Visit the manufacturer’s website and download the appropriate tool for your SSD model.
- Connect your SSD drive to your computer: Ensure that your external portable SSD drive is properly connected to your computer either through a USB port or other compatible interface.
- Run the Secure Erase tool: Open the Secure Erase tool and select your SSD drive from the list of available devices. Follow the prompts to initiate the Secure Erase process.
- Confirm the erasure: Once the Secure Erase process is completed, the tool will provide a confirmation message. Double-check that you have selected the correct drive before proceeding.
It’s important to note that the Secure Erase process can vary slightly depending on the manufacturer and model of your SSD drive. Therefore, it’s essential to refer to the specific instructions provided by the manufacturer to ensure that you are performing the Secure Erase correctly.
Secure Erase is a reliable and efficient method for erasing data from your external portable SSD drive. By using this built-in feature, you can rest assured that your data is securely erased and cannot be recovered, ensuring the privacy and protection of your sensitive information.
Method 2: Formatting the Drive
Formatting the external portable SSD drive is a common method for erasing data. It involves removing all existing files and partitions on the drive, essentially resetting it to its factory default state. While formatting the drive may seem like a straightforward option, it’s important to note that standard formatting methods may not completely erase the data and could potentially be recovered. Therefore, it’s recommended to use a secure formatting option to ensure that the data is securely erased.
To format your external portable SSD drive securely, follow these steps:
- Backup your data: Before formatting the drive, make sure to backup any important data stored on the SSD drive. Formatting will erase all data, and it will be impossible to recover it afterwards.
- Connect your SSD drive to your computer: Ensure that the external portable SSD drive is properly connected to your computer, either through a USB port or other compatible interface.
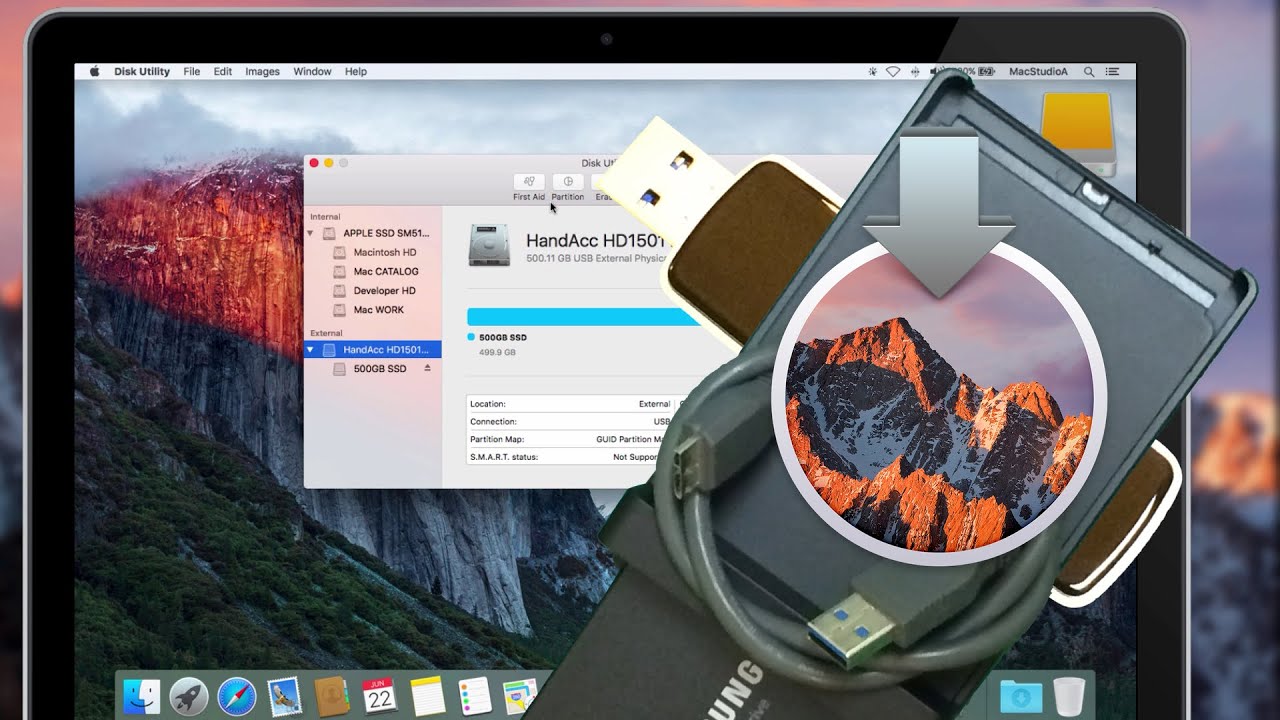
- Open the Disk Management tool: In Windows, you can access the Disk Management tool by right-clicking on the Start button and selecting “Disk Management” from the context menu. On macOS, you can use the Disk Utility application, which can be found in the Utilities folder within the Applications folder.
- Select and format the SSD drive: In the Disk Management tool or Disk Utility, locate your external portable SSD drive from the list of available drives. Right-click on the drive (in Windows) or click on the “Erase” button (in macOS) to format the drive. Choose a secure formatting option, such as a full format or a secure erase format, if available.
- Confirm the formatting: Before proceeding, double-check that you have selected the correct drive to format. Once you proceed, all data on the selected drive will be permanently erased.
- Complete the formatting process: Follow the prompts to complete the formatting process. Once completed, you will have a freshly formatted external portable SSD drive.
Remember to exercise caution when formatting your external portable SSD drive, as it will permanently erase all data stored on the drive. It is always recommended to double-check that you have backed up any essential data before proceeding with the formatting process.
While formatting the drive provides a convenient way to erase data, it’s important to be aware that standard formatting methods may not completely remove the data from the drive. If you require a more secure and reliable erasure method, consider exploring other options, such as using data erasure software or performing a secure erase (if supported by your SSD drive).
Method 3: Using Data Erasure Software
Using data erasure software is a highly effective method for securely and permanently erasing data from your external portable SSD drive. These software tools are specifically designed to overwrite the data on the drive multiple times, making it virtually impossible to recover. They offer advanced techniques that ensure the complete erasure of your data, giving you peace of mind that your information is securely removed.
Follow these steps to use data erasure software to erase your external portable SSD drive:
- Research and choose a reliable data erasure software: There are several data erasure software programs available on the market. Take the time to research and choose a reputable software tool that suits your needs. Look for features such as multiple erasure algorithms, compatibility with your SSD drive, and user-friendly interface.
- Download and install the selected data erasure software: Visit the software developer’s website and download the appropriate version of the data erasure software for your operating system. Follow the installation instructions to install the software on your computer.
- Launch the data erasure software: Open the data erasure software on your computer. Ensure that your external portable SSD drive is connected to your computer through the appropriate interface (e.g., USB).
- Select the SSD drive for erasure: From the list of available drives within the data erasure software, select your external portable SSD drive as the target for erasure.
- Choose the erasure method and settings: Depending on the software tool you’re using, you’ll have several erasure methods and settings to choose from. Common options include single-pass, multi-pass, and random data overwriting. Select the desired erasure method and adjust the settings according to your preferences.
- Start the erasure process: Once you’ve chosen the erasure method and settings, start the erasure process. The software will begin overwriting the data on your external portable SSD drive using the selected algorithm. The duration of the erasure process depends on the size of your drive and the chosen erasure method.
- Verify the completion: After the erasure process is complete, the software may offer a verification option to ensure that the data has been successfully erased. It’s always recommended to verify the completion of the erasure process.
Using data erasure software provides a high level of security and confidence that your external portable SSD drive’s data is permanently and irreversibly erased. These software tools are specifically designed to make data recovery impossible and are an excellent choice for safeguarding your sensitive information.
Always ensure that you select a reputable and trusted data erasure software tool and follow the instructions provided by the software developer to ensure a successful erasure process.
Method 4: Physically Destroying the Drive
If you require the highest level of security and want to ensure that no data can ever be recovered from your external portable SSD drive, physically destroying the drive is the most extreme and foolproof method. By rendering the drive completely unusable, you can guarantee that no data remnants remain on the device.
Here are some methods for physically destroying your external portable SSD drive:
- Drilling Holes: Use a power drill to create multiple holes in the SSD drive. Aim to puncture through the memory chips and other critical components, making sure the drive is effectively destroyed.
- Shredding: If available, use an industrial shredder capable of shredding electronic devices. These machines can thoroughly destroy the drive into small pieces, making data recovery impossible.
- Hammering and Crushing: Use a hammer or other heavy object to physically smash and crush the SSD drive. Apply sufficient force to damage the internal components to a point where they are irreparable.
- Burning: Extreme caution should be exercised if considering this method. Burning the SSD drive can be effective in destroying it, but it can also result in toxic fumes and damage to the surrounding environment. Ensure you follow proper safety precautions and adhere to local regulations.
It’s important to note that physically destroying the drive is irreversible, and the drive will no longer be functional or usable. Therefore, this method should only be considered if you have no further use for the drive and data destruction is your top priority.
Lastly, it’s important to dispose of the destroyed drive responsibly. Consider recycling options for electronic waste or consult with local authorities regarding proper disposal methods.
Physically destroying the external portable SSD drive provides the highest level of security, ensuring that no data remnants can be recovered from the device. However, due to the irreversible nature of this method, it should be reserved for cases where absolute data destruction is necessary.
Additional Tips for Erasing an External SSD Drive
When it comes to erasing an external SSD drive, there are a few additional tips that can help ensure a smooth and effective process. Consider the following tips to enhance your data erasure experience:
- Verify compatibility: Before proceeding with any erasure method, verify that the method you choose is compatible with your specific model of external SSD drive. Not all methods may be suitable or supported by every drive.
- Perform a factory reset: If your external SSD drive has built-in features for a factory reset, consider utilizing this functionality before proceeding with any other erasure methods. A factory reset can often provide a quick and convenient way to restore the drive to its original state.
- Know the risks: Be aware that the data erasure process, especially using software or the Secure Erase method, can be irreversible. Make sure to back up any important data before proceeding, as once the process is completed, the data cannot be recovered.
- Triple-check your drive selection: Before initiating any erasure process, double-check that you have selected the correct external SSD drive. Mistakenly erasing the wrong drive can result in permanent data loss.
- Document the erasure process: Consider taking screenshots or capturing images during the erasure process. This documentation can serve as evidence that you have taken appropriate steps to securely erase the drive and protect your data.
- Keep your operating system and drivers up to date: Ensure that your computer’s operating system and SSD drive drivers are updated to the latest versions. This can help improve compatibility and performance during the erasure process.
- Securely dispose of the drive: If you decide to physically destroy the external SSD drive or if the drive is no longer usable, ensure that you dispose of it responsibly. Look for e-waste recycling programs or consult local regulations for proper disposal methods.
By following these additional tips, you can enhance your data erasure process and minimize the risks involved. Remember that data security and privacy should always be a top priority when handling sensitive information on external SSD drives.
Conclusion
Erasing an external portable SSD drive is a crucial step to protect your data and ensure your privacy. Whether you’re planning to sell or donate the drive, experiencing performance issues, or repurposing it for a different use, choosing the right erasure method is essential.
In this article, we discussed four methods for erasing an external portable SSD drive: Secure Erase, Formatting the Drive, Using Data Erasure Software, and Physically Destroying the Drive. Each method has its own advantages and considerations, allowing you to choose the most suitable option for your needs.
If your SSD drive supports it, Secure Erase is a convenient and reliable method that ensures your data is securely erased. Formatting the drive provides a common approach, but it’s important to use secure formatting options to enhance data erasure. Using data erasure software offers advanced techniques for complete data removal, while physically destroying the drive provides the highest level of security and makes data recovery impossible.
Additionally, we provided some additional tips to enhance the data erasure process, such as verifying compatibility, performing a factory reset, and securely disposing of the drive. Remember to take necessary precautions, back up your data, and carefully follow the instructions provided by the manufacturer or software developer when performing erasure.
Ultimately, the choice of the erasure method depends on your specific requirements for data security and usability of the drive. By selecting the most appropriate method, you can have peace of mind knowing that your sensitive information is securely erased.
Remember, protecting your data is an ongoing effort. Regularly evaluate your data storage devices and implement appropriate measures to securely erase or dispose of them when necessary. By being diligent about data security, you can safeguard your personal and confidential information from falling into the wrong hands.