Why Emptying Cache on Your Android Tablet is Important
Cache is a temporary storage area where data and files are stored on your Android tablet to help improve app and system performance. While a certain amount of cache can be beneficial, over time it can accumulate unnecessary and outdated data, causing your tablet to slow down and potentially impacting its overall performance.
Here are a few reasons why emptying the cache on your Android tablet is important:
1. Improved Performance: By regularly clearing the cache, you can free up storage space and ensure that your tablet operates at its optimal speed. This can lead to faster app launches, smoother multitasking, and overall improved performance.
2. Enhanced Privacy: The cache contains data from websites you visit, apps you use, and other activities on your tablet. Clearing the cache ensures that sensitive information like login credentials and browsing history are removed, providing an added layer of privacy and security.
3. Troubleshooting App Issues: If you encounter problems with specific apps, clearing the cache can often resolve issues such as app crashes, freezes, or incorrect data display. This is because clearing the cache forces the app to start fresh and fetch updated data.
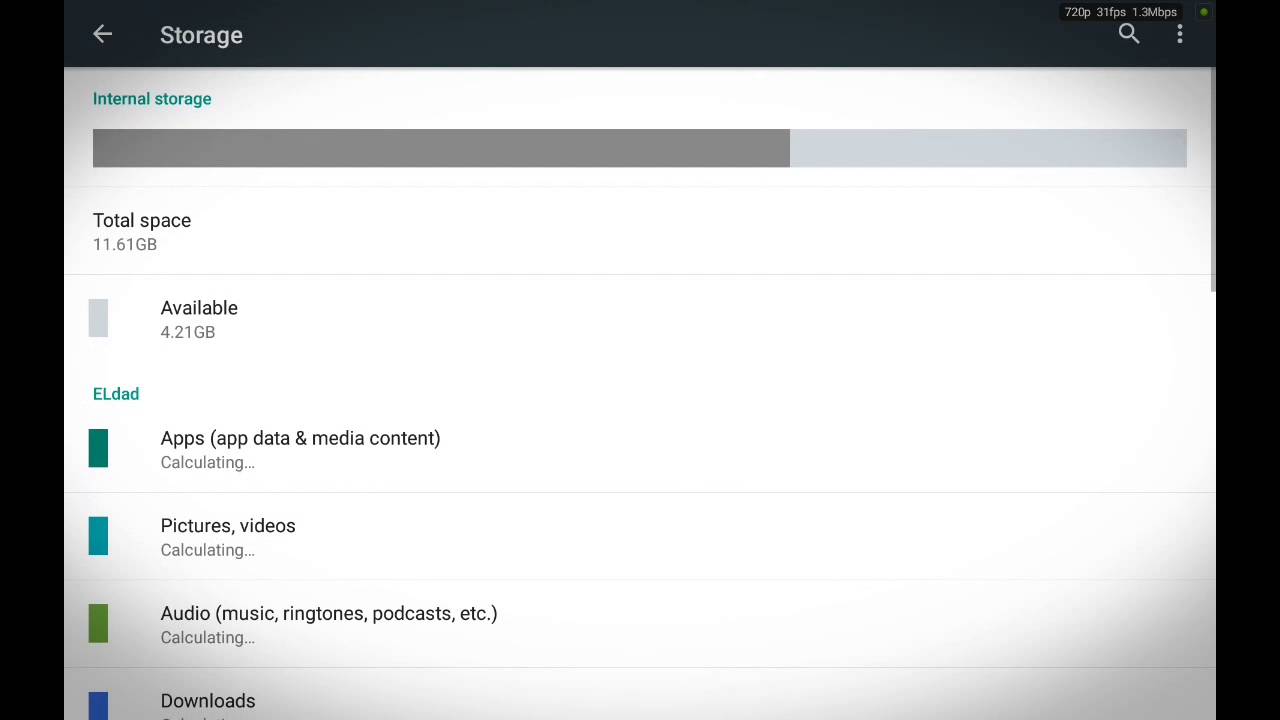
4. Efficient Storage Management: Cache files can consume a significant amount of storage space on your Android tablet. By clearing the cache regularly, you can reclaim valuable storage space and prevent your device from running out of storage capacity.
5. Updated Content: Clearing the cache ensures that you are always viewing the most up-to-date content. Websites and apps often update their data and clearing the cache ensures that you are fetching the latest information.
6. Preventing Data Corruption: In rare cases, cache files can become corrupted or cause conflicts with system files. By clearing the cache, you can minimize the risk of data corruption and improve the stability of your Android tablet.
Overall, regularly emptying the cache on your Android tablet is beneficial for improving performance, enhancing privacy, troubleshooting app issues, efficient storage management, accessing updated content, and preventing data corruption. It is a simple yet effective maintenance practice that can help keep your Android tablet running smoothly.
How to Empty Cache on Android Tablet: Step-by-Step Guide
Clearing the cache on your Android tablet is a straightforward process that can be done in a few simple steps. Here’s a step-by-step guide:
1. Clearing App Cache:
– Open the “Settings” app on your Android tablet.
– Scroll down and tap on “Apps” or “Applications”.
– Select the specific app for which you want to clear the cache.
– Tap on “Storage” or “Storage & cache”.
– Tap on “Clear cache” or “Clear storage”.
2. Clearing Browser Cache:
– Open your preferred web browser on your Android tablet.
– Tap on the menu icon (usually represented by three dots or lines) in the top-right corner of the browser.
– Tap on “Settings” or “Privacy & Security”.
– Look for an option like “Clear cache” or “Clear browsing data”.
– Select the types of data you want to clear (e.g., cache, cookies, browsing history).
– Tap on “Clear” or “Delete” to remove the selected data.
3. Clearing System Cache:
– Turn off your Android tablet.
– Press and hold the Power button and the Volume Down button simultaneously until the device powers on.
– Use the Volume buttons to navigate to the “Recovery Mode” option and press the Power button to select it.
– Once in Recovery Mode, use the Volume buttons to navigate to the “Wipe cache partition” option.
– Press the Power button to confirm the selection.
– Wait for the process to complete, then use the Volume buttons to select the “Reboot system now” option.
– Press the Power button to restart your Android tablet.
It’s important to note that the steps to clear the cache may vary slightly depending on the make and model of your Android tablet and the version of the operating system. If you’re unsure about any specific steps, refer to the manufacturer’s instructions or consult the user manual.
Remember to exercise caution when clearing the cache, as some apps may store important data in the cache that you don’t want to lose. Be sure to read any warning messages before proceeding.
By regularly following these steps to clear the cache on your Android tablet, you can ensure that your device remains optimized, performs efficiently, and provides a seamless user experience.
Clearing App Cache
Clearing the app cache on your Android tablet can help resolve various issues, improve performance, and free up valuable storage space. Follow these steps to clear the app cache:
– Open the “Settings” app on your Android tablet. You can usually find the app in the app drawer or by swiping down from the top of the screen and tapping the gear icon.
– Scroll down and tap on “Apps” or “Applications.” This will display a list of all the installed apps on your tablet.
– Select the specific app for which you want to clear the cache. You can either scroll through the list or use the search bar at the top to quickly find the app.
– Tap on “Storage” or “Storage & cache.” This will take you to the storage settings for the selected app.
– Tap on “Clear cache” or “Clear storage.” If the option is labeled as “Clear storage,” you may need to tap on it and then select “Clear cache” from the subsequent screen.
– Confirm your action by tapping on “OK” or “Clear.” Depending on the amount of data stored in the app cache, it may take a few moments to complete the process.
Clearing the app cache can significantly improve the performance of the selected app. It can solve issues like app crashes, freezing, or sluggishness. Additionally, it can also help address problems with app data not displaying correctly or being out of sync.
However, it’s important to note that clearing the app cache will remove temporary files and data associated with the app. In most cases, this won’t cause a loss of important information, as apps are designed to regenerate necessary data as needed. Still, it’s a good idea to make sure you don’t need any specific data before clearing the cache.
It’s recommended to clear the app cache regularly, especially for apps that you use frequently or those that tend to accumulate a significant amount of cache data over time. By doing this, you can ensure that the app runs smoothly and that any performance issues related to cache buildup are avoided.
Remember, the steps mentioned above may vary slightly depending on the Android tablet model and the version of the operating system you’re using. If you encounter any difficulties or can’t find the specific options mentioned, refer to the manufacturer’s instructions or consult the user manual for your device.
Clearing Browser Cache
Clearing the browser cache on your Android tablet can help improve browsing performance, resolve website loading issues, and ensure you’re always viewing the most up-to-date content. Follow these steps to clear the browser cache:
– Open your preferred web browser on your Android tablet. Common browser options include Chrome, Firefox, and Safari.
– Tap on the menu icon located in the top-right corner of the browser. This icon is typically represented by three dots or lines.
– From the dropdown menu, tap on “Settings” or “Options” to access the browser settings.
– Look for an option like “Privacy & Security” or “Advanced settings” and tap on it. This will display additional settings related to your browsing data.
– Within the privacy or security settings, you should find an option similar to “Clear cache” or “Clear browsing data.” Tap on it to proceed.
– On the next screen, you’ll generally see checkboxes or toggles to select the types of data you want to clear. This may include the cache, cookies, browsing history, and other related data. Select the appropriate options for clearing the cache.
– To ensure that you’re clearing the cache from the desired time period, you may have an option to choose the time range. Select the relevant range or choose “All time” to clear the entire cache.
– Finally, tap on “Clear” or “Delete” to initiate the cache clearing process. This may take a few moments depending on the amount of cached data to be removed.
Clearing the browser cache can resolve issues like slow loading web pages, incorrect content display, and cached redirects. It can also free up storage space and enhance your browsing experience.
Remember that clearing the cache will delete temporary files, cookies, and other locally stored browsing data associated with websites you’ve visited. However, it won’t affect your bookmarks, saved passwords, or browsing history unless those options are selected during the process.
It’s a good practice to periodically clear the browser cache to ensure optimal performance and to avoid potential conflicts with updated website data. You can also adjust the browser settings to automatically clear the cache on a regular basis.
Keep in mind that the steps outlined above could vary slightly depending on the browser you’re using and the version of the browser app installed on your Android tablet. If you encounter any difficulties, refer to the browser’s documentation or support resources for specific instructions.
Clearing System Cache
Clearing the system cache on your Android tablet can help resolve various system-related issues, improve performance, and optimize the overall functionality of your device. Follow these steps to clear the system cache:
– Turn off your Android tablet by pressing and holding the power button until the power menu appears.
– Press and hold the power button and the volume down button simultaneously. Keep holding both buttons until the device powers on and you see the Android logo on the screen.
– Use the volume buttons to navigate through the options on the screen and look for “Recovery Mode” or a similar option. Once you find it, press the power button to select it.
– Your tablet will enter Recovery Mode, displaying an Android logo with an exclamation mark.
– Now, simultaneously press and hold the power button and then press and release the volume up button. This will bring up the recovery options menu.
– Use the volume buttons to navigate to the option labeled “Wipe cache partition” or “Clear cache partition.” Once highlighted, press the power button to select it.
– A confirmation prompt will appear on the screen. Use the volume buttons to navigate to the “Yes” option and press the power button to confirm.
– The cache clearing process will begin and may take a few moments to complete. You will see progress messages on the screen.
– Once the cache is cleared, the option to “Reboot system now” will be highlighted. Press the power button once again to restart your Android tablet.
Clearing the system cache can help solve issues such as sluggish performance, random app crashes, and unresponsive system functions. It removes temporary files and cached data that may be causing conflicts or hindering the device’s performance.
It’s important to note that clearing the system cache will not delete any personal files or data stored on your tablet. It only removes temporary system files and cached data related to the operating system and apps.
Performing a system cache wipe can also be beneficial after a major software update or if you’ve been experiencing persistent issues with your device’s performance. However, it’s recommended to exercise caution and make sure you backup any important data before proceeding.
Please keep in mind that the steps to clear the system cache may vary slightly depending on the make and model of your Android tablet. If you’re unsure about any specific steps or encounter any difficulties, it’s best to refer to the manufacturer’s instructions or consult the user manual for your device.
Additional Tips for Keeping your Android Tablet Cache-Free
In addition to regularly clearing the cache on your Android tablet, there are a few other tips you can follow to help keep your device cache-free and maintain optimal performance:
1. Use App-Specific Cache Settings: Some apps allow you to customize the amount of cache they use. Check the settings of your installed apps to see if there are options to reduce cache size or disable caching altogether.
2. Restrict Background Data: Limiting data usage by background apps can help prevent unnecessary caching. Go to the “Data Usage” or “Network & Internet” settings on your tablet and restrict background data access for apps that don’t require it.
3. Regularly Update Apps and System Software: Keeping your apps and the Android operating system up to date can help fix bugs, improve performance, and ensure compatibility with the latest technologies. Updated apps often include cache optimization features and bug fixes.
4. Utilize Cloud-Based Storage: Storing files, documents, photos, and videos in the cloud can help reduce the amount of local storage used on your tablet. This can prevent excessive caching and maintain optimal performance.
5. Limit App Installations: Installing too many apps on your tablet can lead to increased cache accumulation and decreased performance. Only install apps you frequently use and regularly uninstall those that you no longer need.
6. Clear Cache Automatically: Enable automatic cache clearing for specific apps or your web browser, if available. This can be done within the settings of the respective app or browser to ensure cache clearing happens in the background without manual intervention.
7. Perform Regular Device Maintenance: Alongside clearing the cache, perform routine maintenance tasks like deleting unnecessary files, clearing browser history, and managing app permissions. This can help keep your tablet optimized and free from excessive cache buildup.
8. Restart your Tablet Regularly: Rebooting your tablet on a regular basis can help clear temporary system files and refresh the device, including the cache. This can improve overall performance and resolve minor issues.
By utilizing these additional tips, you can maintain a cache-free Android tablet that performs optimally and delivers a seamless user experience. Regular maintenance and staying mindful of the cache usage of your apps and system can go a long way in keeping your tablet running smoothly.
Conclusion
Regularly emptying the cache on your Android tablet is essential for maintaining optimal performance, improving privacy, troubleshooting app issues, managing storage efficiently, accessing updated content, and preventing data corruption. By following the step-by-step guides to clear app cache, browser cache, and system cache, you can ensure that your device runs smoothly and continues to provide a seamless user experience.
Clearing the app cache helps resolve app-specific issues, enhances performance, and frees up storage space. It is recommended to clear the cache of frequently used apps or those that accumulate a significant amount of cache over time.
Clearing the browser cache improves browsing performance, resolves website loading issues, and ensures that you are viewing the most up-to-date content. It is beneficial to periodically clear the browser cache to optimize browsing experience and prevent conflicts with updated website data.
Clearing the system cache can resolve system-related issues, improve overall performance, and optimize your tablet’s functionality. Performing a system cache wipe is particularly useful after a major software update or if you have been experiencing persistent performance issues on your device.
In addition to regularly clearing the cache, there are other tips to keep your Android tablet cache-free. Utilizing app-specific cache settings, restricting background data access, keeping apps and system software up to date, utilizing cloud-based storage, limiting app installations, enabling automatic cache clearing, performing regular device maintenance, and restarting your tablet regularly all contribute to maintaining optimal performance.
Remember, it is important to consult the manufacturer’s instructions or the user manual of your Android tablet for specific steps and information that may vary based on your device.
By incorporating cache clearing as part of your regular maintenance routine and following the additional tips mentioned, you can ensure that your Android tablet operates at its best, providing a smoother and more enjoyable user experience for the long term.


