Introduction
Do you own a Samsung tablet and find that your storage is filling up quickly? One of the main culprits behind this can be the accumulation of unnecessary files in the trash folder. Just like a computer, Samsung tablets have a trash or recycle bin where deleted files go before being permanently erased. However, simply deleting files from your tablet doesn’t immediately free up space as they still reside in the trash folder. It’s important to regularly empty the trash on your Samsung tablet to reclaim valuable storage space and keep your device running smoothly.
In this guide, we will walk you through the step-by-step process of emptying the trash on your Samsung tablet. Whether you have a newer Galaxy Tab or an older model, the process is relatively similar across different Samsung tablet models. By following these instructions, you’ll be able to effectively clear out the clutter and make room for new files and apps.
Please note that the specific steps may vary slightly depending on the model and software version of your Samsung tablet. We recommend that you always refer to your device’s user manual or Samsung’s official support website for the most accurate and up-to-date instructions.
Now that you understand the importance of emptying the trash on your Samsung tablet, let’s dive into the first step of the process: accessing the Settings menu.
Step 1: Access the Settings menu
The first step to emptying the trash on your Samsung tablet is to access the Settings menu. This is where you’ll find the necessary options to manage your device’s storage and delete unwanted files.
To begin, locate and tap on the “Settings” app on your tablet. You can usually find this app by swiping down from the top of the screen and searching for the gear icon. Alternatively, you can navigate to the app drawer, which is typically located at the bottom center of the home screen, and look for the “Settings” app icon.
Once you’ve opened the Settings app, scroll down until you find the subsection labelled “Device.” The exact naming and placement of this subsection may vary depending on your tablet model and software version. Tap on the “Device” option to proceed.
In the Device settings, you will find a list of various options related to your tablet’s functionality and performance. Scroll through this list until you come across the option called “Storage” or “Storage and USB” (depending on your tablet model and software version). Tap on this option to access the storage settings.
By following these steps, you’ve successfully accessed the Settings menu on your Samsung tablet. Now, let’s move on to the next step in the process: locating the Storage option.
Step 2: Locate the Storage option
After accessing the Settings menu on your Samsung tablet, the next step is to locate the Storage option. This is where you’ll find the specific settings and options related to your device’s storage, including the trash folder.
Within the Storage settings, you’ll typically find information about the total storage capacity of your tablet, as well as how much storage is currently being used and how much is available. This section also allows you to view a breakdown of storage usage by different categories, such as apps, photos, videos, and miscellaneous files.
To locate the Storage option, scroll through the settings menu until you find the section titled “Device care” or “Storage”. The exact naming and placement may vary depending on your tablet model and software version. Once you’ve found the appropriate section, tap on it to continue.
After selecting the Storage option, you’ll be presented with a detailed overview of your device’s storage usage. This will typically include a visual representation of storage usage, such as a color-coded bar graph. Look for the section or tab labeled “Trash” or “Recycle bin” within the storage settings.
It’s important to note that some Samsung tablet models may not have a dedicated trash or recycle bin section. In such cases, deleted files are automatically erased from the tablet’s storage and cannot be recovered. Nevertheless, following the steps outlined in this guide will help ensure that you’ve covered all bases in managing your device’s storage.
With the Storage option located and the trash or recycle bin section identified (if applicable), you’re ready to move on to the next step: clearing the trash from your Samsung tablet.
Step 3: Clear the trash
Now that you’ve accessed the Storage settings on your Samsung tablet and located the trash or recycle bin section, it’s time to clear out the unwanted files and free up valuable storage space. This step involves permanently deleting the files that are residing in the trash folder.
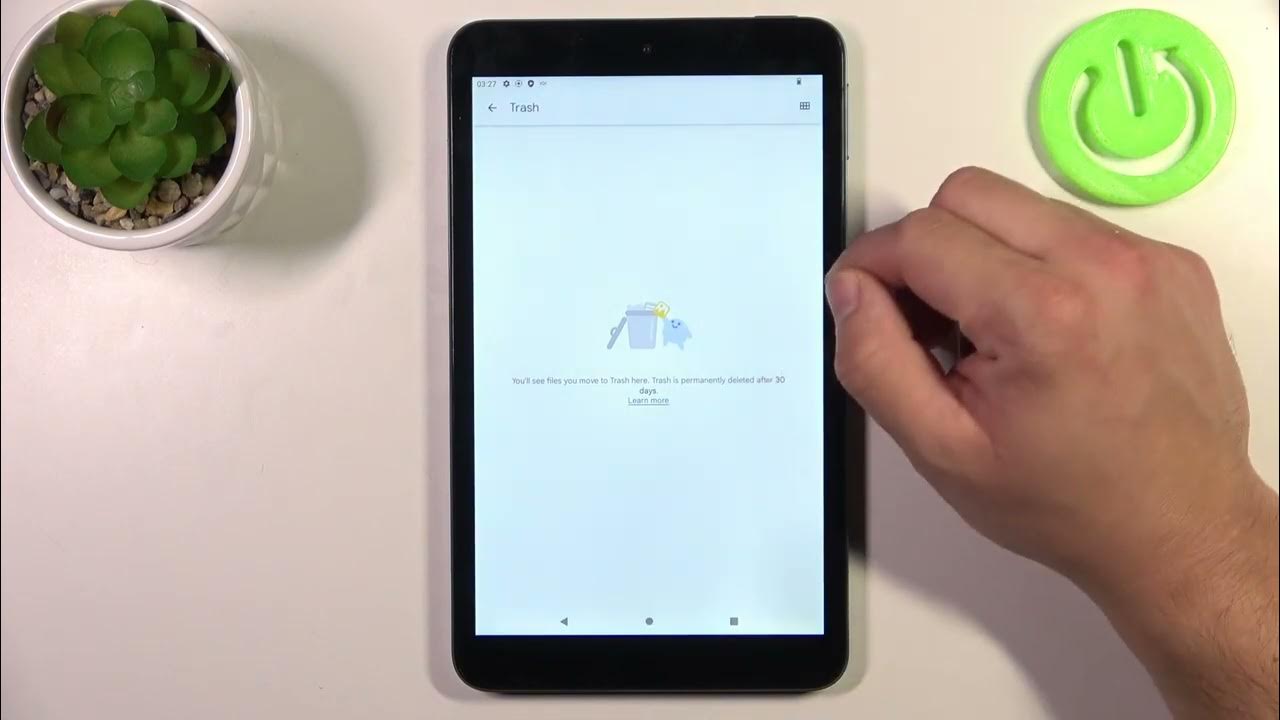
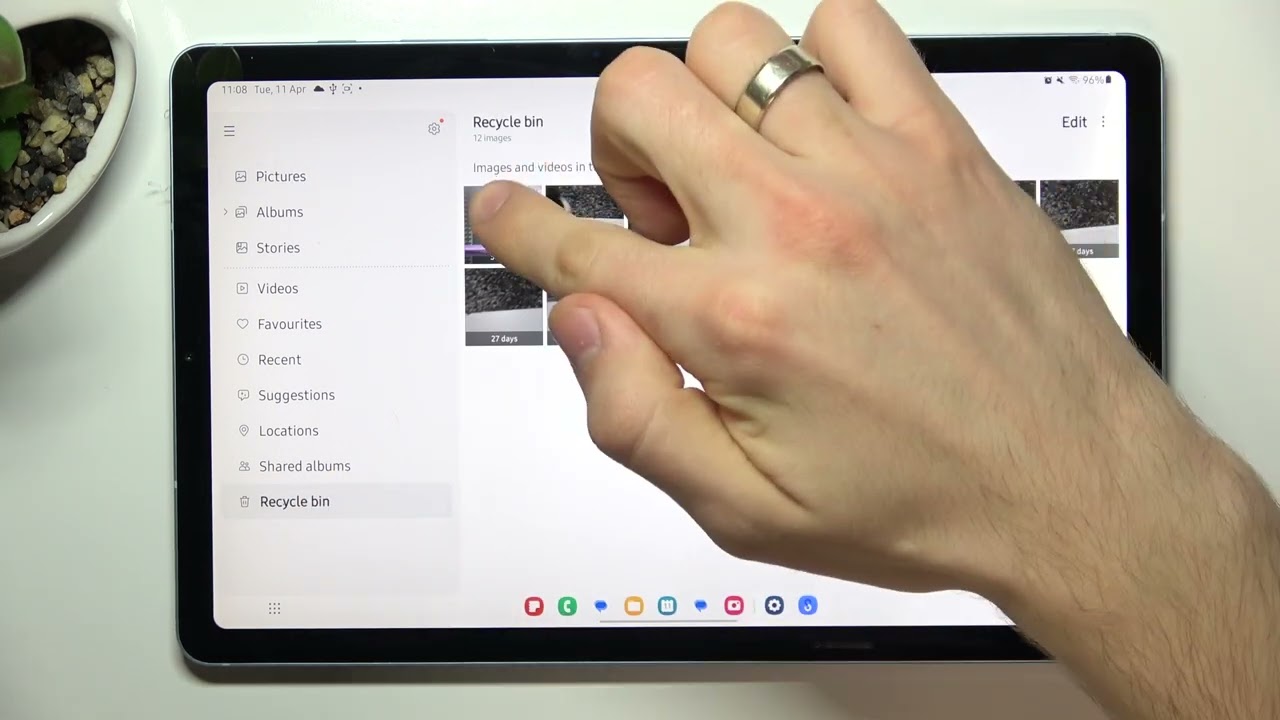
Within the trash or recycle bin section of the Storage settings, you should see a list of deleted files that are still taking up space on your tablet. These files may include deleted photos, videos, documents, and other types of data.
To clear the trash, tap on the option that allows you to view the contents of the trash folder. This could be a button labeled “View trash” or “Open recycle bin”. By selecting this option, you’ll be able to see the individual files that are currently in the trash.
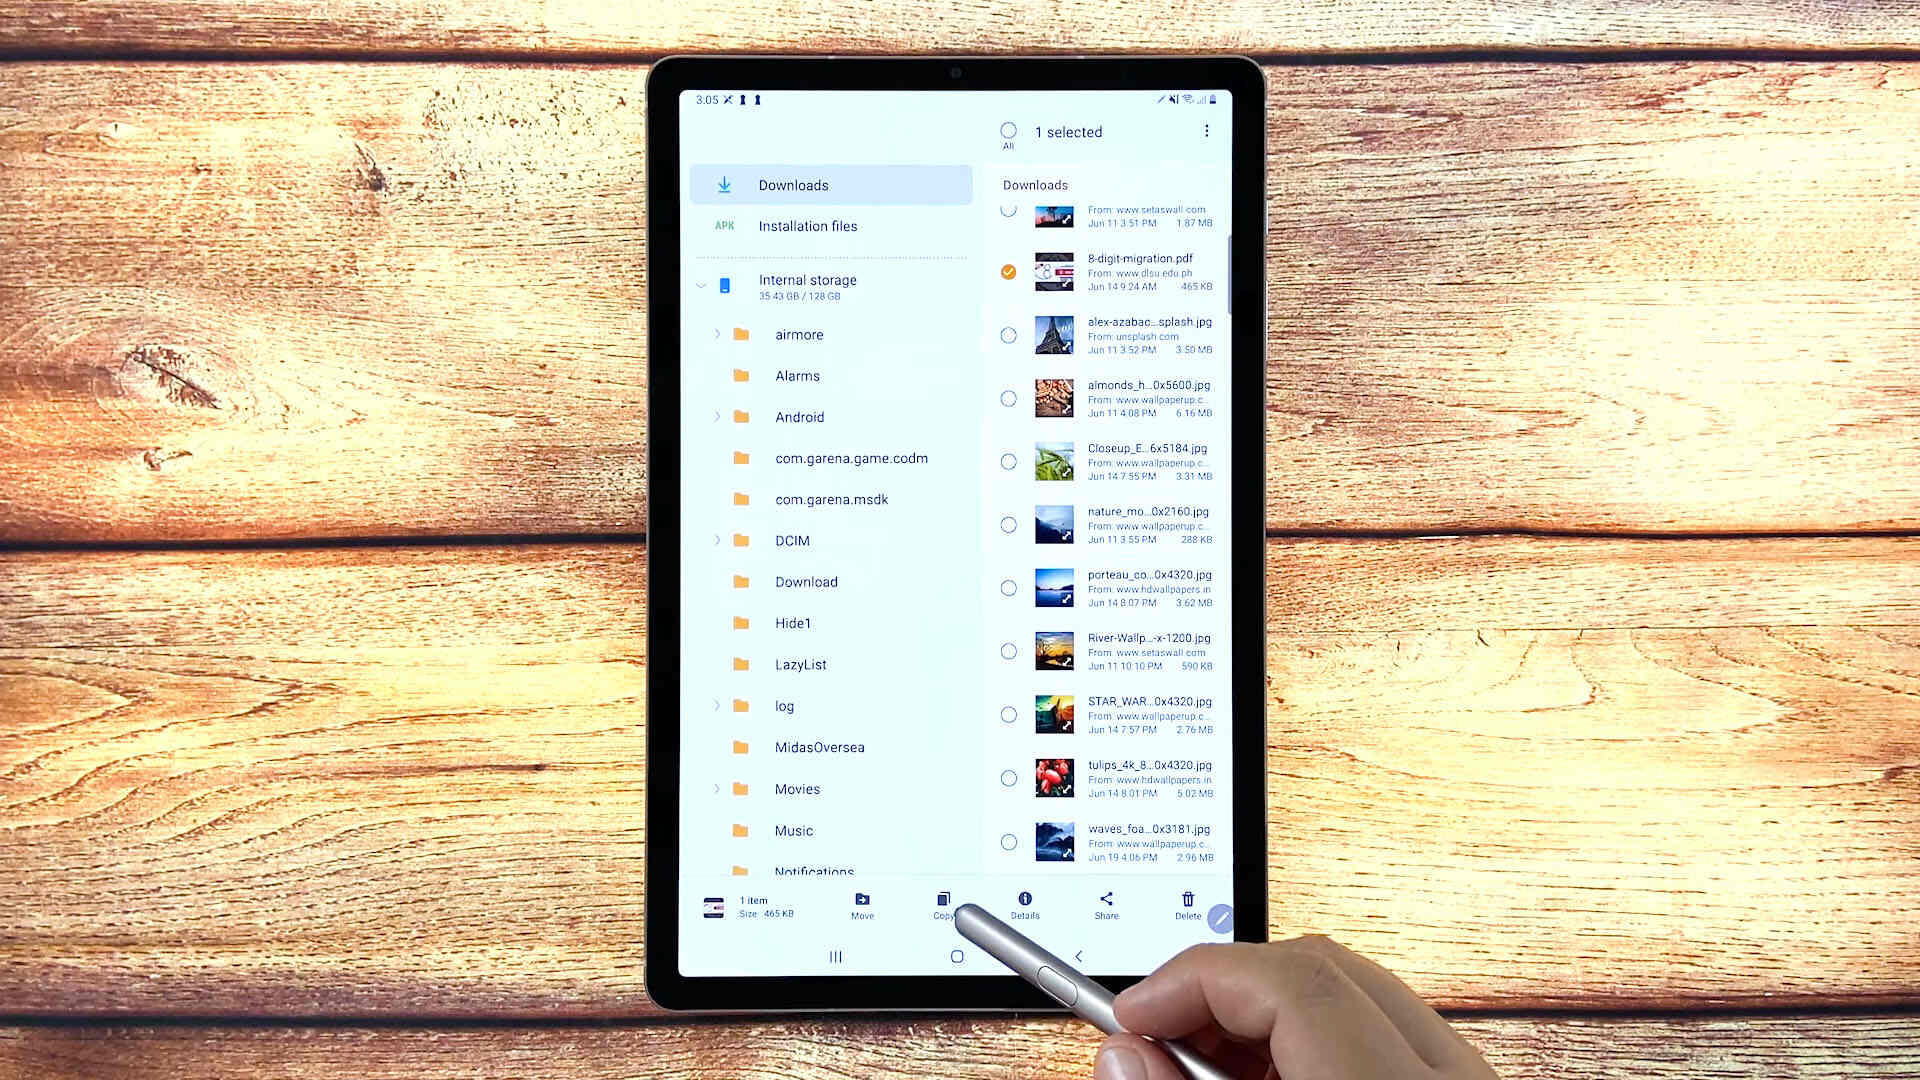
Review the list of files in the trash folder and select the ones you want to permanently delete. You can typically do this by tapping on the checkbox or selecting the corresponding file thumbnails. If you want to delete all the files in the trash folder, look for an option that says “Select all” or similar.
Once you’ve chosen the files you want to remove, locate the delete or trash icon within the trash or recycle bin section. It is usually represented by a trash can symbol. Tap on this icon to initiate the permanent deletion process.
A confirmation prompt may appear asking you to confirm the deletion of the selected files. Read the prompt carefully and make sure you’re deleting the correct files. If you’re certain, proceed with confirming the deletion.
After confirming the deletion, your Samsung tablet will begin permanently removing the selected files from the trash folder. This process may take a few moments, depending on the number and size of the files being deleted.
With the trash cleared, you’ve effectively freed up storage space on your Samsung tablet. However, it’s a good idea to periodically check and clear the trash folder to ensure that it doesn’t become cluttered again. In the next step, we’ll provide some tips and considerations for managing your tablet’s storage more efficiently.
Step 4: Confirm the deletion
After clearing the trash on your Samsung tablet, it’s important to confirm the deletion of the selected files. This step ensures that the deleted files are permanently removed from your device’s storage, allowing you to reclaim valuable space.
Once you’ve selected the files you want to delete from the trash folder, a confirmation prompt will typically appear on your tablet’s screen. This prompt serves as a final confirmation, allowing you to double-check your selection before proceeding with the deletion.
Take a moment to review the list of files displayed in the confirmation prompt. Make sure that the files you want to delete are indeed the ones you have selected. If you’re certain of your selection, proceed with confirming the deletion.
To confirm the deletion, tap on the “Delete” button or similar option within the confirmation prompt. This action will initiate the permanent removal of the selected files from your Samsung tablet’s storage.
It’s important to note that once you confirm the deletion of the files, they cannot be recovered. Therefore, exercise caution when confirming the deletion and ensure that you have backed up any important files or data prior to this step.
After confirming the deletion, your Samsung tablet will proceed with removing the selected files from the trash folder. The time required for this process will vary depending on the number and size of the files being deleted. You may notice a progress bar or a notification indicating the deletion status.
Once the deletion process is complete, a notification or confirmation message will typically appear on your tablet’s screen. This message may inform you of the amount of space that has been freed up as a result of clearing the trash folder.
By confirming the deletion of the selected files, you have successfully cleared the trash on your Samsung tablet and reclaimed storage space. Now you can enjoy a cleaner and more efficient device.
In the next section, we’ll provide some tips and considerations to help you manage your tablet’s storage more effectively.
Tips and considerations
Managing the storage on your Samsung tablet is an ongoing task that can help optimize its performance and ensure that you have enough space for your files and apps. Here are some helpful tips and considerations to keep in mind:
- Regularly empty the trash: It’s a good practice to periodically clear out the trash or recycle bin on your tablet to free up storage space. Make it a habit to check the trash folder and delete any unwanted files.
- Back up important files: Before deleting files from the trash folder, make sure to back up any important files to an external storage device or cloud storage. This ensures that you won’t lose any valuable data during the deletion process.
- Manage your downloads: Keep an eye on your downloads folder and delete any unnecessary files. This can help prevent your tablet’s storage from getting cluttered with downloaded files that you no longer need.
- Use cloud storage: Consider utilizing cloud storage services like Google Drive or Dropbox to store your files. This can help reduce the amount of storage space used on your tablet while still allowing you to access your files whenever you need them.
- Regularly uninstall unused apps: Go through your installed apps and uninstall any that you no longer use or need. This can free up significant space on your tablet’s storage and improve its overall performance.
- Clear cache and app data: Clearing cache and app data can help free up storage space on your tablet. Go to the Settings menu, select “Device care”, and then tap on “Storage”. From there, you can clear cache and app data for individual apps or all apps at once.
By following these tips and considerations, you can effectively manage the storage on your Samsung tablet and ensure that it remains optimized for performance and functionality.
To summarize, regularly emptying the trash, backing up important files, managing downloads, utilizing cloud storage, uninstalling unused apps, and clearing cache and app data are all important practices to maintain a well-organized and efficient tablet.
Conclusion
Clearing the trash on your Samsung tablet is a vital step in managing your device’s storage and optimizing its performance. By regularly emptying the trash folder, you can free up valuable space, avoid clutter, and ensure that your tablet operates smoothly.
In this guide, we covered the step-by-step process of emptying the trash on your Samsung tablet. We started by accessing the Settings menu, locating the Storage option, clearing the trash, and confirming the deletion of selected files. Additionally, we provided some helpful tips and considerations for effectively managing your tablet’s storage.
Remember to periodically check and clear the trash folder to prevent it from accumulating unnecessary files. Backing up important files, uninstalling unused apps, and utilizing cloud storage are just a few strategies you can adopt to keep your tablet’s storage organized and optimized.
If you encounter any difficulties or have specific questions regarding your Samsung tablet model or software version, refer to the user manual or visit Samsung’s official support website for detailed instructions and assistance.
By following the steps outlined in this guide and implementing the recommended tips, you can ensure that your Samsung tablet remains fast, efficient, and ready to accommodate your storage needs.
Now, go ahead and take control of your tablet’s storage by clearing out the trash and enjoy a clutter-free device!