Introduction
In today’s technology-driven world, we rely heavily on our Android tablets to search for information, connect with others, and stay on top of the latest trends. As we browse the web and use various apps, our tablets keep track of our search history and store frequently searched terms as “trending searches.”
While this feature can be convenient and time-saving, some users may prefer to clear their trending searches for privacy reasons or to start with a clean slate. If you’re wondering how to delete trending searches on your Android tablet, you’ve come to the right place.
In this article, we will guide you through the step-by-step process to remove those trending searches from your Android tablet. By following these simple instructions, you can maintain your privacy and ensure that your tablet’s search history remains confidential.
Before we begin, it’s important to note that the steps outlined here may vary slightly depending on the Android OS version and the device you are using. However, the overall process should remain similar across most Android tablets.
Now, let’s dive into the steps to delete trending searches on your Android tablet.
Step 1: Open the Settings app
The first step is to locate and open the Settings app on your Android tablet. The Settings app is where you can access and customize various settings and preferences on your device.
To open the Settings app, locate the gear-shaped icon usually found in the app drawer or on the home screen of your tablet. The exact placement may vary depending on the device and the customized user interface.
Once you have located the Settings app icon, simply tap on it to open the app. It will take you to the main settings screen where you can make changes to different aspects of your Android tablet.
If you are having trouble finding the Settings app on your device, you can use the search function. Swipe down from the top of the screen to reveal the notification panel and tap on the magnifying glass icon. From there, type “Settings” in the search bar, and it should appear as a suggestion. Tap on it to open the app.
Now that you have successfully opened the Settings app, you’re ready to proceed to the next step and delete the trending searches on your Android tablet. Let’s move on to step 2.
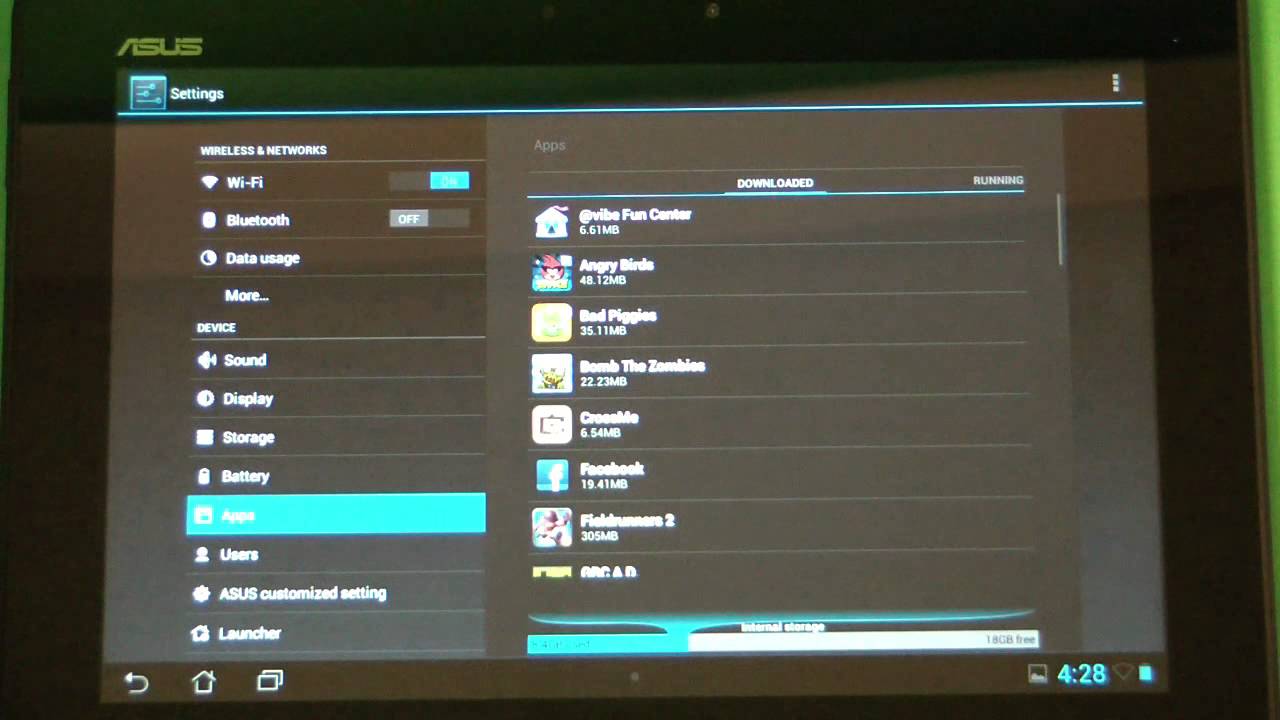
Step 2: Tap on “Apps & notifications”
Once you have the Settings app open on your Android tablet, it’s time to navigate to the “Apps & notifications” section. This section allows you to manage the various applications installed on your device and control their settings.
To access the “Apps & notifications” section, you will need to scroll through the main settings screen until you find the option labeled as such. On most Android devices, it is located towards the top of the settings menu.
Tap on “Apps & notifications” to open the section. You will be presented with a list of all the applications installed on your tablet.
In this section, you have the ability to view and modify various settings related to each individual app, such as permissions, notifications, and storage usage. It is a comprehensive hub where you can manage the behavior and preferences of all the applications on your Android tablet.
Now that you have successfully navigated to the “Apps & notifications” section, you’re ready to proceed to the next step and continue the process of deleting trending searches on your Android tablet. Let’s move on to step 3.
Step 3: Select “Google”
After entering the “Apps & notifications” section in the Settings app on your Android tablet, it’s time to locate and select the “Google” option. This step is crucial as it allows you to access the settings specific to Google applications on your device, including the Google Search app.
Scroll through the list of applications until you find “Google.” It is usually listed towards the top, as it is one of the most commonly used and essential apps on Android devices.
Tap on “Google” to proceed. This will take you to a screen where you can view and manage various settings related to Google apps installed on your tablet.
In addition to the Google Search app, you may also see other Google apps listed in this section, such as Google Chrome, Gmail, Google Maps, and more. We are specifically interested in accessing the settings for the Google Search app to delete trending searches.
Once you have selected “Google,” you’re ready to move on to the next step and continue the process of removing trending searches on your Android tablet. Let’s proceed to step 4.
Step 4: Tap on “Storage & cache”
Now that you have selected the “Google” option in the “Apps & notifications” section of the Settings app, it’s time to access the storage and cache settings for the Google Search app. This step is crucial as it allows you to clear the search data, including the trending searches, stored on your Android tablet.
Within the Google settings, you will find various options and settings related to the app. Scroll down through the list until you locate and tap on the “Storage & cache” option.
By selecting “Storage & cache,” you will be able to view and manage the storage usage, temporary files, and cached data for the Google Search app. This includes the search history, including the trending searches, that are stored on your device.
It’s important to note that clearing the storage and cache for the Google Search app will delete all the search data, including the trending searches, from your device. Hence, it is recommended to proceed with caution.
Now that you have successfully accessed the “Storage & cache” settings for the Google Search app, you’re ready to move on to the next step and continue the process of deleting the trending searches on your Android tablet. Let’s proceed to step 5.
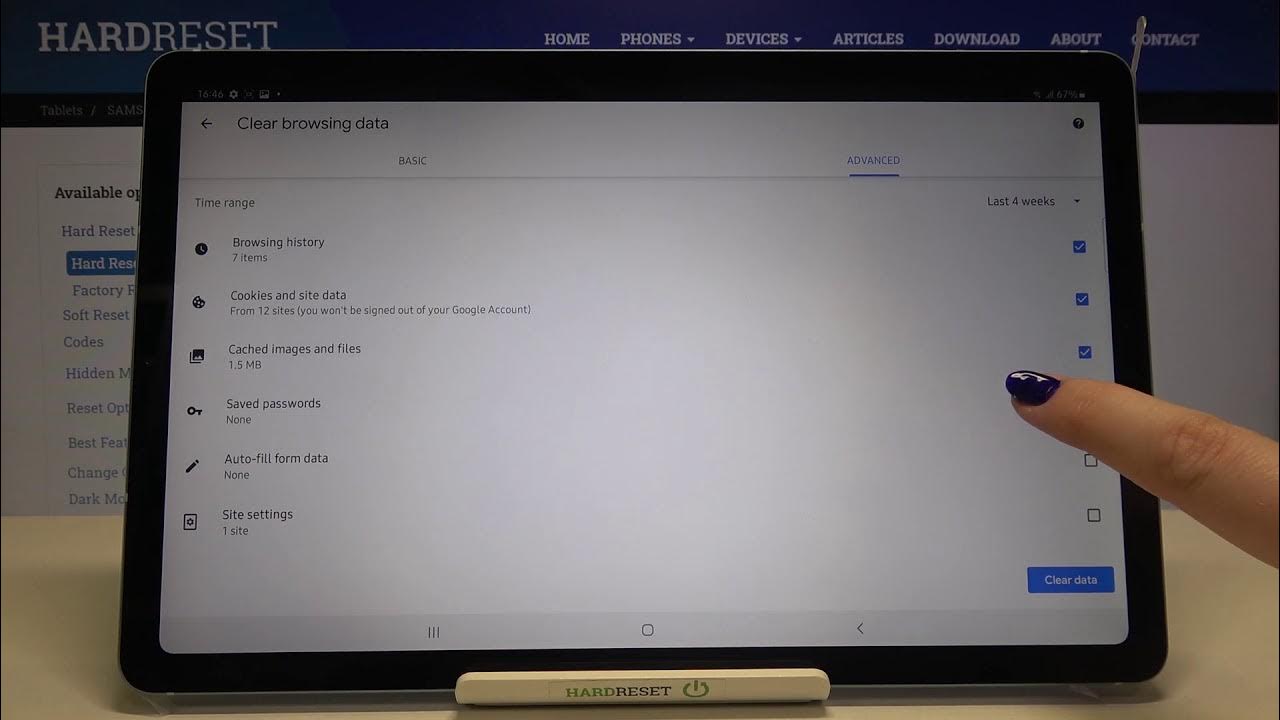
Step 5: Clear search data
Once you have entered the “Storage & cache” settings for the Google Search app on your Android tablet, it’s time to clear the search data, including the trending searches, stored on your device. This step is essential to ensure that your search history remains private and that you start with a clean slate.
Within the “Storage & cache” settings, you will find the option to clear the search data. Look for a button or an option labeled something similar to “Clear data,” “Clear search history,” or “Delete trending searches.”
Tap on this option to proceed with clearing the search data. A confirmation message may appear, asking if you are sure you want to delete all the search data. Take a moment to read the message and make sure you are comfortable with deleting the trending searches.
It’s important to note that clearing the search data for the Google Search app will not only remove the trending searches but also delete your entire search history. This action cannot be undone, so it’s crucial to make sure you have backed up any important information before proceeding.
Once you have confirmed the deletion of the search data, the process will begin. Depending on the amount of data stored, it may take a few seconds or longer to complete. Please be patient and allow the device to finish the process.
Now that you have successfully cleared the search data, including the trending searches, you’re ready to continue using your Android tablet with the peace of mind that your search history remains confidential. Let’s move on to the final step, step 6.
Step 6: Confirm deletion
After clearing the search data for the Google Search app on your Android tablet, it’s important to take a moment to confirm that the deletion was successful. This step ensures that the trending searches and your search history have indeed been removed from the device.
To confirm the deletion, you can follow a few simple steps. First, navigate back to the main settings screen by using the back button or gesture on your device. From there, you can access the “Apps & notifications” section again.
Scroll down through the list of applications until you find the “Google” option. Tap on it to open the settings for the Google apps installed on your tablet.
Within the “Google” settings, you can verify whether the search data has been deleted. Look for options or labels such as “Search history,” “Trending searches,” or “Recent searches.”
If these options are no longer present or if the search history is empty, it means that the deletion process was successful. Congratulations! You have successfully deleted the trending searches on your Android tablet.
It’s important to note that the search data will start accumulating again as you perform new searches on your device. If you wish to maintain your privacy, it’s a good idea to periodically repeat this process to clear the search history and trending searches.
With the confirmation of the deletion, you can now enjoy a clean and private search experience on your Android tablet. Take advantage of the newfound privacy and continue exploring the vast digital world at your fingertips.
Conclusion
Deleting trending searches on your Android tablet can help protect your privacy and ensure a clean search history. By following the step-by-step guide outlined in this article, you can easily remove the trending searches stored on your device and maintain your confidentiality.
Starting with Step 1, you learned how to open the Settings app on your Android tablet. From there, you navigated to the “Apps & notifications” section in Step 2 and selected “Google” in Step 3. In Step 4, you accessed the “Storage & cache” settings, and then in Step 5, you cleared the search data. Finally, in Step 6, you confirmed the successful deletion of the trending searches.
Remember, clearing the search data not only removes the trending searches but also deletes your entire search history. It is essential to backup any important information before proceeding with this action.
Now that you’ve completed the process, you can enjoy a renewed sense of privacy and a fresh start for your search history. You have taken control of your Android tablet and ensured that your search data remains confidential.
Keep in mind that as you continue using your device, new searches will accumulate and may become trending searches over time. To maintain your privacy, it is recommended to periodically repeat this process and clear your search history.
Thank you for following this guide on how to delete trending searches on your Android tablet. We hope that the information provided has been helpful and that you can now enjoy a more private and personalized search experience.