Introduction
Welcome to this guide on how to delete an email account. Whether you’re switching to a new email provider or simply no longer require a particular email account, deleting it can help declutter your digital life. However, before proceeding with the deletion process, it’s essential to back up any important data or emails associated with the account to avoid losing valuable information.
In the following steps, we will walk you through the process of deleting an email account. We will cover the necessary precautions to take, the specific steps to follow, and any additional instructions that may be required. It’s important to note that the steps outlined here may vary slightly depending on the email service provider you are using, but the general process should remain similar.
Deleting an email account involves permanently removing all the associated data, including emails, contacts, and other stored information. Therefore, it’s crucial to make sure that you have backed up or transferred any important data to your new email account or a different storage location before proceeding.
By following the instructions in this guide, you can confidently and securely delete your email account. Let’s begin with the first step: backing up important data.
Step 1: Back up important data
Before proceeding with the deletion of your email account, it is crucial to back up any important data or emails that you want to retain. This ensures that you don’t lose any valuable information during the deletion process.
There are a few different methods you can use to back up your data, depending on your email service provider and personal preference. Let’s explore some of the most common backup options.
1. Export to a local email client: One popular method is to export your emails to a local email client such as Microsoft Outlook or Mozilla Thunderbird. This allows you to save your emails directly on your computer’s hard drive. To do this, navigate to your email client’s settings and look for the option to import or add an account. Follow the on-screen instructions to connect your email account and transfer the data.
2. Use a cloud storage service: Another convenient option is to use a cloud storage service like Google Drive, Dropbox, or OneDrive to save your important emails and attachments. Simply create a folder in your cloud storage account and upload the emails or files you wish to back up. This method ensures that your data is readily accessible in a secure online location.
3. Forward emails to another account: If you have another active email account, you can forward important emails from the account you’re planning to delete to this alternate email address. This way, you’ll have a copy of these emails in your other account. To set up email forwarding, check your email provider’s settings or preferences section for the forwarding options.
Remember, it’s essential to carefully review and select the data you want to back up. Depending on the size and number of emails, the backup process may take some time. Ensure that you have a stable internet connection and enough storage space available to store your data.
Once you have successfully backed up your important data, you’re ready to proceed to the next step: signing in to your email account.
Step 2: Sign in to the email account
Once you have backed up your important data, the next step is to sign in to your email account. Accessing your account is necessary to navigate to the account settings and initiate the deletion process. Follow the steps below to sign in to your email account.
1. Open your web browser: Launch your preferred web browser (such as Google Chrome, Mozilla Firefox, or Safari) on your computer or mobile device.
2. Go to the email provider’s website: Enter the URL of your email service provider’s website in the address bar. For example, if you use Gmail, go to https://www.gmail.com. If you’re unsure, a quick internet search with the name of your email provider should help you find the correct website.
3. Enter your login credentials: On the email provider’s website, you will typically find a login form. Enter your email address and password in the respective fields. Be sure to double-check the accuracy of your credentials before proceeding.
4. Complete any additional security measures: Depending on your email provider, you may need to go through additional security measures such as two-factor authentication or entering a verification code sent to your phone or backup email address. Follow the instructions provided to complete these security steps.
5. Access your inbox: Once you have successfully signed in, you will be directed to your email inbox. Take a moment to ensure that you have access to all the necessary features and settings of your email account.
It’s important to note that if you have multiple email accounts and want to delete a specific account, you should sign in using the credentials associated with that particular account.
With your email account successfully accessed, you’re now ready to proceed to the next step: navigating to the account settings.
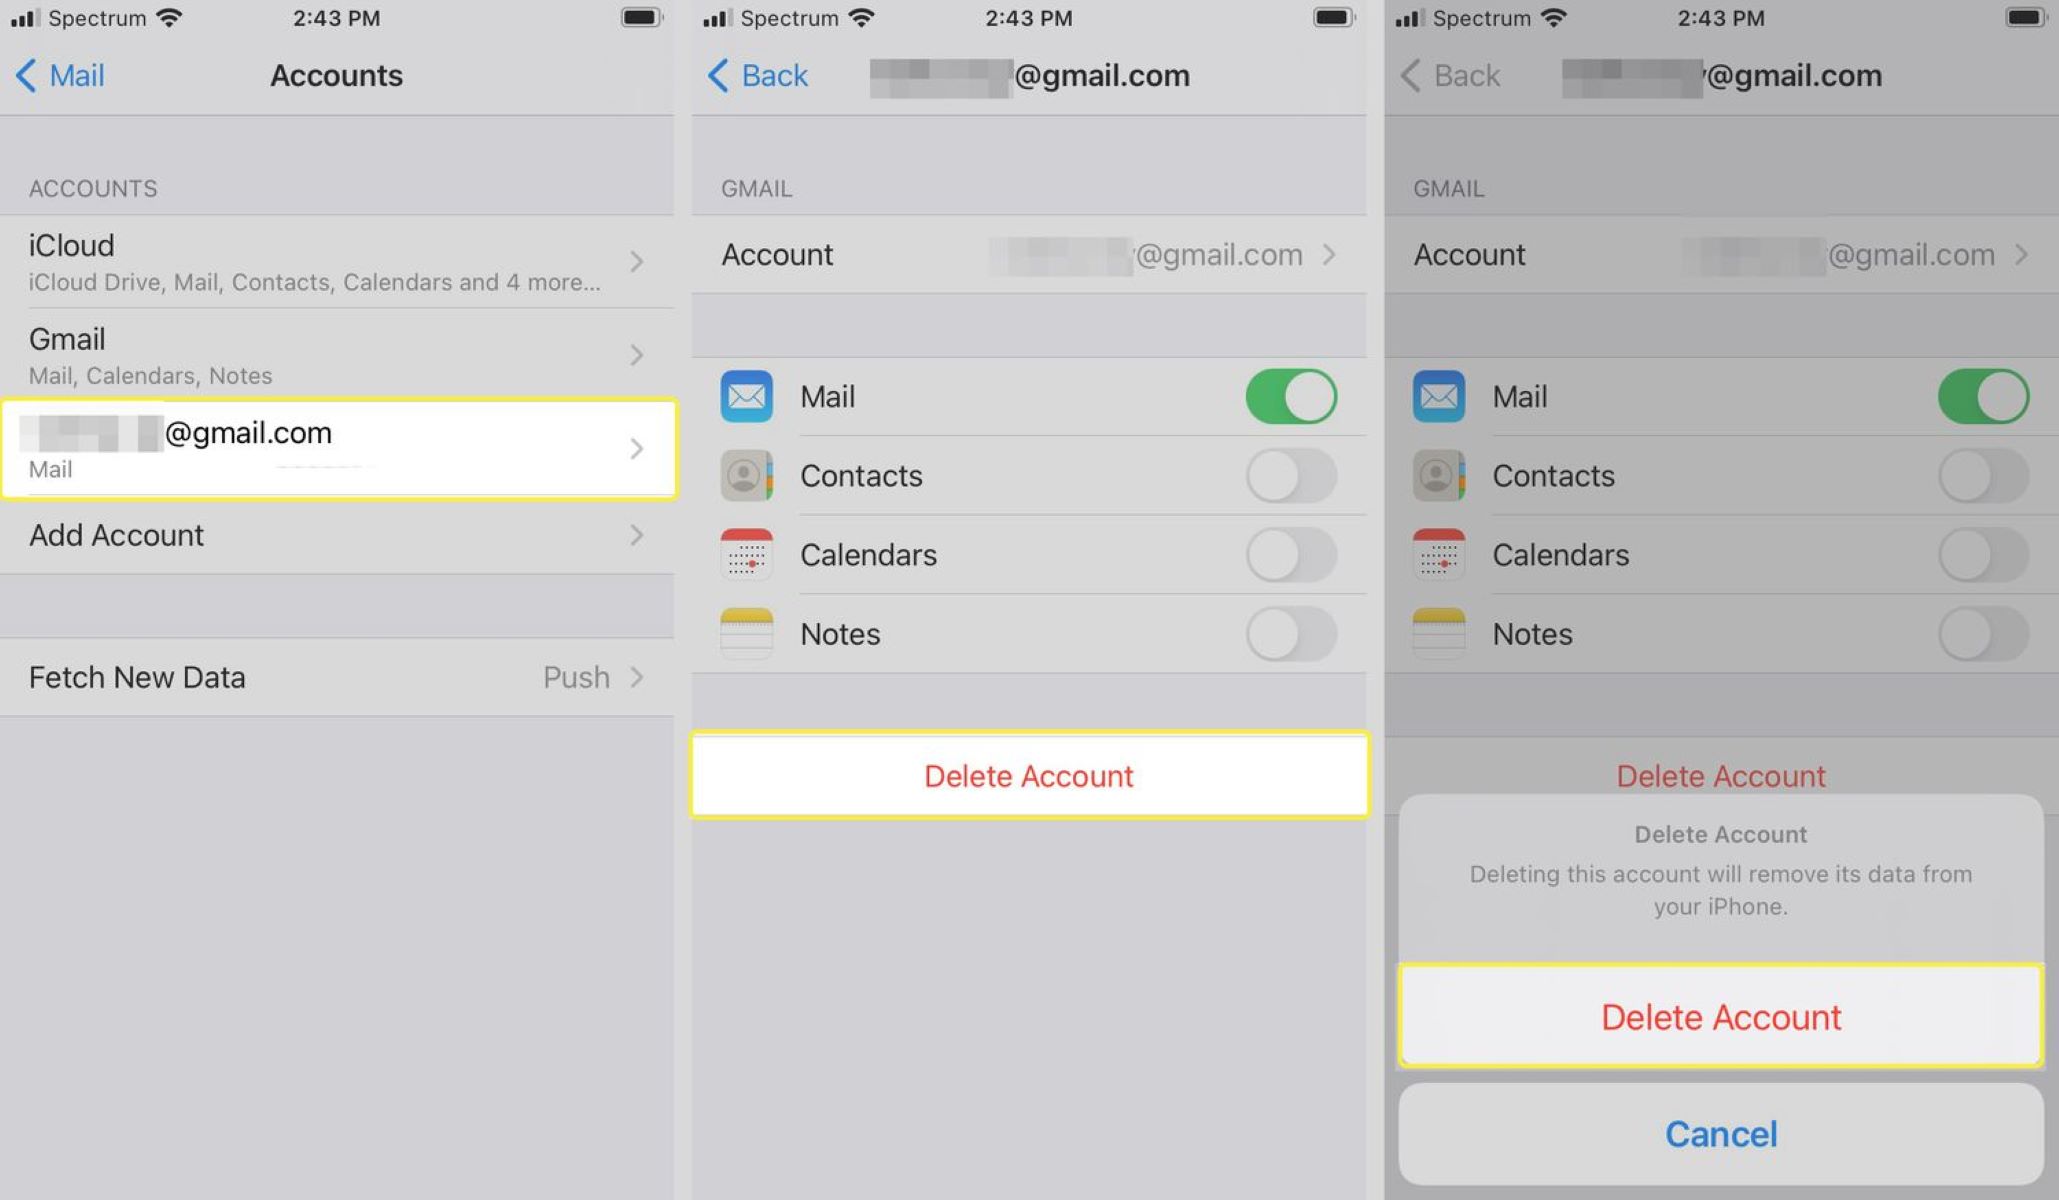
Step 3: Navigate to the account settings
After signing in to your email account, the next step is to locate the account settings. The account settings section is where you can make changes to your account, including deleting it. Follow the instructions below to navigate to the account settings in your email account.
1. Look for your account avatar or profile picture: In most email interfaces, your account avatar or profile picture is located in the upper right or left corner of the screen. It is usually a small thumbnail image associated with your email account. Click or tap on this image to open the account-related dropdown or menu.
2. Find the settings option: In the account-related dropdown or menu, look for an option labeled “Settings” or “Account Settings.” The wording may vary slightly depending on your email provider. Click or tap on this option to access the settings page.
3. Explore the settings page: Once you’re on the settings page, take a moment to familiarize yourself with the different sections and options available. Look for a section specifically related to account management or account preferences. This is where you will find the option to delete your email account.
4. Locate the account deletion option: Depending on your email provider, the account deletion option might be labeled as “Delete Account,” “Close Account,” or something similar. Some providers may require you to navigate through sub-menus or additional security steps before reaching the deletion option. Take your time to carefully read through the options to ensure you don’t miss the account deletion feature.
If you’re having trouble finding the account settings or deletion option, consider consulting your email provider’s help documentation or performing a quick internet search using relevant keywords along with your email provider’s name. This should help you find specific instructions or screenshots related to your email provider’s interface.
With the account settings successfully located, you’re now ready to proceed to the next step: locating the delete account option.
Step 4: Locate the delete account option
Once you have navigated to the account settings in your email account, the next step is to locate the delete account option. This option may be located within the account settings or in a separate section specifically dedicated to account management. Below are some general guidelines to help you find the delete account option in your email account.
1. Browse through the account settings: In the account settings page, carefully scan through the different sections and options. Look for any labels or headings related to account management, privacy, or security. The delete account option is usually located within one of these sections.
2. Check for sub-menus or additional options: Depending on your email provider, the delete account option may be further categorized under sub-menus or additional options. Explore each section thoroughly and click or tap on any relevant sub-menus or links that might lead to the account deletion feature.
3. Search for keywords: If you are having trouble locating the delete account option, try using the search or find feature within the account settings page. Enter keywords such as “delete account,” “close account,” or “terminate account” in the search bar and see if any relevant results appear. This can help you quickly narrow down the options.
4. Consult the email provider’s help documentation: If you are still unable to find the delete account option, consider referring to your email provider’s official help documentation or support resources. These resources often provide step-by-step instructions and screenshots to guide you through the account deletion process specific to their platform.
It’s important to note that the location and labeling of the delete account option may vary depending on your email service provider. Be patient and thorough in your search to ensure you find the option without any confusion. Once you have successfully located the delete account option, you’re ready to move on to the next step: confirming the deletion.
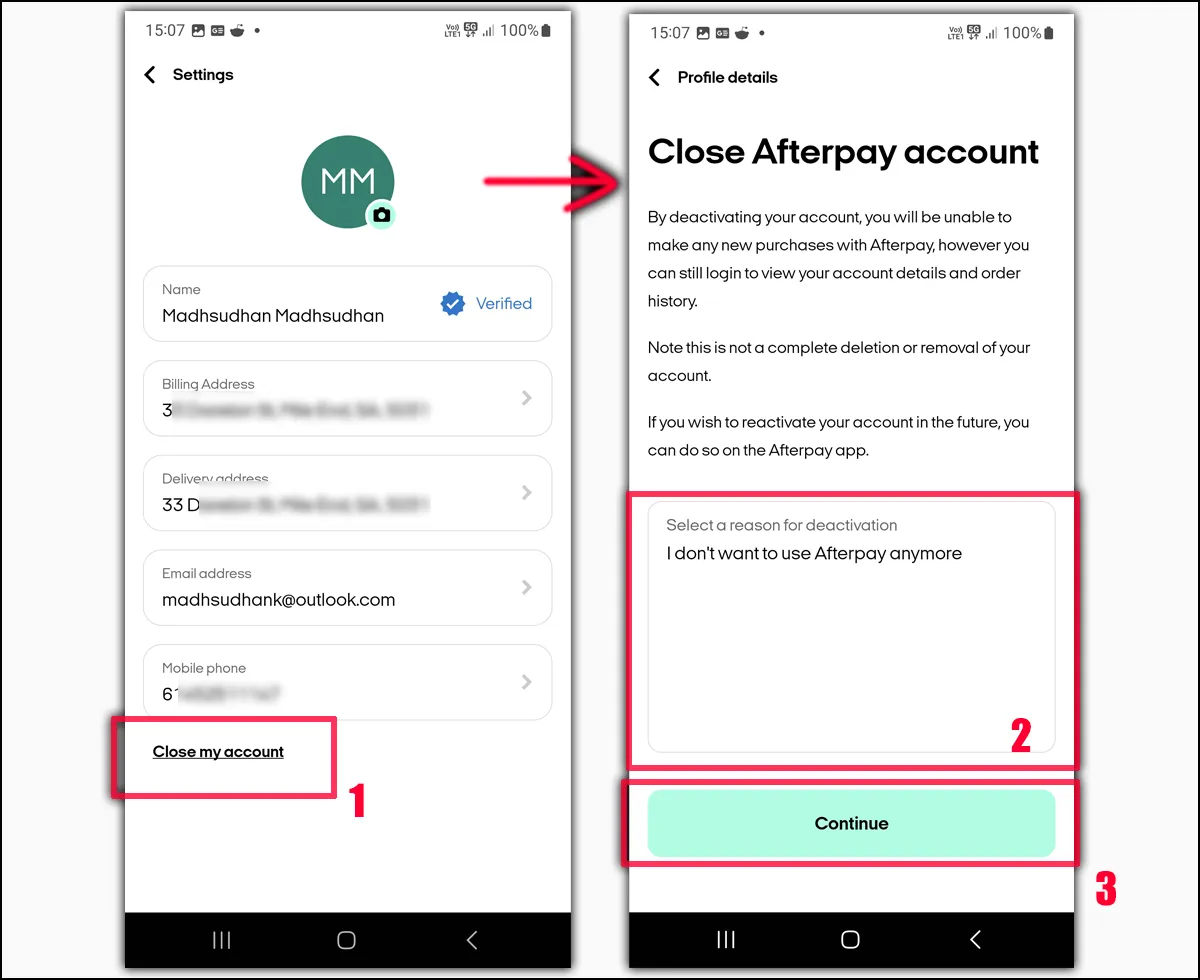
Step 5: Confirm the deletion
After locating the delete account option in your email settings, the next step is to confirm the deletion. Before you proceed, it’s crucial to carefully review the implications of deleting your email account, as this action is usually irreversible. Follow the steps below to confirm the deletion of your email account.
1. Read through the instructions: Once you have found the delete account option, click or tap on it to initiate the process. You will likely be presented with a confirmation prompt or a series of instructions regarding the consequences of deleting your account. Take the time to read through the instructions carefully and ensure that you understand the implications.
2. Verify your decision: After familiarizing yourself with the instructions, you may be asked to verify your decision to delete the account. This is often done by entering your password or confirming your account ownership through email or SMS verification. Follow the on-screen instructions to complete this step.
3. Provide optional feedback (if prompted): Some email providers may offer the opportunity to provide optional feedback on why you are deleting your account. This feedback can be valuable to them in improving their services. If you wish to provide feedback, take the opportunity to do so. Otherwise, you can proceed to the next step.
4. Confirm the deletion: Finally, you will likely encounter a button or link to confirm the deletion of your account. This button may be labeled as “Delete Account,” “Close Account,” or something similar. Click or tap on this button to proceed with the deletion.
During this step, it’s crucial to take the time to double-check that you are deleting the correct account. Once you confirm the deletion, you may lose access to all the data associated with that email account, including emails, contacts, and any other stored information.
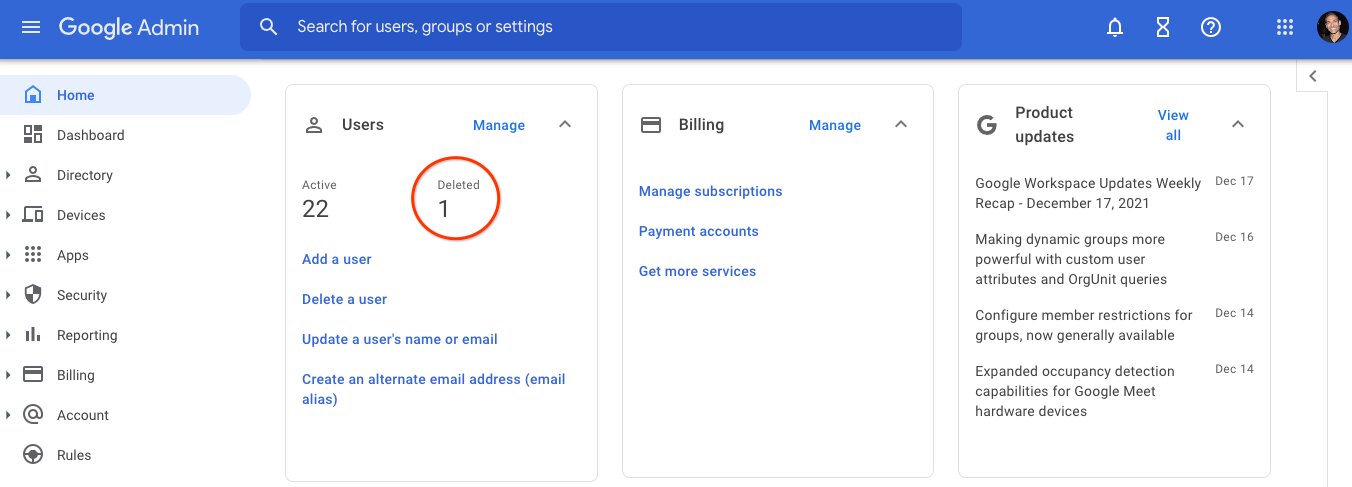
After confirming the deletion, your email provider may redirect you to a confirmation page or send you a confirmation email. Be sure to follow any additional instructions provided to ensure that the deletion process is successfully completed.
With the deletion of your email account confirmed, you have successfully taken a major step towards removing your account from the provider’s system.
Step 6: Follow additional instructions (if any)
After confirming the deletion of your email account, there may be additional instructions from your email provider that you need to follow to complete the process. These instructions can vary depending on the specific platform and the policies of the email service provider. Below are some common additional instructions that you might encounter:
1. Complete a waiting period: Some email providers have a waiting period after the account deletion confirmation. During this time, your account remains deactivated but not permanently deleted. This waiting period is a precautionary measure to allow users to reconsider their decision and retrieve their account if needed. If your provider has a waiting period, make sure to wait until it has expired before considering the account permanently deleted.
2. Verify the deletion through a confirmation email: To finalize the account deletion, you might receive a confirmation email from your email provider. This email may contain a link or a verification code that you have to click or enter to confirm the deletion. Keep an eye on your inbox or spam folder for any communication from your provider and follow the instructions provided.
3. Clear cache and cookies: Some email providers recommend clearing your browser’s cache and cookies after deleting your account. This step ensures that no remnants of your account data are stored on your device, providing an added layer of security and privacy. Refer to your email provider’s support documentation or help center for instructions on clearing cache and cookies specific to your browser.
4. Update email forwarding or account recovery settings: If you had set up email forwarding or had account recovery options in place, you may need to revisit those settings and remove the references to the deleted email account. This prevents any potential confusion or forwarding of emails to an account that no longer exists.
5. Securely dispose of any backup files: If you had created backup files or exported data from your email account, take the necessary steps to securely dispose of them. This can involve permanently deleting the backup files from your computer, cloud storage, or physical storage devices. Ensure that no sensitive or personal information is left vulnerable after the account deletion process.
It’s important to carefully follow any additional instructions provided by your email provider to ensure a complete and proper account deletion process. These instructions are designed to protect your privacy and security, as well as help you transition smoothly without any potential issues.
With the completion of any additional instructions, you have successfully finalized the deletion process of your email account.
Conclusion
Congratulations! You have successfully learned how to delete an email account. By following the steps outlined in this guide, you have taken the necessary precautions to back up important data, signed in to your email account, navigated to the account settings, located the delete account option, confirmed the deletion, and followed any additional instructions provided by your email provider.
Deleting an email account is a significant decision, and it’s important to understand the implications and consequences that come with it. Make sure that you have backed up any important data and considered alternative options before proceeding with the deletion process.
Remember, once an email account is deleted, you will no longer have access to the associated data, including emails, contacts, and any other stored information. It’s essential to securely dispose of any backup files and update any settings or references to the deleted account to avoid any potential confusion or forwarding of emails to a non-existent account.
If you have any concerns or encounter any difficulties during the account deletion process, consider reaching out to your email provider’s support or consulting their help documentation. They will be able to provide specific guidance and assistance based on their platform’s features and policies.
Thank you for following this guide on how to delete an email account. We hope that this information has been helpful to you and that you can now confidently proceed with deleting your email account if it aligns with your needs and preferences.
Remember, always consider the impact and think through your decision thoroughly before permanently deleting an email account.