Introduction
Welcome to our step-by-step guide on how to delete your Afterpay account. Whether you no longer need the services or you’re looking to switch to a different payment platform, we’ve got you covered. Afterpay is a popular buy-now-pay-later service that allows consumers to make purchases and pay for them in installments. However, if you have decided to remove your Afterpay account for any reason, we will walk you through the process.
Deleting your Afterpay account is a straightforward process that can be completed in just a few steps. It’s important to note that once your account is deleted, you won’t be able to recover it, so make sure to save any relevant information before proceeding. Additionally, please keep in mind that deleting your account will not cancel any outstanding payments or open orders, so it’s essential to settle any outstanding balances before initiating the deletion.
Before we dive into the step-by-step process, you’ll need to ensure that you have access to the email address associated with your Afterpay account. This is important as Afterpay will send a verification email to confirm the account deletion. So without further ado, let’s get started on deleting your Afterpay account.
Step 1: Sign in to your Afterpay Account
The first step towards deleting your Afterpay account is to sign in to your account. Open your preferred web browser and navigate to the Afterpay website. Once there, locate the sign-in option and click on it. You’ll be redirected to the login page where you’ll need to enter your email address and password associated with your Afterpay account.
If you don’t remember your password, don’t worry. Afterpay provides an option to reset your password by clicking on the “Forgot password” link on the sign-in page. Follow the instructions provided to reset your password and regain access to your account.
After successfully signing in, you’ll have access to your Afterpay account dashboard, where you can manage your payment options, view your purchase history, and make any necessary changes to your account.
Now that you’re logged in, let’s move on to the next step.
Step 2: Go to your Account Settings
Once you’re logged in to your Afterpay account, the next step is to navigate to your account settings. Look for an icon or link that represents your account settings. It is typically located in the top-right corner of the page. Click on it to access the account settings menu.
In the account settings menu, you will find various options and preferences that you can adjust according to your needs. Take a moment to familiarize yourself with the different sections and options available.
Within the account settings, you may come across options such as personal information, contact details, payment preferences, and security settings. These sections allow you to manage and update your account information as necessary. However, our focus in this guide is on deleting your account, so proceed to the next step to continue with the deletion process.
If you are having trouble locating the account settings, you can refer to the Afterpay help center or the FAQ section for more specific instructions. These resources are designed to assist you in navigating through the platform and finding the necessary settings.
Now that you’ve found the account settings, let’s move on to the next step.
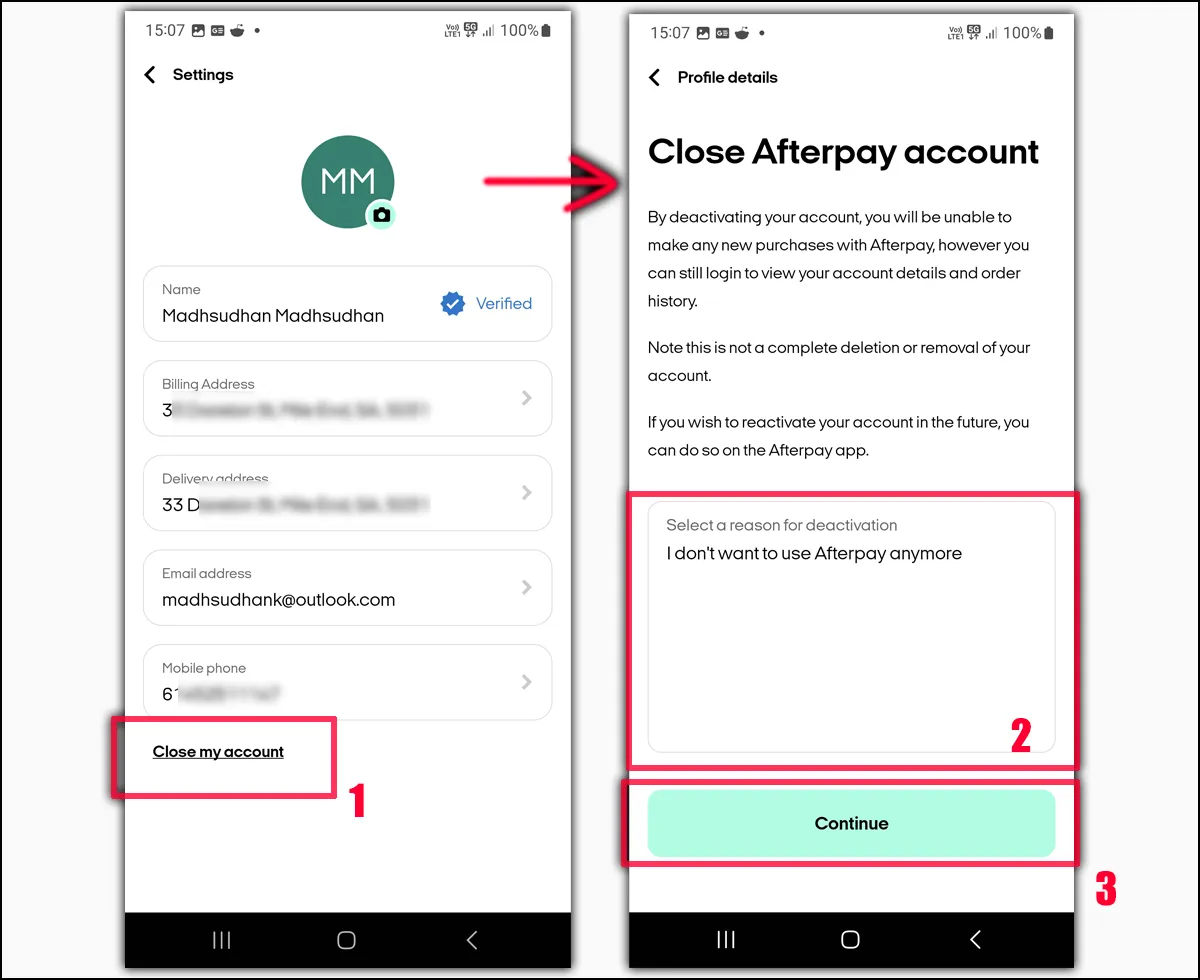
Step 3: Select “Delete Account”
Once you have accessed your account settings, it’s time to find the option to delete your Afterpay account. Keep in mind that the exact placement of this option may vary slightly depending on the Afterpay website’s layout and any recent updates to the platform.
Look for a section or tab labeled “Account,” “Profile,” or something similar within your account settings. Click on that section to reveal additional options related to your account.
Scroll through the options until you find the one that says “Delete Account” or something similar. This is the option you need to select in order to proceed with deleting your Afterpay account.
Clicking on the “Delete Account” option will typically open a confirmation window or prompt asking you to verify your decision. The prompt may include information about the consequences of deleting your account, such as the permanent removal of all your data and the inability to recover the account once deleted.
Before finalizing your decision, review the information provided in the confirmation prompt to ensure you understand the implications of deleting your account. If you are certain about deleting your Afterpay account, proceed to the next step.
Now that you have selected the “Delete Account” option, it’s time to move on to the final step to complete the deletion process.
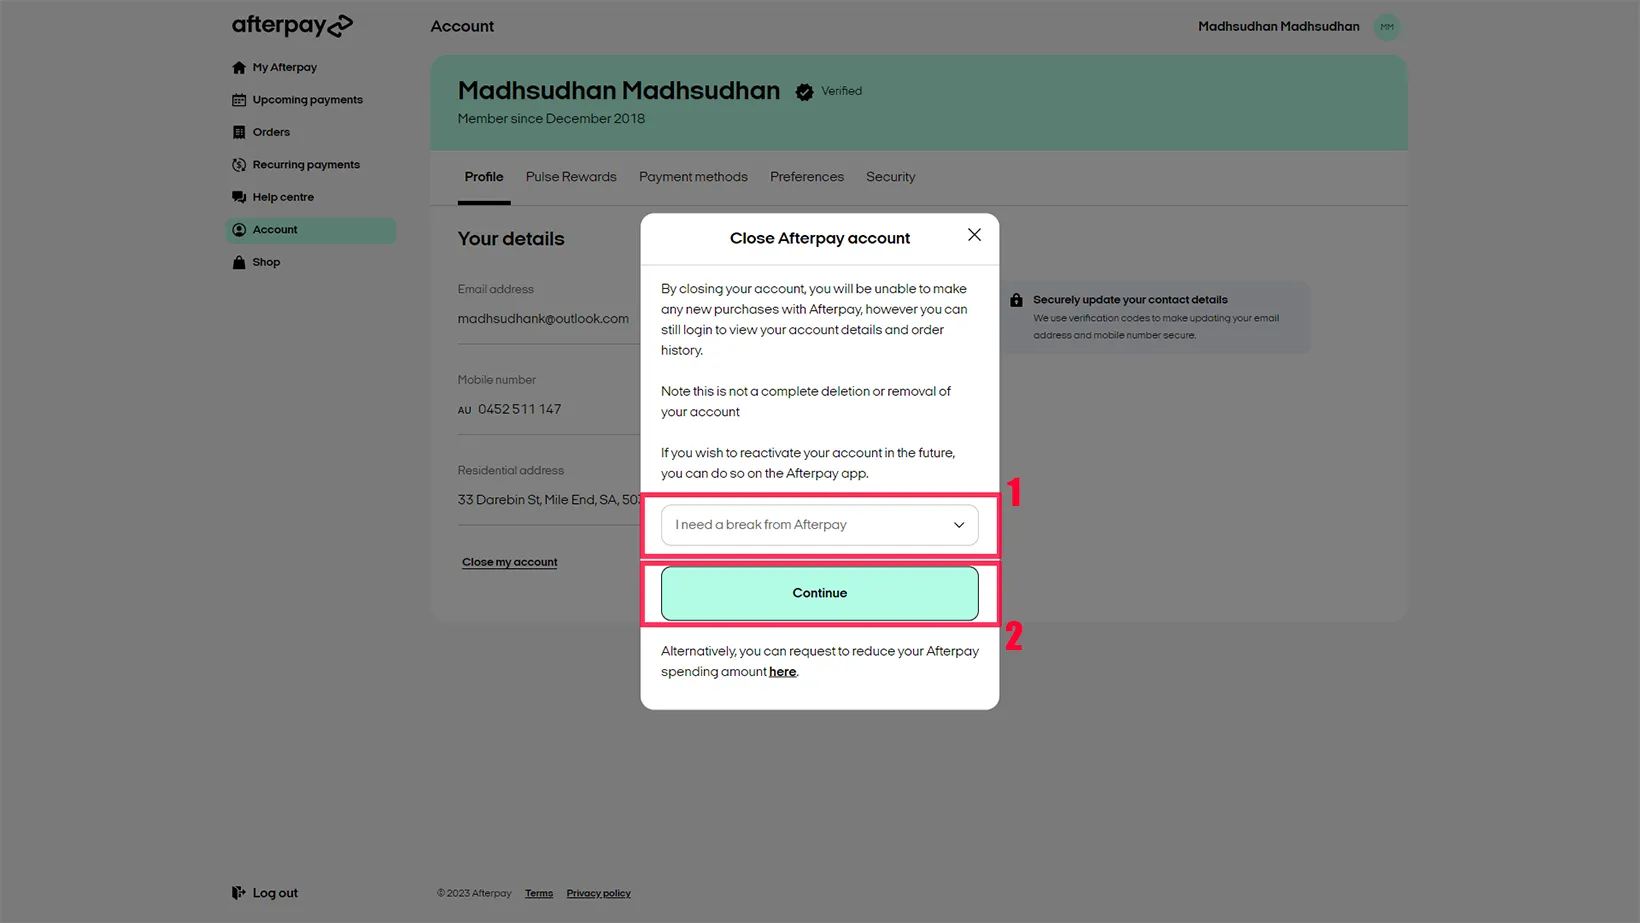
Step 4: Confirm Deletion
After selecting the “Delete Account” option in the previous step, you will be prompted to confirm your decision to delete your Afterpay account. This step is crucial, as the deletion process is irreversible, and you will lose access to all account-related information and features.
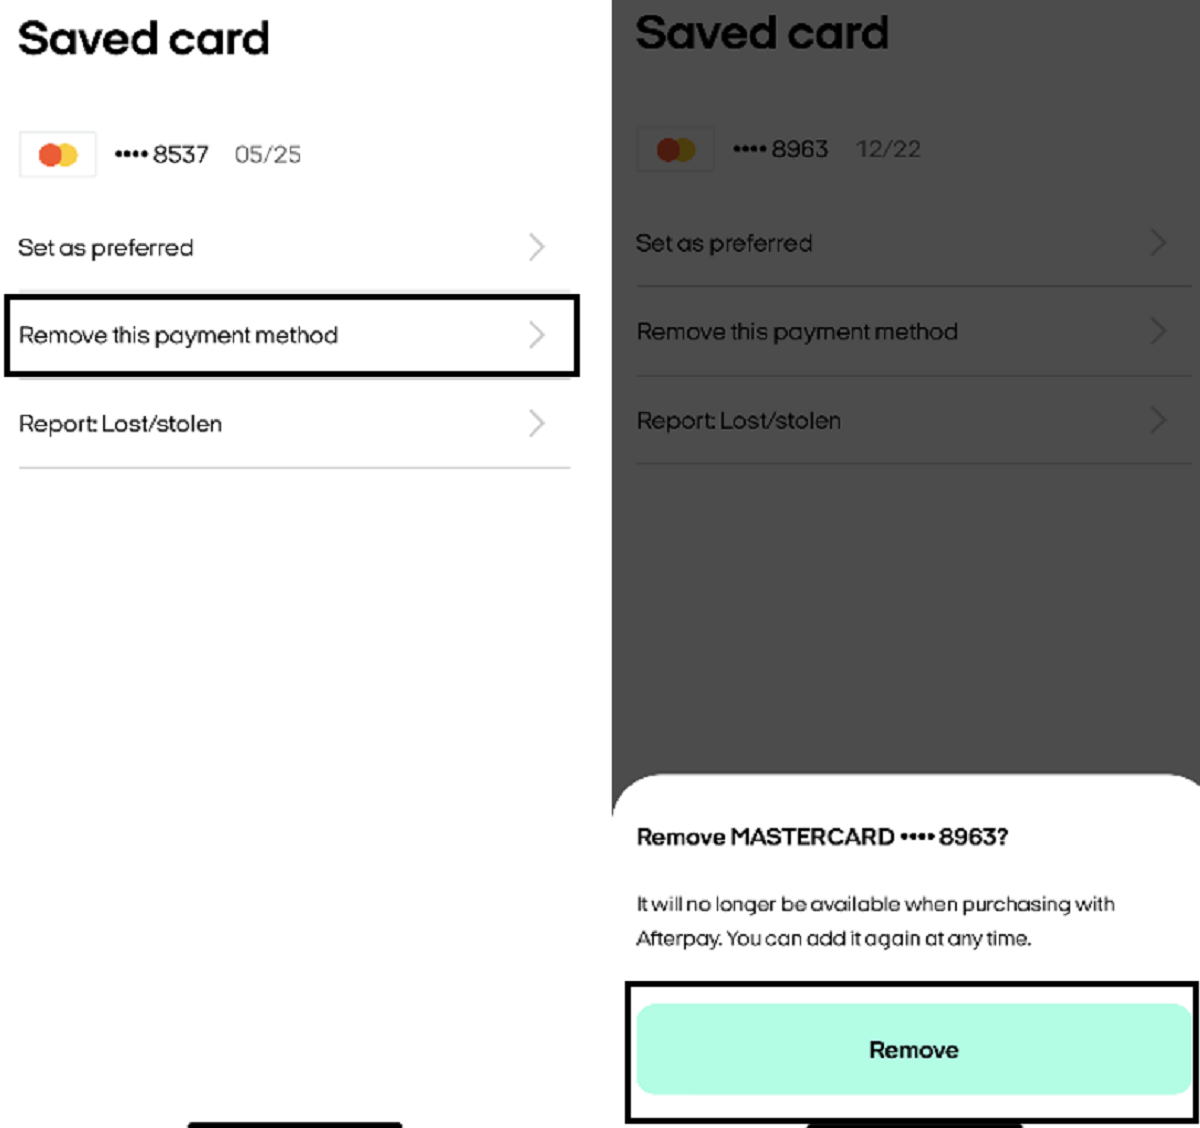
Take a moment to carefully read the confirmation prompt that appears on your screen. It may provide additional information about the consequences of deleting your account, such as the permanent loss of saved payment methods, purchase history, and any pending orders.
If you are certain about deleting your Afterpay account, click on the confirmation button to proceed. This may be labeled as “Confirm Deletion,” “Yes, I want to delete my account,” or something similar.
Upon confirming your decision, Afterpay will process your account deletion request. Depending on server load and other factors, this process may take a few moments to complete. It’s important to note that you will not receive immediate confirmation of the deletion. Instead, Afterpay may send a verification email to the email address associated with your account to validate the deletion request.
Check your email inbox for the verification email from Afterpay. Open the email and follow the provided instructions to verify the account deletion. This step ensures that the deletion request is legitimate and helps protect your account security.
Once you have verified the account deletion, your Afterpay account will be permanently deleted from the platform. Congratulations! You have successfully completed the process of deleting your Afterpay account.
Remember to settle any outstanding balances or open orders before deleting your account, as deleting your Afterpay account does not cancel any ongoing financial commitments.
For any further assistance or inquiries regarding the account deletion process, you can reach out to Afterpay’s customer support.
Conclusion
Deleting your Afterpay account is a straightforward process that can be completed in just a few steps. By following this step-by-step guide, you have learned how to delete your Afterpay account and take control of your online payment preferences.
Remember, before deleting your account, it is essential to settle any outstanding balances or open orders to avoid any complications. Additionally, make sure to save any important account information before proceeding with the deletion, as it is irreversible.
We hope this guide has been helpful in assisting you with deleting your Afterpay account. If you have any further questions or need assistance, feel free to reach out to Afterpay’s customer support for additional guidance.
Whether you’re looking to switch to a different payment platform or no longer need the services of Afterpay, you can now move forward confidently in managing your financial preferences.
Thank you for using our guide, and we wish you the best in your future endeavors!