Introduction
Connecting a virtual machine to the internet is essential for accessing online resources, updating software, and performing various tasks that require an internet connection. In this guide, we will explore how to connect a virtual machine to the internet using VirtualBox, a popular virtualization software.
VirtualBox allows users to run multiple operating systems within their host operating system, creating a virtual environment where different software and configurations can be tested and run independently. To ensure seamless internet connectivity for your virtual machine, a few configuration steps are required.
By following this step-by-step tutorial, you will learn how to set up network connectivity in VirtualBox and configure the network settings in your virtual machine. We will be using VirtualBox as the virtualization software throughout this guide, but similar principles can be applied to other virtual machine software as well.
Whether you are a developer who needs to test applications in different environments, a student studying networking concepts, or simply someone who wants to experiment with various operating systems, this guide will provide you with the knowledge and skills to connect your virtual machine to the internet effectively.
Let’s get started by ensuring that you have the necessary prerequisites in place before diving into the configuration process.
Prerequisites
Before you begin the process of connecting your virtual machine to the internet, make sure you have the following prerequisites:
- A host operating system installed on your computer. This will be the operating system from which you will run the virtual machine.
- VirtualBox software installed on your computer. You can download VirtualBox for free from the official website and install it according to the instructions provided.
- A virtual machine set up in VirtualBox. If you haven’t set up a virtual machine yet, you can follow the VirtualBox documentation or any relevant tutorial to create a virtual machine with the desired operating system.
- Basic knowledge of your operating system’s network settings. Understanding how to access network settings and make changes to network adapters will be helpful during the configuration process.
- A stable internet connection. Ensure that your host computer is connected to the internet via an ethernet cable or Wi-Fi.
Having these prerequisites in place will ensure a smooth configuration process and a successful connection between your virtual machine and the internet. Now that you have everything ready, let’s move on to the next step, where we will set the network adapter to bridged mode in VirtualBox.
Step 1: Set network adapter to Bridged Mode in VirtualBox
In order to connect your virtual machine to the internet, you need to configure the network adapter in VirtualBox to use the bridged mode. Bridged mode allows the virtual machine to share the host computer’s network connection, essentially making it appear as a separate device on the network.
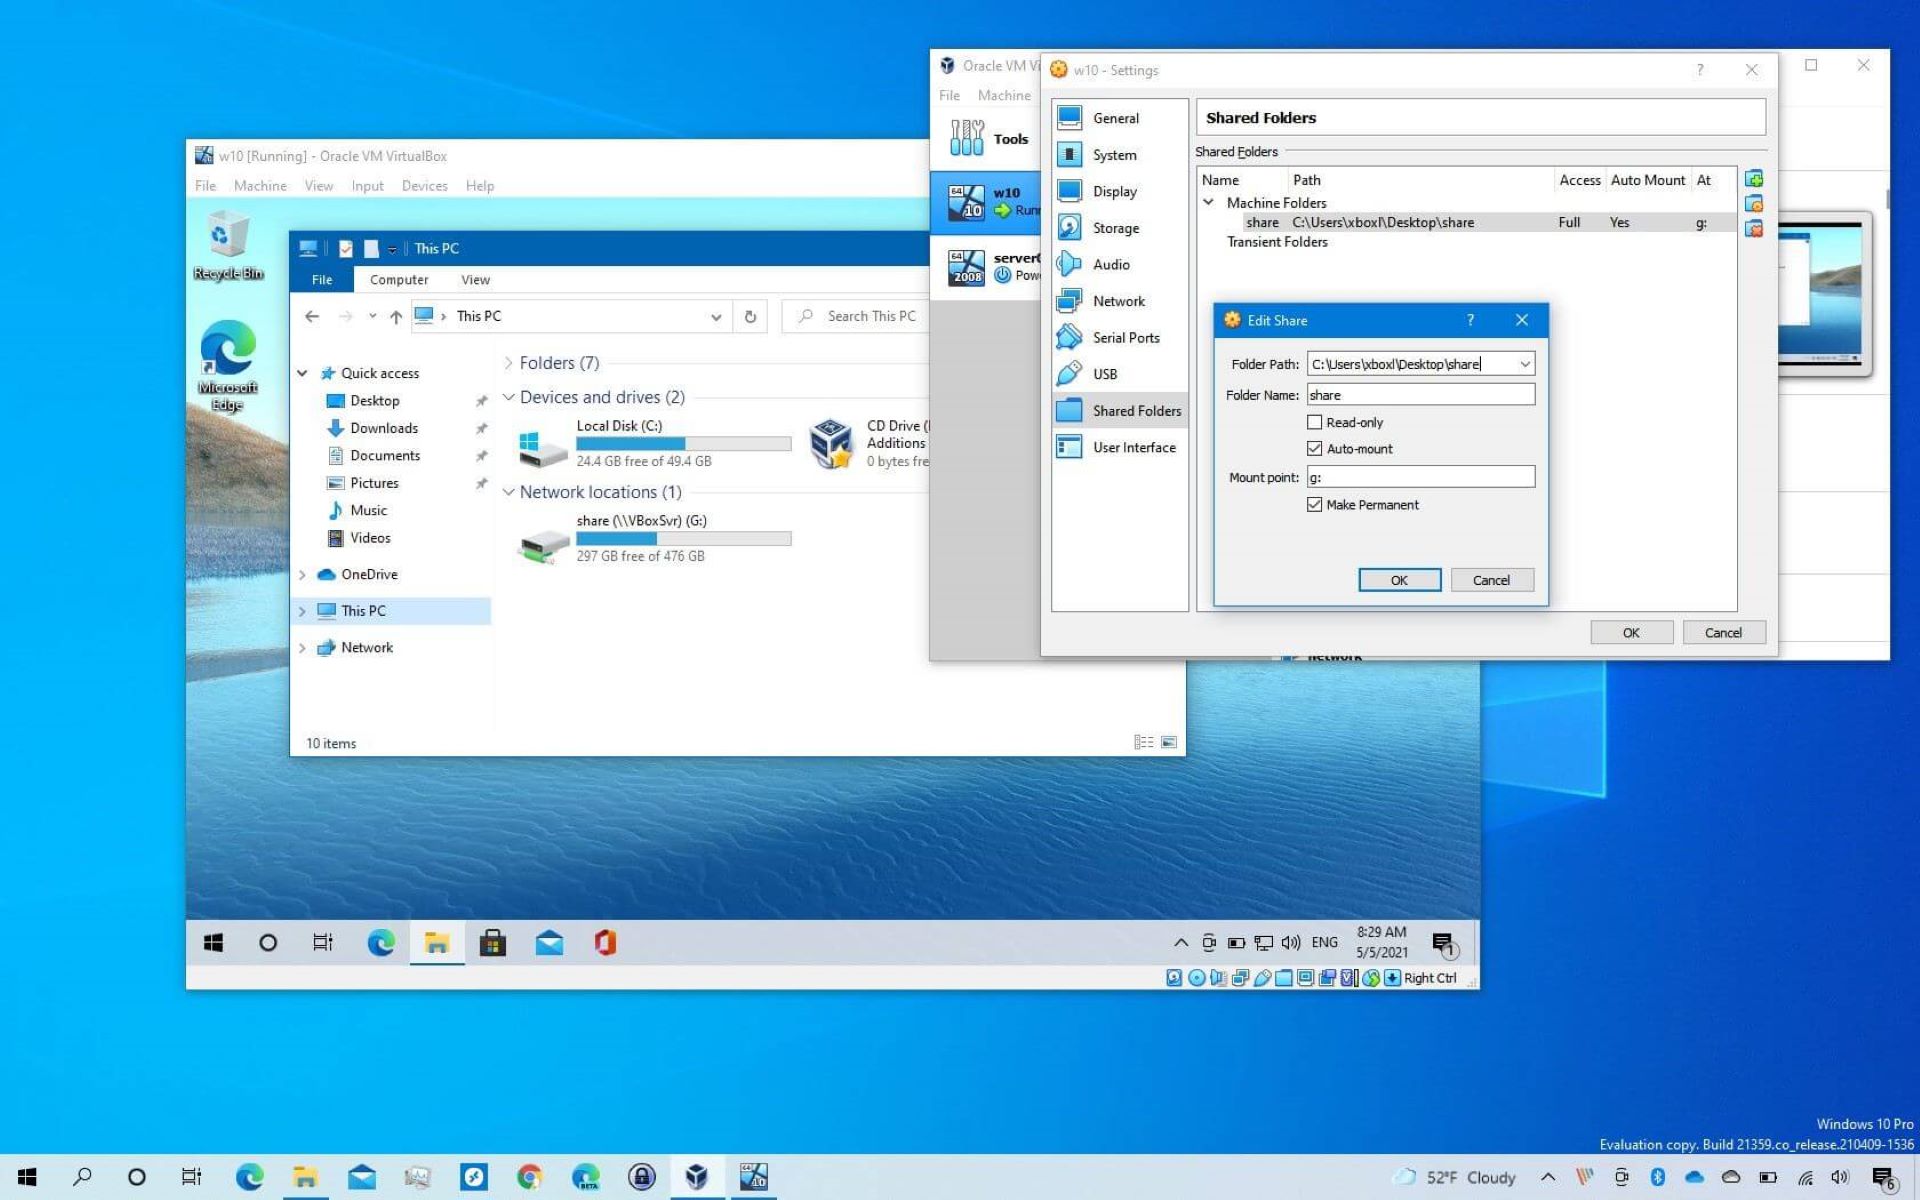
Follow these steps to set the network adapter to bridged mode:
- Open VirtualBox and select the virtual machine that you want to connect to the internet.
- Click on “Settings” to open the virtual machine’s settings.
- In the settings window, navigate to the “Network” tab.
- Under “Adapter 1” (or the desired adapter), select “Bridged Adapter” from the “Attached to” dropdown menu.
- Choose the network adapter that is currently in use by your host computer. This will allow the virtual machine to utilize the same network connection.
- Click “OK” to save the changes and close the settings window.
By setting the network adapter to bridged mode, you are enabling the virtual machine to have direct access to the network, just like any other device on the network. This will allow the virtual machine to obtain its own IP address and connect to the internet.
Now that the network adapter is in bridged mode, let’s move on to the next step where we will configure the network settings in the virtual machine itself.
Step 2: Configure network settings in virtual machine
Now that you have set the network adapter to bridged mode in VirtualBox, it’s time to configure the network settings within your virtual machine to establish a connection to the internet.
Follow these steps to configure the network settings in your virtual machine:
- Start your virtual machine.
- Once the virtual machine is up and running, log in to the operating system.
- Open the network settings, typically found in the Control Panel or System Preferences, depending on the operating system.
- Select the network adapter or connection settings within the virtual machine.
- Set the network configuration to obtain an IP address automatically. This option is usually labeled as “DHCP” or “Obtain an IP address automatically.”
- Save the changes and restart the virtual machine for the new network settings to take effect.
After configuring the network settings, your virtual machine should be ready to connect to the internet. The virtual machine will now obtain an IP address from your network’s DHCP server, allowing it to browse the internet and access other network resources.
Keep in mind that the exact steps to configure network settings may vary depending on the operating system you are using within your virtual machine. Consult the documentation or online resources specific to the operating system for more detailed instructions if needed.
Now that you have successfully configured the network settings within your virtual machine, it’s time to test the internet connection to ensure everything is functioning correctly.
Step 3: Test internet connection in virtual machine
After setting up the network settings in your virtual machine, it’s important to test the internet connection to ensure that your virtual machine is successfully connected to the internet. This step will help you verify that all the configurations you made are working correctly.
Follow these steps to test the internet connection in your virtual machine:
- Open a web browser within the virtual machine.
- Type in a website address, such as “www.google.com”, in the address bar and press Enter.
- If the webpage loads successfully, it means your virtual machine is connected to the internet.
- You can further test the internet connection by visiting multiple websites and verifying that they load without any issues.
- If the webpage does not load or you encounter any errors, double-check that the network settings in both VirtualBox and the virtual machine are configured correctly.
- Ensure that your host computer is connected to an active internet connection.
- If the issue persists, you may need to troubleshoot network connectivity in your virtual machine, such as checking firewall settings or DNS configuration.
By successfully testing the internet connection in your virtual machine, you can be confident that your virtual machine is now connected to the internet and ready to be used for various tasks and activities that require internet access.
Remember that in some cases, network configuration within the virtual machine may require additional steps or adjustments based on the specific operating system you are using within the virtual machine. Consult relevant documentation or online resources for further troubleshooting or specific instructions if needed.
Now that you have tested the internet connection in your virtual machine, you are ready to enjoy a seamless online experience within your virtual environment!
Conclusion
Connecting your virtual machine to the internet opens up a world of possibilities. Whether you’re a developer testing applications, a student studying networking concepts, or simply someone wanting to explore different operating systems, the ability to connect your virtual machine to the internet is essential.
In this guide, we discussed the step-by-step process of connecting a virtual machine to the internet using VirtualBox. By setting the network adapter to bridged mode, your virtual machine can share the host computer’s network connection, mimicking a separate device on the network. Additionally, we covered how to configure the network settings within the virtual machine itself to establish a connection to the internet.
After setting up the network configurations, it’s crucial to test the internet connection within the virtual machine to ensure everything is functioning correctly. By visiting websites and verifying their successful loading, you can confirm that your virtual machine is successfully connected to the internet.
Remember to keep the following points in mind:
- Ensure you meet the prerequisites, including a host operating system, VirtualBox software, and a stable internet connection.
- Follow the steps carefully when setting the network adapter to bridged mode and configuring the network settings within the virtual machine.
- If you encounter any issues during the process, consult the relevant documentation for VirtualBox or specific operating system instructions.
- Regularly update your virtual machine’s software and operating system to maintain security and performance.
By successfully connecting your virtual machine to the internet, you can now enjoy seamless access to online resources, perform software updates, and carry out various tasks that require an internet connection.
Now that you have mastered the process of connecting your virtual machine to the internet, you can explore and experiment with different operating systems, applications, and network configurations within your virtual environment.
Happy virtual machine networking!