Introduction
Welcome to the world of ethical hacking and penetration testing! Kali Linux, a powerful open-source operating system, provides a wealth of tools and resources for cybersecurity professionals and enthusiasts. By combining the flexibility of a virtual machine with the capabilities of Kali Linux, you can set up a secure and isolated environment to practice and hone your cybersecurity skills.
Whether you’re a beginner or an experienced professional, this article will guide you through the process of downloading and installing Kali Linux on your Windows machine using VirtualBox, a popular virtualization software.
Before we get started, it’s important to note that Kali Linux is a specialized distro designed for ethical hacking and penetration testing. It’s crucial to use it responsibly and within the boundaries of the law. Using Kali Linux without proper authorization or for malicious purposes is strictly prohibited and can result in legal consequences.
In this step-by-step guide, we’ll walk you through the process of setting up Kali Linux on Windows using VirtualBox. By the end of this tutorial, you’ll have a fully functional Kali Linux virtual machine up and running on your Windows computer.
Ready to dive into the exciting world of cybersecurity? Let’s get started with the prerequisites you’ll need before installing Kali Linux.
Prerequisites
Before you begin the installation process, make sure you have the following prerequisites in place:
- A Windows computer with a stable internet connection.
- At least 4GB of RAM and a dual-core processor to ensure smooth performance.
- Free disk space of around 30GB to accommodate the Kali Linux virtual machine.
- VirtualBox software, which you can download for free from the official VirtualBox website (https://www.virtualbox.org).
- The Kali Linux ISO file, which you can obtain from the official Kali Linux website (https://www.kali.org/downloads).
- A basic understanding of virtualization concepts and familiarity with the Windows operating system.
If your system meets these requirements, you’re ready to proceed with the installation. It is also essential to ensure that your system has virtualization capabilities enabled in the BIOS settings. Virtualization technologies such as Intel VT-x or AMD-V need to be enabled for VirtualBox to function correctly.
In case you’re unsure whether your computer has virtualization capabilities or how to enable them, you can refer to your computer’s documentation or consult the manufacturer’s website for detailed instructions.
Once you have ensured that your system meets the prerequisites, and virtualization capabilities are enabled, you’re all set to move on to the next step – downloading VirtualBox.
Step 1: Download VirtualBox
The first step in installing Kali Linux on your Windows machine is to download and install VirtualBox, a powerful and widely used virtualization software. VirtualBox allows you to create and manage virtual machines, providing a secure and isolated environment for running different operating systems.
Follow the steps below to download VirtualBox:
- Open your web browser and navigate to the official VirtualBox website at https://www.virtualbox.org.
- Click on the “Downloads” link located on the left-hand side of the page.
- On the downloads page, you’ll see a list of available downloads for different platforms. Choose the version suitable for your Windows operating system. Click on the “Windows hosts” link to initiate the download.
- Once the download is complete, locate the downloaded installer file and double-click on it to start the installation process.
- Follow the on-screen instructions to complete the installation. Leave the default settings as they are unless you have specific requirements.
- Once the installation is finished, you’re ready to move on to the next step of installing Kali Linux.
By downloading and installing VirtualBox, you now have the necessary software to create a virtual machine on your Windows computer. This virtual machine will serve as the platform for installing Kali Linux and running it alongside your Windows operating system.
Now that VirtualBox is installed on your machine, it’s time to proceed to the next step – downloading the Kali Linux ISO file.
Step 2: Download Kali Linux
Once you have VirtualBox installed on your Windows machine, the next step is to download the Kali Linux ISO file. The ISO file contains the installation image of the Kali Linux operating system that we will use to set up our virtual machine.
Follow the steps below to download Kali Linux:
- Open your web browser and navigate to the official Kali Linux website at https://www.kali.org/downloads.
- On the downloads page, you’ll find different versions and editions of Kali Linux. Choose the version suitable for your needs. For most users, the “Kali Linux 64-bit (Installer)” option is recommended.
- Click on the “Download” button next to the selected version. You can also choose to use a torrent file if you prefer.
- The download will begin, and the ISO file will be saved to your specified location on your computer.
Downloading the Kali Linux ISO file may take some time, depending on your internet connection speed. Once the download is complete, you are ready to proceed with the next step of creating a new virtual machine in VirtualBox.
Make sure to keep the downloaded Kali Linux ISO file in a location where you can easily access it later during the installation process. With VirtualBox and the Kali Linux ISO file in hand, we can now move on to setting up our virtual machine and installing Kali Linux.
Step 3: Create a new Virtual Machine
With VirtualBox installed and the Kali Linux ISO file downloaded, it’s time to create a new virtual machine in VirtualBox. This virtual machine will serve as the platform for installing and running Kali Linux.
Follow the steps below to create a new virtual machine:
- Open the VirtualBox application on your Windows machine.
- Click on the “New” button located in the top-left corner of the VirtualBox window. This will open the “Create Virtual Machine” wizard.
- In the “Name and operating system” section, specify a name for your virtual machine, such as “Kali Linux”.
- From the “Type” dropdown menu, select “Linux”.
- From the “Version” dropdown menu, select “Debian (64-bit)” if you downloaded the 64-bit version of Kali Linux. If you downloaded a different version, choose the corresponding option.
- Click “Next” to proceed.
- In the “Memory size” section, allocate the amount of RAM you want to allocate to the virtual machine. It is recommended to allocate at least 2GB or more for smooth performance.
- Click “Next” to proceed.
- In the “Hard disk” section, select the option “Create a virtual hard disk now” and click “Create”.
- Choose the file type for the virtual hard disk. The default option, “VDI (VirtualBox Disk Image)”, is recommended.
- Choose the option “Dynamically allocated” for the storage on physical hard disk.
- Specify the size of the virtual hard disk. It is recommended to allocate at least 20GB or more to ensure ample space for installing applications and storing data in Kali Linux.
- Click “Create” to finish creating the virtual hard disk.
Once you have completed these steps, you will have successfully created a new virtual machine in VirtualBox. In the next step, we will proceed with installing Kali Linux on this virtual machine.
Step 4: Install Kali Linux on VirtualBox
Now that you have created a new virtual machine in VirtualBox, it’s time to install Kali Linux onto it. Follow the steps below to install Kali Linux:
- Select the newly created virtual machine from the left-hand side of the VirtualBox window.
- Click on the “Settings” button. This will open the settings window for the selected virtual machine.
- In the settings window, click on the “Storage” tab.
- Under “Controller: IDE”, click on the empty CD/DVD icon.
- On the right-hand side, click on the disk icon to the right of “Optical Drive”. Choose the “Choose/Create a disk image” option.
- In the file browser, navigate to the location where you saved the Kali Linux ISO file. Select the ISO file and click “Open”.
- Back in the settings window, click “OK” to save the changes.
- Now, select the virtual machine again and click on the “Start” button.
- The Kali Linux installer should now boot up. You will see the “Welcome to the Kali Linux installer” screen.
- Use the arrow keys on your keyboard to select the “Install” option and press Enter.
- Follow the prompts in the installer to set your language, location, and keyboard layout.
- When asked to enter the hostname for the Kali Linux system, you can leave it as the default or choose a custom name.
- Next, set up your user account by providing a username, password, and full name.
- Follow the remaining instructions to set up the partitioning, time zone, and other system settings.
- Once the installation process is complete, you will be prompted to reboot the virtual machine.
- After the reboot, Kali Linux will be installed and ready to use on your virtual machine.
Congratulations! You have successfully installed Kali Linux on your VirtualBox virtual machine. In the next step, we will configure Kali Linux to optimize its performance and usability.
Step 5: Configure Kali Linux
After installing Kali Linux on your VirtualBox virtual machine, there are a few additional steps you can take to configure and optimize its performance and usability. Follow the steps below to configure Kali Linux:
- Start the Kali Linux virtual machine in VirtualBox.
- Login using the username and password you set up during the installation process.
- Once you are logged in, you can customize several aspects of Kali Linux to suit your preferences.
- Update the system: Open a terminal and run the command
sudo apt update && sudo apt upgradeto update the system packages to the latest versions. - Install guest additions: In the VirtualBox menu, go to “Devices” > “Insert Guest Additions CD Image.” This will mount the VirtualBox Guest Additions. Open a terminal and run the command
sudo /media/cd-rom/VBoxLinuxAdditions.runto install the guest additions. - Customize the desktop environment: Kali Linux comes with the GNOME desktop environment by default. You can customize the theme, icons, and other settings to your liking.
- Install additional software: Kali Linux provides a wide range of tools for ethical hacking and penetration testing. You can install additional software using the package manager
aptor by downloading specific tools from trusted sources. - Configure network settings: Depending on your network setup, you may need to configure network settings to ensure internet connectivity in the virtual machine.
- Set up SSH and remote access: If you plan to access Kali Linux remotely, you can set up SSH and configure the necessary firewall rules for secure remote access.
By following these configuration steps, you can optimize your Kali Linux virtual machine for your specific needs and improve its performance and usability.
Once you have finished configuring Kali Linux, you’re ready to move on to the final step – starting Kali Linux on VirtualBox and beginning your cybersecurity journey!
Step 6: Start Kali Linux on VirtualBox
Now that you have installed and configured Kali Linux on your VirtualBox virtual machine, it’s time to start using it. Follow the steps below to start Kali Linux on VirtualBox:
- Open the VirtualBox application on your Windows machine.
- Select the Kali Linux virtual machine from the list on the left-hand side of the VirtualBox window.
- Click on the “Start” button at the top of the VirtualBox window.
- The Kali Linux virtual machine will start, and you will see the Kali Linux boot sequence.
- Once Kali Linux has finished booting, you will be presented with the login screen.
- Enter the username and password that you set up during the installation process.
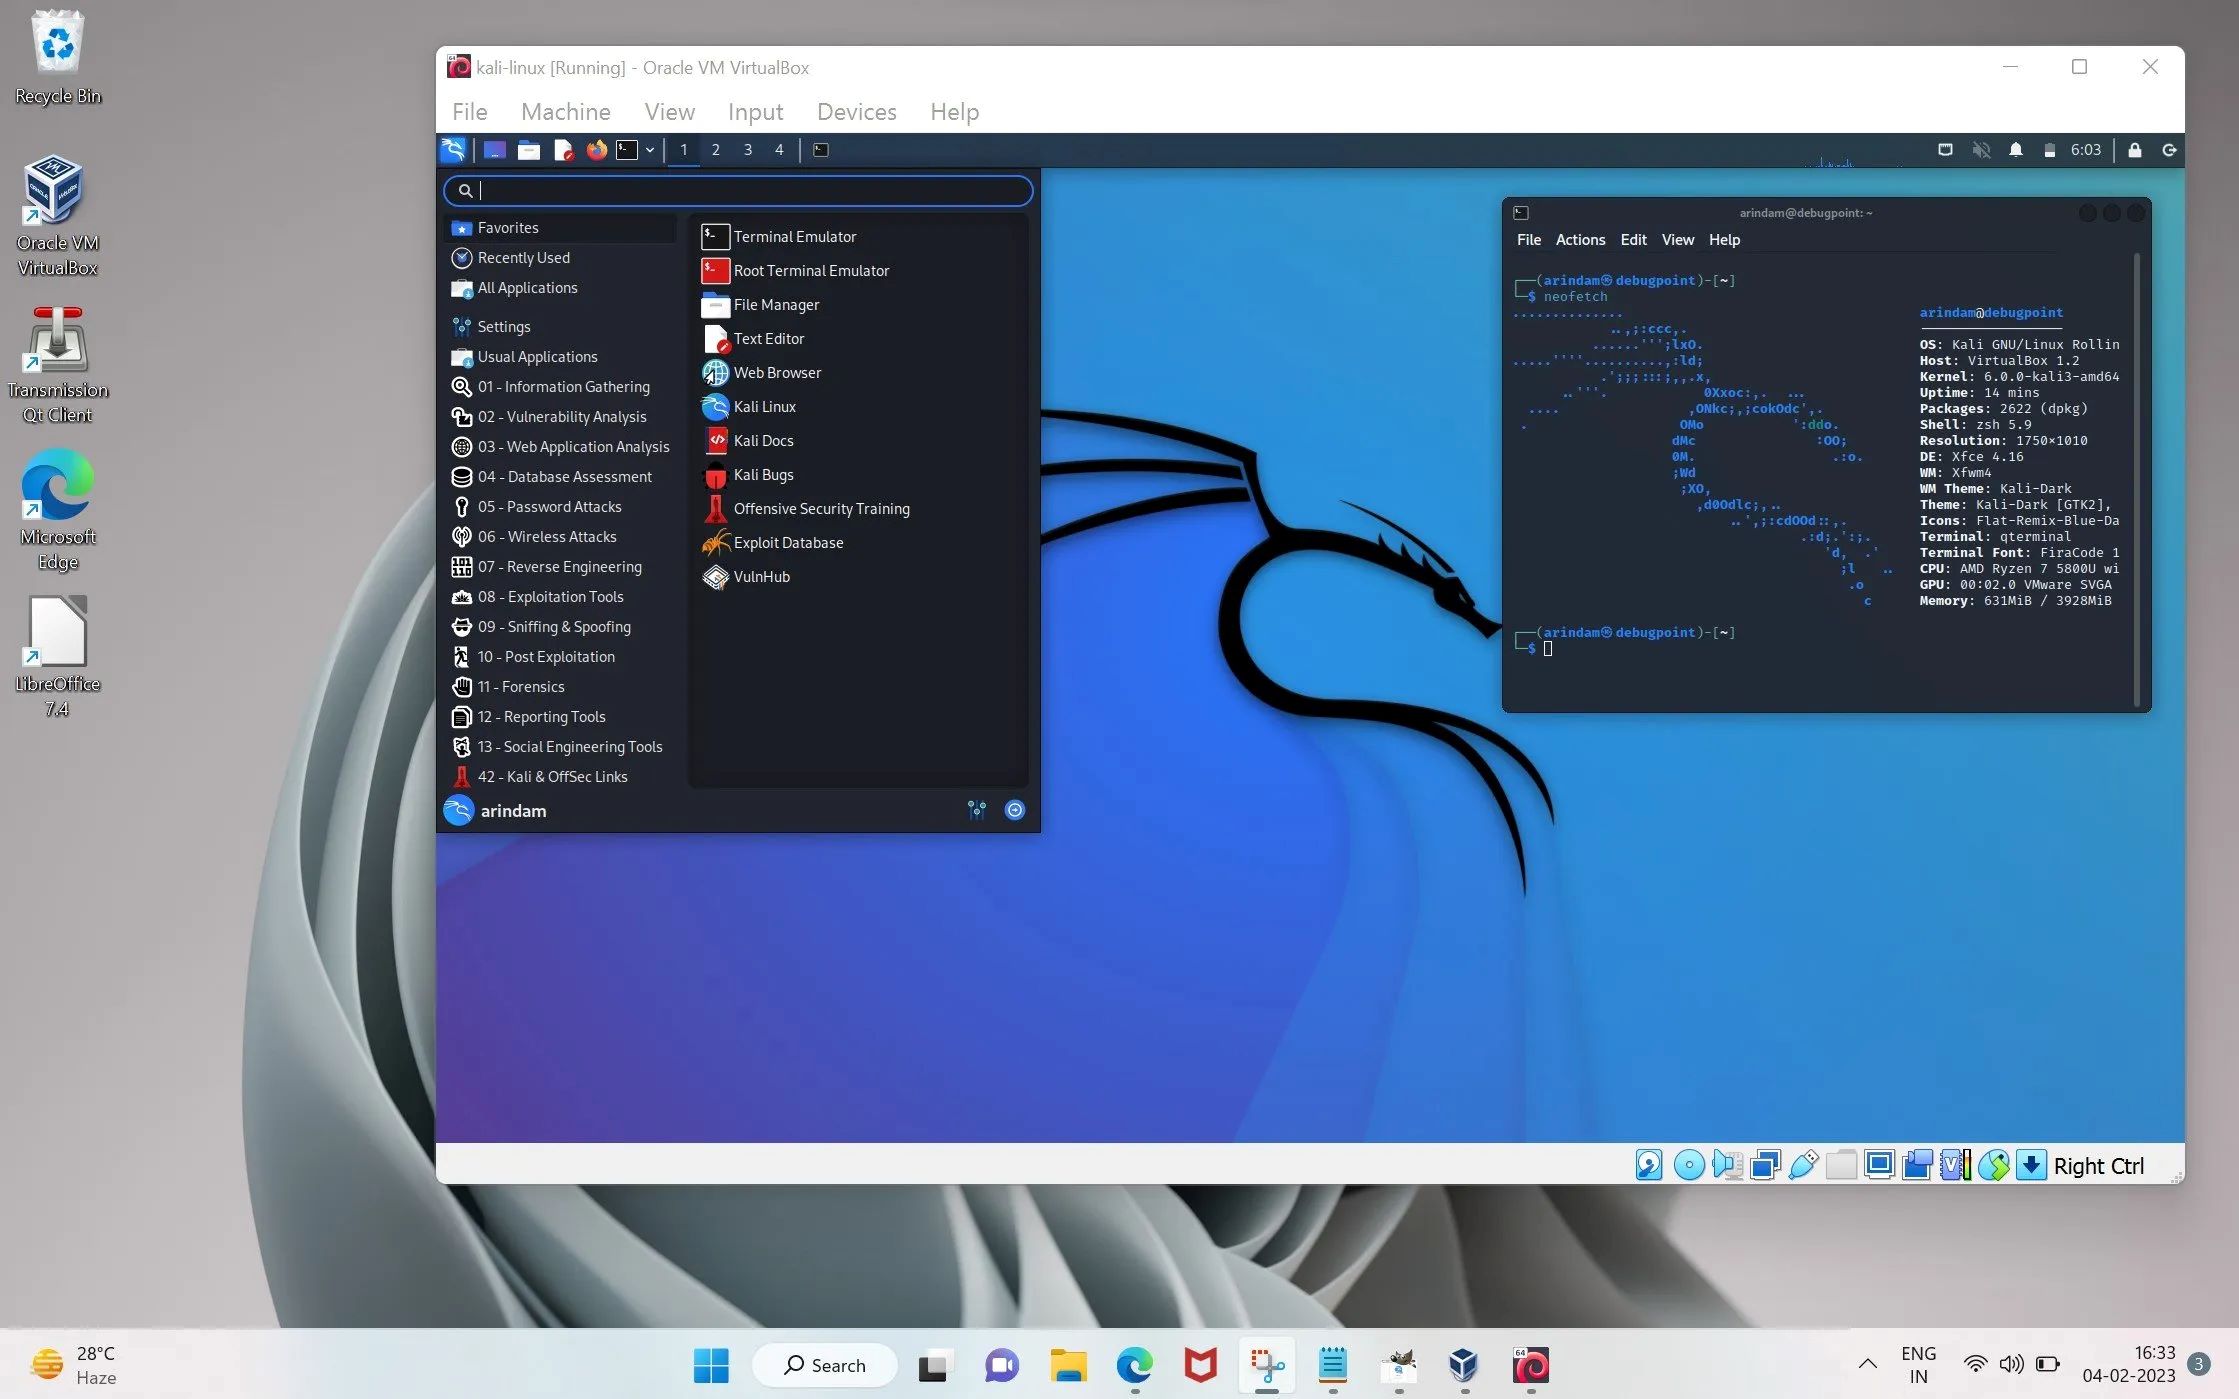
- After successful login, you will be directed to the Kali Linux desktop environment.
- You are now ready to explore the various tools and functionalities of Kali Linux for ethical hacking and penetration testing.
As you navigate through Kali Linux, you will notice a wide range of pre-installed tools and applications designed for various cybersecurity purposes. Take your time to familiarize yourself with the system and its capabilities. It is always advisable to refer to official documentation and resources to get the most out of Kali Linux.
Remember to use Kali Linux responsibly and within the legal boundaries. It is intended for ethical hacking and penetration testing purposes only. Be sure to respect the privacy and security of others and always obtain proper authorization before engaging in any cybersecurity activities.
With Kali Linux up and running on VirtualBox, you are well-equipped to embark on your cybersecurity journey and enhance your skills in the ever-evolving field of cybersecurity.
Conclusion
Congratulations on successfully installing and setting up Kali Linux on your Windows machine using VirtualBox! You have taken a significant step towards enhancing your cybersecurity skills and exploring the world of ethical hacking and penetration testing.
In this guide, we’ve covered the essential steps you need to follow, from downloading VirtualBox and the Kali Linux ISO file to creating a new virtual machine, installing Kali Linux, and configuring the system. By carefully following each step, you now have a fully functional Kali Linux virtual machine running on your Windows computer.
As you continue your journey with Kali Linux, keep in mind that responsible and ethical use of the tools and resources it provides is crucial. Ensure that you always have proper authorization and adhere to legal guidelines when conducting any cybersecurity activities.
Remember to keep your Kali Linux system updated and explore the vast range of tools available to enhance your cybersecurity knowledge and skills. With time and practice, you’ll gain a deeper understanding of ethical hacking techniques, vulnerabilities, and how to secure systems against them.
Lastly, never stop learning. The field of cybersecurity is constantly evolving, and staying updated with the latest trends, techniques, and best practices is essential. Take advantage of online resources, forums, and communities to engage with other cybersecurity professionals and enthusiasts.
Now, armed with Kali Linux and your determination, you are ready to embark on your cybersecurity journey. Use your skills responsibly, continue to learn and explore, and make a positive impact in the world of cybersecurity.


