Introduction
Setting up a virtual environment to run Kali Linux is a great way to explore and test out its powerful tools and features without interfering with your primary operating system. Kali Linux, a Debian-based distribution, is widely used for advanced penetration testing and digital forensics. With virtualization software like VM Workstation, you can easily create a virtual machine (VM) to run Kali Linux seamlessly on your computer.
Whether you’re a cybersecurity enthusiast, a professional pentester, or someone who wants to learn more about ethical hacking, this step-by-step guide will walk you through the process of running Kali Linux on VM Workstation. It ensures that you can experiment with Kali Linux comfortably in a controlled environment, enhancing your skills without any risk to your main system.
Before we dive into the step-by-step instructions, let’s quickly go over some prerequisites. First, you’ll need a decent computer with enough resources to handle running a virtual machine. This typically includes a good amount of RAM, at least 4GB, and a capable processor. Next, make sure you have enough free disk space to accommodate the VM and the Kali Linux installation. Lastly, you will need to download and install VM Workstation, which is available for Windows, macOS, and Linux, and to obtain the Kali Linux ISO image.
With everything set, let’s get started with the first step of downloading and installing VM Workstation.
Prerequisites
Before you begin setting up Kali Linux on VM Workstation, there are a few things you need to ensure you have in place. Let’s take a look at the prerequisites to make sure you’re ready to proceed:
- A computer with sufficient resources: Running a virtual machine can be resource-intensive, so it’s important to have a computer with adequate specifications. Aim for at least 4GB of RAM, though more is better for smoother performance. Additionally, a capable processor will ensure that the virtual machine operates efficiently.
- Free disk space: Virtual machines require disk space to store the virtual hard drive and other necessary files. Ensure that you have enough free disk space to accommodate the size of the VM, as well as the space required for the Kali Linux installation.
- VM Workstation: Download and install VM Workstation from the official VMware website. It is available for Windows, macOS, and Linux. Make sure you have the latest version installed to gain access to the most up-to-date features and functionality.
- Kali Linux ISO image: Obtain the Kali Linux ISO image from the Kali Linux website. Choose the appropriate version based on your computer’s architecture, such as 32-bit or 64-bit. The ISO image will be used to install Kali Linux on the virtual machine.
By ensuring you have all these prerequisites in place, you’ll be well-prepared to proceed with setting up Kali Linux on VM Workstation. Having the right hardware specifications, sufficient disk space, the latest VM Workstation version, and the Kali Linux ISO image will ensure a smooth and successful installation process. Now that you have everything ready, let’s move on to the next step of downloading and installing VM Workstation.
Step 1: Downloading and Installing VM Workstation
To begin the process of running Kali Linux on VM Workstation, the first step is to download and install the VM Workstation software. Follow these guidelines to get started:
- Visit the official VMware website (https://www.vmware.com/products/workstation-pro.html) and navigate to the “Downloads” section.
- Choose the appropriate version of VM Workstation based on your operating system and click on the corresponding download button.
- Once the download is complete, locate the installer file and double-click on it to start the installation process.
- Follow the on-screen instructions to install VM Workstation. Review and agree to the license terms, choose the installation directory, and select any additional components you wish to install.
- During the installation, you may be prompted to enter your administrator password or provide administrative privileges to proceed. Follow the prompts and provide the necessary information.
- Wait for the installation to complete. This may take a few minutes depending on your system’s performance.
- After the installation is finished, launch VM Workstation from your desktop or start menu.
- If it’s your first time using VM Workstation, you may be asked to enter a license key, which can be obtained from the VMware website. Alternatively, you can choose the option to use VM Workstation in trial mode, which provides full functionality for a limited period.
Congratulations! You have now successfully downloaded and installed VM Workstation on your computer. This software will serve as the platform for running the virtual machine that will host Kali Linux. In the next step, we will guide you through the process of downloading the Kali Linux ISO image, so you can proceed with the installation of Kali Linux on VM Workstation.
Step 2: Downloading Kali Linux ISO
With VM Workstation installed, the next step is to obtain the Kali Linux ISO image. The ISO image file contains the complete operating system that will be used to install and run Kali Linux on the virtual machine. Here’s how you can download the Kali Linux ISO:
- Go to the official Kali Linux website (https://www.kali.org/downloads/).
- On the downloads page, you will see different versions of Kali Linux available for download. Choose the version that suits your needs and click on the “Downloads” link next to it.
- Scroll down the page to the “ISO” section, and under the “Installer” column, click on the appropriate download link based on your system’s architecture (32-bit or 64-bit).
- The ISO file will begin downloading to your computer. Depending on your internet speed, this process may take some time.
- Once the download is complete, ensure that you have the ISO file saved in a location accessible to you when configuring the virtual machine.
Great! You have successfully obtained the Kali Linux ISO image. This file will be used in the next steps to create a new virtual machine and install Kali Linux on VM Workstation. Make sure to keep the ISO file in a safe and easily accessible location on your computer.
In the next step, we will guide you through the process of creating a new virtual machine on VM Workstation to prepare for the installation of Kali Linux.
Step 3: Creating a New Virtual Machine
Now that you have downloaded the Kali Linux ISO, it’s time to create a new virtual machine (VM) within VM Workstation. The VM will serve as the container for installing and running Kali Linux. Follow these steps to create a new virtual machine:
- Launch VM Workstation if it’s not already open.
- Click on the “Create a New Virtual Machine” option or navigate to “File” > “New Virtual Machine” from the menu bar.
- The New Virtual Machine Wizard will open. Select “Typical” and click “Next”.
- In the next window, select “Installer disc image file (iso)” and click “Next”.
- Browse for the Kali Linux ISO file you downloaded in the previous step and click “Next”.
- Provide a name for your virtual machine and choose a location where it will be saved on your computer. Click “Next” to proceed.
- Specify the disk capacity for the virtual machine. The recommended value is 20 GB or more. Adjust the size if desired and click “Next”.
- On the next screen, select “Store virtual disk as a single file” for better performance and click “Next”.
- Review the summary of your virtual machine settings and click “Finish” to create the virtual machine.
Congratulations! You have successfully created a new virtual machine in VM Workstation. The VM is now ready to be configured and the Kali Linux installation process can begin. In the next step, we will guide you through the installation of Kali Linux on the virtual machine.
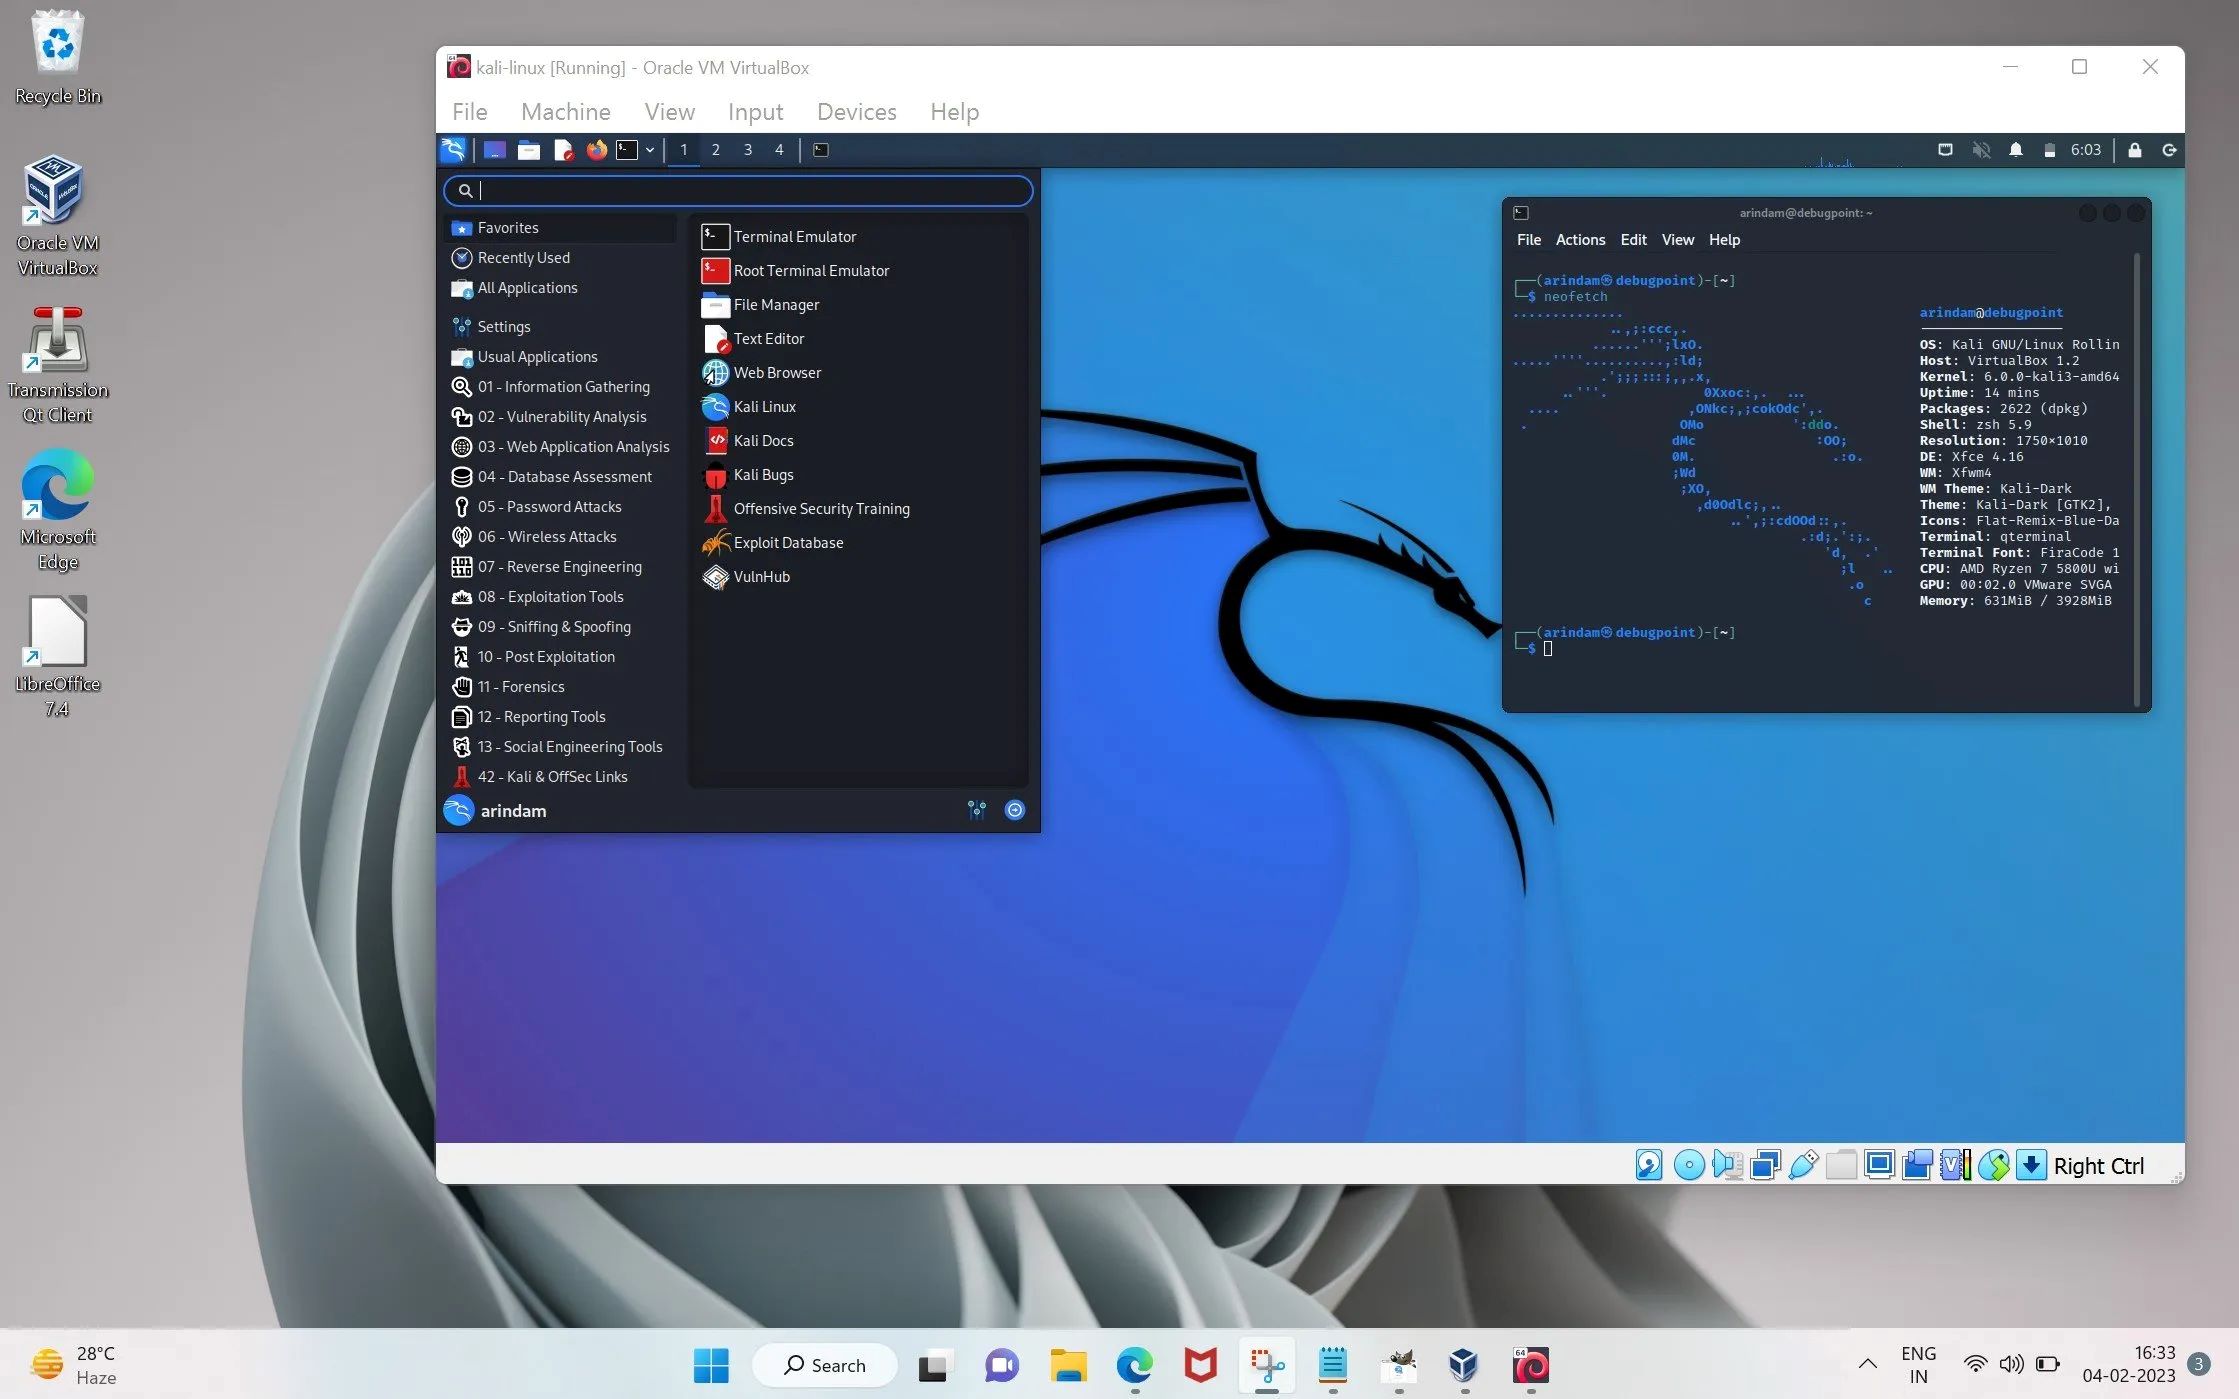
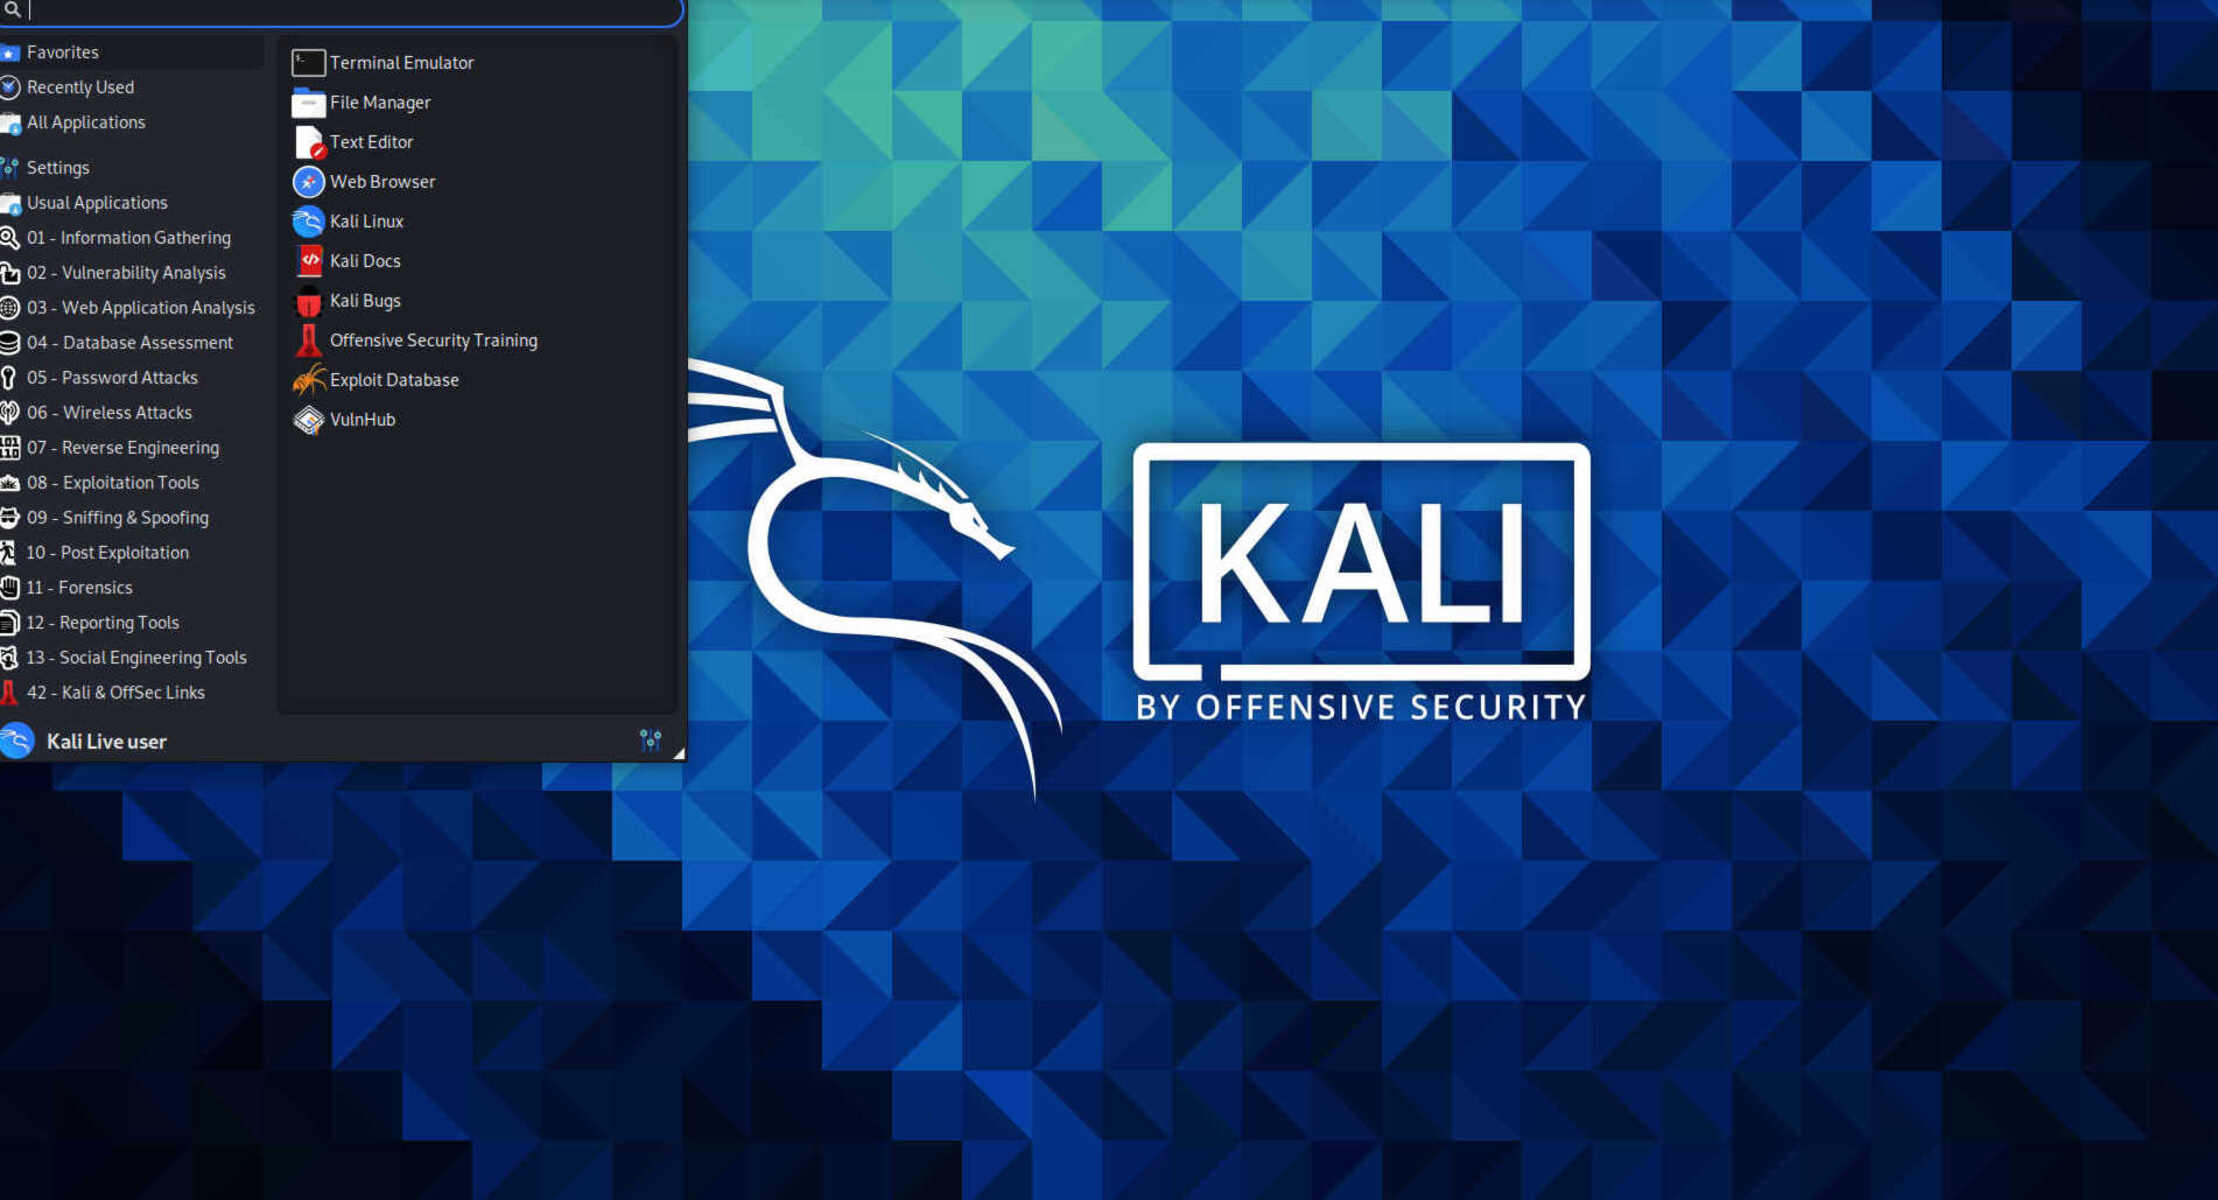
Step 4: Installing Kali Linux on VM Workstation
With the virtual machine created, it’s time to install Kali Linux. Follow these steps to install Kali Linux on VM Workstation:
- Ensure that the virtual machine you created is powered off.
- Select the virtual machine from the VM library in VM Workstation and click on the “Power on this virtual machine” option.
- Once the virtual machine is powered on, the Kali Linux installation process will start.
- Follow the on-screen instructions to choose your preferred language, locale, and keyboard layout.
- When prompted for the installation type, select “Graphical Install” for a user-friendly installation process.
- Next, select your location and configure the network settings based on your requirements.
- Create a root password for the Kali Linux system and confirm it.
- Set up a user account by providing a full name and a username for the account. Set a secure password and confirm it.
- Proceed with the installation process and wait for it to complete. The installation time may vary depending on your system’s performance and the selected options.
- Once the installation is finished, you will be prompted to restart the virtual machine. Click “Restart” to complete the installation process.
Congratulations! You have successfully installed Kali Linux on the virtual machine in VM Workstation. With the installation complete, you can now proceed to configure and customize the Kali Linux system to suit your needs. In the next step, we will guide you through the process of configuring various settings and installing VM tools on Kali Linux.
Step 5: Configuring Kali Linux after Installation
After successfully installing Kali Linux on your virtual machine, there are a few important configurations you should perform to optimize your experience. Follow these steps to configure Kali Linux:
- Log in to your Kali Linux system using the username and password you set during the installation process.
- Once logged in, open a terminal window by clicking on the “Terminal” icon located in the taskbar or by pressing Ctrl+Alt+T.
- Update the system: Execute the command `sudo apt update && sudo apt upgrade` to update and upgrade the system packages to the latest versions. This ensures that you have the most recent software and security patches.
- Configure repositories: Use the text editor of your choice, such as Nano or Vi, to edit the `sources.list` file located in the `/etc/apt/` directory. Uncomment the repositories by removing the `#` symbol in front of the repository URLs.
- Install additional software: Kali Linux provides a wide range of powerful tools, but you may want to install additional software to meet your specific requirements. Use the `apt` package manager to install the desired packages. For example, `sudo apt install package-name`.
- Enable full-screen mode: To make the most of your virtual machine, install the VMware Tools by navigating to “VM” > “Install VMware Tools” in VM Workstation. This will allow you to use Kali Linux in full-screen mode and enable other useful features.
- Configure network settings: Adjust the network settings to ensure your virtual machine has the desired network connectivity. This can be done in the virtual machine settings within VM Workstation.
- Set up shared folders: If you need to transfer files between your host machine and the Kali Linux virtual machine, you can set up shared folders in VM Workstation. This allows you to easily share files and data between the two environments.
By following these steps, you can configure and optimize your Kali Linux system after installation. Updating the system, configuring repositories, installing additional software, enabling full-screen mode, and setting up shared folders will enhance your experience and provide a more seamless integration between your main operating system and Kali Linux. In the next step, we will guide you through the installation of VM tools to further enhance your Kali Linux environment.
Step 6: Installing VM Tools on Kali Linux
Installing VM Tools on Kali Linux is essential for improving the performance and functionality of your virtual machine. VM Tools provides features such as full-screen mode, seamless mouse integration, and automatic guest OS updates. Follow these steps to install VM Tools on Kali Linux:
- Ensure that your Kali Linux virtual machine is powered on and running.
- In VM Workstation, click on “VM” in the menu bar and select “Install VMware Tools”.
- A virtual CD containing the VMware Tools installation files will be mounted in your Kali Linux virtual machine.
- Open a terminal window in Kali Linux by clicking on the “Terminal” icon in the taskbar or by pressing Ctrl+Alt+T.
- Navigate to the virtual CD by executing the command `cd /media/cdrom/`.
- Extract the contents of the VMware Tools archive by executing the command `tar -xvf VMwareTools-
.tar.gz`, replacing ` ` with the actual version of VMware Tools. - Change the directory to the extracted VMware Tools folder by executing the command `cd vmware-tools-distrib/`.
- Run the VMware Tools installer by executing the command `sudo ./vmware-install.pl`.
- Follow the on-screen instructions to complete the installation. Press Enter to accept the default options when prompted.
- Restart your Kali Linux virtual machine to allow the changes to take effect. You can do this by executing the command `sudo reboot`.
Congratulations! You have successfully installed VM Tools on Kali Linux. This will enhance your virtual machine experience by providing seamless mouse integration, improved screen resolution, and other useful features. After restarting your virtual machine, you can now enjoy the benefits of VM Tools on Kali Linux. In the next step, we will guide you through customizing Kali Linux within VM Workstation.
Step 7: Customizing Kali Linux in VM Workstation
Once you have successfully installed Kali Linux and configured it with VM Tools, you can further customize your virtual machine to suit your preferences. Customizing your Kali Linux environment in VM Workstation allows you to enhance usability and improve your overall experience. Follow these steps to customize Kali Linux:
- Launch VM Workstation and power on your Kali Linux virtual machine.
- Open the virtual machine settings by right-clicking on the virtual machine in the VM library and selecting “Settings”.
- In the settings window, you can customize various aspects of your virtual machine. Here are a few key settings to consider:
- Hardware: Adjust your virtual machine’s hardware settings, such as memory allocation and processor cores, to optimize performance.
- Display: Modify display settings like screen resolution and graphics acceleration to enhance visual quality.
- Network Adapter: Configure network settings to ensure connectivity and enable features like bridged networking or NAT.
- Shared Folders: Set up shared folders to easily transfer files between your host machine and Kali Linux virtual machine.
- Autostart: Configure the virtual machine to automatically start when VM Workstation launches, for convenience.
- Make your desired changes to the settings and click “OK” to save the modifications.
- Restart your Kali Linux virtual machine to apply the settings, if necessary.
- Explore additional customization options within the Kali Linux operating system, such as changing the desktop environment, installing themes, or customizing the appearance and behavior of the user interface.
By customizing Kali Linux in VM Workstation, you can tailor the virtual machine to match your specific requirements and preferences. Adjusting hardware settings, optimizing display options, configuring networking, and utilizing shared folders are just a few ways to enhance your experience within the virtual environment. Take the time to explore the customization options available both in VM Workstation and within the Kali Linux operating system to create a personalized and efficient workspace.
Conclusion
Congratulations on successfully running Kali Linux on VM Workstation! By following the step-by-step guide outlined in this article, you have learned how to set up a virtual environment to explore the powerful tools and features of Kali Linux without compromising your main operating system. Let’s recap the key steps we covered:
- Downloaded and installed VM Workstation, a virtualization software that serves as the platform for running Kali Linux.
- Obtained the Kali Linux ISO image from the official website.
- Created a new virtual machine within VM Workstation using the Kali Linux ISO.
- Installed Kali Linux on the virtual machine, following the installation process.
- Configured Kali Linux after installation, including updating the system and customizing repositories.
- Installed VM Tools to enhance the performance and functionality of the virtual machine.
- Customized Kali Linux within VM Workstation to suit your preferences and requirements.
With Kali Linux running smoothly within your virtual machine, you now have a secure and isolated environment to explore and practice penetration testing, ethical hacking, and digital forensics techniques. Remember to keep your Kali Linux system updated with the latest security patches and packages to ensure a robust and safe learning experience.
By leveraging the power of VM Workstation, you can experiment freely with Kali Linux’s powerful tools while maintaining the stability of your main operating system. Enjoy exploring the vast array of cybersecurity tools and resources that Kali Linux offers, and continue to expand your knowledge and skills in the field of cybersecurity.
Thank you for following this guide, and we hope it has provided you with the necessary information to run Kali Linux on VM Workstation. Happy hacking!