Introduction
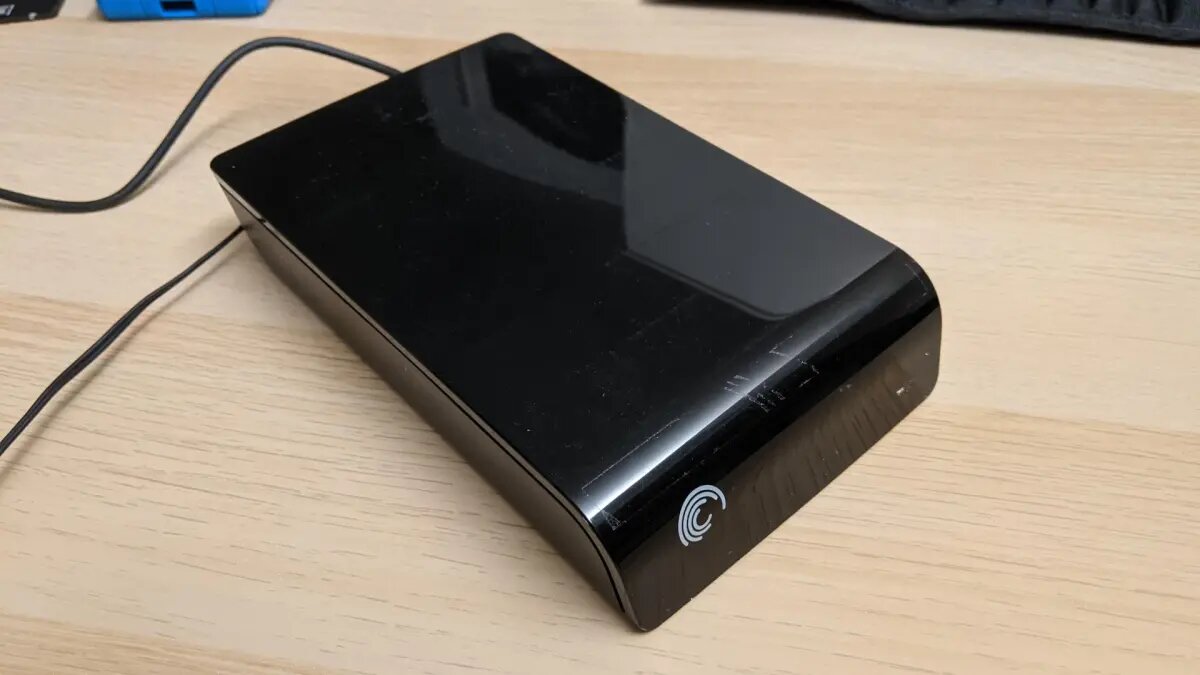
Clearing an external hard drive on a Mac is an important task to ensure that your storage device is clean and ready for use. Whether you’re planning to sell your external hard drive, repurpose it, or simply want to start fresh with a clean slate, this guide will walk you through the steps to clear your external hard drive on a Mac.
Over time, an external hard drive can accumulate unnecessary files, clutter, and outdated data, which can slow down its performance. Clearing your external hard drive not only frees up valuable storage space but also improves its overall speed and efficiency.
Before you begin the process of clearing your external hard drive, it’s crucial to back up any important data stored on it. Clearing the drive will permanently erase all the files and data, so having a backup ensures that you don’t lose any vital information.
In this guide, we’ll take you through the step-by-step process of clearing your external hard drive on a Mac. From backing up your data to erasing the drive and making it ready for use again, we’ve got you covered. So, let’s dive in and learn how to clear your external hard drive on a Mac.
Step 1: Back up your data
Before you start clearing your external hard drive on a Mac, it’s essential to back up any important data that you have stored on it. This step ensures that you don’t accidentally lose any files during the clearing process.
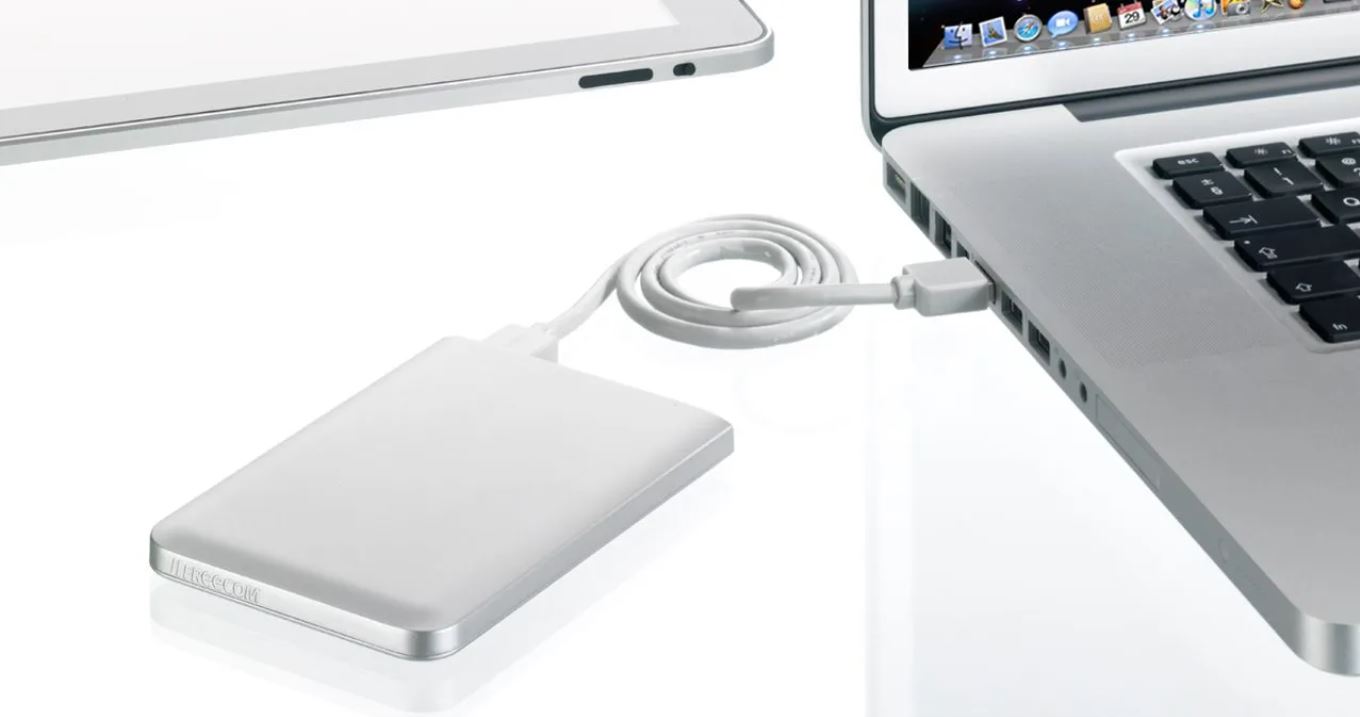
To back up your data, you have several options. One of the easiest ways is to use the built-in Time Machine feature on your Mac. Time Machine allows you to create a complete backup of your Mac, including all the files and folders on your external hard drive. Simply connect an external storage device, such as another hard drive or an iCloud account, and follow the on-screen prompts to set up Time Machine.
Alternatively, you can manually copy and paste the files from your external hard drive onto another storage device. This method is useful if you only have a few files that you want to back up.
If you have sensitive or confidential data on your external hard drive, you may want to consider encrypting your backup. Encryption adds an extra layer of security by scrambling the data, making it unreadable without the appropriate decryption key. macOS provides FileVault, a built-in encryption tool that you can enable for your backup drive.
Taking the time to back up your data is crucial to ensure that you have a copy of all your important files before clearing your external hard drive. Once you’ve successfully backed up your data, you can proceed with confidence to the next step of the process.
Step 2: Disconnect the external hard drive
Before proceeding with clearing your external hard drive on a Mac, it’s important to disconnect it properly to avoid any data corruption or loss. This step ensures that your external hard drive is safely disconnected from your Mac, reducing the risk of any potential issues.
To disconnect your external hard drive, follow these simple steps:
- Eject the external hard drive: Locate the external hard drive icon on your desktop or in the Finder sidebar. Right-click on the icon and select “Eject” from the drop-down menu. Alternatively, you can also drag the icon to the Trash bin, and it will change to an eject symbol.
- Wait for the confirmation: Give your Mac a moment to safely eject the external hard drive. You’ll see a notification on your screen confirming that it’s safe to disconnect the device.
- Physically disconnect the hard drive: Once you receive the confirmation, unplug the USB cable or power adapter from your Mac. If you’re using a Thunderbolt or Firewire cable, make sure to disconnect it properly as well.
Taking the time to disconnect your external hard drive properly ensures that all data is written to the drive and that there are no ongoing operations that could be interrupted. It helps prevent any potential data corruption and ensures that your external hard drive is ready for the next step of the clearing process.
Step 3: Open Disk Utility
Once you’ve safely disconnected your external hard drive, it’s time to open Disk Utility. Disk Utility is a built-in application on Mac that allows you to manage and format your storage devices, including external hard drives.
To open Disk Utility, follow these steps:
- Navigate to the Utilities folder: Go to the Finder and click on the “Go” menu at the top of the screen. From the drop-down menu, select “Utilities”. Alternatively, you can use the keyboard shortcut “Command + Shift + U” to open the Utilities folder directly.
- Locate Disk Utility: In the Utilities folder, scroll down or use the search bar to find “Disk Utility”. Click on it to open the application.
Once Disk Utility is open, you’ll see a list of all the storage devices connected to your Mac, including your external hard drive. Disk Utility provides various tools and functions to manage your drives, such as formatting, partitioning, and repairing disk errors.
Keep in mind that Disk Utility is a powerful tool, and it’s important to use caution when making any changes to your drives. Before proceeding to the next step, double-check that you’ve selected the correct external hard drive in Disk Utility to avoid any accidental formatting or deletion of the wrong drive.
Now that you have Disk Utility open and ready, you can proceed to the next step, where you’ll select your external hard drive and begin the clearing process.
Step 4: Select the external hard drive
After opening Disk Utility, the next step in clearing your external hard drive on a Mac is to select the drive you want to erase. Disk Utility will display a list of all the storage devices connected to your Mac, including your external hard drive.
To select the external hard drive in Disk Utility, follow these steps:
- Locate the external hard drive: In the left-hand sidebar of Disk Utility, you’ll see a list of all the drives and volumes. Look for the name or model of your external hard drive and click on it to select it. The drive will appear in the main window of Disk Utility, displaying information about the drive.
- Verify the selected drive: Take a moment to ensure that you have selected the correct external hard drive. Check the name, model, and capacity of the drive to confirm that it matches your intended drive for clearing. This step is crucial to avoid accidentally erasing the wrong device.
Once you have successfully selected the external hard drive in Disk Utility, you are now ready to proceed with the next steps to erase the drive. It’s important to double-check your selection before proceeding to ensure that you don’t accidentally erase any important data on a different drive.
Note: If your external hard drive does not appear in Disk Utility, make sure it is properly connected to your Mac and powered on. You may need to troubleshoot any connection or power issues before proceeding with the clearing process.
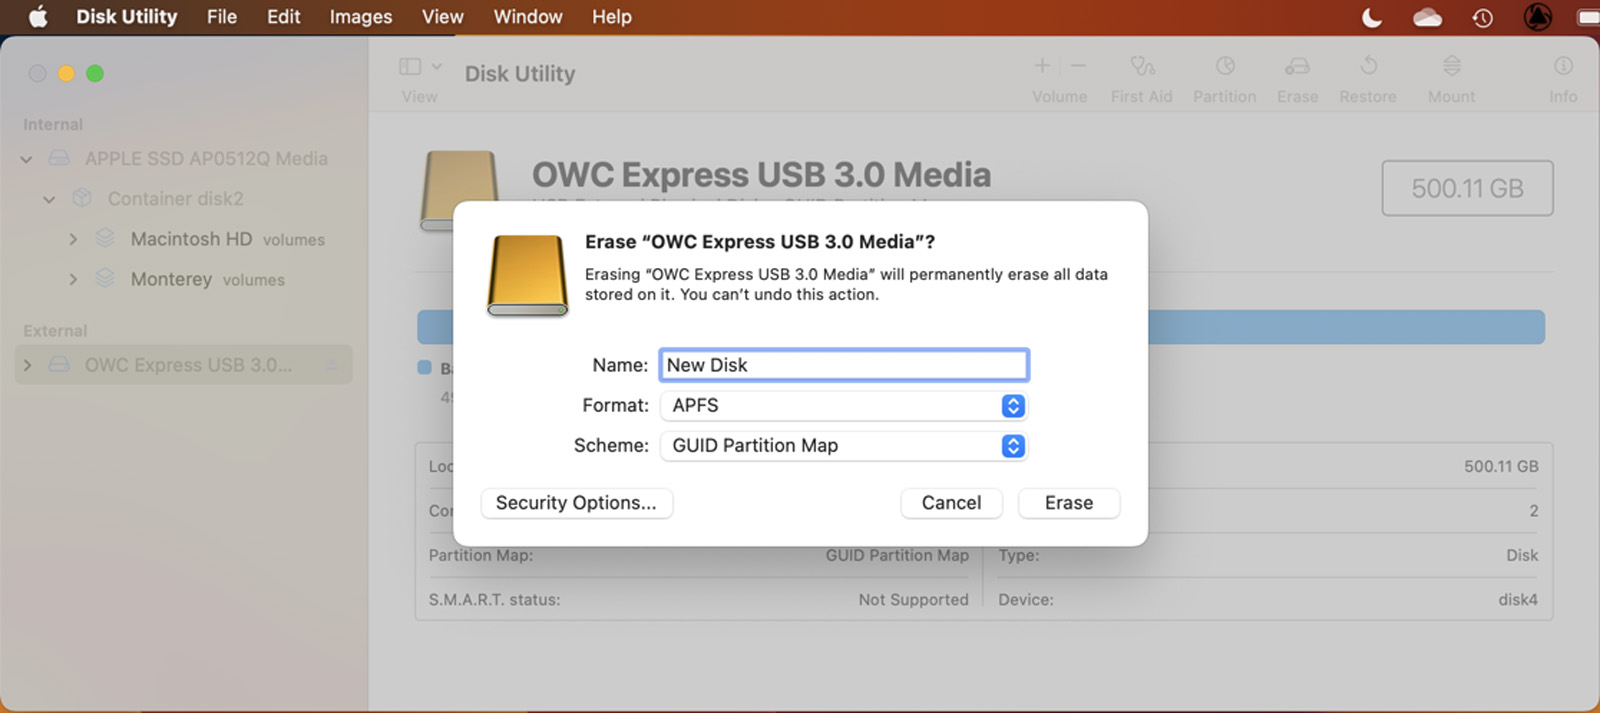
Step 5: Click on “Erase”
Once you have selected the external hard drive in Disk Utility, the next step is to click on the “Erase” button. This action will begin the process of clearing the drive and preparing it for future use.
To click on “Erase” in Disk Utility, follow these simple steps:
- On the top toolbar in Disk Utility, click on the “Erase” tab: This tab is located next to the “First Aid” and “Partition” tabs.
- Review the erase options: In the Erase tab, you will see various options for erasing the drive. These options include the format, scheme, and name of the drive.
- Select the desired format: Choose the format that best suits your needs. If you’re planning to use the drive on a Mac, the recommended format is APFS (Apple File System). If you need compatibility with other operating systems, consider choosing exFAT or FAT32.
- Choose the scheme: If you’re erasing an external hard drive for use only on Mac, the recommended scheme is GUID Partition Map. If you need compatibility with older Macs or Windows PCs, consider choosing Master Boot Record (MBR) or Apple Partition Map.
- Name the external hard drive: Give the drive a recognizable name that will make it easier for you to identify it in the future.
- Click on the “Erase” button: Once you have reviewed and confirmed the erase options, click on the “Erase” button to initiate the clearing process.
Disk Utility will prompt you with a warning that all data on the selected drive will be permanently erased. Ensure that you have backed up any important data before proceeding. If you’re certain that you want to proceed with erasing the drive, click on the “Erase” button in the confirmation dialogue box.
Now that you have clicked on “Erase” in Disk Utility, the clearing process will begin. The time it takes to complete will depend on the size and speed of your external hard drive. Do not interrupt the process and wait for it to complete before proceeding to the next step.
Step 6: Choose a format for the external hard drive
After clicking on “Erase” in Disk Utility, the next step in the process of clearing your external hard drive on a Mac is to choose a format for the drive. The format determines how the drive will be organized and the file system it will use.
To choose a format for your external hard drive, take the following steps:
- Review the available formats: Disk Utility will display a list of available formats for your external hard drive. The options may include APFS, Mac OS Extended (Journaled), exFAT, and FAT32.
- Consider compatibility: If you plan to use the external hard drive exclusively with macOS devices, choosing APFS or Mac OS Extended (Journaled) is recommended. If you need cross-platform compatibility with Windows or other operating systems, consider exFAT or FAT32.
- Select the desired format: Click on the format that best suits your needs. Keep in mind that different formats have different limitations and capabilities, so choose accordingly.
- Confirm the format selection: Disk Utility will display a confirmation message, reminding you that all data on the drive will be erased. Make sure you have backed up any important data before proceeding.
- Click on the “Erase” button: If you are certain about your format selection and have made the necessary backups, click on the “Erase” button to format the external hard drive with the chosen format.
Choosing the appropriate format for your external hard drive is essential for ensuring compatibility and optimal performance. Consider your specific needs and the devices you plan to use with the drive before making a decision. Once you have selected the format and clicked on “Erase,” Disk Utility will begin the formatting process, which may take some time depending on the size of the drive.
It’s important to note that formatting the drive will permanently delete all data on it. Make sure you have backed up any important files before proceeding with the format to avoid losing valuable information.
Step 7: Name the external hard drive
After choosing the format for your external hard drive in Disk Utility, the next step is to give it a name. Naming your drive helps you identify it easily, especially if you have multiple external hard drives connected to your Mac.
To name your external hard drive, follow these simple steps:
- Locate the “Name” field: In Disk Utility, you will find a field labeled “Name” under the format and scheme options.
- Click on the field to enter a name: Click on the existing name or the field itself to select it. Then type the desired name for your external hard drive.
- Choose a descriptive and recognizable name: Select a name that will help you identify the drive easily. You can use any name that is meaningful to you, such as the purpose of the drive, the brand, or any other relevant information.
Take some time to think about a name that will make it easy for you to distinguish this particular external hard drive from others. A descriptive name can save you time and confusion in the future, especially if you have multiple drives.
It’s important to note that the name you choose for the drive will only be displayed on your Mac. If you use the drive on other devices, the name may not appear as you’ve named it in Disk Utility.
Once you have entered the desired name for your external hard drive, you can proceed to the next step of the clearing process. It’s always a good idea to double-check the name you’ve entered before moving forward to ensure accuracy.
Step 8: Click on “Erase” again to confirm
After naming your external hard drive in Disk Utility, the next step is to click on the “Erase” button once again to confirm the clearing process. This final step ensures that you are ready to proceed with the erasure of the drive and that you understand the irreversible nature of this action.
To click on “Erase” again and confirm the process, follow these straightforward steps:
- Review the erasure options: Disk Utility will display a summary of the chosen format, scheme, and the name you’ve given to your external hard drive. Take a moment to double-check that all the settings are as desired.
- Confirm the erasure: Read the warning message that Disk Utility presents, which states that erasing the drive will permanently delete all data on it. Ensure that you have backed up any important files or information before proceeding.
- Click on the “Erase” button: If you are certain about your decision and have made the necessary preparations, click on the “Erase” button to start the clearing process.
Once you click on “Erase” again to confirm, Disk Utility will begin the final erasure of your external hard drive. This process may take some time depending on the size of the drive and the speed of your Mac. It’s important to note that the erasure cannot be undone, so make sure you have safely backed up any essential data before proceeding.
While the erasure is in progress, it’s best to avoid using or disconnecting the external hard drive. Interruptions during the erasure process could lead to data loss or drive corruption. Instead, patiently wait for Disk Utility to complete the erasure and notify you when it’s finished.
Now that you have clicked on “Erase” again to confirm, the clearing process is underway. All the data on your external hard drive will be permanently deleted, and the drive will be prepared for its next use. Remain patient and avoid any interruptions until the process is complete.
Step 9: Wait for the erasing process to complete
After confirming the erasure of your external hard drive in Disk Utility, the next step is to wait patiently for the erasing process to complete. This process involves permanently deleting all data on the drive and preparing it for its next use.
The time it takes for the erasing process to complete will depend on various factors, including the size of the drive and the speed of your Mac. Larger drives or slower systems may take longer to erase. It’s important to avoid interrupting or disconnecting the drive during this process to prevent any potential data loss or drive corruption.
While the erasing process is underway, you will see a progress indicator in Disk Utility that shows the remaining time or percentage of completion. It’s best to let the process run without any unnecessary interference, allowing Disk Utility to perform the necessary operations in the background.
During this waiting period, you can take the time to prepare for the next steps after the erasing process is completed. This might involve gathering any software or files you want to transfer to the newly cleared drive or considering any additional setup steps you may need to take.
Once the erasing process is complete, Disk Utility will notify you, either through a completion message or by returning the drive to its original state in the sidebar. At this point, you can proceed to the final step of reconnecting and using your external hard drive on your Mac.
Remember that the erasing process is irreversible and permanently deletes all data on the drive. Ensure that you have made the necessary backups and are ready to continue with a blank slate before proceeding with this step.
Take this time to be patient and wait for Disk Utility to finish erasing your external hard drive. Once the process is complete, you’ll be ready to move on to the next step in utilizing your cleared drive effectively.
Step 10: Reconnect and use the external hard drive
After the erasing process is complete and your external hard drive has been cleared, the final step is to reconnect it to your Mac and start using it again. With a clean slate, you can now utilize the drive for various purposes such as data storage, backups, or file transfers.
To reconnect and use your external hard drive, follow these steps:
- Ensure the drive is powered off: If the drive was powered on during the erasure process, make sure to power it off before reconnecting it to your Mac.
- Connect the drive to your Mac: Depending on the type of connector your external hard drive uses (USB, Thunderbolt, etc.), connect the appropriate cable to your Mac’s port and the drive itself.
- Power on the external hard drive: Once connected, power on the external hard drive using the appropriate method, such as pressing the power button or plugging it into a power source.
- Wait for the drive to mount: Give your Mac a few moments to recognize the reconnected drive. It should appear on your desktop, in the Finder sidebar, or in Disk Utility.
- Start using the drive: Now that your external hard drive is reconnected and recognized by your Mac, you can start using it. Depending on your needs, you can drag and drop files onto the drive, use it for backups with Time Machine, or transfer files to and from the drive.
It’s important to note that newly cleared external hard drives may require some initial setup, such as formatting or partitioning, depending on your specific requirements. This step should be done only if necessary and with caution to avoid accidentally erasing any data.
Remember to regularly back up the important files stored on your external hard drive to avoid any potential data loss. Creating a backup system or using cloud-based storage options can provide additional protection for your valuable information.
Congratulations! You have successfully completed the process of clearing your external hard drive on a Mac and reconnecting it for use. Enjoy the newfound storage space and utilize the drive for your desired purposes.