Introduction
Welcome to this helpful guide on how to change your computer’s case fan! If you own a desktop computer, you know how critical it is to keep your system cool and prevent overheating. The case fan plays a crucial role in regulating the temperature inside your computer, ensuring optimal performance and longevity of your hardware.
Over time, case fans may start making noise, performing poorly, or stop working altogether. When this happens, it’s important to replace the faulty fan to avoid potential damage to your computer components.
In this guide, we will walk you through the step-by-step process of changing your computer’s case fan. We will provide you with valuable insights, safety tips, and all the information you need to successfully complete this task.
Whether you’re a seasoned computer enthusiast or a beginner in the world of hardware, this guide is designed to help you. By following these instructions, you’ll be able to keep your computer running smoothly, prevent overheating, and ensure your system remains in optimal condition.
Before we dive into the details, it’s important to note that if you’re not comfortable working with computer hardware or are unsure of any step, it’s always best to seek professional assistance. Additionally, make sure to check your computer’s warranty as making modifications to your hardware may void it.
Now, let’s get started with changing your computer’s case fan and ensuring your system stays cool and efficient!
Overview of Computer Case Fans
Computer case fans are essential components that help maintain the temperature inside your computer case. They work by exhausting hot air and drawing in cooler air, preventing the buildup of heat that can damage your system’s internal components.
There are two types of case fans: intake fans and exhaust fans. Intake fans are typically mounted at the front or sides of the computer case and draw in cool air from the surroundings. Exhaust fans, on the other hand, are usually located at the rear or top of the case and expel hot air generated by the components.
Case fans come in various sizes, typically measured in millimeters (mm). The most common sizes are 80mm, 120mm, and 140mm, although larger sizes such as 200mm are also available. The size of the fan affects its airflow capacity and noise level.
In addition to size, case fans differ in terms of airflow (measured in cubic feet per minute or CFM) and static pressure (measured in millimeters of water or mmH2O). Higher airflow and static pressure ratings indicate better cooling performance, but they may also result in increased noise levels.
When choosing a new case fan, it’s essential to consider your specific requirements. Factors such as the size and layout of your computer case, the existing fan configuration, and the components being cooled all play a role in determining the most suitable fan for your needs.
Some computer cases come with pre-installed fans, while others may have available mounting points for additional fans. It’s important to check your case’s specifications and available fan slots before purchasing new fans.
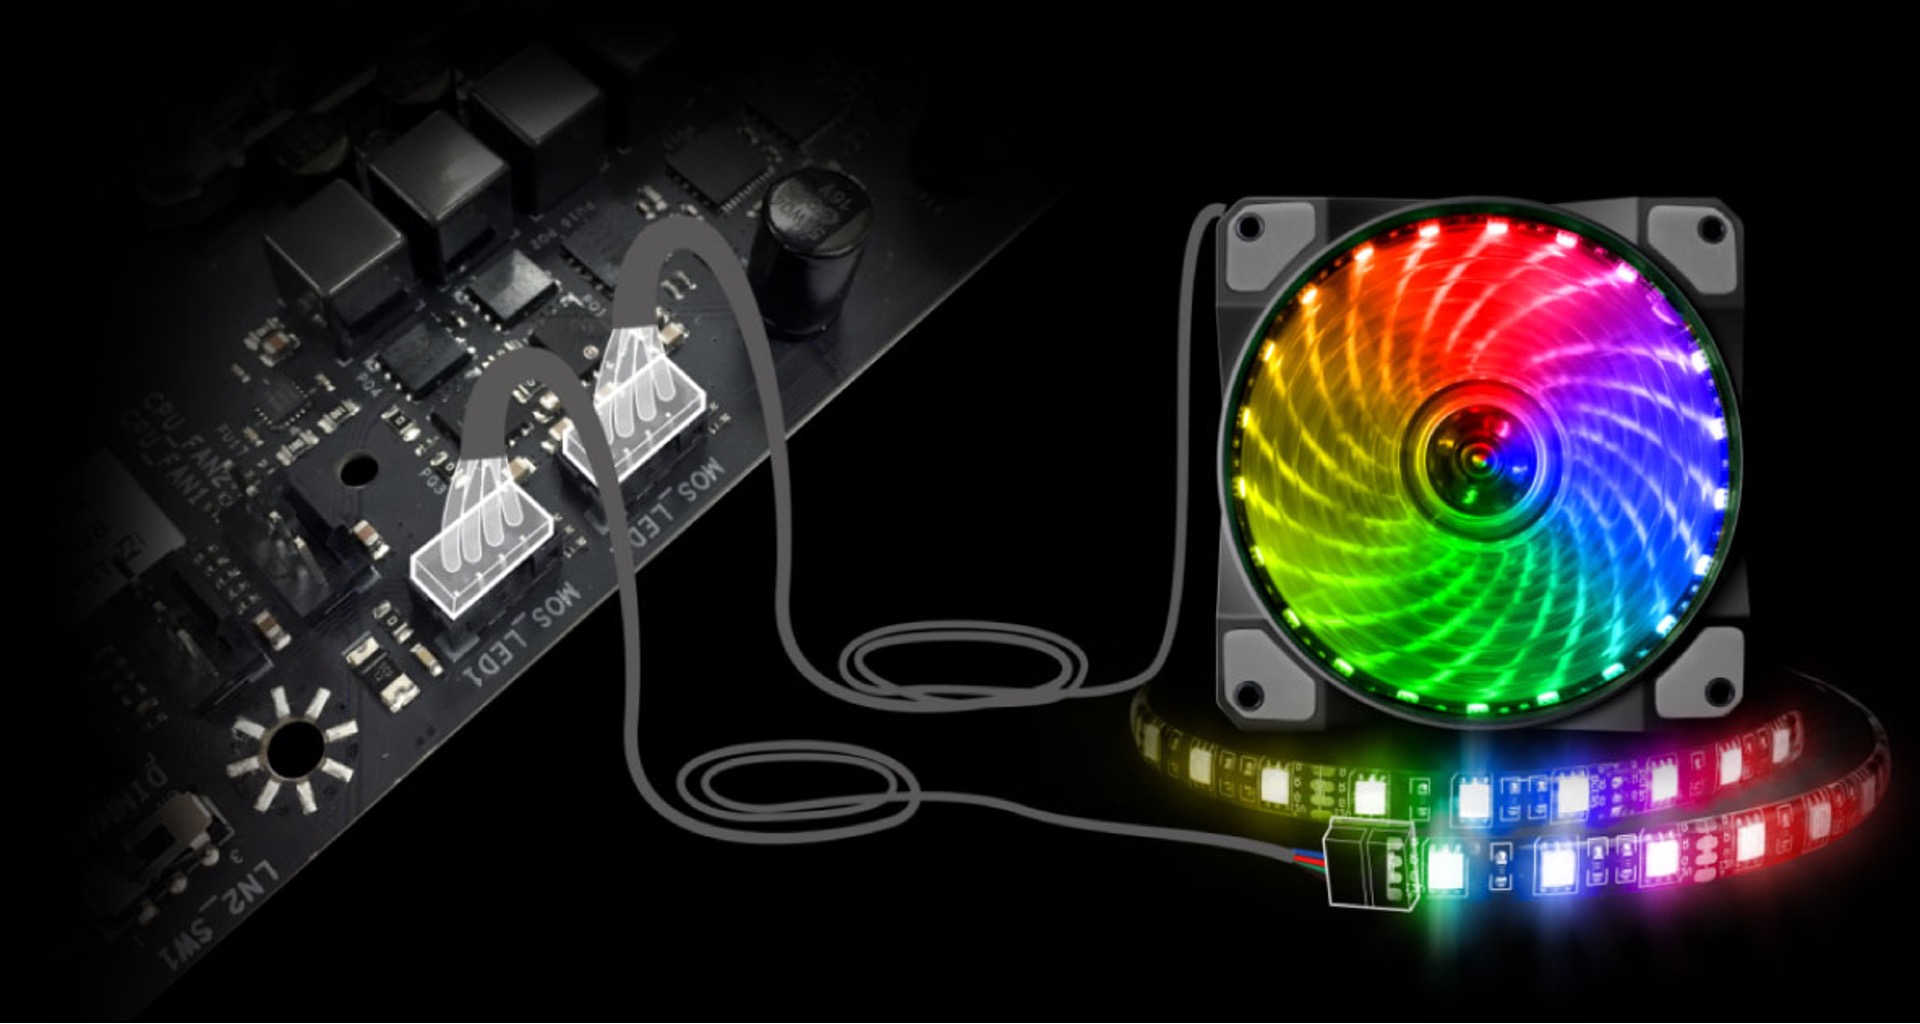
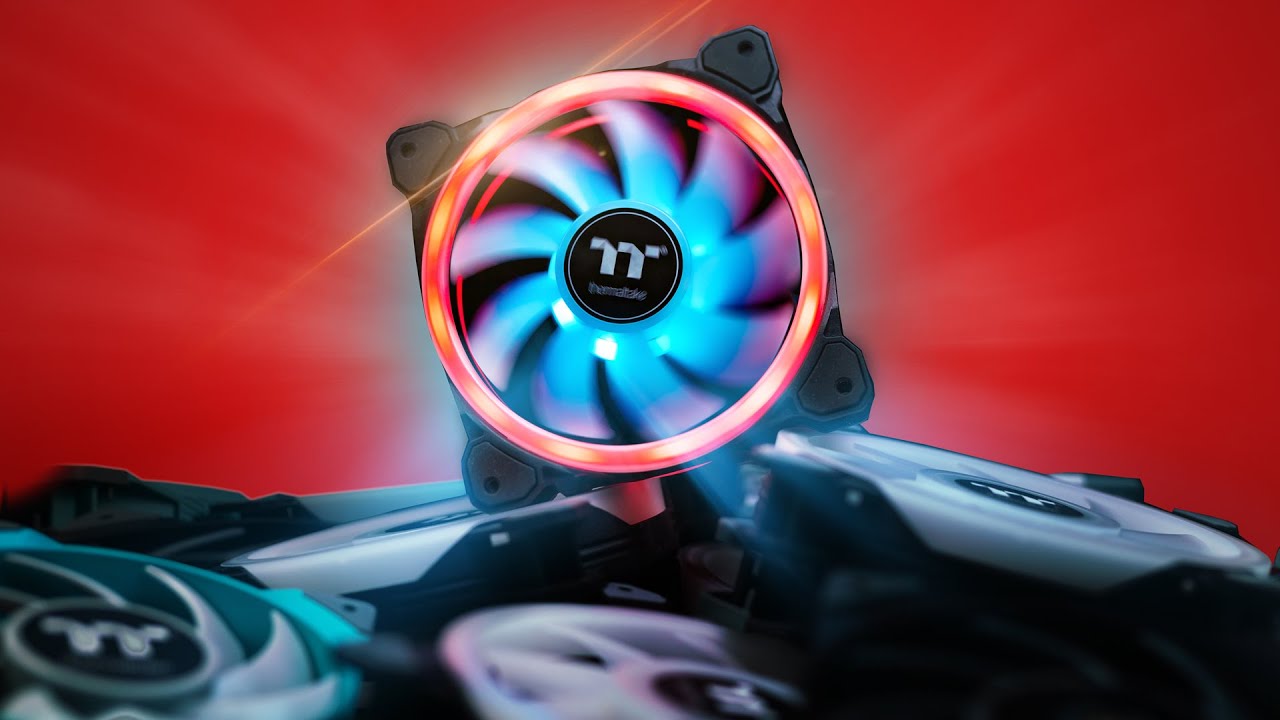
Modern case fans often utilize features such as ball bearings or fluid dynamic bearings to ensure smooth and quiet operation. Additionally, some fans come equipped with RGB lighting, allowing you to customize the color and effects to match your build’s aesthetics.
Now that we’ve established the importance of case fans and their various characteristics, let’s move on to the step-by-step process of changing a computer’s case fan!
Tools and Materials Needed
Before you start replacing your computer’s case fan, it’s important to gather all the necessary tools and materials to ensure a smooth and efficient process. Here’s a list of what you’ll need:
- Screwdriver: A Phillips head screwdriver is typically required for removing the screws that secure the old case fan in place.
- New Case Fan: Select a high-quality case fan that matches the size requirements and specifications of your computer case. Consider factors such as airflow, static pressure, noise level, and any additional features you desire.
- Thermal Paste (if necessary): If you’re replacing a CPU cooler fan or any fan that makes direct contact with a heat sink, you may need to apply thermal paste to ensure proper heat transfer.
- Cable Ties or Zip Ties: These can be used to manage the cables and keep them neatly organized inside your computer case.
- Anti-static Wrist Strap (optional): While not mandatory, an anti-static wrist strap can help protect sensitive computer components from electrostatic discharge.
- Clean Cloth or Compressed Air: Before installing the new fan, it’s a good idea to clean any dust or debris from your computer case to optimize airflow and prevent clogging.
Make sure you have these tools and materials ready before you begin. It’s essential to use compatible and high-quality components to ensure the longevity and performance of your computer system.
Now that we have all the necessary tools and materials, let’s move on to some important precautions and safety tips to keep in mind during the fan replacement process!
Precautions and Safety Tips
Changing a computer’s case fan involves working with delicate hardware components. It’s important to exercise caution and follow these precautions and safety tips:
- Power Off and Disconnect: Before beginning any work, make sure to shut down your computer properly and disconnect it from the power source. This will help prevent any accidental electric shocks or damage to your system.
- Ground Yourself: To avoid harming sensitive computer components with static electricity, it’s advisable to use an anti-static wrist strap or touch an unpainted metal surface to discharge any static buildup before handling any internal hardware.
- Refer to the Manual: Consult your computer’s manual or online resources for specific instructions and diagrams related to your particular computer model. This will ensure that you correctly identify the case fan and understand the fan removal and installation process.
- Handle Components with Care: Be gentle when handling computer components, as excessive force or mishandling can lead to damage. Avoid touching any exposed circuitry or connectors with your fingers to prevent static discharge or oil transfer.
- Be Mindful of Cables: Take note of the cable connections before disconnecting the old fan. Ensure that you reconnect the new fan’s cables in the correct orientation to avoid any issues with power or control.
- Cleanliness: Keep your work area clean and free of dust and debris. Use a clean cloth or compressed air to remove any accumulated dust from the computer case and components, as this can aid in maintaining optimal airflow and cooling performance.
- Seek Professional Assistance: If you’re unsure about any step or lack the necessary tools and experience, it’s best to seek the help of a professional computer technician. They have the expertise to handle hardware installations and can ensure the job is done safely and efficiently.
By following these precautions and safety tips, you can minimize the risk of damage to your computer components and ensure a smooth and successful case fan replacement process. Now that you’re aware of the safety measures, let’s move on to the step-by-step instructions to change your computer’s case fan!
Step 1: Shutting Down and Disconnecting the Computer
Before you can begin replacing your computer’s case fan, you must first ensure that the system is shut down and properly disconnected. Following these steps will help prevent any accidents or damage during the process.
- Save and Close: Save any open files and close all applications running on your computer. This will prevent any data loss or corruption during the shutdown process.
- Shutdown: Click on the “Start” menu in the bottom left corner of your screen, then select “Shutdown” or “Restart”. Wait for the computer to completely power off before proceeding. It’s important to not simply put the computer into sleep or hibernation mode as this may keep some components powered.
- Unplug Power Cable: Locate the power cable connected to the back of your computer tower and unplug it from the wall outlet. This will ensure there is no electrical power flowing through the system.
- Disconnect Other Cables: Take note of any other cables connected to your computer, such as the monitor, keyboard, mouse, and Ethernet cable. Carefully unplug these cables from the appropriate ports on the back of the computer case.
Ensure that you handle all cables with care and do not apply excessive force when disconnecting them. If necessary, label or take a photo of the cable connections to assist in reconnection later.
Once you have completed these steps, your computer will be powered off and disconnected, allowing you to safely proceed with the case fan replacement process. In the next step, we will guide you through removing the side panel of your computer case.
Step 2: Removing the Side Panel
With the computer powered off and disconnected, you can now proceed to remove the side panel of your computer case. This will provide you with access to the internal components, including the case fan.
- Locate the Screws: Take a look at the back of your computer case and identify the screws or fasteners holding the side panel in place. These are usually located along the edges of the panel.
- Use the Screwdriver: Grab the appropriate screwdriver, typically a Phillips head, and begin removing the screws that secure the side panel. Turn the screws counterclockwise to loosen and remove them. Set the screws aside in a safe place to avoid misplacing them.
- Slide or Lift the Panel: Once all the screws have been removed, gently slide or lift the side panel away from the computer case. Most cases will have a mechanism that allows the panel to slide or pivot open. Take care not to force or bend the panel as you remove it.
At this point, you should have successfully removed the side panel of your computer case. Place the panel in a safe location where it won’t get damaged. With the panel removed, you will now have a clear view of the internal components, including the case fan that needs to be replaced.
Remember to handle the side panel and screws with care to avoid any damage to the case or injuries to yourself. In the next step, we will guide you through locating the case fan inside your computer case.
Step 3: Locating the Case Fan
Now that you have removed the side panel of your computer case, you can proceed to locate the case fan that needs to be replaced. The case fan is typically positioned in a specific area to provide effective airflow and cooling to the internal components.
- Identify the Fan Mounting Points: Take a close look inside the computer case and locate the fan mounting points. These are often found either at the front, rear, or sides of the case, depending on the case design.
- Recognize the Fan Assembly: Look for the fan assembly, which consists of the fan itself attached to a frame or bracket. The fan may be mounted directly to the case or to a removable fan tray or bracket.
- Note the Fan Size: Pay attention to the size of the case fan. The size is typically indicated by the width of the fan (usually 80mm, 120mm, or 140mm). This is important information when purchasing a replacement fan to ensure compatibility.
- Observe the Fan Orientation: Take note of how the case fan is currently oriented. This information will help you correctly install the new fan later on. Some fans are positioned to draw air into the case, while others are set up to expel hot air from the case.
It’s important to be aware of any other components located near the case fan, such as cables, heat sinks, or other fans. This will help you plan the installation and ensure there is enough space and clearance for the new fan.
Now that you have successfully located the case fan, you’re ready to move on to the next step: disconnecting the old fan from the system.
Step 4: Disconnecting the Old Fan
With the case fan located inside your computer case, it’s time to disconnect the old fan from the system. This step will involve disconnecting the necessary cables and removing any fasteners that secure the fan in place.
- Cable Removal: Start by identifying the cables connected to the old case fan. In most cases, there will be a power cable and possibly a control cable. Gently unplug these cables from their respective connectors on the motherboard or fan controller. Take note of the orientation and placement of these cables.
- Remove Fasteners: Once the cables are disconnected, locate any screws or fasteners holding the fan in place. Using a screwdriver, carefully remove these fasteners by turning them counterclockwise. Set the screws aside in a safe place, ensuring they don’t get mixed up with other components.
- Gently Remove the Old Fan: With the cables detached and the fasteners removed, carefully lift or slide the old fan out of its mounting position. Take care not to damage any other components as you do this. If the fan is secured with clips or brackets, release them as necessary to remove the fan completely.
Throughout this process, it is essential to handle the fan and cables with care to avoid any damage. Keep in mind that the old fan may have accumulated dust and debris over time, so exercise caution when removing it to prevent loose particles from spreading inside your computer case.
With the old fan disconnected and removed, it’s time to move on to the next step: installing the new fan.
Step 5: Installing the New Fan
After successfully disconnecting and removing the old case fan, it’s time to install the new fan in its place. Proper installation is crucial to ensure effective cooling and optimal performance of your computer system.
- Choose the Right Orientation: Before installing the new fan, determine the desired orientation based on the airflow requirements of your system. If you are using the fan as an intake, position it to draw cool air into the case. For exhaust, orient it to expel hot air from the case.
- Align the Screw Holes: Place the new fan over the mounting points in your computer case, aligning the screw holes with the corresponding holes in the case. Ensure that the fan fits securely and flush against the case surface.
- Secure the Fan: Depending on your case design, use the screws that came with the new fan to fasten it to the case. Insert the screws into the screw holes and turn them clockwise until they are snug but not overly tightened. Be cautious not to overtighten, as this may damage the fan or case threads.
- Ensure Clearances: Check for any obstructions or interference with other components in the case. Ensure that the fan blades have enough clearance to rotate freely without making contact with cables, brackets, or other fans.
If your computer’s case uses brackets or clips to secure the fan, follow the manufacturer’s instructions to properly install the fan using these mechanisms. Some cases may have specialized fan mounting systems that require specific steps to secure the fan correctly.
Remember to consider the airflow direction when installing the fan to maintain proper cooling within your computer case. Also, double-check that the fan is securely fastened to prevent any unwanted vibrations or movement that could affect its performance.
With the new fan successfully installed, you can proceed to the next step: connecting the necessary cables to power and control the fan.
Step 6: Connecting the New Fan
Now that you have installed the new case fan in your computer, it’s time to connect the necessary cables to ensure proper power and control. These connections are essential for the fan to operate correctly and integrate with your system.
- Locate the Fan Connectors: Take a look at the new case fan and locate the cables extending from it. Depending on the fan model, there may be one or more cables that need to be connected.
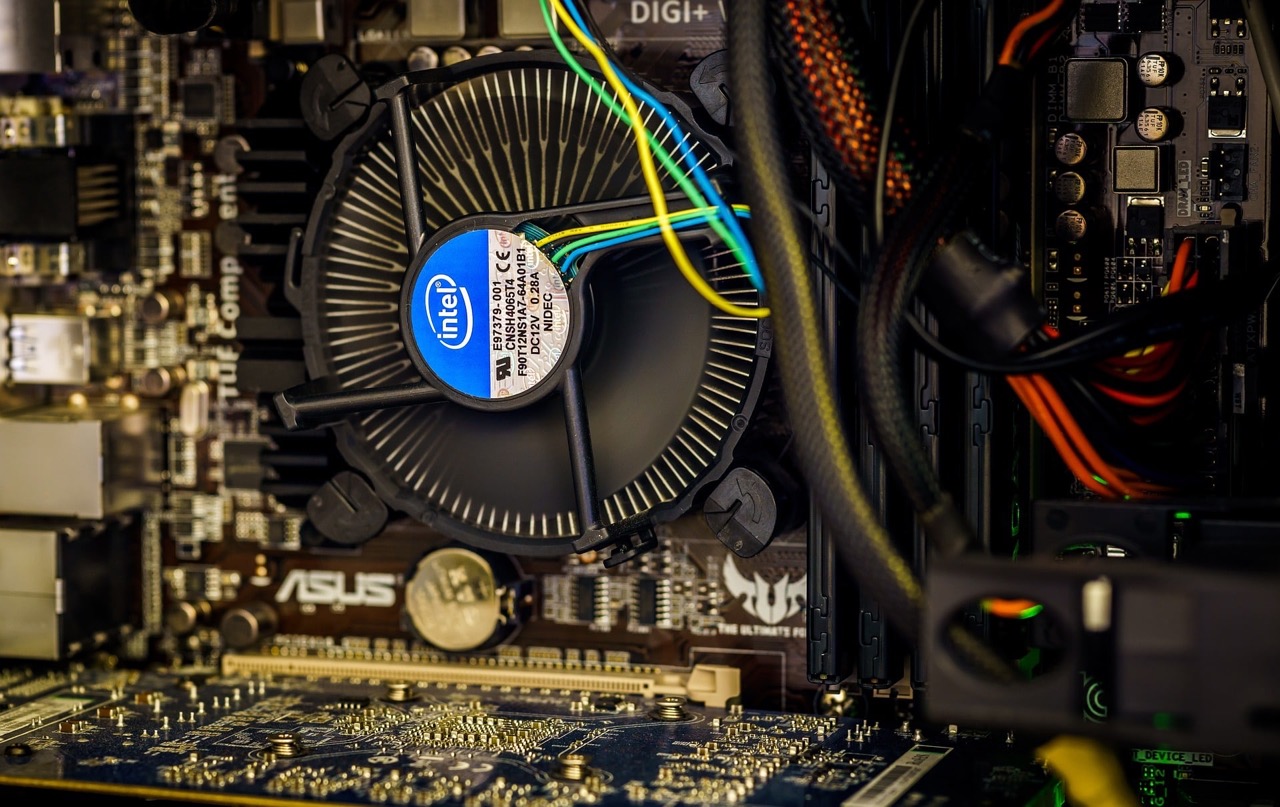
- Power Connector: Identify the power connector cable, which is typically a 3-pin or 4-pin connector. Align the connector with the corresponding motherboard or fan controller connection. Gently insert the power connector into the appropriate header, ensuring a secure fit.
- Control Connector (if applicable): Some fans may come with additional control cables, such as a PWM (Pulse Width Modulation) cable. If your fan requires control, locate the control connector and connect it to the appropriate header on the motherboard or fan controller.
Make sure to align the connectors correctly, taking note of the orientation and matching the alignment tabs or notches on the connectors and headers. Apply gentle pressure to insert the connectors fully, ensuring a solid and secure connection.
Properly connecting the cables is crucial for the new fan to function as intended. Check that the cables are securely attached and that there are no loose connections that could cause issues with power delivery or fan control.
With the new fan properly connected, you are now ready to proceed to the next step: securing the fan in place within the computer case.
Step 7: Securing the New Fan in Place
After connecting the necessary cables to the new case fan, it’s important to secure it in place within the computer case. Properly securing the fan helps ensure stability, prevents vibrations, and maintains optimal airflow for efficient cooling.
- Check the Alignment: Before securing the fan, double-check its alignment and position. Ensure that the fan is correctly oriented for the desired airflow direction.
- Fasten the Screws: If your fan is secured with screws, use the provided screws or any existing ones from the previous fan to fasten the fan in place. Tighten the screws by turning them clockwise until they are snug, but avoid overtightening to prevent damage to the fan or case threads.
- Clip or Snap into Position: Some cases may have brackets, clips, or mechanisms designed to secure fans without the need for screws. Follow the case manufacturer’s instructions to properly secure the fan using these mechanisms. Make sure the fan is securely locked in place.
- Inspect for Clearance: Check for any obstructions or interference with other components in the case. Ensure that the fan blades have ample clearance to rotate freely without making contact with cables, brackets, or other fans.
While securing the new fan, take note of any provided rubber or silicone mounting pads or grommets. These can reduce vibrations and noise by acting as dampeners between the fan and the case. If provided, install them as directed by the fan manufacturer.
Once the fan is securely in place, give it a gentle but firm push and check for any movement or wobbling. If the fan does not move, you have successfully secured it within the computer case.
Now that the new fan is properly secured, you’re ready for the next step: reattaching the side panel of the computer case.
Step 8: Reattaching the Side Panel
With the new case fan securely installed, it’s time to reattach the side panel of your computer case. Reattaching the side panel will not only provide protection to the internal components but also help maintain proper airflow within the case.
- Align the Panel: Take the side panel that you previously removed and align it with the corresponding edges of the computer case. Ensure that the panel is correctly positioned for a snug fit.
- Guide the Panel Into Place: Depending on your case design, the side panel may slide, hinge, or have clips that need to be engaged. Carefully guide the panel into place by sliding it or pressing it firmly against the case. Make sure it aligns properly with the case structure.
- Secure the Panel: Once the panel is in position, use the screws you removed earlier to secure it. Insert the screws into their respective holes and turn them clockwise to tighten until snug. Avoid overtightening to prevent stripping the screw threads.
Ensure that all screws are tightened evenly to maintain a balanced and secure fit for the side panel. A properly attached side panel will prevent dust, debris, and excessive noise from entering or exiting the case.
Double-check that the side panel is securely fastened and that there are no gaps or looseness. If everything looks and feels secure, congratulations — you have successfully reattached the side panel of your computer case!
Now that the side panel is back in place, it’s time for the final step: powering on and testing the new case fan.
Step 9: Powering On and Testing the New Fan
With the side panel of your computer case securely reattached, it’s time to power on your system and test the newly installed case fan. This step will ensure that the fan is functioning correctly and providing the desired cooling effect to your computer components.
- Connect and Reassemble: Plug in the power cable of your computer system and connect any other peripherals that were previously disconnected.
- Power On: Press the power button on your computer to turn it on. Allow the system to boot up and reach the desktop or login screen.
- Listen and Observe: Once the system is powered on, listen for any unusual noises or vibrations coming from the newly installed fan. Additionally, observe the rotation of the fan blades to ensure they are spinning smoothly and consistently.
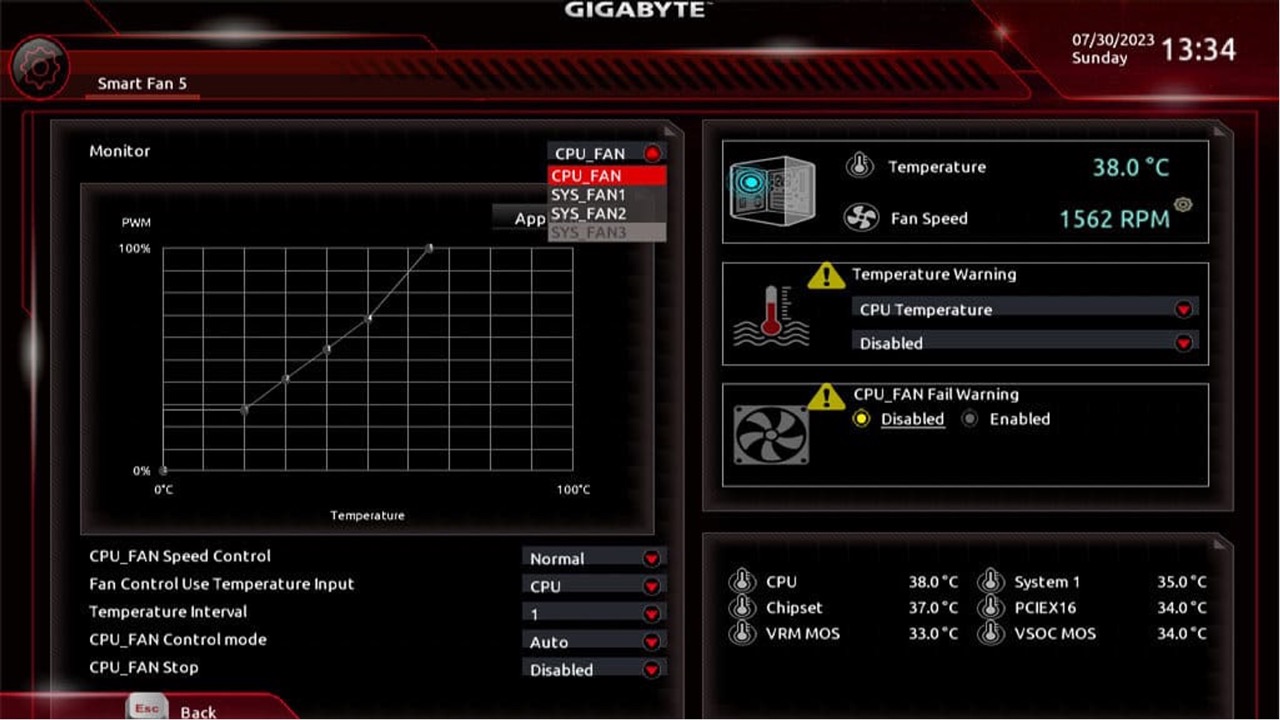
- Check Temperature and Performance: Monitor your computer’s temperatures using software monitoring tools or the BIOS. Ensure that the new fan is adequately cooling the system and keeping the temperatures within acceptable ranges for your hardware.
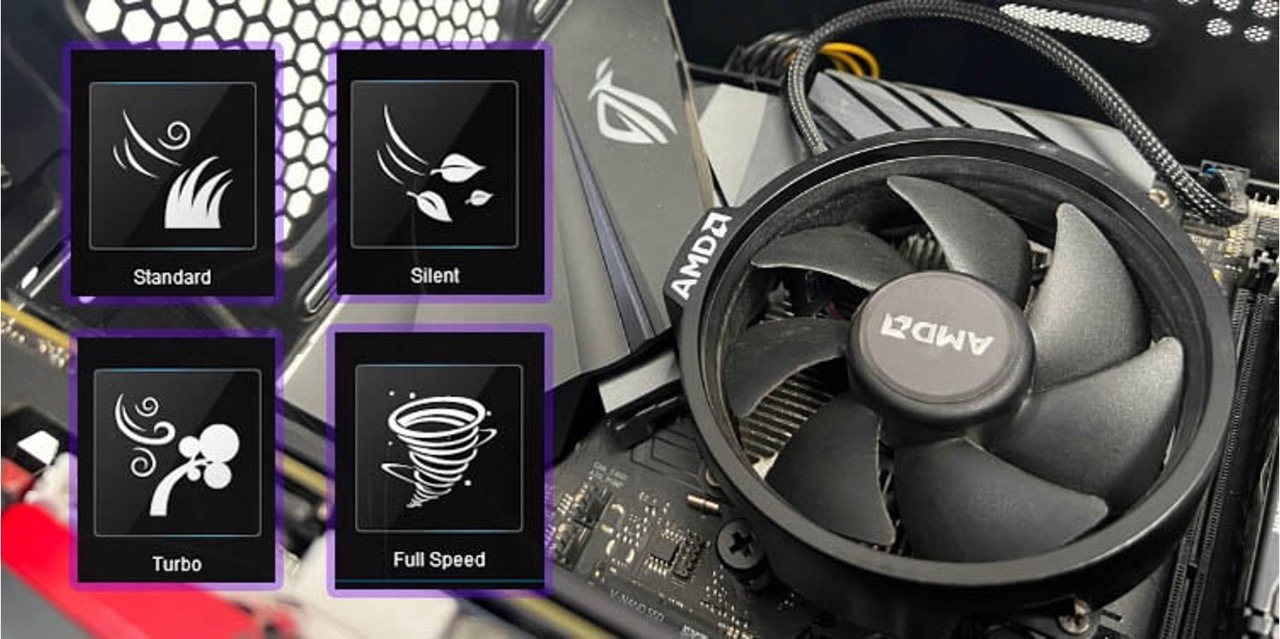
- Adjust Fan Speed (if applicable): If your computer system allows for fan speed adjustment, consider adjusting it to find a balance between cooling performance and noise level. This can be done through the BIOS or specialized software provided by your motherboard manufacturer.
During the testing phase, be attentive to any unusual behavior or issues related to the new fan. If you notice any abnormal noises, vibrations, or temperature spikes, double-check the fan installation and connections to ensure everything is properly set up.
If the new fan is working as expected, providing adequate cooling, and operating within acceptable noise levels, then congratulations! You have successfully changed your computer’s case fan and can now enjoy a cooler and more efficient system.
If any issues persist or you are uncertain about the fan’s performance, it’s recommended to consult the manufacturer’s documentation or seek professional assistance for further troubleshooting.
With the new fan tested and verified, you have completed the process of changing your computer’s case fan. By regularly checking and maintaining your computer’s cooling system, you can help protect your hardware and prolong its lifespan.
Conclusion
Congratulations on successfully changing your computer’s case fan! By following the step-by-step instructions in this guide, you have taken an important step in maintaining proper cooling and ensuring the longevity of your computer system.
We discussed the importance of case fans and their role in regulating the internal temperature of your computer. We went over the tools and materials needed for the fan replacement process and highlighted the precautions and safety tips to keep in mind.
You learned how to shut down and disconnect your computer, remove the side panel, locate the case fan, disconnect the old fan, install the new fan, connect the necessary cables, secure the new fan in place, reattach the side panel, and finally, power on and test the new fan.
Remember, regularly cleaning and maintaining your computer’s cooling system is crucial to keep it running optimally. Pay attention to the fan’s performance, temperature levels, and any unusual noises or vibrations that may indicate a problem. Addressing any issues promptly will help prevent potential damage to your hardware.
Should you encounter any difficulties during the fan replacement process or have any concerns about your computer’s cooling system, don’t hesitate to seek professional assistance. It’s always better to be safe than sorry when it comes to complex hardware tasks.
Thank you for using this guide! We hope it has been helpful in guiding you through the process of changing your computer’s case fan. Enjoy your improved cooling and smoother computing experience!