Introduction
Welcome to the world of computer cooling! If you’re wondering how to change your case fan speed, you’ve come to the right place. Cooling is a critical aspect of maintaining a healthy and efficient computer system. Case fans play a crucial role in dissipating heat and ensuring optimal performance. By adjusting the speed of your case fans, you can strike the perfect balance between cooling efficiency and noise levels.
While many computer enthusiasts are familiar with the concept of case fan speed control, it can often be a challenge to figure out where to start. That’s why we’ve put together this guide to help you navigate the various methods and options available for changing your case fan speed.
By the end of this article, you’ll have a clear understanding of how to take control of your case fan speed and optimize your computer’s cooling capabilities. So, let’s dive right in and explore the different approaches you can take to adjust your case fan speed effectively.
Why Should You Change Your Case Fan Speed?
Properly managing the speed of your case fans can bring several benefits to your computer system. Here are a few reasons why you might consider changing your case fan speed:
- Temperature Control: One of the primary functions of case fans is to keep your computer components cool. By adjusting the fan speed, you can fine-tune the airflow and cooling capacity to maintain optimal temperatures. Lowering the fan speed can help reduce noise levels while still providing sufficient cooling, especially during idle or low-intensity tasks.
- Noise Reduction: If you find that the noise generated by your case fans is becoming a disturbance, changing the fan speed can help mitigate this issue. Running fans at lower speeds results in reduced noise levels, creating a quieter and more pleasant computing environment. This is particularly beneficial if you use your computer for tasks that require a lot of concentration or if it’s located in a noise-sensitive area.
- Power Consumption: Case fans can consume a significant amount of power, especially when running at full speed. By adjusting the fan speed to a more optimal level, you can potentially reduce power consumption and save on electricity costs. This is particularly relevant if you have multiple case fans or if you’re using high-performance fans that consume more power.
- Extended Fan Lifespan: Running your case fans at lower speeds puts less strain on the motor, bearings, and other components, thereby extending their lifespan. By reducing fan speed to an appropriate level, you can help minimize wear and tear, leading to longer-lasting and more reliable fans.
- Customization and Control: Changing your case fan speed allows you to have greater control over your computer’s cooling system. This customization can be particularly beneficial for overclocking enthusiasts or individuals who require specific cooling configurations for their work. Adjusting fan speed gives you the flexibility to achieve the perfect balance between cooling efficiency and noise levels, tailored to your specific needs and preferences.
Understanding the reasons behind changing your case fan speed can help you make informed decisions about how to optimize your cooling setup. In the next sections, we will explore various methods and tools that you can use to control your case fan speed effectively.
How to Control Case Fan Speed
There are several methods you can employ to control the speed of your case fans. Let’s explore some of the most common approaches:
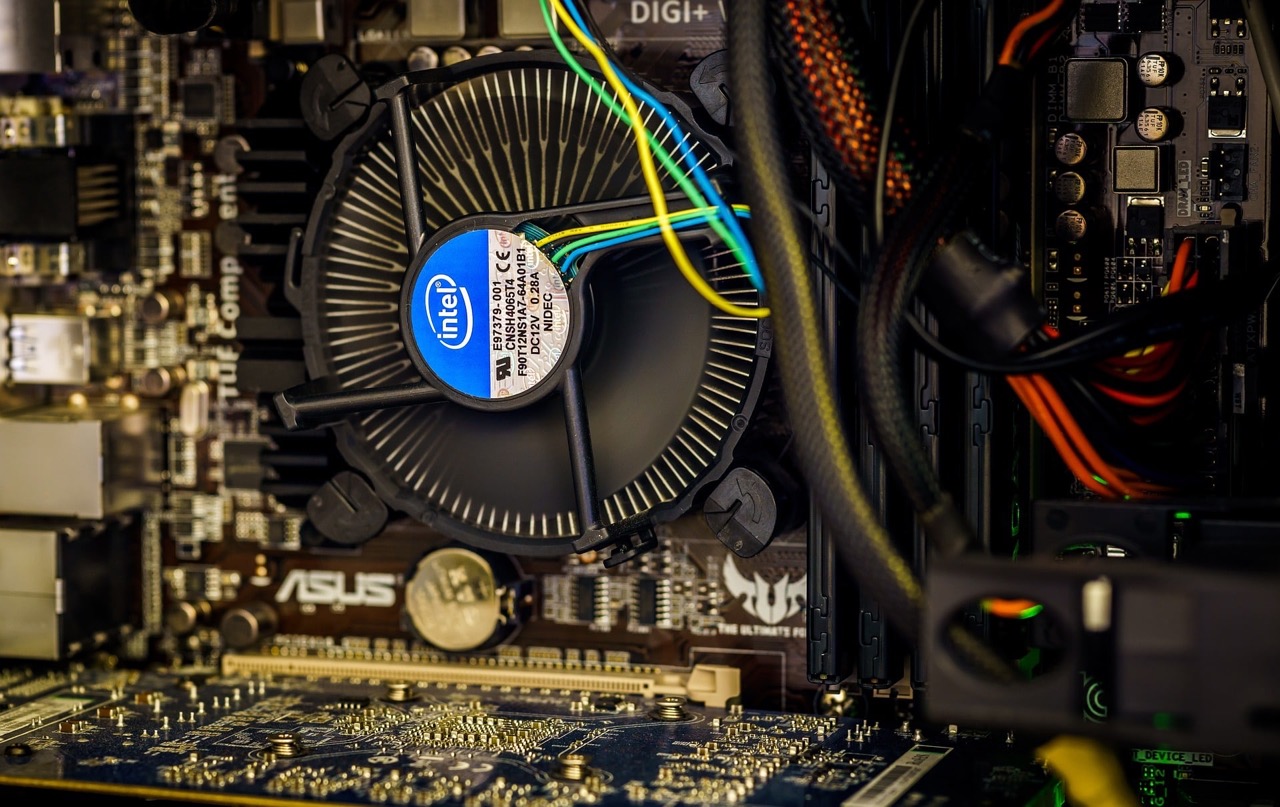
- Check if Your Motherboard Supports Fan Speed Control: The first step is to determine if your motherboard has built-in support for fan speed control. Many modern motherboards come equipped with BIOS settings or software utilities that allow you to adjust fan speeds. Consult your motherboard’s manual or visit the manufacturer’s website for information on how to access and utilize these features.
- Use BIOS Settings to Adjust Fan Speed: If your motherboard supports fan speed control, accessing the BIOS settings is a straightforward method to adjust fan speeds. Reboot your computer and press the appropriate key (usually Del, F2, or F10) during the startup process to enter the BIOS. Once inside the BIOS, navigate to the Fan Control or PC Health section and look for options related to fan speeds. Note that the exact steps and terminology may vary depending on your motherboard model.
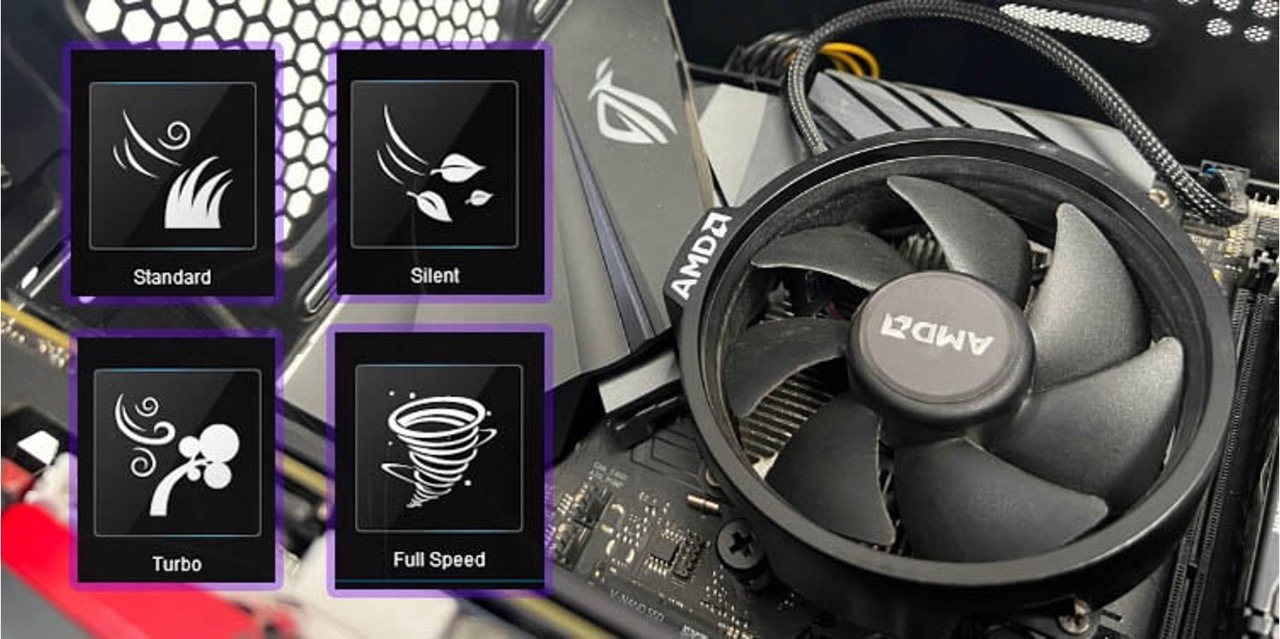
- Install Fan Control Software: If your motherboard lacks built-in fan speed control capabilities, you can utilize third-party software to manage your case fan speeds. Programs like SpeedFan, Argus Monitor, or CAM offer user-friendly interfaces that allow you to monitor and adjust fan speeds according to your preferences. These software solutions often provide additional features such as temperature monitoring and fan curve customization.
- Utilize Fan Speed Controller Hardware: If you prefer a hardware-based solution, you can opt for a fan speed controller. Fan controllers come in various forms, including manual knobs or digital controllers that connect to the power supply and control the fan speed directly. These devices offer a convenient way to adjust fan speeds on the fly without the need for additional software or BIOS configurations.
- Consider Upgrading Your Fans: If you find that your case fans are not providing adequate cooling or are too noisy even at lower speeds, you may consider upgrading to high-performance fans. Premium fans often come with features such as advanced bearings and optimized blade designs that provide superior cooling efficiency while maintaining lower noise levels. Additionally, some high-end fans offer integrated fan speed control, giving you even greater flexibility in managing your case fan speeds.
Remember to validate any changes you make to your case fan speed by monitoring the temperatures of your system components using software tools or BIOS monitoring capabilities. This ensures that you maintain optimal cooling performance while balancing noise reduction and power consumption.
By employing these methods and tools, you can take full control of your case fan speed and create a well-balanced cooling setup that meets your specific requirements.
Check if Your Motherboard Supports Fan Speed Control
Before exploring other methods of controlling your case fan speed, it’s essential to determine if your motherboard has built-in support for fan speed control. Many modern motherboards provide options for adjusting fan speeds through BIOS settings or dedicated software utilities.
To check if your motherboard supports fan speed control, you’ll need to consult the documentation that came with your motherboard or visit the manufacturer’s website. Look for information regarding fan control or fan speed adjustment features specific to your motherboard model.
If you don’t have access to the physical documentation, you can typically find the manual or user guide in PDF form on the manufacturer’s website. Make sure to locate the manual for your motherboard’s exact model number to ensure accurate information.
Once you have the manual, search for terms such as “fan control,” “fan speed adjustment,” or “PC health” within the document. These sections should provide instructions on how to access the fan speed control options within the BIOS or the provided software tools.
To access the BIOS settings, you’ll need to restart your computer and press the appropriate key during the startup process. The commonly used keys to enter the BIOS are Del, F2, or F10, but they may vary depending on your motherboard manufacturer.
Once inside the BIOS, navigate to the section related to Fan Control or PC Health. Look for options that allow you to manage fan speeds. Depending on your motherboard, you may be able to set a fixed fan speed or define a temperature-based fan curve.
Take some time to familiarize yourself with the available options and their descriptions. Different motherboards may use different terminology or have varying levels of customization. Some motherboards offer a graphical interface within the BIOS to adjust fan speeds, while others provide simple percentage-based controls. Experiment with the settings to find the configuration that best suits your needs.
If your motherboard does not support fan speed control, don’t worry! There are still alternative methods, such as using fan control software or hardware-based solutions, which we’ll discuss in later sections.
Checking if your motherboard supports fan speed control is an essential first step in managing your case fan speeds effectively. It allows you to leverage the built-in functionality of your motherboard, providing a straightforward and reliable method to adjust fan speeds.
Use BIOS Settings to Adjust Fan Speed
If your motherboard supports fan speed control, one of the easiest and most direct methods to adjust your case fan speed is through the BIOS settings. By accessing the BIOS, you can manipulate the fan speed settings and create a customized cooling profile for your system.
To begin, restart your computer and press the specific key during the startup process to enter the BIOS. The commonly used keys are Del, F2, or F10, but they may differ depending on your motherboard manufacturer.
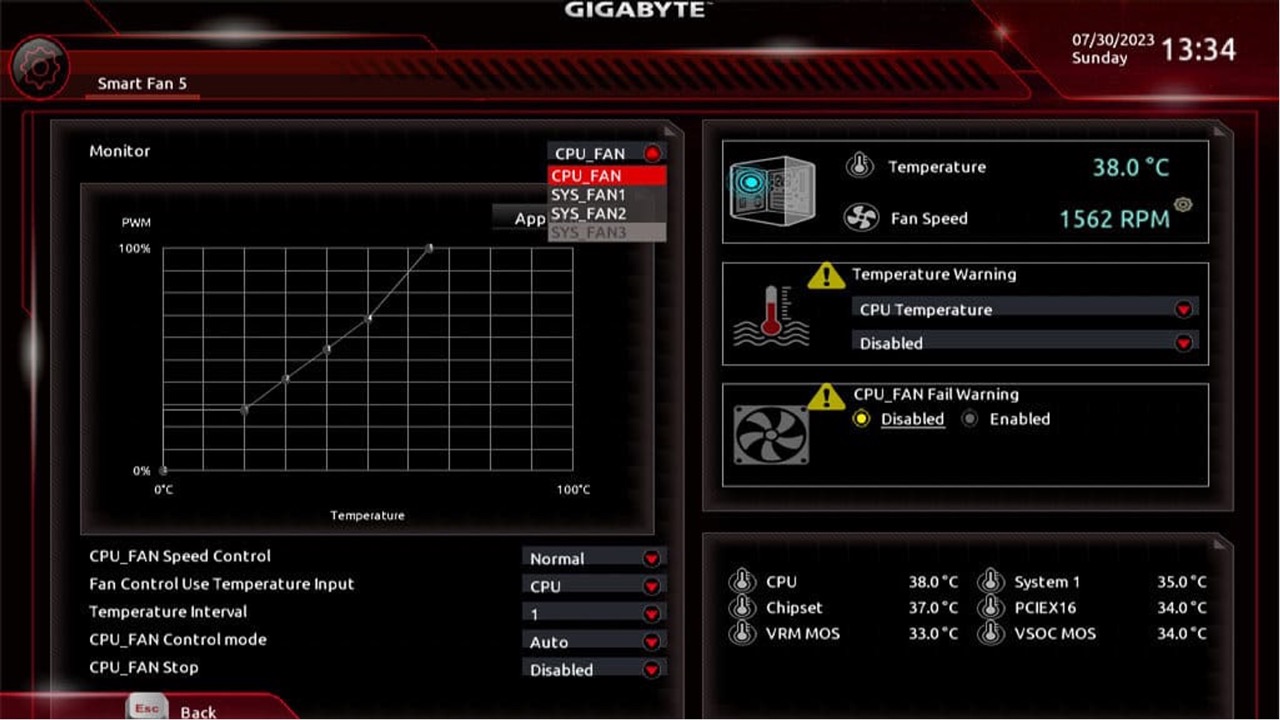
Once inside the BIOS, navigate to the section related to Fan Control or PC Health. The location and layout of these settings may vary depending on your motherboard model, so consult the manual or on-screen instructions if needed.
Within the Fan Control or PC Health section, you should find options for adjusting fan speeds. The available settings can vary, but here are some common options:
- Manual Fan Speed Control: This option enables you to set a fixed fan speed for your case fans. You can specify the percentage or RPM (rotations per minute) at which the fans should operate.
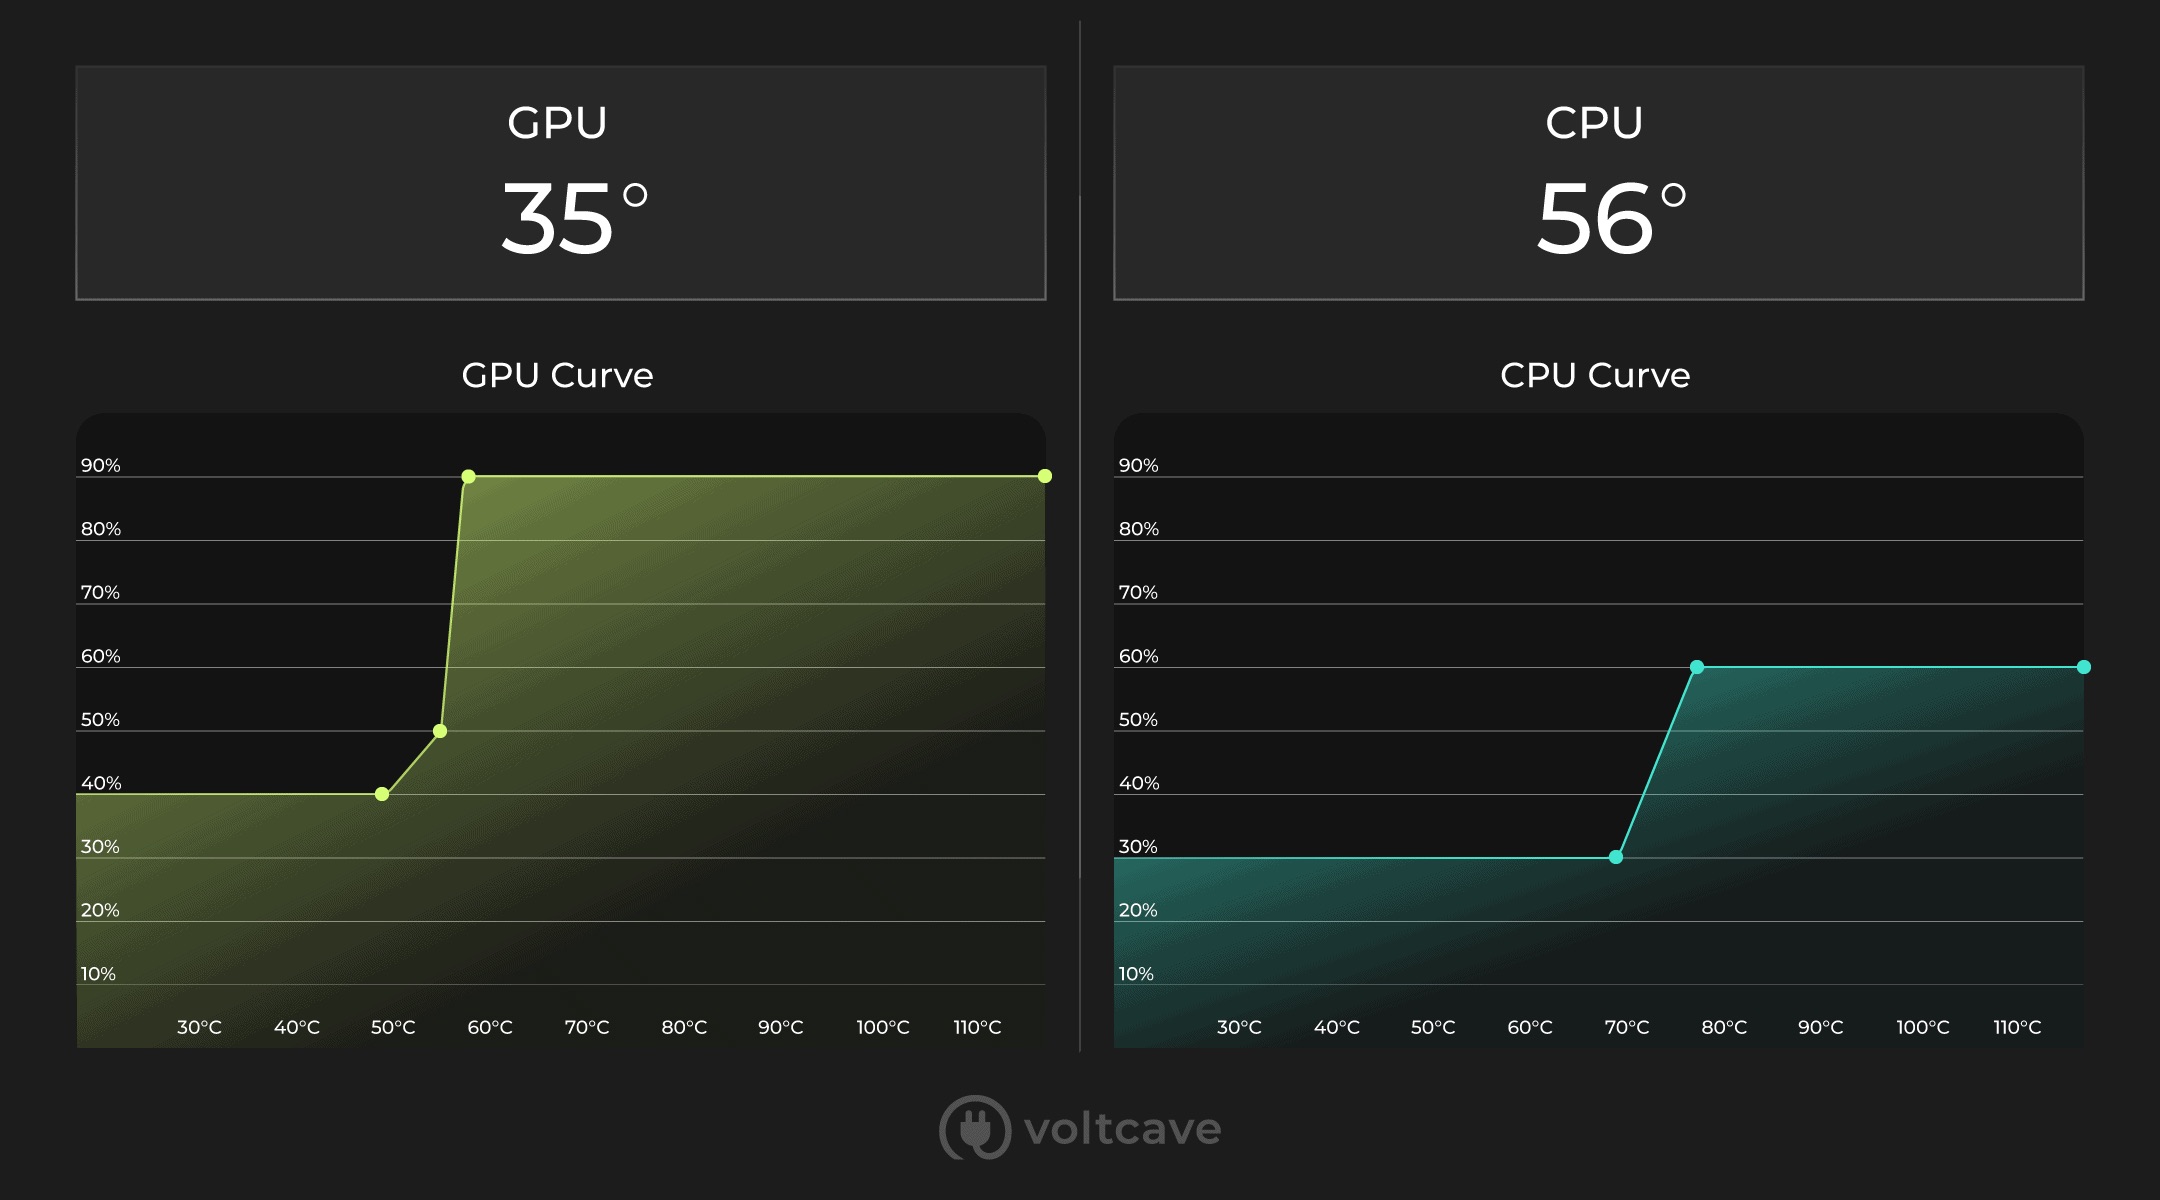
- Fan Curve: This option allows you to create a custom fan curve based on temperature. You can define the fan speed at different temperature thresholds to achieve an optimal balance between cooling performance and noise levels.
- Smart Fan: Some motherboards offer a “Smart Fan” option that automates fan speed control based on temperature readings from various system sensors. Smart Fan settings adjust fan speeds dynamically to provide efficient cooling under different load conditions.
When adjusting the fan speed settings, it’s important to consider the cooling needs of your system components and strike a balance between cooling efficiency and noise levels. Higher fan speeds provide better cooling performance but may generate more noise, while lower speeds reduce noise but may compromise cooling capacity.
Save your changes in the BIOS and exit. The new fan speed settings will take effect the next time you boot up your computer. Monitor the performance and temperature of your system to ensure that the adjusted fan speeds are providing adequate cooling.
Remember, not all motherboards have the same BIOS layout or terminology, so it’s crucial to refer to your motherboard’s manual or manufacturer’s website for specific instructions and details regarding the fan speed control options.
Using the BIOS settings to adjust fan speed is a reliable method, as it allows direct control over your case fans without the need for additional software or utilities.
Install Fan Control Software
If your motherboard does not have built-in support for fan speed control or you prefer a more intuitive and flexible approach, installing fan control software can be an excellent option. Fan control software provides you with advanced features and a user-friendly interface to adjust and monitor your case fan speeds.
Here are the steps to install and use fan control software:
- Research and Choose Software: There are several fan control software options available, such as SpeedFan, Argus Monitor, and CAM. Research different software programs to find one that is compatible with your motherboard and fits your needs in terms of available features and ease of use.
- Download and Install: Visit the official website of the chosen software and download the latest version. Follow the installation instructions provided by the software developer to install the program on your computer.
- Launch the Software: Once the software is successfully installed, launch it from the Start menu or desktop shortcut. The software should detect and display information about your system’s fans.
- Adjust Fan Speeds: Within the fan control software, you’ll typically find options to adjust fan speeds manually or set up custom fan curves. You can select specific fans and adjust their speeds through sliders, percentage values, or RPM settings. Some software may also provide temperature-based fan control, allowing you to set different fan speeds based on system temperature readings.
- Monitor Temperatures and Fan Speeds: Fan control software often includes a monitoring section that displays real-time information about temperatures, fan speeds, and other system parameters. Take advantage of this feature to keep an eye on the effectiveness and performance of your case fans.
- Save and Apply Settings: After adjusting the fan speeds to your desired levels, make sure to save the settings within the software. This ensures that the desired fan speeds are automatically applied each time you start your computer.
It’s important to note that fan control software may have different interfaces and functionalities, so familiarize yourself with the specific features and instructions provided by the software you choose.
Fan control software offers a convenient way to manage your case fan speeds without the need to access the BIOS settings. It provides greater control and customization options, allowing you to fine-tune your cooling setup based on your specific preferences and system requirements.
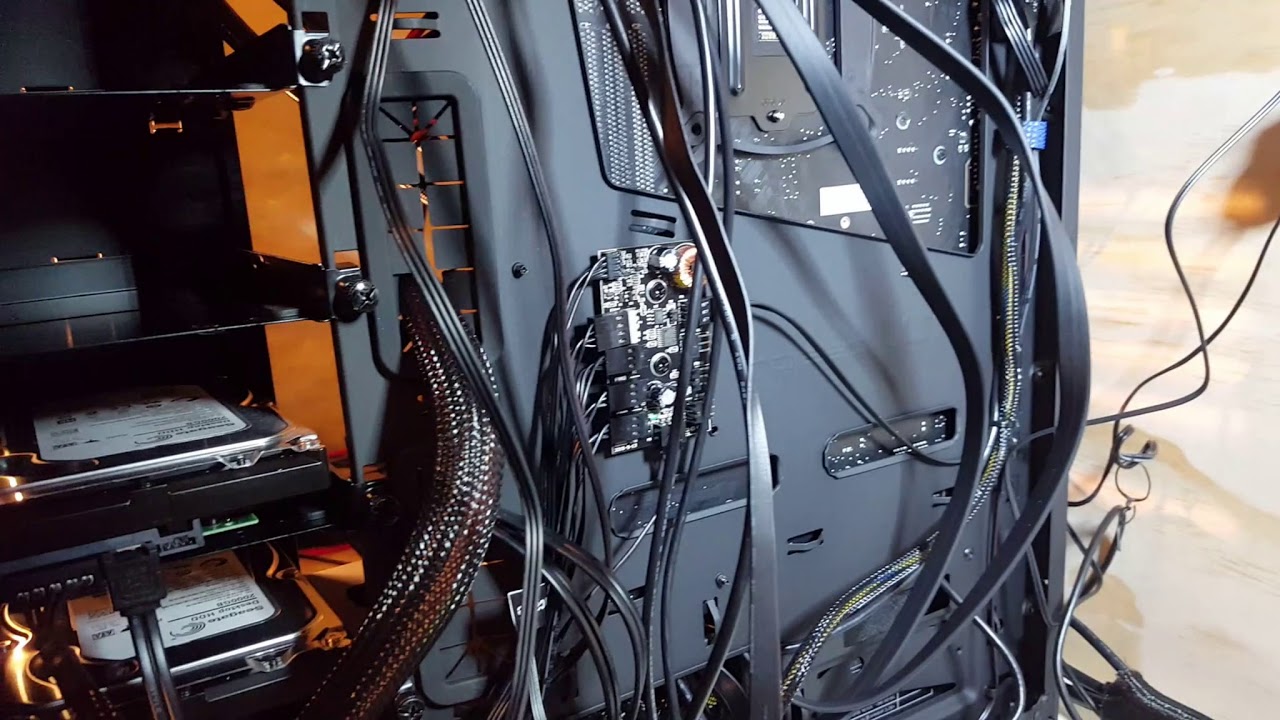
Utilize Fan Speed Controller Hardware
If you prefer a hardware-based solution for controlling your case fan speed, you can utilize fan speed controller devices. These hardware controllers offer easy and direct control over your fans without the need for software installations or BIOS configurations.
Here’s how you can utilize fan speed controller hardware:
- Research and Choose a Fan Speed Controller: There are various types of fan speed controller hardware available, including manual knob controllers and digital controllers. Research different options and choose a controller that suits your needs in terms of features, compatibility, and aesthetics.
- Install the Fan Speed Controller: Follow the manufacturer’s instructions to install the fan speed controller into your computer system. Typically, this involves connecting the controller to a spare power supply connector and to the fans through the provided cables or adapters.
- Connect the Fans to the Controller: Depending on the type of fan speed controller you have, you’ll need to connect your case fans to the controller using the appropriate cables or connectors. Refer to the controller’s manual for specific instructions on how to connect the fans.
- Adjust Fan Speeds: Once the fan speed controller is installed and the fans are connected, you can start adjusting the fan speeds. Manual knob controllers usually feature knobs or sliders that allow you to increase or decrease the fan speed by manually turning the knobs. Digital controllers, on the other hand, may have buttons or a touchscreen interface for adjusting the fan speeds digitally.
- Monitor Fan Speeds and Temperatures: Some fan speed controllers also provide real-time monitoring of fan speeds and temperature readings. Take advantage of this feature to keep track of the performance and temperature of your system.
- Find the Ideal Fan Speed: Experiment with different fan speed settings to find the optimal balance between cooling performance and noise levels. Consider the cooling needs of your system components and adjust the fan speeds accordingly.
Fan speed controller hardware provides a simple and convenient way to adjust and control your case fan speeds. It allows you to fine-tune your cooling system without the need for complex software installations or BIOS configurations.
Remember to regularly check and clean your fans to ensure optimal performance and longevity, regardless of the fan speed control method you choose to employ.
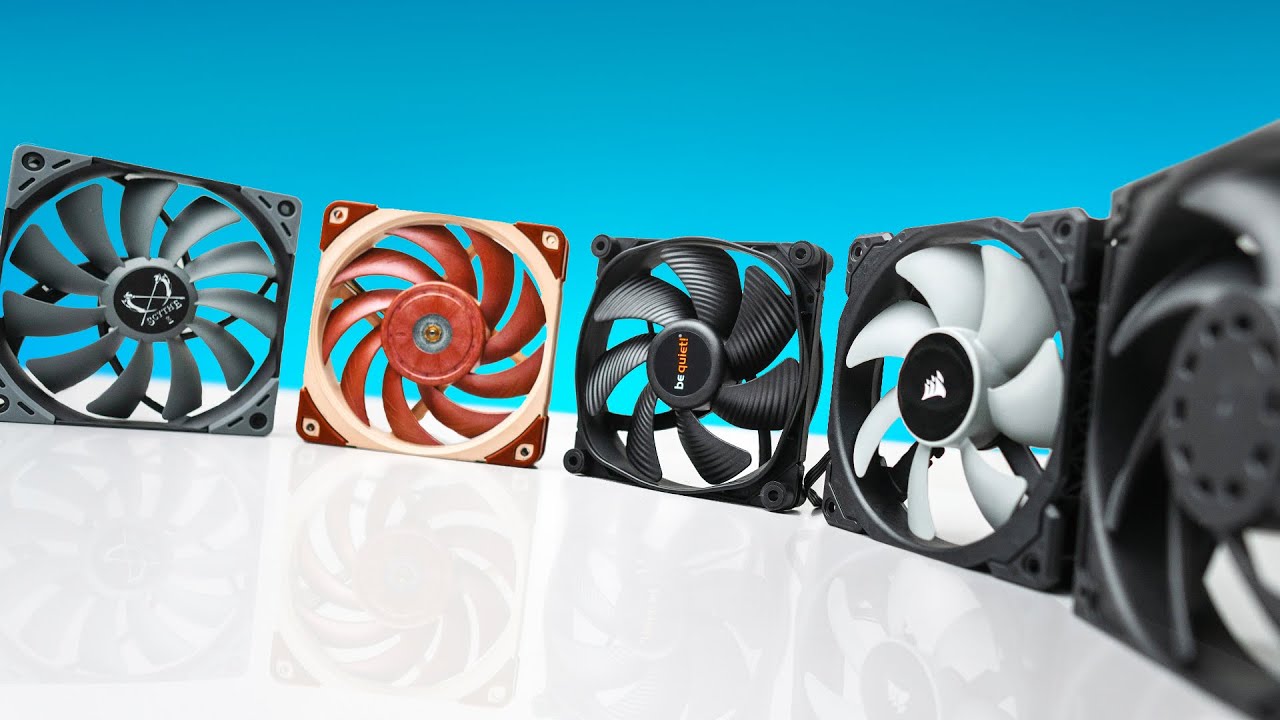
Consider Upgrading Your Fans
If you’re looking to improve the cooling efficiency of your computer system while maintaining optimal fan speeds, it may be worth considering upgrading your case fans. Upgraded fans can provide better airflow, improved static pressure, and lower noise levels, enhancing the overall performance and cooling capabilities of your system.
Here are a few factors to consider when upgrading your fans:
- Fan Size and Compatibility: Make sure to choose fans that are compatible with your case and motherboard. Common fan sizes include 120mm and 140mm, but smaller or larger sizes may also be available depending on your case’s fan mounting options.
- Noise Levels: Look for fans that are advertised as low-noise or silent fans, as these are designed to provide efficient cooling while generating minimal noise. Consider fans with advanced bearing technologies, such as fluid dynamic bearings (FDB) or magnetic levitation (ML) bearings, as they can help reduce noise levels.
- Airflow and Static Pressure: Fans that offer high airflow and static pressure are more effective at cooling your components. Higher airflow ensures better heat dissipation, while higher static pressure helps push air through restrictive areas, such as dense heatsinks or radiator fins.
- Blade Design: Different fan designs, such as straight, curved, or angled blades, can impact both airflow and noise levels. Consider fans with optimized blade designs that strike a balance between air movement and reduced turbulence, contributing to efficient cooling and quieter operation.
- Fan Speed Control: Some upgraded fans come with built-in fan speed control features, allowing you to manually adjust the fan speeds or set up custom fan curves. This provides greater flexibility in managing the fan speeds according to your specific cooling requirements and noise preferences.
- RGB Lighting: If aesthetics are important to you, consider fans with RGB lighting capabilities. These fans can add a visually appealing touch to your computer system by offering customizable lighting effects.
Upgrading your fans can be a worthwhile investment, particularly if you require enhanced cooling performance or desire a quieter computing experience. When selecting fans, carefully review product specifications, read customer reviews, and consider recommendations from reputable sources to ensure you choose fans that meet your needs and preferences.
Keep in mind that while upgrading your fans can have a positive impact on cooling performance, it’s essential to consider the overall airflow within your case. Ensure that your case has adequate intake and exhaust points to maximize the effectiveness of the upgraded fans.
By upgrading your fans, you can optimize the cooling efficiency of your system while maintaining control over the fan speed and noise levels, resulting in an overall enhanced computing experience.
Conclusion
Controlling the speed of your case fans is crucial for maintaining optimal cooling performance and creating a pleasant computing environment. Whether you need to adjust fan speeds to manage temperatures, reduce noise levels, or customize your cooling setup, there are various methods available to meet your needs.
If your motherboard supports it, accessing the BIOS settings provides direct control over fan speeds. This method is reliable and doesn’t require additional software installations. However, if your motherboard lacks fan speed control capabilities, installing fan control software is a convenient alternative. Fan control software offers advanced features and a user-friendly interface for adjusting fan speeds and monitoring system parameters.
If you prefer a hardware-based solution, fan speed controller devices allow for direct control over fan speeds without the need for software or BIOS configurations. This approach provides simplicity and flexibility in adjusting fan speeds to suit your preferences and system requirements.
Additionally, considering upgrading your case fans can further enhance cooling efficiency, reduce noise levels, and offer improved performance. Upgraded fans with features such as low noise levels, higher airflow, optimized blade designs, and fan speed control capabilities can greatly enhance your overall computing experience.
Remember to consider factors such as fan size, compatibility, noise levels, airflow, and blade design when selecting upgraded fans. Additionally, ensure proper case ventilation to optimize the effectiveness of the new fans.
By taking control of your case fan speeds and optimizing your cooling setup, you can achieve the perfect balance between cooling performance, noise levels, and customization. This will result in a more efficient, quieter, and enjoyable computing experience.