Introduction
A PC case fan plays a crucial role in maintaining the temperature and airflow inside your computer system. It ensures that the components stay cool, preventing overheating and potential damage. However, there may be instances when you notice that your PC case fan is not spinning, which can be worrisome. Understanding the reasons behind this issue and knowing how to troubleshoot it can help you get your fan back up and running.
When your PC case fan stops spinning, it can lead to increased temperatures within your system, potentially causing performance issues or even hardware failure. Therefore, it is important to address this issue promptly and effectively.
In this article, we will explore the various reasons why your PC case fan may not be spinning and provide troubleshooting steps to resolve the problem. Whether it’s a power connection issue, a malfunctioning fan, or a software configuration problem, we’ll guide you through the process of getting your PC case fan back to optimal performance.
It is important to note that not all cases of a non-spinning PC case fan indicate a faulty hardware component. Sometimes, the issue might be fixable by adjusting settings or cleaning out dust and debris. However, in some cases, it may require replacement or professional assistance to rectify the problem.
So, let’s dive in and explore the possible reasons behind your PC case fan not spinning and how you can troubleshoot to get it working again.
Reasons why your PC case fan is not spinning
There are several reasons why your PC case fan may not be spinning. Understanding these factors can help you identify the cause of the issue and take appropriate measures to fix it. Here are some common reasons:
- Power connection issues: One of the common causes of a non-spinning PC case fan is a power connection problem. Ensure that the fan is properly connected to the power supply unit (PSU) or the motherboard.
- Fan cable not properly connected: Sometimes, the issue may be as simple as the fan cable not being securely connected to the fan header on the motherboard. Check if the cable is properly seated and secure it if necessary.
- Fan malfunction or damage: Over time, fans can wear out or become damaged, resulting in a failure to spin. Inspect the fan for any visible signs of damage or wear, such as bent blades or excessive noise.
- Fan speed control settings: Some fans have speed control settings that can be adjusted. If the fan speed is set too low or turned off completely in the BIOS or fan control software, the fan may not spin. Check the settings and adjust them as needed.
- Motherboard or BIOS configuration: In some cases, the issue may lie in the motherboard or BIOS settings. Certain motherboard models may have specific settings to enable or disable fan operation. Ensure that the fan settings are configured correctly.
- Overheated system: When a computer system overheats, it may trigger a safety mechanism that shuts down the fans to prevent further damage. Monitor the temperature of your system and address any overheating issues by improving ventilation or cleaning out dust accumulation.
- Dust and debris accumulation: Dust and debris can accumulate on the fan blades and hinder their movement. Clean the fan blades and surrounding areas to remove any obstructing particles.
- Fan controller failure: If your PC case fan is connected to a fan controller module, the issue may lie with the controller itself. Test the fan with a different controller or connect it directly to the motherboard to rule out any controller malfunctions.
- Faulty power supply unit (PSU): A faulty PSU can prevent the fan from receiving adequate power. Test the fan with a different PSU or consult a professional to diagnose and replace the faulty unit if necessary.
- Other hardware or software conflicts: Conflicts between hardware or software components can sometimes interfere with the operation of the PC case fan. Review recent hardware or software changes and make any necessary adjustments or updates.
Understanding these common reasons behind a non-spinning PC case fan can assist you in troubleshooting the issue and finding an appropriate solution. Let’s explore the steps to rectify this problem in the next section.
Power connection issues
One of the most common reasons why your PC case fan may not be spinning is due to power connection issues. When the fan is not receiving power, it will not be able to function properly. Here are some steps to troubleshoot and resolve power connection issues:
- Check the power connection: Ensure that the fan’s power cable is securely connected to the power supply unit (PSU) or the designated fan header on the motherboard. Sometimes, the cable may become loose during transportation or cleaning, resulting in a non-spinning fan.
- Inspect the cable for damage: Examine the fan’s power cable for any signs of damage, such as frayed wires or bent pins. If you notice any issues, consider replacing the cable with a new one to ensure a secure and proper connection.
- Test the fan with a different power source: If possible, connect the fan to a different power source to determine if the issue lies with the original power connection. You can use a spare PSU or try connecting the fan to a different fan header on the motherboard.
- Reset the BIOS settings: In some cases, the fan may not receive power due to incorrect settings in the BIOS. Access the BIOS and reset the settings to default. This will ensure that the motherboard assigns power to the fan correctly.
- Consult the motherboard manual: Refer to the motherboard manual to understand the specific fan power connectors and their corresponding settings. This will help you verify if the fan is connected to the appropriate header.
By checking and addressing power connection issues, you can ensure that your PC case fan is receiving the necessary power supply for optimal operation. If the problem persists after performing these steps, it may indicate another underlying issue, which we will explore in the subsequent sections.
Fan cable not properly connected
Another common reason for a PC case fan not spinning is a fan cable that is not properly connected. This can occur if the fan cable becomes loose or disconnected during installation or maintenance. To address this issue, follow these steps:
- Check the fan cable: Examine the fan cable to ensure that it is securely connected to the fan header on the motherboard. Gently push the cable into the header to guarantee a proper connection.
- Verify the orientation: Some fan cables have notches or markings that align with the fan header’s pin configuration. Make sure the cable is inserted in the correct orientation to ensure a proper connection.
- Reseat the cable: If the fan cable appears to be connected but the fan is still not spinning, try gently removing and reinserting the cable. This will help establish a stronger connection and may resolve the issue.
- Try a different fan header: If available, try connecting the fan to a different fan header on the motherboard. This will help determine if the issue lies with a faulty fan header rather than the fan itself.
- Consider using a fan extension cable or splitter: If the cable is too short to reach the desired fan header, you can use a fan extension cable or splitter. Ensure that the extension cable or splitter is securely connected to both the fan and the fan header.
By checking and ensuring that the fan cable is properly connected, you can eliminate one possible cause of a non-spinning PC case fan. If the issue persists even after performing these steps, continue troubleshooting with the next sections.
Fan malfunction or damage
If your PC case fan is not spinning, it could be due to a malfunction or damage to the fan itself. Over time, fans can wear out or become damaged, leading to a failure to spin. Here are steps you can take to troubleshoot and address this issue:
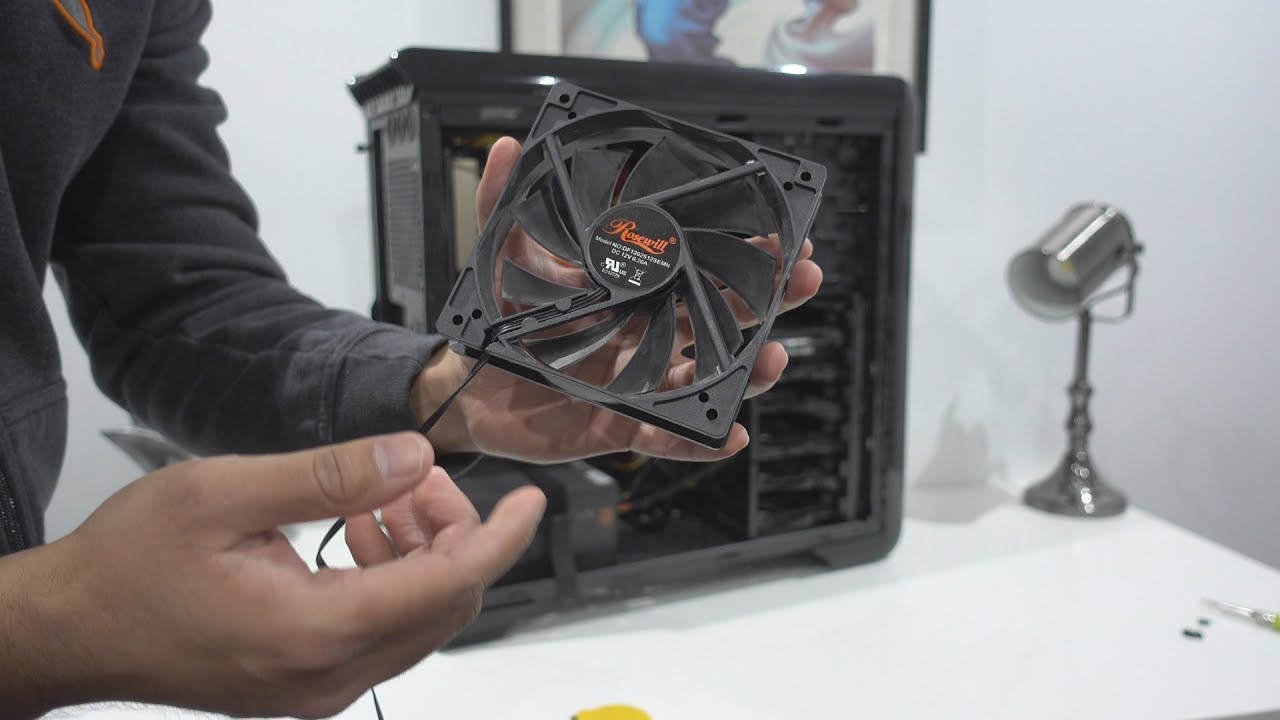
- Inspect the fan for visible damage: Take a close look at the fan, both on the front and back, for any visible signs of damage. Look for bent blades, cracks, or excessive dirt accumulation. If you notice any damage, the fan may need to be replaced.
- Listen for unusual noises: Turn on your computer and listen carefully to the fan’s operation. If you hear grinding, scraping, or rattling noises, it may indicate internal damage. In such cases, replacing the fan is typically the best course of action.
- Check the fan hub connection: Some fans have removable blades, which can be detached from the fan hub. Ensure that the blades are securely connected to the hub. Loose or improperly attached blades can prevent the fan from spinning properly.
- Test the fan on a different system: If possible, remove the fan from your current system and test it on a different computer. If the fan works properly in another system, it suggests that the issue may lie with your motherboard or system configuration.
- Consider replacing the fan: If all other troubleshooting steps fail, it may be necessary to replace the fan. There are various types of fans available in the market, such as case fans, CPU fans, and GPU fans. Consult your computer’s documentation or manufacturer’s website for compatible replacement options.
Keep in mind that fans can wear out over time due to continuous use or exposure to dust and debris. Regularly cleaning your PC case and fans can help prevent damage and prolong their lifespan. However, if the fan is damaged or malfunctions despite these measures, replacement is often the most effective solution.
Fan speed control settings
One possible reason for your PC case fan not spinning is related to the fan speed control settings. Many modern motherboards and fan controllers allow users to adjust the fan speed to optimize noise levels and airflow. Here are steps to troubleshoot and adjust the fan speed control settings:
- Access the BIOS or fan control software: Restart your computer and enter the BIOS settings or open the fan control software installed on your system. The method to access these settings varies depending on your motherboard or software.
- Check the fan speed settings: Look for the fan speed control options, which may be located under the “Hardware Monitor,” “Fan,” or “Power” sections in the BIOS. Ensure that the fan speed is set to an appropriate level, such as “Auto” or a specific RPM value.
- Adjust the fan speed: If the fan speed is set too low or turned off completely, adjust the settings to increase the speed. This can often be done by selecting a higher RPM value or changing the control mode to “Manual” or “PWM.”
- Save and exit: After making any changes to the fan speed settings, save the changes and exit the BIOS or apply the settings in the fan control software. The motherboard or software will then apply the new settings, which should enable the fan to start spinning.
- Monitor fan speed: Use monitoring software, such as HWMonitor or SpeedFan, to check if the fan speed is adjusting correctly according to the changes you made. This will help ensure that the fan is functioning as intended.
By adjusting the fan speed control settings, you can potentially resolve the issue of a non-spinning PC case fan. However, it’s worth noting that not all motherboards or fan control software provide extensive fan speed control options. Some systems may have limited control or only offer preset fan speed profiles.
If the fan speed control settings do not resolve the issue, there may be other factors contributing to the problem, which we will explore further in the upcoming sections.
Motherboard or BIOS configuration
The configuration of your motherboard or BIOS settings can also impact the functionality of your PC case fan. Incorrect settings or conflicts within the configuration can cause the fan to not spin. Here are steps to address potential motherboard or BIOS configuration issues:
- Enter the BIOS: Restart your computer and access the BIOS settings by pressing the designated key during the boot process. The key to access the BIOS may vary depending on your motherboard manufacturer.
- Look for fan-related settings: Navigate to the “Hardware Monitor” or “PC Health” section of the BIOS. Check for settings related to fan control, fan speed, or fan detection. Review and adjust these settings as needed.
- Enable fan detection: If there is an option to enable fan detection, make sure it is enabled. This setting allows the motherboard to detect and control the fan’s operation properly.
- Set fan control to “Auto” or “Default”: If you have made any manual adjustments to the fan control settings, consider resetting them to “Auto” or “Default” to let the motherboard regulate the fan speed automatically.
- Update BIOS firmware: Check if there are any available BIOS updates for your motherboard model on the manufacturer’s website. Updating the BIOS firmware can address compatibility issues and improve overall system stability.
- Save and exit: After making any changes to the motherboard or BIOS settings, save the changes and exit the BIOS. The system will apply the new configuration, potentially resolving the issue of the non-spinning PC case fan.
It’s important to note that incorrectly configuring the motherboard or BIOS settings can cause system instability or other issues. If you are unsure about making changes, consult your motherboard’s manual or seek assistance from a professional.
If the motherboard or BIOS configuration does not appear to be the cause of the non-spinning fan, proceed with exploring additional possibilities in the upcoming sections.
Overheated system
An overheated system can trigger a safety mechanism that shuts down the PC case fan to prevent further damage. When temperatures rise to unsafe levels, the fan may stop spinning as a protective measure. Here are some steps to address an overheated system:
- Check system temperatures: Monitor the temperatures of your computer system using software such as HWMonitor or Core Temp. Pay attention to the CPU and GPU temperatures, as overheating in these components can affect overall system performance.
- Improve system ventilation: Ensure that your computer has proper airflow by checking that the case fans are functioning and positioned correctly. Consider adding additional fans or upgrading to more efficient cooling solutions if necessary.
- Clean out dust and debris: Over time, dust and debris can accumulate on the fan blades and other components, hindering airflow and causing overheating. Use compressed air or a soft brush to gently clean out any dust buildup, paying special attention to the fan and heatsink areas.
- Reapply thermal paste: If you have recently performed maintenance on your CPU, it may be worth checking the thermal paste application. Poorly applied or dried-out thermal paste can result in overheating. Clean off the old thermal paste and apply a fresh, thin layer before reinstalling the heatsink.
- Consider upgrading cooling solutions: If your system tends to run hot even with proper ventilation and cleaning, it may be beneficial to invest in more effective cooling solutions. Upgrading your CPU cooler, adding liquid cooling, or installing additional case fans can help dissipate heat more efficiently.
By monitoring system temperatures and taking appropriate measures to address overheating, you can help ensure that your PC case fan continues to spin and properly cool your system. If the overheating issue persists despite these steps, further troubleshooting may be required.
Dust and debris accumulation
Dust and debris accumulation can hinder the proper operation of your PC case fan, leading to it not spinning. Over time, particles can gather on the fan blades and obstruct their movement, reducing airflow and causing potential overheating. Here are steps to address dust and debris accumulation:
- Power down and unplug your computer: Before attempting to clean the PC case fan, ensure that your computer is turned off and unplugged from the power source. This will eliminate any risk of electrical shock.
- Open the computer case: Carefully remove the side panel of your computer case to access the internal components. Refer to the user manual or online resources for instructions specific to your case model.
- Locate the PC case fan: Identify the fan that is not spinning and inspect it for dust and debris accumulation. It is usually positioned at the front, back, or side of the case and may be secured with screws or clips.
- Clean the fan blades: Use compressed air or a soft brush to gently remove the dust and debris from the fan blades. Be careful not to apply too much force, as it could damage the blades or dislodge them from the fan hub.
- Clean surrounding areas: While cleaning the fan, also pay attention to the surrounding areas inside the computer case. Clear away any dust or debris that may obstruct airflow or accumulate on other components.
- Reassemble and test: Once the fan and surrounding areas are cleaned, securely reattach the fan to the case and close the side panel. Plug in your computer and power it on to check if the fan now spins properly.
- Maintain regular cleaning: To prevent dust and debris accumulation in the future, establish a regular cleaning schedule. Depending on your environment, it may be necessary to clean the PC case fan and other components every three to six months.
By addressing dust and debris accumulation, you can improve the airflow and performance of your PC case fan. However, if the fan still does not spin after cleaning, there may be other factors contributing to the issue that require further troubleshooting.
Fan controller failure
In some cases, the failure of the fan controller can prevent your PC case fan from spinning. A fan controller is a device that regulates the speed and operation of the fans in your system. If the fan controller malfunctions, the fan may not receive the necessary signal to spin. Here are steps to address fan controller failure:
- Check the fan controller: If you have a separate fan controller module installed in your system, examine it for any visible signs of damage or malfunction, such as loose cables or burnt components.
- Test the fan on a different controller: If possible, disconnect the fan from the current fan controller and connect it to a different fan controller in your system, or directly to the motherboard. This will help determine if the issue lies with the fan controller or the fan itself.
- Connect the fan directly to the motherboard: If you do not have a separate fan controller, try connecting the fan directly to the fan headers on the motherboard. This bypasses any potential issues with a faulty fan controller.
- Replace or repair the fan controller: If you have determined that the fan controller is indeed the cause of the non-spinning fan, you can consider replacing or repairing the faulty component. Consult the manufacturer’s documentation or seek professional assistance for guidance.
- Explore software fan control options: If your system has software-based fan control, you can try adjusting the fan settings through the provided software. This can help bypass a faulty hardware fan controller and regain control over fan operation.
If the issue persists even after performing these steps and ruling out fan controller failure, it may be necessary to investigate other potential causes for the non-spinning PC case fan.
Faulty power supply unit (PSU)
A faulty power supply unit (PSU) can be a culprit behind a non-spinning PC case fan. The PSU provides the necessary power to all the components in your system, including the fan. If the PSU is faulty or not supplying enough power, the fan may not receive the required energy to spin. Here are steps to address a faulty PSU:
- Check the PSU cables: Ensure that all the cables connecting the PSU to the motherboard and other components are securely plugged in. A loose or improperly connected cable can result in insufficient power delivery.
- Swap cables or connectors: If possible, try using different cables or connectors to connect the fan to the PSU. This can help identify if the issue lies with a faulty cable or connector rather than the PSU itself.
- Test the fan with a different PSU: If you have access to a spare PSU, connect the fan to it and observe if it starts spinning. If the fan operates normally with the new PSU, it indicates a problem with the original PSU.
- Replace the PSU: If the fan still does not spin even with a different PSU, it is likely that the PSU itself is faulty. Consider replacing the PSU with a new one that offers the appropriate power rating for your system.
- Consult with a professional: If you are uncertain about testing or replacing the PSU on your own, it is advisable to consult a professional technician. They can diagnose the issue accurately and provide appropriate solutions.
A faulty PSU can impact the overall performance and functionality of your computer system. If you suspect that the PSU is the cause of the non-spinning fan and replacing it does not resolve the issue, further troubleshooting may be necessary.
Other hardware or software conflicts
Sometimes, other hardware or software conflicts can prevent your PC case fan from spinning. Incompatibilities or conflicts between components or software can disrupt the fan’s operation. Here are steps to address other potential conflicts:
- Review recent hardware changes: If you have recently installed new hardware, such as a graphics card or CPU cooler, double-check that it is properly installed and compatible with your system. Incompatibilities or incorrect installations can lead to conflicts that affect the fan’s operation.
- Check for driver updates: Ensure that you have the latest drivers installed for all your hardware components. Outdated or incompatible drivers can cause conflicts and may affect the fan’s operation. Visit the manufacturer’s website for the latest driver updates.
- Update firmware and BIOS: Check for firmware updates for your hardware components and motherboard. Updating the firmware and BIOS can address compatibility issues and improve overall system stability, including the operation of the fan.
- Disable fan control software: If you have installed third-party fan control software, it may conflict with the system’s built-in fan control settings. Try disabling or uninstalling the software to see if it resolves the issue with the non-spinning fan.
- Perform a system restore: If the non-spinning fan issue started after a recent software installation or system update, consider performing a system restore to a previously functioning state. This can help revert any changes that may have caused conflicts with the fan’s operation.
- Seek professional assistance: If you have tried troubleshooting on your own but are unable to resolve the issue, it is advisable to seek professional assistance. A technician can diagnose the problem accurately and help identify any hardware or software conflicts causing the non-spinning fan.
Other hardware or software conflicts can sometimes elude quick fixes. It may require careful examination, trial and error, or specialized tools to identify and resolve the conflict. If the non-spinning fan issue persists, consulting a professional may provide the best course of action.
Troubleshooting steps to fix a PC case fan not spinning
When faced with a non-spinning PC case fan, troubleshooting the issue systematically can help identify and resolve the underlying problem. Here are some steps to follow when troubleshooting a non-spinning fan:
- Check power connection: Ensure that the fan’s power cable is securely connected to the power supply unit (PSU) or the designated fan header on the motherboard.
- Verify fan cable connection: Make sure the fan cable is properly connected to the fan header on the motherboard and consider reseating the cable if necessary.
- Inspect fan for damage: Examine the fan for any visible signs of damage or wear, such as bent blades or excessive noise.
- Adjust fan speed control settings: Check the fan speed control settings in the BIOS or fan control software and ensure that the fan speed is set appropriately.
- Review motherboard or BIOS configuration: Verify the motherboard or BIOS settings related to fan control and ensure they are properly configured.
- Monitor system temperature: Ensure that your system is not overheating, as high temperatures can cause the safety mechanism to shut down the fan. Improve system ventilation and clean out dust and debris if necessary.
- Address dust and debris accumulation: Clean the fan blades and surrounding areas to remove any dust and debris that may inhibit the fan’s movement.
- Check for fan controller failure: Test the fan with a different fan controller or connect it directly to the motherboard to rule out any potential fan controller malfunctions.
- Investigate faulty power supply unit (PSU): Test the fan with a different PSU or consult a professional to diagnose and replace a faulty PSU.
- Identify other hardware or software conflicts: Review recent hardware or software changes and consider updating drivers, firmware, or performing system restores to resolve conflicts.
By systematically going through these troubleshooting steps, you can pinpoint the cause of the non-spinning fan and apply the appropriate solution. It is essential to exercise caution and seek professional assistance if needed, especially when dealing with hardware components and complex configurations.
Conclusion
A non-spinning PC case fan can be a frustrating issue to encounter, as it can lead to overheating and potential system damage. However, by understanding the possible causes and following the appropriate troubleshooting steps, you can usually resolve the problem and restore the fan’s functionality.
In this article, we explored the various reasons why a PC case fan may not be spinning, including power connection issues, fan cable not properly connected, fan malfunction or damage, fan speed control settings, motherboard or BIOS configuration, overheated system, dust and debris accumulation, fan controller failure, faulty power supply unit (PSU), and other hardware or software conflicts.
We provided troubleshooting steps for each possible cause, guiding you through the process of identifying and resolving the issue. It’s important to note that some issues may require professional assistance or component replacement, depending on the severity and complexity of the problem.
Always prioritize the safety and proper maintenance of your computer system. Regularly cleaning the case and fans, monitoring system temperatures, and keeping drivers and firmware up-to-date can help prevent future issues with non-spinning fans.
If you are unsure about performing any troubleshooting steps or encounter difficulties in resolving the issue, it is recommended to consult a professional technician who can provide expert guidance.
By effectively troubleshooting and addressing a non-spinning PC case fan, you can ensure the optimal performance, longevity, and cooling efficiency of your computer system.


