Introduction
Your PC case fan plays a critical role in maintaining optimal airflow and cooling for your computer. However, it can be quite frustrating when you notice that your fan is barely moving. A slow or barely spinning fan can lead to inadequate cooling, increased temperatures, and potential damage to your hardware.
There can be several reasons why your PC case fan is not spinning as fast as it should. In this article, we will explore the possible causes of this issue and discuss troubleshooting steps to resolve it. Whether you’re a seasoned computer enthusiast or a casual user, understanding why your fan is barely moving and how to address the problem is essential for maintaining optimal performance and preventing overheating issues.
It’s important to note that a PC case fan that is barely moving can be indicative of multiple underlying issues. Therefore, it’s crucial to identify the specific cause in order to implement the appropriate solution. By the end of this article, you will have a thorough understanding of the potential reasons behind your fan’s sluggish movement and the necessary steps to rectify the issue.
In the following sections, we will dive deep into some common causes for a slow-moving PC case fan and provide step-by-step instructions for troubleshooting each scenario. By following these guidelines, you’ll be able to troubleshoot and resolve the issue, ensuring that your PC runs smoothly and efficiently.
Reasons why your PC case fan might be barely moving
There are several possible reasons why your PC case fan is barely moving. Understanding these reasons will help you identify the problem and take the necessary steps to resolve it. Here are some common factors that can contribute to a slow or barely spinning PC case fan:
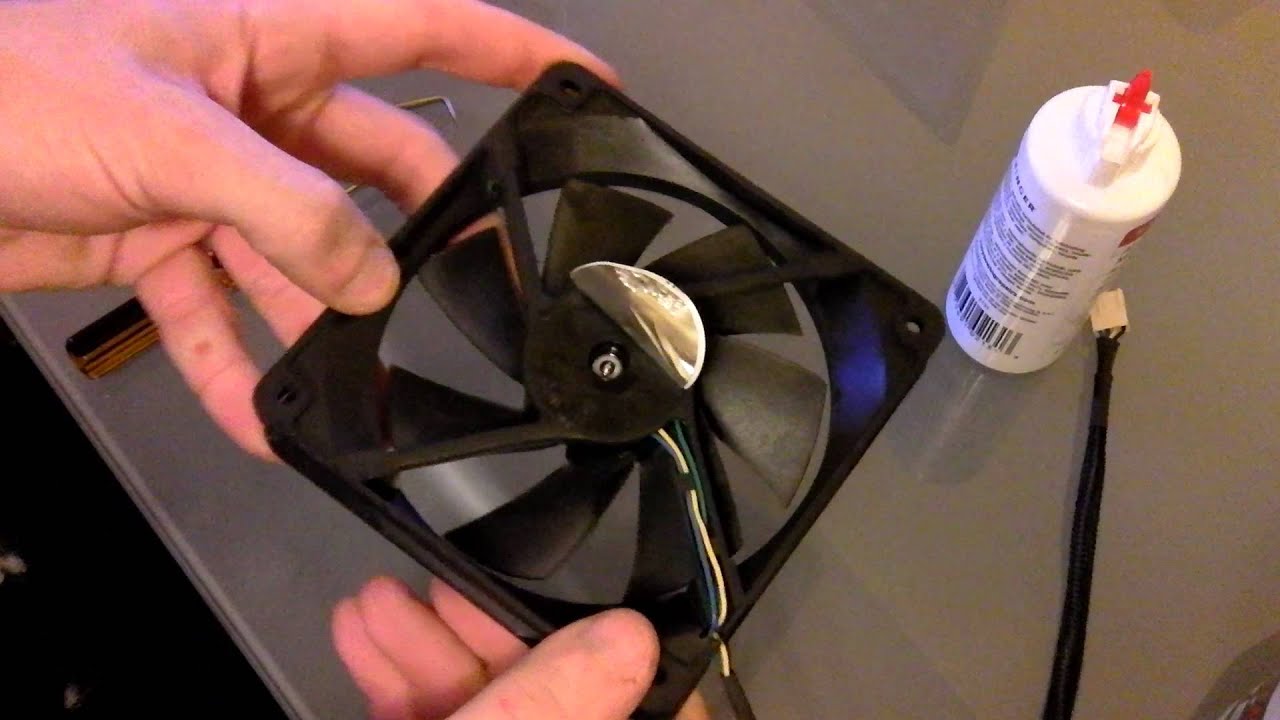
- Dust build-up: Over time, dust and debris can accumulate on the blades and motor of your case fan, impeding its movement and reducing its efficiency. The build-up of dust can increase friction and make it harder for the fan to spin at its full capacity.
- Fan speed settings: Many PC case fans have adjustable speed settings to control the airflow and noise levels. If the fan speed is set too low, the fan may appear to be barely moving. It’s worth checking the fan speed settings in your computer’s BIOS or software utility to ensure that it is configured correctly.
- Physical obstructions: Objects or cables blocking the path of the fan can prevent it from spinning properly. Make sure there are no cables, wires, or other objects obstructing the fan blades’ movement. Additionally, check if the fan is installed in a position where there is sufficient clearance for proper airflow.
- Improper fan installation: If the fan is not correctly installed, it may not spin freely and operate at its full capacity. Check if the fan is securely attached to the case or the heatsink and ensure that screws or fasteners are tightened properly. Also, verify that the connections between the fan and the motherboard or fan controller are secure.
- Faulty fan motor: In some cases, the fan motor itself may be faulty or damaged, causing the fan to barely move. A damaged motor will require a replacement to restore the fan’s functionality. If all other troubleshooting steps fail to resolve the issue, it’s possible that the fan motor needs to be replaced.
Now that we have explored the potential reasons why your PC case fan is barely moving, let’s move on to the next section, where we will discuss how to troubleshoot and resolve this issue.
Dust build-up
One of the most common reasons for a PC case fan to barely move is the accumulation of dust and debris. Over time, dust can settle on the fan blades and motor, creating a layer of resistance that hinders the fan’s movement. This build-up can significantly reduce the efficiency of the fan and impede proper airflow, leading to inadequate cooling of your computer components.
To address this issue, it’s important to regularly clean your PC case and fan to remove any dust or debris that may have accumulated. Here’s how you can do it:
- Gather the necessary tools: Before you begin cleaning, make sure you have a can of compressed air, a soft brush or cloth, and a vacuum cleaner (optional) on hand. These tools will help you remove the dust effectively without causing any damage to the fan or other components.
- Power down your computer: Before working on the inside of your computer case, ensure that your PC is shut down and disconnected from the power source. This will prevent any accidental damage or electrostatic discharge that could occur while cleaning.
- Remove the fan: Depending on the type of fan and case you have, you may need to remove the fan to clean it thoroughly. Check your computer’s manual or online resources for specific instructions on how to remove the fan safely.
- Use compressed air: Use the can of compressed air to blow away the dust and debris from the fan blades, motor, and surrounding areas. Hold the can at a 45-degree angle and use short bursts of air to dislodge the dust. Avoid spraying the air too close to the fan to prevent damage.
- Brush or wipe down the fan: If there is stubborn dust that cannot be fully removed by compressed air, use a soft brush or cloth to gently brush or wipe away the remaining debris. Take care not to apply too much pressure or use abrasive materials that could scratch or damage the fan surface.
- Vacuum the case: If you have a vacuum cleaner with a brush attachment, you can use it to suction out any loose dust particles from the case. Be cautious not to get too close to the delicate components, as the vacuum’s suction force can cause damage.
- Reinstall the fan: Once the fan and case are clean, carefully re-install the fan following the manufacturer’s instructions. Ensure that all connections are secure and that the fan is properly aligned for optimal airflow.
Regularly cleaning your PC case fan will not only prevent a build-up of dust and maintain optimal airflow, but it will also prolong the lifespan of your fan and improve the overall performance of your computer. With a clean fan, you should notice a significant improvement in its movement and the cooling efficiency of your system.
Now that we have covered the first possible reason for your PC case fan barely moving, let’s move on to the next section where we will discuss fan speed settings and how they can affect the fan’s movement.
Fan speed settings
Another factor that can cause your PC case fan to barely move is incorrect fan speed settings. Many modern motherboards and fan controllers provide the option to adjust the speed of your case fans to find a balance between cooling performance and noise levels. If your fan speed is set too low, the fan may appear to be sluggish or barely moving.
To check and adjust your fan speed settings, follow these steps:
- Access your BIOS or software utility: Restart your computer and access your computer’s BIOS settings by pressing the designated key during the boot process. The key to enter the BIOS varies depending on your motherboard manufacturer (common keys include Del, F2, F10, etc.). Alternatively, you may have a software utility installed that allows you to adjust fan speed settings within the operating system.
- Navigate to the fan settings: In the BIOS or software utility, locate the section or tab that pertains to fan settings or hardware monitoring. This will allow you to view and adjust the fan speed configurations.
- Check the current fan speed setting: Take note of the current fan speed setting. It may be expressed as a percentage or as a value corresponding to a specific RPM (rotations per minute).
- Adjust the fan speed setting: Depending on your BIOS or software utility, you may have various options to adjust the fan speed. You can try increasing the fan speed incrementally to see if it improves the fan’s movement. Keep in mind that higher fan speeds generally result in more noise, so find a balance that works for your needs.
- Save and exit: Once you have adjusted the fan speed setting to your preferences, save the changes and exit the BIOS or software utility.
After adjusting the fan speed settings, restart your computer and observe if the fan’s movement has improved. If not, you may need to check other possible causes and proceed with further troubleshooting steps.
It’s worth noting that some fans are designed to run at lower speeds by default, especially if they are specifically designed for silent operation. In such cases, it’s essential to refer to the fan’s specifications and manufacturer’s recommendations to ensure that you’re operating the fan within its intended parameters.
Now that we have discussed the impact of fan speed settings on the movement of your PC case fan, let’s move on to the next section where we will explore the possibility of physical obstructions affecting the fan’s performance.
Physical obstructions
Physical obstructions around or on the PC case fan can also cause it to barely move. Objects, cables, or even components within the computer case can obstruct the fan’s blades, preventing them from spinning freely and reducing the airflow. It’s important to check for any potential obstructions and remove them to restore the fan’s proper movement.
Here are the steps to identify and address physical obstructions around the PC case fan:
- Power down your computer: Before inspecting and removing any physical obstructions, make sure your computer is shut down and disconnected from the power source. This will ensure your safety and prevent any accidental damage.
- Open your PC case: Depending on the design of your computer case, you may need to remove the side panel or access another entry point to view the internal components. Refer to your computer’s manual or online resources for specific instructions on how to open the case safely.
- Inspect the area around the fan: Take a close look at the PC case fan and its surroundings. Check for any loose cables, wires, or other objects that may be touching the fan blades or obstructing their movement. It’s crucial to ensure that nothing is blocking the path of the fan’s rotation.
- Remove any obstructions: Carefully remove any obstructions that you find. Gently move away any cables or wires that are blocking the fan. Ensure that no components or objects are too close to the fan, as they can cause interference and restrict its movement.
- Ensure proper clearance: After removing the obstructions, verify that there is sufficient clearance around the fan for proper airflow. Ensure that the fan has enough space to rotate without any hindrance. Improperly positioned components or cables can obstruct the fan even if they don’t directly touch the blades.
- Close the PC case: Once you have removed the obstructions and ensured proper clearance, securely close the PC case according to the manufacturer’s instructions.
By conducting a thorough inspection and removing any physical obstructions, you can significantly improve the movement of your PC case fan. This will enhance the airflow within the system and facilitate better cooling of your components.
In the next section, we will discuss the importance of proper fan installation and how it can impact the movement and performance of the fan.
Improper fan installation
If your PC case fan is barely moving, improper installation may be the culprit. Incorrectly installed fans can experience restricted movement due to misalignment, loose screws, or poor connections. It’s essential to ensure that the fan is installed correctly in order to maximize its efficiency and avoid any issues with movement or airflow.
Here are the steps to ensure proper fan installation:
- Refer to the manual: Consult the manual or documentation provided with your PC case and fan for specific instructions on proper installation. Each manufacturer may have different guidelines, so it’s important to follow their recommendations.
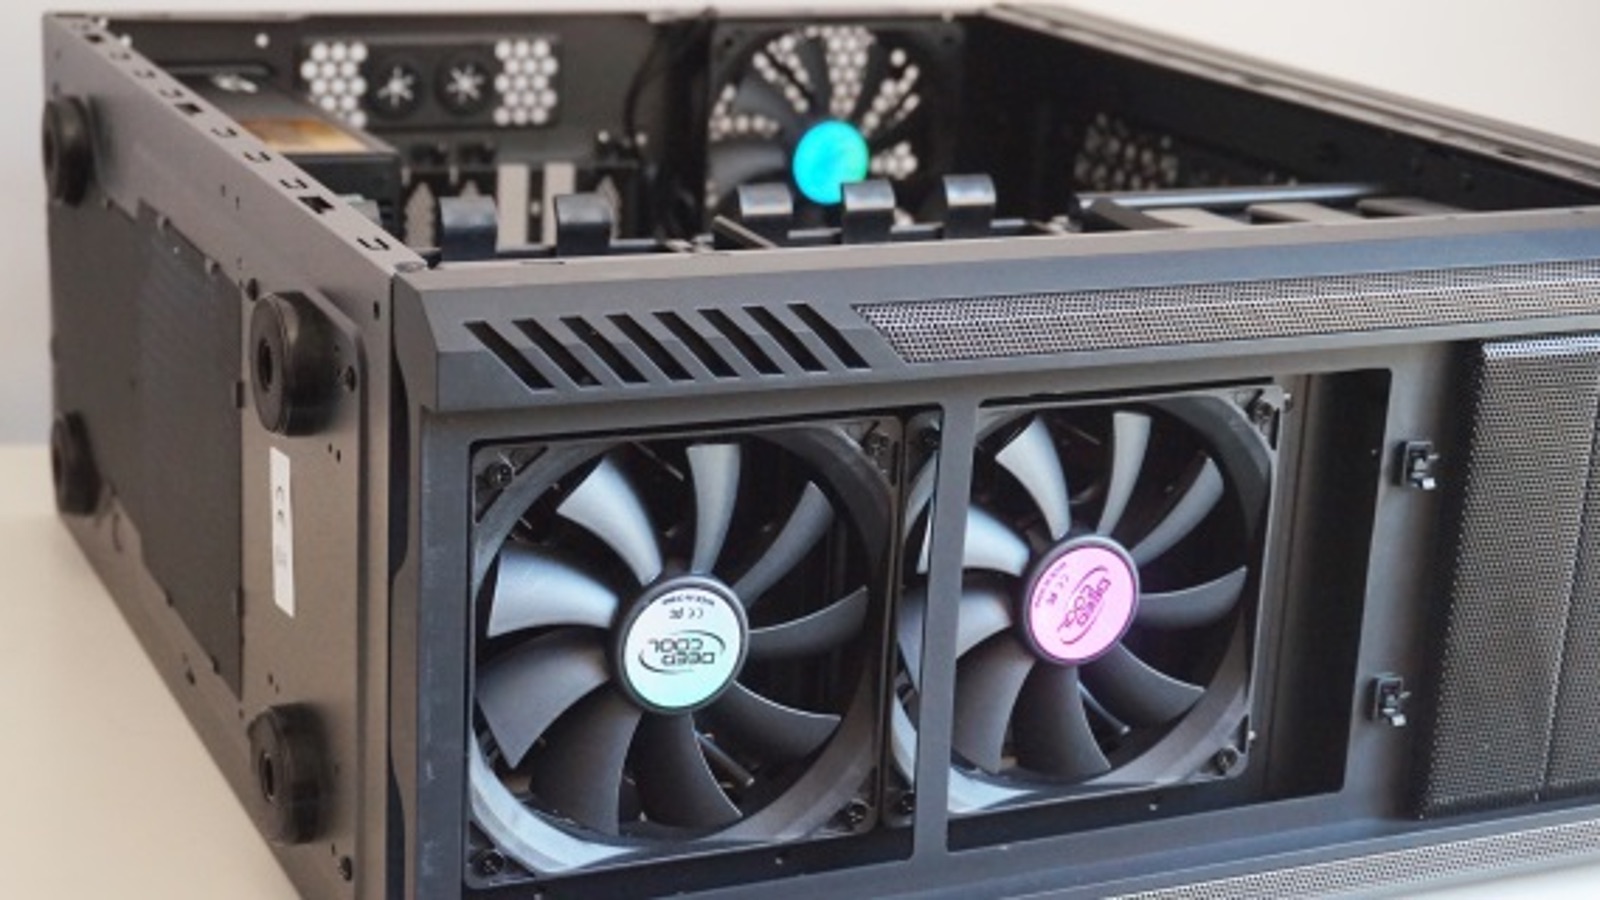
- Select the appropriate fan location: Identify the designated fan mounting spots in your PC case. These are typically located at the front, rear, or top of the case. Ensure that you choose a location that aligns with the airflow requirements and the specific design of your computer case.
- Align the fan correctly: Place the fan in the designated mounting spot, ensuring that it aligns with the screw holes or mounting brackets. Take note of any arrows or markings on the fan to ensure it is facing the correct direction for proper airflow.
- Tighten the screws: Securely tighten the screws or fasteners provided with the fan to hold it in place. However, be careful not to overtighten, as this can damage the fan or the case. Use a screwdriver or tool specific to your case to ensure a snug fit.
- Check connections: Verify that the fan’s power cable is securely connected to the appropriate motherboard or fan controller header. Ensure that the connection is tight and there are no loose wires or pins. Improper connections can cause the fan to operate at a reduced speed or not spin at all.
- Double-check clearance: Ensure that there is sufficient clearance around the fan for unobstructed movement. Make sure that no cables, components, or the case itself are interfering with the fan’s rotation.
- Test the fan: After installation, power on your computer and observe the fan’s movement. Listen for any unusual noises or vibrations that could indicate improper installation. If the fan is still barely moving or not functioning properly, consider revisiting the installation steps to ensure accuracy.
Proper fan installation is crucial for optimal performance and movement. When the fan is installed correctly, it can effectively cool your components and maintain proper airflow within the PC case.
Now that we have discussed the importance of proper fan installation, let’s move on to the next section where we will explore the possibility of a faulty fan motor causing the sluggish movement of your PC case fan.
Faulty fan motor
If you’ve gone through the previous troubleshooting steps and your PC case fan is still barely moving, it’s possible that the fan motor itself is faulty or damaged. The motor is responsible for spinning the fan blades and generating airflow, so any issues with the motor can result in sluggish movement or complete failure of the fan.
Here’s how you can test and potentially replace a faulty fan motor:
- Observe the fan’s movement: Carefully watch the fan to see if it’s attempting to spin or if it remains stationary despite receiving power. If the fan makes intermittent movements or doesn’t spin at all, there may be an issue with the motor.
- Disconnect the fan: Power down your computer and disconnect the fan from the motherboard or fan controller header. You may need to unscrew or unfasten the fan from its mounting spot to access the connector. Be mindful of any warranty conditions or safety precautions while doing so.
- Test the fan motor: Depending on the availability of spare parts and your technical expertise, you can test the fan motor separately. This requires applying power directly to the fan motor using a suitable power source. If the motor fails to spin or exhibits abnormal behavior, it’s likely that the motor is faulty and needs to be replaced.
- Consider fan motor replacement: If testing confirms that the fan motor is indeed faulty, you will need to replace it. Contact the fan manufacturer or check their website for replacement options specific to your model. Alternatively, you may need to consult a professional or a computer repair technician to assist you with the replacement process.
- Install the new fan motor: Once you have obtained a replacement fan motor, carefully install it following the manufacturer’s instructions and the proper installation steps discussed earlier. Take extra care to ensure the connections are securely fastened and the motor is aligned correctly.
- Test the new fan motor: After installation, power on your computer and observe the movement of the new fan motor. It should spin freely and generate adequate airflow, resolving the issue of the fan barely moving.
Replacing a faulty fan motor can be more involved and may require technical knowledge or assistance. If you’re uncomfortable with performing the replacement yourself, it’s advisable to consult a professional to ensure proper installation and functionality.
With the possibility of a faulty fan motor explored, let’s move on to the next section, where we will discuss troubleshooting steps to address a PC case fan that is barely moving.
How to troubleshoot a PC case fan that is barely moving
If your PC case fan is barely moving, it’s important to troubleshoot the issue to identify the underlying cause and implement the necessary solutions. Here are the troubleshooting steps you can take to address a slow or barely spinning fan:
- Clean the fan and remove dust: Dust build-up can hinder the movement of the fan. Regularly clean the fan blades and motor to remove accumulated dust and debris, allowing for unimpeded rotation and better airflow.
- Check and adjust fan speed settings: Incorrect fan speed settings can limit the fan’s movement. Access your computer’s BIOS or software utility to ensure that the fan speed is set appropriately for optimal performance.
- Remove obstructions around the fan: Objects, cables, or components obstructing the fan can limit its movement. Identify and remove any physical obstructions to allow the fan to spin freely and maintain proper airflow.
- Ensure proper fan installation and connections: Improper installation, loose screws, or faulty connections can cause a fan to barely move. Check that the fan is securely installed, aligned correctly, and properly connected to the motherboard or fan controller.
- Test and replace the faulty fan motor: If all other troubleshooting steps fail, and the fan continues to barely move, it may indicate a faulty fan motor. Test the fan motor separately and replace it if necessary to restore proper movement and functionality.
It’s important to approach each troubleshooting step methodically and carefully. Start with the easiest and least invasive steps, such as cleaning the fan or adjusting the fan speed settings. If the issue persists, move on to more involved measures, such as removing obstructions or testing the fan motor.
Remember, depending on your level of expertise and comfort, it may be best to seek professional assistance, especially for intricate tasks like replacing a fan motor.
By following these troubleshooting steps, you can identify and resolve the issue of a PC case fan that is barely moving. Ensuring proper fan movement is crucial for maintaining optimal cooling performance, preventing overheating, and prolonging the lifespan of your computer components.
In the next section, we will conclude our discussion and summarize the key points we’ve covered throughout the article.
Clean the fan and remove dust
Dust build-up is a common culprit behind a PC case fan that is barely moving. Over time, dust particles accumulate on the fan blades and motor, creating resistance that hinders smooth rotation. This build-up can impede the fan’s movement, reduce airflow, and compromise cooling performance. To address this issue, it is crucial to regularly clean the fan and remove dust and debris.
Follow these steps to clean your PC case fan effectively:
- Power off and unplug your computer: Before performing any maintenance, ensure that your computer is powered off and unplugged from the electrical outlet. This prevents any accidents or damage during the cleaning process.
- Access the fan inside your PC case: Depending on your computer model, you may need to remove the side panel or access a specific compartment to reach the fan. Refer to your computer’s manual or online resources for guidance on safely accessing the fan.
- Use compressed air: With the fan exposed, use a can of compressed air to blow away the dust and debris clinging to the fan blades, motor, and surrounding areas. Hold the can upright and at a safe distance to avoid damage.
- Brush gently or wipe with a soft cloth: For stubborn dust, use a soft brush or cloth to gently wipe the fan blades and motor. Ensure you apply gentle pressure to avoid bending or damaging the blades.
- Remove dust from the surrounding areas: Dust can accumulate in other parts of your computer case as well. Use compressed air to blow away dust from nearby components, heat sinks, and vents to maintain optimal airflow.
- Reinstall the fan: After cleaning, carefully reattach the fan to its original position according to the manufacturer’s instructions. Ensure that all screws or fasteners are secure but not over-tightened.
Cleaning your PC case fan on a regular basis is crucial for maintaining optimal performance and preventing overheating. By removing dust and debris, you allow the fan to spin freely, ensuring efficient airflow and cooling throughout the computer case.
Remember to perform this cleaning process in a well-ventilated area to avoid inhaling dust particles. Take necessary precautions to protect sensitive components from ESD (electrostatic discharge) and refer to your computer’s manual for any specific instructions or restrictions.
Regularly monitoring and cleaning your PC case fan will help prolong its lifespan and improve overall system performance. With a clean and efficiently moving fan, you can ensure the optimal functioning of your computer and maintain safe operating temperatures.
Check and adjust fan speed settings
Another factor that can contribute to a PC case fan barely moving is incorrect fan speed settings. Many motherboards and fan controllers offer the ability to adjust the fan speed to achieve a balance between performance and noise levels. If the fan speed is set too low, it may appear as if the fan is barely moving. Checking and adjusting the fan speed settings can help restore proper fan movement and airflow.
Follow these steps to check and adjust your fan speed settings:
- Access your computer’s BIOS: Restart your computer and enter the BIOS setup by pressing the designated key during startup. The key for accessing the BIOS varies depending on the motherboard manufacturer (common keys include Del, F2, F10, etc.).
- Navigate to the fan control settings: Once in the BIOS, navigate to the section containing fan control or monitoring settings. The exact location and naming may differ among different BIOS versions.
- Review the current fan speed settings: Check the current fan speed settings and note if they are expressed as a percentage or as specific RPM (rotations per minute).
- Adjust the fan speed settings: Depending on your BIOS options, you can adjust the fan speed setting by increasing or decreasing the percentage or RPM value. Increasing the fan speed will provide more airflow but may generate more noise.
- Save and exit: After adjusting the fan speed settings, save your changes and exit the BIOS. Your computer will reboot with the adjusted settings.
In addition to accessing the BIOS, some motherboards also offer software utilities that allow you to adjust fan speed settings directly from the operating system. These utilities provide more flexibility and convenience in managing fan speeds. Check your motherboard’s manufacturer website for any available software that corresponds to your motherboard model.
It’s important to note that not all fans support variable fan speeds. Some fans are fixed-speed fans and operate at a constant speed determined by their design. Consult your fan’s specifications and documentation to determine if it supports speed adjustments.
Finding the ideal fan speed balance is crucial, as lower speeds can result in reduced airflow and higher temperatures, while higher speeds can generate increased noise. Take into consideration your cooling needs and noise tolerance to adjust the fan speed settings accordingly.
By checking and adjusting your fan speed settings, you can restore optimal fan movement and maintain a balance between cooling performance and noise levels. Proper fan speed settings ensure efficient cooling and help prevent components from overheating, leading to better system stability and longevity.
Remove obstructions around the fan
Obstructions around the PC case fan can impede its movement and result in a fan that barely moves. It’s essential to ensure that there are no objects, cables, or components obstructing the fan’s blades, as these can limit airflow and cause the fan to struggle. Removing obstructions allows the fan to spin freely and improves its overall performance.
Follow these steps to remove obstructions around the fan:
- Power down your computer: Before proceeding, make sure to shut down your computer completely and disconnect it from the power source. This ensures your safety and prevents any accidental damage.
- Open your PC case: Depending on your computer’s design, you may need to remove the side panel or access a specific area to reach the fan. Consult your computer’s manual or online resources for instructions on safely opening your PC case.
- Inspect the fan area: Carefully examine the area around the fan, looking for any obstructions such as cables, wires, or components that may be obstructing the fan’s blades. Pay close attention to any loose cables or wires that may have inadvertently come into contact with the fan.
- Remove the obstructions: Gently remove any cables, wires, or objects that are obstructing the fan’s movement. Take care not to strain or damage any wires or cables while doing this.
- Check for clearance: Ensure that there is sufficient clearance around the fan to allow for unobstructed movement. Make sure that no other components are blocking or interfering with the fan’s rotation. Adjust the positioning of any components if needed to create enough clearance for the fan.
- Close the PC case: Once you have removed the obstructions and ensured proper clearance, securely close the PC case according to the manufacturer’s instructions.
Removing obstructions around the PC case fan is crucial to ensure optimal airflow and cooling efficiency. By eliminating any objects or cables that hinder the fan’s movement, you allow it to operate freely and effectively dissipate heat from the computer’s components.
Regularly inspecting and maintaining clear pathways for the fan to function properly goes a long way in preventing overheating issues and ensuring the longevity of your hardware.
Remember to exercise caution while working inside your PC case to avoid accidental damage or ESD (electrostatic discharge). If you are unsure about removing or adjusting any components, seek assistance from a professional technician to ensure proper handling.
By removing obstructions around the fan, you can optimize airflow and maintain the overall performance and stability of your computer system.
Ensure proper fan installation and connections
Improper fan installation or loose connections can lead to a PC case fan that barely moves. It’s crucial to ensure that the fan is correctly installed and securely connected to maintain optimal performance and airflow. By verifying the fan’s installation and connections, you can resolve any issues that may be hindering its movement.
Follow these steps to ensure proper fan installation and connections:
- Refer to the manual: Before starting, consult the manual or documentation provided with your PC case and fan for specific instructions on proper installation. Each fan and case may have different mounting requirements and connection methods.
- Select the correct fan location: Identify the appropriate mounting location for the fan within your PC case. This is usually indicated by designated areas with screw holes or mounting brackets. Ensure that you choose a location that aligns with the airflow requirements and matches the size of your fan.
- Align the fan correctly: Carefully position the fan in the designated mounting spot, ensuring that it aligns with the screw holes or mounting brackets. Take note of any arrows or markings on the fan to ensure it is facing the correct direction for optimal airflow.
- Tighten the screws: Securely tighten the screws or fasteners provided with the fan to hold it in place. Take care not to overtighten, as this can damage the fan or the case. Use a screwdriver or appropriate tool to ensure a snug fit.
- Check connections: Verify that the fan’s power cable is securely connected to the appropriate motherboard header or fan controller. Ensure that the connection is tight and there are no loose wires or pins. A loose or improper connection can cause the fan to operate at a reduced speed or not spin at all.
- Double-check clearance: After installation, ensure that there is sufficient clearance around the fan for unobstructed movement. Make sure that no surrounding components, cables, or the case itself are interfering with the fan’s rotation.
- Test the fan: Power on your computer and observe the movement of the fan. Listen for any unusual noises or vibrations that could indicate improper installation. If the fan is still barely moving or not functioning properly, consider revisiting the installation and connection steps to ensure correctness.
Proper fan installation and secure connections are vital for the fan to operate optimally. Ensuring that the fan is correctly aligned, tightly fastened, and connected will enable it to move freely and provide efficient airflow to cool your computer components.
Keep in mind that different fans and cases may have unique installation and connection requirements. Always consult the manufacturer’s instructions or seek guidance from online resources if you encounter any difficulties during the installation process.
By guaranteeing proper fan installation and connections, you can alleviate any issues affecting the fan’s movement and ensure effective cooling for your computer system.
Test and replace the faulty fan motor
If you’ve exhausted all other troubleshooting steps and your PC case fan is still barely moving, it’s possible that the fan motor itself is faulty or damaged. The motor is responsible for spinning the fan blades, so any issues with the motor can result in sluggish movement or no movement at all. Testing and potentially replacing the fan motor may be necessary to restore proper fan functionality.
Follow these steps to test and potentially replace a faulty fan motor:
- Disconnect the fan: Power off your computer and disconnect the fan from the power source. Depending on your fan’s connection method, you may need to unplug it from a header on the motherboard or a fan controller.
- Perform a motor test: If you have access to a separate power source (e.g., a power supply tester) or a spare fan header on the motherboard, connect the fan directly to that power source. Ensure proper polarity and voltage compatibility. If the fan motor fails to spin or exhibits irregular behavior, it is likely faulty and needs to be replaced.
- Obtain a replacement fan motor: Identify the correct replacement fan motor for your specific fan model. Consult the manufacturer’s website or contact their support for information on compatible replacement parts. It’s important to ensure that the replacement motor matches the specifications and size of your existing fan.
- Remove the faulty motor: Carefully remove the faulty fan motor from your fan assembly. This may involve unscrewing or unclipping the motor from the fan frame or heat sink. Take note of the motor’s wiring connections for the installation of the replacement motor.
- Install the replacement motor: Attach the replacement motor to the fan assembly, aligning it with the appropriate slots or screw holes. Ensure that the wiring connections are properly reconnected, following the color coding or specific instructions provided by the manufacturer.
- Secure and test the replacement motor: Tighten the screws or clips to secure the replacement motor in place. Reconnect the fan to the power source and power on your computer. Observe the fan’s movement to confirm that the replacement motor is functioning correctly.
Replacing a faulty fan motor may require some technical knowledge and expertise. If you are uncomfortable performing this procedure on your own, consider consulting a professional or seeking assistance from a computer repair technician.
A faulty fan motor significantly impacts the fan’s ability to cool your system. By testing and replacing the faulty motor, you can ensure proper fan movement, allowing for efficient cooling and preventing potential overheating issues.
Remember to handle electrical components with care and always prioritize safety while working inside your computer case. Take necessary precautions to avoid electrostatic discharge (ESD) damage and refer to the manufacturer’s documentation for specific instructions related to your fan model.
By testing and replacing a faulty fan motor, you can restore proper fan functionality and ensure reliable cooling performance for your PC system.
Conclusion
A PC case fan that is barely moving can lead to inadequate airflow, inefficient cooling, and potential damage to your computer components. Understanding the possible causes of this issue and implementing the necessary troubleshooting steps is crucial for maintaining optimal performance and preventing overheating problems.
Throughout this article, we have explored several reasons why a PC case fan might be barely moving. We discussed the importance of cleaning the fan and removing dust build-up, checking and adjusting fan speed settings, removing obstructions around the fan, ensuring proper fan installation and connections, and testing and replacing a faulty fan motor if all else fails.
Regularly cleaning your PC case fan and removing dust can significantly improve its movement and enhance overall airflow within the system. Additionally, checking and adjusting the fan speed settings ensure that the fan operates at the appropriate speed for optimal cooling performance.
Removing any physical obstructions around the fan is crucial for its smooth rotation and uninterrupted airflow. Ensuring proper fan installation and secure connections guarantee that the fan operates at its full potential without any hindrances.
In rare cases where the fan still barely moves, a faulty fan motor may be the cause. Testing and potentially replacing the motor can restore the fan’s functionality and ensure efficient cooling for your computer components.
By following the troubleshooting steps outlined in this article, you can identify and address the underlying causes of a PC case fan that is barely moving. Remember to prioritize safety while working inside your computer case and seek professional assistance if needed.
Regular maintenance and check-ups can help maintain the optimal performance of your PC case fan and prevent overheating issues. Monitoring the fan’s movement, cleaning it regularly, and addressing any potential issues promptly will ensure that your computer runs smoothly and efficiently.
With proper care and attention, you can maintain an optimal PC case fan movement, maximize cooling performance, and extend the lifespan of your computer system.