Introduction
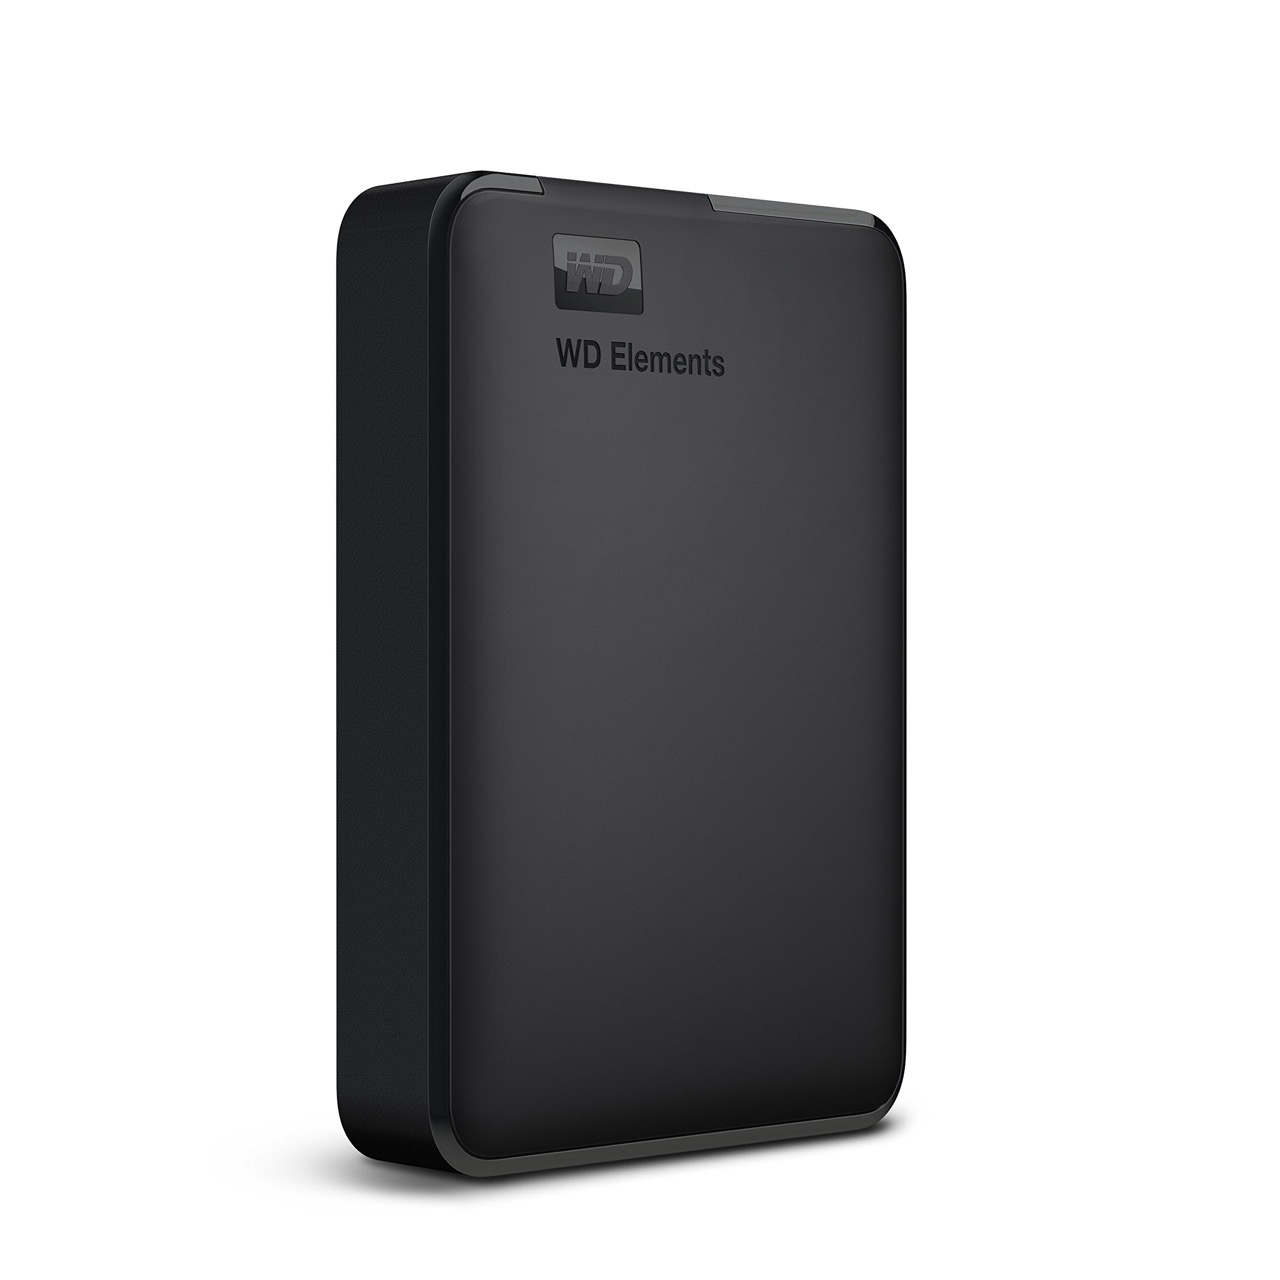
Backing up your computer data is crucial to protect your important files and prevent data loss. One effective way to ensure the safety of your data is by using an external hard drive to create backups. With Windows 8.1, the process of backing up your computer to an external hard drive is simple and straightforward.
In this article, we will guide you through the step-by-step process of how to backup your computer to an external hard drive Windows 8.1. Whether you want to safeguard your personal documents, photos, or important work files, following these instructions will help you create a reliable backup system for your computer.
By backing up your computer to an external hard drive, you can rest easy knowing that your data is secure and easily recoverable in case of a system failure or accidental deletion. Whether you’re a business professional, a student, or a casual computer user, implementing regular backups is essential for maintaining the integrity of your data.
Throughout this article, we will cover all the necessary steps, including connecting the external hard drive to your computer, setting up the backup process, customizing advanced settings, monitoring the progress, and restoring files from the external hard drive when needed.
It’s important to note that the steps outlined in this article are specifically for Windows 8.1. If you’re using a different operating system, the process may vary. However, the concept of using an external hard drive for backups remains the same, and you can still adapt the general guidelines to fit your specific system.
Now that you understand the importance of backing up your data and the purpose of this article, let’s dive into the step-by-step process of how to backup your computer to an external hard drive on Windows 8.1.
Step 1: Connect the external hard drive to your computer
The first step in backing up your computer to an external hard drive is to physically connect the external hard drive to your computer. Follow the instructions below to complete this step:
- Locate an available USB port on your computer. Most computers have multiple USB ports located on the front or back panel.
- Take the USB cable that came with your external hard drive and plug one end into the external hard drive’s USB port.
- Connect the other end of the USB cable to an available USB port on your computer. Make sure the cable is securely inserted into both the external hard drive and the computer.
- Your computer should recognize the external hard drive and automatically install any necessary drivers. Wait for the installation process to complete.
- To confirm that the external hard drive is successfully connected, open File Explorer (formerly known as Windows Explorer) by pressing Windows Key + E or by selecting it from the Start menu.
- In the left-hand pane of File Explorer, you should see the external hard drive listed under the “This PC” or “Computer” section, along with your other disk drives.
Once you have connected the external hard drive to your computer and verified its presence in File Explorer, you are ready to proceed to the next step of setting up the backup process in Windows 8.1.
Step 2: Open File History settings
After connecting the external hard drive to your computer, the next step is to open the File History settings in Windows 8.1. Follow the steps below to access the File History settings:
- Click on the Start button in the bottom-left corner of your screen to open the Start menu.
- In the search box, type “File History” and click on the “File History settings” option that appears in the search results.
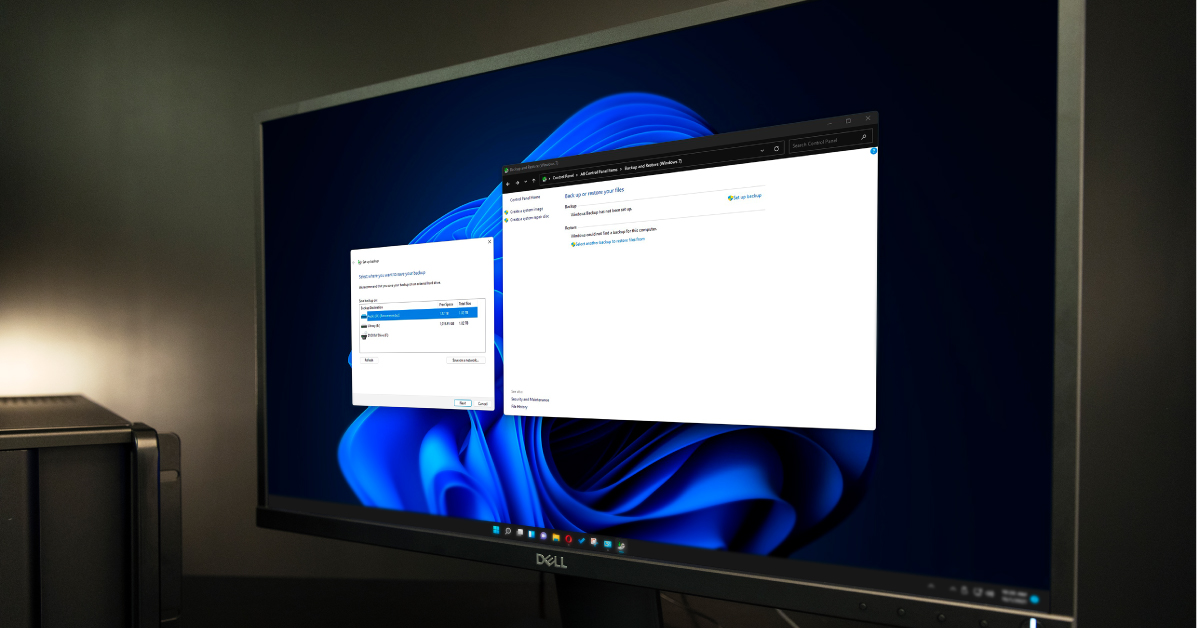
- The File History settings window will open, displaying the options for configuring your backup settings.
Alternatively, you can access the File History settings through the Control Panel:
- Open the Control Panel by right-clicking on the Start button and selecting “Control Panel” from the context menu.
- In the Control Panel, navigate to the “System and Security” category and click on “File History.”
- The File History settings window will open, allowing you to customize your backup preferences.
Opening the File History settings gives you access to various options that allow you to configure your backup settings according to your needs. From this window, you can specify the external hard drive you connected in Step 1 as the backup destination, choose how often you want the backup to occur, and set the duration for keeping saved versions of your files.
By default, Windows 8.1 is configured to save files to the internal hard drive or SSD. To ensure that your files are backed up to the external hard drive, you need to specify this drive as the backup destination in the File History settings. In the next step, we will guide you through the process of setting up File History backup on Windows 8.1.
Step 3: Set up File History backup
Once you have opened the File History settings in Windows 8.1, you are ready to set up the backup process. Follow the steps below to configure the File History backup:
- In the File History settings window, click on the “Turn on” button located under the “File History” heading. This will enable the File History feature and open up additional options.
- Under the “Back up my files” section, click on the “Select a drive” link to choose the external hard drive you connected previously. A list of available drives will be displayed.
- Select the external hard drive from the list, and click on the “OK” button to confirm your selection. This will set the external hard drive as the backup destination for your files.
- Optionally, you can click on the “More options” link to access additional settings for customizing your backup preferences. This includes options for how often to back up your files, how long to keep saved versions of documents, and whether or not to back up files from the desktop, libraries, and default folders.
- Once you have configured the backup settings to your preference, click on the “Back up now” button to start the initial backup process. Windows 8.1 will begin copying your files to the designated external hard drive.
It is recommended to keep your computer connected to a power source during the backup process to prevent interruption. Depending on the size of your files and the speed of your computer, the initial backup may take some time to complete. Subsequent backups will only copy new and modified files, making the process faster.
Once the initial backup is finished, File History will automatically create regular backups of your files based on the schedule you have set. Windows 8.1 will continue to monitor file changes and update the backup accordingly, ensuring that your important documents, photos, and other files are always protected.
With the File History backup now set up, you can move on to the next step and select specific files and folders to include in the backup process.
Step 4: Select files and folders to back up
After setting up the File History backup in Windows 8.1, you have the option to choose specific files and folders to include in the backup process. Follow the steps below to select the files and folders you want to back up:
- In the File History settings window, click on the “More options” link located below the backup settings.
- Scroll down to the “Back up these folders” section and click on the “+ Add a folder” button.
- A file browser window will appear, allowing you to navigate through your computer’s file system. Select the folders you want to include in the backup by clicking on them. You can select individual folders or entire libraries (such as Documents, Pictures, Music, etc.) by expanding the library and checking the box next to it.
- Click on the “Choose this folder” button to add the selected folders to the backup.
- Repeat steps 2-4 if you want to add more folders to the backup.
- If you no longer want to include a folder in the backup, click on the “x” icon next to the folder in the “Back up these folders” section.
- Once you have chosen all the folders you want to back up, you can close the settings window. Windows 8.1 will now include these selected folders in the File History backup process.
By selecting specific files and folders to back up, you have more control over which data is included in the backup. This allows you to prioritize important files and exclude less critical data, optimizing the backup process and saving storage space on your external hard drive.
It is a good practice to regularly review and update the selection of files and folders to be backed up. As your file organization and storage needs change, you can easily modify the backup settings to accommodate these changes.
With the files and folders selected, the File History backup will automatically include them in the regular backup process. Any changes made to these files or new files added to the selected folders will be captured and backed up, ensuring that your important data is always protected.
Step 5: Customize advanced settings
Windows 8.1 provides advanced settings options for customizing your File History backup preferences. By accessing these options, you can fine-tune the backup process to suit your specific needs. Follow the steps below to customize the advanced settings:
- In the File History settings window, click on the “More options” link located below the backup settings.
- In the “Advanced settings” section, you’ll find several options to customize your backup preferences:
- Save copies of files: Here, you can choose how often Windows creates copies of your files. The default setting is every hour, but you can increase or decrease the frequency according to your preference.
- Keep saved versions: By default, Windows saves multiple versions of your files. You can specify how long these versions should be kept – options include indefinitely, until space is needed, or for a certain number of months.
- Exclude folders: If there are specific folders you don’t want to include in the backup, you can exclude them here. Simply click on the “+ Add a folder” button and select the folder(s) you wish to exclude.
- Advanced settings: Clicking on this link will give you access to additional options, such as adjusting the cache size, configuring network drive settings, and managing offline files.
- Customize the advanced settings according to your preferences.
Customizing the advanced settings allows you to tailor the backup process to your specific requirements. For example, if you don’t need frequent backups, you can increase the time interval between backups to minimize system resource usage. Similarly, adjusting the retention period for saved versions of files can help optimize storage space on your external hard drive.
Excluding specific folders from the backup can be useful if you have large folders with files that don’t need to be backed up, such as temporary files or system files. This saves time and resources by skipping unnecessary data during the backup process.
By exploring the advanced settings, you can fine-tune File History to meet your backup needs. Once you have customized the advanced settings, your backup preferences will be updated, and Windows 8.1 will adhere to these settings during the backup process.
Step 6: Start the backup process
Now that you have set up the File History backup and customized the advanced settings, it’s time to initiate the backup process in Windows 8.1. Follow the steps below to start the backup:
- In the File History settings window, click on the “Back up now” button located under the “Overview” section.
- Once you click on the button, Windows 8.1 will begin the backup process. The duration of the backup will depend on the amount of data being backed up and the speed of your computer and external hard drive.
- You can monitor the progress of the backup by returning to the File History settings window. The “Last backup” information will display the date and time of the most recent backup, and a progress bar will show the status of the backup in real-time.
- It is recommended to keep your computer connected to a power source during the backup process to prevent interruptions and ensure the backup completes successfully.
- Once the initial backup is complete, File History will continue to run in the background, regularly backing up your files based on the frequency you configured in the backup settings.
During subsequent backups, File History will only copy new and modified files, significantly reducing the time and resources required for the backup process. This incremental backup approach ensures that your most recent files are always protected without duplicating unchanged files.
If you need to interrupt or pause the backup process, you can do so by clicking on the “Stop backup” button in the File History settings window. You can resume the backup later by clicking on the “Back up now” button again.
By starting the backup process, you have taken a crucial step in protecting your important files and ensuring their recoverability in the event of data loss or system failure. Let the backup process run in the background, and proceed to the next step to learn how to monitor the backup progress.
Step 7: Monitor backup progress
Once you have started the backup process using File History in Windows 8.1, it’s important to monitor the backup progress to ensure that your files are being successfully backed up. Follow these steps to monitor the backup progress:
- Open the File History settings by following the steps outlined in previous sections.
- In the File History settings window, you will see the “Last backup” section, which displays the date and time of the most recent backup.
- Below the “Last backup” information, there is a progress bar that indicates the current status of the ongoing backup process. You can visually track the percentage completed.
- You can also click on the “Options” button located in the upper-right corner of the File History settings window to view additional information about the backup process.
- From the “Options” menu, you can access the “Backup” tab, which provides details such as the size of the backup, the number of files in the backup, and the backup location.
- Additionally, you can check the status of the backup by hovering over the File History icon in the system tray, which resembles a clock with a green checkmark.
- If you encounter any errors or issues during the backup process, Windows will display an error message or provide suggested solutions in the File History settings window. Take note of any error messages and follow the recommended steps to resolve the issue.
- It is important to periodically check the backup progress to ensure that your files are being backed up regularly and without any interruptions. This helps to confirm the integrity of your backup system and provides peace of mind knowing that your important data is protected.
By actively monitoring the backup progress, you can stay informed and address any potential issues promptly. Regularly conducting these checks will help ensure the reliable and consistent backup of your important files.
With the ability to monitor the backup progress in Windows 8.1, you can rest assured that your files are being securely and successfully backed up. Proceed to the next step to learn how to restore files from the external hard drive when needed.
Step 8: Restore files from the external hard drive
Having a solid backup system is not only about creating backups but also being able to restore your files when needed. In this step, we will guide you on how to restore your files from the external hard drive using File History in Windows 8.1. Follow the steps below:
- Connect the external hard drive containing the backed-up files to your computer.
- Open File Explorer by pressing the Windows Key + E or selecting it from the Start menu.
- In the File Explorer window, navigate to the location where your files were originally saved.
- Click on the “History” button located in the top menu. This will display a list of all available backups.
- Scroll through the list to find the version of the file you want to restore.
- Once you have located the desired file version, you have a couple of options:
- Restore the file to its original location: Select the file and click on the “Restore” button. This will overwrite the current version of the file with the selected backup version.
- Restore the file to a different location: Right-click on the file and select “Restore to” or “Restore previous versions.” Choose a new location to save the restored file.
- The selected file will be restored to the desired location, either replacing the current version or creating a new copy, based on your selection.
- Repeat this process for each file or folder you wish to restore from the external hard drive.
It’s important to note that the File History backup keeps multiple versions of your files, allowing you to choose from different time points. This flexibility enables you to recover files that may have been accidentally deleted, modified, or corrupted.
By following these simple steps, you can easily restore your files from the external hard drive using File History in Windows 8.1. Having access to previous versions of your documents, photos, and other important files provides an added layer of protection and ensures that your data is recoverable when needed.
Now that you know how to restore files from the external hard drive, you can confidently manage and recover your backed-up data. With these steps completed, you have successfully implemented a comprehensive backup and restore system using File History in Windows 8.1.
Conclusion
Creating a backup of your computer data is essential for safeguarding your important files and preventing the risk of data loss. Windows 8.1 provides a user-friendly and efficient tool called File History, which allows you to easily back up your computer to an external hard drive. By following the steps outlined in this article, you can set up and customize the File History backup, select specific files and folders to include, monitor the backup progress, and restore files when needed.
Through the process of connecting the external hard drive to your computer, opening the File History settings, and configuring the backup preferences, you establish a reliable backup system. Customizing advanced settings and regularly monitoring the backup progress are key for ensuring the integrity of the backup process. Additionally, being able to restore files from the external hard drive empowers you to recover data in case of accidental deletion, file corruption, or system failures.
Remember to regularly review and update the files and folders selected for backup to accommodate changes in your data organization. It is also important to keep your computer connected to a power source during the backup process to avoid interruptions and ensure the successful completion of backups.
By implementing File History and diligently following the steps outlined in this article, you can have peace of mind knowing that your important files are safely backed up to an external hard drive. This proactive approach to data backup ensures the recoverability of your files and protects you from the potential disruptions caused by data loss.
Take the time to implement File History and make backing up your computer a regular part of your routine. By doing so, you prioritize the safety and security of your valuable data.