Introduction
Welcome to the world of Windows 11, Microsoft’s latest operating system that combines a sleek and modern interface with powerful features. As you embark on your Windows 11 journey, one crucial aspect to keep in mind is the importance of backing up your data. Accidents can happen, and it’s better to be prepared than to face the potential loss of important files and documents.
In this article, we will guide you through the process of backing up Windows 11 to an external hard drive, ensuring that your precious data remains safe and easily retrievable. Whether you’re a cautious user who wants to regularly back up your system or someone who just wants to safeguard your priceless photos and videos, we’ve got you covered.
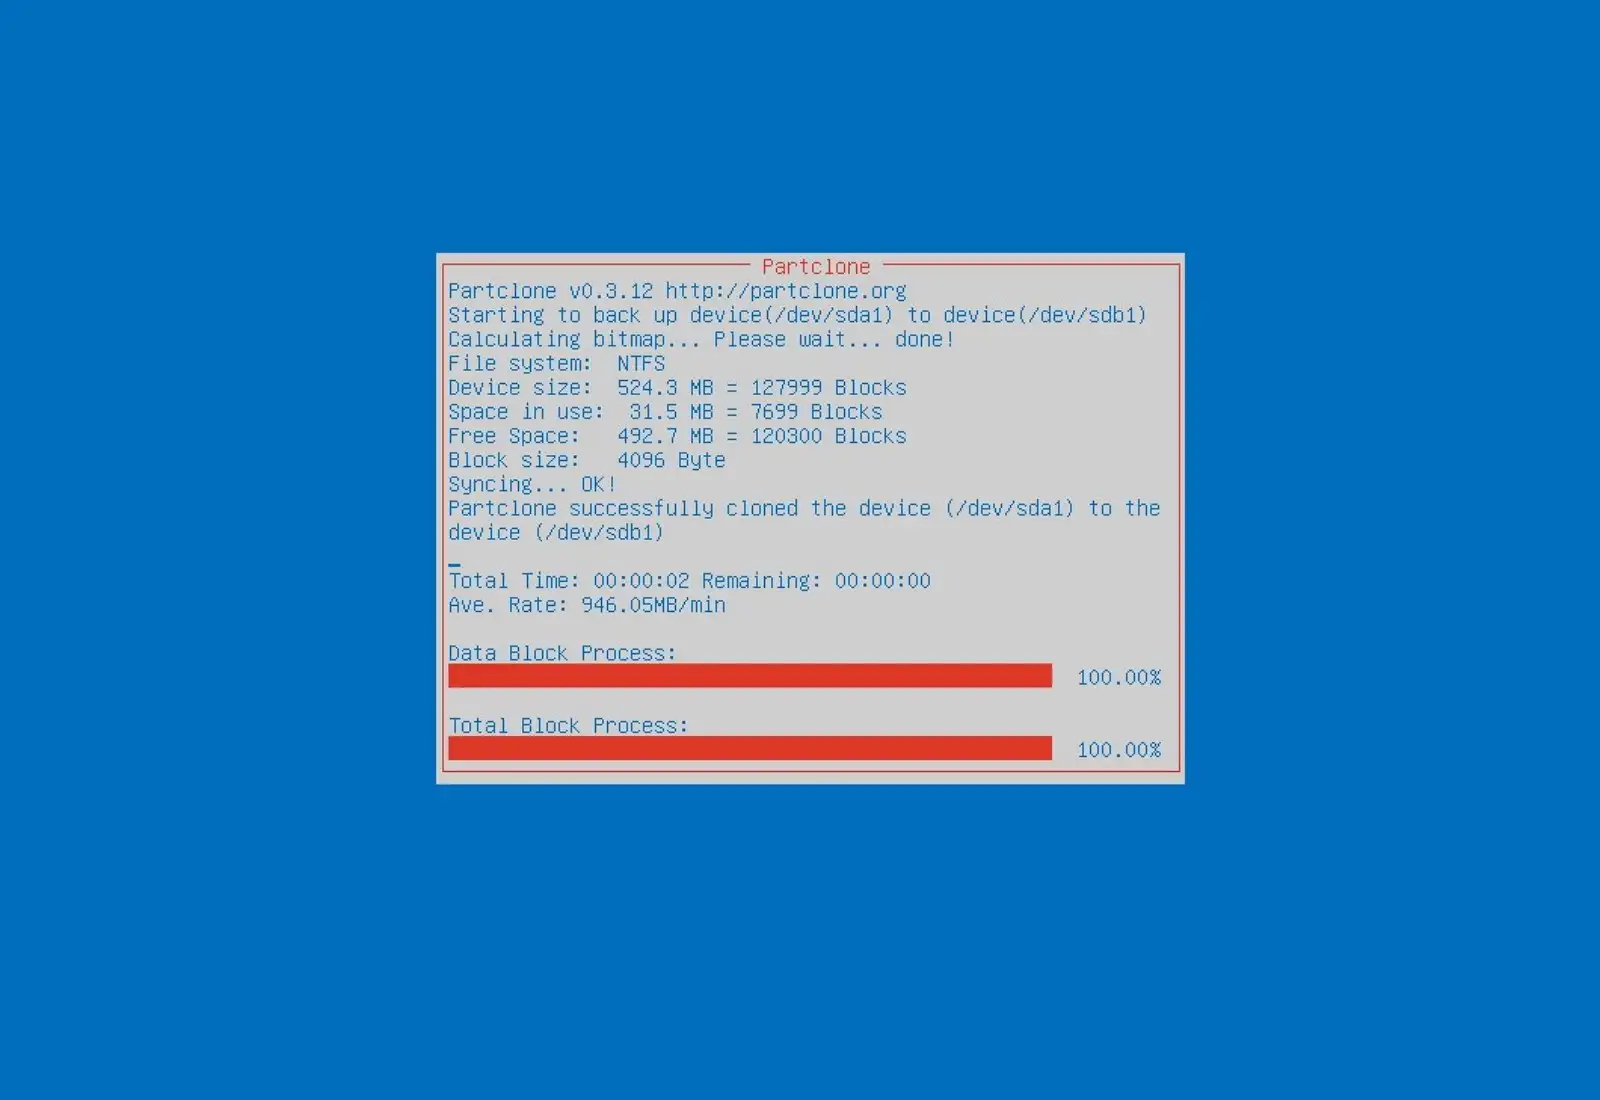
Backing up your Windows 11 system to an external hard drive offers multiple benefits. Firstly, it provides an off-site storage option, separate from your computer, which means that even if your computer is compromised or damaged, your data remains safe. Additionally, it allows for easy restoration of files and documents in case of accidental deletion, hard drive failure, or system crashes.
Choosing the right external hard drive for your Windows 11 backup needs is a crucial step. Consider factors such as storage capacity, transfer speed, and durability. Opt for a reliable and reputable brand to ensure the long-term safety and accessibility of your data. Higher storage capacities, such as 1TB or more, are recommended to accommodate the ever-increasing size of data files.
Once you have selected the perfect external hard drive, the next step is to prepare it for use with Windows 11. This involves formatting the drive using the appropriate file system and allocating it a drive letter. In the following sections, we will provide clear and concise instructions to help you complete this process effortlessly.
So, let’s get started with backing up your Windows 11 system to an external hard drive. Follow along with our step-by-step guide to ensure that your valuable data is always protected and easily recoverable.
Choosing the Right External Hard Drive
When it comes to choosing the right external hard drive for your Windows 11 backup needs, there are several factors to consider. Selecting the perfect external hard drive will ensure that your data is safely stored and easily accessible whenever you need it.
First and foremost, it’s essential to consider the storage capacity of the external hard drive. The size of your backup needs will depend on the amount of data you want to back up. If you have a large collection of photos, videos, or other media files, it’s recommended to opt for a higher storage capacity, such as 1TB or more. This will ensure that you have ample space to store all your important files, without the need to constantly delete or transfer data to free up space.
In addition to storage capacity, consider the transfer speed of the external hard drive. Faster transfer speeds mean that your backup process will be quicker and more efficient. Look for external hard drives with USB 3.0 or higher interfaces, as these offer faster data transfer rates than USB 2.0.
Durability is another important factor to consider. Your external hard drive may be exposed to potential risks such as drops, bumps, or accidents. Look for drives that are built to withstand such incidents, with features like shock resistance or rugged enclosures. It’s also worth considering drives that are resistant to dust, water, or even extreme temperatures if you anticipate using the drive in harsh environments.
Reliability is paramount when it comes to choosing an external hard drive. Look for reputable brands with a track record of producing high-quality and reliable drives. Reading customer reviews and checking the warranty offered can give you a good idea of the reliability of a particular drive.
Consider the physical size and portability of the external hard drive as well. If you plan on taking your backup drive with you on the go, a compact and lightweight option may be more suitable.
Finally, it’s important to compare prices and find an external hard drive that fits your budget. Prices can vary depending on the size, brand, and features of the drive. Determine your budget range and compare options to ensure you find the right balance between cost and quality.
By considering these factors – storage capacity, transfer speed, durability, reliability, portability, and price – you can select the perfect external hard drive for your Windows 11 backup needs. Remember, investing in a high-quality external hard drive is an investment in the safety and accessibility of your valuable data.
Preparing Your External Hard Drive
Now that you’ve chosen the perfect external hard drive for your Windows 11 backup needs, it’s time to prepare the drive for use. This involves formatting the drive using the appropriate file system and allocating a drive letter to ensure compatibility with Windows 11.
The first step is to connect your external hard drive to your Windows 11 computer using the provided USB cable. Ensure that the drive is securely plugged in and recognized by the system before proceeding.
To format the drive, open the File Explorer on your Windows 11 computer. Right-click on the Start menu button and select “File Explorer” from the context menu that appears. Alternatively, you can press the Windows key + E on your keyboard to launch File Explorer.
In the File Explorer window, locate and right-click on “This PC” in the left-hand navigation pane. Select “Manage” from the dropdown menu that appears.
In the Computer Management window, click on “Disk Management” under the “Storage” section in the left-hand menu. You will now see a list of all the connected drives, including your external hard drive.
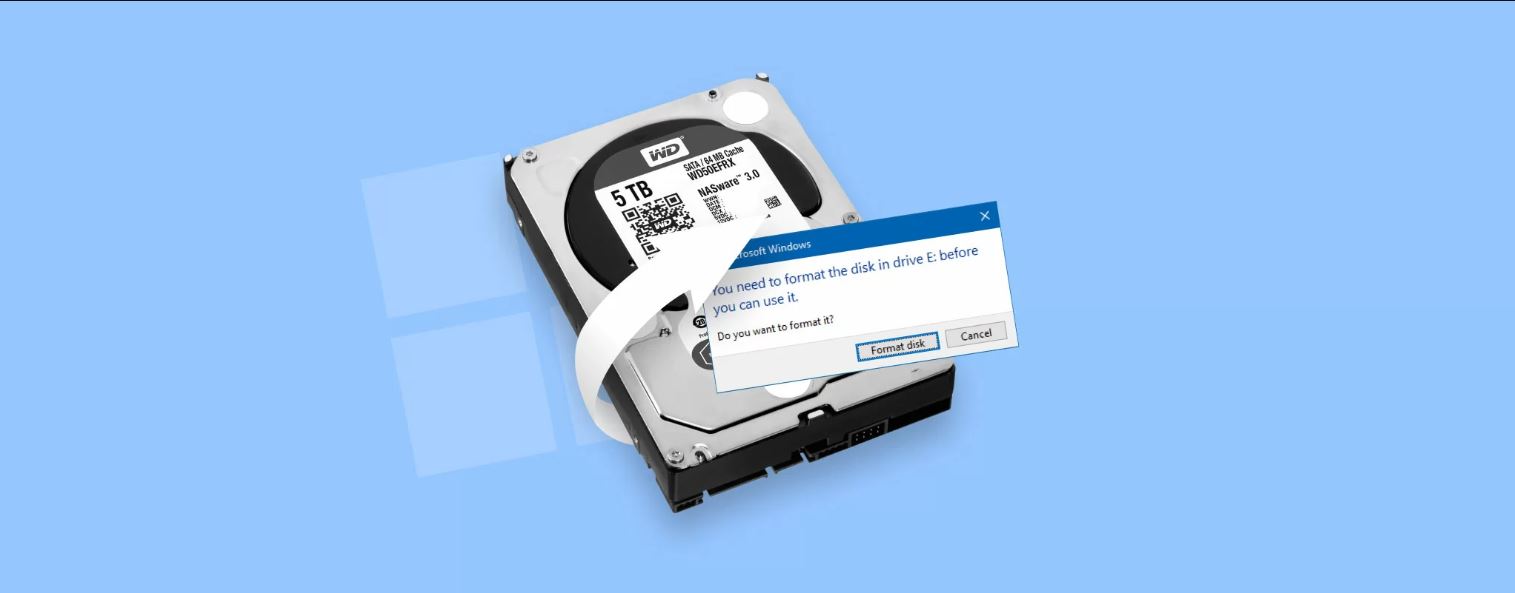
Identify your external hard drive from the list, ensuring that you select the correct drive to avoid accidentally formatting the wrong drive. Right-click on the drive and choose the “Format” option from the context menu.
In the Format window, you can customize the settings according to your preferences. Choose the desired file system, such as NTFS or exFAT. NTFS is recommended for most users as it offers better performance and supports larger file sizes. Specify a volume label to easily identify the drive if you have multiple external hard drives.
Once you have configured the settings, click on the “Start” button to begin the formatting process. You will receive a warning that all data on the drive will be erased. Confirm your choice to proceed.
The formatting process may take a few moments or longer, depending on the size of the drive. Once the process is complete, you will receive a notification. Your external hard drive is now formatted and ready to be used for Windows 11 backups.
Now that your external hard drive is formatted, the next step is to assign a drive letter. This will allow you to access the drive easily from File Explorer. To assign a drive letter, right-click on the newly formatted drive in the Disk Management window and select “Change Drive Letter and Paths.”
In the next window, click on “Add” and select a drive letter from the dropdown menu. Click “OK” to confirm the assignment. You will now see the drive letter appear next to your external hard drive in File Explorer.
With your external hard drive properly formatted and assigned a drive letter, you’re now ready to set up file history and start backing up your Windows 11 system.
Setting Up File History on Windows 11
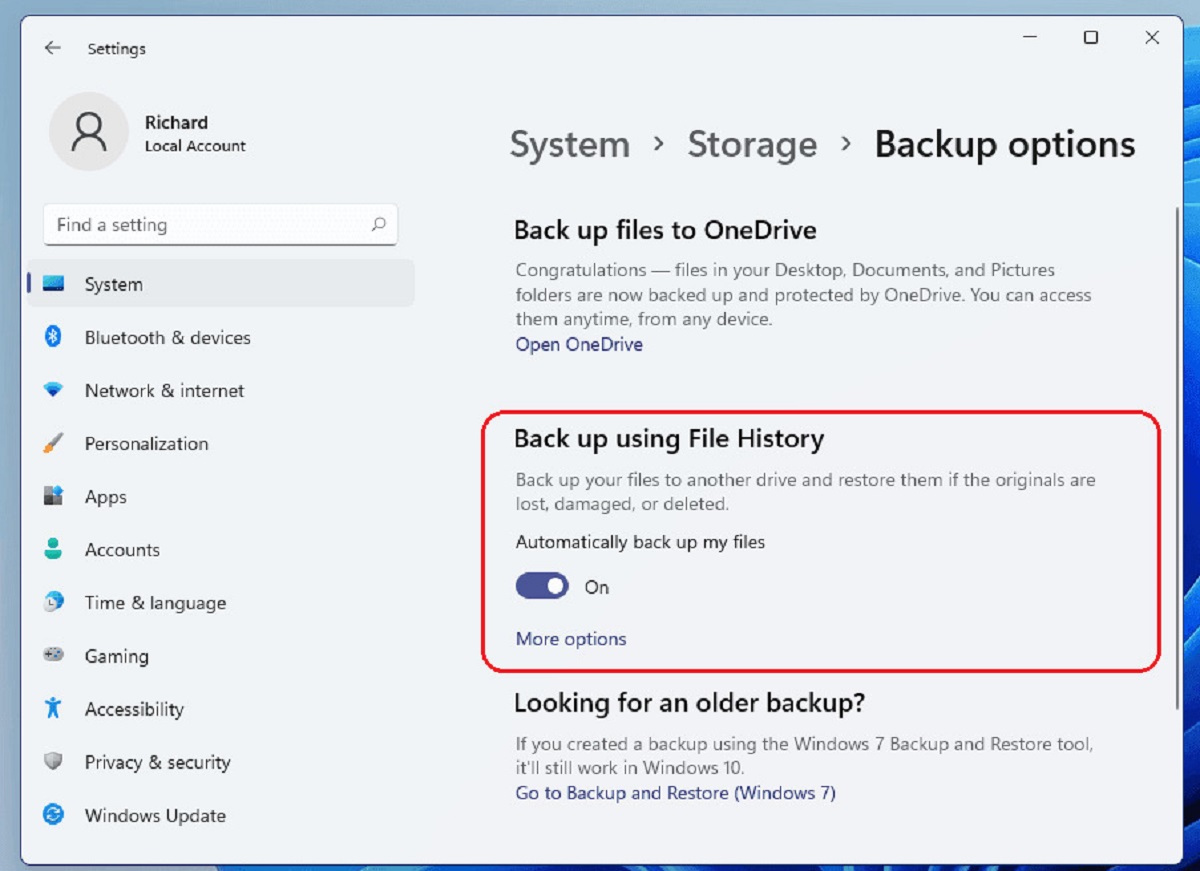
File History is a built-in feature in Windows 11 that allows you to automatically back up your important files and folders to your external hard drive. By setting up File History, you can ensure that your data is continuously backed up, providing an extra layer of protection against accidental deletion, hardware failure, or system crashes.
To set up File History on Windows 11, follow these simple steps:
- Connect your external hard drive to your Windows 11 computer.
- Open the Settings app by clicking on the Start menu and selecting the gear icon, or by pressing the Windows key + I on your keyboard.
- In the Settings app, click on the “System” category.
- In the left-hand menu, select “Storage”, then scroll down and click on the “Advanced storage settings” link.
- Under the “Backup” section, click on the “Add a drive” button.
- A list of available drives will appear. Select your external hard drive from the list.
- Once your external hard drive is selected, click on the “Back up now” button to initiate the initial backup process. This may take some time depending on the size of your files and the speed of your computer.
- After the initial backup is complete, Windows 11 will automatically back up your files at regular intervals. By default, File History backs up your files every hour. However, you can change the backup frequency by clicking on the “More options” link under the “Backup” section in the Advanced storage settings.
File History allows you to customize various backup settings to suit your preferences. To access these settings, click on the “More options” link under the “Backup” section in the Advanced storage settings menu.
In the File History settings, you have the option to exclude specific folders from the backup, add or remove additional folders to be included in the backup, and adjust the retention policy to control how long Windows keeps the backed-up files.
It’s important to note that File History only backs up your personal files, such as documents, pictures, videos, and music. It does not back up system files or applications. For a complete system backup, consider using a dedicated backup solution or creating a system image.
With File History enabled and properly configured, your important files and folders will be backed up automatically to your external hard drive. You can rest easy knowing that your data is protected and easily recoverable in case of any unforeseen events.
Configuring Backup Settings
Once you have set up File History on Windows 11 and initiated the initial backup, you can further configure backup settings to customize the backup process according to your preferences. Configuring backup settings allows you to specify specific folders, adjust the backup frequency, and manage other options to optimize your backup experience.
To configure backup settings in Windows 11, follow these steps:
- Open the Settings app by clicking on the Start menu and selecting the gear icon, or by pressing the Windows key + I on your keyboard.
- In the Settings app, click on the “System” category.
- In the left-hand menu, select “Storage”, then scroll down and click on the “Advanced storage settings” link.
- Under the “Backup” section, click on the “More options” link.
Within the backup settings, you have several options to customize your backup experience:
- Add folders to the backup: By default, File History backs up your personal files such as documents, pictures, videos, and music. However, you can add additional folders to be included in the backup by clicking on the “Add a folder” button. This allows you to back up files from custom locations.
- Exclude folders from the backup: If there are specific folders that you do not want to include in the backup, you can exclude them by clicking on the “Exclude folders” button. This is useful if you have large folders or folders containing temporary files that you don’t need to back up.
- Backup frequency: By default, File History backs up your files every hour. If you prefer a different backup frequency, you can change it by clicking on the “Backup options” link. Here, you can adjust the backup frequency to every 10 minutes, 15 minutes, 20 minutes, 30 minutes, or once a day. Choose the frequency that best suits your needs.
- File versions: File History keeps multiple versions of your files, allowing you to restore to a previous version if needed. By default, Windows 11 keeps the latest version and previous versions of a file. You can adjust the file versions by clicking on the “Keep my backups” drop-down menu. Choose the number of file versions you want to retain.
- Advanced settings: By clicking on the “Advanced settings” link, you can further customize the backup experience. You can choose whether to back up files on battery power, adjust the network usage during backup, and specify how long to keep deleted files in the backup.
Take the time to review and adjust these backup settings according to your preferences. This will ensure that your backup process is efficient, tailored to your needs, and optimized for your storage capacity.
By configuring backup settings in Windows 11, you can have full control over which folders are backed up, the frequency of backups, and the retention of file versions. This level of customization allows you to create a backup system that suits your specific requirements and provides optimal protection for your important files and folders.
Scheduling Automatic Backups
One of the key benefits of using File History on Windows 11 is the ability to schedule automatic backups. By scheduling backups, you can ensure that your important files and folders are regularly backed up without the need for manual intervention. Scheduling automatic backups provides peace of mind and eliminates the risk of forgetting to perform backups regularly.
Here’s how you can schedule automatic backups using File History:
- Open the Settings app by clicking on the Start menu and selecting the gear icon, or by pressing the Windows key + I on your keyboard.
- In the Settings app, click on the “System” category.
- In the left-hand menu, select “Storage”, then scroll down and click on the “Advanced storage settings” link.
- Under the “Backup” section, click on the “More options” link.
- Scroll down to the “Automatically back up my files” section and toggle the switch to enable automatic backups.
- Once enabled, you can further customize the backup schedule by clicking on the “Back up options” link.
- In the Backup options menu, click on the “Add times” button.
- Choose the specific days and times when you want the automatic backups to occur. You can select multiple time slots for different days of the week.
By scheduling automatic backups, you can choose the most convenient times when your computer is likely to be idle or when you’re not actively using it. This ensures that backups don’t interfere with your work or other activities.
It’s important to note that your computer needs to be powered on and connected to your external hard drive during the scheduled backup times for the backups to occur. If your computer is in sleep or hibernation mode during the scheduled backup, the backup process will initiate as soon as the computer is awake and connected to the external hard drive.
Keep in mind that the frequency of automatic backups is determined by the backup schedule you set. If you schedule backups to occur once a day, File History will automatically perform backups at the designated time intervals. This ensures that your files are regularly backed up, minimizing the risk of data loss due to accidental deletion or system issues.
By scheduling automatic backups using File History, you can have peace of mind knowing that your important files and folders are continuously protected. You don’t have to worry about manually backing up your data or forgetting to perform backups. Windows 11 takes care of it for you based on the schedule you’ve set, allowing you to focus on your work or other priorities without the constant need to remember to back up your files.
Restoring Files from Your External Hard Drive
Accidents happen, files get deleted, and systems may encounter issues. But fear not, with File History on Windows 11 and the backup you’ve created on your external hard drive, restoring your important files is a breeze. Whether you need to recover a deleted document or restore an entire folder, File History provides a simple and efficient way to retrieve your files.
To restore files from your external hard drive using File History, follow these steps:
- Connect your external hard drive to your Windows 11 computer.
- Open the File Explorer by clicking on the folder icon on your taskbar, or by pressing the Windows key + E on your keyboard.
- In File Explorer, navigate to the folder where the file or folder you want to restore was located.
- Click on the “Home” tab in the File Explorer ribbon at the top.
- On the right side of the ribbon, click on the “History” button. This will open the File History interface.
- You will now see a timeline of files and folders that have been backed up by File History. Scroll through the timeline to find the specific version of the file or folder you want to restore.
- Once you’ve located the desired version, select it and click on the “Restore” button. This will restore the file or folder to its original location.
- If you want to restore the file or folder to a different location, right-click on the file or folder and select “Restore To” from the context menu. Choose the desired location for the restoration.
File History will restore the selected file or folder to its original state, allowing you to access and use it just as it was before. If you’re restoring a folder, all the files and subfolders within the folder will be restored as well.
It’s important to note that if you’re restoring a file or folder that already exists in its original location, File History will create a new version of the file or folder with a different name. This prevents any potential conflicts with the existing file or folder.
File History stores multiple versions of your files, allowing you to choose a specific version to restore. This is particularly useful if you need to recover an older version of a file or if you accidentally made changes that you want to undo.
With File History, restoring files from your external hard drive is a simple and straightforward process. You can rest assured that your important files are safe and easily recoverable, providing peace of mind and minimizing the impact of data loss or accidental deletion.
Troubleshooting Backup Issues
While File History on Windows 11 is designed to provide a seamless backup experience, you may occasionally encounter issues that prevent successful backups or hinder the restoration of files. In this section, we will outline some common backup issues and provide troubleshooting steps to help you overcome them.
Issue: File History is not backing up files
If File History is not backing up your files as expected, try the following solutions:
- Ensure that your external hard drive is properly connected to your computer and recognized by Windows 11.
- Check that File History is turned on and set up correctly in the Storage settings.
- Make sure your external hard drive has enough free space to accommodate the backup.
- Restart your computer and try initiating a manual backup to see if that resolves the issue.
Issue: File History is slow or taking a long time to complete backups
If File History is slow or taking too long to complete backups, consider the following solutions:
- Ensure that your computer and external hard drive are not experiencing any performance issues or connectivity problems.
- Connect your computer to a stable and uninterrupted power source during backups.
- Reduce the number of folders being backed up or exclude unnecessary folders to speed up the backup process.
- Check for any background processes or applications that may be consuming system resources and affecting the backup performance.
Issue: Cannot restore files from File History
If you experience difficulties restoring files from File History, try the following solutions:
- Ensure that your external hard drive is connected and accessible to your computer.
- Open File Explorer and navigate to the folder where the file or folder you want to restore was located.
- Click on the “History” button in the File Explorer ribbon to access the File History interface, and try restoring the file or folder again.
- If the file or folder is not visible in the File History interface, try locating it in a different location or using the “Restore To” option to choose a specific restoration location.
Issue: External hard drive is not recognized by Windows 11
If your external hard drive is not recognized by Windows 11, consider the following solutions:
- Ensure that the external hard drive is properly connected to your computer and that the cables are securely plugged in.
- Try connecting the external hard drive to a different USB port on your computer.
- Check if the external hard drive is recognized on a different computer or device, indicating whether the issue lies with the external hard drive or the Windows 11 computer.
- Update the drivers for your external hard drive by visiting the manufacturer’s website and downloading the latest drivers or firmware.
If you’ve tried the above troubleshooting steps and are still experiencing issues with File History or your external hard drive, consider seeking further assistance from the Microsoft support website or contact their customer support for specialized help in resolving the problem.
By troubleshooting common backup issues, you can ensure that your files are properly backed up and easily restored, maintaining the security and continuity of your valuable data on Windows 11.
Conclusion
Backing up your Windows 11 system to an external hard drive is a vital step in safeguarding your valuable data and ensuring its availability in case of unexpected events. With File History, Windows 11 provides a user-friendly and efficient way to automate the backup process and restore files easily.
In this article, we covered the essential steps to help you back up your Windows 11 system to an external hard drive. We discussed how to choose the right external hard drive, format and prepare it for use, set up File History, configure backup settings, schedule automatic backups, and restore files from your external hard drive.
Remember to choose an external hard drive with sufficient storage capacity, fast transfer speeds, and reliable durability. Be sure to properly format and assign a drive letter to your external hard drive for seamless compatibility with Windows 11. Once you set up File History and configure backup settings, you can enjoy the peace of mind that comes with automated and regular backups of your important files and folders.
If you encounter any issues during the backup process, troubleshooting steps can help you identify and resolve common problems. However, if you need additional assistance, Microsoft’s official documentation and customer support are valuable resources to consult.
By following the steps outlined in this article, you can protect your Windows 11 system from data loss and ensure that your important files are always backed up and easily recoverable. Don’t wait until it’s too late – start backing up your Windows 11 system today and enjoy the peace of mind that comes with knowing your data is safe and secure.