Introduction
Welcome to our guide on how to backup files in Windows 11 to an external hard drive. Regularly backing up your files is essential to protect your valuable data from accidental loss, hardware failures, or security breaches. Windows 11 provides a built-in feature called File History, which allows you to automatically back up your files to an external hard drive, ensuring that you always have a copy of your important files.
With File History, you can easily restore previous versions of files or recover files that were accidentally deleted or modified. By following the steps in this guide, you will learn how to set up File History and configure it according to your backup preferences.
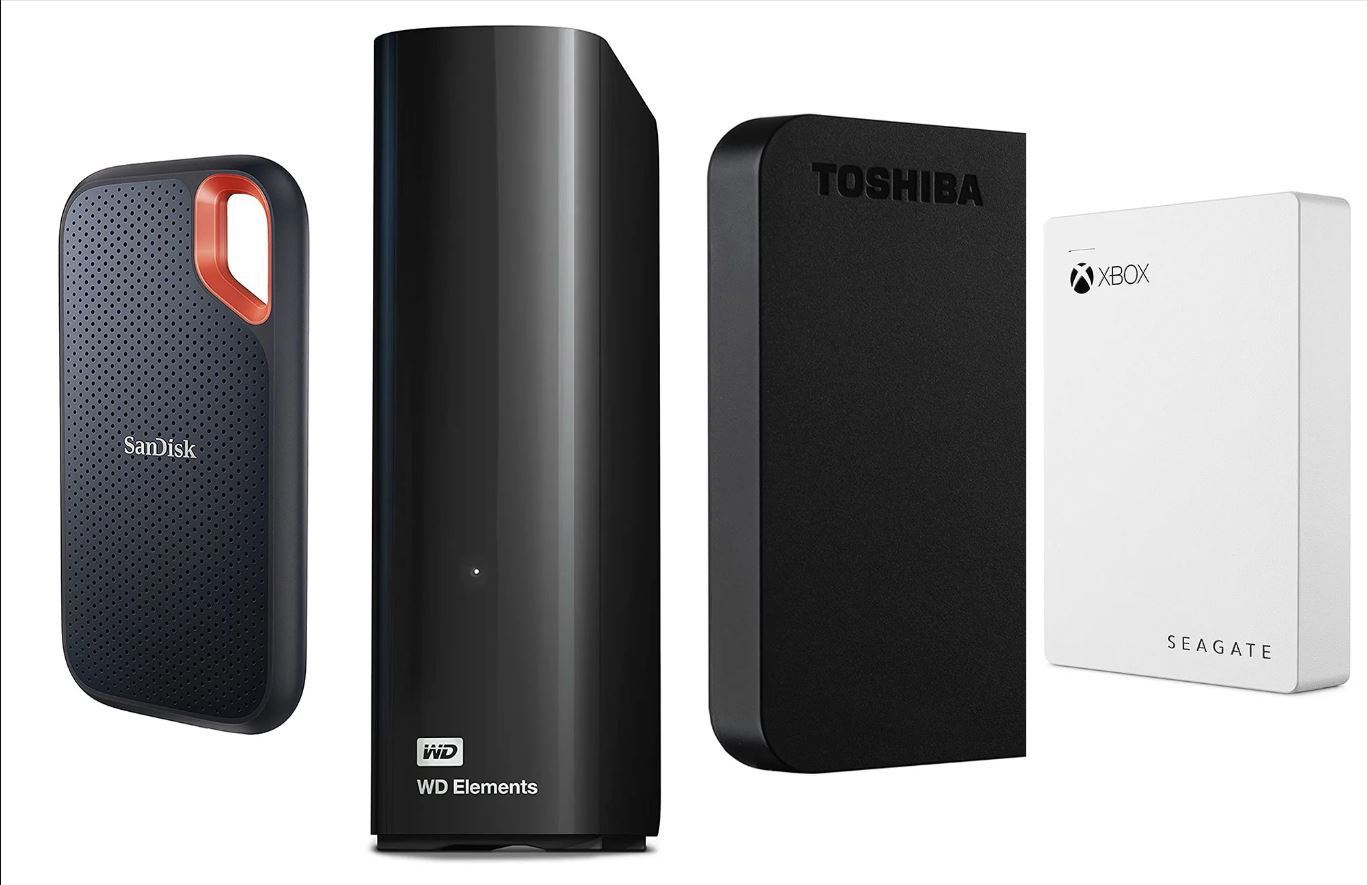
Before proceeding, ensure that you have an external hard drive connected to your Windows 11 computer. This could be a USB drive, an external SSD, or an external HDD, with sufficient storage capacity to accommodate the files you want to back up. Once you have your external hard drive ready, let’s dive into the steps for backing up files using Windows 11 File History.
Connecting the External Hard Drive
Before you can start backing up your files, you need to connect your external hard drive to your Windows 11 computer. Follow the steps below to ensure a proper connection:
- Locate an available USB port on your computer.
- Take the USB cable that came with your external hard drive and connect one end to the USB port on your computer.
- Take the other end of the USB cable and connect it to the USB port on your external hard drive.
- Ensure that the connections are secure and firm.
Once the connections are made, Windows 11 will automatically detect the external hard drive and assign it a drive letter. You can verify the connection by checking if the external hard drive appears in the Windows File Explorer under “This PC” or “My Computer”.
If the external hard drive doesn’t appear, try the following troubleshooting steps:
- Try using a different USB port on your computer.
- Ensure that the USB cable is not damaged.
- Restart your computer and reconnect the external hard drive.
- If the issue persists, consult the user manual or contact the manufacturer for further assistance.
Once you have successfully connected the external hard drive and it is detected by Windows 11, you are ready to proceed with configuring File History to back up your files.
Accessing File History Settings
To configure File History and initiate the backup process, you need to access the File History settings in Windows 11. Follow the steps below to access the File History settings:
- Click on the Start button located at the bottom left corner of the taskbar. The Start menu will open.
- Click on the Settings icon (which looks like a gear) to open the Windows Settings menu.
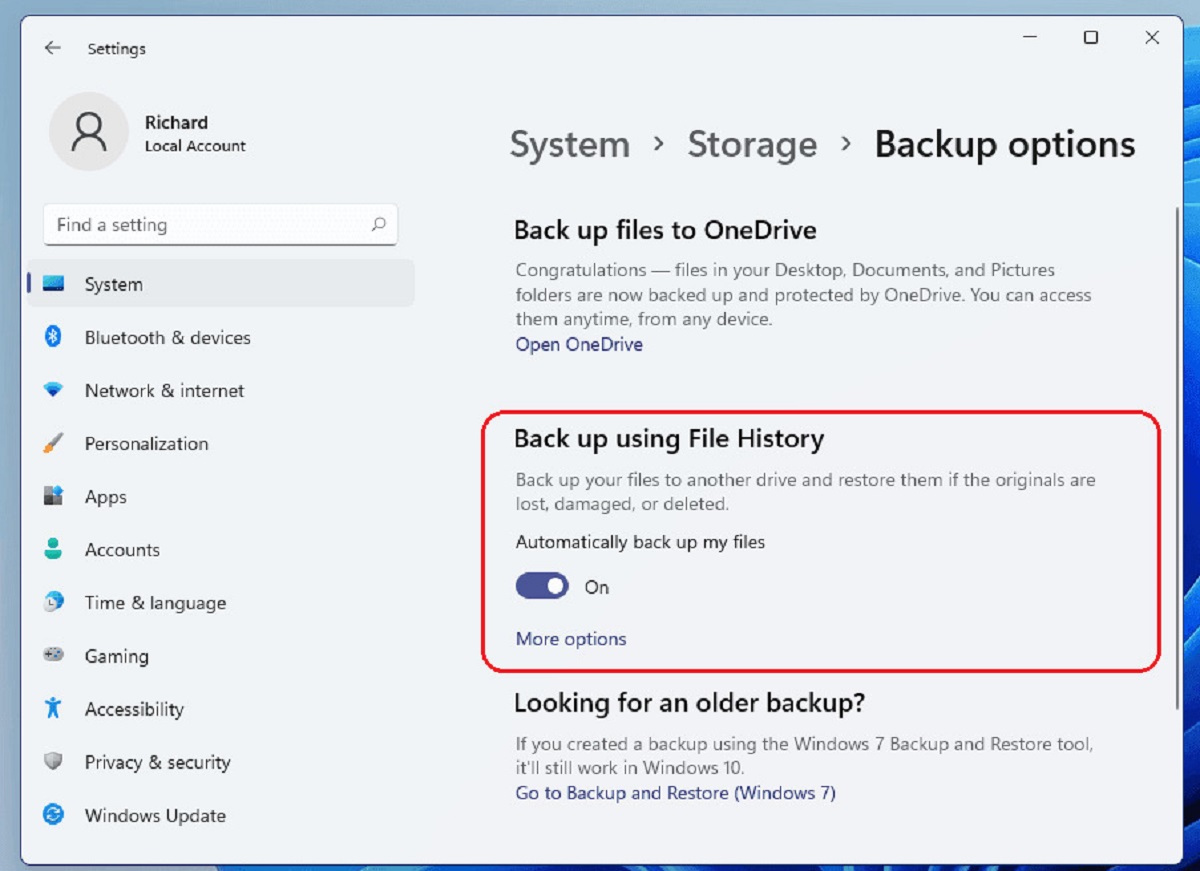
- In the Windows Settings menu, click on the “System” option.
- Within the System settings, click on the “Storage” tab located in the left sidebar.
- Scroll down in the main content area and click on the “Advanced storage settings” link.
- In the advanced storage settings, locate and click on the “Manage backup” link under the File History section.
This will open the File History settings page, where you can configure various options related to your backup preferences.
Alternatively, you can also access the File History settings by searching for “File History” in the Windows 11 search bar, and then selecting the “File History settings” from the search results.
Once you have accessed the File History settings, you are ready to proceed with configuring File History and selecting the files and folders you want to back up.
Configuring File History
After accessing the File History settings in Windows 11, you can now configure the backup settings according to your preferences. Follow the steps below to configure File History:
- In the File History settings page, click on the “Add a drive” button. This will allow you to select the external hard drive that you connected earlier for the backup.
- Choose the external hard drive from the list of available drives. If your external hard drive is not listed, make sure it is properly connected and try refreshing the list.
- Once you have selected the external hard drive, click on the “More options” link to customize advanced backup settings.
- Here, you can choose how often File History should back up your files by selecting the desired backup frequency from the drop-down menu. You can choose between every 10 minutes, every hour, or every day.
- Under the “Keep my backups” section, you can specify how long old versions of files should be kept before they are deleted. You can choose a duration ranging from 1 month to forever.
- Below that, you will find the “Back up these folders” section. By default, File History will automatically back up files in your Libraries, Desktop, Contacts, and Favorites folders. If you want to include additional folders, click on the “+ Add a folder” button and select the desired folders from your computer.
- Once you have made the desired changes, click on the “Back up now” button to initiate the backup process.
Windows 11 will start backing up your selected files and folders to the external hard drive. Depending on the amount of data being backed up, this process may take some time. It is recommended to keep your computer connected to a power source during the backup process to avoid interruptions.
Now that you have configured File History and initiated the backup process, you can rest assured that your important files are being regularly backed up to the external hard drive. In the next section, we will discuss how to select specific files and folders for backup using File History.
Selecting Files and Folders to Backup
With File History in Windows 11, you have the flexibility to choose specific files and folders that you want to include in your backup. Follow the steps below to select the files and folders you want to back up:
- Open the File History settings in Windows 11 by following the steps mentioned earlier.
- In the File History settings page, click on the “More options” link.
- Scroll down to the “Back up these folders” section.
- To include additional folders for backup, click on the “+ Add a folder” button.
- A file explorer window will open, allowing you to navigate and select the folders you want to include.
- Choose the desired folders and click on the “Add this folder” button.
- The selected folders will now be included in your File History backup. You can repeat these steps to add more folders if needed.
- If you want to remove a folder from the backup, simply click on the folder name in the “Back up these folders” section and then click on the “Remove” button.
By selecting specific files and folders, you can customize your backup to include only the most important data. This allows you to optimize storage space on your external hard drive and ensures that you have a backup of the files that matter to you the most.
It’s worth noting that File History will automatically back up files in your Libraries, Desktop, Contacts, and Favorites folders by default. However, adding custom folders gives you more control over what gets backed up.
Now that you have successfully selected the files and folders for backup, let’s move on to the next section to learn how to change the backup frequency and size.
Changing Backup Frequency and Size
Windows 11 offers flexibility when it comes to changing the backup frequency and size for File History. By adjusting these settings, you can customize how often your files are backed up and how much storage space is allocated for backups. Follow the steps below to change the backup frequency and size:
- Open the File History settings in Windows 11.
- Click on the “More options” link.
- In the “Back up these folders” section, click on the “Change” button.
- A new window will appear, showing the options to change the backup frequency and size.
- To change the backup frequency, select a new interval from the drop-down menu. You can choose between every 10 minutes, every hour, and every day.
- To change the backup size, click on the “Clean up versions” button.
- In the next window, you can specify how long you want to keep versions of files. Drag the slider to the desired duration, or choose a specific value in months.
- Click on the “Save” button to apply the changes.
By changing the backup frequency, you can decide how often File History will automatically back up your files. If you work with documents or files that frequently change, you may want to select a more frequent interval. Conversely, if your files remain relatively static, you can choose a longer interval to reduce the frequency of backups.
Changing the backup size determines how long File History will retain versions of your files. You can adjust this according to your requirements and the available storage space on your external hard drive. It’s important to find the right balance between keeping older versions for reference and managing storage space efficiently.
Now that you have learned how to change the backup frequency and size, let’s move on to the next section to initiate the backup process and start protecting your files.
Initiating the Backup Process
Once you have configured the File History settings to your liking, it’s time to initiate the backup process in Windows 11. Follow the steps below to start backing up your selected files and folders to the external hard drive:
- Open the File History settings in Windows 11.
- Click on the “Back up now” button located in the main File History settings page.
- Windows 11 will begin the backup process, copying your selected files and folders to the external hard drive.
- The time it takes to complete the backup process will depend on the size of the files being backed up and the speed of your computer and external hard drive.
- Make sure your computer stays powered on and connected to a power source throughout the backup process to prevent interruptions.
- You can monitor the progress of the backup by checking the File History settings or by looking for the File History icon in the system tray. The icon will indicate that the backup is in progress.
- Once the backup is complete, you will receive a notification confirming that the files have been successfully backed up.
Congratulations! Your files are now backed up to the external hard drive using File History in Windows 11. It is recommended to periodically check the backup status and ensure that the backup is running smoothly. By regularly backing up your files, you can have peace of mind knowing that your important data is safe and protected.
In the next section, we will discuss how to restore files from the external hard drive using File History in Windows 11.
Restoring Files from the External Hard Drive
If you ever need to restore files from your external hard drive using File History in Windows 11, the process is straightforward. Follow the steps below to restore your files:
- Connect your external hard drive to your Windows 11 computer.
- Open the File History settings in Windows 11.
- Click on the “Restore files from a current backup” link located in the main File History settings page.
- A new window will appear, displaying your available file backups.
- Navigate through the folders and files to find the specific file or folder you want to restore.
- Once you have located the file or folder, select it and click on the “Restore” button.
- The selected file or folder will be restored to its original location.
- If you want to restore multiple files or folders at once, you can select them all and click on the “Restore” button.
File History will restore the selected files or folders to their original locations, overwriting any existing versions. It’s important to note that if you accidentally modify or delete a file, you can also use File History to recover previous versions of the file. Simply navigate to the file’s location, right-click on it, and select “Restore previous versions” from the context menu.
By utilizing the restore feature of File History, you can recover lost or modified files with ease, providing an additional layer of protection for your important data.
Now that you know how to restore files from the external hard drive using File History, let’s move on to the next section to explore how to manage File History settings.
Managing File History Settings
In Windows 11, you have the ability to manage and customize various settings related to File History. By managing these settings, you can further optimize your backup experience. Here are some key File History management options:
- Configure Advanced Settings: In the File History settings, click on the “Advanced settings” link. Here, you can adjust various advanced options, such as the location of your backup folder, how long to keep saved versions of files, and how to handle conflicts when a file has multiple versions.
- Exclude Folders: If there are certain folders or files that you do not want to include in your File History backup, you can exclude them. In the File History settings, click on the “Exclude folders” link, and then select the folders or files you want to exclude from the backup.
- Monitor Backup Status: Windows 11 provides a convenient way to monitor the backup status of File History. You can check the File History settings page to view the last backup time and the next scheduled backup. Additionally, you can look for the File History icon in the system tray, which will indicate if the backup is in progress or if there are any issues.
- Manage Disk Space: As your backup history grows, it’s important to manage disk space on your external hard drive. In the File History settings, click on the “Clean up versions” button to manually delete older versions of files, thereby freeing up space on the external hard drive.
- Restore Options: When restoring files using File History, you have the option to restore them to their original location or to a different location. Choose the appropriate option based on your needs.
By effectively managing File History settings, you can tailor the backup process to suit your specific requirements. Regularly reviewing and adjusting these settings will ensure a smooth and efficient backup experience with File History in Windows 11.
Now that you are familiar with managing File History settings, let’s conclude this guide on how to backup files in Windows 11 to an external hard drive.
Conclusion
Backing up your files is crucial to protect your valuable data from unforeseen events. Windows 11 offers a convenient built-in feature called File History, allowing you to easily back up your files to an external hard drive. By following our guide, you have learned how to connect an external hard drive, access the File History settings, configure backup options, select specific files and folders for backup, change backup frequencies and sizes, initiate the backup process, restore files from the external hard drive, and manage File History settings.
Regularly backing up your files using File History provides peace of mind, knowing that your important data is safe and can be easily restored in case of accidental deletion, hardware failure, or any other unfortunate event. Remember to periodically check the backup status and manage disk space to optimize the backup process.
By following the steps outlined in this guide, you can ensure that your files are consistently protected with File History in Windows 11. Take a moment to connect your external hard drive, configure the File History settings, and start backing up your files today.
Thank you for reading our guide, and we hope it has been helpful in assisting you with backing up your files in Windows 11.