Introduction
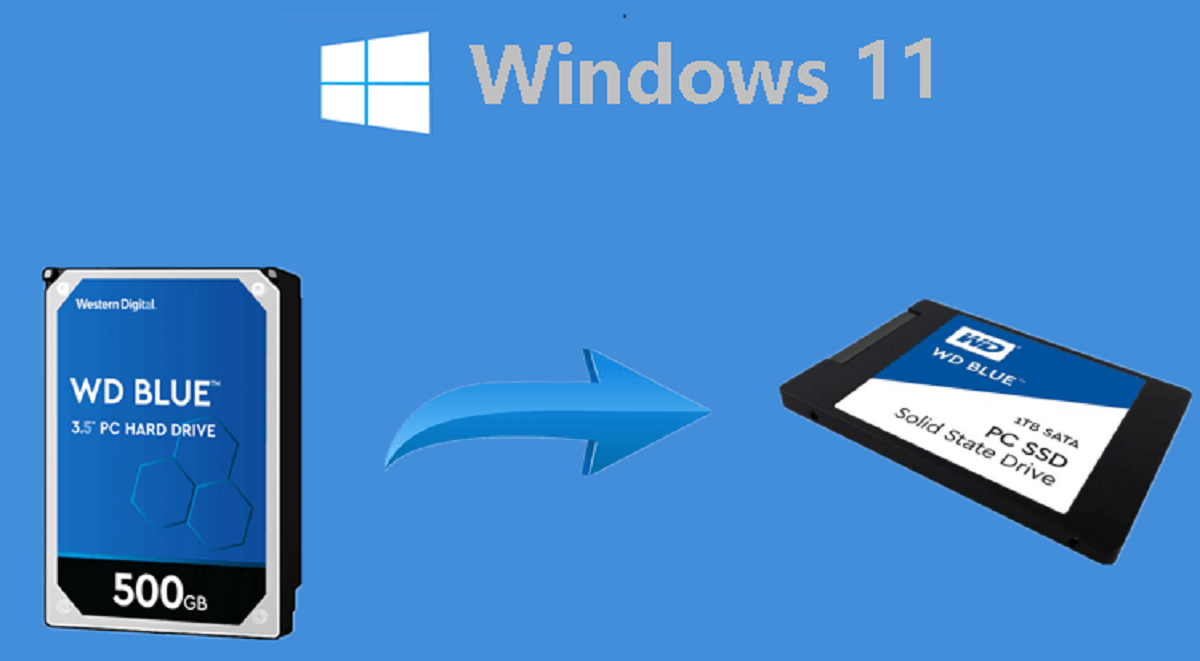
Welcome to the world of Windows 11! Microsoft’s latest operating system brings a range of exciting features and updates that promise a faster, more secure, and visually stunning computing experience. One way to optimize your Windows 11 performance is by cloning it to a solid-state drive (SSD). In this guide, we will walk you through the process of cloning Windows 11 to an SSD, highlighting the benefits and requirements along the way.
Cloning refers to the process of creating an exact copy of a hard drive or partition, including the operating system and all its files, onto another storage device. By cloning Windows 11 to an SSD, you can take advantage of the SSD’s lightning-fast read and write speeds, resulting in significantly improved boot times, application load times, and overall system performance. SSDs also offer enhanced durability, quieter operation, and reduced power consumption compared to traditional mechanical hard drives.
The benefits of cloning Windows 11 to an SSD go beyond performance gains. It allows you to seamlessly transfer all your programs, settings, and files to the new drive without the hassle of reinstalling everything from scratch. Whether you are upgrading to a larger SSD for additional storage capacity or replacing an aging hard drive, cloning is a convenient and time-saving solution that ensures a smooth transition.
Before diving into the cloning process, there are a few requirements to keep in mind. Firstly, you will need a compatible SSD that meets the storage capacity requirements for your Windows 11 installation. It is recommended to choose an SSD with ample space to accommodate your operating system, applications, and personal files comfortably. Additionally, you will require a cloning software tool to facilitate the transfer of data from the source drive to the SSD. Don’t worry; we will cover these requirements and the step-by-step process in detail.
So, grab your SSD, make sure you have a backup of your important data, and let’s begin the journey of cloning Windows 11 to an SSD for a faster, smoother, and more efficient computing experience.
What is cloning and why is it important?
Cloning, in the context of computer systems, refers to the process of creating an identical copy of a hard drive or partition. It involves duplicating all the contents, including the operating system, files, and settings, onto another storage device, such as an SSD. Cloning is an essential technique that can have significant benefits for Windows 11 users.
Cloning becomes important when you want to transfer your existing operating system and data to a new storage device, such as an SSD. By cloning Windows 11 to an SSD, you can ensure that all your programs, settings, and files are replicated accurately, saving you the time and effort of reinstalling everything from scratch. It provides a seamless transition, allowing you to retain your familiar computing environment while taking advantage of the enhanced performance and other benefits offered by SSDs.
The primary reason why cloning to an SSD is important is the substantial performance improvement it brings. SSDs are known for their blazing-fast read and write speeds, which significantly reduce boot times and application load times. With an SSD, you can experience a snappier and more responsive system, making multitasking and resource-intensive tasks much smoother and enjoyable. The improved overall performance translates into increased productivity and a more efficient workflow.
Another crucial advantage of cloning to an SSD is the enhanced durability and reliability offered by these drives. Unlike traditional mechanical hard drives, SSDs have no moving parts, which makes them more resistant to physical shocks and vibrations. This factor contributes to their longer lifespan and reduces the risk of data loss due to sudden impacts or accidental drops. In addition, SSDs operate silently, generating less noise and heat compared to their mechanical counterparts.
Cloning to an SSD also allows you to benefit from the power efficiency that SSDs provide. As they do not require spinning disks or moving parts, SSDs consume less power, resulting in lower energy costs and extended battery life for laptops and portable devices. With Windows 11’s focus on sustainability and energy efficiency, leveraging the power-saving capabilities of an SSD aligns perfectly with the system’s goals.
In summary, cloning Windows 11 to an SSD is important because it enables a hassle-free transfer of your operating system, applications, and files to a high-performance storage medium. It delivers significant performance gains, improved durability, quiet operation, and power efficiency. Whether you are a casual user looking for a smoother computing experience or a power user demanding top-notch performance, cloning to an SSD is a worthwhile investment that can transform your Windows 11 experience.
What are the benefits of cloning Windows 11 to an SSD?
Cloning Windows 11 to an SSD offers a range of benefits that enhance your overall computing experience. From improved performance to increased reliability, here are several advantages to consider:
- Faster Speeds: One of the most significant benefits of cloning Windows 11 to an SSD is the tremendous improvement in speed. SSDs utilize flash memory technology, which allows for lightning-fast read and write speeds. This translates into quicker boot times, faster application launches, and snappier overall system performance. You’ll experience a noticeable difference in responsiveness, enabling you to be more productive and efficient with your tasks.
- Enhanced Productivity: With reduced loading times for software and files, you can work more efficiently and accomplish tasks faster. Whether you’re launching applications, accessing large files, or multitasking, the improved performance of an SSD allows for smooth and seamless transitions between tasks. The increased productivity can make a significant difference, particularly in demanding work environments.
- Improved Reliability: As SSDs have no moving parts, they are inherently more reliable than traditional mechanical hard drives. This means they are less susceptible to mechanical failures and are more resistant to shock and vibration. By cloning Windows 11 to an SSD, you’ll benefit from enhanced data integrity and a reduced risk of data loss due to physical damage. This reliability is especially crucial for users who handle important and critical data.
- Lower Power Consumption: SSDs are known for their energy efficiency. Compared to traditional hard drives, SSDs consume less power during operation, resulting in lower energy costs. In addition, the reduced power consumption can contribute to longer battery life for laptops and portable devices. This benefit is especially valuable for users who are frequently on the go or rely on battery-powered devices.
- No Noise or Heat: SSDs operate silently since they lack any moving components. This leads to a quieter and more peaceful computing environment. Additionally, SSDs generate less heat compared to mechanical hard drives, which helps maintain lower system temperatures. The absence of noise and heat can enhance your overall user experience, creating a more comfortable and enjoyable working environment.
- Easy Migration: Cloning your Windows 11 to an SSD simplifies data migration. It allows you to seamlessly transfer all your installed applications, settings, and files to the new drive without the need for a complicated reinstalment process. This saves time and effort and ensures a smooth transition to the new storage medium.
By taking advantage of these benefits, cloning Windows 11 to an SSD allows you to unlock the full potential of your operating system while enjoying faster speeds, improved reliability, and increased efficiency. It’s a worthwhile investment for anyone looking to elevate their computing experience to new heights.
Requirements for cloning Windows 11 to an SSD
Before embarking on the process of cloning Windows 11 to an SSD, it’s important to ensure that you have the necessary requirements in place. These requirements include both hardware and software components to ensure a seamless and successful cloning process. Here’s what you need:
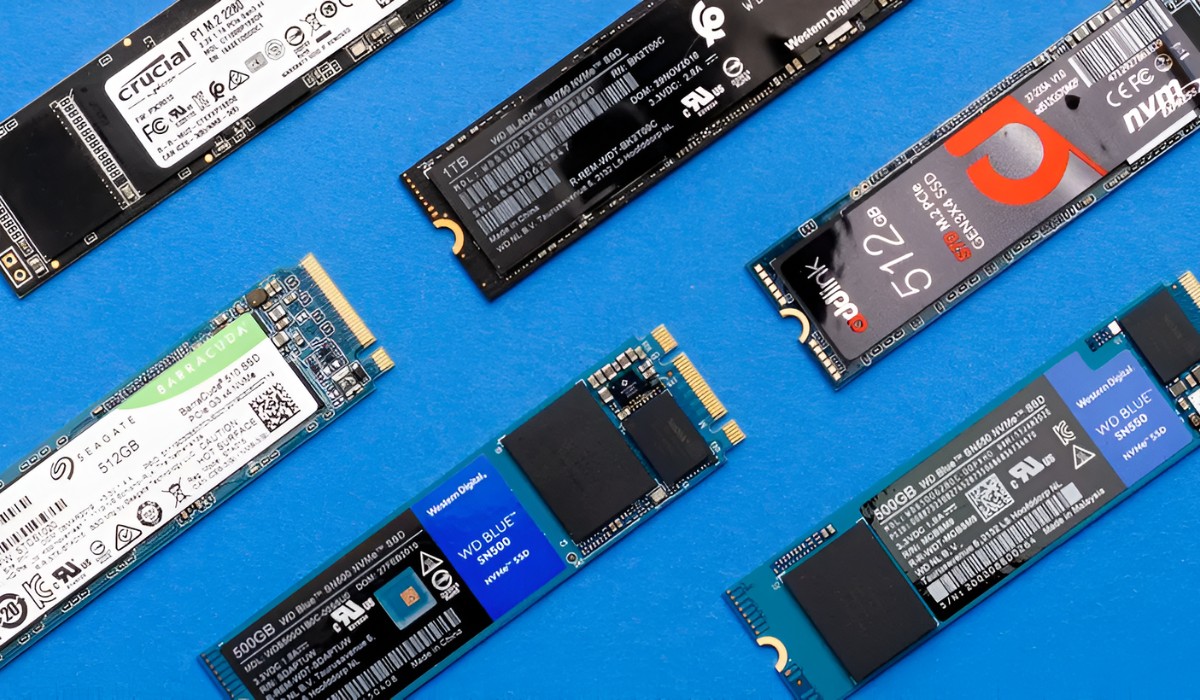
- Compatible SSD: Firstly, you’ll need a compatible SSD to serve as the destination drive for the cloning process. It’s essential to choose an SSD that is compatible with your system and meets your storage capacity requirements. Consider the size of your current Windows 11 installation, including the operating system, applications, and personal files, to determine the appropriate storage capacity for your SSD.
- Sufficient Free Space: The SSD you choose should have enough free space to accommodate your entire Windows 11 installation. It’s recommended to leave an ample amount of free space on the SSD to allow for future updates and expansion. As a rule of thumb, select an SSD that provides at least 20-30% more storage capacity than your current Windows 11 installation requires.
- Cloning Software: To clone your Windows 11 installation to the SSD, you’ll need reliable cloning software. There are several third-party cloning tools available, such as Acronis True Image, EaseUS Todo Backup, and Macrium Reflect, that offer user-friendly interfaces and efficient cloning capabilities. Choose a cloning software that suits your needs and ensures compatibility with Windows 11.
- Backup of Data: Before initiating the cloning process, it’s crucial to back up all your important data. Cloning involves making changes to your system’s storage, and although rare, there’s always a risk of data loss. By creating a backup beforehand, you can rest assured knowing that your valuable files are safe and can be restored if needed.
- External Drive or Cloud Storage: Since you’ll be creating a backup of your data, you’ll need either an external drive or cloud storage to store the backup. This can be a USB flash drive, an external hard drive, or a cloud storage service like Google Drive or Dropbox. Ensure that you have sufficient storage capacity on your chosen backup medium to accommodate all your important files.
- Stable Power Source: It’s crucial to ensure a stable power source throughout the cloning process. Sudden power fluctuations or interruptions can disrupt the cloning process and potentially lead to data corruption or system instability. Therefore, it’s recommended to connect your system to an uninterrupted power supply (UPS) or ensure a reliable power source during the cloning procedure.
- Basic Computer Skills: While cloning software often offers user-friendly interfaces, it’s still important to have basic computer skills to navigate through the cloning process. Familiarize yourself with the steps involved and pay attention to any specific instructions provided by the cloning software.
By meeting these requirements, you’ll have everything you need to successfully clone Windows 11 to an SSD. Take the time to ensure compatibility, create backups, and understand the process before proceeding with cloning to ensure a smooth and error-free transition to your new SSD.
Step-by-Step Guide to Clone Windows 11 to SSD
Cloning Windows 11 to an SSD may sound complex, but with the right tools and guidance, it can be a straightforward process. Follow these step-by-step instructions to successfully clone your Windows 11 installation to an SSD:
- Backup your data: Before proceeding with any changes to your system, it’s essential to create a backup of all your important data. This ensures that your files are safe and can be easily restored if needed.
- Prepare the SSD and connect it to your system: Ensure that your SSD is properly prepared and connected to your computer. This may involve formatting the SSD if necessary and connecting it via SATA, M.2, or USB, depending on the type of SSD and available interfaces on your system.
- Choose a cloning software: Select a reliable cloning software that is compatible with Windows 11. Popular options include Acronis True Image, EaseUS Todo Backup, or Macrium Reflect. Install the cloning software on your system.
- Run the cloning software: Launch the cloning software and follow the on-screen prompts to initiate the cloning process. Familiarize yourself with the software’s interface and options before proceeding.
- Select the source and destination drives: In the cloning software, select your current Windows 11 drive as the source drive and the connected SSD as the destination drive. Double-check that you have chosen the correct drives to avoid any data loss.
- Start the cloning process: Once you have selected the source and destination drives, start the cloning process by clicking the appropriate button in the cloning software. This may be labeled as “Clone” or “Start Clone.” The software will begin copying the data from the source drive to the SSD.
- Wait for the cloning process to complete: The cloning process may take some time, depending on the size of your Windows 11 installation and the speed of your drives. Be patient and avoid interrupting the process. You can monitor the progress within the cloning software.
- Disconnect the source drive and reconnect the SSD: Once the cloning process is complete, safely disconnect the source drive (the original Windows 11 drive) from your system. Then, connect the SSD to the same interface that was previously used by the source drive. Check that the SSD is properly connected and secured.
- Verify and adjust BIOS/UEFI settings: Before booting up your system, enter the BIOS/UEFI settings and ensure that the SSD is recognized as the primary boot device. Make any necessary adjustments to the boot order to prioritize the SSD. Save the changes and exit the BIOS/UEFI settings.
- Boot your system from the SSD: Restart your computer, and it should now boot from the SSD. Windows 11 will load from the SSD, providing you with the improved performance and benefits associated with the drive.
By following these step-by-step instructions, you can successfully clone your Windows 11 installation to an SSD. Remember to take your time, be cautious, and double-check your actions to ensure a smooth transition to the faster and more efficient SSD environment.
Backup your data
Before embarking on the process of cloning Windows 11 to an SSD, it is crucial to create a backup of all your important data. Although the cloning process is generally safe and reliable, there is always a small risk of data loss or corruption. By backing up your data, you can ensure that your files are safe and can be easily restored if any unforeseen issues arise during the cloning process.
To begin the backup process, identify the data that you want to safeguard. This can include documents, photos, videos, music files, and any other files that are important to you. Make a list of the folders and files that you need to back up to ensure that nothing is missed.
Next, decide on the backup method that best suits your needs. You have a few options to choose from:
1. External Hard Drive or USB: Connect an external hard drive or USB flash drive to your computer and copy your important files onto the external storage device. Ensure that the storage device has enough capacity to accommodate all the files you want to back up.
2. Cloud Storage Service: Use popular cloud storage services such as Google Drive, Dropbox, or OneDrive to upload and store your data securely in the cloud. This option provides the advantage of accessibility from multiple devices and protection against physical damage or loss.
3. Network Attached Storage (NAS): If you have a NAS device connected to your network, you can back up your data directly to the NAS. This allows for easy access and retrieval of files within your local network.
Once you have determined the backup method, proceed with copying the identified files to the selected storage medium. Depending on the volume of data and the speed of your computer, this process may take some time, so it is essential to be patient.
Double-check that all the important files have been successfully backed up before proceeding to the next steps. Verification ensures peace of mind and minimizes the risk of losing any crucial data.
Remember to keep your backup in a safe place, preferably outside of your computer or in a secure cloud storage account. Regularly update your backup to include any new or modified files to maintain data redundancy and protection.
By diligently backing up your data, you are taking proactive steps to safeguard your important files and ensure that you can easily restore them if needed. This precautionary measure provides peace of mind throughout the cloning process and protects against any unforeseen circumstances that may arise during the transition to an SSD environment.
Prepare the SSD and connect it to your system
Once you have backed up your data, it’s time to prepare the solid-state drive (SSD) that will serve as the destination for cloning your Windows 11 installation. Follow these steps to prepare the SSD and connect it to your system:
- Check compatibility: Ensure that the SSD you have chosen is compatible with your system. Check the connector type (SATA, M.2, or NVMe) and the physical size (2.5-inch or M.2 form factor) to match your motherboard’s available ports and slots.
- Format the SSD (if required): If the SSD is new or contains any existing data, you may need to format it before proceeding with cloning. Formatting the SSD will erase any existing data and prepare it for the cloning process. Right-click on the SSD drive in File Explorer (Windows Explorer) and select the “Format” option. Choose the desired file system (NTFS is recommended), allocation unit size, and give the drive a name.
- Connect the SSD: Once the SSD is ready, connect it to your system using the appropriate interface. If it is a 2.5-inch SSD, connect it to an available SATA port using a SATA cable. If it is an M.2 SSD, insert it into the corresponding M.2 slot on your motherboard and secure it using the mounting screw provided. Ensure that the connection is firm and secure.
- Check SSD detection: Restart your system and access the BIOS/UEFI settings by pressing the designated key during the startup process (usually Del, F2, or F10). Navigate to the “Storage” or “Boot” section and verify that the SSD is detected by the system. If not, check the cable connections and ensure that the SSD is seated correctly.
By following these steps, you can properly prepare the SSD and connect it to your system. This is an important initial step before proceeding with the cloning process. Ensuring compatibility and establishing a successful connection between your system and the SSD sets the stage for a smooth and successful cloning process.
Choose a cloning software
When it comes to cloning your Windows 11 installation to an SSD, selecting the right cloning software is essential. The cloning software will handle the process of copying all your data, including the operating system, applications, and files, from the source drive to the destination SSD. Here are some factors to consider when choosing cloning software:
- Compatibility: Ensure that the cloning software is compatible with Windows 11. Check the software’s system requirements and ensure that it supports the specific version of Windows 11 you are using. Compatibility is crucial for a smooth and error-free cloning process.
- User-Friendly Interface: Opt for cloning software that provides a user-friendly interface. A straightforward and intuitive interface will make the cloning process easier to understand and navigate, even for those with limited technical knowledge.
- Reliability and Reputation: Research the cloning software’s reputation and reliability in the market. Look for reviews, feedback from users, and ratings to gauge the software’s performance and compatibility with different hardware configurations.
- Cloning Features: Evaluate the features offered by the cloning software. Look for features such as disk/partition cloning, sector-by-sector cloning, and automatic resizing capabilities. These features enhance flexibility and ensure the successful migration of your Windows 11 installation to the SSD.
- Technical Support: Consider the availability of technical support provided by the software vendor. In case any issues arise during the cloning process, having prompt and reliable technical assistance can be valuable in resolving problems and ensuring a successful cloning operation.
- Speed and Efficiency: Cloning large amounts of data can take time, but efficient cloning software will optimize the process and complete it in the shortest time possible. Look for software that prioritizes speed and efficiency without compromising the integrity of your data.
Based on these factors, popular cloning software options to consider include Acronis True Image, EaseUS Todo Backup, Macrium Reflect, and Clonezilla. These software tools have proven track records and offer user-friendly interfaces, reliable performance, and a range of cloning features to simplify the process.
Take the time to research and choose a cloning software that best suits your needs and preferences. By selecting the right software, you can ensure a successful and hassle-free cloning process, allowing you to migrate your Windows 11 installation seamlessly to the SSD.
Run the cloning software
Now that you have selected the appropriate cloning software, it’s time to run the software and proceed with the cloning process. Follow these steps to initiate the cloning software and get started:
- Launch the cloning software: Double-click on the desktop shortcut or navigate to the location where the cloning software is installed. Run the software by clicking on the executable file.
- Familiarize yourself with the interface: Once the cloning software is launched, take a moment to familiarize yourself with the interface. Review the available options, buttons, and menus. Understanding the layout of the software will help you navigate through the cloning process smoothly.
- Start a new cloning operation: Within the cloning software, look for an option to start a new cloning operation. This may be labeled as “Clone,” “Clone Disk,” or something similar. Click on this option to begin the process.
- Select the source drive: In the cloning software, you will be prompted to select the source drive from which you want to clone your Windows 11 installation. Choose the drive that currently contains your Windows 11 operating system, applications, and files.
- Select the destination SSD: After selecting the source drive, you will be prompted to choose the destination drive where you want to clone your Windows 11 installation – the SSD. Ensure that the SSD is properly connected to your system and recognized by the cloning software. Select the SSD as the destination drive.
- Review cloning options: The cloning software may offer additional options or settings that you can configure before starting the cloning process. These options might include sector-by-sector cloning, automatic partition resizing, or specific cloning profiles. Review and adjust these options based on your preferences and requirements.
- Confirm and initiate the cloning process: Double-check that the source drive and destination SSD are correctly selected. Confirm that you are ready to start the cloning process by clicking on a button labeled “Start Clone,” “Begin,” or similar. Depending on the software, you might be prompted to provide confirmation or enter a final confirmation to proceed.
- Monitor the progress: The cloning process will begin, and the software will display the progress of the operation. Depending on the size of your Windows 11 installation and the speed of your drives, the process may take some time. Monitor the progress within the cloning software, ensuring that there are no interruptions or errors during the process.
- Completion notification: Once the cloning process is complete, the software will notify you of its successful completion. You may see a completion message or a progress bar indicating 100% completion. At this point, you can close the cloning software.
By following these steps, you can run the cloning software and initiate the cloning process to transfer your Windows 11 installation from the source drive to the destination SSD. Take your time, carefully review the selected drives, and ensure that the process is started accurately. In the next steps, we will cover the verification, adjustment of BIOS/UEFI settings, and the final step of booting your system from the SSD.
Select the source and destination drives
After launching the cloning software and starting a new cloning operation, the next step is to select the source drive (current Windows 11 installation) and the destination drive (SSD) where you want to clone your operating system. Follow these steps to ensure the correct selection of source and destination drives:
- Source Drive: Within the cloning software, look for an option that allows you to select the source drive. The source drive is the one currently housing your Windows 11 operating system, applications, and files. It is important to choose the correct drive to ensure that the cloning process copies all necessary data.
- Destination Drive: Next, choose the destination drive for the cloning operation. This is the SSD that you have prepared and connected to your system. Double-check that the SSD is recognized and listed as a selectable option within the cloning software.
- Confirmation: Before proceeding, carefully review your selection to make sure that the source and destination drives are correct. It is crucial to avoid any mistakes, as selecting the wrong drives can result in data loss or an unsuccessful cloning process.
- Adjustments if necessary: In some cases, you may have multiple partitions or drives on your source drive. If you want to clone specific partitions or drives, ensure that you select the correct ones within the cloning software. You may need to deselect unnecessary partitions or drives to avoid unnecessary cloning.
It is essential to double-check and verify your selection of source and destination drives before proceeding with the actual cloning process. Any mistakes or incorrect selections could lead to potential data loss or an unsuccessful cloning operation. Take the time to carefully review the drives and ensure that the cloning software has correctly identified them.
Once you are confident that the source and destination drives are accurately selected, you can proceed to the next step and start the cloning process. The cloning software will begin copying your Windows 11 operating system, applications, and files from the source drive to the destination SSD, paving the way for a seamless transition and improved performance on your new SSD.
Start the cloning process
With the source and destination drives selected in the cloning software, you are ready to initiate the actual cloning process. This step begins the transfer of your Windows 11 operating system, applications, and files from the source drive to the destination SSD. Follow these steps to start the cloning process:
- Check the cloning settings: Before proceeding, review the cloning settings within the software. Ensure that the selected options align with your requirements. These options may include sector-by-sector cloning, automatic partition resizing, or specific cloning profiles. Double-check the settings to confirm that they accurately reflect what you need for the cloning operation.
- Confirm the start of the cloning: Once you are satisfied with the cloning settings, click on a button labeled “Start Clone,” “Begin,” or a similar action to start the cloning process. Depending on the software, you may be prompted to provide confirmation or enter a final confirmation to proceed with the cloning.
- Monitor the progress: The cloning process will begin, and the software will display the progress of the operation. Usually, you will see a progress bar or a percentage indicating how much of the process has been completed. The time it takes to complete the cloning process will depend on the size of your Windows 11 installation and the speed of your drives. It is essential to monitor the progress and ensure that there are no interruptions or errors during the process.
- Avoid interruptions: While the cloning process is underway, it is crucial to refrain from interfering with your system. Avoid shutting down or restarting your computer, disconnecting the drives, or interrupting the power supply. Any interruptions during this phase can lead to data corruption or an incomplete cloning process.
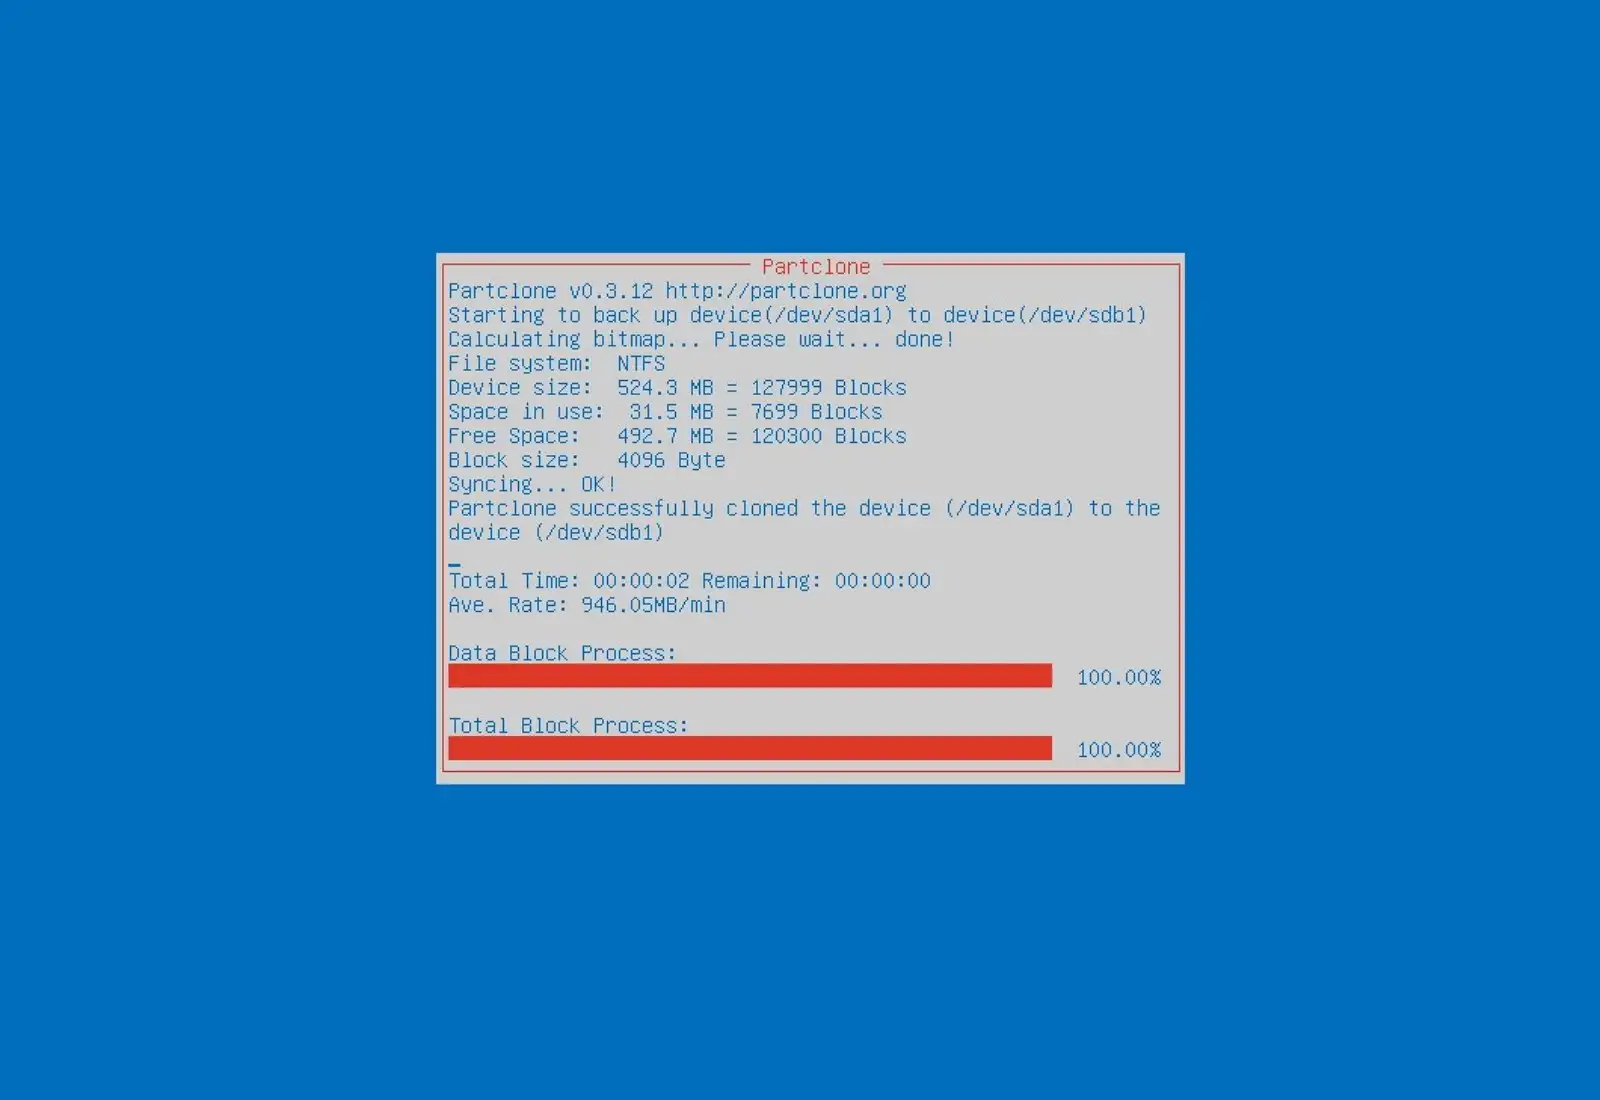
Starting the cloning process initiates the transfer of your Windows 11 operating system and data from the source drive to the destination SSD. It is important to closely monitor the progress and allow the software to complete the cloning without interruptions. Once the cloning process reaches completion, you can proceed with the next steps of the migration process, including verifying and adjusting BIOS/UEFI settings, reconnecting drives, and booting your system from the newly cloned SSD.
Wait for the cloning process to complete
After initiating the cloning process, it is crucial to allow sufficient time for the software to complete the transfer of your Windows 11 operating system, applications, and files from the source drive to the destination SSD. The time it takes to complete the cloning process depends on the size of your Windows 11 installation and the speed of your drives. Here are some important things to consider:
- Monitor the progress: During the cloning process, closely monitor the progress displayed by the cloning software. This may be represented by a progress bar, a percentage, or other visual indicators. This allows you to track how far along the cloning process is and estimate the time remaining.
- Avoid interruptions: It is crucial to avoid any interruptions or disruptions to the cloning process. Refrain from shutting down or restarting your computer, disconnecting the drives, or interrupting the power supply. Any interruptions may result in an incomplete cloning process or data corruption, requiring you to start the process from scratch.
- Be patient: The time it takes to clone a drive can vary significantly depending on factors such as the size and speed of the drives, as well as the capabilities of the cloning software. It is important to be patient and allow the software to complete the process smoothly. Avoid rushing or interrupting the process prematurely.
It is common for the cloning process to take some time, especially if you have a large Windows 11 installation or if you have selected options like sector-by-sector cloning. The software may also show a slower rate of progress during certain phases of the cloning process. This is normal and does not necessarily indicate a problem. Allow the software to work at its own pace and trust that it is diligently transferring all your data to the new SSD.
While waiting for the cloning process to complete, you can use this time to organize any additional steps that need to be taken after the cloning process, such as verifying and adjusting BIOS/UEFI settings, swapping drives, and configuring the system to boot from the SSD. Once the cloning process reaches completion, you can proceed to the next steps with the confidence that your Windows 11 installation has been successfully cloned to the SSD.
Disconnect the source drive and reconnect the SSD
Once the cloning process is complete and your Windows 11 operating system, applications, and files have been successfully transferred to the new SSD, it is time to disconnect the source drive and reconnect the SSD. Follow these steps to ensure a seamless transition:
- Shut down your computer: First, shut down your computer completely. It is important to ensure that your system is powered off before making any hardware changes.
- Open your computer case: Depending on the type of computer you have (such as a desktop or laptop), follow the appropriate steps to access the internal components. This usually involves removing screws or undoing latches to open the computer case.
- Disconnect the source drive: Locate the source drive that you cloned from (usually a traditional hard drive or an older SSD). Carefully unplug the power cable and data cable from the source drive. Take note of the ports they were connected to, as you will later connect the SSD to these same ports.
- Reconnect the SSD: Locate the SSD that you cloned to. Plug the power cable and data cable into the corresponding ports on the SSD. Ensure that the connections are secure and properly aligned. Take precaution not to force any connections.
Once you have successfully connected the new SSD, you can proceed to the next steps of the migration process, such as verifying and adjusting BIOS/UEFI settings, ensuring that the system recognizes the new SSD, and configuring the system to boot from the SSD. Before doing so, ensure that the source drive has been disconnected to avoid any conflicts or confusion during the boot process.
The process of disconnecting the source drive and reconnecting the new SSD is a crucial step in completing the migration. By properly replacing the source drive with the cloned SSD, you are positioning your system to fully leverage the enhanced performance and benefits offered by the SSD. Once you have completed these steps, you are ready to move on to post-migration tasks and enjoy the improved speed and responsiveness of your Windows 11 installation on the SSD.
Verify and adjust BIOS/UEFI settings
After reconnecting the SSD, the next step is to verify and adjust the BIOS (or UEFI) settings to ensure that your system recognizes the new SSD as the primary boot device. Follow these steps to verify and adjust the BIOS/UEFI settings:
- Power on your computer: Turn on your computer and access the BIOS (or UEFI) settings. This is typically done by pressing a designated key during the startup process, such as Del, F2, or F10. The specific key varies depending on the manufacturer and model of your computer.
- Navigate to the Boot menu: Once in the BIOS (or UEFI) settings, locate and navigate to the Boot menu. The exact location and naming may vary, but it is commonly found under a section specifically titled “Boot,” “Boot Options,” or “Boot Priority.”
- Set the SSD as the first boot device: Within the Boot menu, locate the option to set the boot order or boot priority. Ensure that the SSD is listed as the first boot device. If it is not already set as the first boot device, use the instructions provided within the BIOS (or UEFI) settings to select the SSD and move it to the top of the boot order.
- Save and exit: Once you have adjusted the boot order to prioritize the SSD, save your changes and exit the BIOS (or UEFI) settings. The specific steps to save and exit may vary, but it is typically done by selecting the appropriate option, such as “Save and Exit,” “Exit and Save Changes,” or pressing a key combination, such as F10.
By verifying and adjusting the BIOS (or UEFI) settings, you ensure that your system recognizes the SSD as the primary boot device. This is crucial for your Windows 11 installation to load from the SSD and take advantage of its improved speed and performance. It is important to save your changes and exit the BIOS (or UEFI) settings correctly to ensure they are applied.
After completing these steps, your system should reboot and load Windows 11 from the new SSD. Verify that the system boots up correctly without issues. If everything is functioning as expected, you can proceed with the final step of booting your system from the SSD.
Keep in mind that accessing and navigating the BIOS (or UEFI) settings may differ between manufacturers and models. Refer to your computer’s documentation or manufacturer’s website for specific instructions if needed. The goal is to set the SSD as the primary boot device to complete the migration process and enjoy the benefits of a faster and more efficient Windows 11 installation.
Boot your system from the SSD
After verifying and adjusting the BIOS/UEFI settings to prioritize the SSD as the primary boot device, it’s time to reboot your system and boot Windows 11 from the newly cloned SSD. Follow these steps to ensure a successful boot:
- Save any unsaved work: Before proceeding with the reboot, save any unsaved work and close all open applications. This helps prevent any data loss or potential issues during the boot process.
- Restart your computer: Restart your computer to initiate the boot process. You can usually do this by clicking on the Start menu, selecting the power icon, and choosing “Restart.” Alternatively, you can press the physical restart button on your computer if available.
- Watch for the system logo or boot screen: As your system restarts, keep an eye on the screen for the manufacturer’s logo or boot screen. This typically shows up before the Windows logo appears.
- Windows 11 loading from the SSD: If all goes well, you should see Windows 11 loading from the SSD. The boot process may be faster than before since SSDs offer superior read/write speeds compared to traditional hard drives. Depending on your system’s configuration, it may take a few seconds or less for Windows 11 to fully load.
- Verification of a successful boot: Once Windows 11 has loaded, take a moment to verify that everything is functioning correctly. Check for any error messages or unusual behavior. You should also notice faster startup times and improved overall system performance resulting from the faster SSD.
If your system successfully boots from the SSD and Windows 11 operates as expected, congratulations! You have completed the cloning process and successfully migrated your Windows 11 installation to the SSD. Enjoy the benefits of quicker boot times, faster application launches, and enhanced overall system responsiveness.
In the rare event that your system does not boot from the SSD or you encounter any issues during the process, consult the user manual or support resources provided by your computer or motherboard manufacturer. They can provide guidance on troubleshooting and resolving any boot-related problems you may encounter.
Conclusion
Congratulations on successfully cloning your Windows 11 installation to an SSD! Throughout this guide, we have explored the process of cloning Windows 11 to an SSD, highlighting its benefits and providing step-by-step instructions to ensure a seamless transition. By migrating to an SSD, you can experience faster boot times, quicker application launches, improved system responsiveness, and enhanced overall performance.
We began by understanding the concept of cloning and its importance in transferring your operating system, applications, and files to a new storage device. Cloning allows you to avoid the time and effort of reinstalling everything from scratch, providing a convenient and efficient way to upgrade to an SSD. We discussed the benefits of cloning, such as improved speed, enhanced productivity, increased reliability, lower power consumption, and reduced noise and heat production.
To successfully clone Windows 11 to an SSD, we covered the requirements, including a compatible SSD, sufficient storage capacity, reliable cloning software, data backup, stable power source, and basic computer skills. We then guided you through the step-by-step process, which involved backing up your data, preparing and connecting the SSD, choosing a cloning software, running the software, selecting the source and destination drives, starting the cloning process, waiting for its completion, disconnecting the source drive, reconnecting the SSD, and verifying and adjusting BIOS/UEFI settings. Finally, we discussed the importance of successfully booting your system from the SSD.
By following this guide, you have successfully migrated your Windows 11 system to an SSD, unlocking its full potential and enjoying a faster and more responsive computing experience. Remember to keep your backup data safe and regularly update it to maintain data redundancy. Additionally, stay informed about updates and maintenance procedures for your SSD to ensure its optimal performance and longevity.
We hope that this guide has provided clarity and guidance throughout the cloning process. Enjoy the benefits of your newly migrated Windows 11 installation on the SSD and make the most of the improved speed, reliability, and efficiency it offers in your day-to-day computing activities. Happy computing!