Introduction
Welcome to this guide on how to format a Solid State Drive (SSD) for Windows 11. Formatting an SSD is a crucial step when setting up a new operating system or if you want to give your existing SSD a fresh start. By formatting your SSD, you can ensure optimal performance and compatibility with the latest version of Windows.
Windows 11, the latest operating system from Microsoft, comes with a range of exciting features and enhancements. To make the most of these features, it is important to have a properly formatted SSD. This not only improves the overall speed and efficiency of your system but also ensures smoother operation and reduces the risk of data corruption.
In this guide, we will take you through the step-by-step process of formatting your SSD for Windows 11. We will cover essential aspects such as backing up your data, verifying SSD compatibility, creating a Windows 11 installation media, changing BIOS settings, installing Windows 11 on your SSD, updating Windows 11 and drivers, and formatting your old hard drive.
Before you begin, ensure that you have a backup of all your important data. Although the formatting process generally does not erase your data, it is always better to be safe than sorry. Additionally, make sure to have a reliable internet connection and a working USB drive to create the installation media.
Now, let’s dive into the detailed step-by-step instructions on how to format your SSD for Windows 11 and optimize your system’s performance.
Prerequisites
Before you begin formatting your SSD for Windows 11, there are a few prerequisites you should take into consideration. These prerequisites will ensure a smooth and successful formatting process.
- Backup your data: Before proceeding with any formatting or installation, it is crucial to create a backup of all your important data. Formatting an SSD will erase all existing data, so it’s essential to have a copy of your files stored on an external drive or cloud storage.
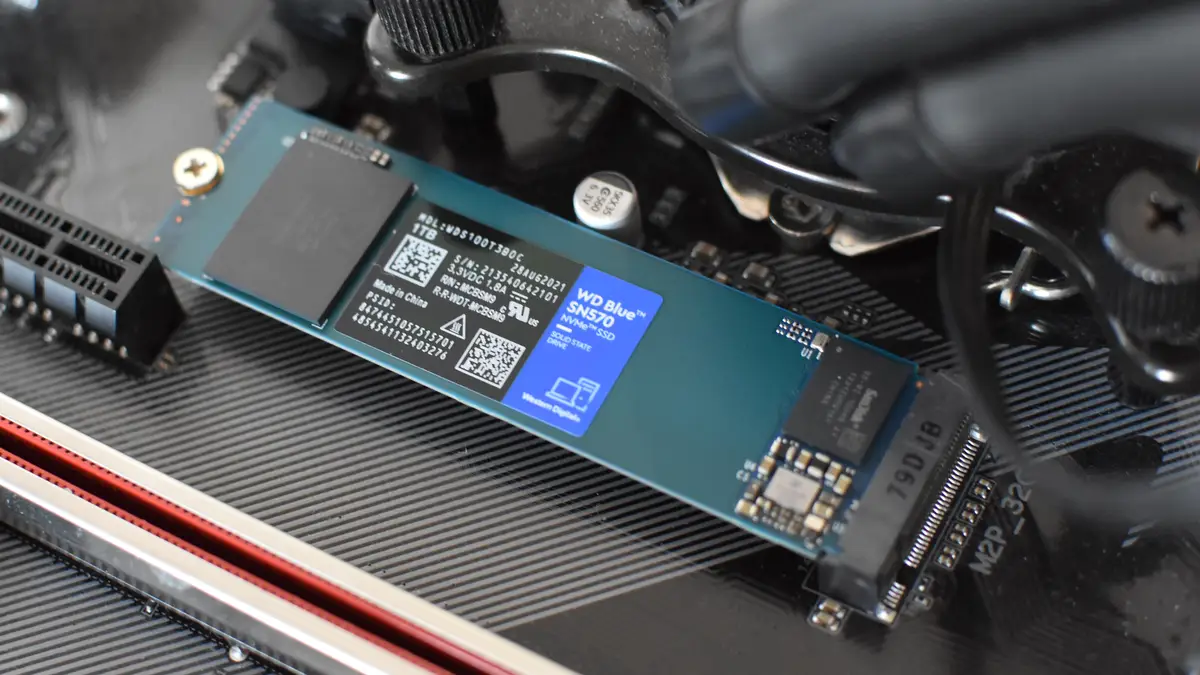
- Verify SSD compatibility: Ensure that your SSD is compatible with Windows 11. Refer to the manufacturer’s website or documentation to confirm compatibility. It’s important to have an SSD that meets the system requirements to avoid any installation or performance issues.
- Windows 11 installation media: Create a bootable Windows 11 installation media. You can do this by using a USB drive with a minimum capacity of 8GB. Follow the official Microsoft instructions to create the installation media.
- Working USB drive: Make sure you have a functioning USB drive to create the installation media and to store the necessary files during the installation process.
- Reliable internet connection: A stable and reliable internet connection is required to download the necessary Windows 11 updates and drivers.
- Access to BIOS settings: You will need access to your computer’s BIOS settings to change the boot order and configure other necessary settings for the installation process. Consult your computer’s manual or the manufacturer’s website for instructions on accessing the BIOS.
By fulfilling these prerequisites, you will ensure a smooth and hassle-free experience while formatting your SSD for Windows 11. It is crucial to take these steps to prevent any data loss and to ensure the compatibility and optimal performance of your SSD.
Step 1: Backing Up Your Data
Before you begin formatting your SSD for Windows 11, it is essential to create a backup of all your important data. Formatting an SSD will erase all existing data, so it’s crucial to have a copy of your files stored on an external drive or cloud storage.
To back up your data, follow these simple steps:
- Identify your important files: Take some time to identify all the files and folders that you consider essential and want to back up. This may include documents, photos, videos, music, and other personal files. Make a list of these files to ensure you don’t miss anything during the backup process.
- Choose a backup method: Decide on the backup method that best suits your needs. You can either use an external hard drive, a network-attached storage (NAS) device, or opt for cloud storage services like Google Drive, Dropbox, or OneDrive. Each method has its advantages, so choose the one that works best for you.
- Transfer files to backup location: Once you have chosen your backup method, start transferring your important files to the backup location. If you’re using an external hard drive, simply connect it to your computer and drag-and-drop the files to the destination folder. If you’re using cloud storage, follow the instructions provided by the service to upload your files.
- Verify the backup: After the transfer is complete, it’s important to verify the backup to ensure that all your files were successfully transferred. Take a few moments to check the backup location and confirm that all your important files are safely stored.
By following these steps, you can ensure that your important data is backed up and protected before proceeding with the SSD formatting process. This step is crucial to prevent any data loss and to provide peace of mind knowing that your files are securely stored.
Step 2: Verifying SSD Compatibility
Before formatting your SSD for Windows 11, it is important to verify its compatibility with the operating system. This will ensure smooth installation and optimal performance. Here are the steps to verify SSD compatibility:
- Check the system requirements: Refer to the official Windows 11 system requirements provided by Microsoft. Ensure that your SSD meets or exceeds the minimum requirements for storage capacity and speed. This information can usually be found on the manufacturer’s website or in the product documentation.
- Compatibility tools: Some SSD manufacturers provide compatibility tools or utilities that can help determine if your SSD is compatible with Windows 11. Check the manufacturer’s website for any such tools and follow the instructions provided to perform the compatibility check.
- Consult the manufacturer’s documentation: If you’re unsure about your SSD’s compatibility, refer to the manufacturer’s documentation or contact their support for assistance. They can provide specific information about your SSD’s compatibility with Windows 11 and any necessary firmware updates.
- Research online: Look for user experiences and feedback from the community regarding your SSD model and its compatibility with Windows 11. Online forums and tech communities can be valuable resources for finding information and insights from others who have already tested the compatibility of certain SSDs.
Verifying SSD compatibility is an important step to ensure a successful formatting and installation process. It ensures that your SSD meets the necessary requirements and avoids any potential issues that may arise from using an incompatible SSD with Windows 11.
Step 3: Creating a Windows 11 Installation Media
In order to format your SSD with Windows 11, you’ll need to create a bootable installation media. This will allow you to install the operating system on your SSD. Follow these steps to create a Windows 11 installation media:
- Download the Windows 11 Media Creation Tool: Visit the official Microsoft website and download the Windows 11 Media Creation Tool. This tool will help you create a bootable USB drive with the necessary files for installation.
- Run the Media Creation Tool: Once the Media Creation Tool is downloaded, run the executable file to begin the process. You may be prompted with a User Account Control (UAC) window. Click “Yes” to proceed.
- Accept the license terms: Read and accept the license terms presented to you.
- Select “Create installation media (USB flash drive, DVD, or ISO file) for another PC”: From the available options, select the one that allows you to create installation media for another PC.
- Choose the language, edition, and architecture: Select your preferred language, edition (such as Windows 11 Home or Pro), and architecture (32-bit or 64-bit). Ensure that you choose the same edition and architecture as your current Windows installation.
- Select “USB flash drive”: Choose the option to create a bootable USB flash drive. Ensure that you have a USB drive with at least 8GB of available storage space and that it is formatted and empty.
- Select your USB drive: From the list of available drives, select the USB drive you want to use for creating the installation media.
- Begin the creation process: Click the “Next” button to start the creation process. The Media Creation Tool will download the necessary files and copy them to the USB drive. This may take some time depending on your internet speed.
- Complete the process: Once the process is complete, you will see a “Your USB flash drive is ready” message. Click the “Finish” button to close the Media Creation Tool.
By following these steps, you will have successfully created a bootable Windows 11 installation media on a USB drive. This media will be used to install Windows 11 on your SSD in the next steps.
Step 4: Changing BIOS Settings
Before installing Windows 11 on your SSD, you need to change the BIOS settings on your computer to ensure that it boots from the USB drive containing the installation media. Follow these steps to change the BIOS settings:
- Restart your computer: Start by restarting your computer.
- Enter the BIOS: During the startup process, you will see a message on your screen indicating the key to press to enter the BIOS setup. Common keys include F2, F10, Del, or Esc. Press the appropriate key to enter the BIOS.
- Navigate to the Boot menu: Once in the BIOS setup, navigate to the “Boot” or “Boot Order” section. This location may vary depending on your computer’s motherboard manufacturer and BIOS version.
- Set the USB drive as the first boot device: In the Boot menu, look for an option called “Boot Priority” or “Boot Sequence.” Select this option and move the USB drive containing the Windows 11 installation media to the top of the list. This will ensure that the computer boots from the USB drive first.
- Save and exit the BIOS: After setting the USB drive as the first boot device, save the changes you made in the BIOS settings and exit the BIOS. Look for an option like “Save and Exit” or “Exit and Save Changes.”
Once you have changed the BIOS settings, your computer will restart and boot from the USB drive containing the Windows 11 installation media. This will allow you to proceed with the installation process and format your SSD with Windows 11 in the following steps.
Step 5: Installing Windows 11 on SSD
With the BIOS settings configured to boot from the USB drive, you can now proceed with installing Windows 11 on your SSD. Follow these steps to install Windows 11:
- Connect the USB drive: If you haven’t already, connect the USB drive containing the Windows 11 installation media to your computer.
- Restart your computer: Restart your computer to begin the installation process. It should now boot from the USB drive.
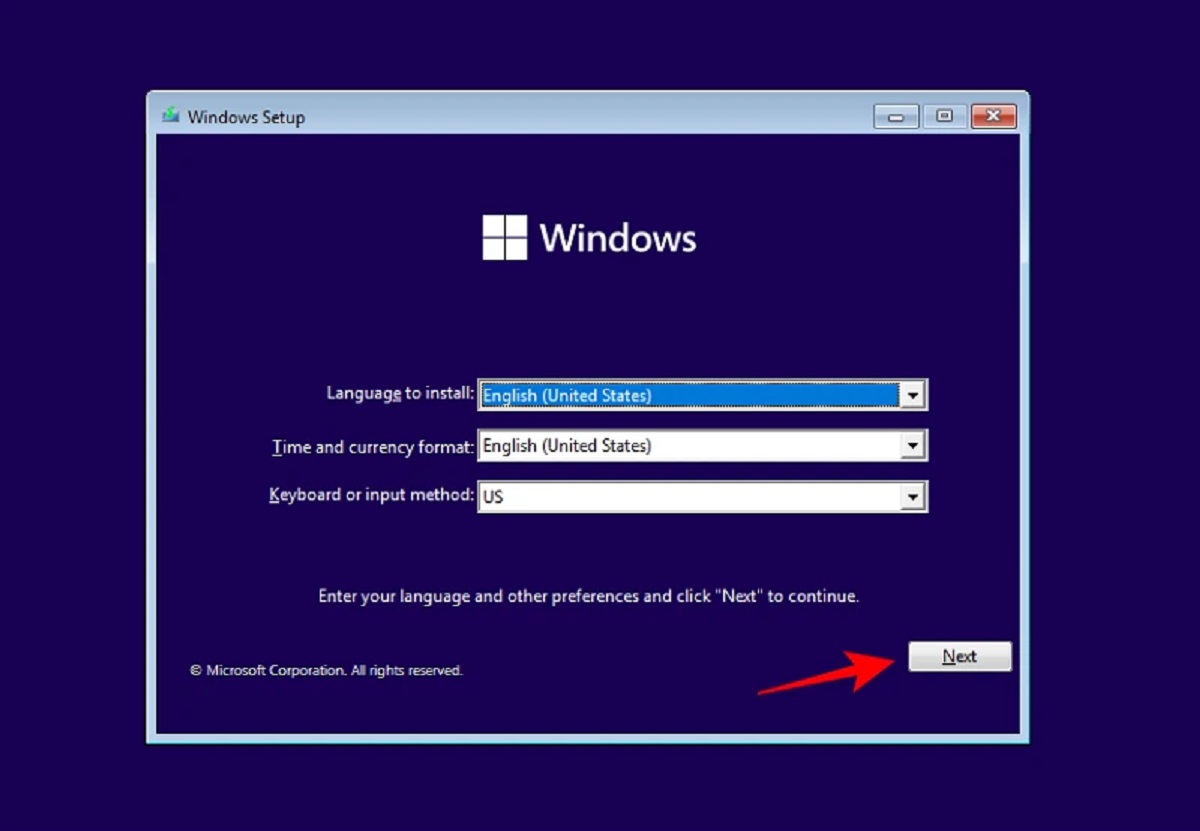
- Select the language and other preferences: On the Windows Setup screen, select your preferred language, time, and keyboard input method, then click “Next.”
- Click “Install now”: On the next screen, click the “Install now” button to start the installation process.
- Enter the product key: If prompted, enter your Windows 11 product key. You may also choose to skip this step by clicking “I don’t have a product key.”
- Accept the license terms: Read and accept the license terms to proceed with the installation.
- Choose the installation type: Select the “Custom: Install Windows only (advanced)” option to perform a clean installation on your SSD.
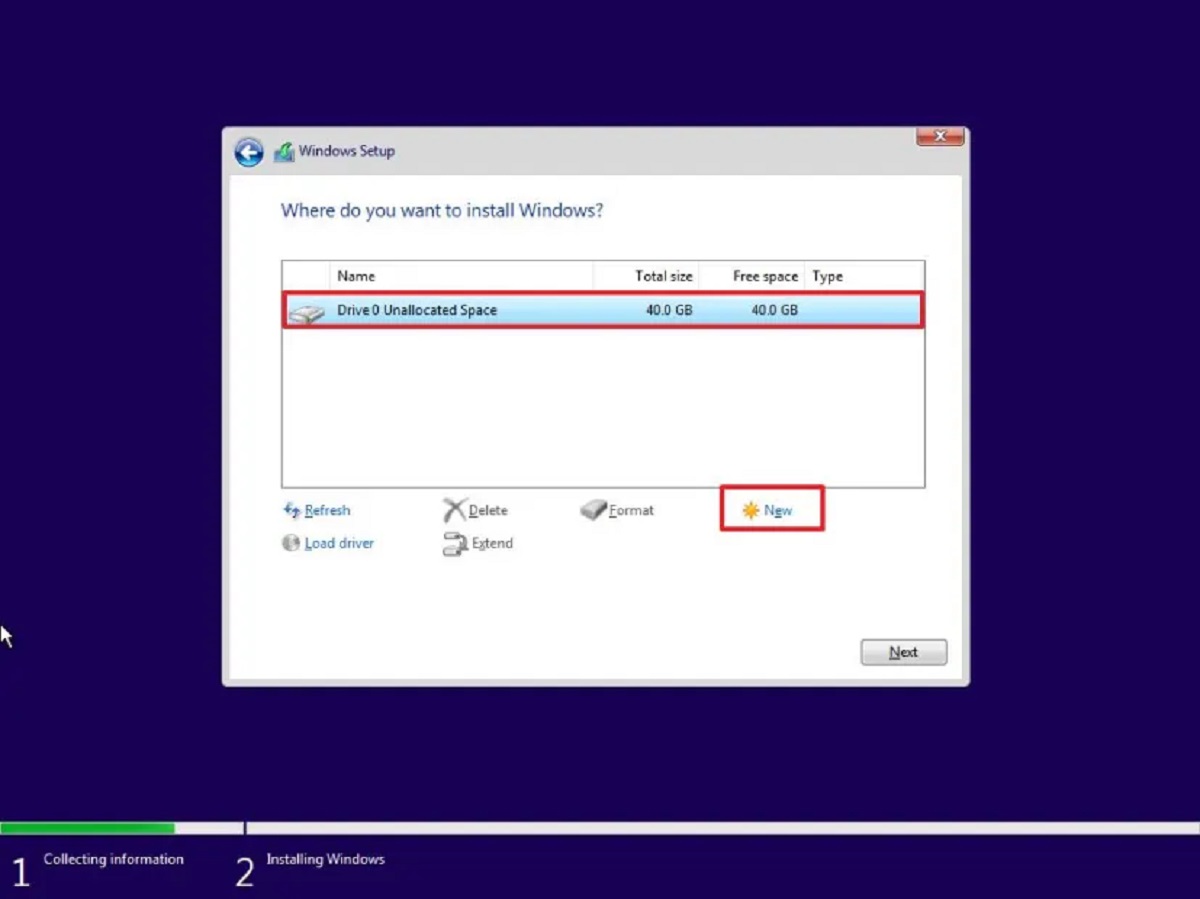
- Select the SSD: On the next screen, you will see a list of available drives. Select your SSD as the destination for the Windows 11 installation.
- Format the SSD: Click on the “Drive options (advanced)” link to format the SSD. This will erase all existing data on the SSD, so ensure that you have backed up any important files beforehand.
- Begin the installation: Click the “Next” button to start the installation process. Windows 11 will now be installed on your SSD.
- Follow the on-screen instructions: Follow the prompts and instructions provided by the Windows 11 setup wizard. This includes configuring personalization options, signing in with your Microsoft account, and selecting privacy settings.
- Wait for the installation to complete: The installation process may take some time to complete. Your computer will restart multiple times during the process.
Once the installation is complete, Windows 11 will be installed on your SSD, ensuring a fresh start and optimal performance. You can now proceed to the next step of updating Windows 11 and installing necessary drivers.
Step 6: Updating Windows 11 and Drivers
After successfully installing Windows 11 on your SSD, it’s important to update the operating system and install the necessary drivers to ensure the best performance and compatibility with your hardware. Follow these steps to update Windows 11 and install drivers:
- Connect to the internet: Make sure your computer is connected to the internet via Ethernet or a Wi-Fi connection.
- Open Windows Update: Click on the Start button, then go to Settings > Windows Update.
- Check for updates: Click on the “Check for updates” button. Windows 11 will now search for any available updates for your system.
- Install updates: If there are any updates available, click on the “Install” or “Download and install” button to start the updating process. This may take a while depending on the size and number of updates.
- Restart if necessary: After the updates have been installed, you may be prompted to restart your computer. If so, click on the “Restart now” button.
- Install device drivers: After restarting your computer, it’s important to install the necessary device drivers. You can typically download the latest drivers from the manufacturer’s website or use a driver update utility.
- Visit the manufacturer’s website: Go to the website of your computer’s manufacturer or the individual hardware component manufacturers (such as graphics card, network adapter, etc.). Look for the support or downloads section and search for the latest drivers for your specific model and hardware components.
- Download and install the drivers: Download the latest drivers from the manufacturer’s website and follow the instructions provided to install them. It’s recommended to start with essential drivers like chipset, graphics, and network drivers.
- Repeat for other hardware components: Repeat the process for any other hardware components that require drivers, such as sound cards, printers, and external devices.
- Restart your computer: After installing the drivers, it’s a good idea to restart your computer to ensure the changes take effect.
By following these steps, you will ensure that your Windows 11 operating system is up to date and that your hardware components have the latest drivers installed. This will help optimize the performance and compatibility of your system with Windows 11.
Step 7: Formatting the Old Hard Drive
After successfully installing Windows 11 on your SSD and ensuring that everything is working correctly, you may want to format your old hard drive to free up space or repurpose it. Formatting the old hard drive will wipe all its data, so it’s crucial to back up any important files before proceeding. Follow these steps to format the old hard drive:
- Open File Explorer: Click on the Start button and then click on the File Explorer icon.
- Locate the old hard drive: In the left sidebar of File Explorer, you should see a list of drives connected to your computer. Identify the old hard drive that you want to format.
- Right-click on the old hard drive: Right-click on the icon or name of the old hard drive and select the “Format” option from the context menu.
- Choose the formatting options: In the Format window, you can choose the file system (such as NTFS or exFAT) and set a new volume label for the drive if desired.
- Select a Quick format (recommended): For a faster formatting process, it is recommended to select the “Quick format” option. Keep in mind that this option does not thoroughly erase the data on the drive, so if you want to ensure complete data deletion, choose the regular format option.
- Start the formatting process: Click on the “Start” button to begin the formatting process. A warning message will pop up, notifying you that all data on the drive will be erased.
- Confirm the formatting: Double-check that you have backed up all important files from the old hard drive and click on the “OK” button to proceed with the formatting process.
- Wait for the formatting to complete: The formatting process may take some time, depending on the size and speed of the hard drive. Do not interrupt the process until it is fully completed.
- Formatting completed: Once the formatting process is finished, you will see a notification confirming the completion. The old hard drive is now formatted and ready for use.
By following these steps, you can easily format your old hard drive, freeing up space and preparing it for reuse or disposal. Remember to exercise caution and ensure that you have backed up any important files before proceeding with the formatting process.
Conclusion
Congratulations! You have successfully formatted your SSD for Windows 11 and completed the installation process. By following the steps outlined in this guide, you have ensured that your SSD is optimized for performance, compatibility, and security. Formatting your SSD allows you to start fresh with a clean installation of Windows 11, providing a seamless and efficient computing experience.
In this guide, we covered the essential steps to take when formatting your SSD for Windows 11, including backing up your data, verifying SSD compatibility, creating a Windows 11 installation media, changing BIOS settings, installing Windows 11 on your SSD, updating Windows 11 and drivers, and formatting your old hard drive. Each step plays a vital role in ensuring a successful formatting process and a smooth transition to Windows 11.
Remember, before formatting your SSD, always make sure to back up your data to prevent any loss. Additionally, verifying SSD compatibility and following the steps diligently will help minimize potential issues and ensure a hassle-free experience.
Now that your SSD is formatted and Windows 11 is installed, make sure to regularly update the operating system and drivers to keep your system secure and up to date. This will ensure that you have access to the latest features, improvements, and bug fixes provided by Microsoft and your hardware manufacturers.
We hope this guide has been helpful in assisting you with formatting your SSD for Windows 11. Enjoy the enhanced performance and new features that Windows 11 has to offer!