Introduction
Windows 11 is the latest operating system from Microsoft, promising a new and improved user experience with exciting features and a sleek design. The update brings a fresh look to your desktop, enhanced productivity tools, and improved performance. If you’re eager to try out Windows 11 and want to know how to update from your current version of Windows, this guide is for you.
Before diving into the update process, it’s essential to ensure that your system meets the minimum requirements for Windows 11. The new operating system has specific hardware requirements that may differ from previous versions of Windows. It’s crucial to check your computer’s compatibility to avoid any compatibility issues during the upgrade.
Once you’ve confirmed your system’s compatibility, you’ll need to prepare for the update. It’s always a good idea to back up your important files and data before performing any major updates. This will help safeguard your files in case anything goes wrong during the installation process.
In addition to backing up your data, it’s advisable to free up disk space on your computer. Windows 11 requires a certain amount of free space to install and run smoothly. By removing unnecessary files and programs, you can ensure that you have enough space for the update without any hiccups.
Updating drivers and applications is another critical step before proceeding with the Windows 11 update. Outdated drivers and incompatible applications can cause issues and may prevent the update from installing or functioning correctly. Checking for updates and ensuring driver and application compatibility will help guarantee a smooth transition to Windows 11.
Now that you’ve taken all the necessary preparations, it’s time to proceed with the update. There are different methods to update to Windows 11: through Windows Update, using the Media Creation Tool, or performing a clean install. Each method has its own advantages and requirements, so choose the one that suits your preferences and situation.
If you encounter any issues or errors during the update process, don’t worry. We’ll also cover some common troubleshooting tips to help you overcome potential obstacles and ensure a successful update to Windows 11.
So, let’s dive into the details and learn how to update to Windows 11, unlocking the full potential of Microsoft’s latest operating system.
System Requirements
Before upgrading to Windows 11, it’s crucial to ensure that your system meets the minimum hardware requirements. Windows 11 has specific requirements that may differ from previous versions, so it’s essential to verify your computer’s compatibility.
Here are the minimum system requirements for Windows 11:
- Processor: 1 gigahertz (GHz) or faster with at least 2 cores on a compatible 64-bit processor
- RAM: 4 gigabytes (GB) or more
- Storage: 64 GB or more of available storage
- Graphics Card: DirectX 12 compatible graphics with a WDDM 2.0 driver
- Display: A display with a resolution of 720p or higher, at least 9 inches diagonally, with 8 bits per color channel
- Internet Connection: Internet connectivity is necessary to download updates and activate Windows 11
Please note that these are the minimum requirements, and it’s recommended to have higher specifications for optimal performance. If your system falls short in any of these areas, it may not be compatible with Windows 11.
In addition to the above hardware requirements, Windows 11 also includes specific security features that necessitate certain hardware capabilities. These features include TPM (Trusted Platform Module) version 2.0, which provides enhanced security for your system. Your computer must have TPM 2.0 support enabled in the BIOS or UEFI settings to upgrade to Windows 11.
It’s important to note that not all computers that meet the minimum requirements for Windows 11 will receive the update immediately. Microsoft will be gradually rolling out the update to eligible devices over time to ensure a smooth experience for all users. You can check Microsoft’s official website or use the “PC Health Check” tool provided by Microsoft to determine if your device is eligible for the Windows 11 update.
By checking your system’s compatibility and ensuring it meets the minimum requirements, you can ensure a smooth and successful upgrade to Windows 11. Now that you’re aware of the system requirements, let’s move on to the next steps in the update process.
Checking Compatibility
Before proceeding with the Windows 11 update, it’s crucial to check your computer’s compatibility to ensure a smooth transition. Microsoft has implemented specific hardware requirements for Windows 11 that may differ from previous versions of Windows.
To check if your computer is compatible with Windows 11, you can use the “PC Health Check” tool provided by Microsoft. This tool will scan your system and provide you with information on whether your computer meets the requirements for Windows 11.
Here’s how to check compatibility using the “PC Health Check” tool:
- Visit Microsoft’s official website and search for “PC Health Check.”
- Download and install the tool on your computer.
- Launch the tool once installation is complete.
- Click on the “Check now” button to start the compatibility scan.
- Wait for the tool to analyze your system’s hardware and software configuration.
- Once the scan is complete, the tool will display a message indicating whether your computer is compatible with Windows 11.
If your computer is compatible, you’ll receive a message stating that your device meets the requirements for Windows 11. In this case, you can proceed with the update process. However, if the tool indicates that your computer is not compatible, you may need to consider upgrading your hardware or stick with your current version of Windows.
In some cases, the tool may show that your computer does not meet the requirements due to specific hardware components or firmware settings. You can check with your computer manufacturer for any firmware updates or compatibility support they provide for Windows 11. Some manufacturers may release BIOS or UEFI updates that enable compatibility with Windows 11.
It’s important to note that Microsoft has stated that even if your computer is not compatible with Windows 11, you will still continue to receive Windows 10 updates until its end of support. Windows 10 will remain a secure and supported operating system until October 14, 2025.
By checking compatibility using the “PC Health Check” tool or consulting with your computer manufacturer, you can determine whether your system is ready for the Windows 11 update. Once you’ve confirmed compatibility, you can proceed with the necessary preparations to ensure a seamless update experience.
Preparing for the Update
Preparing your computer for the Windows 11 update is an important step to ensure a smooth and successful transition. Taking a few extra precautions before starting the update process can help protect your data and minimize any potential issues that may arise during the installation.
Here are some essential steps to prepare for the Windows 11 update:
- Back up Your Data: Before performing any major software update, it’s always recommended to back up your important files and data. This ensures that you have a copy of your data in case anything goes wrong during the update process. You can use an external hard drive, cloud storage, or a reliable backup software to create a backup of your files.
- Free Up Disk Space: Windows 11 requires a certain amount of free space on your computer for the installation process. To ensure a smooth update, it’s a good idea to free up disk space by removing unnecessary files, temporary files, and cleaning up your system. You can use the built-in Disk Cleanup tool or third-party software to clear up space on your hard drive.
- Update Drivers and Applications: Outdated or incompatible drivers and applications can cause compatibility issues during the Windows 11 update. It’s important to check for driver updates from your computer manufacturer’s website and update them before proceeding. Additionally, make sure that all your essential applications are up to date to avoid any conflicts or compatibility problems.
- Check for Firmware Updates: Some computers require firmware updates to be compatible with Windows 11. Check your computer manufacturer’s website for any available firmware updates for your specific model. It’s important to install these updates before initiating the Windows 11 update.
- Uninstall Unnecessary Software: Take the time to uninstall any unnecessary software and programs from your computer. Removing unused applications not only frees up disk space but also reduces the chance of compatibility issues during the update process.
- Make Note of Important Settings: If you have customized settings on your current version of Windows, it’s a good idea to jot them down or take screenshots. This will help you replicate your preferred settings on Windows 11 after the update.
By following these preparation steps, you can ensure that your computer is ready for the Windows 11 update. Taking the time to back up your data, free up disk space, update drivers, check for firmware updates, uninstall unnecessary software, and note important settings will help streamline the upgrade process and minimize potential issues.
Now that you’ve prepared your computer for the update, it’s time to proceed with the Windows 11 installation. In the following sections, we will guide you through different methods to update to Windows 11, including using Windows Update, the Media Creation Tool, and performing a clean install.
Backing Up Your Data
Before embarking on any major updates, such as upgrading to Windows 11, it’s crucial to back up your important files and data. While the update process is designed to preserve your files, it’s always better to be safe than sorry. Creating a backup ensures that your valuable data remains protected in case of any unforeseen issues during the update.
Here are a few methods you can use to back up your data:
- External Hard Drive or USB: One of the most common and straightforward methods is to use an external hard drive or USB flash drive to manually transfer and store your files. Simply connect the device to your computer, copy the files you want to back up, and safely disconnect the drive for safekeeping.
- Cloud Storage: Another option is to utilize cloud storage services such as Google Drive, Microsoft OneDrive, or Dropbox. These services offer online storage where you can upload your important files and access them from any device with internet connectivity. It’s a convenient and secure way to back up your data and provides an additional layer of protection.
- Backup Software: If you have a large amount of data or prefer automated backups, you can use backup software. There are various backup solutions available, both free and paid, that offer features such as scheduled backups, incremental backups, and system image backups. Research and choose a reputable backup software that suits your needs and follow the instructions provided to back up your data.
- Network Attached Storage (NAS): If you have a network-attached storage device in your home or office, you can utilize it to back up your files. NAS devices are connected to your network and offer storage space accessible to all devices connected to the same network. Set up a backup job to automatically copy your files to the NAS device, ensuring your data remains safe.
Remember to identify and back up all essential files, including documents, photos, videos, music, and any personal files or folders that hold sentimental or irreplaceable value. It’s also a good idea to save any necessary software installation files or product keys that you might need after the update.
By taking the time to back up your data, you ensure that your files remain safe and can be easily restored if needed. A backup provides peace of mind during the update process, allowing you to proceed with the Windows 11 installation confidently.
Once you have completed the backup process, you’re ready to move on to the next steps in the Windows 11 update process, such as freeing up disk space and updating drivers and applications.
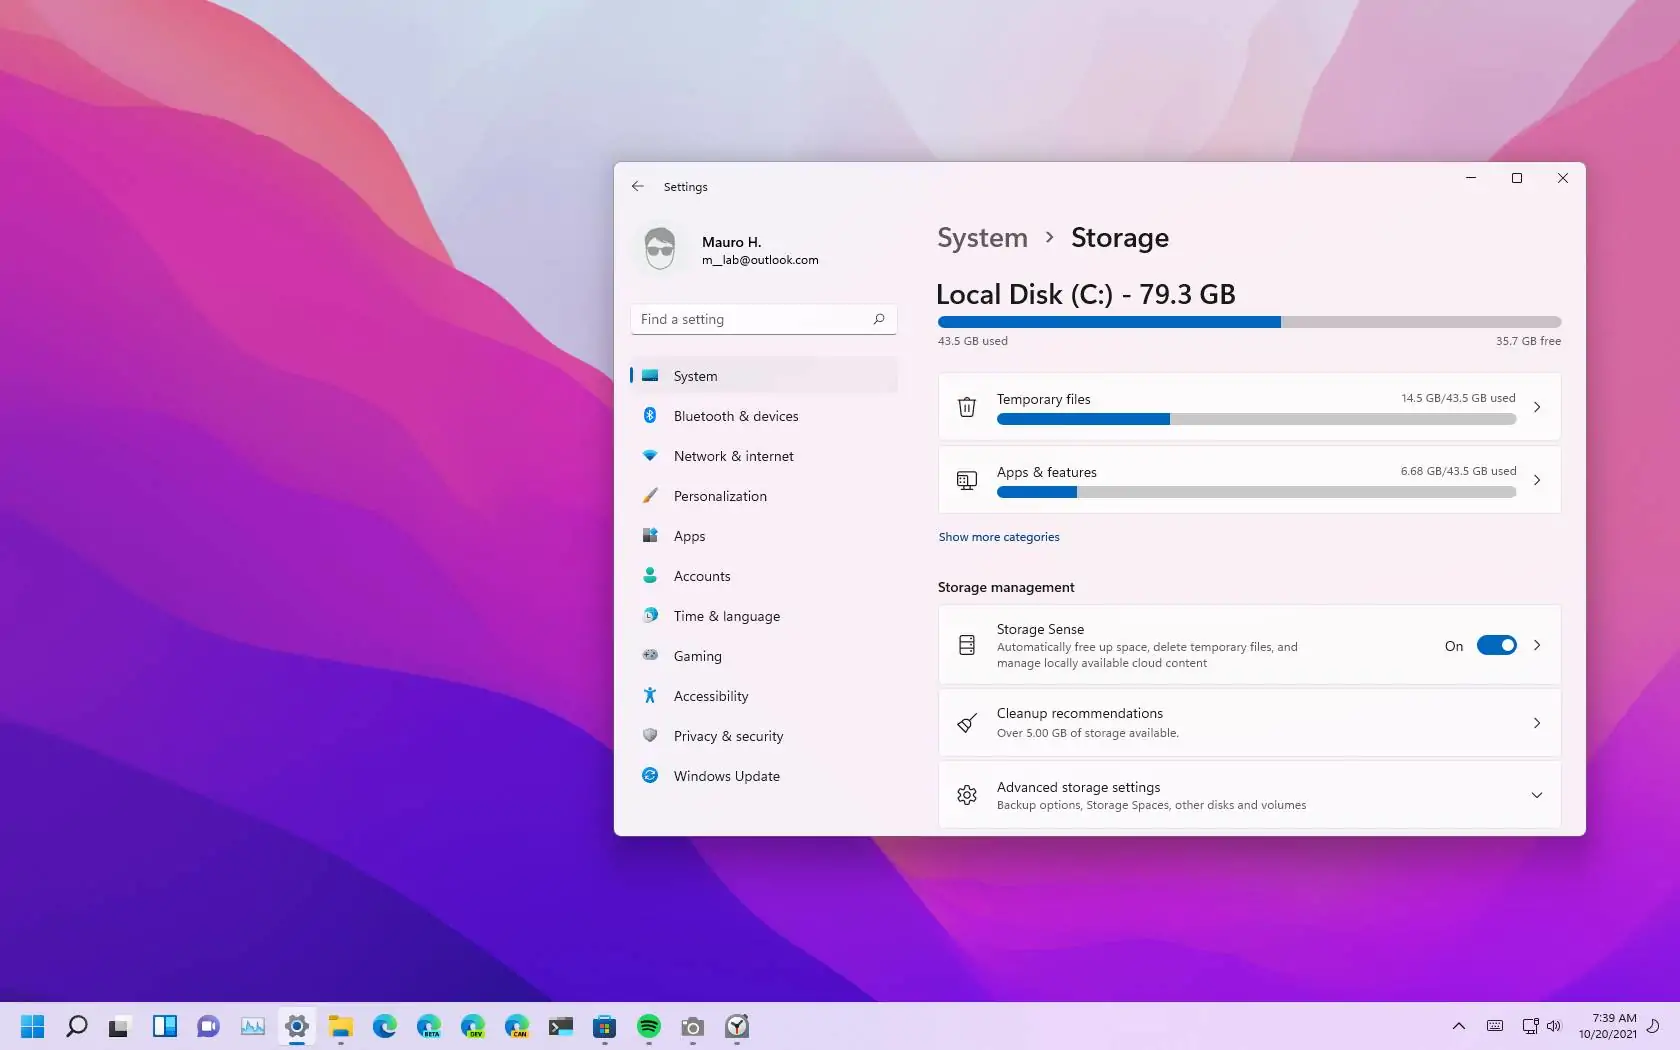
Freeing Up Disk Space
As you prepare to update to Windows 11, it’s important to ensure that you have enough free disk space for the installation process. Windows 11 requires a certain amount of space to install and function properly. By freeing up disk space before the update, you can avoid potential issues and ensure a smooth transition.
Here are some steps you can follow to free up disk space:
- Remove Unnecessary Files: Start by cleaning up your computer’s storage by removing unnecessary files. This includes temporary files, old downloads, and files in your recycle bin. Windows has a built-in Disk Cleanup tool to assist with this process. Simply search for “Disk Cleanup” in the Start menu, select the drive you want to clean up, and let the tool analyze and suggest files to delete.
- Uninstall Unused Applications: Take a moment to go through your installed applications and uninstall any that you no longer need or use. This not only helps free up disk space but also reduces clutter and potential conflicts during the update. Open the Control Panel or navigate to the Apps & Features settings in Windows Settings to manage your installed applications.
- Move Files to External Storage: If you have large files, such as movies, music, or photos, that you don’t need immediate access to, consider moving them to an external storage device. This could be an external hard drive or a cloud storage service. By transferring these files to another location, you can free up significant disk space on your computer.
- Clear Browser Cache: Web browsers store temporary files and cache data to improve browsing performance. However, these files can accumulate over time and take up valuable disk space. Clearing your browser’s cache can help free up storage. Access the settings of your browser and search for options like “Clear browsing data” or “Clear cache” to perform this task.
- Use Disk Cleanup Tools: In addition to the built-in Disk Cleanup tool in Windows, there are various third-party disk cleanup software available. These tools often offer additional features and options for optimizing your disk space. Research and choose a reputable disk cleanup software that suits your needs, and follow the instructions to clean up your storage.
By freeing up disk space, you ensure that your computer has enough room to accommodate the Windows 11 update. It helps prevent potential installation errors and improves the overall performance of your system. Once you have cleared unnecessary files and created more space, you can proceed with confidence to the next steps of the update process.
In the next section, we’ll discuss the importance of updating drivers and applications before moving forward with the Windows 11 update.
Updating Drivers and Applications
Before updating to Windows 11, it’s essential to update your drivers and applications to ensure compatibility and optimize performance. Outdated drivers and incompatible applications can cause issues during the update process and may result in functionality problems after upgrading to Windows 11. By updating your drivers and applications, you can minimize potential conflicts and ensure a smooth transition.
Here are some steps to update drivers and applications:
- Check for Driver Updates: Visit the website of your computer’s manufacturer and look for the support or downloads section. Search for the latest drivers specific to your computer model and the Windows 11 operating system. Download and install any available driver updates, particularly those related to your graphics card, network adapter, and chipset. Updating these drivers can help ensure compatibility and optimal performance with Windows 11.
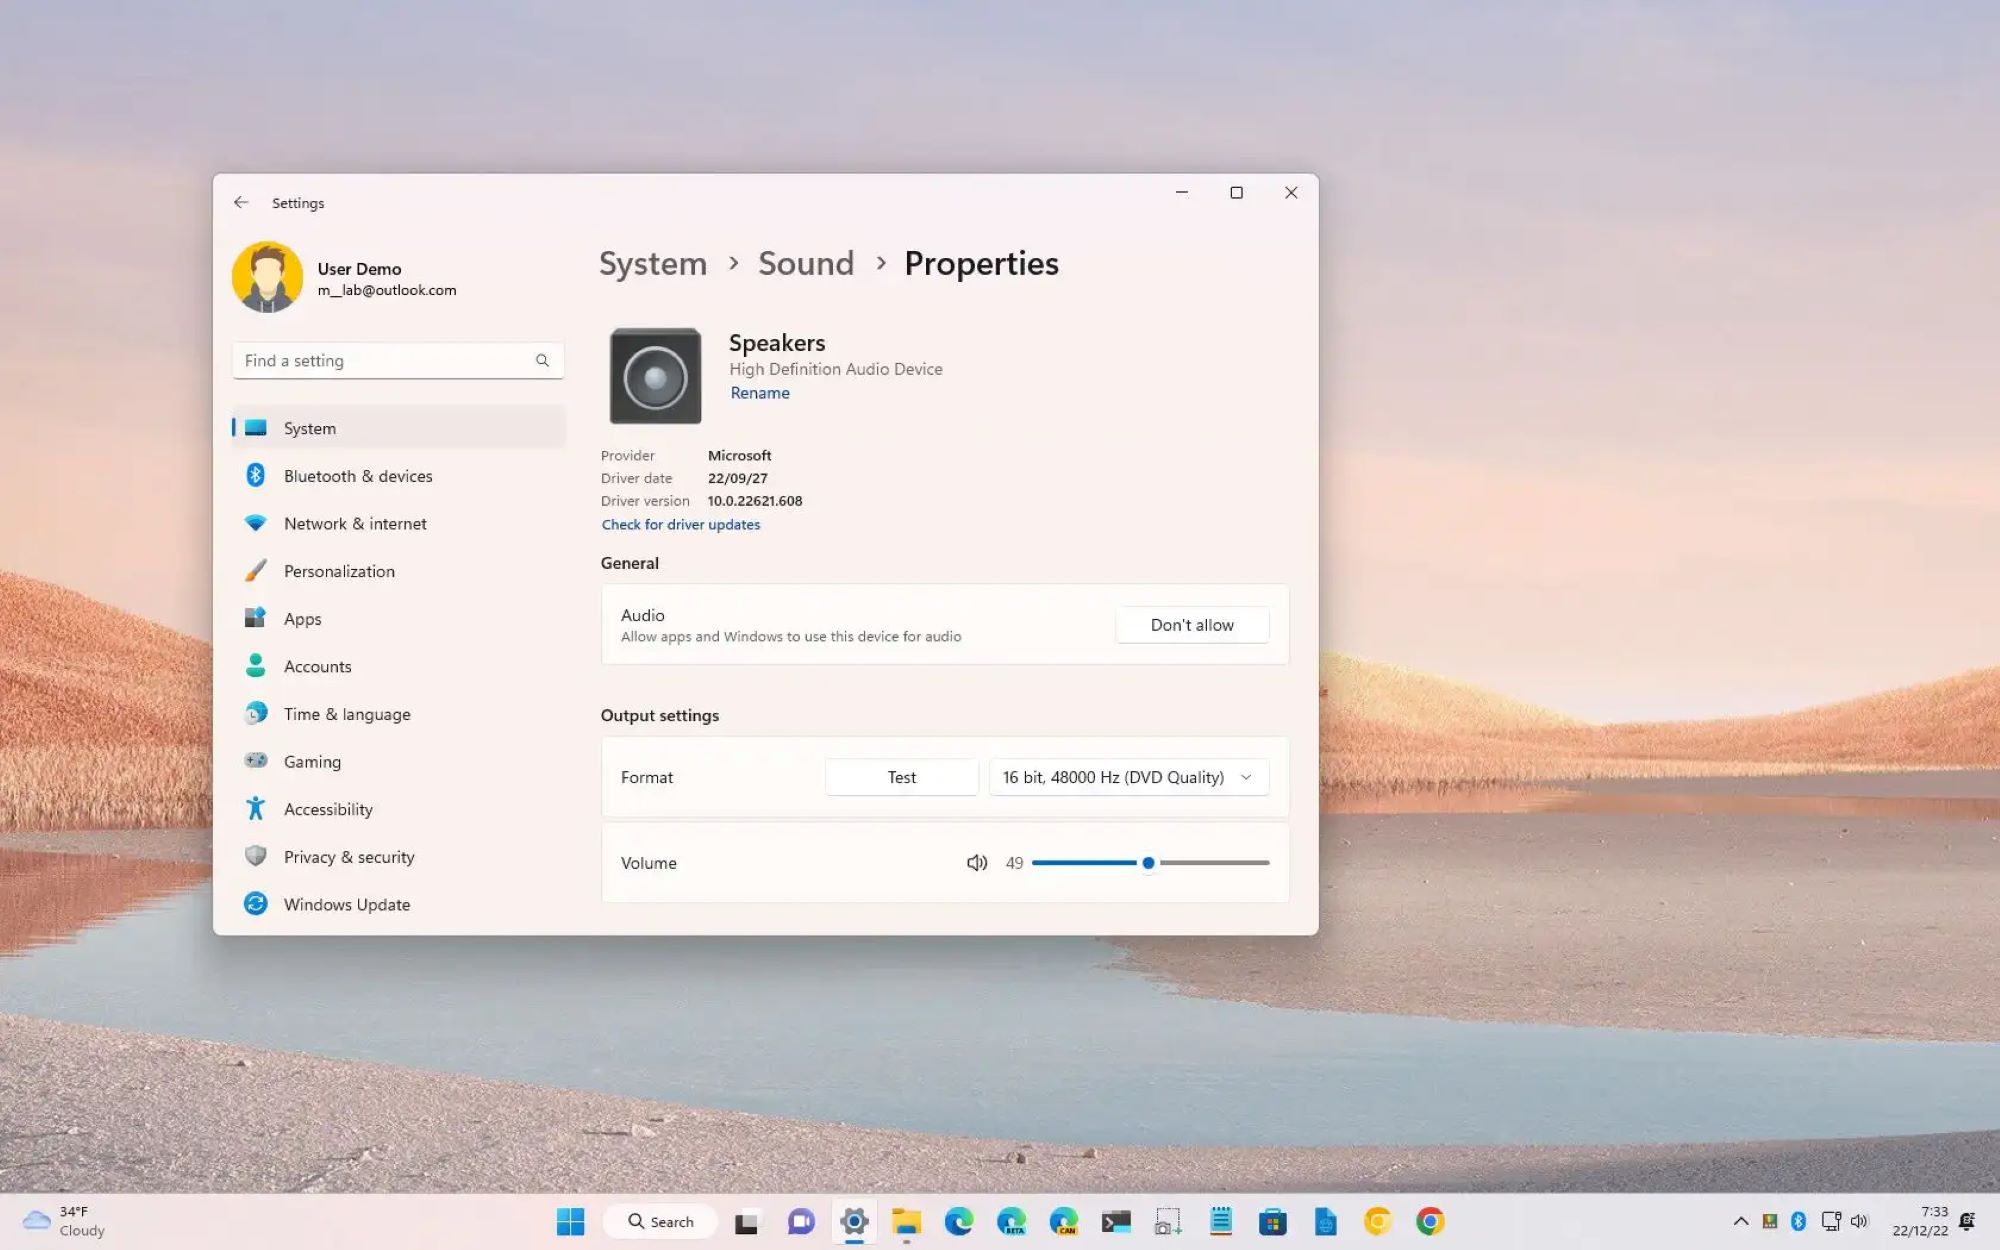
- Windows Update: Run Windows Update before commencing the update to Windows 11. Windows Update often includes driver updates for various hardware components. Start by pressing the Windows key + I to open the Settings app, then go to “Windows Update” and click on “Check for updates.” If there are any available driver updates, proceed to install them.
- Update Applications: Many applications, especially system utilities and security software, may need updates to be compatible with Windows 11. Check the official websites or support pages of your installed applications for any available updates. Look for versions specifically designed for Windows 11 or that mention compatibility with the new operating system. Install these updates to ensure smooth operation after the update.
- Use Automatic Update Tools: Some drivers and applications have automatic update tools, either built-in or provided by the manufacturer. These tools can simplify the updating process by automatically checking for updates and installing them for you. Check if your computer manufacturer or the software developers provide any such tools and utilize them to keep your system up to date.
- Compatibility Mode: In some cases, certain drivers or applications may not have updates available for Windows 11 compatibility. If you encounter compatibility issues with specific software, you can try running it in compatibility mode. Right-click on the application’s shortcut or executable file, select “Properties,” go to the “Compatibility” tab, and enable compatibility mode for the previous version of Windows that the software was designed for.
Taking the time to update your drivers and applications eliminates potential compatibility issues and ensures that your system is ready to run smoothly on Windows 11. By keeping your software up to date, you can also benefit from the latest features, bug fixes, and security enhancements offered by the updated versions.
Now that you have updated your drivers and applications, it’s time to proceed with the Windows 11 update process. In the upcoming sections, we will explore different methods to update to Windows 11, including using Windows Update, the Media Creation Tool, and performing a clean install.
Updating to Windows 11
Now that you have completed the necessary preparations, such as checking compatibility, backing up your data, freeing up disk space, and updating drivers and applications, you are ready to update to Windows 11. There are multiple methods available to update your computer, depending on your preferences and situation.
Method 1: Using Windows Update
The most straightforward way to update to Windows 11 is through the Windows Update feature, which allows you to download and install the latest version of the operating system directly from Microsoft. Here’s how to update to Windows 11 using Windows Update:
- Ensure that your computer is connected to the internet.
- Open the Settings app by pressing the Windows key + I.
- Click on “Windows Update” in the left sidebar.
- Click on the “Check for updates” button to search for available updates.
- If Windows 11 is available for your computer, you will see an option to “Download and install” the update.
- Follow the on-screen instructions to complete the installation process.
- Allow your computer to restart when prompted.
Method 2: Using the Media Creation Tool
If you prefer a manual installation method or want to create installation media for multiple devices, you can use the Media Creation Tool provided by Microsoft. Here’s how to update to Windows 11 using the Media Creation Tool:
- Visit the official Microsoft website and search for the “Windows 11 Media Creation Tool.”
- Download and run the tool on your computer.
- Read and accept the license terms.
- Choose the option to “Upgrade this PC now.”
- The tool will download the necessary files and prepare your system for the update.
- Follow the on-screen instructions to complete the installation process.
Method 3: Performing a Clean Install
If you prefer starting fresh with a clean installation of Windows 11, you can choose the clean install method. This method involves wiping your computer’s hard drive and installing Windows 11 from scratch. It’s important to note that performing a clean install will erase all existing files and applications on your computer. Make sure to back up your data before attempting this method. Here’s how to perform a clean install:
- Create a bootable USB drive with the Windows 11 installation files using the Media Creation Tool or other methods.
- Restart your computer and boot from the USB drive.
- Follow the on-screen instructions to install Windows 11.
- When prompted, select the option to perform a clean installation and format the hard drive.
- Follow the remaining installation instructions.
Regardless of the method you choose, ensure that your computer remains connected to a power source and that you have a stable internet connection during the update process. The installation may take some time, depending on your computer’s specifications and the method chosen.
After completing the update to Windows 11, take the time to customize your settings and reinstall any necessary applications. You can refer to the notes or screenshots you took earlier to replicate your preferred settings. Additionally, reinstall your applications from trusted sources, ensuring compatibility with Windows 11.
By following one of these update methods, you can enjoy the new features, enhanced performance, and sleek design of Windows 11 on your computer.
Method 1: Using Windows Update
The most straightforward way to update to Windows 11 is through the Windows Update feature, which allows you to download and install the latest version of the operating system directly from Microsoft. This method is suitable for users who prefer a simple and automated update process. Here’s how to update to Windows 11 using Windows Update:
- Ensure that your computer is connected to the internet.
- Open the Settings app by pressing the Windows key + I.
- Click on “Windows Update” in the left sidebar.
- Click on the “Check for updates” button to search for available updates.
- If Windows 11 is available for your computer, you will see an option to “Download and install” the update.
- Click on the “Download and install” button to initiate the update process.
- Wait for the update to download and install on your computer. This may take some time, depending on your internet connection speed and the size of the update.
- Once the installation is complete, your computer will prompt you to restart.
- Click on the “Restart now” button to restart your computer and complete the update process.
- After the restart, your computer will boot into Windows 11, and you can start exploring the new features and improvements.
It’s essential to note that during the update process, your computer may restart multiple times to complete the installation. It’s crucial to allow these restarts to occur without interruption for a successful update. Additionally, ensure that your computer is connected to a reliable power source to prevent any power-related interruptions during the update.
If Windows 11 is not available for your computer through Windows Update, it may indicate that your system does not meet the minimum hardware requirements or that Microsoft has not released the update for your device yet. In such cases, you can check Microsoft’s official website for information on the availability of Windows 11 for your specific computer model or consider alternative update methods.
Once you have successfully updated to Windows 11, take some time to explore the new features, user interface changes, and enhanced performance. Customize your settings and reinstall any necessary applications to ensure compatibility with the new operating system.
Now that you are familiar with the Windows Update method, let’s explore other options, such as using the Media Creation Tool or performing a clean install, in the following sections.
Method 2: Using the Media Creation Tool
If you prefer a manual installation method or want to create installation media for multiple devices, you can use the Media Creation Tool provided by Microsoft to update to Windows 11. This method allows you to download the necessary files and perform the installation at your convenience. Here’s how to update to Windows 11 using the Media Creation Tool:
- Visit the official Microsoft website and search for the “Windows 11 Media Creation Tool.”
- Download and run the tool on your computer. Make sure to download the version compatible with your system architecture (32-bit or 64-bit).
- Read and accept the license terms presented by the Media Creation Tool.
- Choose the option to “Upgrade this PC now” and click on “Next.”
- The tool will start downloading the necessary files for the Windows 11 update. This process may take some time, depending on your internet connection speed.
- Once the download is complete, the tool will start preparing your system for the update.
- Follow the on-screen instructions provided by the Media Creation Tool to complete the installation process.
- During the installation, your computer may restart multiple times. It’s important not to interrupt the process and allow it to proceed uninterrupted.
- After the installation is complete, your computer will boot into Windows 11, and you can start exploring the updated operating system.
Using the Media Creation Tool provides flexibility and control over the update process. It allows you to create installation media such as a bootable USB drive, which can be helpful for updating multiple devices or performing a clean install of Windows 11. However, it’s important to note that performing a clean install will erase all existing files and applications on your computer. Make sure to back up your data before attempting this method.
Ensure that your computer is connected to a stable power source during the update process to prevent any interruptions. Additionally, have patience during the download and installation, as the duration may vary depending on your internet connection speed and the size of the Windows 11 update files.
Now that you are familiar with the Media Creation Tool method, you have the option to update to Windows 11 through this manual process. In the next section, we will explore another method – performing a clean install of Windows 11.
Method 3: Performing a Clean Install
If you prefer starting fresh or want to ensure a clean and optimized installation of Windows 11, you can choose to perform a clean install. This method involves wiping your computer’s hard drive and installing Windows 11 from scratch. It’s important to note that performing a clean install will erase all existing files and applications on your computer. Make sure to back up your data before attempting this method. Here’s how to perform a clean install of Windows 11:
- Create a bootable USB drive with the Windows 11 installation files using the Media Creation Tool or other methods.
- Ensure that your computer is connected to a stable power source and insert the bootable USB drive.
- Restart your computer and access the BIOS or UEFI settings to change the boot order. Set the USB drive as the first boot device.
- Save the BIOS or UEFI settings and exit, allowing your computer to restart.
- Follow the on-screen instructions to boot from the USB drive.
- Once you reach the Windows 11 installation screen, select your language, time zone, and keyboard preferences.
- Click on “Install now” to begin the installation process.
- Enter your Windows 11 product key if prompted. If you don’t have a product key, you can choose the option to proceed without entering one.
- Read and accept the license terms.
- Select the “Custom: Install Windows only (advanced)” option.
- Choose the drive where you want to install Windows 11 and click on “Next.”
- Windows 11 will start installing on your chosen drive.
- Follow the remaining on-screen instructions to complete the installation.
- After the installation is complete, your computer will restart, and you can start setting up Windows 11 by following the prompts.
Performing a clean install of Windows 11 ensures a fresh start and can help eliminate any potential issues or conflicts that may have accumulated over time. It also allows you to take full advantage of the new features and performance improvements that Windows 11 offers.
Remember, performing a clean install will erase all the files and applications on your computer. Ensure that you have backed up all necessary data and have the installation media and product key (if applicable) ready before proceeding with the clean install.
Now that you are familiar with the clean install method, you have the option to perform a fresh installation of Windows 11. However, exercise caution and ensure that you have the necessary backups and product keys before proceeding.
Troubleshooting Common Issues
While updating to Windows 11, you may encounter various issues that can disrupt the smooth installation process. It’s essential to be prepared and familiar with common troubleshooting steps to overcome these challenges. Here are some common issues and their potential solutions:
- Compatibility Errors: If you receive an error message stating that your computer is not compatible with Windows 11, despite meeting the minimum requirements, try updating your BIOS or UEFI firmware to the latest version. Check your computer manufacturer’s website for firmware updates specifically designed for Windows 11 compatibility.
- Insufficient Disk Space: If you receive an error indicating that you do not have enough disk space for the Windows 11 update, you can free up disk space by deleting temporary files, uninstalling unused applications, and moving large files to an external storage device. Ensure that you have enough free space before attempting the update.
- Installation Stuck or Frozen: If the installation process gets stuck or frozen at a certain percentage, try restarting your computer and attempt the update again. If the issue persists, disconnect any external devices or peripherals that are not necessary for the update, such as printers or external hard drives. Also, ensure that your computer has a stable internet connection during the update process.
- Driver and Application Compatibility: If certain drivers or applications are incompatible with Windows 11, you may encounter issues during or after the update. Update your drivers to the latest versions compatible with Windows 11, and check the application developer’s website for any updates or compatibility information. If compatibility issues persist, consider contacting the respective manufacturer for further assistance or explore alternative software options.
- Error Codes: If you encounter specific error codes during the update process, note them down and search for them on Microsoft’s official support website or community forums. Microsoft often provides detailed instructions or fixes for common error codes, helping you troubleshoot and resolve the issue.
- System Restore: If you encounter critical issues or errors after updating to Windows 11, you can use the System Restore feature to roll back to a previous restore point. This reverts your system to an earlier state, undoing any changes made during the update. Access the System Restore feature through the Windows Recovery Environment or by searching for “System Restore” in the Start menu.
Remember, troubleshooting steps may vary depending on the specific issue, and not all issues can be resolved with simple solutions. If you are unsure or encounter persistent problems during the Windows 11 update, consider seeking assistance from Microsoft support or consulting with a professional technician.
By being prepared and familiar with troubleshooting steps for common issues, you can overcome challenges that may arise during the Windows 11 update process. Through perseverance and proper guidance, you can successfully update to Windows 11 and enjoy its new features and improvements.
Conclusion
Updating to Windows 11 can bring a fresh and improved experience to your computer, with updated features, enhanced performance, and a sleek design. By following the necessary steps, such as checking compatibility, backing up your data, freeing up disk space, updating drivers and applications, and choosing the appropriate update method, you can successfully transition to Windows 11.
Throughout this guide, we outlined three methods to update to Windows 11: using Windows Update, utilizing the Media Creation Tool, or performing a clean install. Each method offers its own benefits and considerations, allowing you to choose the one that aligns best with your preferences and needs.
During the update process, it’s important to be aware of potential issues and their troubleshooting solutions. By troubleshooting common issues like compatibility errors, insufficient disk space, installation freezes, driver and application compatibility, error codes, and utilizing system restore, you can address any obstacles that may arise along the way.
As you embark on the Windows 11 update journey, remember to exercise caution and ensure that you have backups of your important files and applications. Take note of your preferred settings and be prepared for possible restarts during the installation process.
Ultimately, updating to Windows 11 offers you an opportunity to enjoy the latest features, improved performance, and modern user interface. It’s an exciting step to enhance your computing experience and stay up-to-date with the latest technology.
If you encounter any challenges or need further assistance during the update process, don’t hesitate to consult official Microsoft resources, community forums, or seek help from technical professionals. With perseverance and the right guidance, you can successfully update to Windows 11 and take full advantage of its benefits.