Introduction
Welcome to the world of email communication! In today’s digital age, email has become an essential tool for personal and professional communication. Whether you are sending a quick message, a formal business proposal, or sharing important documents, having an email account is a necessity.
In this article, we will guide you through the process of adding an email account. We’ll cover everything from signing up for an email account to customizing your email settings. By the end of this article, you’ll have all the knowledge you need to get started with email communication.
Adding an email account is a straightforward process that can be completed in just a few steps. Whether you are using a popular email provider like Gmail, Yahoo Mail, or Outlook, or a lesser-known provider, the basic steps remain the same. So, let’s dive in and get started!
Before we begin, make sure you have an active internet connection and a device, such as a computer, smartphone, or tablet, to access your email account. If you meet these prerequisites, you are ready to embark on this email journey with us.
Now, without further ado, let’s proceed to step one: signing up for an email account. This initial step will allow you to create your unique email address, which will serve as your online identity for sending and receiving emails.
Step 1: Sign Up for an Email Account
To add an email account, the first step is to sign up for an email account. There are various email service providers available, such as Gmail, Yahoo Mail, Outlook, and more. In this step, we will guide you through the process of signing up and creating your email address.
1.1 Choose an Email Service Provider:
Start by selecting an email service provider that suits your needs. Consider factors such as storage space, user interface, security features, and additional services provided by the email provider. Some popular options include Gmail, which offers a seamless integration with other Google services, Yahoo Mail, known for its user-friendly interface, and Outlook, a widely used email service from Microsoft.
1.2 Visit the Email Provider’s Website:
Once you have chosen an email service provider, open your web browser and visit their official website. You can do this by entering the provider’s name in the search engine or directly typing the URL into the address bar.
1.3 Click on the “Sign Up” or “Create an Account” Button:
Most email service providers prominently display a “Sign Up” or “Create an Account” button on their homepage. Locate this button and click on it to begin the account creation process.
1.4 Fill Out the Registration Form:
Once you click on the “Sign Up” button, you will be redirected to a registration form. In this form, you will be asked to provide certain information, including your name, desired email address, password, and sometimes additional personal details such as phone number or alternate email address. Fill out this form accurately and ensure that your chosen email address is unique and available.
1.5 Choose a Strong Password:
When creating your account, it is crucial to choose a strong password to protect your email from unauthorized access. Combine uppercase and lowercase letters, numbers, and special characters to create a password that is difficult to guess. Avoid using common phrases, your name, or birth date as your password.
1.6 Agree to the Terms of Service:
Read through the email provider’s terms of service and privacy policy, and once you are comfortable with them, tick the box to agree to these terms. It is essential to understand the policies regarding data usage and privacy protections.
1.7 Complete the Account Creation Process:
Click on the “Create Account” or similar button to complete the email account creation process. The provider will verify your email address, and in some cases may require additional verification steps such as phone number verification.
1.8 Congratulations! You Have Created an Email Account:
Once the account creation process is complete, you will receive a confirmation message or be redirected to your newly created email inbox. Congratulations! You have successfully signed up for an email account.
Now that you have created your email account, you are ready to move on to the next steps of adding an email account and making the most out of your email experience.
Step 2: Open Your Email Provider’s Website
Now that you have successfully signed up for an email account, it’s time to open your email provider’s website and access your email inbox. In this step, we will guide you through the process of finding and accessing the website of your email service provider.
2.1 Open Your Web Browser:
Start by opening your preferred web browser on your device. Common web browsers include Google Chrome, Mozilla Firefox, Safari, and Microsoft Edge.
2.2 Type the URL:
In the address bar of your web browser, type the URL of your email provider’s website. For example, if you have signed up for a Gmail account, type “www.gmail.com”. If you are using Yahoo Mail, type “www.mail.yahoo.com”.
2.3 Perform a Search:
If you don’t remember the URL of your email provider’s website or you are using a less popular email service, you can perform a search using a search engine like Google. Simply enter the name of your email provider in the search bar and click on the search button.
2.4 Click on the Search Result:
From the search results, locate the official website of your email service provider and click on the appropriate link. It is recommended to choose the result that represents the official website to ensure security and reliability.
2.5 Bookmark the Website:
If you plan to frequently access your email account, it’s a good idea to bookmark the website of your email provider. This will save you time in the future by providing quick access to your email inbox without having to perform a search each time.
2.6 Enter Your Email Address:
Once you reach the website, you will typically find a sign-in or log-in button on the homepage. Click on this button and you will be directed to a sign-in page. Enter the email address you used during the account creation process.
2.7 Enter Your Password:
Next, enter the password associated with your email account. It is important to remember that passwords are case-sensitive, so ensure that you enter it correctly.
2.8 Sign In to Your Email Account:
After entering your email address and password, click on the sign-in or log-in button to access your email account. Voila! You have successfully opened your email provider’s website and accessed your email inbox.
Now that you are logged in, you can explore the various features and options available to you in your email account. In the next steps, we will guide you through customizing your email settings and composing emails.
Step 3: Click on the “Sign In” or “Log In” Button
Once you have opened your email provider’s website, the next step is to find and click on the “Sign In” or “Log In” button. This button will allow you to enter your email credentials and gain access to your email account. In this step, we will guide you through the process of locating and clicking on the “Sign In” or “Log In” button in order to log in to your email account.
3.1 Locate the Sign-In or Log-In Button:
On the website of your email provider, search for the “Sign In” or “Log In” button. This button is typically located on the top right corner of the webpage, or it may be prominently displayed on the homepage. Look for a button that indicates user login or email access.
3.2 Click on the Sign-In or Log-In Button:
Once you have found the “Sign In” or “Log In” button, click on it to proceed to the login page. This action will take you to a new page where you can enter your email address and password.
3.3 Enter Your Email Address:
On the login page, you will see a field to enter your email address. Carefully type in the email address that you used to create your account. Double-check it to make sure there are no typos that might prevent you from logging in.
3.4 Enter Your Password:
The next field on the login page is for your password. Type in the password associated with your email account. Remember that passwords are case-sensitive, so enter it exactly as you did during the account creation process.
3.5 Enable Auto-fill or Save Password:
If you are using your personal device and have a secure password management tool, you may have the option to enable auto-fill or save your password. This can make it easier and quicker to log in to your email account in the future. However, exercise caution when using this feature on shared or public devices.
3.6 Click on the “Sign In” or “Log In” Button:
After entering your email address and password, double-check that the information is correct. Once you are confident, click on the “Sign In” or “Log In” button to proceed. This action will initiate the login process and verify your credentials.
3.7 Wait for Account Verification:
After clicking the “Sign In” or “Log In” button, your email provider will verify your credentials and authenticate your account. This process may take a few seconds, so be patient and wait for the account verification to complete.
3.8 Access Your Email Account:
Once your account is verified, you will be redirected to your email account’s dashboard or inbox. Congratulations! You have successfully clicked on the “Sign In” or “Log In” button and gained access to your email account.
Now that you have logged in to your email account, you can explore the features and functionalities available to you. In the following steps, we will guide you through email customization and composing emails to make the most out of your email experience.
Step 4: Enter Your Email Address
After clicking on the “Sign In” or “Log In” button on your email provider’s website, the next step is to enter your email address. The email address serves as your unique identifier, allowing the email system to direct incoming messages to your specific account. In this step, we will guide you through the process of entering your email address to proceed with logging in to your email account.
4.1 Locate the Email Address Field:
On the login page of your email provider, look for the designated field or box where you need to enter your email address. This field is typically labeled or highlighted as “Email Address” or something similar.
4.2 Double-check Your Email Address:
Before entering your email address, take a moment to verify that you are typing it correctly. It is important to enter the exact email address that you used during the account creation process. Pay attention to spelling, punctuation, and any added numbers or symbols.
4.3 Type in Your Email Address:
Once you have located the email address field and double-checked the accuracy of your email address, start typing it into the designated box. Use the appropriate combination of lowercase and uppercase letters, as necessary, based on the format of your email address.
4.4 Avoid Copy-Pasting Errors:
If you choose to copy and paste your email address from another source (such as a text document or note-taking app), be cautious about unintentionally including extra spaces or characters. It’s best to manually type in your email address to ensure accuracy.
4.5 Be Aware of Case Sensitivity:
Remember that email addresses are generally not case-sensitive. This means that whether you enter “Username@example.com” or “username@example.com,” both variations should be accepted as the same email address. However, some email providers may still be case-sensitive, so it’s advisable to enter your email address with the correct capitalization.
4.6 Check for Auto-fill or Saved Information:
If you have previously logged in from the same device or browser and have enabled auto-fill or saved your email address, you may see the email address field pre-populated with your information. Verify that the pre-filled email address is correct before proceeding.
4.7 Avoid Using Public Devices:
When entering your email address, exercise caution if you are using a public device, such as a computer in a library or an internet café. Avoid saving your email address or enabling auto-fill on such devices to protect your personal information.
4.8 Proceed to the Next Step:
Once you have entered your email address correctly and reviewed it for accuracy, you are now ready to move on to the next step in the login process. The next step typically involves entering your password, which we will cover in the following step.
Congratulations on successfully entering your email address! You are one step closer to accessing your email account and all its associated features and benefits.
Step 5: Click on the “Next” or “Continue” Button
After entering your email address in the designated field, the next step in the login process is to click on the “Next” or “Continue” button. This action will allow you to proceed to the next screen and enter your password to access your email account. In this step, we will guide you through the process of locating and clicking on the “Next” or “Continue” button to proceed with logging in to your email account.
5.1 Locate the “Next” or “Continue” Button:
On the login page of your email provider, carefully scan the page to find the “Next” or “Continue” button. This button is usually placed below the email address field or adjacent to it. It may be labeled with “Next” or “Continue,” or it could be an arrow symbol indicating progression.
5.2 Read the Instructions, If Provided:
In some cases, email providers may provide additional instructions or guidance before clicking on the “Next” or “Continue” button. Take a moment to review any relevant information or messages displayed on the page to ensure that you are following the correct process.
5.3 Understand the Function of the Button:
The “Next” or “Continue” button serves as the trigger to move forward in the login process and proceed to the password entry step. It signifies that you have entered your email address correctly and are ready to provide your password to access your email account.
5.4 Ensure You Are Ready to Continue:
Before clicking on the “Next” or “Continue” button, double-check that you are prepared to proceed. Confirm that you have entered the correct email address and are ready to enter your password. Once you click the button, you will be directed to the password entry screen, and there may be no way to go back without refreshing the page.
5.5 Position the Cursor Over the Button:
Using your mouse or trackpad, position the cursor over the “Next” or “Continue” button on the screen. This will help ensure accuracy when clicking and avoid accidental clicks on other buttons or links.
5.6 Click on the “Next” or “Continue” Button:
With the cursor in the correct position, press the left mouse button or tap on your trackpad to click on the “Next” or “Continue” button. A click action will trigger the continuation of the login process and prompt you to enter your password in the next step.
5.7 Wait for Processing:
After clicking on the “Next” or “Continue” button, the system may take a brief moment to process the request and validate your email address. This processing time can vary depending on the speed of your internet connection and the email provider’s server load. Wait patiently for the next screen to appear.
5.8 Proceed to the Next Step:
Once the processing is complete, you will be directed to the password entry screen. In the next step, we will guide you through entering your password to finalize the login process and gain access to your email account. Keep reading to learn more!
Pat yourself on the back for successfully clicking on the “Next” or “Continue” button. You are now closer to accessing your email account and engaging with your messages, contacts, and various email features.
Step 6: Enter Your Password
After clicking on the “Next” or “Continue” button, you will now proceed to the password entry step. In this step, you will enter the password associated with your email account to authenticate and gain access to your email account. Follow the instructions below to safely and securely enter your password.
6.1 Locate the Password Field:
On the password entry screen, locate the designated field where you need to enter your password. This field is typically labeled as “Password” or “Enter Your Password”. It may be masked with asterisks or dots for security purposes.
6.2 Remember Your Password:
Before entering your password, make sure you remember it correctly. It is crucial to enter the exact password associated with your email account. Take a moment to recall your password and ensure its accuracy before proceeding.
6.3 Be Mindful of Case-Sensitivity:
Many email providers treat passwords as case-sensitive, meaning that uppercase and lowercase letters are considered to be different. Pay attention to the correct capitalization of your password as you enter it. For example, “Password” and “password” would be considered two different passwords.
6.4 Type in Your Password:
Start entering your password into the designated field. Take your time to input each character accurately. Be aware of any additional characters, numbers, or special characters that may be part of your password. Ensure that your password is correctly spelled and contains the right combination of characters.
6.5 Use the On-Screen Keyboard (If Available):
Some email providers offer an on-screen keyboard, which can be used to enter your password securely. This can protect against keystroke logging software or potential security breaches. If an on-screen keyboard is available, consider using it for added password protection.
6.6 Double-Check for Typos:
Before proceeding, double-check your password entry for any potential typos or mistakes. Individual characters might mistakenly be mistyped, which could result in a failed login attempt. Ensure that every character of your password is correct before moving forward.
6.7 Utilize the “Show Password” Option (If Available):
If available, some email providers offer a “Show Password” option that can temporarily reveal your password on-screen. This is helpful for verifying that you have entered the correct characters. However, exercise caution when using this option on shared or public devices to maintain the privacy and security of your password.
6.8 Click on the “Sign In” or “Log In” Button:
After entering your password accurately, click on the “Sign In” or “Log In” button to proceed. This will initiate the authentication process, and the email provider will verify your password’s validity.
6.9 Wait for Authentication:
Once you have clicked on the “Sign In” or “Log In” button, the email provider will authenticate your entered password. This process may take a few seconds as the system verifies the password against the stored credentials. Be patient and wait for the authentication to complete.
6.10 Access Your Email Account:
Congratulations! After successfully entering your password and completing the authentication process, you will gain access to your email account. You will be redirected to your email inbox or the main page of your email account, ready to explore and engage with your messages.
You have completed the password entry step and successfully entered your password. You are now logged in to your email account, ready to enjoy the convenience and benefits of email communication.
Step 7: Click on the “Sign In” or “Log In” Button (Again)
After entering your password, the next step is to click on the “Sign In” or “Log In” button once again. Clicking this button will finalize the login process and grant you full access to your email account. Follow the instructions below to successfully click on the “Sign In” or “Log In” button and log in to your email account.
7.1 Locate the “Sign In” or “Log In” Button:
On the password entry screen, carefully locate the button labeled as “Sign In” or “Log In”. This button is typically positioned below the password field and may be visually distinguishable from other buttons or links on the page.
7.2 Understand the Function of the Button:
The “Sign In” or “Log In” button serves as the final step of the login process. Clicking this button affirms that you have entered your email address and password correctly and initiates the verification of your credentials to gain access to your email account.
7.3 Confirm You Are Ready to Proceed:
Prior to clicking the “Sign In” or “Log In” button, ensure that you are prepared to proceed with logging in to your email account. Double-check that you have correctly entered your password and that you are logging in from a secure and trusted device.
7.4 Position the Cursor Over the Button:
Using your mouse or trackpad, position the cursor over the “Sign In” or “Log In” button. This will help ensure accuracy when clicking and avoid unintentional clicks on other buttons or links.
7.5 Click on the “Sign In” or “Log In” Button:
With the cursor in the correct position, press the left mouse button or tap on your trackpad to click on the “Sign In” or “Log In” button. This click action will trigger the final verification process and initiate the login to your email account.
7.6 Wait for Verification:
After clicking the “Sign In” or “Log In” button, a verification process will take place to ensure the accuracy of your credentials. The email provider’s system will validate your login information, including your email address and password, before granting you access to your email account. This process may take a few moments, so be patient and wait for the verification to complete.
7.7 Access Your Email Account:
Once the verification process is complete, you will be granted access to your email account. You will be redirected to your email inbox or the main page of your email account, where you can start managing your emails, sending messages, and exploring the various features and settings offered by your email provider.
Congratulations! By successfully clicking on the “Sign In” or “Log In” button for the second time, you have now securely logged in to your email account. Enjoy the convenience and benefits of accessing your messages and engaging with your contacts through email.
Step 8: Explore Your Email Inbox
After successfully logging in to your email account, it’s time to explore your email inbox. This is where all your received emails will be stored, allowing you to view, organize, and manage your messages efficiently. In this step, we will guide you through the process of familiarizing yourself with your email inbox and its key features.
8.1 Navigate to Your Inbox:
Upon logging in, you will typically be automatically directed to your email inbox. If not, look for a tab or link labeled “Inbox” or an icon resembling an envelope. Click on it to access your inbox.
8.2 Familiarize Yourself with the Layout:
Take a moment to familiarize yourself with the layout of your email inbox. The user interface may vary depending on the email provider, but common elements include a list of emails in chronological order, folders or labels for organization, and a toolbar with options for managing your messages.
8.3 Sort and Organize Emails:
To make it easier to find specific emails, you can sort your inbox by various criteria such as date, sender, subject, or importance. Explore the sorting options available within your email provider’s interface and customize them to suit your preferences.
8.4 View and Open Emails:
To read a specific email, click on its subject line or sender’s name in your inbox. The selected email will open in a new window or within the same interface, allowing you to view its content, attachments, and any replies or conversation threads.
8.5 Take Action on Emails:
Within your email inbox, you can perform various actions on individual or multiple emails. Common actions include replying, forwarding, marking as spam, deleting, archiving, or moving emails to specific folders. Familiarize yourself with the available options and tools to manage your emails effectively.
8.6 Utilize Filters and Search Functions:
If you have a large number of emails, using filters and search functions can help you locate specific messages quickly. Filters can automatically categorize or prioritize incoming emails based on specific criteria, while search functions allow you to search for keywords, senders, or attachments within your inbox.
8.7 Customize Your Inbox Layout:
Many email providers offer customization options to tailor your inbox layout to your preferences. Explore the settings or preferences section of your email account to adjust the display density, enable or disable conversation view, and choose the information displayed for each email in the list.
8.8 Manage Folders and Labels:
To keep your inbox organized, you can create folders or labels to categorize your emails. This allows you to easily find and access specific groups of messages. Learn how to create, rename, and manage folders or labels within your email provider’s interface.
8.9 Check Additional Tabs or Categories:
Some email providers automatically sort incoming emails into different tabs or categories based on their content or priority. Navigate through these additional tabs, such as “Promotions,” “Social,” or “Spam,” to ensure you don’t miss any important emails that may have been filtered automatically.
8.10 Take note of Useful Shortcuts and Features:
Email providers often offer keyboard shortcuts and additional features to enhance your productivity and efficiency. Take the time to explore and learn these shortcuts to save time when managing your emails.
By familiarizing yourself with your email inbox and its features, you will be able to efficiently manage your email communications, stay organized, and ensure that important messages are not overlooked.
Step 9: Customize Your Email Settings
After exploring your email inbox, it’s time to customize your email settings. This step allows you to personalize your email experience and tailor the functionality of your email account to meet your specific needs. In this step, we will guide you through the process of customizing your email settings.
9.1 Locate the Settings or Preferences Menu:
Start by locating the settings or preferences menu within your email account. This menu is typically represented by a gear or cogwheel icon, placed either in the top-right corner or under a drop-down menu. Click on it to access the settings options.
9.2 Explore General Settings:
Within the settings menu, you will find a variety of customizable options. Begin by exploring the general settings, where you can personalize your email account’s basics, such as your display name, signature, time zone, and language preferences.
9.3 Manage Account Security and Privacy:
Next, focus on the account security and privacy settings. Here, you can enable two-factor authentication, choose your password recovery options, and review your privacy settings. Adjust these settings to ensure the highest level of security and privacy for your email account.
9.4 Set up Filters and Rules:
Email filters and rules allow you to automate actions for incoming messages based on specific criteria. Explore the filters or rules section and create rules to automatically sort, label, forward, or delete incoming emails, saving you time and helping you manage your inbox more efficiently.
9.5 Customize Notifications and Alerts:
Adjust the notifications and alerts settings to receive immediate or periodic notifications for new emails or important events. Choose whether to receive desktop notifications, email alerts, or mobile push notifications, and set the preferences according to your workflow and preferences.
9.6 Manage Signature and Auto-Responders:
Create a customized email signature that will be appended to every outgoing email. This signature can include your name, job title, contact details, or any other information you would like to include. Additionally, explore the auto-responder settings to set up automatic replies when you are away or unable to respond promptly.
9.7 Organize Folders and Labels:
Within the settings menu, you may find options to manage your folders or labels more extensively. Adjust the organization and hierarchy of your folders or labels, rename or delete them, or create new ones to better categorize and manage your emails.
9.8 Set up Email Forwarding or Import:
If you have multiple email accounts or want to consolidate your emails, look for options to set up email forwarding or import. Forward incoming emails from other accounts to your primary email address or import emails from other accounts into your current email account for a single, unified inbox.
9.9 Explore Advanced Features:
For more advanced users, delve into the advanced features or experimental settings within the settings menu. This may include options to enable or disable specific functionalities, adjust interface elements, or integrate third-party applications or services with your email account.
9.10 Save and Update Settings:
After making changes to your email settings, be sure to save your preferences or update your settings. Look for a “Save” or “Apply” button at the bottom of the settings page. Once you have saved your settings, they will take effect, and your email account will reflect the customized configurations.
By customizing your email settings, you can personalize and optimize your email account to suit your preferences and workflow. Take the time to explore and adjust these settings to enhance your email experience and make the most out of your email communication.
Step 10: Start Composing Emails
Now that you have set up your email account, explored your inbox, and customized your settings, it’s time to start composing emails. Composing emails allows you to communicate with others, whether it’s for personal or professional purposes. Follow the steps below to effectively compose and send emails.
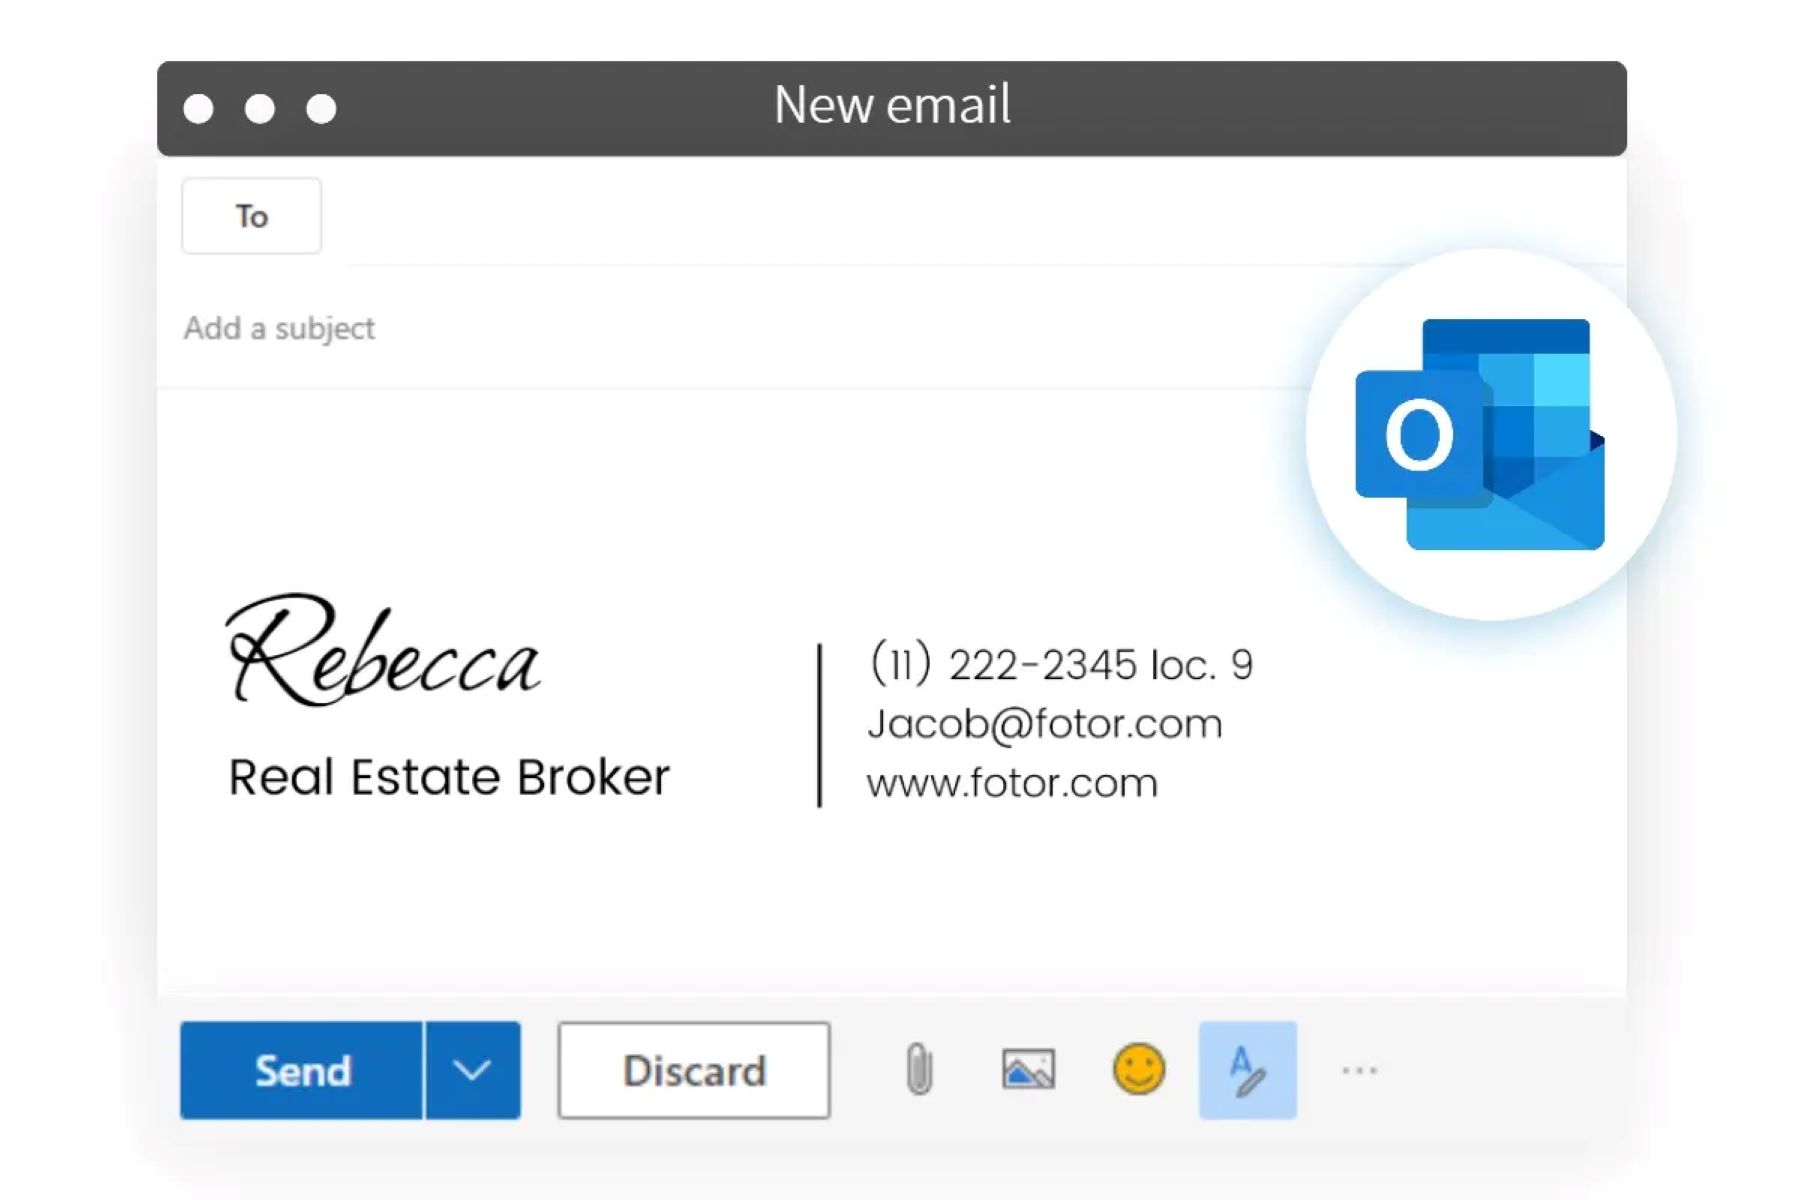
10.1 Click on the “Compose” or “New Email” Button:
To start composing an email, look for the “Compose” or “New Email” button. This button is usually located prominently within your email interface, often represented by a pencil or the words “Compose” or “New.”
10.2 Enter the Recipient’s Email Address:
In the “To” field, enter the email address of the recipient(s) to whom you want to send the email. You can enter multiple email addresses if you want to send the email to multiple recipients.
10.3 Fill in the Subject Line:
In the subject line, provide a concise and descriptive summary of the email’s content. The subject line is meant to grab the recipient’s attention and provide an overview of the email’s purpose.
10.4 Compose the Email Body:
In the main email body, type your message. Start with a warm greeting, such as “Hello” or “Hi,” followed by the recipient’s name. Then, express the main content of your email, keeping it clear, concise, and organized. Use proper paragraphs, punctuation, and formatting techniques like bullet points or numbered lists for readability.
10.5 Include Attachments (If Needed):
If you want to send files, documents, or images along with your email, you can attach them using the attachment option available in your email interface. Click on the “Attach” button and select the files you want to include. Be mindful of attachment size limitations imposed by your email provider.
10.6 Proofread Your Email:
Before sending your email, take a moment to proofread it. Carefully read through your message, checking for any grammatical errors, spelling mistakes, or unclear sentences. Ensure that your email conveys your intended message clearly and professionally.
10.7 Add a Closing and Your Name:
End your email with a closing, such as “Best regards,” “Sincerely,” or “Thank you,” followed by your name. This adds a polite and professional touch to your email.
10.8 Review and Send:
Once you have proofread your email and are satisfied with its content, review all the details, including the recipient’s email address, the subject line, and any attachments. Verify that everything is accurate before clicking the “Send” button.
10.9 Save a Copy (Optional):
You may have the option to save a copy of the email you just composed. This can be useful for your reference or to track your sent messages. Check for any “Save” or “Save as Draft” options either within the email composition window or in your email provider’s interface.
10.10 Congratulations! Your Email Has Been Sent:
Once you hit the “Send” button, your email is sent to the recipients you specified. Depending on the email provider and the recipient’s settings, you may receive a notification when the email is delivered to the recipient’s inbox.
Now that you have mastered the art of composing emails, you can effectively communicate and stay in touch with your contacts, friends, clients, and colleagues through email. Remember to use proper etiquette and maintain professionalism in your email correspondence.
Conclusion
Congratulations on successfully adding an email account and mastering the process of composing and sending emails! Email communication plays a significant role in our personal and professional lives, allowing us to stay connected, exchange information, and collaborate with others. By following the steps outlined in this guide, you have gained the knowledge and skills to navigate the world of email confidently.
We started by signing up for an email account, selecting an email service provider, and creating a unique email address. Then, we walked through the process of opening your email provider’s website, entering your email address, and password to log in. Once inside your email account, we explored the various features of your email inbox, such as managing emails, sorting and organizing messages, and utilizing search and filtering options.
We also covered customizing your email settings to personalize your account, adjust privacy and security preferences, create filters and rules, and manage folders and labels. Lastly, we learned how to compose emails effectively, including entering recipients’ email addresses, writing clear and concise content, attaching files, and sending your messages with professionalism and etiquette.
Remember, email is a powerful communication tool, but it’s essential to use it responsibly and respectfully. Keep your inbox organized, respond to emails promptly, and be mindful of email etiquette, such as using a professional tone and refraining from forwarding irrelevant or sensitive information without permission.
By mastering the art of email communication, you are equipped to stay connected, collaborate with others, and maintain effective communication in both personal and professional settings. Take the knowledge gained from this guide and continue to explore the features and capabilities of your email provider and email account. Stay organized, keep your information secure, and make the most out of the power of email.
Happy emailing!