Introduction
In today’s digital world, smartphones have become an indispensable part of our lives. From communication to entertainment, we rely on these pocket-sized devices for multiple tasks. One of the lesser-known features of smartphones is their ability to connect and print directly from the device itself. Gone are the days of transferring files to a computer or relying on a separate printer. Now, with a few simple steps, you can print documents, photos, and more directly from your Android phone.
Printing from an Android phone has become incredibly accessible, thanks to advancements in technology and the availability of printing apps. Whether you’re looking to print important documents for work, school assignments, or even memorable photos from your vacation, it’s now easier than ever before. In this comprehensive guide, we will walk you through the step-by-step process of printing from your Android phone, ensuring that you can harness the full potential of your device.
Before diving into the details, it’s important to note that the printing process may vary slightly depending on the make and model of your Android device. However, the principles and steps outlined in this guide should apply to most Android phones. We’ll cover everything from checking printer compatibility to installing the necessary printing app, so you’ll have all the information you need to get started.
So, if you’re ready to unleash the printing possibilities of your Android phone, let’s jump right in and explore how you can print documents and photos with ease. By the end of this guide, you’ll be equipped with the knowledge and confidence to print directly from your Android phone, saving you time and making your life more convenient in the process. Let’s get started!
Printing from an Android Phone: A Step-by-Step Guide
Printing from your Android phone can seem like a daunting task, but with the right guidance, it’s a simple and straightforward process. In this step-by-step guide, we’ll walk you through each stage, from checking printer compatibility to printing your desired documents or photos. So, let’s dive into the process together:
Step 1: Check Your Printer Compatibility
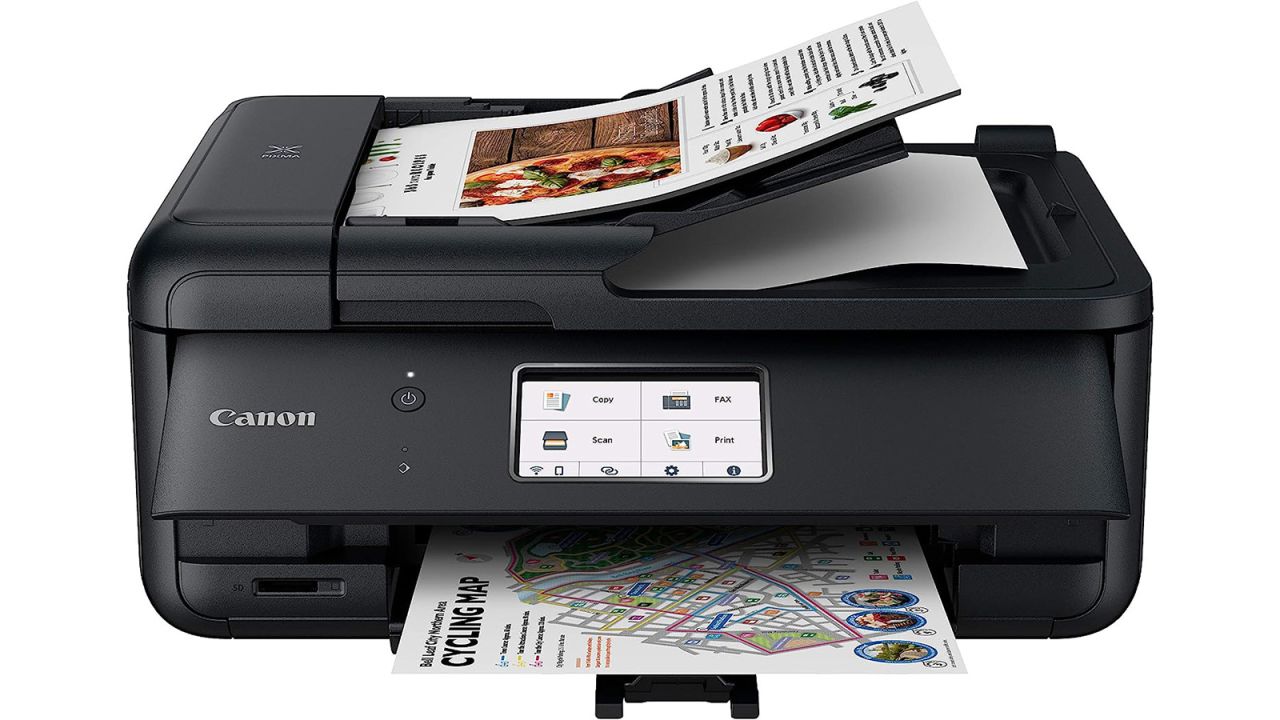
The first step in printing from your Android phone is to ensure that your printer is compatible. Most modern printers come with built-in support for printing from mobile devices, including Android phones. Check the printer’s user manual or visit the manufacturer’s website to confirm its compatibility with Android devices. If your printer doesn’t have built-in support, don’t worry. Various third-party apps can bridge the gap and allow you to print wirelessly.
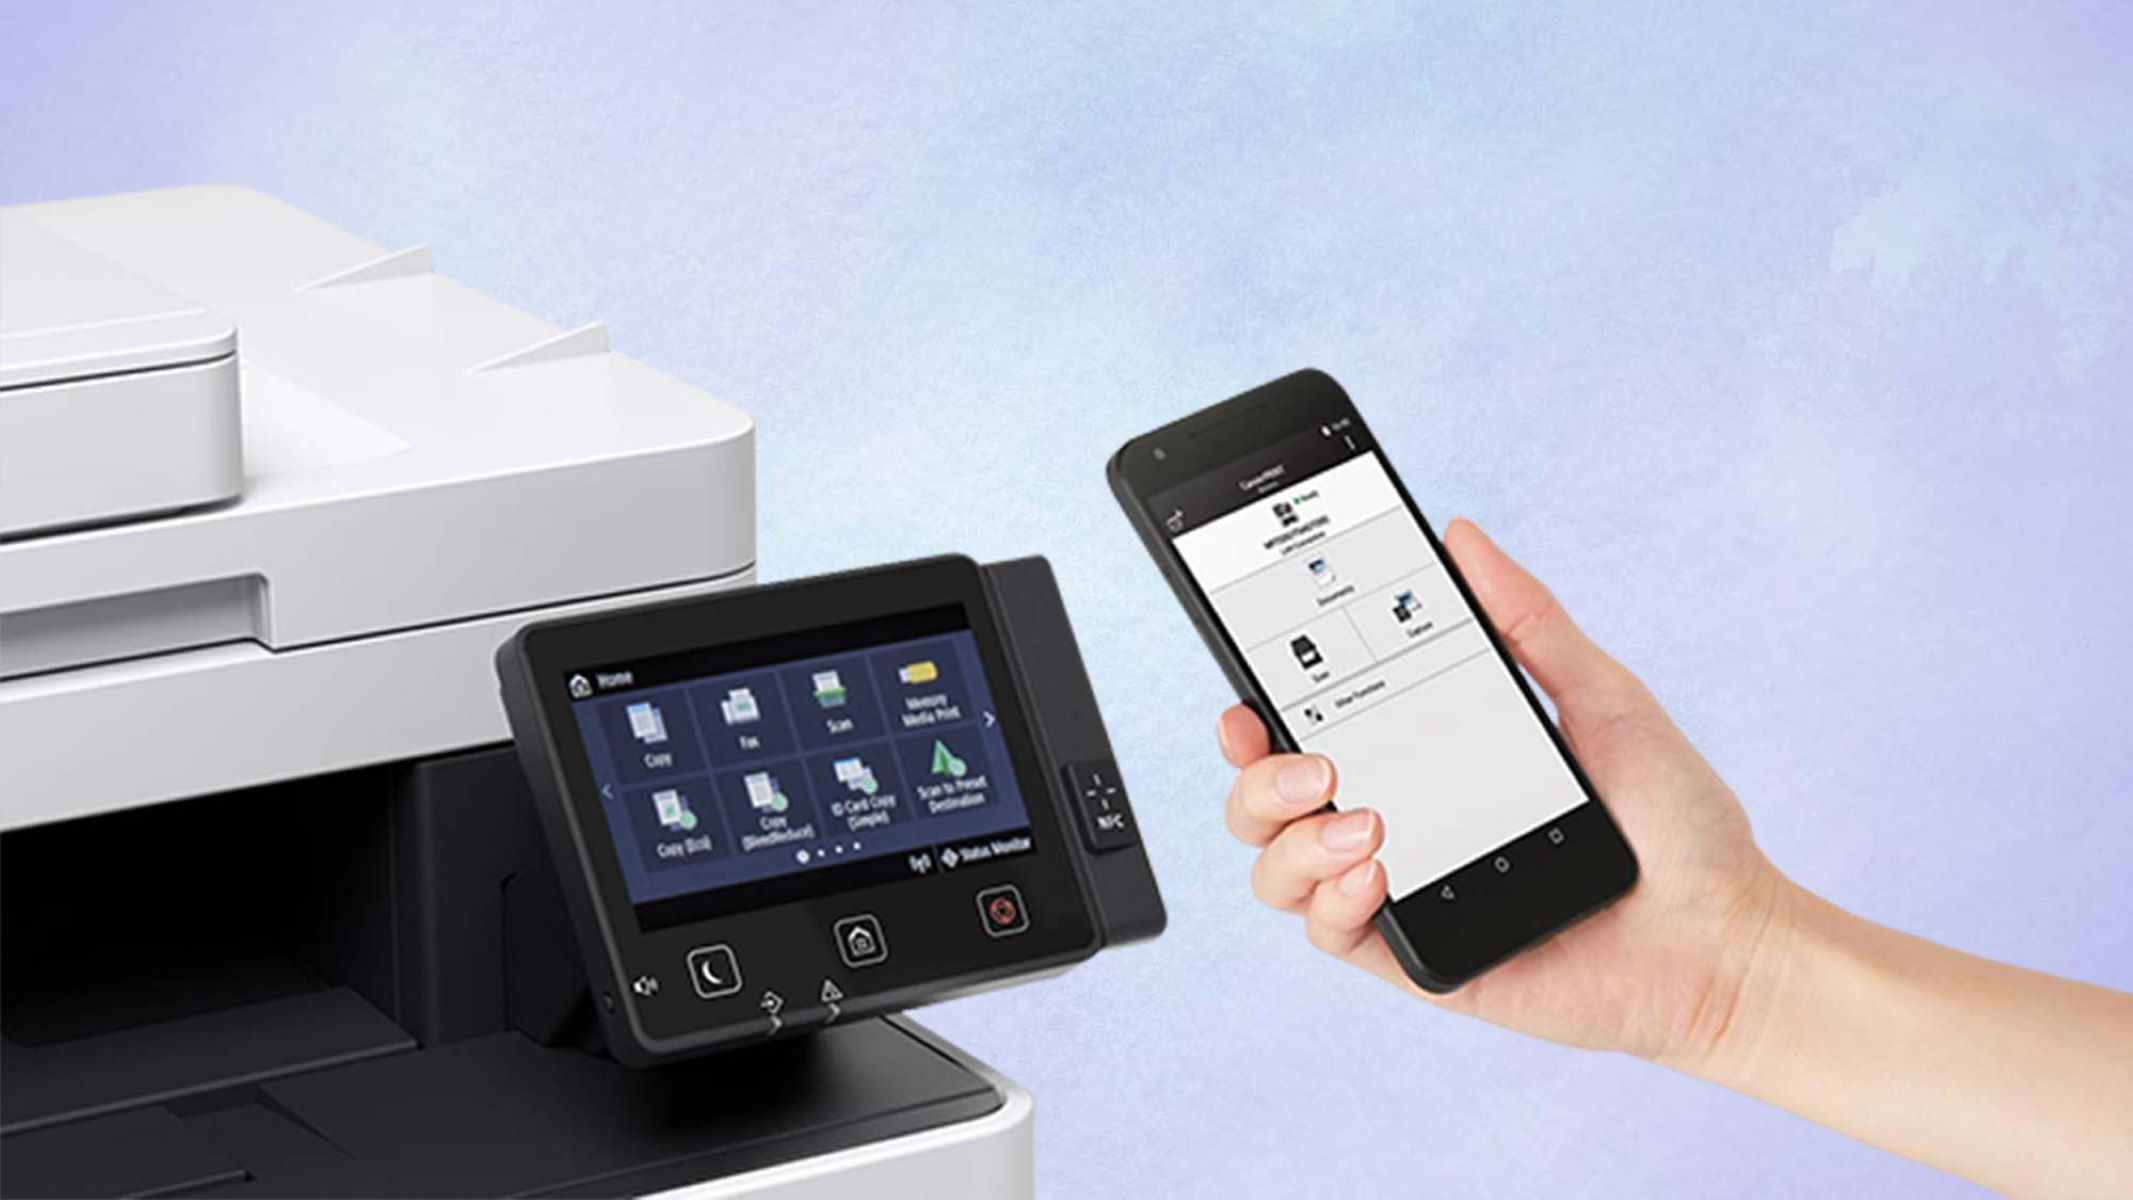
Step 2: Connect Your Printer to Your Android Phone
Once you’ve confirmed printer compatibility, it’s time to establish a connection between your printer and Android phone. There are two ways to do this: via Wi-Fi or using a USB cable. For a wireless connection, make sure both your printer and phone are connected to the same Wi-Fi network. Alternatively, if your printer supports direct wireless printing, you can connect to it directly from your phone’s settings. If you prefer a wired connection, connect your phone to the printer using a compatible USB cable.
Step 3: Install a Printing App
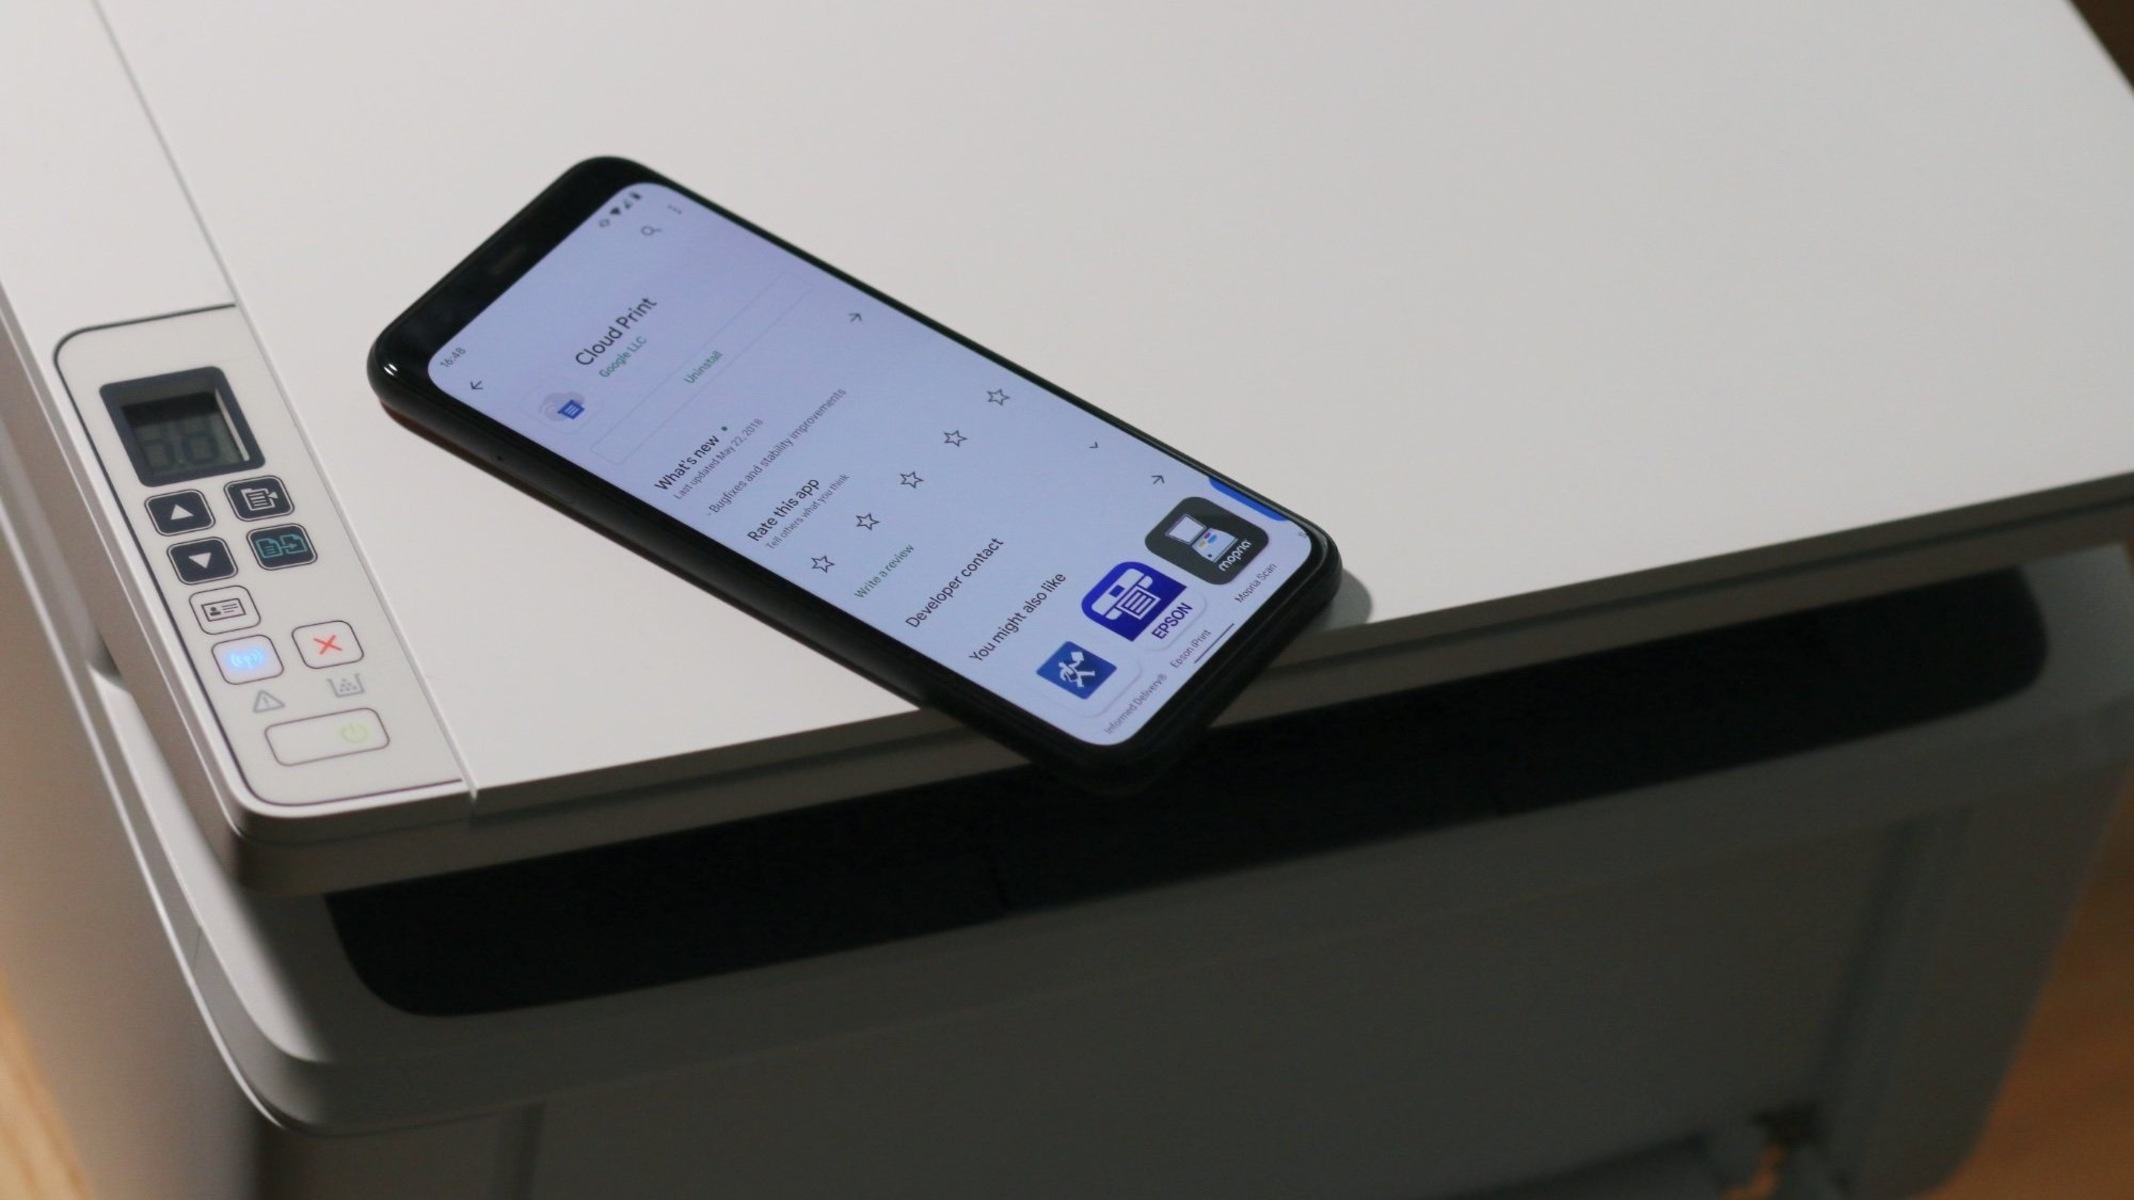
To enable printing functionality on your Android phone, you will need to install a printing app from the Google Play Store. Popular options include Google Cloud Print, PrinterShare, and Epson iPrint. These apps provide a seamless connection between your Android device and printer, allowing you to print with ease. Install the app of your choice and follow the on-screen instructions for setup.
Step 4: Set Up the Printing App
Once the printing app is installed, open it and follow the setup process. This may involve selecting your printer from a list of available devices or entering its IP address manually. Make sure to grant the necessary permissions and enable any required settings within the app. The setup process may vary depending on the app you choose, so refer to the app’s documentation or support resources for specific instructions.
Step 5: Print from Your Android Phone
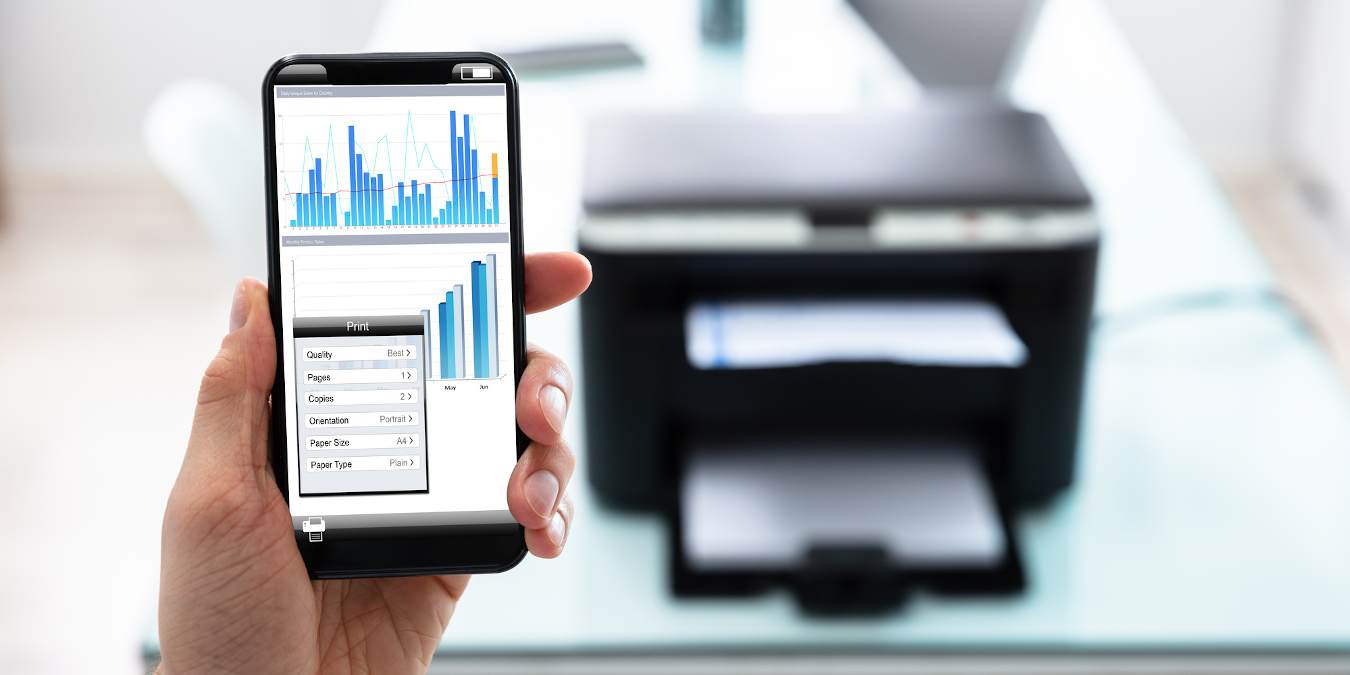
With the printer and app set up, it’s time to start printing from your Android phone. Open the document, photo, or webpage you want to print and tap the Share or Print option. Select the printing app you installed and configure any print settings, such as the number of copies or paper size. Finally, tap the Print button to send the print job to your printer. Sit back and watch as your Android phone seamlessly communicates with the printer and delivers your printed materials.
By following these five simple steps, you can print directly from your Android phone. Whether it’s urgent work documents, important school papers, or cherished memories captured in photos, printing from your Android phone has never been easier. With the right printer compatibility, a reliable connection, the appropriate printing app, and a few taps on your Android phone, you can enjoy the convenience and productivity of on-the-go printing.
Step 1: Check Your Printer Compatibility
Before you can begin printing from your Android phone, it’s crucial to ensure that your printer is compatible with mobile devices. While most modern printers offer support for mobile printing, it’s helpful to confirm this to prevent any compatibility issues. Here’s how you can check the compatibility of your printer with your Android phone:
1. Consult the Printer Documentation
Start by referring to the user manual or documentation that came with your printer. Look for information regarding mobile printing or compatibility with Android devices. Manufacturers often provide detailed instructions or specifications about whether the printer has built-in support for wireless printing from mobile devices. If you no longer have the physical documentation, you can usually find it online by visiting the manufacturer’s website.
2. Visit the Manufacturer’s Website
If you don’t have access to the user manual, the manufacturer’s website is another valuable resource to determine printer compatibility. Head to the support or product page for your specific printer model, and look for information related to mobile printing. Manufacturers often provide a list of compatible devices or information about third-party solutions that enable wireless printing from Android phones. Make sure to check for any software updates or firmware upgrades that may add mobile printing support if your printer doesn’t have it out of the box.
3. Check for Mobile Printing Symbols
Some printers feature mobile printing symbols or logos on their packaging or physical body. Look for symbols like “Mopria Certified,” “Google Cloud Print Ready,” or “Wireless Direct” to identify printers with mobile printing capabilities. These symbols indicate that the printer is designed to work seamlessly with Android or other mobile devices. If you find any of these symbols on your printer, it’s a good indication that it is compatible with your Android phone.
4. Explore Third-Party Printing Solutions
If your printer doesn’t have built-in support for mobile printing, don’t worry—you can still print from your Android phone using third-party apps. Various printing apps, such as Google Cloud Print, PrinterShare, or manufacturer-specific apps, can bridge the gap between your Android phone and the printer. These apps enable wireless printing by establishing a connection between your phone and the printer, regardless of the printer’s built-in capabilities. Check the Google Play Store or manufacturer’s website for recommended printing apps that are compatible with your specific printer model.
By checking your printer’s compatibility with mobile devices, you’ll ensure a smooth printing experience from your Android phone. Whether your printer has built-in mobile printing support or requires the use of third-party solutions, it’s important to verify compatibility to avoid any frustration or compatibility issues. Now that you know how to check printer compatibility, let’s move on to the next step: connecting your printer to your Android phone.
Step 2: Connect Your Printer to Your Android Phone
Now that you’ve checked the compatibility of your printer with your Android phone, it’s time to establish a connection between the two devices. There are a couple of ways to connect your printer to your Android phone, depending on your printer’s capabilities. Here’s a step-by-step guide to help you connect your printer to your Android phone:
1. Wireless Connection
If your printer and Android phone are both connected to the same Wi-Fi network, you can establish a wireless connection for printing. Follow these steps:
- Ensure that your printer is turned on and connected to Wi-Fi.
- On your Android phone, go to the “Settings” menu and select “Wi-Fi.”
- Make sure Wi-Fi is enabled and select the same Wi-Fi network that your printer is connected to.
With the wireless connection established, your Android phone should be able to detect and connect to the printer during the printing process. Continue to the next step to install a printing app on your phone, if you haven’t already done so.
2. Direct Wireless Printing
Some printers, especially newer models, support direct wireless printing, which allows you to connect your Android phone directly to the printer without relying on a shared Wi-Fi network. Follow these steps to establish a direct wireless connection:
- Check if your printer has a wireless direct feature. You can refer to the user manual or visit the manufacturer’s website for instructions specific to your printer model.
- On your Android phone, go to the “Settings” menu and select “Wi-Fi.”
- Toggle on the Wi-Fi option and wait for your phone to detect the available networks.
- Look for the network name or SSID associated with your printer. It typically includes the printer’s brand name or model number.
- Select the printer’s network name to connect your phone directly to the printer.
Once the connection is established, you can proceed with installing a printing app on your Android phone and configuring it for use with your printer. If you prefer a wired connection, such as using a USB cable, continue to the next step.
3. USB Connection
If your printer supports USB connectivity, you can establish a direct wired connection between your Android phone and the printer. Here’s how to connect them using a USB cable:
- Ensure that your printer is turned on and connect one end of the USB cable to the printer’s USB port.
- Connect the other end of the USB cable to your Android phone using a compatible USB port or an OTG (On-The-Go) adapter if necessary.
Once connected, your Android phone should recognize the printer and automatically install any necessary drivers. This allows you to print directly from your phone without requiring an active internet connection.
By following these steps, you can establish a connection between your Android phone and your printer, enabling you to print documents and photos with convenience. With the connection established, it’s time to install a printing app on your Android phone, as explained in the next step.
Step 3: Install a Printing App
To enable printing functionality on your Android phone, you’ll need to install a dedicated printing app from the Google Play Store. These apps act as a bridge between your Android device and the printer, allowing for seamless communication and control. Here’s how you can install a printing app on your Android phone:
1. Google Cloud Print
One of the popular printing apps available for Android is Google Cloud Print. This app allows you to connect your Android phone to your printer and print wirelessly. Follow these steps to install the Google Cloud Print app:
- Open the Google Play Store on your Android phone.
- Search for “Google Cloud Print” using the search bar.
- Select the official Google Cloud Print app from the search results.
- Tap the “Install” button to download and install the app on your device.
2. Printer Manufacturer Apps
Many printer manufacturers also offer their own dedicated printing apps. These apps are specifically designed to work with their respective printer models and may provide additional features and customization options. Follow these steps to install a printer manufacturer app:
- Open the Google Play Store on your Android phone.
- Search for the printer manufacturer’s name, followed by “printing app.”
- Select the official app from the search results that corresponds to your printer manufacturer.
- Tap the “Install” button to download and install the app on your device.
3. Third-Party Printing Apps
Aside from Google Cloud Print and printer manufacturer apps, there are several third-party printing apps available that offer compatibility with a wide range of printers. Popular options include PrinterShare, Epson iPrint, and HP Print Service Plugin. Here’s how you can install a third-party printing app:
- Open the Google Play Store on your Android phone.
- Search for the desired printing app using the search bar.
- Select the app from the search results that best suits your needs.
- Tap the “Install” button to download and install the app on your device.
After installing the printing app of your choice, you’re ready to move on to the next step: setting up the printing app to work with your printer. Each app has its own setup process, so make sure to follow the instructions provided by the app to configure it correctly.
By installing a printing app on your Android phone, you’ll have the necessary tools to print directly from your device to your printer. Whether you choose Google Cloud Print, a printer manufacturer app, or a third-party printing app, these apps enable a seamless connection between your Android phone and printer, making printing as easy as a few taps on your device.
Step 4: Set Up the Printing App
Now that you have installed a printing app on your Android phone, it’s time to set it up and configure it to work with your printer. The setup process may vary slightly depending on the app you have chosen, but the general steps are similar. Follow these guidelines to set up the printing app on your Android phone:
1. Open the Printing App
Locate the printing app on your Android phone and open it. The app icon should be visible on your home screen or in the app drawer. Tap on the icon to access the printing app’s interface.
2. Select Your Printer
Once you open the printing app, it will likely prompt you to select your printer. The app will scan for available printers on the same network or prompt you to manually enter the printer’s IP address. Follow the on-screen instructions to identify and select your printer from the list or enter its details if required.
3. Configure Print Settings
After selecting your printer, you may have the option to customize various print settings according to your preferences or requirements. These settings include the number of copies, paper size, print quality, and more. Take some time to explore the app’s settings and make any necessary adjustments to ensure the desired print output.
4. Grant App Permissions
To ensure smooth printing functionality, the printing app may ask for certain permissions on your Android phone. These permissions can include access to storage for accessing documents or media, access to the camera for scanning documents, or access to contacts for sending files as attachments. Read and grant the requested permissions to allow the app to perform its functions effectively.
5. Test the Connection
With the setup process complete, it’s a good idea to test the connection between your Android phone and the printer. Print a test page or select a sample document or photo from the printing app and send it to your printer. Verify that the app successfully communicates with the printer and that the print job is executed correctly. This step will give you peace of mind knowing that everything is working as intended.
By setting up the printing app on your Android phone, you establish a seamless connection between your device and the printer. Follow the steps provided by the app to select your printer, configure the necessary settings, grant relevant permissions, and ensure a smooth printing experience. With the printing app all set up, you’re now ready to move on to the final step: printing from your Android phone.
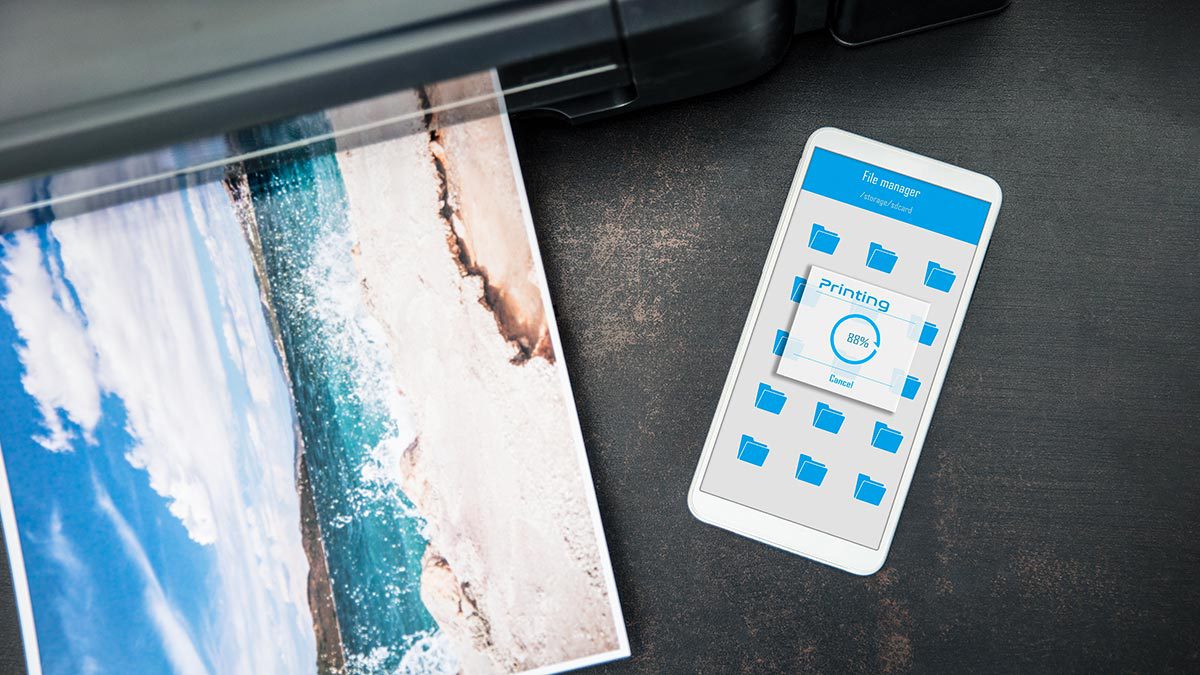
Step 5: Print from Your Android Phone
After setting up the printing app on your Android phone, you’re now ready to start printing documents, photos, and more. With the app configured to work with your printer, follow these steps to print from your Android phone:
1. Open the Document or Photo
Locate the document, photo, or webpage you want to print on your Android phone. This can be a file stored locally on your device, an email attachment, or a webpage you have opened in a browser app.
2. Access the Print Option
Once you have the document or photo open, tap on the menu icon or the share icon (usually represented by three dots or arrows) to access the available options. Look for the “Print” option in the menu or the sharing options list.
3. Select the Printing App
When you tap on the “Print” option, a list of available printing options will appear. Select the printing app that you installed and set up in the previous steps. This will take you to the printing app’s interface for further configuration.
4. Configure Print Settings (If Needed)
In the printing app’s interface, you may have the opportunity to personalize the print settings. Adjust the settings according to your preferences, such as selecting the number of copies, specifying the paper size, or adjusting the print quality. Take a moment to verify that the settings are as desired before proceeding.
5. Initiate the Print Job
Once the print settings are configured, tap the “Print” button or a similar command within the printing app to initiate the print job. Your Android phone will communicate with the printer and send the print job over the established connection. Monitor the progress of the print job on the printer’s display or any notifications from the app.
6. Retrieve Your Printed Document
After the print job is complete, retrieve your printed document from the printer’s output tray. If necessary, make sure to remove any previously printed documents or adjust the printer settings if you have multiple pages to print. The printed document should be ready for your immediate use.
By following these steps, you can easily print documents and photos directly from your Android phone. Whether it’s an important report for work, a school assignment, or a cherished photograph, the printing app and your Android phone provide a convenient printing solution. Enjoy the convenience of wireless printing without the need for a computer or additional steps. Now that you know how to print from your Android phone, you can save time and enhance your productivity on the go.
Tips and Tricks for a Smooth Printing Experience
Now that you’re equipped with the knowledge to print from your Android phone, here are some helpful tips and tricks to ensure a smooth and enjoyable printing experience:
1. Update Printer Firmware and App
Regularly check for firmware updates for your printer. These updates often include bug fixes, performance improvements, and enhanced compatibility with mobile devices. Similarly, keep your printing app up to date by installing the latest version from the Google Play Store. Staying updated ensures you have access to the latest features and improvements.
2. Ensure Proper Wi-Fi Connectivity
If you’re using a wireless connection to print from your Android phone, make sure both your phone and printer have a stable Wi-Fi connection. Keep them in proximity to the Wi-Fi router to maintain a strong signal. If you experience network issues, restarting the router and printer can often resolve temporary connectivity hiccups.
3. Secure Your Printing Workflow
For privacy and security, consider enabling features like user authentication for your printer. This ensures that only authorized individuals can initiate and access print jobs. Additionally, if you’re printing sensitive documents, it’s a good practice to encrypt files before sending them to the printer. This adds an extra layer of protection to your printed materials.
4. Optimize Print Settings
Take advantage of the print settings available in the printing app to optimize your printouts. Adjust settings like print quality, paper size, and color options to match your specific printing needs. Carefully configuring these settings can help reduce ink or toner consumption while maintaining the desired print quality.
5. Use Cloud Storage and Printing
Consider utilizing cloud storage and printing services like Google Drive, Dropbox, or OneDrive. By uploading your documents or photos to these cloud platforms, you can easily access and print them directly from your Android phone. This eliminates the need for physical transfer or relying on local storage.
6. Explore Print Preview
Before initiating the print job, take advantage of the print preview feature provided by the printing app. This allows you to review the document or photo and ensure that everything appears as intended. You can catch any formatting errors or make adjustments to the print settings if necessary, saving time and resources.
By following these tips and tricks, you can enhance your overall printing experience and make the most of the printing capabilities of your Android phone. With proper maintenance, security precautions, and optimization of print settings, you’ll be able to enjoy seamless printing and excellent printouts, whether for personal or professional use.
Conclusion
Printing from your Android phone is a convenient and efficient way to transform digital documents and memories into tangible prints. By following the step-by-step guide provided in this article, you can easily set up your Android phone to connect with your printer and print wirelessly. Checking printer compatibility, establishing a connection, installing a printing app, and configuring the app are essential steps that ensure a smooth printing experience.
Remember to keep your printer’s firmware and the printing app up to date to take advantage of the latest features and improvements. Optimize your print settings, ensure a stable Wi-Fi connection, and prioritize security to protect your privacy while printing. Exploring print preview and utilizing cloud storage and printing services can further enhance your printing workflow.
With the ability to print directly from your Android phone, you can conveniently print important documents for work, school assignments, or cherished photos for your personal collection. The printing process has never been easier or more accessible, allowing you to make the most of your Android device’s capabilities.
So, go ahead and unleash the full potential of your Android phone by embracing the power of wireless printing. With just a few steps, you can turn your digital content into physical copies and enjoy the convenience and flexibility of mobile printing. Start printing from your Android phone today and experience a new level of productivity and convenience in your everyday life.