Introduction
When it comes to storing and organizing your important files and documents, Google Drive is an excellent cloud-based solution. It offers ample storage space, easy file sharing, and seamless integration with other Google services. However, there may come a time when you need to move your files from Google Drive to an external hard drive. Whether you want to free up space on your Google Drive or create a backup of your files, the process can be simple and straightforward.
In this article, we will guide you through the step-by-step process of moving files from Google Drive to an external hard drive. By following these instructions, you will be able to transfer your files safely and efficiently, ensuring that they are accessible even without an internet connection and providing an extra layer of security.
We understand that not everyone is familiar with technical terms or intricacies, which is why we have simplified the steps in plain language. Even if you’re not a tech-savvy individual, you will find it easy to follow along and complete the process successfully.
Before we dive into the details, it’s essential to have both your Google Drive account and an external hard drive ready. Make sure your external hard drive is connected to your computer and has sufficient storage space to accommodate all the files you intend to move from Google Drive.
So, let’s get started with this user-friendly guide on how to move files from Google Drive to an external hard drive.
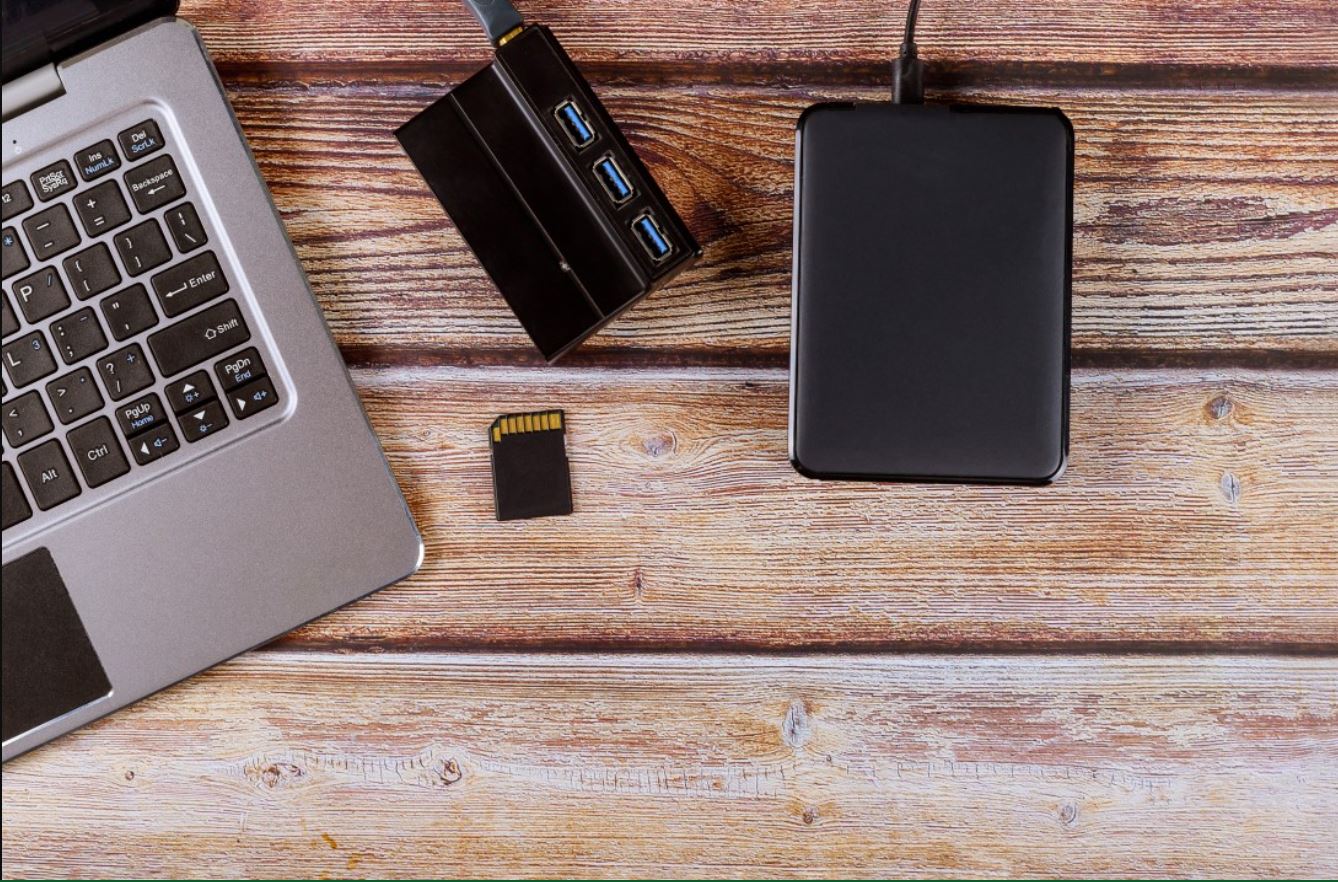
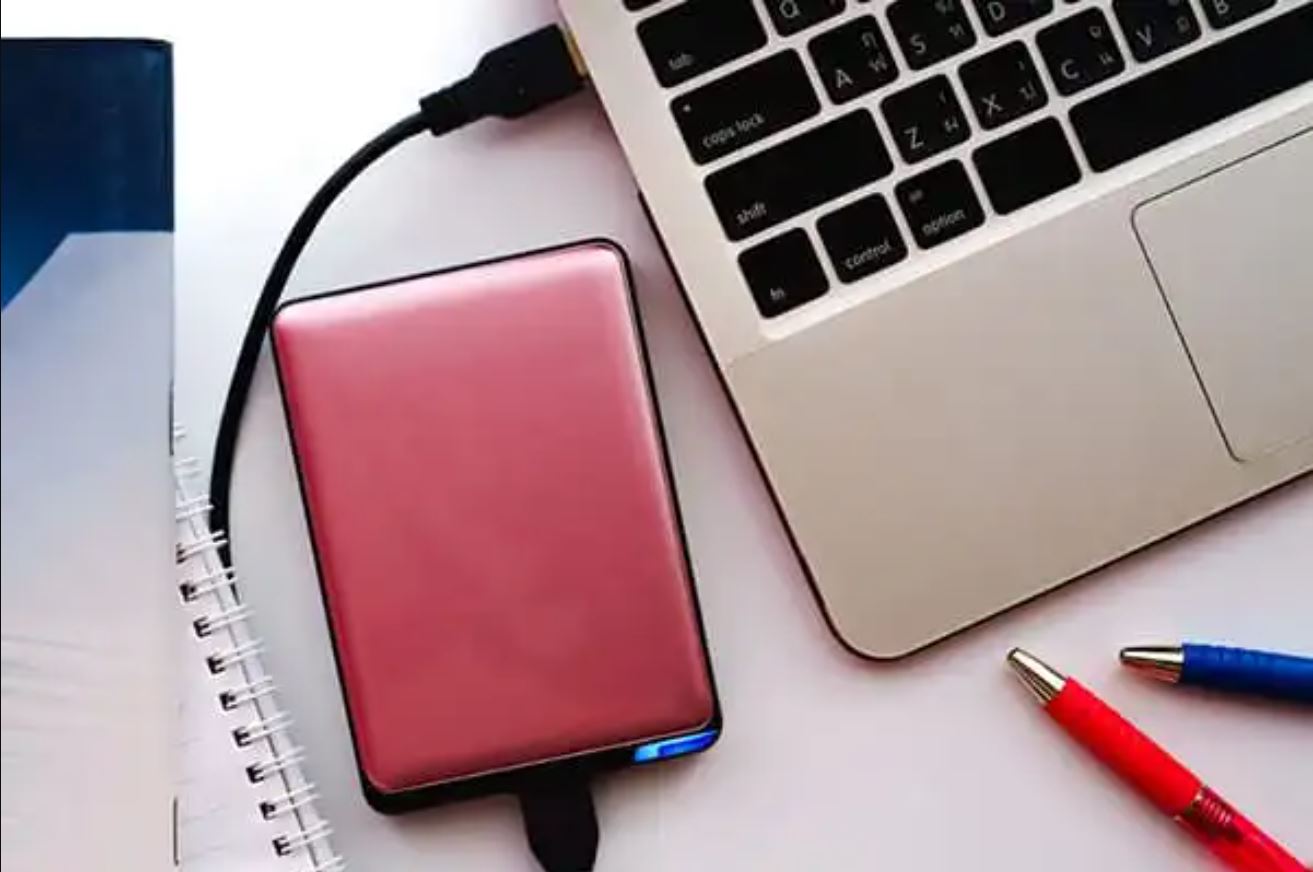
Step 1: Connect the External Hard Drive to Your Computer
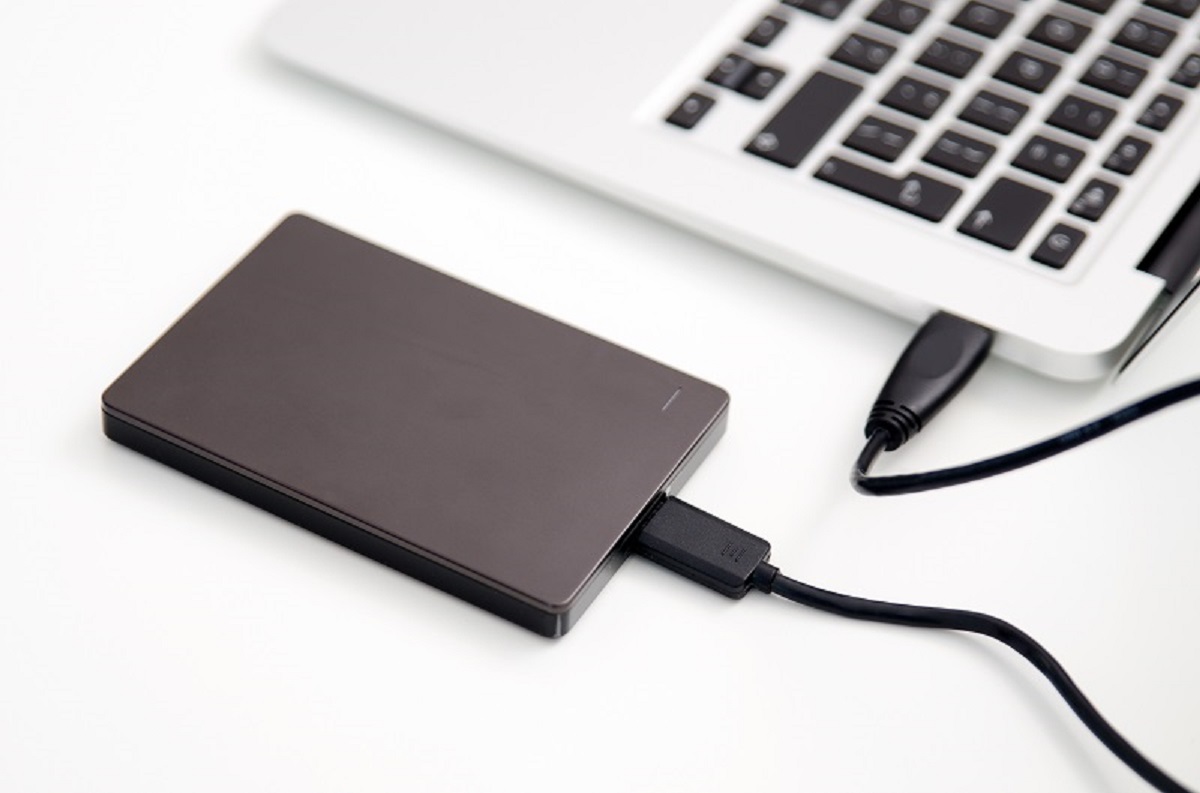
The first step in moving files from Google Drive to an external hard drive is to ensure that the external hard drive is properly connected to your computer. This will allow you to access and transfer files between the two devices.
Start by locating a USB port on your computer. Most computers have multiple USB ports, usually found on the sides or back of the computer tower or on the sides of a laptop. Once you have located the USB port, insert the USB cable of your external hard drive into the port.
Depending on the type of external hard drive you have, you may need to connect it to a power source as well. Some external hard drives are powered through the USB connection, while others may require an additional power adapter. Refer to the manufacturer’s instructions for the specific steps on powering up your external hard drive.
Once the external hard drive is connected and powered on, your computer should recognize it as a new device. You may see a notification or hear a sound indicating that the device has been connected successfully. You can also verify the connection by checking the File Explorer or Finder on your computer, where the external hard drive should appear as a new storage device.
Take a moment to ensure that the external hard drive is functioning properly before proceeding to the next step. You can do this by opening the drive from the File Explorer or Finder and accessing any existing files or creating a new folder to test the write function.
Now that your external hard drive is successfully connected to your computer, you are ready to move on to the next step of transferring files from Google Drive.
Step 2: Open Google Drive
After connecting your external hard drive to your computer, the next step is to open Google Drive. Google Drive can be accessed through a web browser or by using the Google Drive desktop application.
If you prefer to use a web browser, open your preferred browser and visit the Google Drive website at https://drive.google.com/. Make sure you are signed in to your Google account. If you’re not, click on the “Sign In” button in the top right corner and enter your credentials.
If you have the Google Drive desktop application installed on your computer, you can find it in your system tray or menu bar. Simply click on the Google Drive icon to open the application.
Once you have opened Google Drive, you will be able to see all your files and folders stored in the cloud. Take a moment to familiarize yourself with the interface and navigation options. You can sort files by name, date modified, or file size, and you can also create new folders to organize your files.
Make sure you have located the files that you want to move to your external hard drive. If the files are stored in a specific folder, note its location. This will make it easier to select and transfer the files in the following steps.
Now that you have Google Drive open and ready, it’s time to proceed to the next step and select the files you want to move from Google Drive to your external hard drive.
Step 3: Select the Files You Want to Move
Once you have Google Drive open and you have located the files you want to move to your external hard drive, the next step is to select those files.
To select multiple files at once, you can hold down the Ctrl key (Windows) or the Command key (Mac) while clicking on the files you want to move. If you want to select all the files in a folder, you can click on the checkbox at the top left corner of the folder. This will automatically select all the files within that folder.
Another option to select multiple files is to use the Shift key. Click on the first file you want to select, then hold down the Shift key and click on the last file you want to select. This will select all the files between the first and last file you clicked on.
Remember, you can select files from multiple folders within your Google Drive. This allows you to gather all the files you want to move from different locations into a single selection before proceeding to the next step.
Take your time to double-check your selection and ensure that you have included all the files you want to move. It’s important to be thorough at this stage to avoid forgetting any important files.
Now that you have selected the files you want to move, it’s time to download them from Google Drive to your computer in preparation for transferring them to your external hard drive.
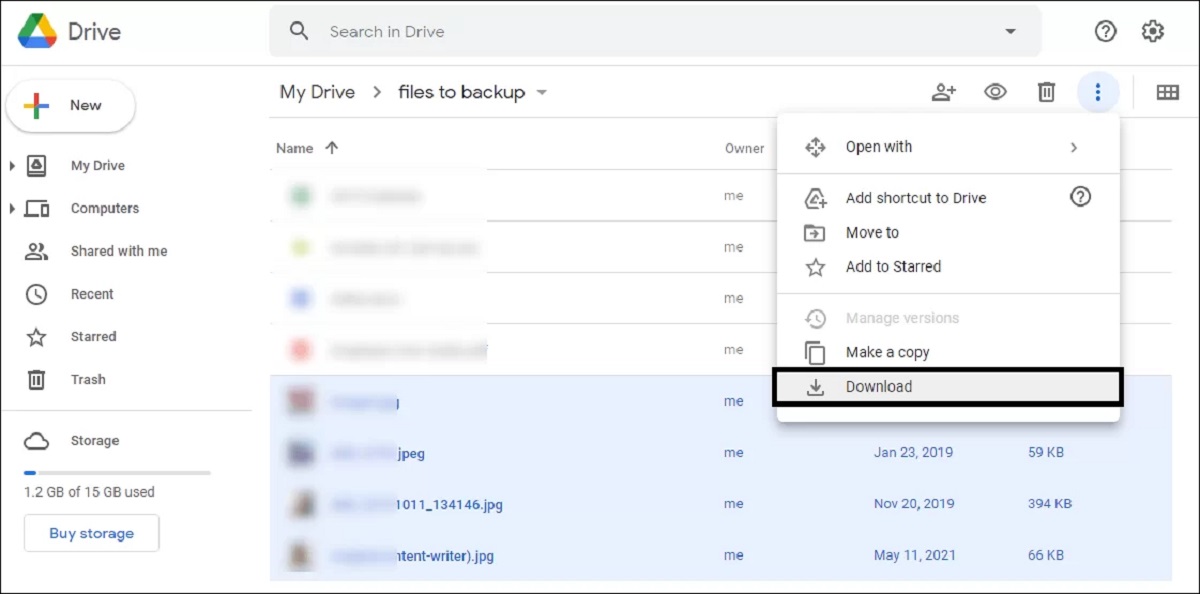
Step 4: Download the Selected Files from Google Drive
Once you have selected the files you want to move from Google Drive to your external hard drive, the next step is to download them from Google Drive to your computer. This will create local copies of the files that can be easily transferred to your external hard drive.
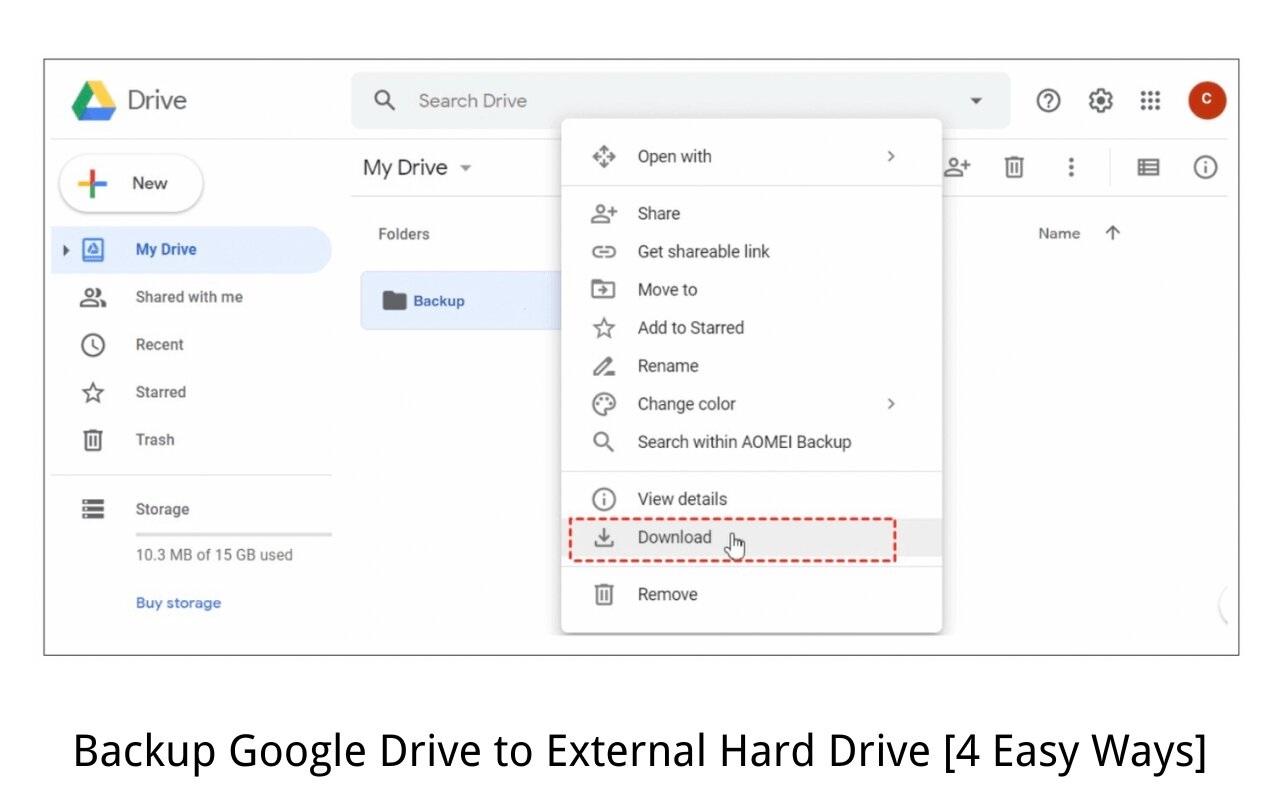
To start the download process, right-click on any of the selected files and click on the “Download” option from the context menu. Alternatively, you can also use the download button in the toolbar at the top of the screen.
Depending on the size and number of files you are downloading, the process may take some time. Google Drive will automatically create a ZIP file containing all the selected files, which will be downloaded to your computer’s default download location.
Once the download is complete, you can locate the ZIP file in the designated download folder on your computer. If the file is not automatically extracted, you can right-click on the ZIP file and select the “Extract All” option to extract the files to a separate folder.
At this point, it is a good idea to verify that all the files you selected have been downloaded correctly. Open the extracted folder and ensure that all the files are present and accessible. This will give you confidence that the files are ready to be transferred to your external hard drive.
Now that you have downloaded the selected files, it’s time to proceed to the next step and copy them to your external hard drive.
Step 5: Locate the Downloaded Files
After downloading the selected files from Google Drive, the next step is to locate the downloaded files on your computer. This will allow you to access the files and prepare them for transfer to your external hard drive.
By default, most web browsers save downloaded files to the “Downloads” folder on your computer. To access the downloaded files, open your file explorer or finder and navigate to the “Downloads” location. Here, you should find a folder or a ZIP file with the name of the download or a similar name.
If you chose to extract the files from the ZIP folder in the previous step, you will find a separate folder containing the extracted files. The folder name will usually be the same as the ZIP file name or have a similar name.
Take a moment to review the extracted files and ensure that they match the files you selected to download from Google Drive. You can open some of the files to verify their content and make sure nothing is missing or corrupted.
If you can’t find the downloaded files in the “Downloads” folder, you may need to check your browser’s settings to confirm the download location. Some browsers allow you to specify a custom download folder, so you may need to navigate to that location instead.
Now that you have located the downloaded files, you are one step closer to transferring them to your external hard drive. Proceed to the next step to learn how to copy the files from your computer to the external hard drive.
Step 6: Copy the Files to the External Hard Drive
Now that you have located the downloaded files on your computer, it’s time to copy them to your external hard drive. This step will ensure that your files are transferred from your computer’s storage to the storage capacity of your external hard drive.
Start by opening your file explorer or finder and navigate to the location where the downloaded files are stored. This is typically the “Downloads” folder or the folder you extracted the ZIP files to in the previous step.
Next, connect your external hard drive to your computer if it isn’t already connected. Ensure that it is recognized and accessible by checking your file explorer or finder. The external hard drive should appear as a separate storage device.
Once you have both the downloaded files folder and the external hard drive visible, it’s time to copy the files. To do this, you can use the drag-and-drop method. Simply click and hold on the files you want to copy, and then drag them over to the external hard drive folder. Release the mouse button to drop the files into the external hard drive folder.
You can also use the right-click menu to copy and paste the files. Right-click on the files you want to copy, select the “Copy” option, then navigate to the external hard drive folder, right-click, and select the “Paste” option.
Depending on the size and number of files, the copying process may take some time. It is important to ensure that the progress is completed and that all the files are successfully transferred to the external hard drive. Avoid disconnecting the external hard drive during the copying process to prevent any data loss or corruption.
Once the files are copied to the external hard drive, you can safely disconnect it from your computer. This will allow you to access the files on any other computer, as long as the external hard drive is connected.
Congratulations! You have successfully copied the files from your computer to the external hard drive. You can now proceed to safely remove the external hard drive in the next step.
Step 7: Safely Remove the External Hard Drive
After copying the files from your computer to the external hard drive, it’s important to safely remove the external hard drive from your computer. This ensures that no data is lost or corrupted during the removal process and helps preserve the integrity of your files.
Before removing the external hard drive, make sure you have closed any open files or applications that may be using the external hard drive. This ensures that all data has been written to the external hard drive and reduces the risk of data loss or corruption.
In Windows, you can safely remove the external hard drive by clicking on the “Safely Remove Hardware and Eject Media” icon in the system tray. This will display a list of connected devices, including your external hard drive. Select the external hard drive and wait for the notification that it is safe to remove the device. Once you receive the confirmation, you can safely unplug the external hard drive from your computer.
In macOS, you can safely eject the external hard drive by clicking on the external hard drive icon on the desktop or in the Finder sidebar. Alternatively, you can also right-click on the external hard drive icon and select the “Eject” option. Wait for the notification that it is safe to disconnect the device, and then unplug the external hard drive from your computer.
It is important to note that abrupt disconnection of the external hard drive without following the proper removal process can potentially cause data loss or damage to the external hard drive. Therefore, it is always recommended to take the extra step to safely remove the device.
With the external hard drive safely removed, you can now use it to access your files on any other computer that supports external storage devices. Your files are now securely stored on the external hard drive, providing an additional backup and allowing for convenient access.
That concludes the process of moving files from Google Drive to an external hard drive. By following these steps, you have successfully transferred your files and ensured their availability even without an internet connection.
Conclusion
Moving files from Google Drive to an external hard drive is a straightforward process that allows you to free up space, create backups, and have offline access to your important files. By following the steps outlined in this guide, you can successfully transfer your files in just a few simple steps.
Throughout this guide, we covered the necessary steps, from connecting the external hard drive to your computer to safely removing it after the transfer. We emphasized the importance of double-checking your file selection, locating and downloading the files from Google Drive, and copying them to the external hard drive.
Remember, it’s always a good practice to ensure that all the files are successfully transferred, both during the download process from Google Drive and during the copy process to the external hard drive. This will help prevent any data loss or corruption.
Additionally, it’s important to safely remove the external hard drive from your computer to ensure the integrity of your files. Abruptly disconnecting the device without following the proper removal process can lead to potential data loss.
By opting to store your files on an external hard drive, you gain the advantage of offline accessibility and an additional layer of security. Your files are no longer solely dependent on an internet connection, and you have control over their storage and backup.
Now that you have successfully moved your files from Google Drive to an external hard drive, you can enjoy the freedom of accessing your files at any time, without relying on cloud storage or an internet connection.
We hope this guide has been helpful in assisting you with the file transfer process. If you have any further questions or need additional guidance, don’t hesitate to seek further assistance. Happy file managing!