Introduction
Safari, the default web browser for Mac, is known for its sleek interface and seamless performance. However, like any software, it may encounter occasional glitches or unresponsiveness. When Safari on your MacBook is acting up, restarting the browser can often resolve the issue. This article will guide you through various methods to restart Safari on your MacBook, ensuring that you can swiftly address any browsing hiccups and get back to enjoying a smooth online experience.
Whether you're encountering slow loading times, unresponsive tabs, or unexpected crashes, restarting Safari can often serve as a quick fix. By following the steps outlined in this guide, you can effectively troubleshoot common issues and restore Safari to its optimal state. From checking for updates to force quitting the browser and clearing cache and data, this comprehensive resource will equip you with the knowledge and tools needed to tackle Safari-related challenges on your MacBook.
So, if you find yourself facing a sluggish Safari or experiencing unexpected errors while browsing, fear not. With the methods presented in this article, you'll be empowered to restart Safari on your MacBook with ease, ensuring that your web browsing experience remains seamless and hassle-free. Let's dive into the various techniques that will help you breathe new life into Safari and get back to exploring the vast digital landscape with confidence and efficiency.
Checking for Updates
Ensuring that Safari is running on the latest version is a fundamental step in troubleshooting any potential issues. Apple regularly releases updates for Safari, addressing security vulnerabilities, improving performance, and introducing new features. By checking for updates, you can ensure that your browser is equipped with the latest enhancements and bug fixes, potentially resolving any underlying issues that may be hindering its performance.
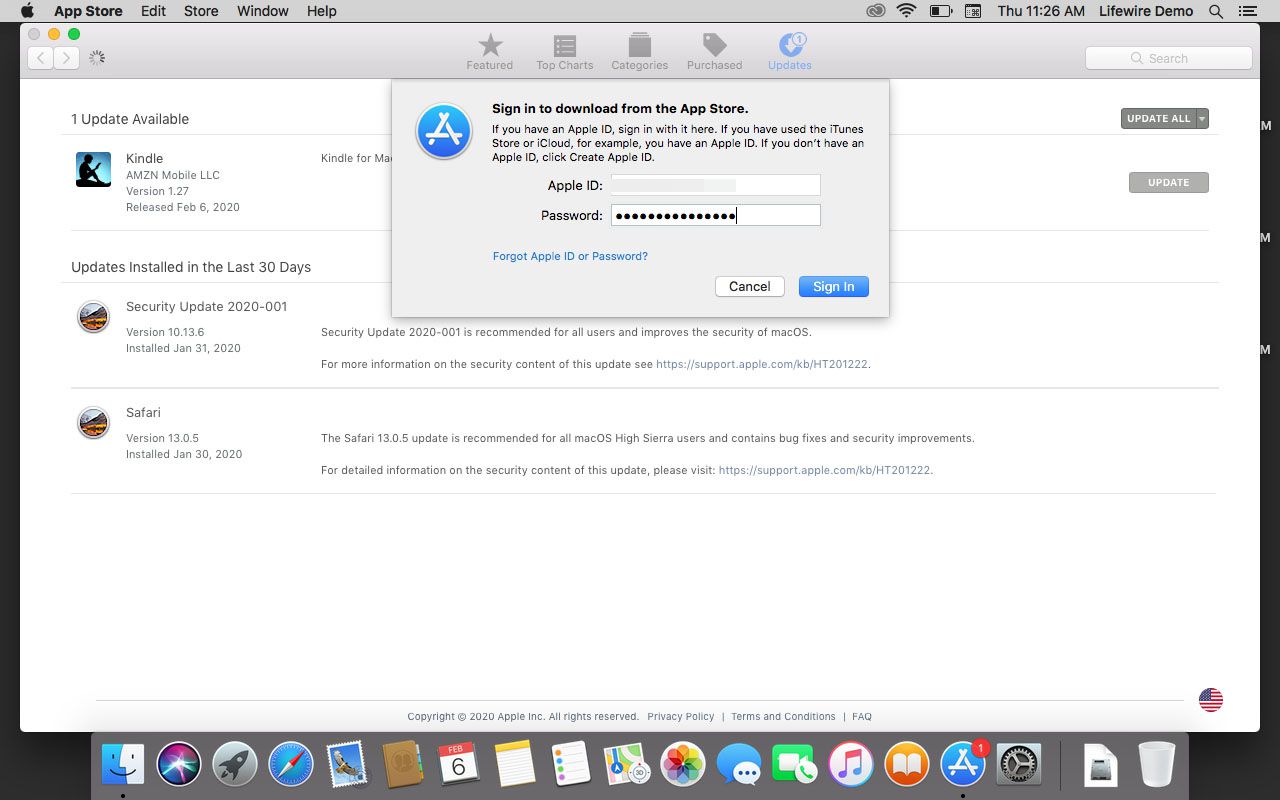
To check for updates, start by launching the App Store on your MacBook. Once the App Store is open, navigate to the "Updates" tab located in the top navigation bar. Here, you will find a list of available updates for your installed applications, including Safari. If an update for Safari is available, you will see it listed along with the option to install the update.
Click on the "Update" button next to Safari to initiate the installation process. Depending on the size of the update and your internet connection speed, the update may take a few minutes to download and install. It's important to ensure that your MacBook is connected to a stable internet connection throughout the update process to prevent any interruptions.
After the update is successfully installed, relaunch Safari to apply the changes. By keeping Safari up to date, you can benefit from improved stability, enhanced security, and optimized performance, all of which contribute to a smoother and more reliable browsing experience.
In addition to checking for updates via the App Store, you can also enable automatic updates for Safari. To do this, go to the "System Preferences" on your MacBook, select "App Store," and then ensure that the "Automatically check for updates" option is enabled. With automatic updates enabled, Safari will be regularly checked for new updates, and any available updates will be downloaded and installed automatically, keeping your browser current without requiring manual intervention.
By proactively checking for updates and ensuring that Safari is running on the latest version, you can mitigate potential issues stemming from outdated software and enjoy the full benefits of the browser's latest improvements and enhancements. This proactive approach to maintaining Safari's currency is a key step in troubleshooting and optimizing its performance on your MacBook.
Force Quitting Safari
When Safari becomes unresponsive or fails to function as expected, force quitting the browser can often serve as an effective solution. Force quitting essentially involves terminating the Safari process forcefully, allowing you to restart the browser from a clean state. This method can help resolve instances where Safari is frozen, unresponsive, or experiencing persistent issues that hinder normal operation.
To force quit Safari on your MacBook, you can follow these simple steps:
-
Using the Apple Menu:
- Click on the Apple logo in the top-left corner of the screen to open the Apple menu.
- From the dropdown menu, select "Force Quit" to open the Force Quit Applications window.
- In the Force Quit Applications window, locate Safari from the list of open applications.
- Select Safari and click the "Force Quit" button to terminate the browser.
-
Using Keyboard Shortcuts:
- Press the "Option + Command + Esc" keys simultaneously to open the Force Quit Applications window.
- In the Force Quit Applications window, select Safari from the list of open applications.
- Click the "Force Quit" button to forcefully terminate the Safari process.
After force quitting Safari, you can relaunch the browser and assess whether the issues you were experiencing have been resolved. This method effectively closes all Safari processes and allows you to start the browser anew, potentially eliminating any underlying causes of unresponsiveness or malfunction.
It's important to note that force quitting should be used judiciously, as it forcibly terminates the application without allowing it to perform its normal shutdown procedures. While force quitting can help address immediate issues, it's advisable to investigate the root cause of Safari's unresponsiveness to prevent recurring issues in the future.
By mastering the art of force quitting Safari when necessary, you can swiftly address instances of browser unresponsiveness and restore its functionality, ensuring a smoother and more reliable browsing experience on your MacBook.
Clearing Safari Cache and Data
Clearing the cache and data in Safari can significantly improve the browser's performance and resolve various browsing issues. The cache is a temporary storage that stores website data, such as images and scripts, to facilitate faster loading times upon revisiting a website. However, over time, the cache can become bloated or corrupted, leading to sluggish performance and unexpected errors. Clearing the cache and data allows Safari to rebuild this temporary storage from scratch, potentially resolving issues related to slow loading times, unresponsive pages, and other browsing anomalies.
To clear the cache and data in Safari on your MacBook, follow these steps:
-
Open Safari on your MacBook and click on the "Safari" menu located in the top-left corner of the screen.
-
From the dropdown menu, select "Preferences" to access the Safari preferences window.
-
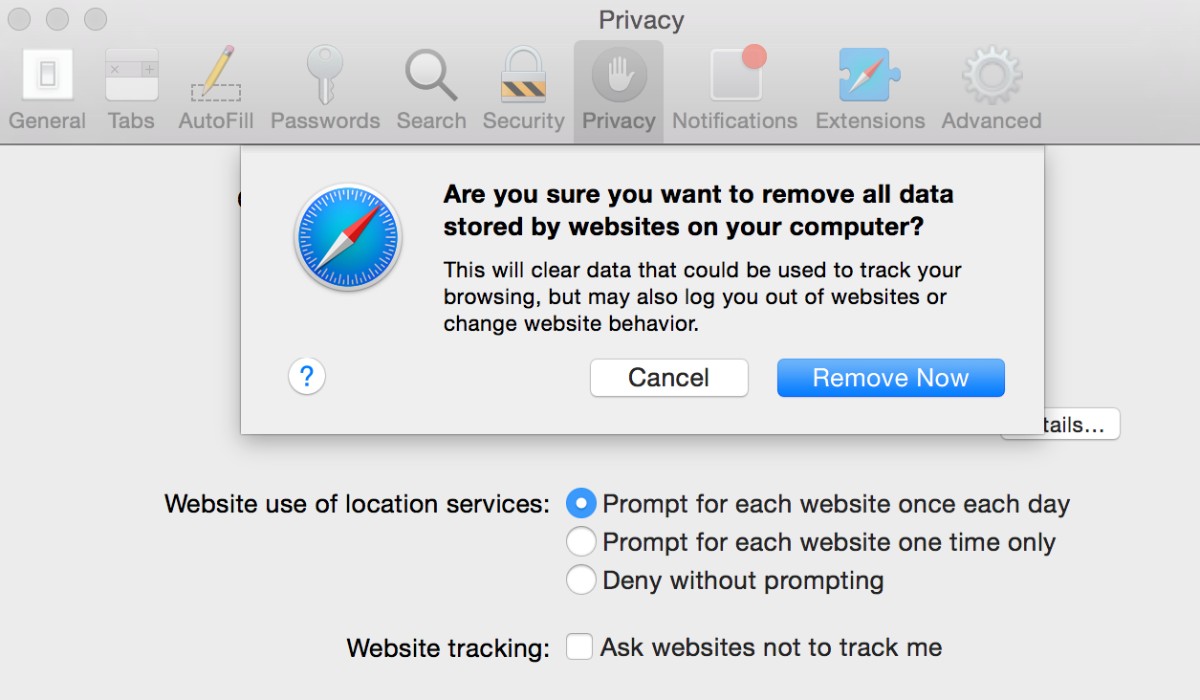
In the preferences window, navigate to the "Privacy" tab, where you will find the option to manage website data.
-
Click on the "Manage Website Data" button to view the stored website data and cache.
-
To clear the cache and data, click on the "Remove All" button. Safari will prompt you to confirm the action, ensuring that you are aware of the consequences of clearing the cache and data.
-
Confirm the removal of the cache and data, and Safari will proceed to clear the stored website data, including the cache.
After clearing the cache and data, relaunch Safari and navigate to your frequently visited websites to observe any improvements in loading times and overall browsing performance. Clearing the cache and data can often lead to a noticeable enhancement in Safari's responsiveness and speed, as it eliminates any outdated or corrupted data that may have been hindering its performance.
It's important to note that clearing the cache and data will log you out of websites and may remove certain website preferences, such as saved login credentials. Therefore, it's advisable to ensure that you have any necessary login information before proceeding with this action.
By regularly clearing the cache and data in Safari, you can maintain the browser's efficiency and mitigate potential issues stemming from bloated or corrupted cache. This proactive maintenance approach can contribute to a smoother and more reliable browsing experience on your MacBook, ensuring that Safari operates at its optimal capacity.
Resetting Safari Settings
Resetting Safari settings can serve as a comprehensive solution to address persistent issues and restore the browser to its default state. This method effectively clears various settings, preferences, and stored data within Safari, offering a fresh start that can help resolve a wide range of browsing anomalies. Whether you're encountering frequent crashes, erratic behavior, or unexplained performance issues, resetting Safari settings can often provide a much-needed reset that revitalizes the browser's functionality.
To reset Safari settings on your MacBook, follow these steps:
-
Open Safari on your MacBook and click on the "Safari" menu located in the top-left corner of the screen.
-
From the dropdown menu, select "Preferences" to access the Safari preferences window.
-
In the preferences window, navigate to the "Privacy" tab, where you will find the option to manage website data.
-
Click on the "Manage Website Data" button to view the stored website data and cache.
-
Before proceeding with resetting Safari settings, it's advisable to back up any essential data, such as bookmarks and browsing history, to ensure that you can restore them after the reset.
-
After backing up necessary data, navigate to the "General" tab within the Safari preferences window.
-
Locate the "Remove All Website Data" option and click on it to clear all stored website data, including cookies, cache, and preferences.
-
Safari will prompt you to confirm the action, ensuring that you are aware of the consequences of resetting the browser settings.
-
Confirm the reset, and Safari will proceed to clear the stored website data and reset various browser settings to their default state.
-
After resetting Safari settings, relaunch the browser and assess its performance. You may need to reconfigure certain preferences and settings, such as homepage and search engine preferences, based on your personal preferences.
By resetting Safari settings, you effectively eliminate any potential configuration issues, corrupted preferences, or problematic data that may have been impacting the browser's performance. This method offers a comprehensive reset that can often resolve persistent issues, providing a clean slate for Safari to operate optimally.
It's important to note that resetting Safari settings will clear browsing history, cookies, and other website data, so it's essential to back up any critical information before proceeding with the reset. Additionally, after the reset, you may need to re-enter login credentials for websites and reconfigure certain preferences based on your browsing habits.
By mastering the art of resetting Safari settings when necessary, you can effectively troubleshoot persistent issues and restore the browser to a pristine state, ensuring a smoother and more reliable browsing experience on your MacBook.
Reinstalling Safari
In rare cases where Safari on your MacBook continues to exhibit persistent issues despite attempting other troubleshooting methods, reinstalling the browser can serve as a final resort to address underlying issues and restore its functionality. Reinstalling Safari essentially involves removing the existing installation of the browser and then reinstalling it from scratch, providing a clean and fresh start that can potentially resolve deep-seated problems that have eluded other troubleshooting methods.
To reinstall Safari on your MacBook, you can follow these steps:
-
Begin by ensuring that you have a backup of any essential data, such as bookmarks, browsing history, and saved passwords. This precautionary measure will allow you to restore your browsing preferences and essential data after the reinstallation.
-
Before proceeding with the reinstallation, it's advisable to close any open Safari windows and ensure that the browser is not running in the background. This will prevent any conflicts during the removal and reinstallation process.
-
Open the Finder on your MacBook and navigate to the "Applications" folder, where you will find the Safari application.
-
Drag the Safari application to the Trash to remove it from your system. You may be prompted to enter your administrator password to authorize the removal of the application.
-
After removing Safari from your MacBook, you can proceed to download a fresh installation of the browser. Since Safari is an integral part of macOS, you can reinstall it by performing a system update. To do this, go to the Apple menu, select "System Preferences," and then choose "Software Update." If a Safari update is available, it will be included in the system update, allowing you to reinstall the browser seamlessly.
-
Follow the on-screen instructions to complete the system update, which will include reinstalling Safari as part of the process.
-
Once the system update is complete, relaunch Safari and verify that the browser is functioning as expected. You can then proceed to restore any essential data, such as bookmarks and browsing history, from your backup to personalize your browsing experience.
By reinstalling Safari, you effectively eliminate any underlying issues associated with the previous installation, providing a fresh start that can often resolve persistent problems. This method ensures that Safari is installed in its default state, free from any potential conflicts or corrupted files that may have been impacting its performance.
It's important to note that reinstalling Safari is a drastic measure and should be considered only when other troubleshooting methods have proven ineffective. Additionally, after reinstalling Safari, you may need to reconfigure certain preferences and settings based on your browsing habits and restore any essential data from your backup to personalize the browser to your liking.
By mastering the process of reinstalling Safari when necessary, you can effectively address deep-seated issues and restore the browser to a pristine state, ensuring a smoother and more reliable browsing experience on your MacBook.


