Introduction
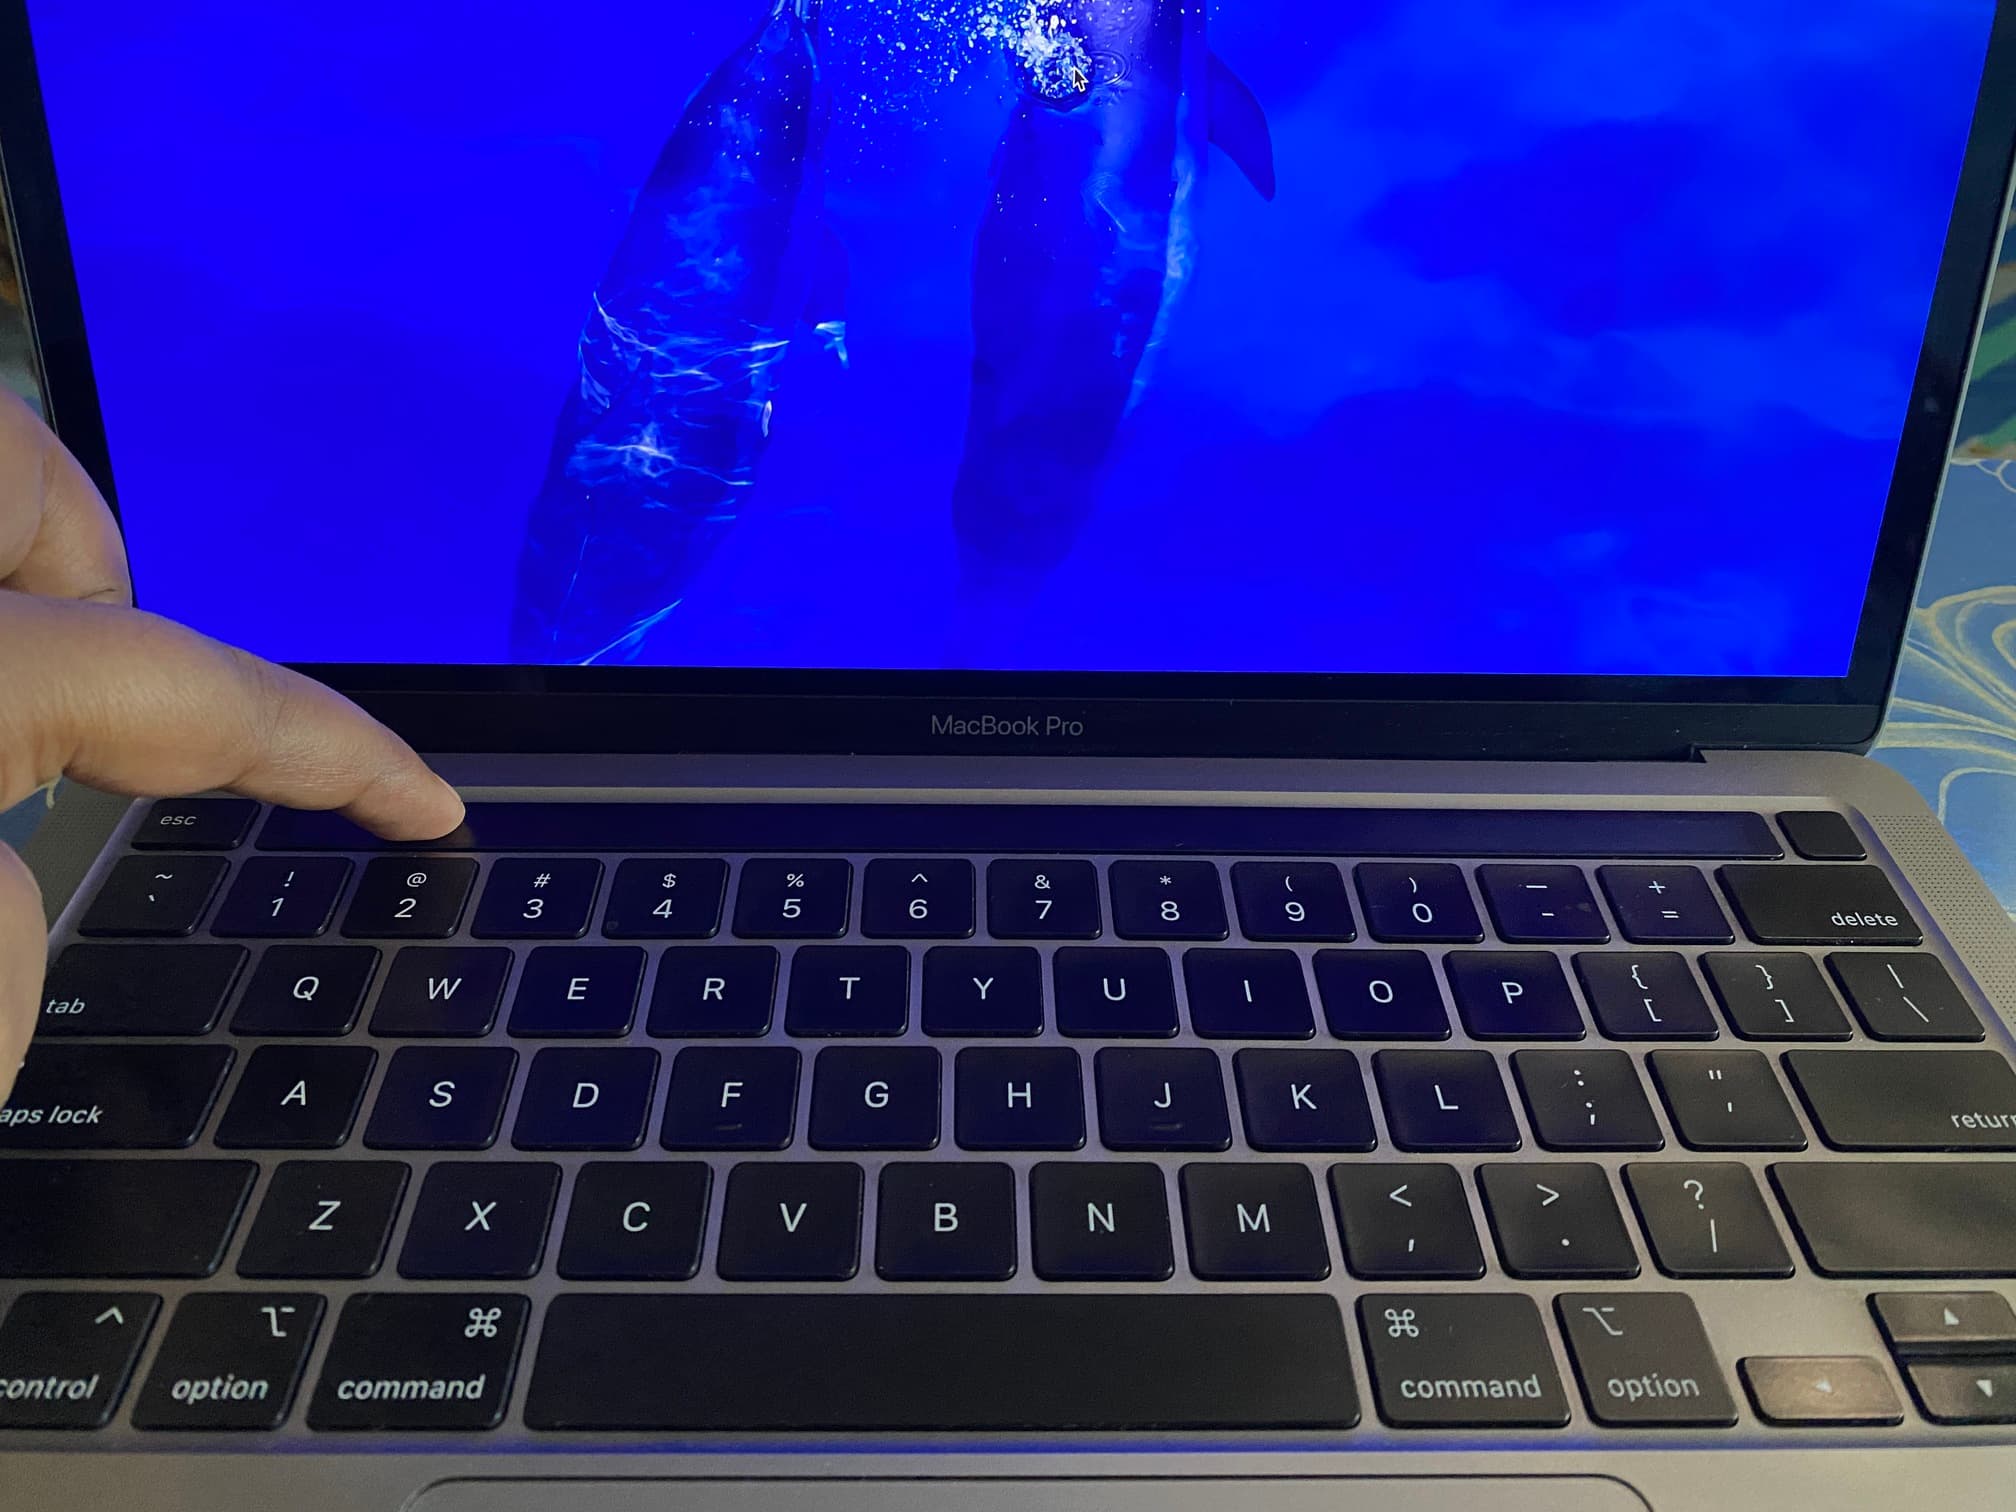
Gone are the days of traditional function keys on your MacBook Pro. With the introduction of the Touch Bar, Apple has revolutionized the way we interact with our laptops. The Touch Bar, a thin OLED display located at the top of the keyboard, provides a dynamic and customizable set of controls that change based on the app you’re using. It’s a touch-based interface that offers quick access to various commands, shortcuts, and functions.
In this guide, we’ll walk you through the steps to turn on and make the most of the Touch Bar on your MacBook Pro. Whether you’ve just purchased a new MacBook Pro or you’ve had one for a while but haven’t explored the full potential of the Touch Bar, this guide will help you unlock its capabilities.
Before we dive in, it’s important to note that the availability of the Touch Bar depends on the model and configuration of your MacBook Pro. The Touch Bar is available on the MacBook Pro 13-inch and 16-inch models starting from late 2016. So, if you have a compatible MacBook Pro, let’s get started on enabling and customizing the Touch Bar!
Step 1: Update macOS
Before you can start using the Touch Bar on your MacBook Pro, it’s crucial to ensure that your macOS is up to date. Apple regularly releases software updates that not only bring new features but also improve the performance and stability of your device. Here’s how to update your macOS:
- Click on the Apple menu icon in the top-left corner of your screen.
- Select “System Preferences” from the drop-down menu.
- In the System Preferences window, click on “Software Update.”
- Your Mac will now check for any available updates.
- If any updates are found, click on the “Update Now” button to download and install them.
- Follow the on-screen instructions to complete the update process.
Once the update is completed and your MacBook Pro has restarted, you’re ready to move on to the next step.
Updating your macOS not only ensures that your system is compatible with the Touch Bar but also provides you with the latest security patches and bug fixes. It’s always a good practice to keep your operating system up to date.
Step 2: Enable Touch Bar
Now that your macOS is up to date, it’s time to enable the Touch Bar on your MacBook Pro. Follow these steps to activate the Touch Bar:
- Click on the Apple menu icon in the top-left corner of your screen.
- Select “System Preferences” from the drop-down menu.
- In the System Preferences window, click on “Keyboard.”
- Go to the “Keyboard” tab if it’s not already selected.
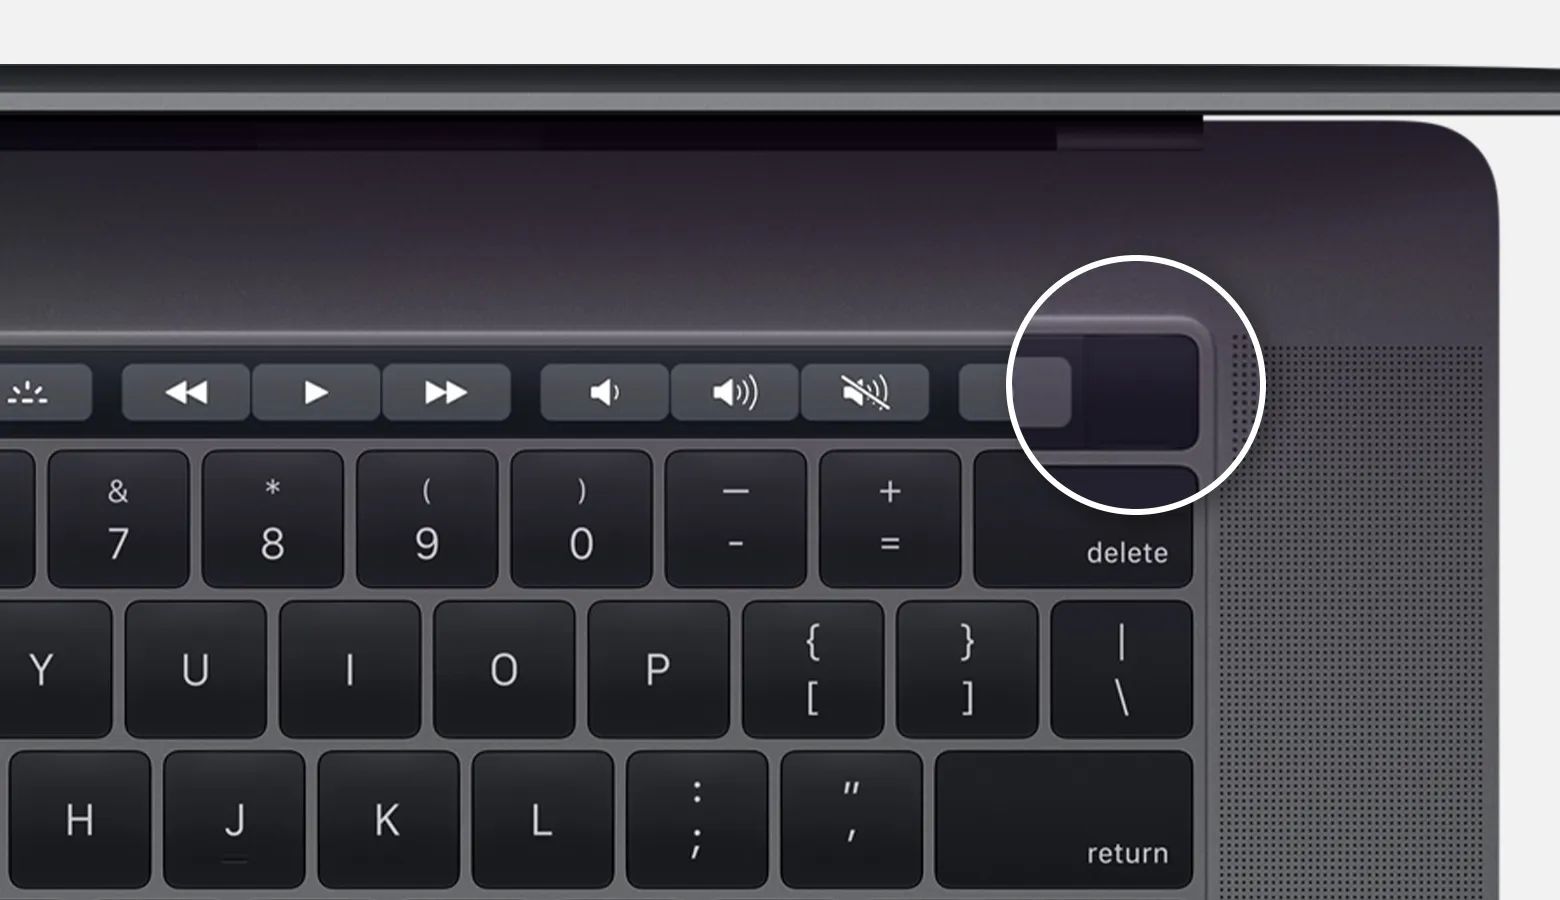
- Check the box that says “Show Control Strip.”
Once you’ve enabled the Touch Bar, you’ll notice that it appears on the top of your MacBook Pro’s keyboard. The default Touch Bar configuration includes various controls like brightness, volume, and media playback options.
Now that you’ve successfully enabled the Touch Bar, it’s time to move on to the next step, where we’ll explore how to customize it to suit your preferences.
Step 3: Customize Touch Bar
One of the biggest advantages of the Touch Bar is its customization options. You can personalize it to include the tools and controls that are most relevant to your workflow. Here’s how to customize the Touch Bar on your MacBook Pro:
- Click on the Apple menu icon in the top-left corner of your screen.
- Select “System Preferences” from the drop-down menu.
- In the System Preferences window, click on “Keyboard.”
- Go to the “Keyboard” tab and click on “Customize Control Strip.”
- You will see a list of available controls on the screen.
- Drag and drop the desired controls from the list onto the Touch Bar.
- You can rearrange the controls by clicking and dragging them within the Touch Bar.
- To remove a control, simply drag it off the Touch Bar and it will disappear.
Feel free to experiment with different configurations until you find the setup that works best for you. You can add controls like screen brightness, volume, Siri, and frequently used shortcuts directly to the Touch Bar.
Additionally, many third-party apps have built-in support for the Touch Bar, allowing you to access app-specific features and shortcuts directly from the Touch Bar. Make sure to explore the customization options within these apps to further enhance your productivity.
Now that you’ve customized the Touch Bar to your liking, let’s move on to the next step and see how you can utilize it in different applications.
Step 4: Use Touch Bar in Different Apps
Now that you’ve customized your Touch Bar, it’s time to explore its functionality in different applications. The Touch Bar adapts to each app you use, providing context-specific controls and shortcuts. Here’s how you can make the most of the Touch Bar in different apps:
- Finder: In Finder, the Touch Bar displays controls for navigating through files and folders, previewing files, and accessing various options.
- Safari: When browsing the web, the Touch Bar provides shortcuts for navigating through tabs, accessing bookmarks, and controlling media playback.
- Photoshop: In Photoshop, the Touch Bar offers quick access to commonly used tools, such as brushes, layers, and adjustment options.
- Final Cut Pro: In video editing apps like Final Cut Pro, the Touch Bar shows timeline controls, video editing tools, and options for adjusting audio levels.
- Mail: In the Mail app, the Touch Bar provides shortcuts for composing, replying, and organizing emails, as well as accessing your mailbox.
These are just a few examples of how the Touch Bar enhances the user experience in various applications. The Touch Bar adapts to different contexts and presents relevant controls, eliminating the need to navigate through menus or memorize keyboard shortcuts.
Keep in mind that not all applications offer full Touch Bar support. However, as developers continue to update their software, more apps are likely to integrate Touch Bar functionality in the future.
By leveraging the power of the Touch Bar in different apps, you can streamline your workflow, save time, and increase productivity.
Now that you’re familiar with how to use the Touch Bar in different apps, let’s wrap up this guide.
Conclusion
Congratulations! You have successfully learned how to enable and make the most of the Touch Bar on your MacBook Pro. By following the steps outlined in this guide, you have unlocked a range of possibilities to enhance your productivity and efficiency.
The Touch Bar offers a dynamic and customizable interface that adapts to different applications, providing contextual controls and shortcuts. Whether you’re using Safari, Photoshop, or any other app, the Touch Bar ensures that frequently used commands and tools are at your fingertips.
Remember, personalizing the Touch Bar to suit your needs is essential. By customizing it with the controls and shortcuts that you find most useful and relevant, you can optimize your workflow and save time.
As technology continues to evolve, the Touch Bar is expected to become even more prevalent and integrated into various applications. Developers are constantly updating their software to provide better support for the Touch Bar, so keep an eye out for improvements and new features.
Now that you’re equipped with the knowledge of how to use and customize the Touch Bar on your MacBook Pro, go ahead and explore its capabilities. Experiment with different setups, discover new features, and harness the power of this innovative interface.
Whether you’re a creative professional, a business user, or someone who simply wants to streamline their daily tasks, the Touch Bar is here to revolutionize your MacBook Pro experience.
So go ahead, embrace the Touch Bar, and unleash its potential to supercharge your productivity!