Introduction
Are you tired of being bombarded with notifications while browsing the web? Chrome notifications can be useful for staying updated on your favorite websites, but they can also become overwhelming when they start popping up from every site you visit. Fortunately, there are simple ways to take control of your Chrome notifications and tailor your browsing experience to suit your preferences.
In this guide, we will walk you through the steps to manage and eliminate unwanted Chrome notifications. Whether you're using Chrome on your desktop or mobile device, these methods will help you regain control over your browsing experience and put an end to intrusive notifications.
By following the steps outlined in this article, you'll be able to customize your notification settings, block notifications from specific websites, and clear your notification history. With these tools at your disposal, you can enjoy a more streamlined and distraction-free browsing experience, allowing you to focus on the content that matters most to you.
So, if you're ready to reclaim your browsing experience and bid farewell to pesky notifications, let's dive into the process of taking charge of your Chrome notifications. Whether you're a casual internet user or a seasoned web surfer, these tips will empower you to make the most of your Chrome browsing experience without the constant interruption of unwanted notifications.
Step 1: Accessing Chrome Settings
Accessing Chrome settings is the first step towards gaining control over the notifications that inundate your browsing experience. Whether you're using Chrome on your desktop or mobile device, the process of accessing settings remains consistent. Here's how you can do it:
On Desktop:
-
Open Chrome: Launch the Chrome browser on your desktop or laptop.
-
Click on the Menu Icon: Look for the three vertical dots located at the top-right corner of the browser window. Click on this icon to reveal a dropdown menu.
-
Select "Settings": From the dropdown menu, locate and click on the "Settings" option. This will open a new tab displaying various settings and customization options for Chrome.
-
Navigate to "Privacy and Security": In the left-hand sidebar of the Settings tab, you'll find a list of categories. Click on "Privacy and Security" to access a range of options related to your browsing privacy and security settings.
-
Choose "Site Settings": Within the "Privacy and Security" section, locate and click on "Site Settings." This will take you to a page where you can manage permissions and settings for individual websites, including notifications.
On Mobile:
-
Launch Chrome App: Open the Chrome app on your mobile device.
-
Tap on the Menu Icon: Look for the three vertical dots in the top-right corner of the screen. Tap on this icon to reveal the main menu.
-
Access "Settings": Scroll down the menu and tap on the "Settings" option. This will open a new screen with various settings and customization options for Chrome on your mobile device.
-
Select "Site Settings": Within the Settings menu, locate and tap on "Site Settings." This will allow you to manage permissions and settings for individual websites, including notifications.
By following these steps, you can easily access the Chrome settings on both desktop and mobile platforms. Once you've accessed the settings, you'll be ready to move on to the next steps in managing and customizing your Chrome notifications.
Step 2: Managing Site Notifications
Once you've accessed the Chrome settings, the next crucial step is managing site notifications. Chrome allows you to control which websites can send you notifications, giving you the power to tailor your browsing experience according to your preferences. Here's how you can effectively manage site notifications on Chrome:
Allowing or Blocking Site Notifications
- Access Site Settings: Within the Chrome settings, navigate to "Site Settings" to view and manage permissions for individual websites.
- Locate Notifications Settings: Under the "Permissions" section, find the "Notifications" option. Here, you'll see a list of websites that have requested to send you notifications.
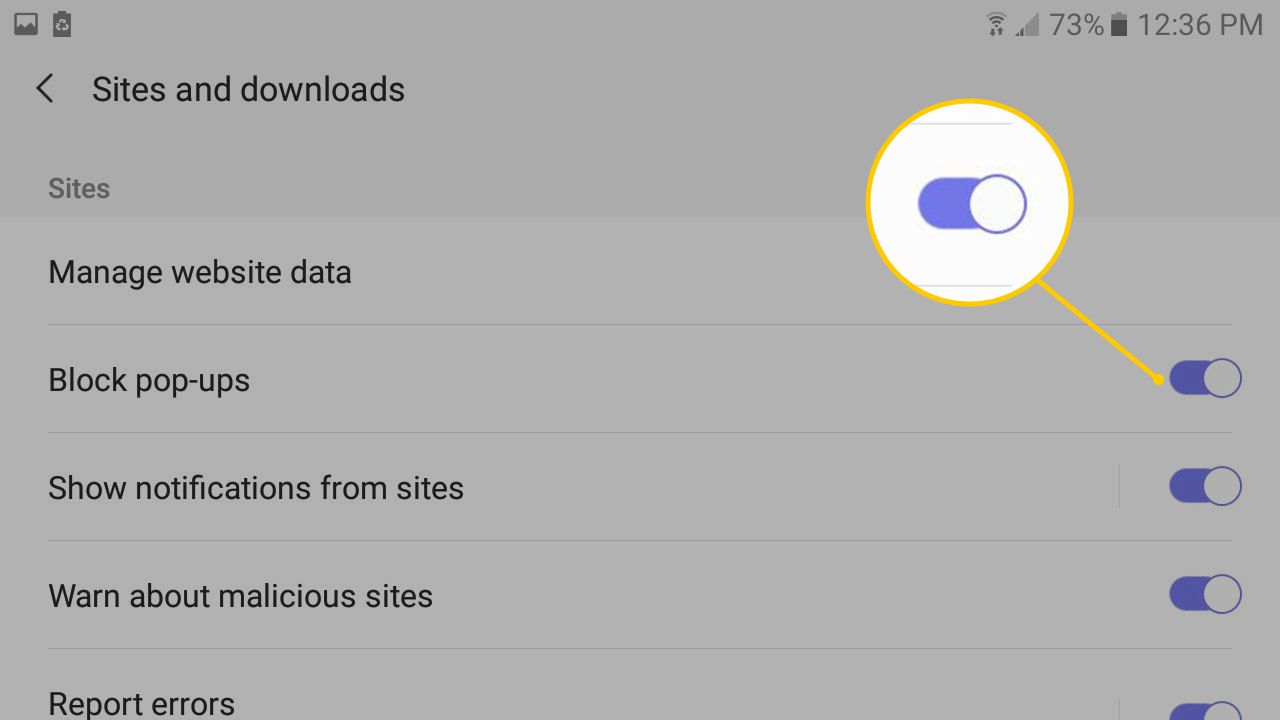
- Allow or Block Notifications: For each website listed, you can choose to allow or block notifications by toggling the switch next to the website's name. This gives you the flexibility to receive notifications from websites you're interested in while blocking those that are intrusive or irrelevant.
Customizing Notification Preferences
- Fine-Tune Notification Settings: Clicking on the "Notifications" option allows you to further customize your preferences for each website. You can choose to allow or block notifications, as well as set the behavior for notifications, such as showing them silently or blocking them completely.
- Managing Exceptions: Chrome also provides the option to manage exceptions, where you can add specific websites to either allow or block notifications, regardless of the default settings. This level of customization ensures that you have full control over the notifications you receive from different websites.
Understanding Notification Behavior
- Silent Notifications: Enabling silent notifications allows websites to send notifications without interrupting your browsing experience. These notifications are displayed in a less intrusive manner, ensuring that they don't disrupt your workflow.
- Blocking Notifications: If you choose to block notifications from a specific website, you won't receive any notifications from that site, providing a distraction-free browsing experience.
By effectively managing site notifications, you can curate a personalized browsing experience that aligns with your interests and preferences. Whether you want to stay updated with notifications from your favorite websites or eliminate distractions from irrelevant sources, Chrome's notification management tools empower you to take control of your browsing experience.
Step 3: Blocking Notifications from Specific Sites
Blocking notifications from specific sites is a crucial aspect of regaining control over your browsing experience. While some websites may bombard you with intrusive notifications, Chrome provides a straightforward method to block notifications from these sources. By implementing this feature, you can effectively eliminate distractions and tailor your browsing environment to suit your preferences.
How to Block Notifications
-
Access Site Settings: To begin the process of blocking notifications from specific sites, navigate to the "Site Settings" within the Chrome settings menu. This section allows you to manage permissions and settings for individual websites, including notifications.
-
Locate Notifications Settings: Under the "Permissions" section, find the "Notifications" option. Here, you'll see a list of websites that have requested to send you notifications. Identify the website from which you wish to block notifications.
-
Block Notifications: For the website you want to block, simply toggle the switch next to its name to the "off" position. This action effectively blocks notifications from that particular site, ensuring that you no longer receive intrusive alerts while browsing.
Benefits of Blocking Notifications
-
Distraction-Free Browsing: By blocking notifications from specific sites, you can enjoy a more focused and distraction-free browsing experience. This is particularly beneficial when visiting websites that tend to inundate users with frequent and irrelevant notifications.
-
Customized Preferences: Chrome's ability to block notifications from specific sites empowers users to customize their browsing environment according to their preferences. Whether it's preventing interruptions during work or maintaining a serene browsing atmosphere, this feature allows for tailored notification management.
-
Enhanced Productivity: Eliminating unnecessary notifications can significantly enhance productivity by minimizing interruptions and allowing users to concentrate on their tasks without constant distractions.
By leveraging Chrome's capability to block notifications from specific sites, users can take charge of their browsing experience and create a personalized environment that aligns with their preferences and productivity goals. This feature exemplifies Chrome's commitment to providing users with the tools to curate a seamless and enjoyable browsing experience.
Step 4: Clearing Notification History
Clearing notification history is an essential step in maintaining a clutter-free browsing experience. Over time, the accumulation of notifications can clutter your notification center, making it challenging to stay organized and focused. Fortunately, Chrome provides a straightforward method to clear your notification history, allowing you to declutter and reset your browsing environment. Here's how you can effectively clear your notification history on Chrome:
Accessing Notification Settings
-
Open Chrome Settings: Begin by accessing the Chrome settings menu on your desktop or mobile device. Navigate to the "Site Settings" section, where you manage permissions and settings for individual websites, including notifications.
-
Locate Notifications Settings: Within the "Site Settings," find the "Notifications" option. This section displays a list of websites that have sent you notifications, along with the corresponding notification history.
Clearing Notification History
-
View Notification History: Click on the "Notifications" option to access your notification history. Here, you'll see a chronological list of notifications received from various websites.
-
Clear Notification History: Chrome provides an option to clear your entire notification history with a single click. Look for the "Clear All" or "Clear Browsing Data" button within the notification history section, and select it to remove all notifications from the list.
-
Individual Notification Removal: Additionally, you can choose to remove specific notifications from the history by hovering over the notification and selecting the delete or dismiss option, depending on the platform you're using.
Benefits of Clearing Notification History
-
Organized Browsing Experience: By clearing your notification history, you can maintain an organized and clutter-free browsing environment, allowing you to focus on relevant notifications without being overwhelmed by outdated alerts.
-
Privacy and Security: Clearing notification history can enhance your privacy and security by removing potentially sensitive information from your browsing session, ensuring that old notifications are not accessible to unauthorized users.
-
Improved Performance: Regularly clearing notification history can contribute to improved browser performance, particularly on devices with limited storage or memory, by reducing the data load associated with stored notifications.
By clearing your notification history, you can reset your browsing environment, declutter your notification center, and maintain a streamlined and organized experience. This simple yet effective process empowers users to stay in control of their browsing environment and ensure that their notification history remains relevant and up to date.
Conclusion
In conclusion, taking control of your Chrome notifications empowers you to create a personalized and distraction-free browsing experience. By following the steps outlined in this guide, you can access Chrome settings, manage site notifications, block notifications from specific sites, and clear your notification history. These actions allow you to tailor your browsing environment to align with your preferences, productivity goals, and privacy considerations.
By accessing Chrome settings, you gain the ability to customize your notification preferences, ensuring that you receive alerts from websites that matter to you while blocking those that are intrusive or irrelevant. This level of control over site notifications enables you to curate a browsing experience that is tailored to your interests and conducive to productivity.
Furthermore, the capability to block notifications from specific sites is a valuable feature that enhances your browsing environment. Whether you're aiming for a serene and interruption-free browsing experience or seeking to eliminate distractions during focused work sessions, Chrome's notification management tools provide the flexibility to achieve these objectives.
Clearing your notification history is equally important, as it allows you to maintain an organized and clutter-free notification center. By regularly clearing outdated notifications, you can ensure that your notification history remains relevant and up to date, contributing to a streamlined browsing experience.
In essence, the process of managing and eliminating unwanted Chrome notifications is a testament to Chrome's commitment to user empowerment and customization. By providing intuitive tools to control notifications, Chrome enables users to shape their browsing experience according to their unique preferences and requirements.
Ultimately, by implementing the strategies outlined in this guide, you can reclaim your browsing experience from the deluge of notifications and enjoy a more focused, organized, and personalized interaction with the web. Whether you're a casual user seeking a seamless browsing experience or a professional aiming to optimize productivity, taking charge of your Chrome notifications is a pivotal step towards achieving these goals.


